
In the past, static websites commonly featured product images and descriptions, prompting customers to order via email or phone. Today, however, customers anticipate a more dynamic experience with robust e-commerce functionalities. This streamlines the purchasing process, encouraging users to complete transactions on your site instead of exploring competitor options.
Adding a payment gateway and checkout to your static site is quite straightforward. Application programming interfaces (APIs) and serverless architectures let you embed e-commerce features into static websites, enabling your business to accept transactions directly.
This tutorial explores adding PayPal and Stripe payment gateways to a flower delivery shop’s static site. Follow the steps to learn how to add these functions to your website and open new opportunities to drive online sales.
Getting started
Before diving into the steps for integrating a payment gateway and checkout to your static site, let’s set the foundation for a smooth and successful implementation.
- Download and deploy this sample static site code. (We recommend serving your site from Kinsta’s PaaS provider, Sevalla, where you’ll find free static site hosting.)
- Sign up for a PayPal account, opting for a business account, as it’s more suited for this tutorial. This type of account is necessary for testing the buttons you integrate. After signing up, add your business information and link a bank account. Upon verification of your account, you can obtain API credentials from the PayPal Developer portal for later use.
- Create a Stripe account, entering your business and banking details. Stripe offers quick account activation, which is advantageous for this project. Once your account is active, you can immediately access the Stripe dashboard. This is where you retrieve your API key, a crucial component needed in subsequent steps.
Review the sample static site
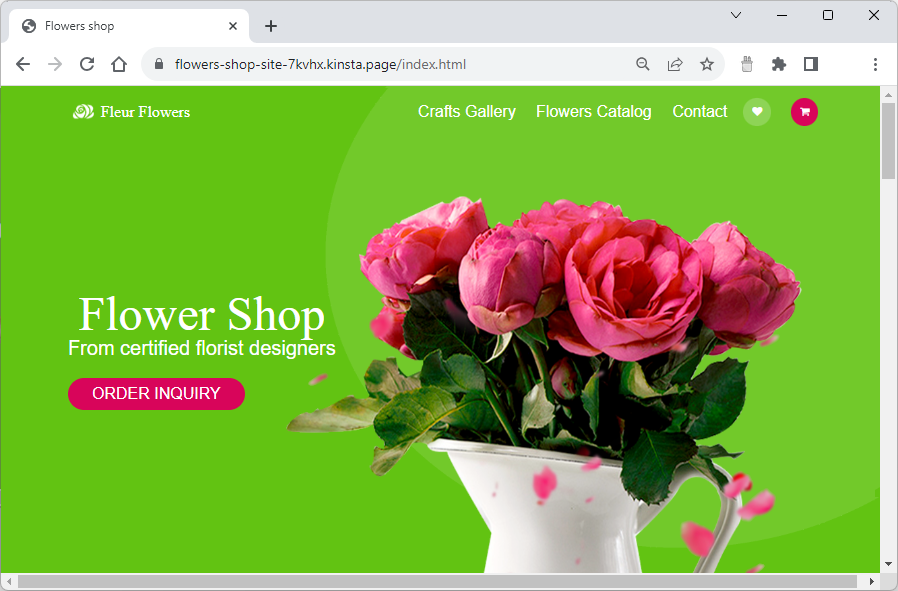
This tutorial uses a pre-existing static site to showcase integrating PayPal and Stripe checkout capabilities. Despite its static content, the sample website mimics an online flower shop.
After deploying your site, go to the home page. Click the ORDER INQUIRY button.
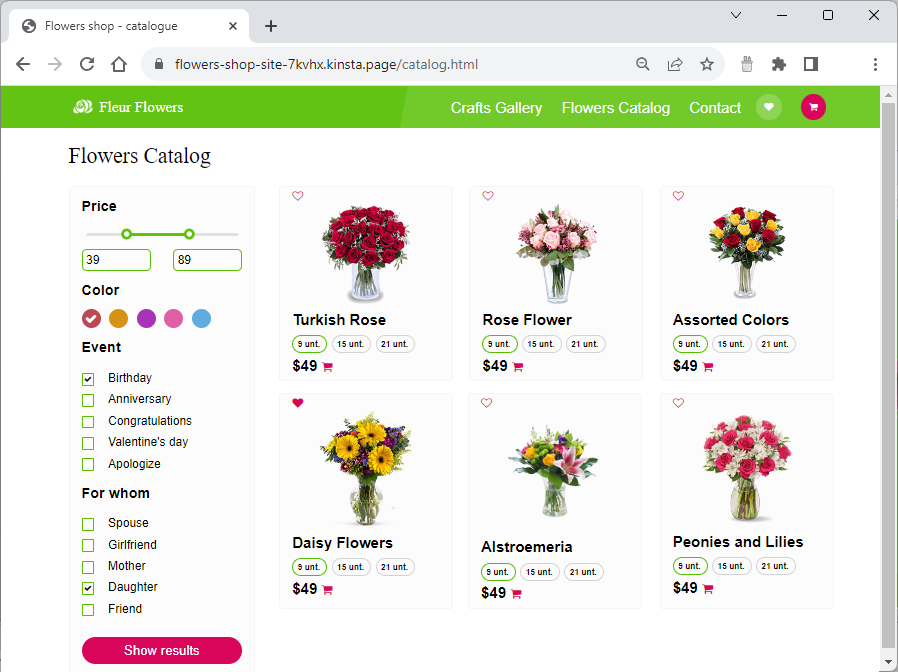
Select an available product on the Flowers Catalog page — the Turkish Rose.
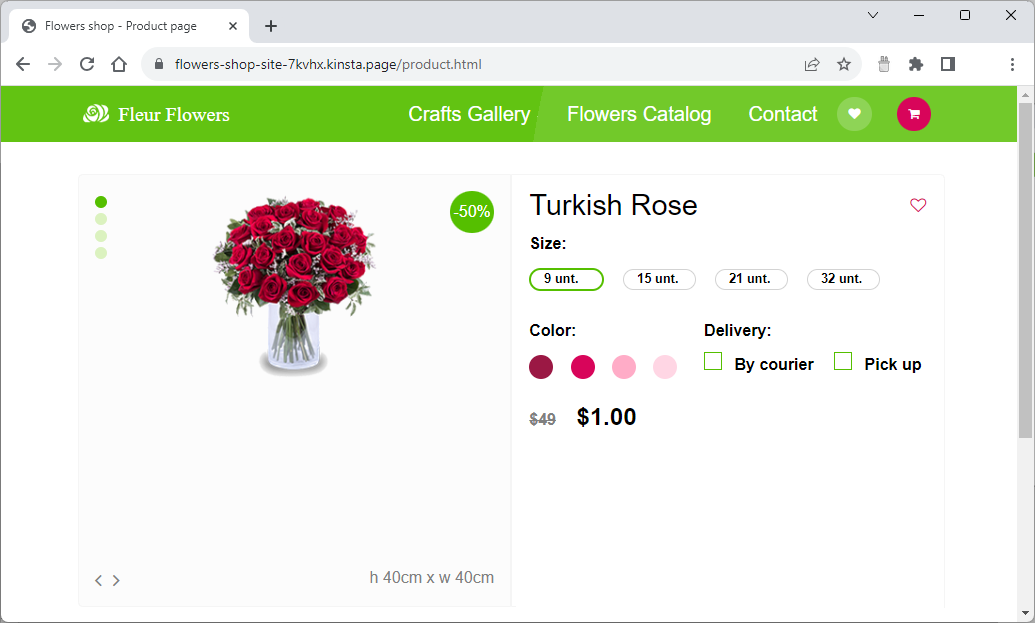
This action takes you to the product details page, where the payment buttons for PayPal and Stripe are implemented.
How to integrate PayPal checkout into your static site
Adding a PayPal checkout offers your customers a secure and trusted payment method and streamlines the transaction process, enhancing user experience. This integration can significantly boost your site’s functionality and customer satisfaction.
Here’s how to integrate PayPal checkout into your static site:
- Log in to the PayPal Developer Dashboard.
- On the dashboard, navigate to the Apps & Credentials section. Turn the Sandbox mode on, then click Create App.
- In the form, give your app a name (e.g. Kinsta Gateway Demo). Select Merchant as the type and click Create App.

PayPal’s Create App form. - Copy the Client ID from the API credentials section for later to make a PayPal checkout button.

PayPal app credentials. - Scroll down the application’s page to review other settings. The defaults are fine for this tutorial. Click Save Changes.

PayPal’s app features. - Next, integrate PayPal checkout into your static site. Create a checkout button using PayPal’s alternative payment method (APM) JavaScript SDK. It lets you integrate various payment methods into a static site without setting up a back-end application. Add the following JavaScript code to the product.html file just before the closing
</body>tag. ReplaceYOUR_CLIENT_IDwith your PayPal Client ID. You may also need to replace theUSDcurrency with the currency your PayPal account accepts.<!-- PAYPAL BUTTON SCRIPT--> <script src="https://www.paypal.com/sdk/js?client-id=YOUR_CLIENT_ID¤cy=USD" data-sdk-integration-source="button-factory"></script> <script> paypal.Buttons({ createOrder: function(data, actions) { // Set up the transaction return actions.order.create({ purchase_units: [{ amount: { value: '1.00' } }] }); }, onApprove: function(data, actions) { // Capture the funds from the transaction return actions.order.capture().then(function(details) { // Show a success message to the buyer alert('Transaction completed by ' + details.payer.name.given_name); }); } }).render('#paypal-button-container'); </script> <!-- PAYPAL BUTTON SCRIPT-->The
paypal.Buttonsfunction defines two functions:createOrder— Configures the transaction details, such as the purchase amount (1.00 USD in this case).onApprove— Handles the transaction’s approval, capturing the funds and displaying a success message to the buyer. In the code above, we are using thealert()function.
Finally, the
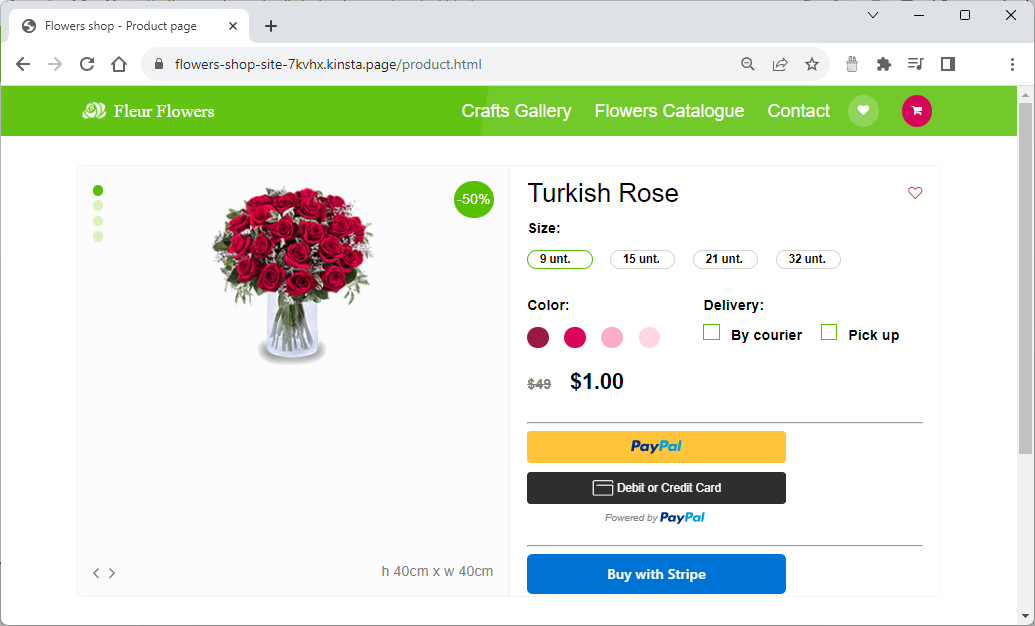
renderfunction specifies that the PayPal button should render inside the existing<div>with the IDpaypal-button-container.You now have PayPal integrated into your static site.
How to integrate Stripe Checkout into your static site
Stripe is a widely-used technology platform that offers payment processing solutions for businesses of all sizes. Here is how to add Stripe payment to your static site:
- Before implementing the Stripe checkout button, you can manage products and prices via an API or the Stripe dashboard. To use the dashboard, open it, select Test mode, and click Product Catalog.

Stripe Product catalog page. - Click the + Add Product button to open the Add a product form.

Stripe’s Add a product page. - Enter your product’s details in the fields as follows:
- Name: Turkish Rose
- Description: This is a beautiful Turkish Rose
- Image: (Upload the sample imagesturkishrose.png file)
- Payment model: One-off
- Amount: $1.00
- Currency: USD (or the currency of your choice)
- Click Add product.
- In the Product catalog page’s list, select the Turkish Rose product.

Stripe Product catalog details. - In the products Pricing section, click Create payment link. Review the product options and ensure the quantity is
1.
Stripe product details for the Turkish Rose. - Click Create link.

Stripe product payment details. - On the PAYMENT LINK page, click Buy button.

Stripe PAYMENT LINK page details. - When the Buy button panel appears, you can view the generated code for the checkout button. Choose the Button layout, turn the Change button text on, and type “Buy with Stripe” in the Change button text field. Then, click Save changes and copy code to copy the generated code to your operating system’s clipboard.

Stripe’s form to create a buy button. - Paste the copied code into the sample code’s product.html file before the closing
</body>tag (between theSTRIPE BUTTON BEGINandSTRIPE BUTTON ENDcomments), similar to PayPal.<!-- STRIPE BUTTON BEGIN --> <script> async src="https://js.stripe.com/v3/buy-button.js"> </script> <stripe-buy-button> buy-button-id="BUY_BUTTON_ID" publishable-key="PUBLISHABLE_KEY" > </stripe-buy-button> <!-- STRIPE BUTTON END -->
Once you are done implementing the PayPal and Stripe checkout buttons, deploy the static site code to your static site hosting environment.
Test the checkout process
Open the static demo site’s product details page. Ensure the PayPal and Stripe buttons display correctly.
Click the PayPal checkout button. It should open a login dialog box where your customer will authenticate with PayPal to make their purchase.
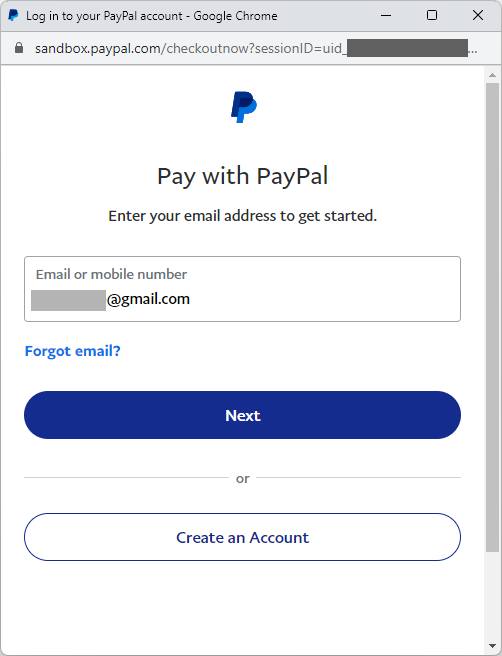
If you encounter login issues at this stage, it might be due to testing with a personal account rather than a business one.
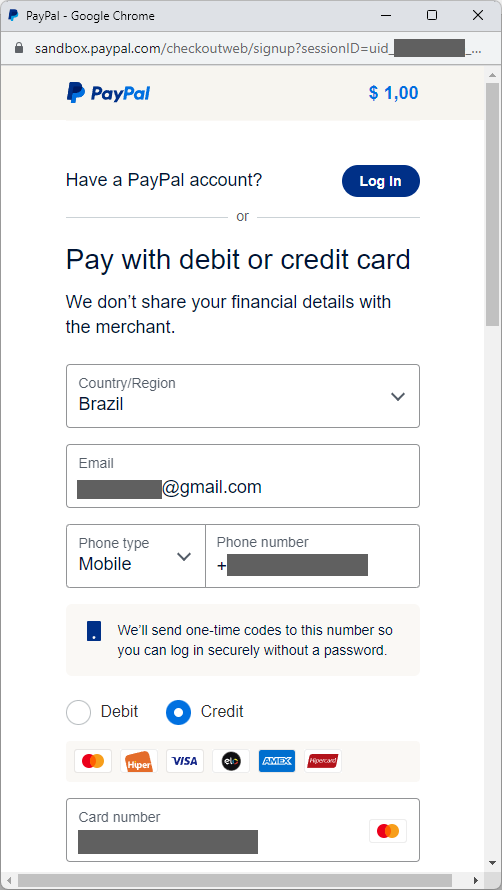
Alternatively, customers can choose the PayPal Debit or Credit Card button. Click that option to view the dialog box. Enter some account details.
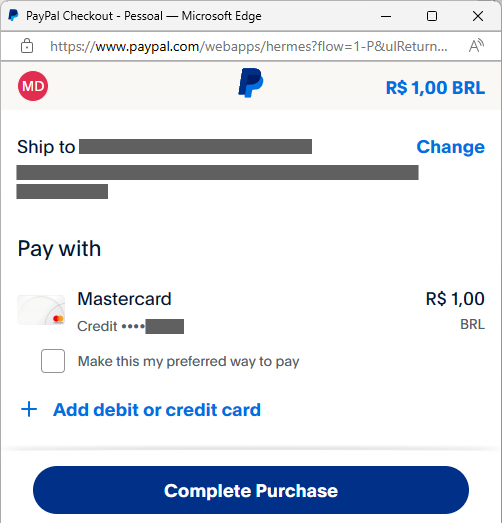
PayPal should present your order and account details. Click Complete Purchase.
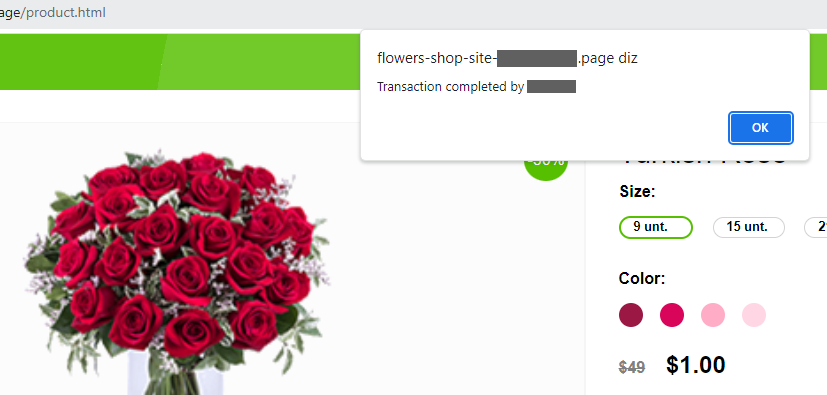
When PayPal approves the transaction, the client JavaScript code displays an alert informing you that the transaction is complete. This alert is for development and debugging purposes — you shouldn’t use it in production code.
To verify that transaction, open the PayPal for Business dashboard. Click Activity > All Transactions to show a detailed list of all recent transactions.

On the flower site’s product.html page, you can also test the Stripe checkout flow by clicking the Buy with Stripe button. This action triggers the Stripe dialog box containing the product details and payment options, including Google Pay, Link, and credit card payments.
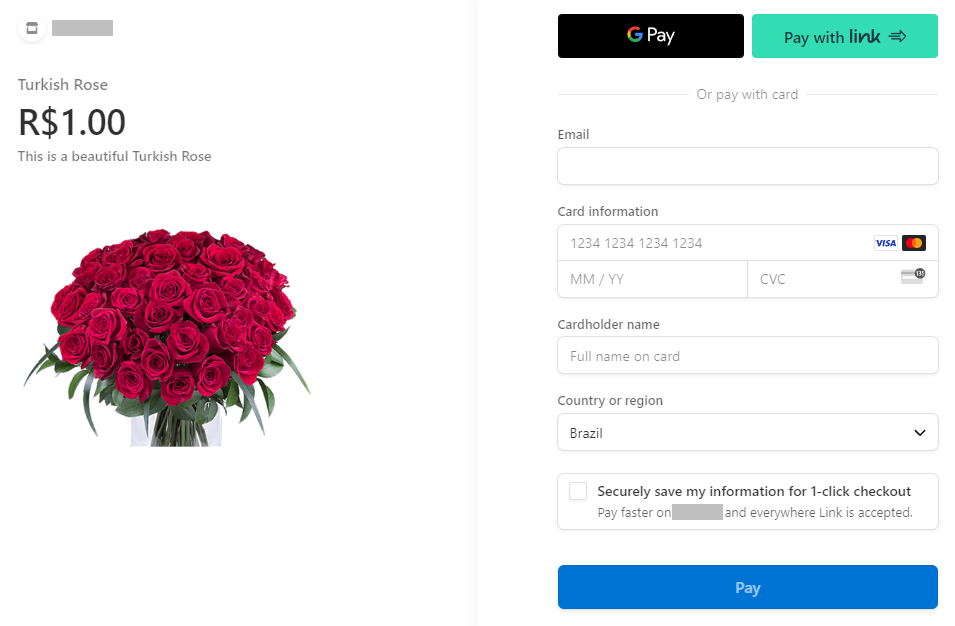
For demonstration purposes, choose Google Pay. A dialog box asks you to confirm the purchase using Google Pay with a card from your list, like a saved Mastercard.
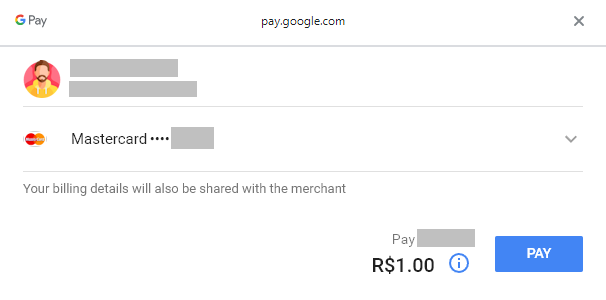
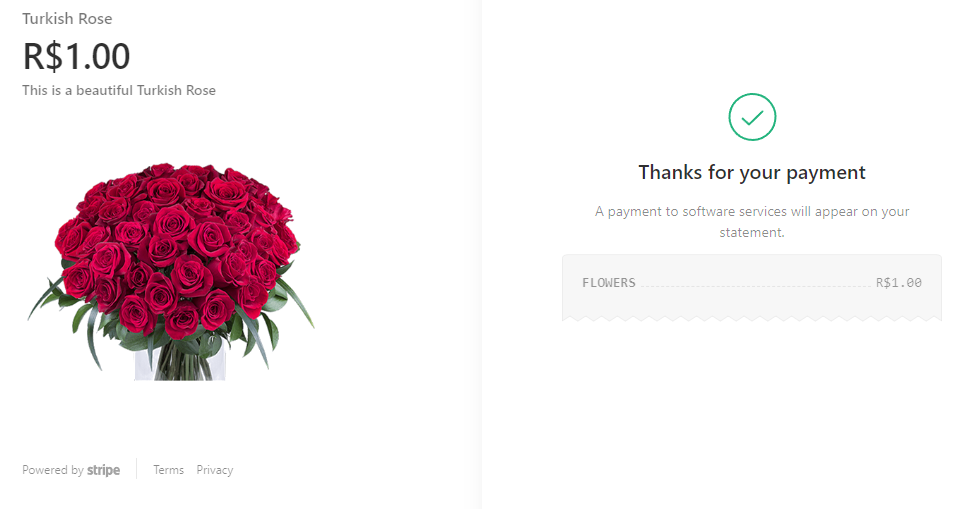
Click PAY. If successful, Stripe presents the customer with the purchase confirmation.
In the Stripe Dashboard, open the Payments tab. It shows the details of the completed transaction, including the amount, currency, description, customer, and date.

How to troubleshoot the checkout process
Here are some troubleshooting steps to diagnose and solve errors encountered during your checkout testing:
- Fix the payment gateway configuration.
- Validate your SSL certificate.
- Check the customer’s browser compatibility.
- Apply proper error handling.
- Test the checkout process in multiple environments.
- Use logging and monitoring techniques.
Summary
You’ve now integrated checkout buttons for PayPal and Stripe payment gateways into a sample online flower shop. The same techniques can be used to add payment options to your other static websites, encouraging customers to purchase your products and boosting sales.


