
Object-oriented programming (OOP), an important paradigm in software, is centered on “objects” — instances of classes that include data and behaviors instead of “actions.”
PHP, known for server-side scripting, benefits greatly from OOP. This is because OPP supports modular and reusable code, making it easier to maintain. In turn, this facilitates better organization and scalability of large projects.
Mastering OOP is important for developers working with WordPress themes, plugins, and custom solutions. In this article, we’ll outline what OOP is in PHP and the impact it has on WordPress development. We’ll also walk you through how to implement OOP principles in PHP.
Prerequisites
To follow the hands-on parts of this article, ensure you have:
- XAMPP (or similar) for Apache and MySQL
- A PHP environment in version 7.4 or higher
- A code editor, like Visual Studio Code
- A local or web-hosted WordPress installation.
- Knowledge of PHP and WordPress
Advantages of OOP in PHP development
OOP significantly boosts PHP development by enhancing modularity, reusability, scalability, maintainability, and teamwork. It organizes PHP code by dividing it into objects, each representing a specific part of the application. Using objects, you can easily reuse code, saving time and reducing errors.
With this in mind, let’s dive into two specific advantages of OOP in PHP, highlighting how it transforms the development process.
1. Code reusability and maintenance
OOP in PHP makes it straightforward to reuse code because of inheritance and polymorphism. Classes can use properties and methods from other classes. This lets you use old code in new ways with little change.
OOP also makes it easier to take care of your code. Encapsulation means objects keep their details private and only share what’s needed, using special methods called getters and setters. This approach helps prevent changes in one part of your application from causing problems in others, making the code simpler to update and maintain.
Also, because objects are complete on their own, finding and fixing bugs in certain parts of the system is easier. This improves overall code quality and reliability.
2. Enhanced clarity and structure
OOP makes PHP code cleaner and more organized using classes and objects. Classes act like templates for objects, keeping everything that belongs together in one place.
OOP also lets classes use features from other classes, meaning you don’t have to write the same code repeatedly. All these help make the code cleaner, easier to fix, and better organized.
Clear code from OOP helps teams work better together. It’s easier for everyone to understand what the code does, meaning less time explaining things and more time doing the work. It also reduces mistakes, helping the project stay on track. And when code is neat and orderly, new team members can quickly catch up.
Implementing OOP in PHP
In OOP for PHP, you organize code with classes and objects, like blueprints and houses. You create classes for everything (like users or books), including their characteristics and actions. Then, you use inheritance to build new classes from existing ones, saving time by not repeating code. And because encapsulation keeps some class parts private, your code is safer.
The following sections walk you through how to use OOP principles effectively in your PHP programming. We create a content management system (CMS) for managing articles.
1. Define a class with properties and methods
Start with an Article class that includes title, content, and status properties — along with methods to set and display these properties.
class Article {
    private $title;
    private $content;
    private $status;

    const STATUS_PUBLISHED = 'published';
    const STATUS_DRAFT = 'draft';

    public function __construct($title, $content) {
        $this->title = $title;
        $this->content = $content;
        $this->status = self::STATUS_DRAFT;
    }

    public function setTitle($title) {
        $this->title = $title;
        return $this;
    }

    public function setContent($content) {
        $this->content = $content;
        return $this;
    }

    public function setStatus($status) {
        $this->status = $status;
        return $this;
    }

    public function display() {
        echo "<h2>{$this->title}</h2><p>{$this->content}</p><strong>Status: {$this->status}</strong>";
    }
}
2. Create objects and implement method chaining
Create an article object and use method chaining to set its properties:
$article = new Article("OOP in PHP", "Object-Oriented Programming concepts.");
$article->setTitle("Advanced OOP in PHP")->setContent("Exploring advanced concepts in OOP.")->setStatus(Article::STATUS_PUBLISHED)->display();
3. Strengthen encapsulation and inheritance
Enhance encapsulation by using getter and setter methods and create a FeaturedArticle class that inherits from Article:
class FeaturedArticle extends Article {
    private $highlightColor = '#FFFF00'; // Default highlight color

    public function setHighlightColor($color) {
        $this->highlightColor = $color;
        return $this;
    }

    public function display() {
        echo "<div> style='background-color: {$this->highlightColor};'>";
        parent::display();
        echo "</div>";
    }
}

$featuredArticle = new FeaturedArticle("Featured Article", "This is a featured article.");
$featuredArticle->setStatus(FeaturedArticle::STATUS_PUBLISHED)->setHighlightColor('#FFA07A')->display();
4. Interfaces and polymorphism
Define an interface for publishable content and implement it in the Article class to demonstrate polymorphism:
interface Publishable {
    public function publish();
}

class Article implements Publishable {
    // Existing class code...

    public function publish() {
        $this->setStatus(self::STATUS_PUBLISHED);
        echo "Article '{$this->title}' published.";
    }
}

function publishContent(Publishable $content) {
    $content->publish();
}

publishContent($article);
5. Use traits for shared behavior
PHP lets you use traits to add functions to classes without needing to inherit from another class. Using the code below, introduce a trait for logging activities within the CMS:
trait Logger {
    public function log($message) {
        // Log message to a file or database
        echo "Log: $message";
    }
}

class Article {
    use Logger;

    // Existing class code...

    public function publish() {
        $this->setStatus(self::STATUS_PUBLISHED);
        $this->log("Article '{$this->title}' published.");
    }
}
OOP in WordPress development
OOP principles significantly enhance WordPress development, particularly when creating themes, plugins, and widgets. With the help of OOP, you can write cleaner, scalable, and more maintainable code for your WordPress sites.
This section reviews how to apply OOP in WordPress development. We’ll provide examples you can copy and paste into a WordPress deployment for testing.
OOP in WordPress themes: Custom post type registration
To demonstrate using OOP in WordPress themes, you create a class that handles the registration of a custom post type.
Place the following code in your theme’s functions.php file. You can find your themes in the wp-content/themes directory.
class CustomPostTypeRegistrar {
    private $postType;
    private $args;

    public function __construct($postType, $args = []) {
        $this->postType = $postType;
        $this->args = $args;
        add_action('init', array($this, 'registerPostType'));
    }

    public function registerPostType() {
        register_post_type($this->postType, $this->args);
    }
}

// Usage
$bookArgs = [
    'public' => true,
    'label'  => 'Books',
    'supports' => ['title', 'editor', 'thumbnail'],
    'has_archive' => true,
];
new CustomPostTypeRegistrar('book', $bookArgs);
This code dynamically registers a custom post type book with its details passed through using the bookArgs array. You can see the newly created custom post type in the WordPress admin sidebar labeled Books.
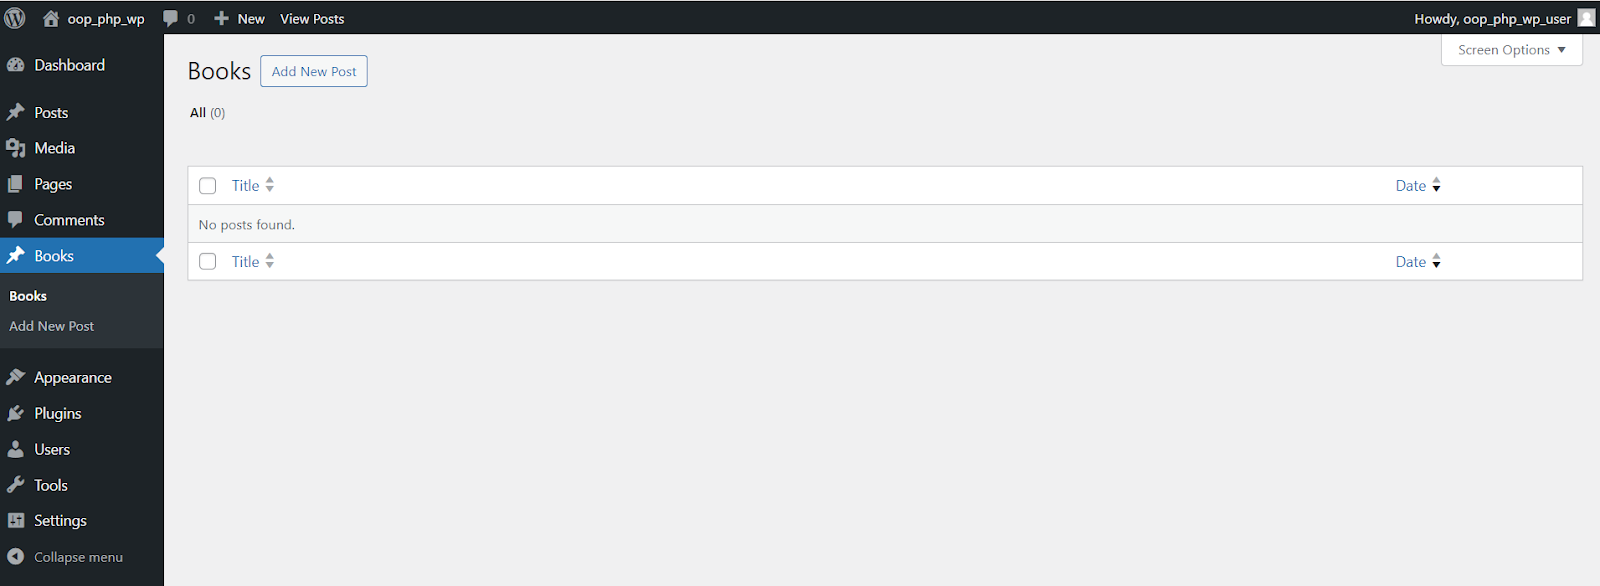
This example illustrates how OOP can encapsulate the functionality for registering custom post types, making it reusable for different types of posts.
OOP in WordPress plugins: Shortcode handler
For a plugin example, you develop a class that handles a shortcode for displaying a special message. You can test this feature by adding the shortcode below to any post or page.
<?php
/**
* Plugin Name: OOP Shortcode Handler
* Description: Handles a custom shortcode with OOP.
* Version: 1.0
* Author: Name
*/
class OOPShortcodeHandler {
public function __construct() {
add_shortcode('oop_message', array($this, 'displayCustomMessage'));
}
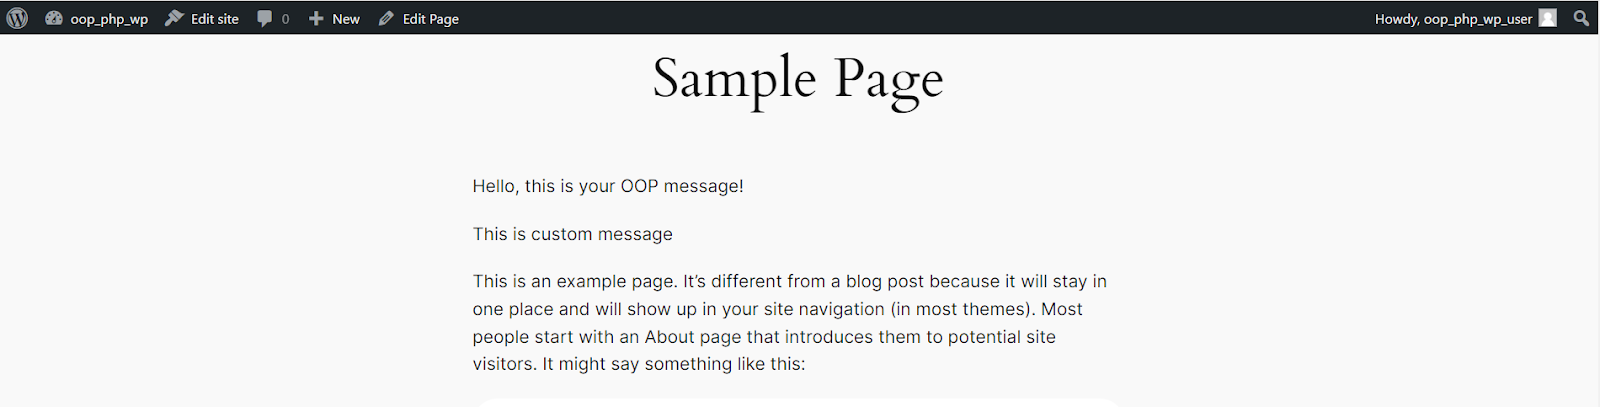
public function displayCustomMessage($atts) {
$attributes = shortcode_atts(['message' => 'Hello, this is your OOP
message!'], $atts);
return "<div>{$attributes['message']}</div>";
}
}
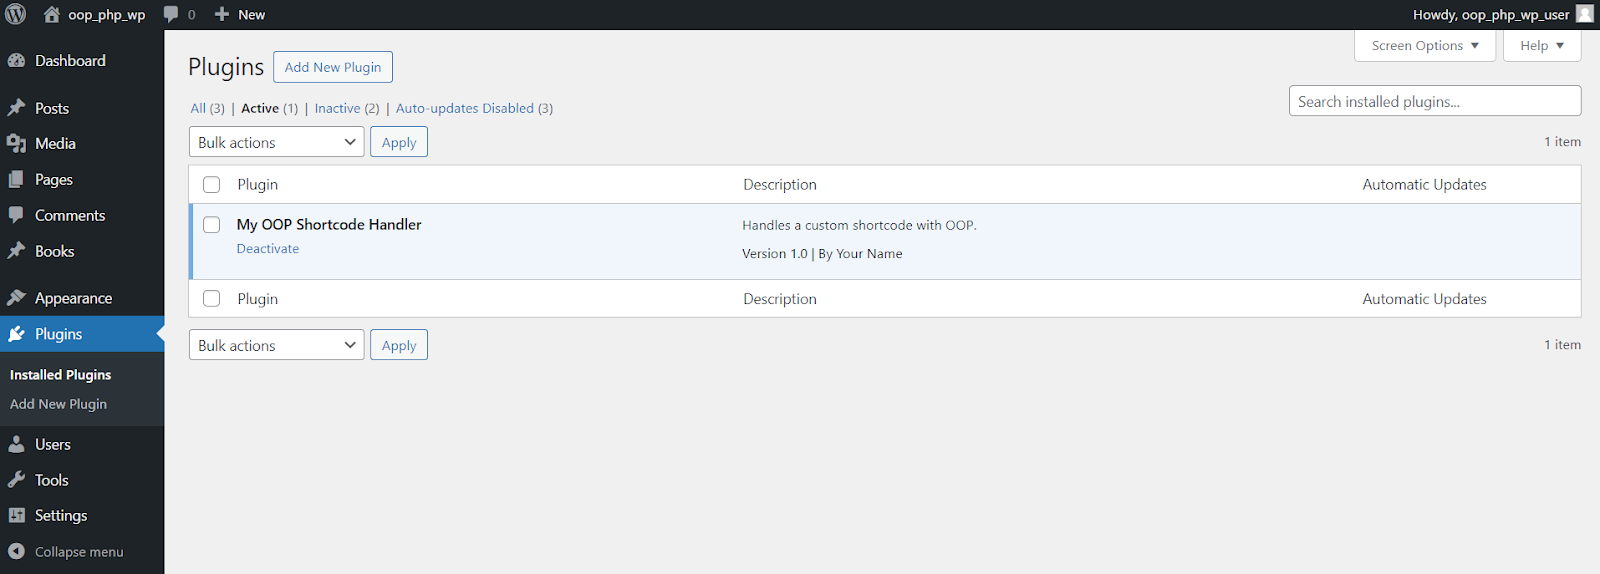
new OOPShortcodeHandler();Save this as my-oop-shortcode-handler.php in the wp-content/plugins directory. Finally, activate the plugin.
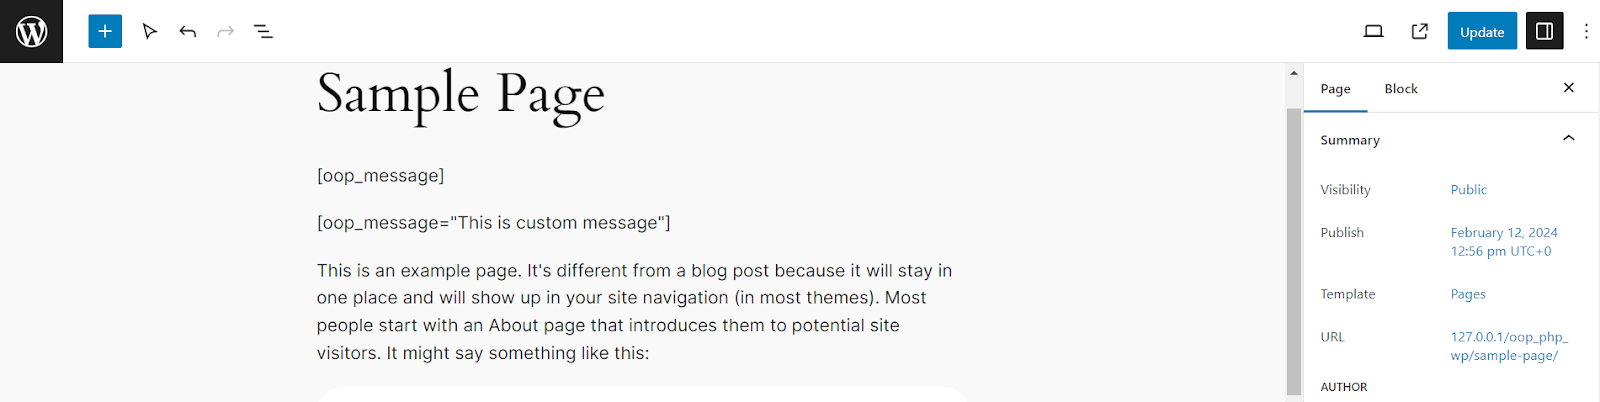
Next, in the page or post editor before publishing or updating, use the shortcodes [oop_message] and [oop_message message="Custom Message Here"], as shown below:
OOP in WordPress widgets: dynamic content widget
OOP is also beneficial for widgets by encapsulating their functionality within classes. WordPress core itself uses OOP for widgets. Here, you create a custom widget that allows users to display dynamic content with a title and text area.
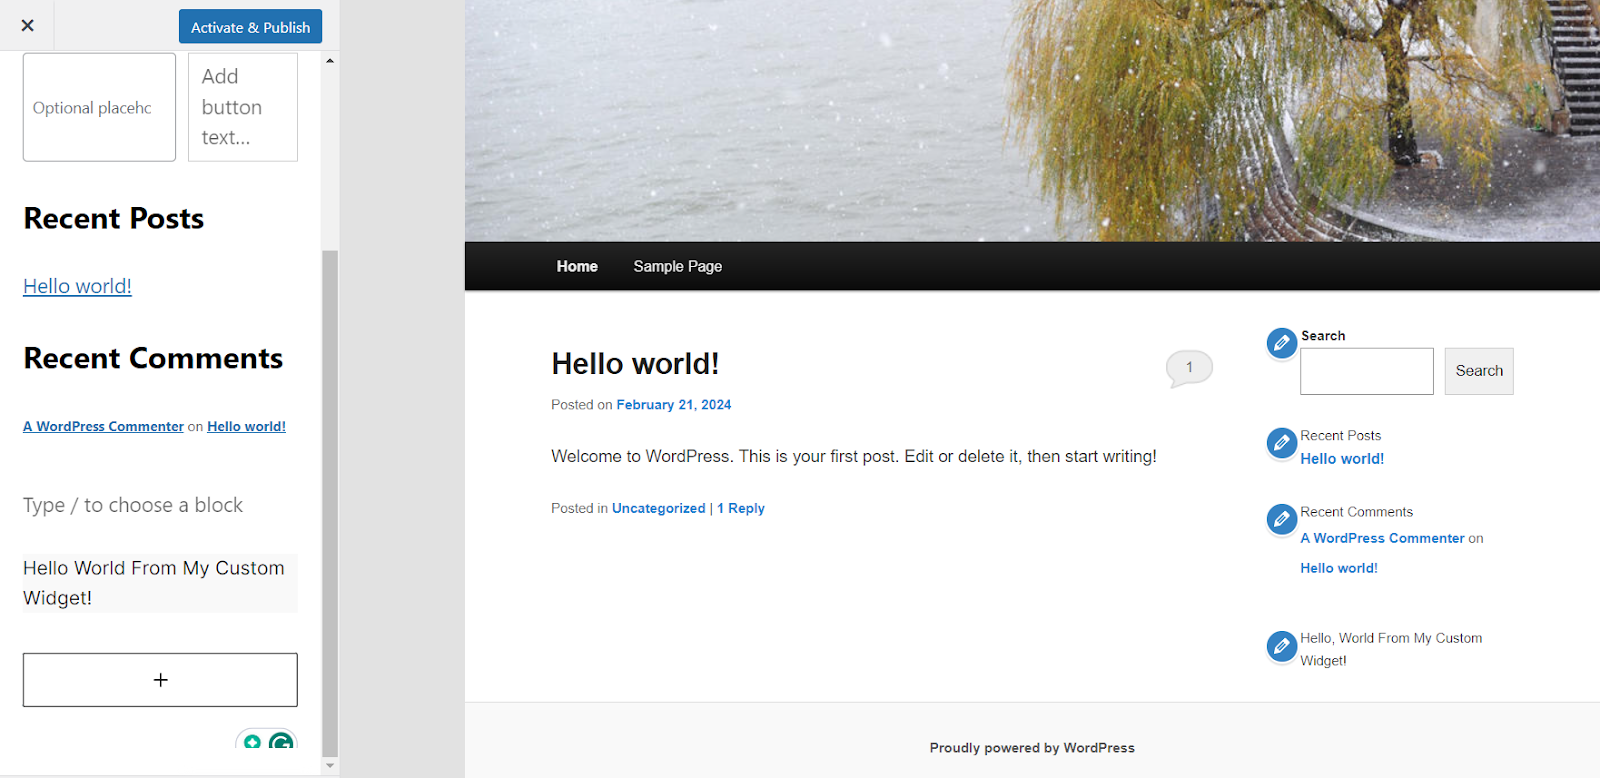
Add the following code to your theme’s functions.php file or within a plugin. It defines a custom widget that displays the message “Hello World From My Custom Widget!”
class My_Custom_Widget extends WP_Widget {

    public function __construct() {
        parent::__construct(
            'my_custom_widget', // Base ID
            'My Custom Widget', // Name
            array('description' => __('A simple custom widget.',
'text_domain'),) // Args
        );
    }

    public function widget($args, $instance) {
        echo $args['before_widget'];
        if (!empty($instance['title'])) {
            echo $args['before_title'] . apply_filters('widget_title',
$instance['title']) . $args['after_title'];
        }
        // Widget content
        echo __('Hello World From My Custom Widget!', 'text_domain');
        echo $args['after_widget'];
    }

    public function form($instance) {
        // Form in WordPress admin
    }

    public function update($new_instance, $old_instance) {
        // Processes widget options to be saved
    }
}

function register_my_custom_widget() {
    register_widget('My_Custom_Widget');
}
add_action('widgets_init', 'register_my_custom_widget');
While editing the active theme using the Customize link under the Appearance on Admin area, you can add a new custom widget wherever needed.
Utilizing WordPress classes
WordPress provides various classes that you can use to interact with the CMS’s core functionality. Two such classes are WP_User and WP_Post, which represent users and posts, respectively.
Extending the WordPress plugin example from above, incorporate these classes to create a shortcode that displays information about the author of a post and details about the post itself.
Save this as my-oop-shortcode-handler-extended.php in the wp-content/plugins directory. Finally, activate the plugin.
<?php
/**
* Plugin Name: Extended OOP Shortcode Handler
* Description: Extends the shortcode handler to display post and author
information.
* Version: 1.1
* Author: Your Name
*/

class ExtendedOOPShortcodeHandler {
    public function __construct() {
        add_shortcode('post_author_details', array($this,
'displayPostAuthorDetails'));
    }

    public function displayPostAuthorDetails($atts) {
        global $post; // Accessing the global $post object to get current post
details

        $attributes = shortcode_atts([
            'post_id' => $post->ID, // Default to the current post ID
        ], $atts);

        $postDetails = get_post($attributes['post_id']); // Getting the WP_Post
object
        if (!$postDetails) {
            return "Post not found.";
        }

        $authorDetails = new WP_User($postDetails->post_author); // Getting the
WP_User object

        $output = "<div class='post-author-details'>";
        $output .= "<h2>Author Information</h2>";
        $output .= "<p>Name: " . esc_html($authorDetails->display_name) .
"</p>";
        $output .= "<h2>Post Information</h2>";
        $output .= "<p>Title: " . esc_html($postDetails->post_title) . "</p>";
        $output .= "<p>Content: " .
esc_html(wp_trim_words($postDetails->post_content, 20, '...')) . "</p>";
        $output .= "</div>";

        return $output;
    }
}

new ExtendedOOPShortcodeHandler();
In this extended version, you’ve created a shortcode: [post_author_details post_id="1"].

WP_User class) and the post itself (using the WP_Post class).
OOP and the WordPress REST API
The WordPress REST API is a modern addition to WordPress that lets you interact with the site’s data in a more programmable way. It leverages OOP extensively, utilizing classes to define the endpoints, responses, and the handling of requests. This represents a clear move from its traditional procedural roots to embracing OOP.
Contrasting sharply with OOP principles, much of WordPress’s core, especially its earlier components such as the themes and plugins API, is written in a procedural programming style.
For example, while a procedural approach might directly manipulate global variables and rely on a sequence of functions for tasks, OOP in the REST API encapsulates the logic within classes. Therefore, specific methods within these classes handle tasks such as fetching, creating, updating, or deleting posts.
This clearly separates concerns and makes the codebase easier to extend and debug.
Through classes that define endpoints and handle requests, such as fetching posts with a GET /wp-json/wp/v2/posts request, the REST API offers a structured, scalable way to interact with WordPress data, returning JSON formatted responses.
Leveraging Kinsta for PHP and WordPress hosting
Kinsta’s hosting solutions help optimize PHP applications and manage WordPress hosting, catering to traditional PHP setups and WordPress-specific needs. With a robust infrastructure built on cutting-edge technologies, Kinsta facilitates unparalleled performance and scalability for OOP-based PHP applications.
For WordPress sites, Kinsta’s specialized WordPress Hosting service offers features like automatic updates, security monitoring, and expert support. It guarantees hassle-free management and superior performance, making it ideal for developers and businesses alike.
Summary
As you’ve seen throughout this article, OOP offers unparalleled flexibility, scalability, and maintainability in PHP and WordPress development.
As a leading managed WordPress hosting provider, Kinsta recognizes this need and offers tailored solutions to support developers like you in your OOP PHP endeavors. That’s why Sevalla’s Application Hosting, Kinsta’s PaaS product, and Kinsta’s WordPress Hosting are designed to assist you in building performant, scalable, OOP-based WordPress projects.
Try Kinsta today to see how we can help you build top-tier WordPress sites!
Have you experienced the benefits of OOP in your projects? Or are you curious about how it can transform your development process? Share in the comments below.


