
Redis is a schemaless, in-memory key-value data store for real-time applications. Developers can use it as a NoSQL database, a secondary data layer, or a cache layer for computing-intensive processes.
Redis offers persistent storage that can cache website session states and other data. Applications that use Redis as a cache layer typically make one complex database query or API call and then cache the results. It can store and retrieve objects quickly and efficiently. Therefore, Redis is a superb companion for WordPress, which uses a more traditional relational database server as its primary content store.
The Redis command-line interface (CLI) can be used to communicate with your WordPress site’s Redis server. Using the Redis CLI (invoked on the command line as redis-cli), you can request and receive responses from the Redis server programmatically, monitor the commands executed in a Redis instance, check the latency of an instance, and observe the state of the server in real-time.
This tutorial shows you how to integrate Redis and your WordPress site and use the Redis CLI to perform create, read, update, and delete (CRUD) operations from your terminal.
Connect Redis to WordPress Using DevKinsta
To connect a WordPress site to a Redis database, we are using DevKinsta, a free, one-click toolkit for quickly spinning up, developing, and deploying WordPress sites from your local environment.
DevKinsta spins up a Dockerized WordPress site locally with the latest versions of its dependencies, including an Nginx web server, PHP, and a MySQL-compatible MariaDB database. It also features CLI support for WordPress.
DevKinsta is available for Windows, Linux, and macOS. You can find more information regarding the installation when you download DevKinsta.
After the installation has finished, create and install a new WordPress site locally on your device using the default hosting stack.
DevKinsta offers three options for locally creating WordPress sites: a brand-new site with default settings, a new site with custom settings, and cloning an existing site hosted on Kinsta to your local development environment.
This tutorial uses the first option with the default settings and the latest releases of Nginx, PHP, MariaDB, and WordPress.
Once you’ve followed those steps, you can view your new site dashboard in DevKinsta:
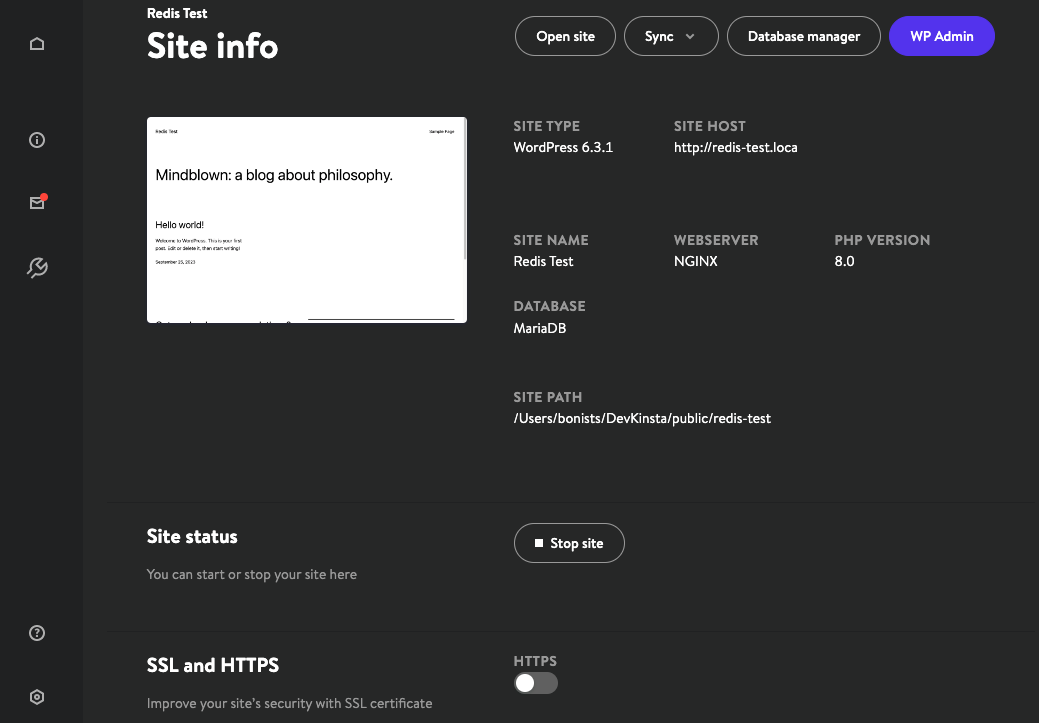
Take note of the Site Path. This is the directory containing the files and folders for the local site. The WP Admin dashboard link appears in the upper right-hand corner. Finally, note the Site Host, which is the URL pointing to your new development site.
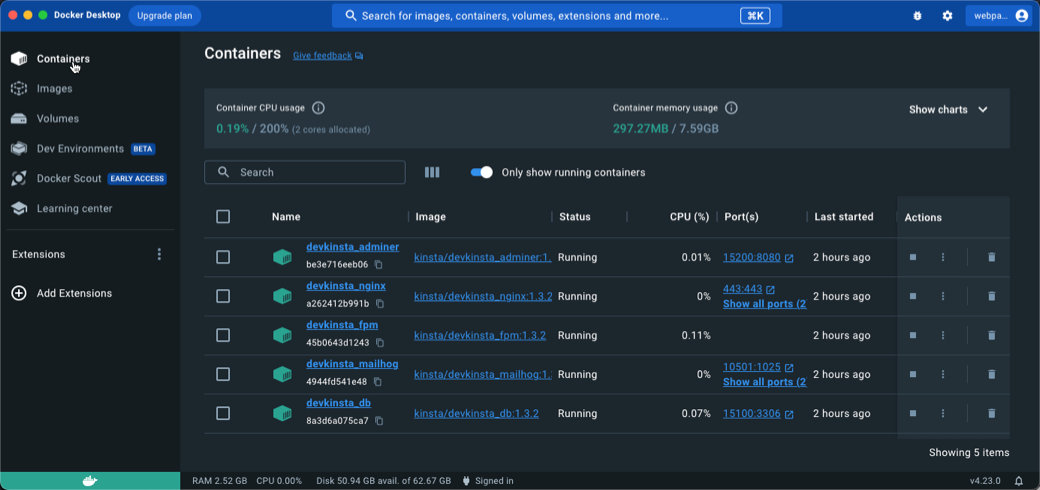
You can open Docker Desktop to list all the containers running as dependencies in your DevKinsta project. To do this, click Containers at the top of the left-hand sidebar:
Now that your WordPress site and container dependencies are up and running, you’re ready to connect a Redis database to your site:
- Click the WP Admin button in DevKinsta to navigate to your WordPress admin dashboard.
- Click on the Plugins tab on the left side.
- Click Add New, and search for “Redis Object Cache.”
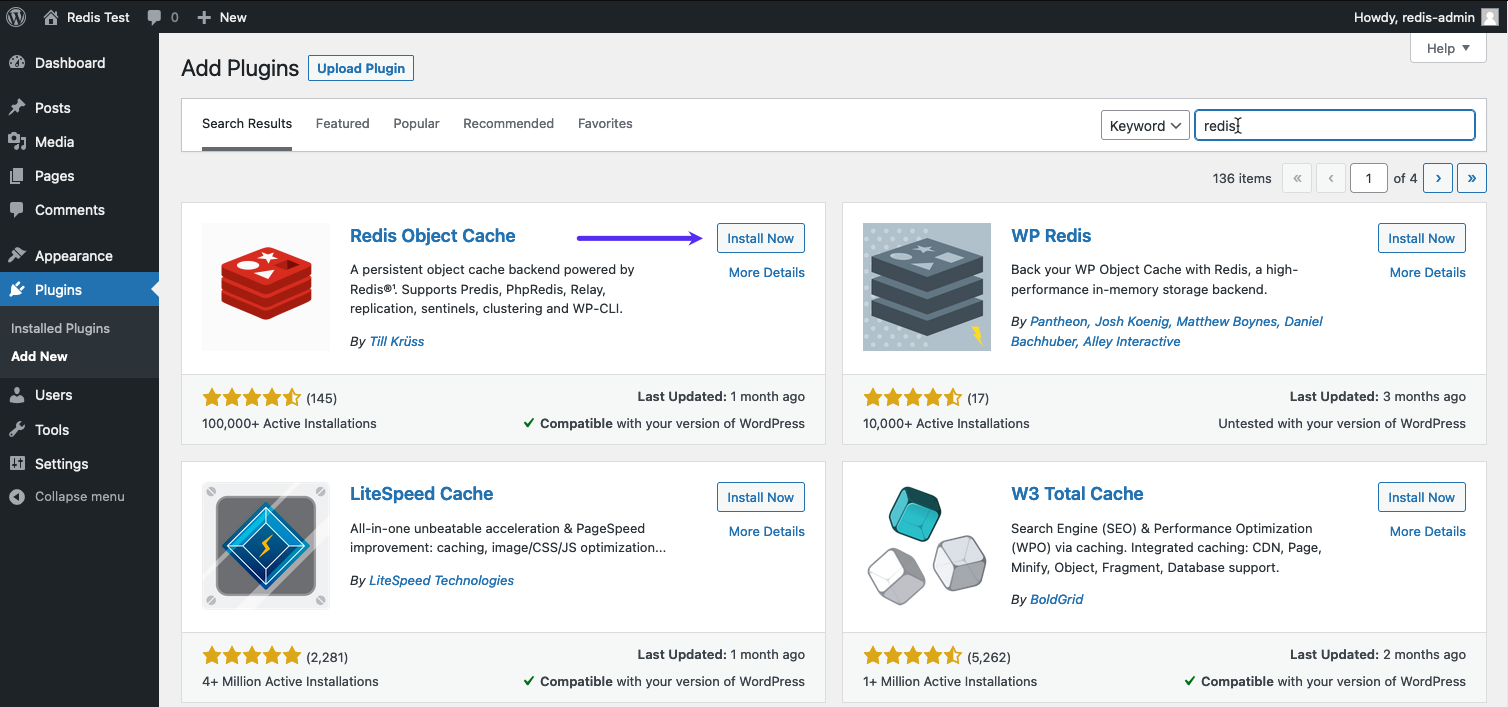
Click Install Now next to the plugin. Then, confirm it is active by clicking the Installed Plugins tab.
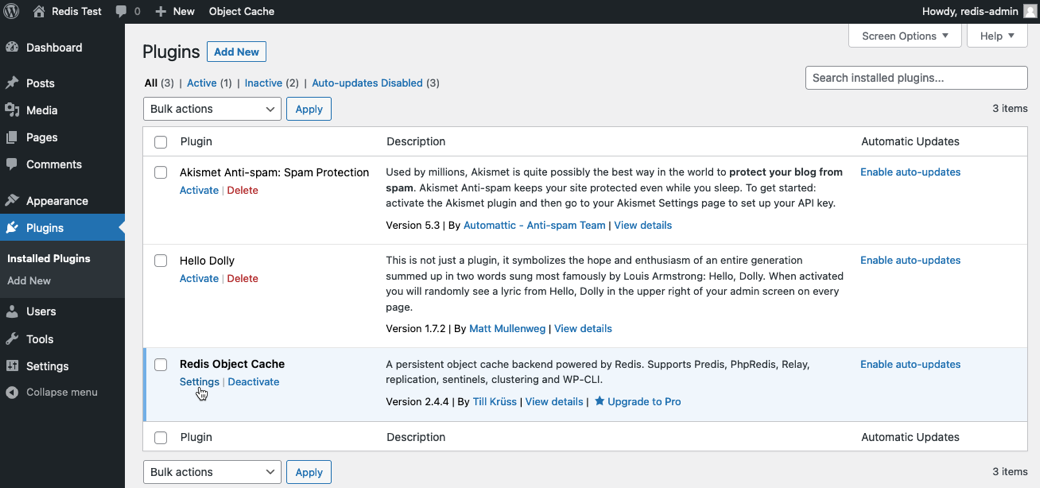
When first activated, the Redis Object Cache plugin will report that it is unable to connect to a Redis database. We solve that by creating a container with a Redis instance within Docker.
Let’s open a terminal and create a network container called redisnet in which to run your Redis image:
docker network create -d bridge redisnetNow, build and run a Redis image as a standalone container inside that network container:
docker run -d -p 6379:6379 --name demo_redis --network redisnet redisAfter starting the container image, verify in Docker Desktop that the Redis image is up and running:

Remember that your WordPress site launched automatically inside a Docker container. You can confirm its container network name and ID:
docker network ls
Above, the truncated version of the network ID for devkinsta_network is d1fa155f7a4d. We’ll be using that later.
One way to connect your Redis cluster and server to your local WordPress site is by directly connecting the Redis and DevKinsta networks. First, verify the container ID for Redis. Here, with the Docker command to list containers, we are using the -l (latest) switch to show just the container created most recently:
docker ps -l
In this example, the truncated container ID appears as c3ffc630e44c.
Connect your Redis container to the DevKinsta network using your container ID in place of ours in the command below.
docker network connect devkinsta_network c3ffc630e44cYou should have successfully added the Redis container image to the list of running containers inside devkinsta_network. To verify the network IP address of the Redis container, run the following command, replacing our devkinsta_network ID with the one you found using the network ls command in your project:
docker inspect d1fa155f7a4d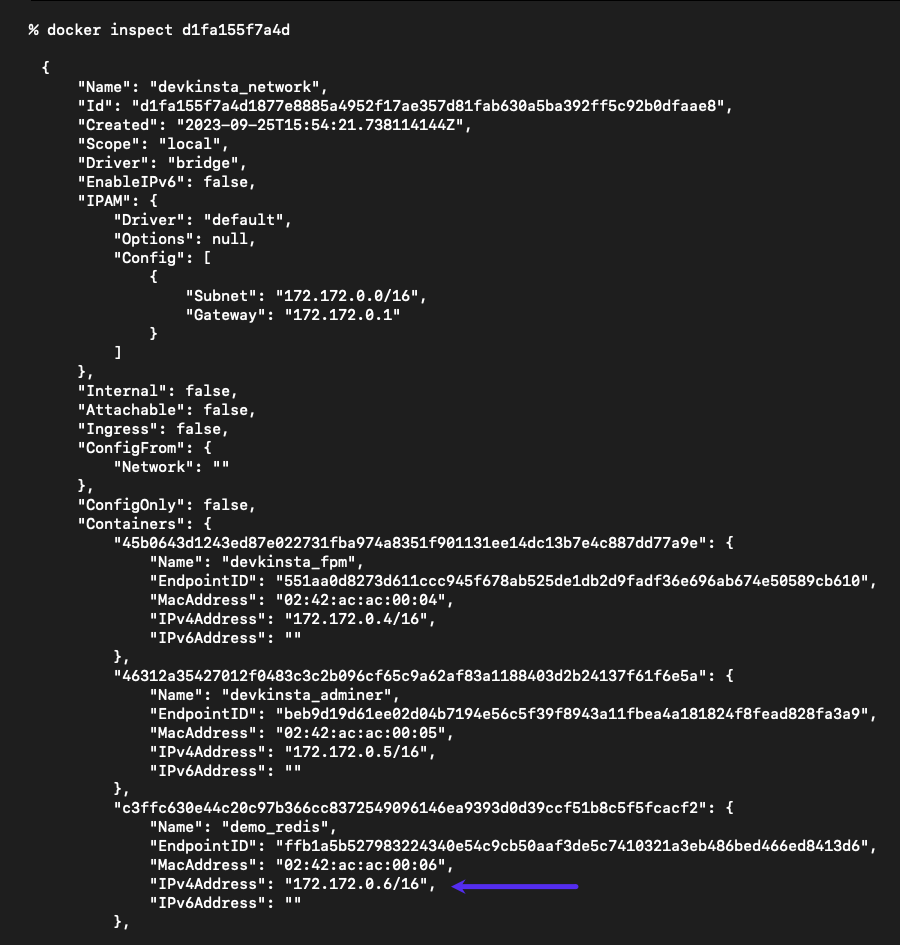
In the image above, the IP address of the demo_redis container is 172.172.0.6. Make a note of the IP address in your project before proceeding with the connection.
Navigate to the root of the WordPress site on your local machine, which is on the Site Path displayed in DevKinsta. Open the wp-config.php file in a text editor and add the following code in the section for custom configuration variables:
define('WP_REDIS_CLIENT', 'predis');
define('WP_REDIS_HOST', '172.172.0.6');
define('WP_REDIS_PORT', '6379');
The IP address you use for WP_REDIS_HOST is the one you discovered for demo_redis when you executed the docker inspect command.
This configuration code adds the Redis client, host, and port so that the plugin can access the Redis server inside the same Docker container and network as DevKinsta.
To confirm the plugin is connected and running:
- Navigate to your WordPress plugins page within the admin dashboard.
- Click the Settings link for the Redis Object Cache.
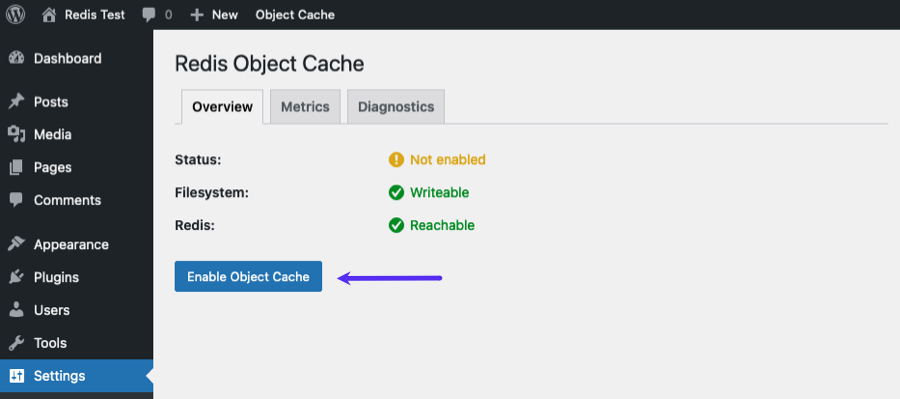
- On the Settings page, click the Enable Object Cache button.
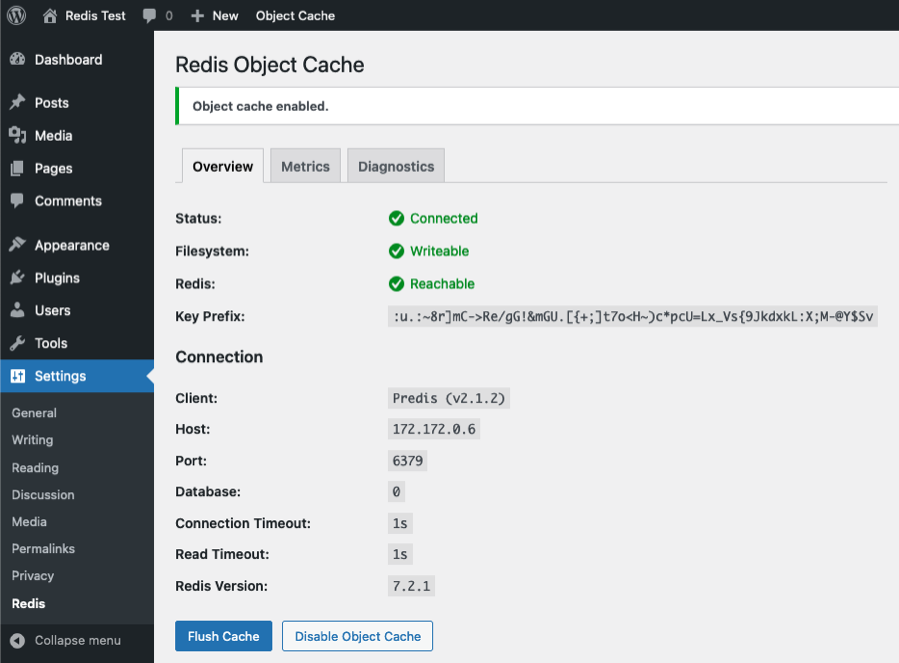
Once the Redis Object Cache is enabled, its Settings page will look something like this:
Launching the Redis CLI
The Redis CLI tool (redis-cli) comes bundled with a Redis server. You can install a Redis server on Windows, macOS, and Linux operating systems.
However, we’re already running Redis in Docker here, so we can launch the CLI tool within our demo_redis container.
Above, when we used the docker ps command, we learned the ID of the container running the Redis image. Ours began c3ffc630e44c. We can use this truncated ID to target demo_redis and launch a command-line shell within it:
docker exec -it c3ffc630e44c /bin/shNow you can invoke the redis-cli tool:

You can ping the server to test the connection:
ping
To connect to the Redis server using its IP address and port and test that connection, run the following command (using the IP address of your demo_redis container):
redis-cli -h 172.172.0.6 -p 6379 ping
You have successfully connected to the Redis server on both your local machine and the Docker container.
Next, verify that your WordPress site is storing data in the Redis cache by using redis-cli and its keys * command to display all the keys in the database:
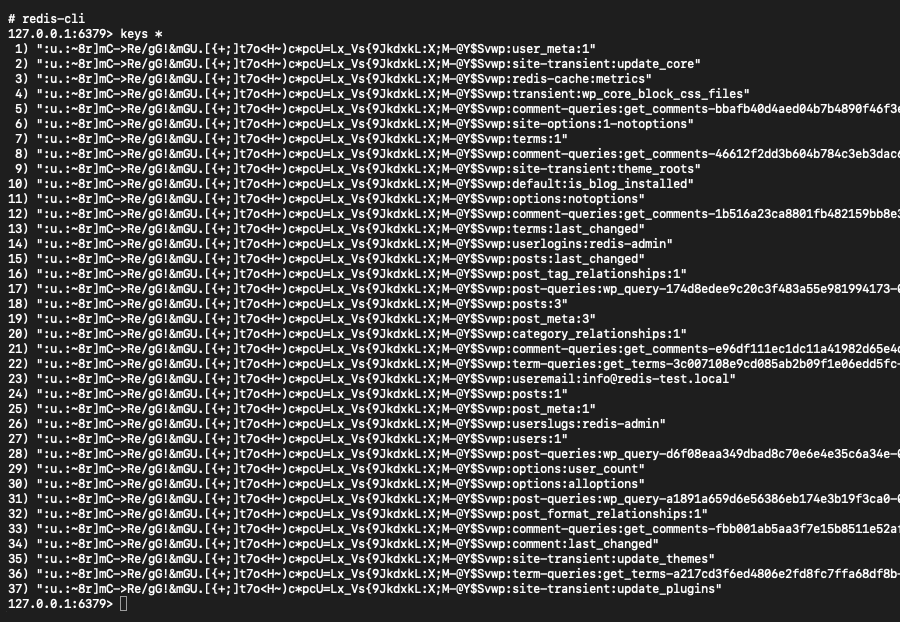
You can see that some WordPress data has already been saved to the Redis cache.
Redis CLI CRUD Operations
You can perform CRUD operations on your Redis database using the CLI tool.
Let’s get the value of a key we copied from our earlier Redis CLI keys * request.
get :u.:~8r]mC->Re/gG!&mGU.[{+;]t7o<H~)c*pcU=Lx_Vs{9JkdxkL:X;M-@Y$Svwp:user_meta:1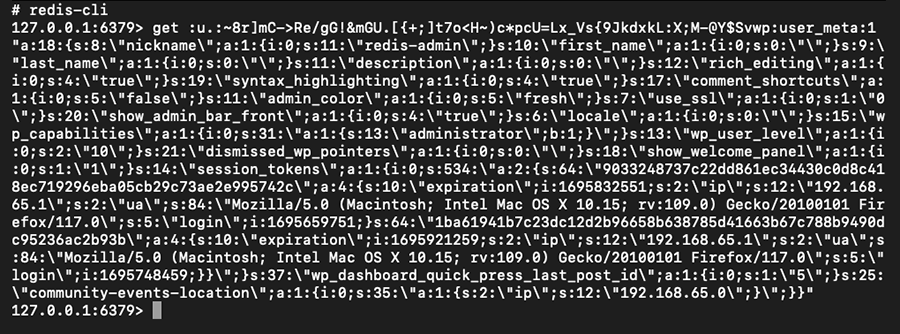
Let’s manipulate the content of the Redis database by invoking redis-cli and using the set, get and del commands to create a key/value pair, query the new key and then delete it:
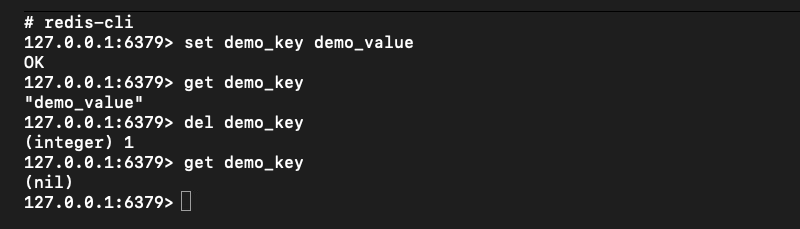
Above, trying to retrieve the value of a key that has been deleted returns nil.
There are many more advanced operations available when using the Redis CLI.
Summary
Redis CLI is an easy way to test Redis commands on your website before pushing it to a live environment. It is also a great way to monitor activity in a Redis instance.
In Docker, a Redis instance provides the tools you need to manage the database — including redis-cli — bundled in a single container.
Meanwhile, DevKinsta’s Dockerized approach makes it easy to develop a WordPress site on a local machine and then deploy it to production with a few clicks of a mouse.
If you’re not already managing some of the 200,000 WordPress sites hosted by Kinsta, discover the advanced features that are available in all of our managed WordPress Hosting plans.

Steve Bonisteel is a Technical Editor at Kinsta who began his writing career as a print journalist, chasing ambulances and fire trucks. He has been covering Internet-related technology since the late 1990s.

