
As a WordPress site owner, you’re probably always on the lookout for new opportunities to engage with your audience.
Shareaholic is a popular WordPress plugin/service that comes with a suite of tools to help you do just that, and maybe even make a little extra money in the process.
But while Shareaholic does give you access to tons of features in one neat package, it also uses a modular approach to ensure you aren’t bogging down your site with features you don’t want. That is, it lets you turn specific features on or off according to your preferences.
In this post, we’ll take a deep look at Shareaholic. We’ll start by discussing all the features that come with Shareaholic. Then, we’ll go hands-on and show you how everything comes together on a live WordPress site.
Shareaholic Features: More Than Just Social Sharing
When you see the name “Shareaholic”, your brain probably goes straight to social media sharing buttons.
And yes – Shareaholic certainly does social sharing…
You can add both floating and in-content share buttons, as well as share buttons on individual images and a couple of options for social follow buttons. Each placement comes with its own array of detailed settings, with the ability to turn on share counts, choose specific social networks, and a lot more.
However, there’s also a lot more than social sharing, which is one of the things that makes Shareaholic unique against all of the other WordPress social sharing plugins.
You also get:
- Related content – show related content suggestions on your site. The nice thing here is that all the processing happens on Shareaholic’s servers, which offers a better performance approach because you won’t have a bunch of database queries running on your own site.
- Analytics – find out how your content fares on social media thanks to UTM and Event tracking integrations with Google Analytics. You can also view this data inside your WordPress dashboard.
- Post Share Prompts – display messages after a user shares your content. You can display your own message and add social follow buttons or banner ads.
- Monetization – Shareaholic offers a number of monetization options, including the ability to automatically insert affiliate links, add banner ads to your related content, and promote sponsored content recommendations (in addition to related content from your own site). These features are totally optional.
- Link shortening – create shortened links (e.g. “shrlc.com/PnVrDPN” right from your dashboard. These links automatically track clicks, and you can view that click data in your dashboard as well.
Let’s take a deeper look at all the features and how they work!
Installing the Shareaholic Plugin
Shareaholic has sort a hybrid setup process where many of the features are available as soon as you activate the plugin, but you can also get access to more features if you create a Shareaholic account and connect it to your site.
It’s important to note that you are not forced to create an account to use most of Shareaholic’s functionality. However, creating an account does give you access to more features, so we’ve connected our example site to our Shareaholic account for this post.
Once you install and activate the free plugin from WordPress.org, you can go to the new Shareaholic area in your WordPress dashboard and click the Shareaholic Dashboard button to create a free Shareaholic account and sync it with your website:

From there, you can manage your site’s functionality using either:
- The New App Manager option in your WordPress dashboard (this feature is technically still in beta when we’re writing this post)
- The Shareaholic cloud dashboard
Either way, the interface is pretty much the same:

Each feature is an “app” that you can enable or disable as needed. This lets you keep things lightweight because you can only use the exact features you want.
Let’s go through the features…
Social Media Share Buttons
As soon as you activate the plugin, Shareaholic automatically adds social media share buttons in two different spots:
- A floating sidebar
- After your post content

Beyond those defaults, you can also add share buttons to individual images (like adding a Pinterest “Pin It” button on images), as well as social media follow buttons.
To control and configure all of this functionality, you can go to the Social area of the App Manager:

From there, you can use the toggle to turn individual features on or off, and the Settings button to configure specific options for each placement.
For example, if you open the settings for the Floated Share Buttons, it will open a detailed popup where you can control all kinds of options:

Some of the things that you can do include:
- Change button size
- Add individual or total share counts
- Choose which social media networks to include
- Add a delay to wait to trigger your share buttons
- Control the mobile design
- Add page targeting rules to control which content has share buttons
- Add Google Analytics UTM tag tracking
- Customize the Twitter share message
For example, if you’re editing the mobile share buttons, you can choose to stick them to the bottom of a visitor’s screen for a better user experience:

You can even have Shareaholic dynamically order your buttons based on which buttons convert the best for specific pages.
Beyond the Floated Share Button settings, Shareaholic’s other social apps also have a similar level of detail.
For example, here’s what it looks like to customize the share buttons that appear at the bottom of a post:

Related Content
Next up, let’s take a look at the related content suggestions in Shareaholic. As soon as you activate Shareaholic, it will start displaying related content underneath your blog posts automatically.
Here’s an example of what it looks like on our test site:

Again, the nice thing about these related content suggestions is that the processing happens on Shareaholic’s servers, rather than your WordPress site’s server. Some related posts plugins can be pretty database-intensive, so this off-site approach takes the load off your server.
To configure your related content, you can go to the Engage tab. Here, you’ll be able to customize or disable each individual display location, or even add new display locations:

If you open the settings for an individual display location, you’ll get another popup where you can control a ton of information.
First, you can choose from 14 different themes, as well as how many posts to display.
For example, if you choose the Portals theme, you’ll get this neat rounded look:

In the Content Pool tab, you can configure which posts are eligible to be displayed as related content.
For example, if you have a “News” category at your site that only posts time-sensitive content, you might want to exclude that category from being eligible because those posts won’t be relevant to people visiting in the future:

If you have Shareaholic Pro, you can also filter by author or how old a post is, which gives you more flexibility for excluding content.
The Algorithm tab lets you tweak how Shareaholic actually surfaces related posts. For example, you can choose how much weight (if any) to put on a piece of content’s:
- Title
- Tags or categories
- Author (Pro)
- Language (Pro)

Finally, the Monetization tab lets you choose whether or not to mix in sponsored content ads into the suggestions. That is, if you enable this feature, Shareaholic will display off-site content suggestions and you’ll earn some money in exchange.
Beyond enabling this feature, you can also choose how many sponsored content suggestions to include. For example, you could do a 50/50 ratio between your own content and sponsored content. Or, you could weight things in either direction:

Analytics
Shareaholic includes a separate Analytics app area. However, these options are tied to the same analytics options you configure when you edit your social share buttons, so you don’t necessarily need to configure anything in the app.
Note – your analytics settings are shared across all of your social media share button placements.
Once you get some data, you can view it in the main Analytics tab in your WordPress dashboard. This data takes 24-48 hours to populate, which is why our dashboard is looking a little empty right now:

After-Share Notices
Whenever someone shares content on your site, Shareaholic displays an after-share notice as a modal popup. Here’s an example of how it looks by default:

Shareaholic gives you a few different ways to customize this notice (or, you can also disable it).
First, if you edit the Post Share Prompt app, you can customize the text. With the Pro plan, you can also customize the colors:

Beyond simply displaying text, though, Shareaholic also gives you two other options. You can insert:
- Social follow buttons – this is a great way to boost your follower counts because you’re displaying the follow buttons at a time when you already know your visitors are engaged.
- Banner ads – if you want to earn some extra revenue, you can also include banner ads.
For example, here are what the social follow buttons look like. You also get plenty of options for changing the layout and which networks are included:

Other Monetization Options
We already showed you two of Shareaholic’s monetization options in the form of:
- Sponsored content in the related suggestions (or banner ads in the related content)
- Banner ads on the post-share notice
However, Shareaholic also offers a couple of other options in the Monetize apps section:
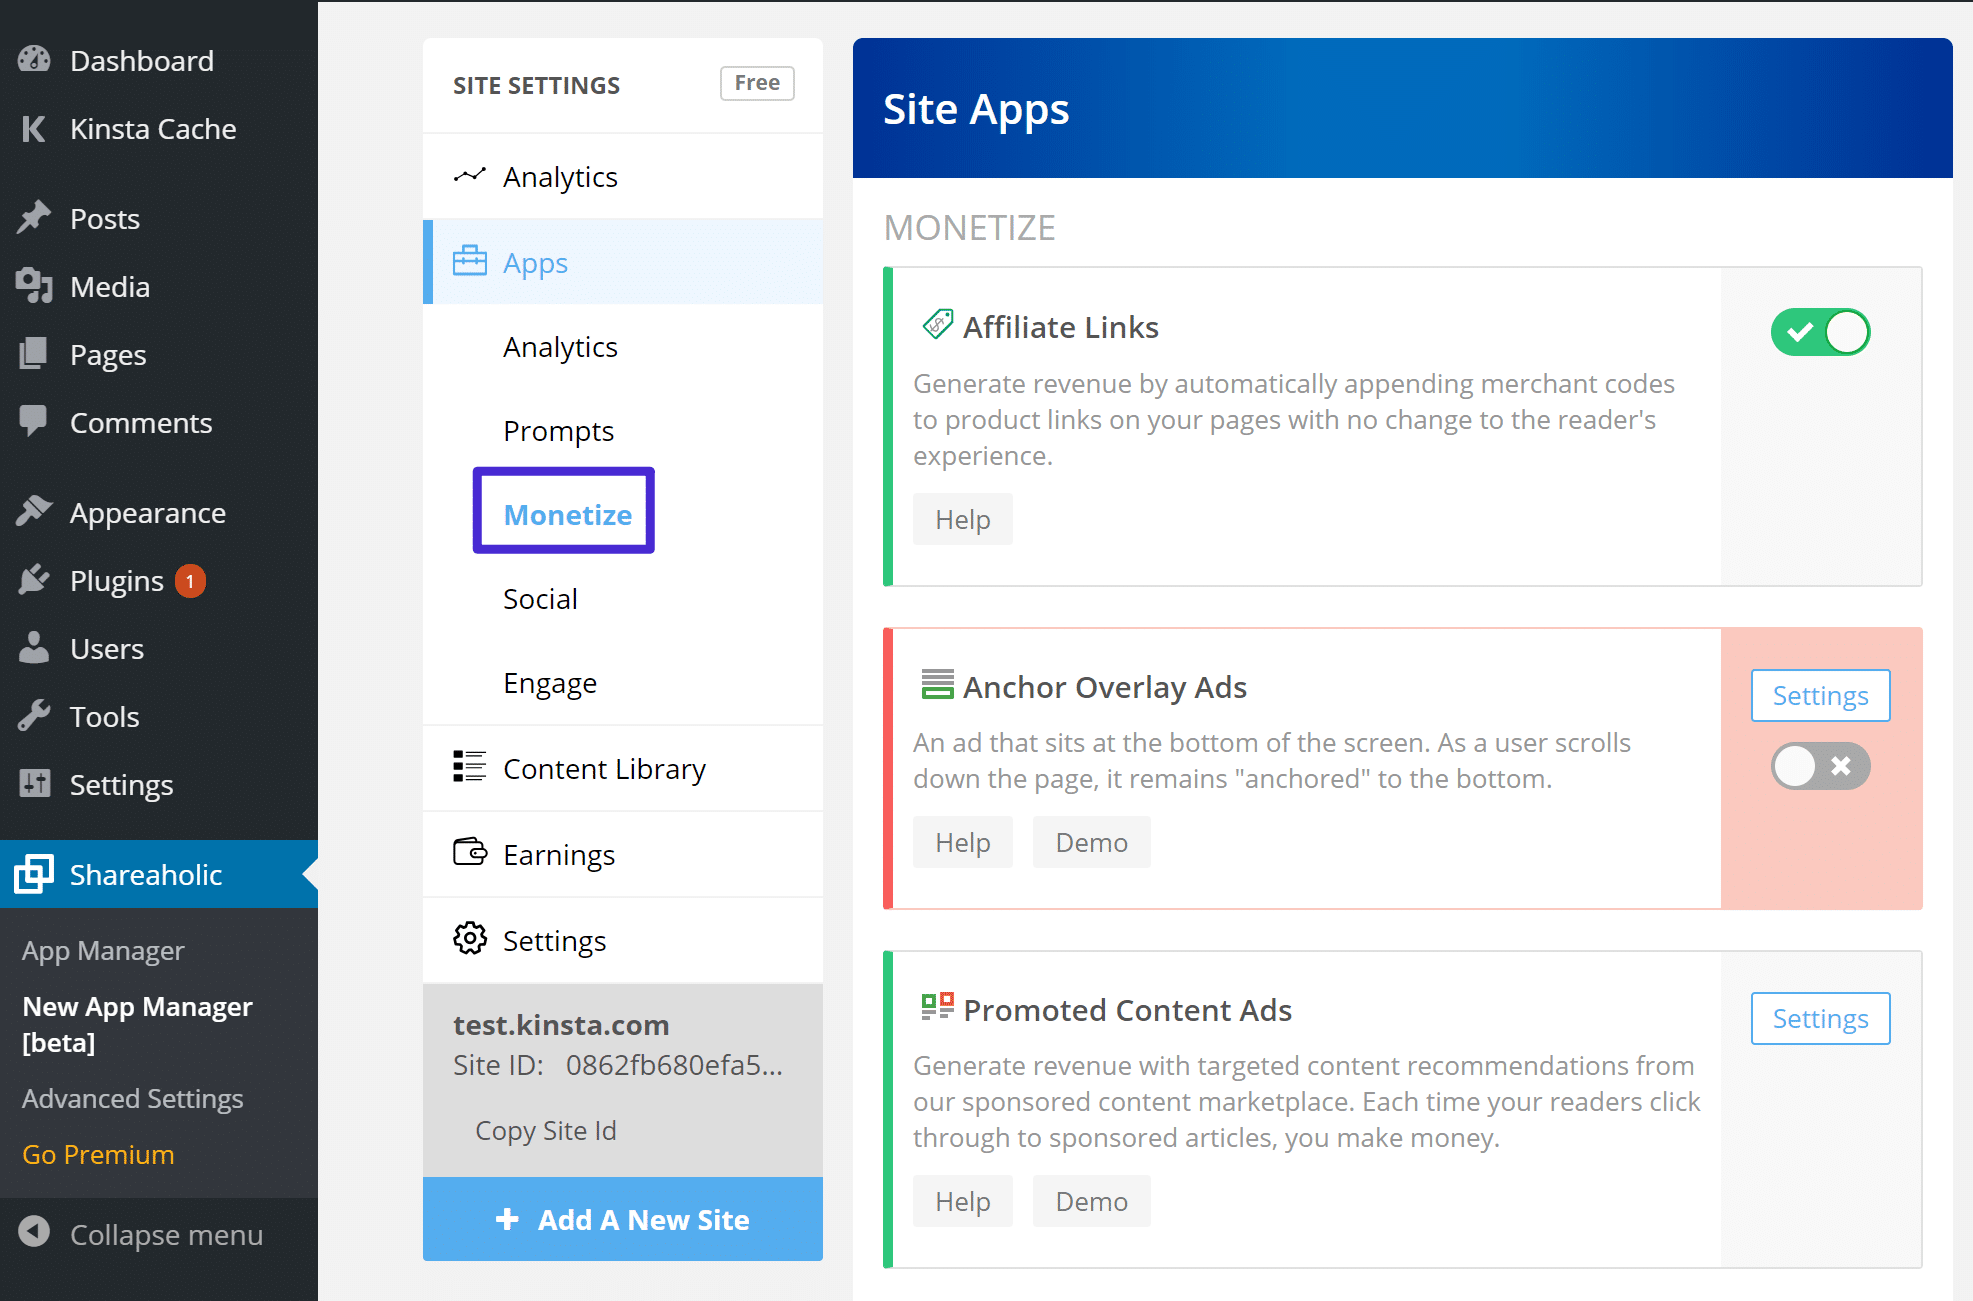
First, the Affiliate Links app lets you automatically add affiliate codes to existing links to earn money with affiliate marketing. For example, if you already have a link to eBay, Shareaholic can add the affiliate code to that link automatically so that you can get a cut of the sale. This is a great way to earn a little money without affecting the user experience at your site in any way.
Second, the Anchor Overlay Ads app lets you add a sticky ad to the bottom of visitors’ screens. You can choose whether to display this for desktop visitors, mobile visitors, or both.
Again, all of these monetization apps are optional. Shareaholic does not force you to insert ads in your site – it just gives you the ability to.
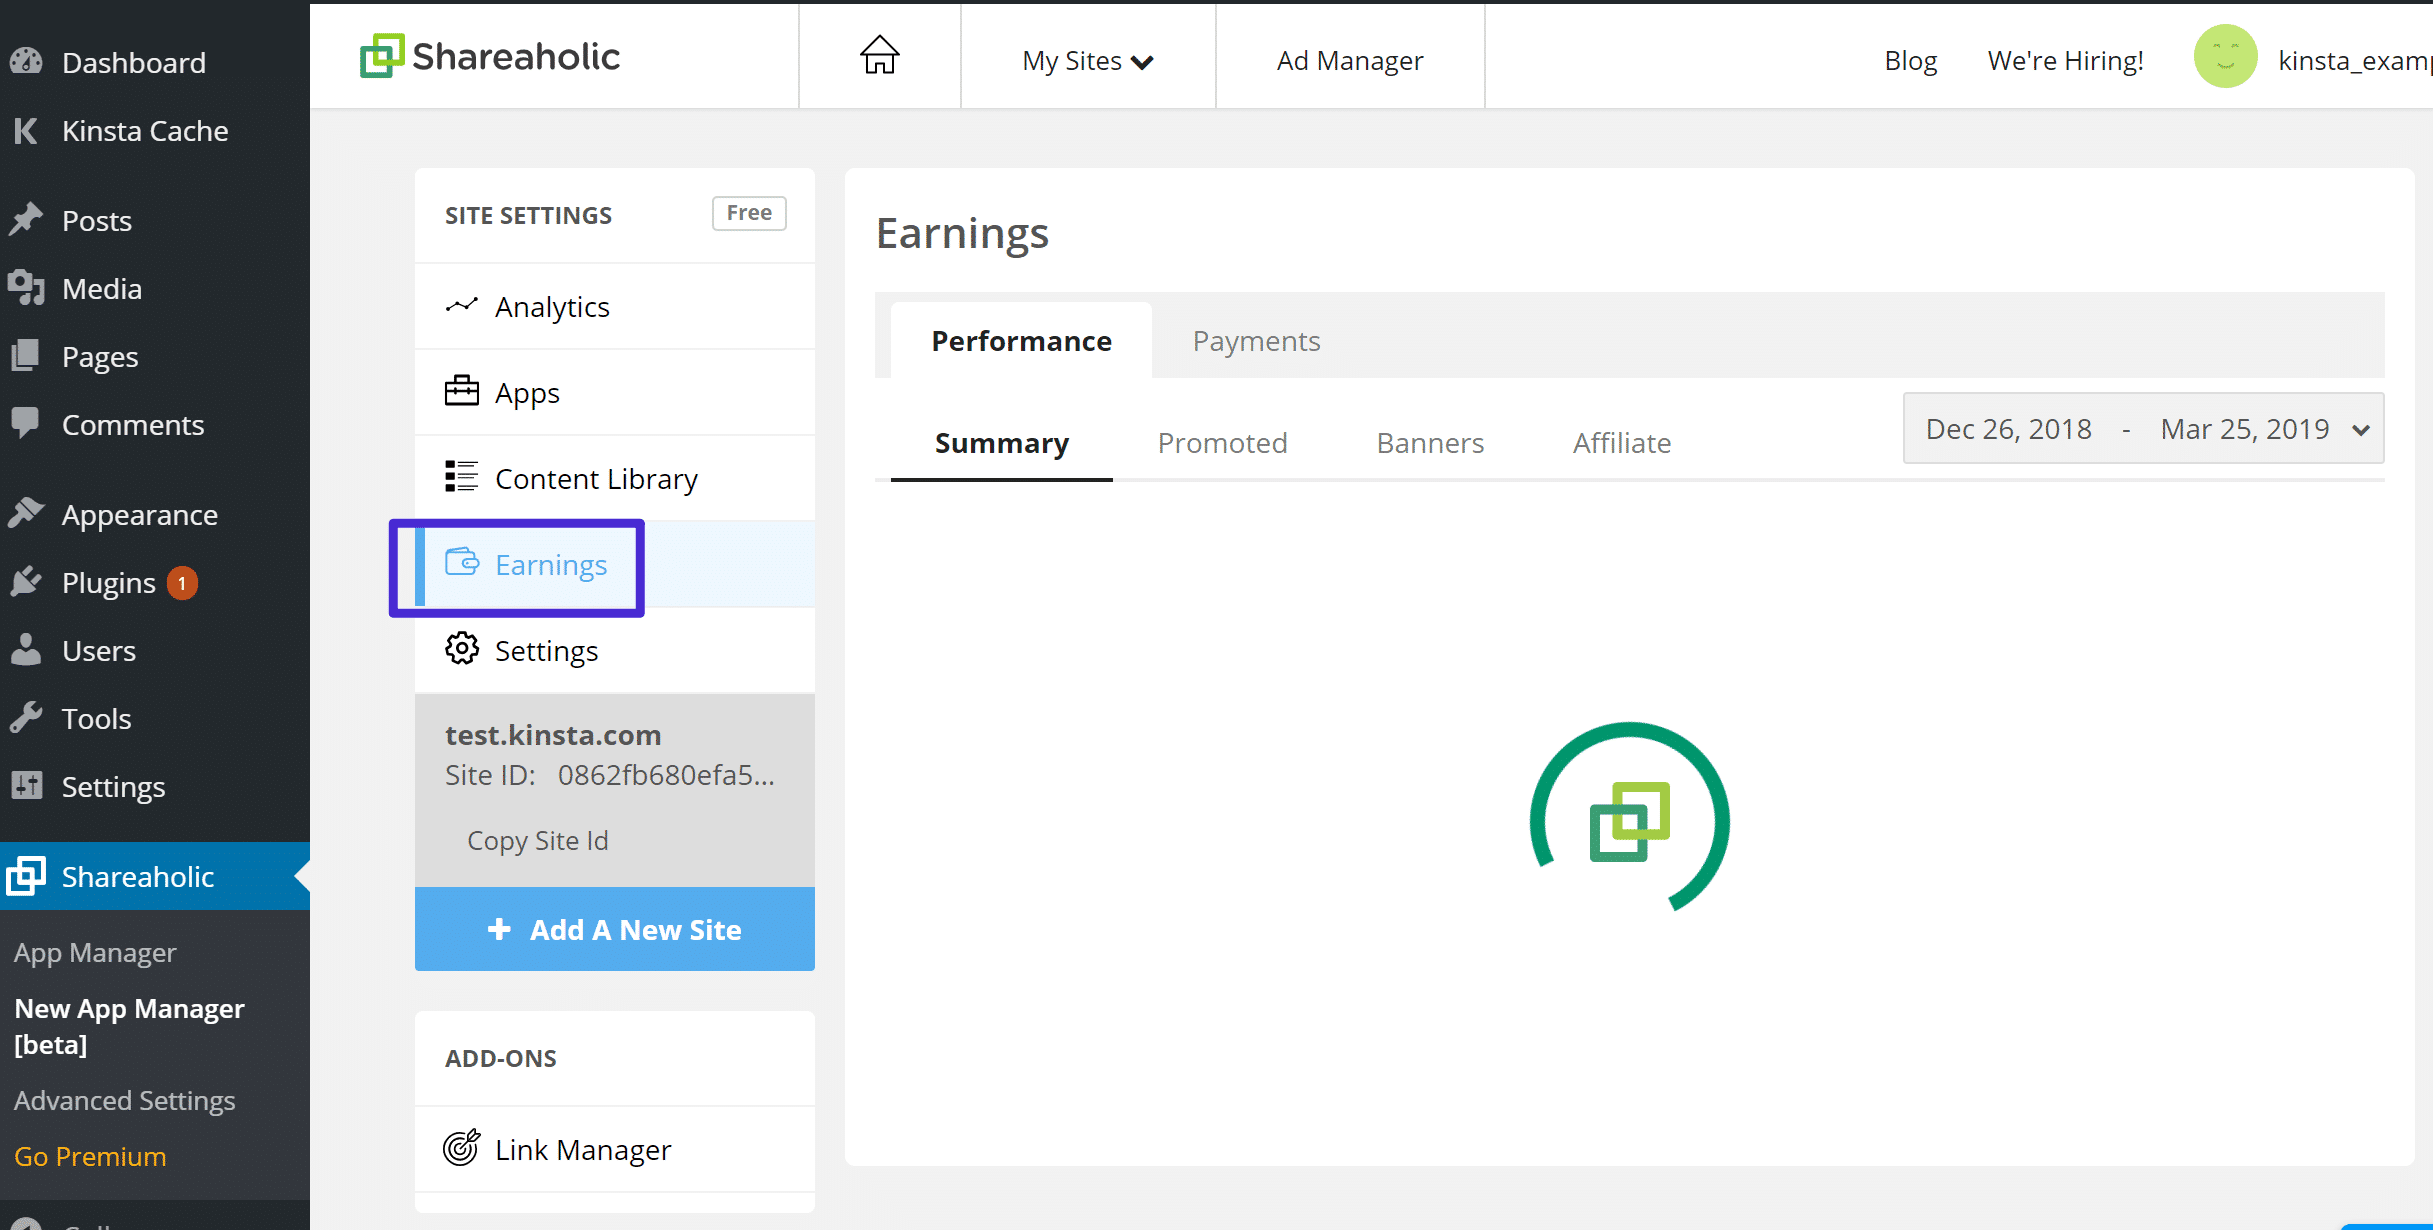
If you do enable any monetization functionality, you’ll be able to see your earnings and payments in the Earnings tab:
Cookie Consent Notice
If you want to add a cookie consent notice to your site to comply with the EU GDPR and cookie consent laws, Shareaholic’s Cookie Consent Prompt makes that easy.
Here’s an example of what it looks like by default:

And if you edit the app’s settings, you’ll be able to:
- Change its placement (e.g. top or bottom)
- Customize the text
- Add a link to your privacy policy

Beyond that, the Targeting Rules tab lets you use geotargeting to control who sees your cookie consent notice. For example, you could opt to only show it to visitors from the European Union.
Link Shortening
Finally, Shareaholic’s Link Manager add-on lets you create shortened links right from your WordPress dashboard, complete with lots of options for adding analytics to those links.
In the Settings tab of the Link Manager add-on, you can:
- Add tracking pixels
- Control how bots are tracked
- Choose which URL shortening service to use. By default, it uses Shareaholic’s own shrlc.com domain, but you can also use bit.ly, and other services

Then, creating a new link is as simple as pasting in the URL you want to link to and choosing which tracking options to use.
Once you get some activity, you’ll be able to view click analytics for each individual link:

What About Performance?
We know some of you might be wondering about the performance of the Shareaholic plugin, so we ran a few of our own tests. Note: You should always test on your own WordPress site.
The first thing is that if you’re already using a plugin that spits out open graph tags such as Yoast SEO, you might want to disable this feature under “Advanced Settings.” Otherwise, you’ll wind up with duplicate tags. This won’t hurt anything, but it’s a waste of code and will only add to your total page size.

Without the Shareaholic Plugin Enabled
We first ran a speed test without the Shareaholic plugin enabled.

With the Shareaholic Plugin Enabled
We then ran a speed test with the Shareaholic plugin enabled and configured the social media sharing buttons. As you can see below, the plugin adds a little over 20 requests and almost 400 KB in total page size.

You can see that it didn’t actually add that much load time overall to the WordPress site, even though it did add a lot of requests. Here are a few reasons why:
- 100% of Shareaholic JavaScript and related files are hosted on Amazon’s Global CDN (Content Delivery Network). This means they should load quite quickly.
- Scripts are both preloaded and loaded asynchronously (after the page loads), as well as specify a cache policy.
- Was optimized with HTTP/2 in mind.
- If you look at the source code, they also add the
dns-prefetchtag. So someone on the development team at Shareaholic is looking at what they should be doing in terms of performance.
<link rel='dns-prefetch' href='//dsms0mj1bbhn4.cloudfront.net' />
<link rel='dns-prefetch' href='//apps.shareaholic.com' />
<link rel='dns-prefetch' href='//grace.shareaholic.com' />
<link rel='dns-prefetch' href='//analytics.shareaholic.com' />
<link rel='dns-prefetch' href='//recs.shareaholic.com' />
<link rel='dns-prefetch' href='//go.shareaholic.com' />
<link rel='dns-prefetch' href='//partner.shareaholic.com' />
- Another advantage that Shareaholic has is that it powers over 300,000+ sites around the globe. This means if you’ve already visited a site using Shareaholic, your web browser most likely will already have some of its resources and libraries in cache. Therefore, most of them should load lightning fast.
- They also offer the additional optional advanced options if you want to try and speed it up even further: enable server-side share counts, turning share counts off on index pages, and turning off third-party data services within analytics.
How Much Does Shareaholic Cost?
Unless otherwise specified, all of the features we showed you above are 100% free.
However, Shareaholic also offers premium plans that get you access to extra functionality like:
- Social share count recovery
- More options for controlling related content eligibility
- Remove the Shareaholic branding from key areas
- More targeting rules
- Plus plenty of other smaller features
These plans start at $8 per month (billed annually).
Beyond that, there are team plans that let you add multiple team members and control permissions for individual team members. These team plans start at $40 per month (billed annually).
Summary
Shareaholic offers a bunch of helpful features in one package. It’s kind of like Automattic’s Jetpack plugin…but for engaging with visitors and monetizing your site.
If you just want the extra functionality – like social media sharing, related content, after-share actions, and Google Analytics tracking – you can only use those features and skip all the monetization options.
However, if you are looking for new ways to monetize your site, Shareaholic can also help you there with some unique, non-intrusive ways to monetize, like mixing in sponsored content to your related content.
To get started, you can install the free Shareaholic plugin from WordPress.org. From there, you can (optionally) sync it up with a free Shareaholic account, and then configure the individual apps that you want to start using on your site.

Brian has a huge passion for WordPress, has been using it for over a decade, and even develops a couple of premium plugins. Brian enjoys blogging, movies, and hiking. Connect with Brian on Twitter.

