
Jetpack is billed as an all-in-one plugin that covers a range of use cases including WordPress security, performance optimization, marketing tools, analytics, and more. The plugin is maintained by Automattic, the team behind other popular WordPress services and products like WordPress.com and WooCommerce.
Over the years, Jetpack has developed a reputation for being a bloated and unnecessary plugin that simply isn’t needed for most sites – especially those on managed WordPress hosts like Kinsta.
In this article, we’ll dig into the pros and cons of Jetpack’s extensive feature set to help you determine whether or not you need it for your WordPress site.
Prefer to watch the video version?
How to Install Jetpack
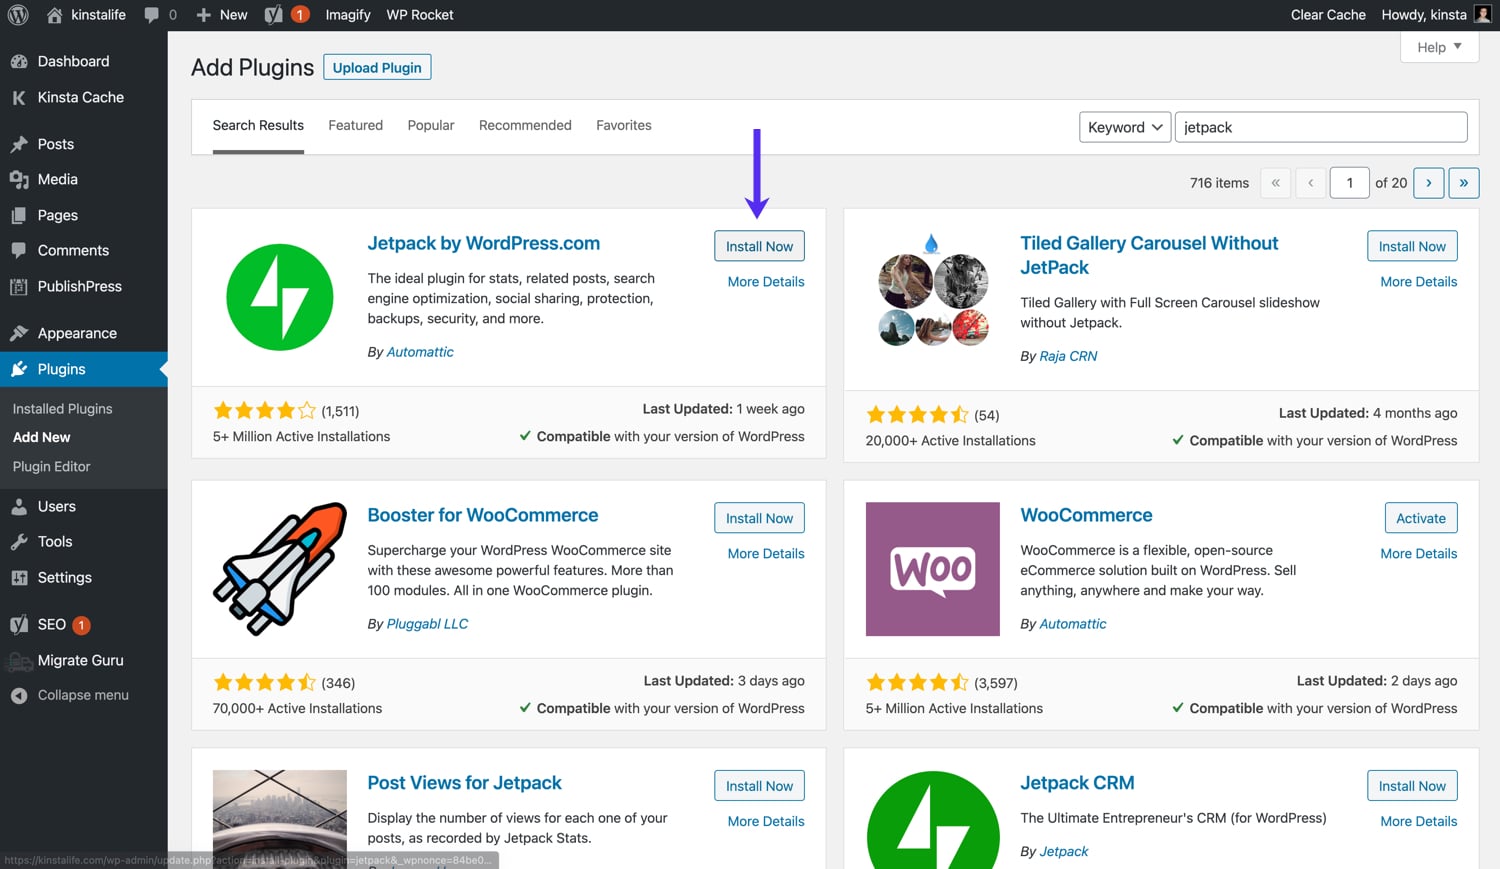
Jetpack can be installed directly from the WordPress plugin repository. At this time, Jetpack has over 5 million active installations with a 4-star rating.
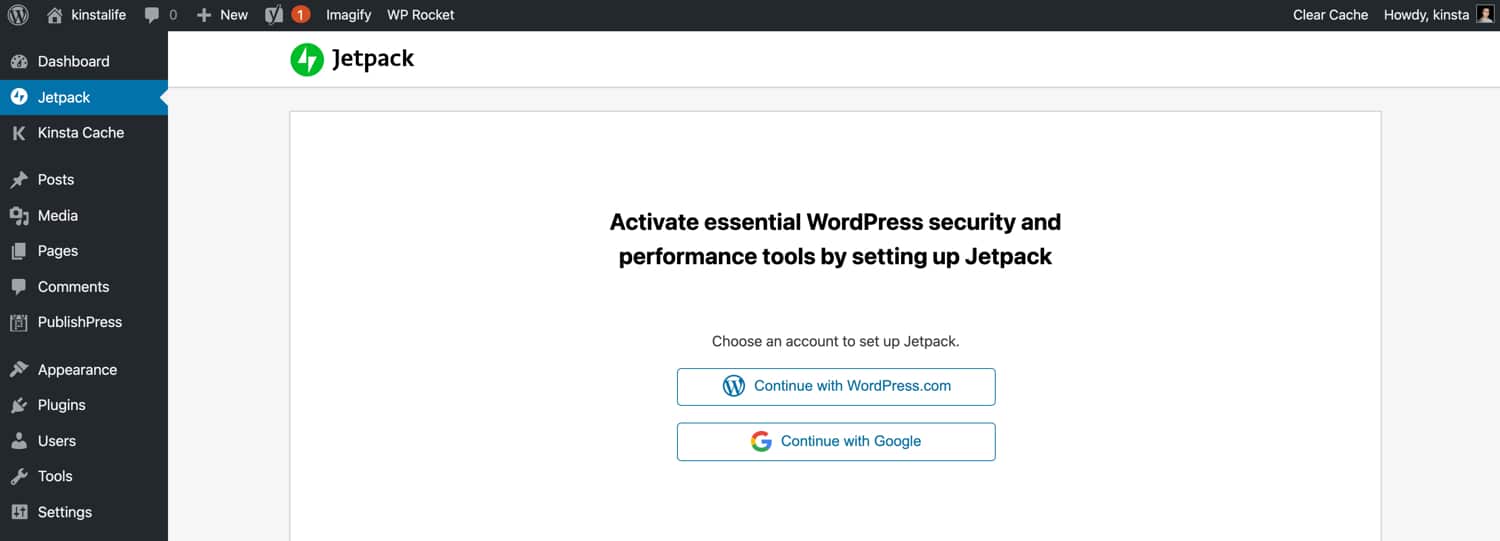
After activating Jetpack, you’ll be asked to log in with a WordPress.com or Google account.
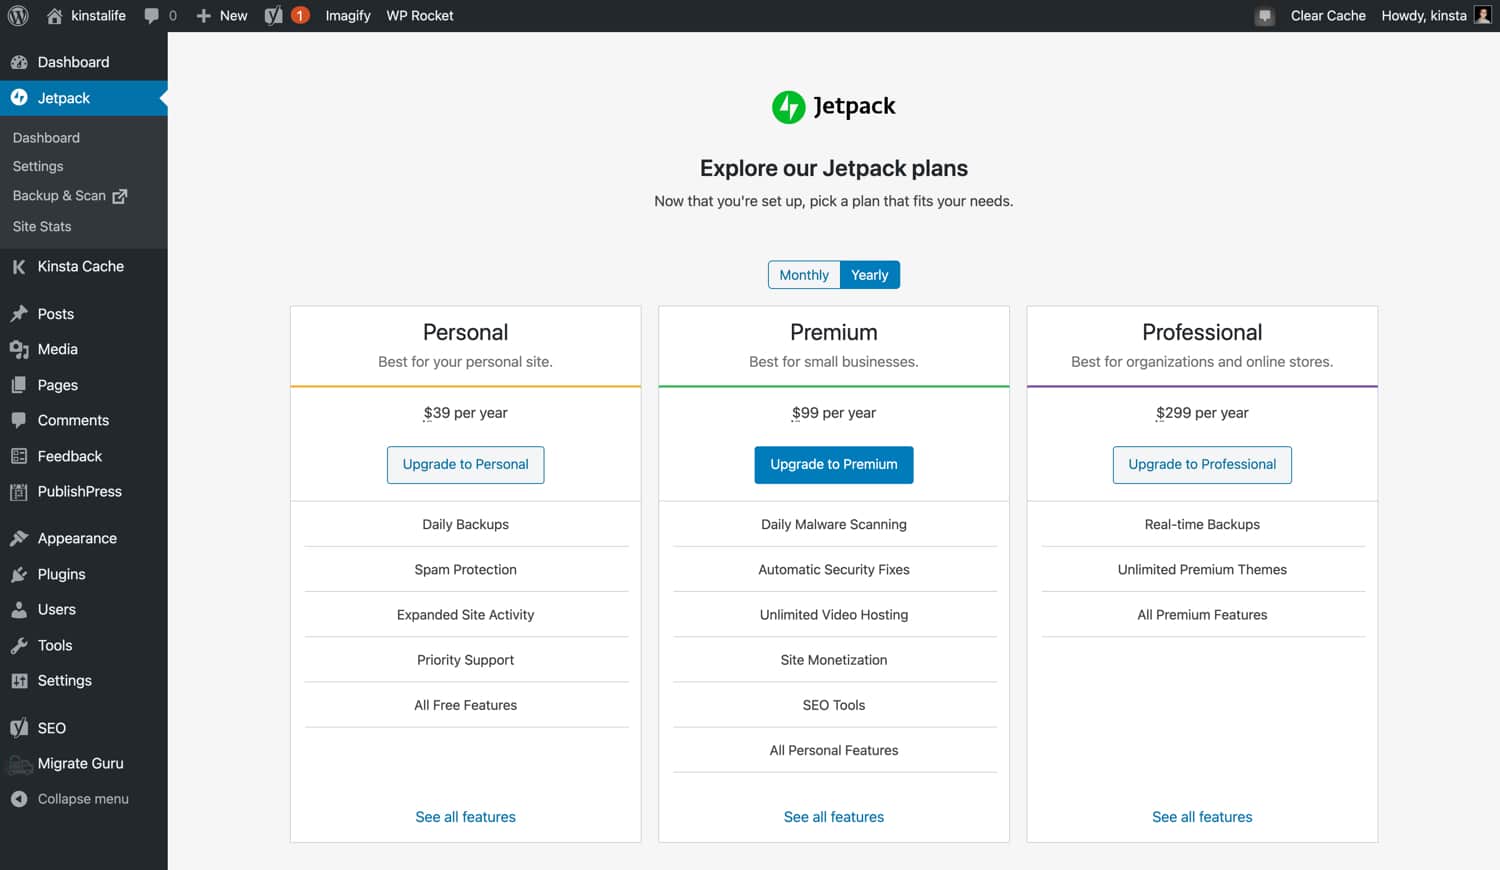
After logging in, you’ll be presented with Jetpack’s various plan tiers. Jetpack’s paid plans range between $39 and $299 per year. There is also a monthly subscription option.
If you would like to subscribe to a paid plan, feel free to upgrade right now. Otherwise, scroll down to the bottom of the page and choose the free option.
How to Configure Jetpack Settings
Jetpack has three sidebar tabs – Dashboard, Settings, and Site Stats.
Let’s dive right into how to configure Jetpack for your site before looking at the dashboard and site stats pages.

- Security – downtime monitoring, auto-updates, brute force protection, and more.
- Performance – search functionality, speed optimization, and media offloading.
- Writing – full screen slideshows, Markdown/LaTeX support, and more.
- Sharing – social sharing, like buttons, and more.
- Discussion – additional commenting functionality, subscriptions, and more.
- Traffic – ads, related posts, shortlink generation, sitemaps, and more.
Jetpack Security Settings
With Jetpack, you can add backups, security, downtime monitoring, and more to your WordPress site. Let’s go through Jetpack’s security features!
Backups and Security Scanning (Paid Plan Only)
Jetpack’s “Backups and Security Scanning” feature is only available for paid plans. Every WordPress site should have a backup and security strategy in place. Jetpack’s solution is a great option if your host doesn’t offer backups and security scanning.
If your site is hosted on Kinsta, we don’t recommend enabling this feature in Jetpack. In addition to automatic daily backups that can be restored anytime in the MyKinsta dashboard, we also offer a downloadable backup option which lets you download a ZIP file containing your WordPress files and database. For advanced users, our external backups add-on lets you backup your site to Amazon S3 or Google Cloud Storage.
On the security front, our sysadmins are constantly monitoring our infrastructure and stopping attacks before they happen. If your site does get hacked while on Kinsta, our team will clean it for free. Learn more about our security guarantee!
Downtime Monitoring
If you’re running a mission-critical website, having some sort of downtime monitoring strategy in place is important. With that said, Jetpack’s downtime monitoring feature isn’t very customizable in terms of monitoring and notification configuration. At this time, Jetpack only supports sending notifications to your WordPress.com email address – no Slack, SMS, and phone call support.

If you’re looking for a downtime monitoring solution for your WordPress site, we recommend looking at a more purpose-built service like UptimeRobot or Pingdom.
Auto-Update Plugins
At first glance, Jetpack’s “auto-update plugins” feature appears to be a big timesaver, but we generally don’t recommend basic automatic updates for WordPress plugins. Over the years, we’ve seen our fair share of plugin updates causing PHP code conflicts and 500 errors.

Whether you’re a hobbyist running a personal blog or a manager for a multinational brand running WooCommerce, we always recommend testing plugin updates in a staging environment before applying changes to your live production environment.
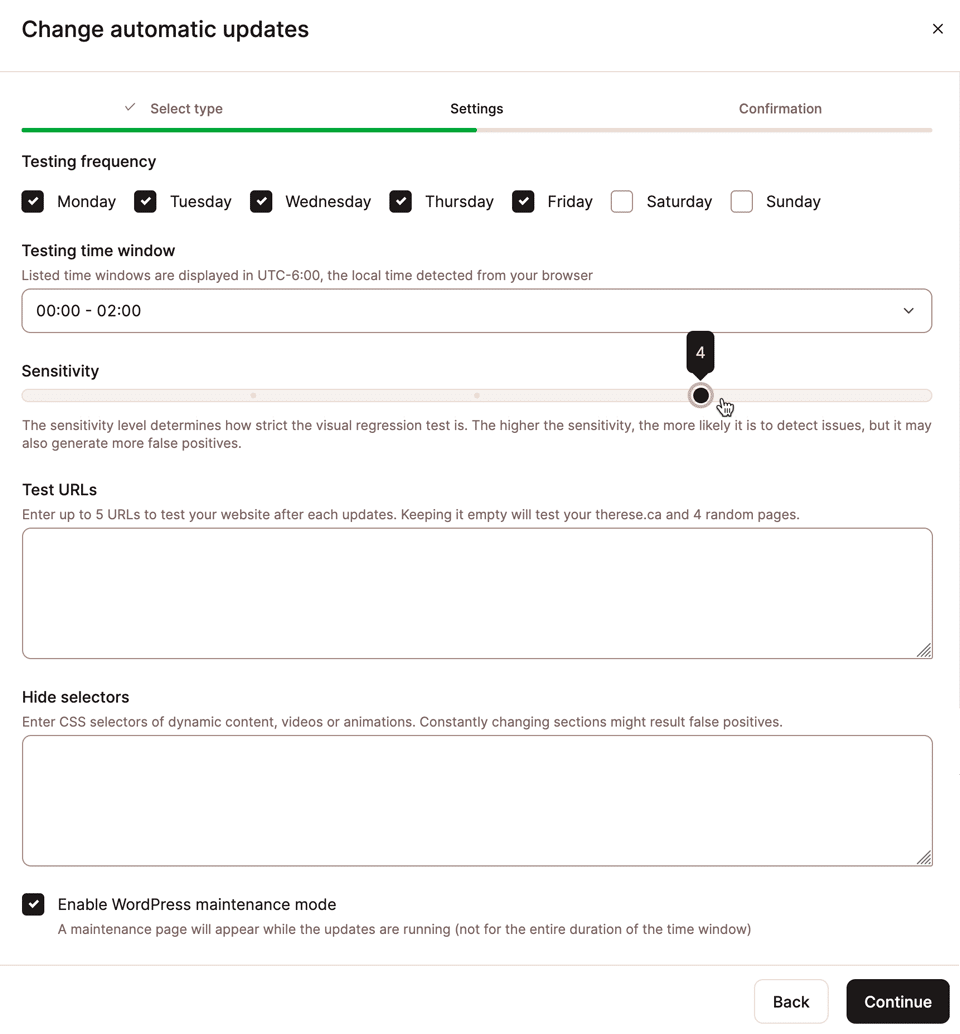
Kinsta Automatic Updates is an add-on that allows our customers to schedule updates of plugins and themes, backed by visual regression testing to detect failures during updates and roll back installations to the most recent functioning configurations:
Brute Force Attack Protection
WordPress is by far the most popular CMS in the world, and it’s a prime target for hackers and other malicious actors. It’s common for WordPress endpoints like /wp-login.php and xmlrpc.php to be bombarded by bots designed to brute force your login credentials.
While brute force protection is an important layer of security, implementing it at the DNS (Cloudflare or Sucuri) or web server level (Nginx or Apache) is preferable to brute force protection at the application level (WordPress).

At Kinsta, our Nginx configuration is specially designed to protect the most common WordPress endpoints from brute force attacks. We also go one step further, and protect SSH and SFTP connections from brute forcing as well. If your host does not provide brute force protection, we recommend securing your site behind Cloudflare and adding rate limits for your login URL.
WordPress.com Login
The option allows you to log in to your WordPress site with your WordPress.com login credentials. We don’t recommend enabling this feature because it doesn’t provide any added convenience, and opens up another attack vector for your site.
If you’re configuring the Jetpack plugin, it means you’re already logged in. With that in mind, there’s no need to add another login option just for the sake of doing so. Instead of adding WordPress.com as a login option, we recommend sticking with the default method, changing your WordPress login URL, and integrating two-factor authentication (2FA) to increase security.
Jetpack Performance Settings
In 2026, ensuring your WordPress site is loading quickly is critical for user experience and SEO. Jetpack offers a few performance-oriented features like search optimization, image optimization, CDN, and video hosting. Let’s take a look at Jetpack’s performance settings.
Search (Paid Plan Only)
First up is Jetpack’s search optimization. Depending on the size of your MySQL database and WordPress configuration, the default search functionality can be slow in some cases. Jetpack Search is an alternate solution powered by Elasticsearch, a powerful open-source indexing engine that allows searches to be done without querying your WordPress database.
If your site is search-heavy, an Elasticsearch-based solution like Jetpack Search could speed up your site’s search functionality for visitors. Keep in mind that pricing for Jetpack Search is based on the number of records in your WordPress database. If your site has over 100,000 records, you could be looking at a monthly bill of $200.
Performance & Speed
Jetpack’s “site accelerator” speeds up image and static file (JavaScript and CSS) load times. The image optimization feature resizes images based on the img tag’s width and height attributes. It also compresses images and converts them to WEBP format for supported browsers.
The static file optimization feature caches certain JavaScript and CSS files on Jetpack’s CDN. There is a catch though, and it’s a big one. At this time, Jetpack only caches static files in WordPress Core, Jetpack, and WooCommerce.
It doesn’t serve JavaScript and CSS files from other plugins or your WordPress theme.

We don’t recommend using Jetpack’s site accelerator because it’s not the best solution to speed up your WordPress site. The image optimization feature doesn’t allow for much customization and doesn’t support cache invalidation.
If you want to purge an image from the cache, you have to manually reach out to Jetpack support. On the contrary, most other CDN solutions including Kinsta CDN allow you to purge your CDN cache right in their respective dashboards.
Jetpack’s static file optimization is also lackluster when compared with other solutions. In 2026, there’s no reason why a WordPress CDN should only serve WordPress Core, Jetpack, and WooCommerce files.
Instead of enabling static file optimization in Jetpack, we recommend using an optimization plugin like Autoptimize to minify assets before serving them over a full-featured CDN like Kinsta CDN. Jetpack also supports lazy-loading for images. If you’re using Jetpack on your site, enable this feature to speed up pages with lots of images.
Video Hosting (Paid Plan Only)
Lastly, Jetpack operates a paid video hosting service that lets you host video files on Jetpack servers for embedding on your WordPress site. This type of service has a few advantages over serving video files straight from your host.
First of all, videos consume an incredible amount of bandwidth, and most WordPress hosts have some kind of bandwidth limit or acceptable use terms.
Secondly, a dedicated video service with distributed data centers will be able to stream across the world more reliably. If you want to self-host a lot of videos on your WordPress site, we recommend taking a look at Jetpack’s solution to see if it’s right for you.
Jetpack Writing Settings
Jetpack has a few useful tools for bloggers and content creators like Markdown support, full-screen image carousels, LaTeX support, and more. Let’s go through them now.
Full-Screen Carousel Slideshows
If you’re a photographer or travel blogger, you probably embed a lot of images on your WordPress site. Adding full-screen carousel support for your image galleries can improve the user experience for your site’s visitors. With Jetpack, you can add full-screen carousel slideshow functionality to your standard WordPress galleries without writing any code.
To use Jetpack’s full-screen carousel slideshows, just enable “Display Images in a Full-Screen Carousel Gallery”. There are also options to display EXIF metadata (camera model, shutter speed, aperture, etc.) and comments for the carousel slideshow.
Lastly, you can choose between a light or dark theme for your carousel.

With the full-screen carousel enabled, clicking on a standard gallery will launch a gorgeous slideshow view like the one below.
The carousel is fully responsive, so it looks great on tablets and mobile devices as well.

Composing
Jetpack includes a few features to enhance writing and content management in WordPress.

- Copy Posts & Pages – this feature is useful if your workflow involves creating new posts and pages based on a single template.
- Markdown Support – Markdown is a syntax format designed for writing content destined for the web. It’s used by millions of people around the world, but WordPress never provided first-class support for it until recently with the Gutenberg editor. If you’re a Gutenberg user, there’s no need to enable this feature for Markdown support. If you’re still using the classic editor, enabling this option will let you write in Markdown.
- LaTeX Support – LaTeX is a markup language for writing equations and other mathematical texts. This feature is very useful for people who often write in LaTeX.
Compose Using Shortcodes – With this option enabled, you can use shortcodes to embed content from a variety of services including Flickr, Hulu, Scribd, Instagram, and more. If you’re using the Gutenberg editor, there is no need to enable this feature because embeds are already supported.
Custom Content Types
Jetpack lets you add two custom content types to your WordPress site – testimonials and tutorials. Depending on your specific theme and needs, this feature can be helpful.
With this feature enabled, you can add testimonials and portfolio items in Jetpack settings or the “Portfolio” and “Testimonials” tabs in the sidebar.

If your theme doesn’t support Jetpack custom content types, you can use their respective shortcodes ([portfolio] and [testimonials]) to display content.
Theme Enhancements
Jetpack lets you add two theme enhancements to your site – infinite scroll and an enhanced CSS customization panel. Infinite scroll replaces your WordPress site’s pagination with an AJAX-based loader that automatically fetches new posts without having to load the next page.
Jetpack provides three options for its infinite scroll feature.
- Load more posts using the default theme behavior
- Load more posts in page with a button
- Load more posts as the reader scrolls down
If you’re looking for an easy way to add infinite scrolling to your site, Jetpack may be a good option. Be sure to keep in mind that if you choose the third option, it may be difficult for visitors to click on links or content in your site’s footer – this is a common problem we often see on WordPress sites that use infinite scrolling.
Enabling the “Enhance CSS Customization Panel” option adds a few additional features to WordPress’ CSS editor in Appearance > Customize > Additional CSS.

- Media Width – if you’ve changed the width of your theme’s primary content area in CSS, specify the width here as well to ensure the default size for image embeds is correct.
- Start Fresh – this option strips your theme’s default CSS styles away completely. This feature is useful if you’re looking to rebuild CSS from scratch without having to override existing styles. It can also help you reduce CSS bloat.
- Preprocessor – the enhanced CSS editor supports LESS and Sass (SCSS Syntax). This feature is useful for people who prefer to write styles in LESS or Sass, and offloading CSS conversion to a preprocessor.
Widgets
In Jetpack’s “Widgets” settings, you’ll find two options to customize widgets on your site.

- Add support for additional widgets including social icons, Flickr, top posts and pages, Twitter timeline, and more. For a complete list of included widgets, refer to Jetpack’s official documentation.
- Customize widget visibility on a per-post or page basis.
Depending on how your WordPress site is configured, these two features may be useful for widget customization. For example, if your blog covers both technology and photography, you can configure a Flickr widget to only appear on your photography-related posts.
Post by Email
This Jetpack feature lets you publish new posts via email. After enabling the feature, Jetpack will provide you with a unique email address to send posts to.

When using this method of publishing, your email’s subject line will be used for the post’s title. There are also a number of shortcodes like [category x,y,z] and [slug some-url-name] for specifying post metadata.
While email publishing may be useful for some bloggers on the go, we don’t think it’s a great experience overall. In order to use email publishing, you have to always remember to get the formatting just right.
Also, you’ll need to make sure you format shortcodes correctly. If you’re in a situation where you have access to an email client, you can probably use a web browser to publish content in the WordPress dashboard as well.
For WordPress users who like to publish on mobile devices, we recommend using the WordPress app instead of email publishing.
WordPress.com Toolbar
Jetpack lets you swap out your WordPress toolbar with a WordPress.com-styled one. The WordPress.com toolbar includes links to all of your sites that are linked to your Jetpack account, notifications, your WordPress.com profile, and more.

Clicking “Write” to start a new post in the WordPress.com toolbar will launch the official WordPress.com editor instead of the default editor.
This editor is an extended version of the WordPress Gutenberg editor. It comes with a variety of pre-made blocks to help you customize your posts and pages.
For more information on the editor, refer to the official WordPress documentation.

Sharing
Jetpack is jam-packed with a variety of social-related features that make it easy to connect with your audience. Let’s take a look!
Publicize Connections
Jetpack’s “Publicize Connections” feature lets you link your WordPress site to Facebook, Twitter, LinkedIn, and Tumblr. When this feature is enabled, newly published posts will automatically be shared on connected social platforms.

Sharing Buttons & Like Buttons
The “Sharing Buttons” feature is pretty self-explanatory. It lets you customize and add social sharing buttons to your posts and pages.
In addition to customizing the look of the button, you can also specify which content types you want to display the sharing buttons on.

Similar to the sharing buttons mentioned above, enabling Jetpack’s “Like Buttons” feature will add a “Like” button to the end of your WordPress posts.

Discussion
Jetpack’s “Discussion” features lets you extend the functionality of WordPress’ built-in commenting system.
Let’s take a deeper look.
Comments
In the “Comments” section, you can add additional authentication methods (WordPress.com, Twitter, Facebook, and Google) for commenting. You can also change the “comment form introduction” and color scheme of the form.
There are also a few other miscellaneous settings in this section – pop-up business cards, Markdown support, and comment likes.

WordPress’ default commenting system is somewhat limited in terms of login methods and engagement features. If you get a lot of comments on your blog, enabling Jetpack’s comments-related features can create a better experience for your visitors.
To learn more about WordPress commenting plugins, check out this article which covers ten alternative options.
Subscriptions
Jetpack’s “Subscriptions” feature provides you with an easy way to add site and comment subscriptions to your WordPress site.
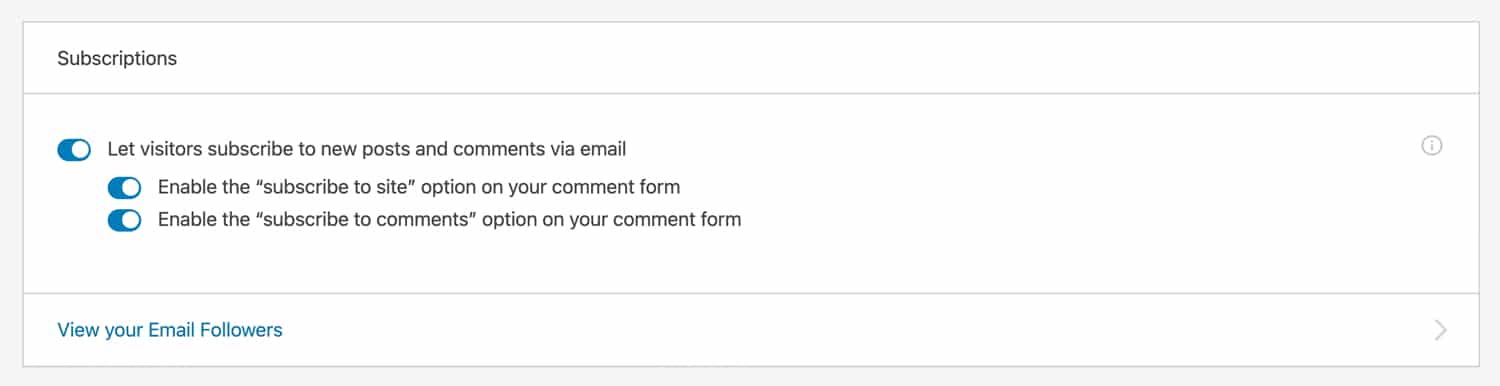
With comment subscriptions enabled, you’ll see two additional checkboxes below the comment form, which will allow visitors to subscribe to either your site or new comments via email.

Traffic
Jetpack’s “Traffic” tab lets you configure a variety of settings including sitemaps, ads, related posts, shortlinks, and more.
Ads (Paid Plan Only)
If you’re on a Jetpack premium plan, you can enable display ads on your site. Jetpack’s ads feature is powered by WordAds, a WordPress-specific ad program that connects your site with over 50 advertisers including Google Adsense, AppNexus, Amazon A9, and more.
According to WordAds, advertisers bid aggressively for placements because display ads on WordAds sites reach over 1 billion people every month.

If you’re a Jetpack premium plan subscriber who wants to incorporate display ads on a WordPress site, enabling WordAds in Jetpack may be a good option.
We recommend testing it out and comparing the RPM (revenue per thousand impressions) with other ad networks like Google Adsense, Mediavine, and AdThrive.
Related Posts
You can use Jetpack’s “Related Posts” feature to add a related posts widget to the bottom of each post. There are a few customization options that let you add a related content header and thumbnail images for individual posts.

You’ll also find a few other options in the Customize > Related Posts. In this menu, you can change the switch between list and grid layouts, and choose whether to show a post’s category/tag and date.

If you’re looking for an easy way to show related content, Jetpack’s built-in related posts feature gets the job done. It’s not as feature-complete in terms of customizability as something like YARPP, but that can actually be an advantage for some use cases.
Search Engine Optimization (Paid Plan Only)
Jetpack has built-in SEO support for paid users. When enabled, you’ll be able to edit SEO titles, meta descriptions, and more in the WordPress editor.
Even if you’re on a paid Jetpack plan, we recommend installing a third-party plugin for SEO. After testing a variety of SEO plugins, our results showed that Yoast SEO and The SEO Framework are the best plugins to improve your SEO strategy.
Google Analytics (Paid Plan Only)
If you’re a paid Jetpack user, you can use Jetpack to add a Google Analytics tracking code to your WordPress site. Even though adding a GA tracking code in Jetpack is convenient, we recommend using Site Kit by Google instead because it lets you integrate your site with Google Analytics, Google Search Console, and Google Adsense in a single plugin.
WP.me Shortlinks
Shortlinks are useful for sharing long URLs. With Jetpack’s “WP.me Shortlinks” feature enabled, you’ll be able to access a https://wp.me shortlink by clicking the green lightning icon in the top right corner of the post editor.

Sitemaps
Jetpack can automatically generate XML sitemaps for your WordPress site. If you’re not using a third-party SEO plugin to generate sitemaps, you can enable this option in Jetpack.
WordPress 5.5 came with built-in XML sitemap support, so be sure to disable all sitemap plugins once you update to 5.5.
Site Verification
Jetpack’s “Site Verification” feature lets you verify ownership of your WordPress site with popular search engines like Google, Bing, Pinterest, and Yandex. If you’ve already verified your site, there is no need to enable this option in Jetpack.
If you haven’t verified your site, you can paste the verification HTML meta tag for each service in Jetpack.

Summary
Jetpack is an all-in-one plugin that’s jam-packed with a variety of features. While Jetpack is capable of doing many things, it falls short compared to purpose-built plugins.
For example, Jetpack’s CDN is not as full-featured as a dedicated CDN solution like Kinsta CDN. Similarly, Jetpack’s CSS and JavaScript optimization is not as good as Autoptimize or WP Rocket. With that being said, Jetpack does have a few features that are quite good. Jetpack’s full-screen image carousels and Markdown/LaTeX support are very useful for certain kinds of content creators.
Whether to enable Jetpack or not ultimately comes down to your site’s specific needs. If you do enable Jetpack, we only recommend enabling the worthwhile features covered in this article.
Do you use Jetpack? Let us know what your favorite Jetpack features are in the comments below!

Brian has been a WordPress user for over 10 years, and enjoys sharing his knowledge with the community. In his free time, Brian enjoys playing the piano and exploring Tokyo with his camera. Connect with Brian on his website at brianli.com.

