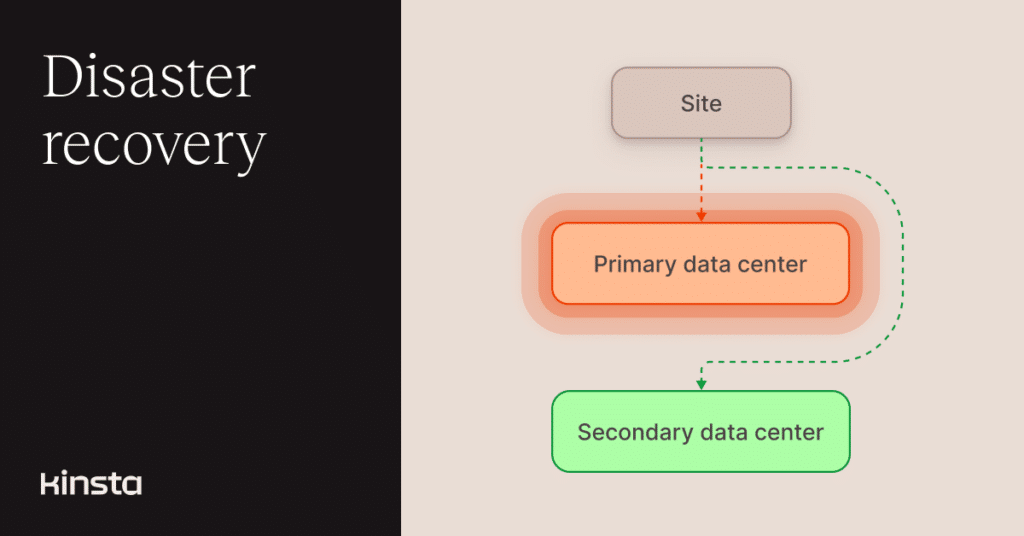
We’ve made it simpler for our dedicated-server customers to request, cancel, and manage disaster recovery protection for their valuable WordPress properties.
Launched in August 2026, Kinsta Disaster Recovery delivers continuous data replication between servers in different data centers, creating a mirrored environment ready to go live if a primary data center is knocked offline.
It’s not easy to take out an entire data center, but flooding, fire — even war — can do it. And now, Kinsta customers can prepare in advance by requesting disaster recovery protection in the MyKinsta Dashboard.
Beginning a Disaster Recovery request
Disaster Recovery is an add-on for our dedicated-server customers. To initialize a request for the service, navigate to Sites > sitename > Add-ons, scroll to Disaster recovery, and click the Request add-on button:
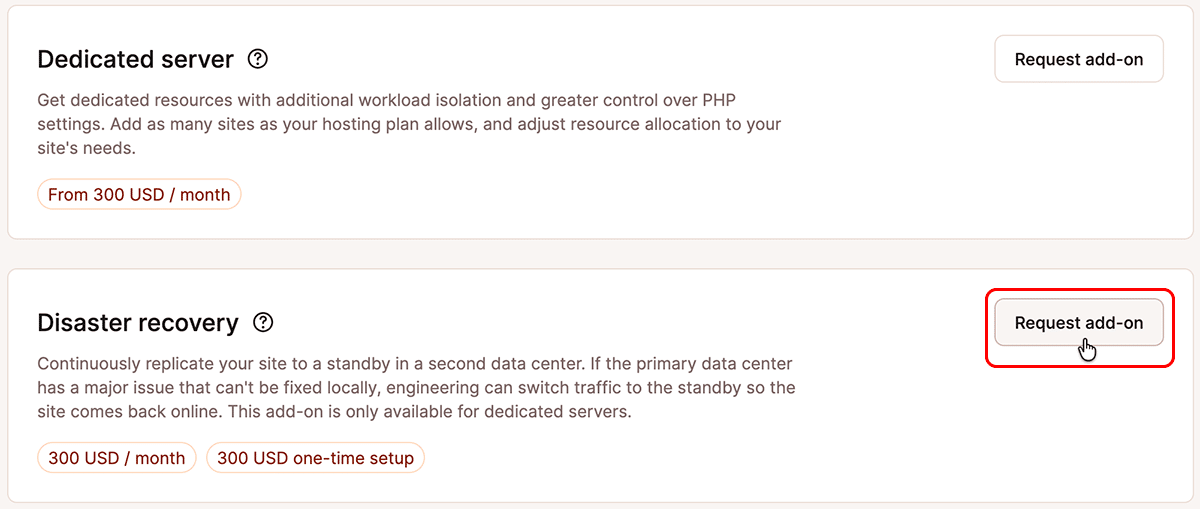
In the example above, the Dedicated Server add-on is not already active (it’s still available on request). In such cases, a customer clicking the Request add-on button for Disaster Recovery will be told the site must first be moved to a dedicated server.
If the active site is on a dedicated server, you’ll be asked to confirm your request for Kinsta Disaster Recovery after reviewing its charges:
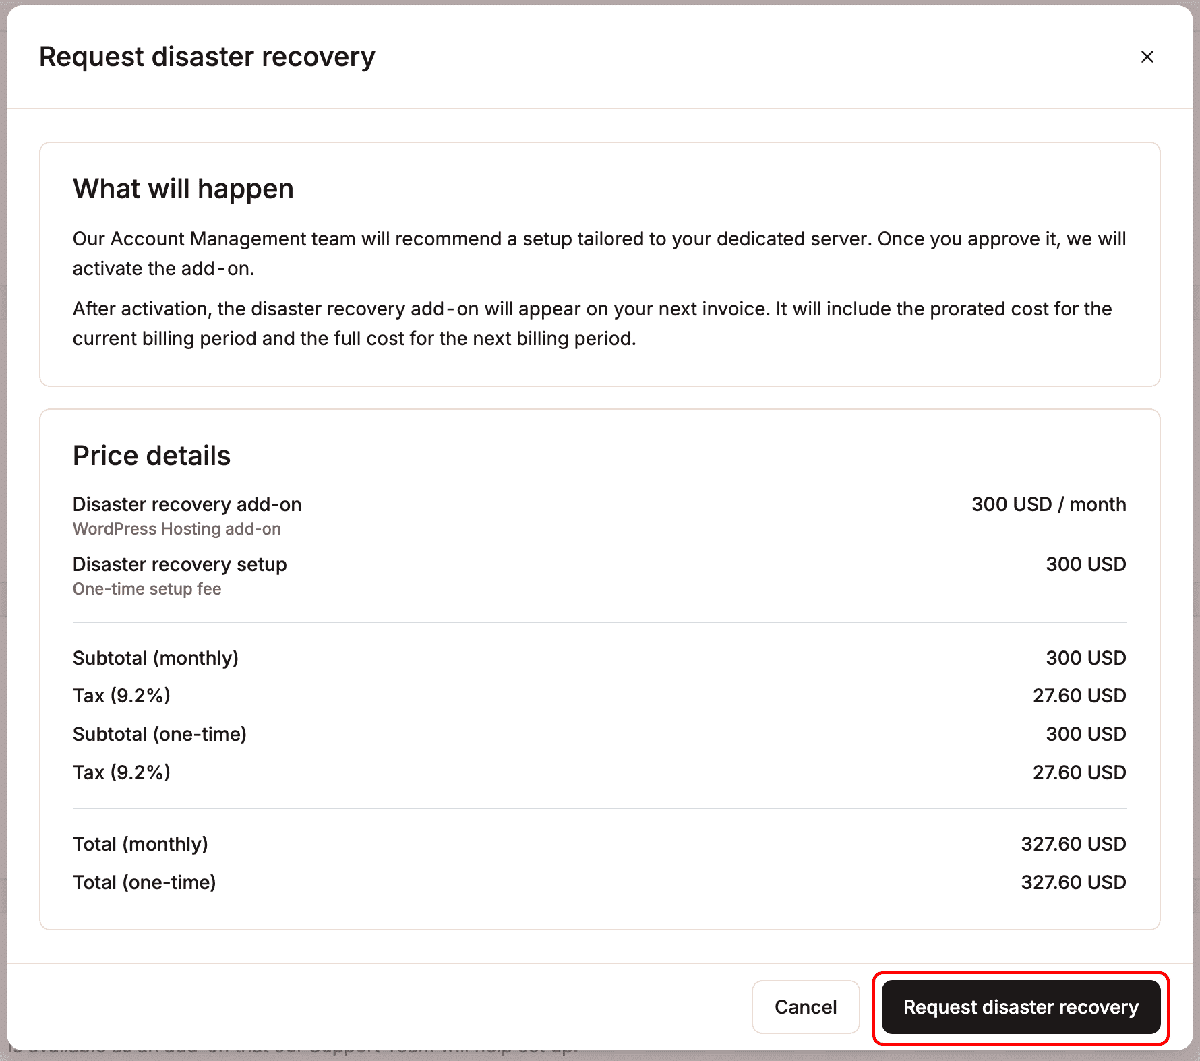
Clicking the Request disaster recovery button shown above will launch a chat with our Support team. We’ll take the next steps and alert you when the service is enabled.
Making changes to Disaster Recovery
Later, you may want to modify or cancel your Disaster Recovery protection. Returning to Sites > sitename > Add-ons and scrolling to Disaster recovery, you’ll see a Change button:

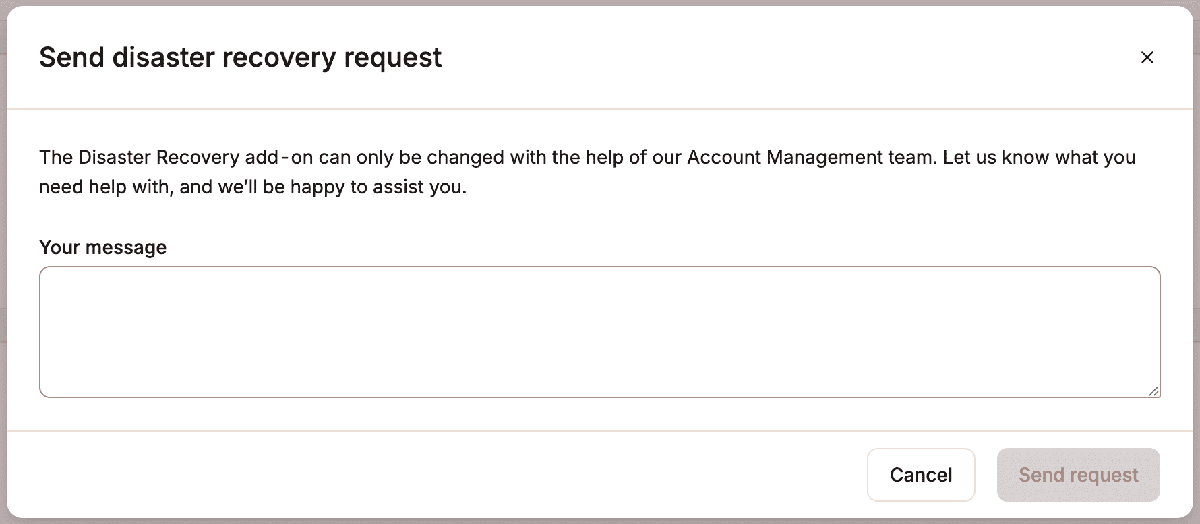
After clicking the Change button, tell us what modifications you have in mind. Then, clicking the Send request button will launch a chat with a Support team member who will have the details of your site’s configuration at hand:
Do you need a dedicated server for your WordPress site?
Kinsta’s Dedicated Servers offer exclusive access to a cloud device’s CPU and RAM to handle the toughest processing loads. Some of our customers deploy dedicated servers to handle traffic surges during recurring sales events or high-profile promotions. Others need that kind of dedicated power 24/7.
Currently, only customers with dedicated servers can take advantage of Kinsta Disaster Recovery protection. You can request a dedicated server for your important website by navigating to Sites > sitename > Add-ons >, scrolling to Dedicated server, and then clicking the Request add-on button.
Our team will work with you to configure the dedicated environment your site requires.