
Learning how to take a screenshot on Windows systems is the simplest way to preserve or share any visual content from a website, program, or video game. You can take it and send it via email, social media, or file-sharing sites with just a few clicks.
This article will show you how to screen-capture any webpage, program, and even full-screen video games using a wide variety of methods. You’ll learn how to capture not just static screenshots but also record videos.
We’ll also explore the differences in screenshotting between the most recent Windows versions: 7, 8, and 10.
How To Screenshot on Windows
Press the Windows + Print Screen keys to take a full print screen, automatically saving it to the Screenshots folder in your Pictures directory. Use the Windows Key + Shift + S to access the Snipping Tool, to select and capture specific windows, or a specific section of a page.
Check Out Our Video Guide to Taking a Screenshot on Windows:
The Basic Windows Method: Print Screen Key
This method works on any version of Windows, including Windows XP and 95.
Standard keyboards for Windows computers include a dedicated key to capture your screen. It looks something like this:
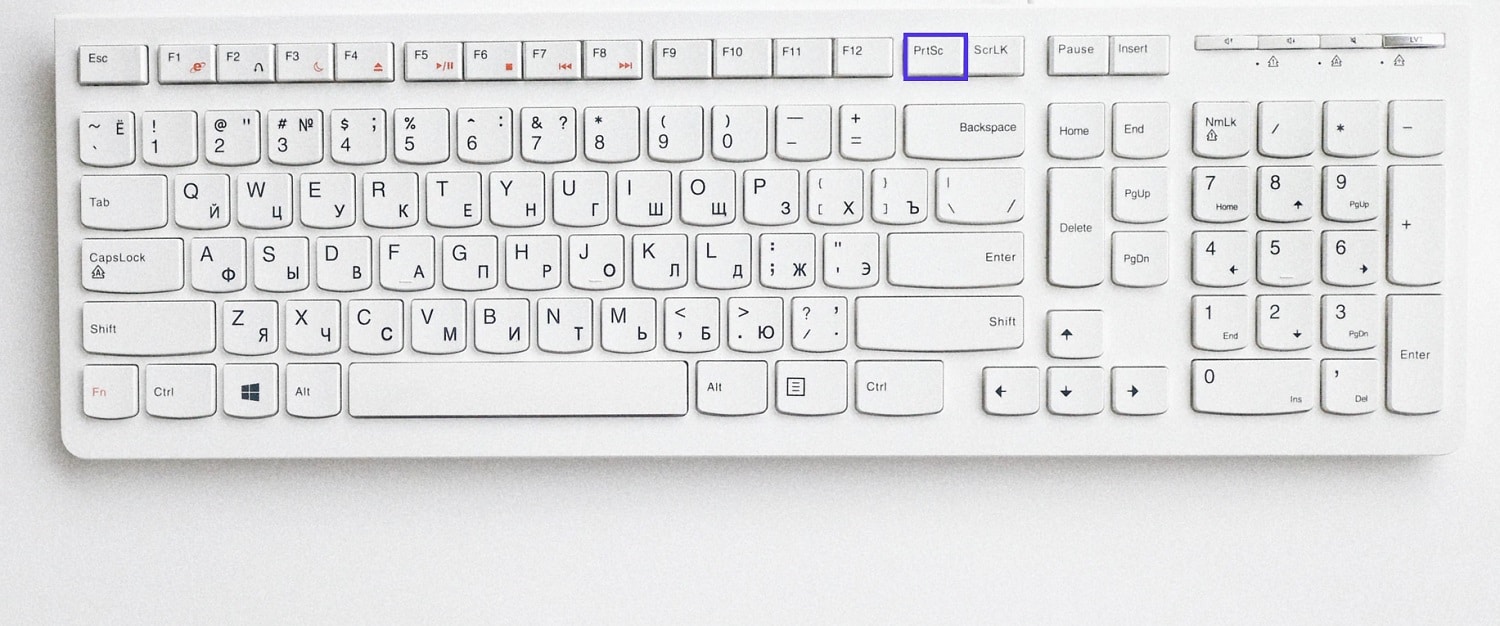
The print screen key says “Print Screen,” “PrtSc,” or “PrtScn,” depending on your keyboard and country. It’s typically in the top right corner beside the final F12 key.
Note: On some newer keyboards, especially on laptops, you need to hold down the “Fn” or “Function” key while pressing “PrtSc” to capture the screen.
When you use this method, the OS copies the entire screen automatically to the clipboard. From there, you can directly paste it into an email, social media platform, or messaging app. You can even start editing it in an image editing software like Photoshop or even MS Paint.
Note: One disadvantage of using this method is that it automatically captures the entire screen, including the toolbar and tab bar of your screen. Manually cropping can lead to inconsistent screenshot sizes.
How to Save and Share the Screenshot
One of the easiest ways to save a screenshot taken with the print screen key is to paste it into your photo editing software of choice. For example, you can use Microsoft Paint, which comes free with all relevant versions of Windows.
Open up Paint and press Ctrl + V to paste the screenshot. You can also right-click and select Paste from the dropdown menu.
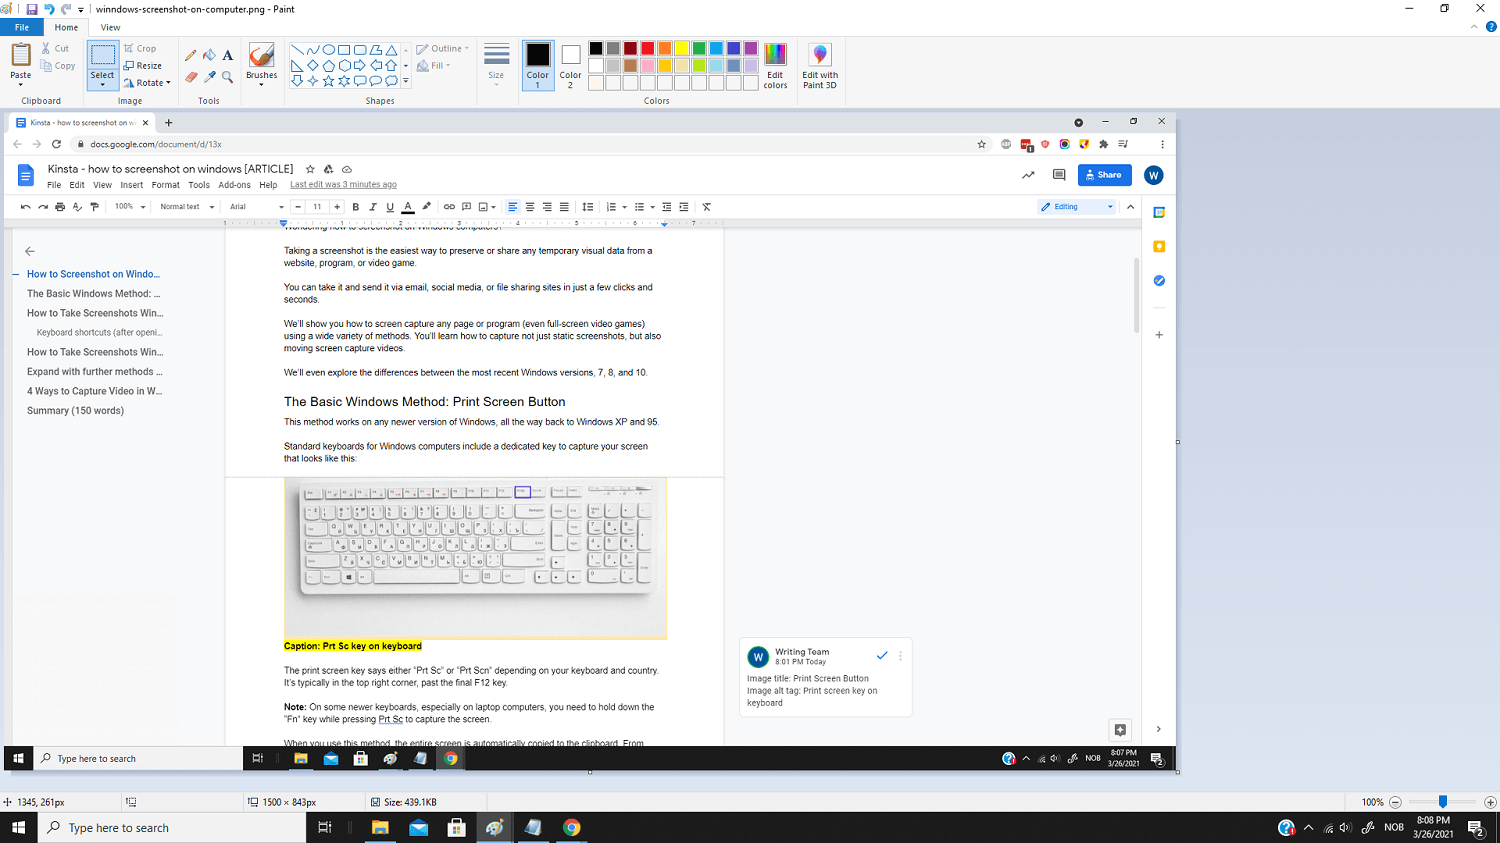
From there, you can edit the file as you want before saving it (Ctrl + S) in the image format you prefer.
If you use Windows 10, you can also use Paint 3D. But if you want to use a more powerful image editor, we recommend a specialized tool.
It’s also possible to paste the screenshot directly into an email or a social media message.
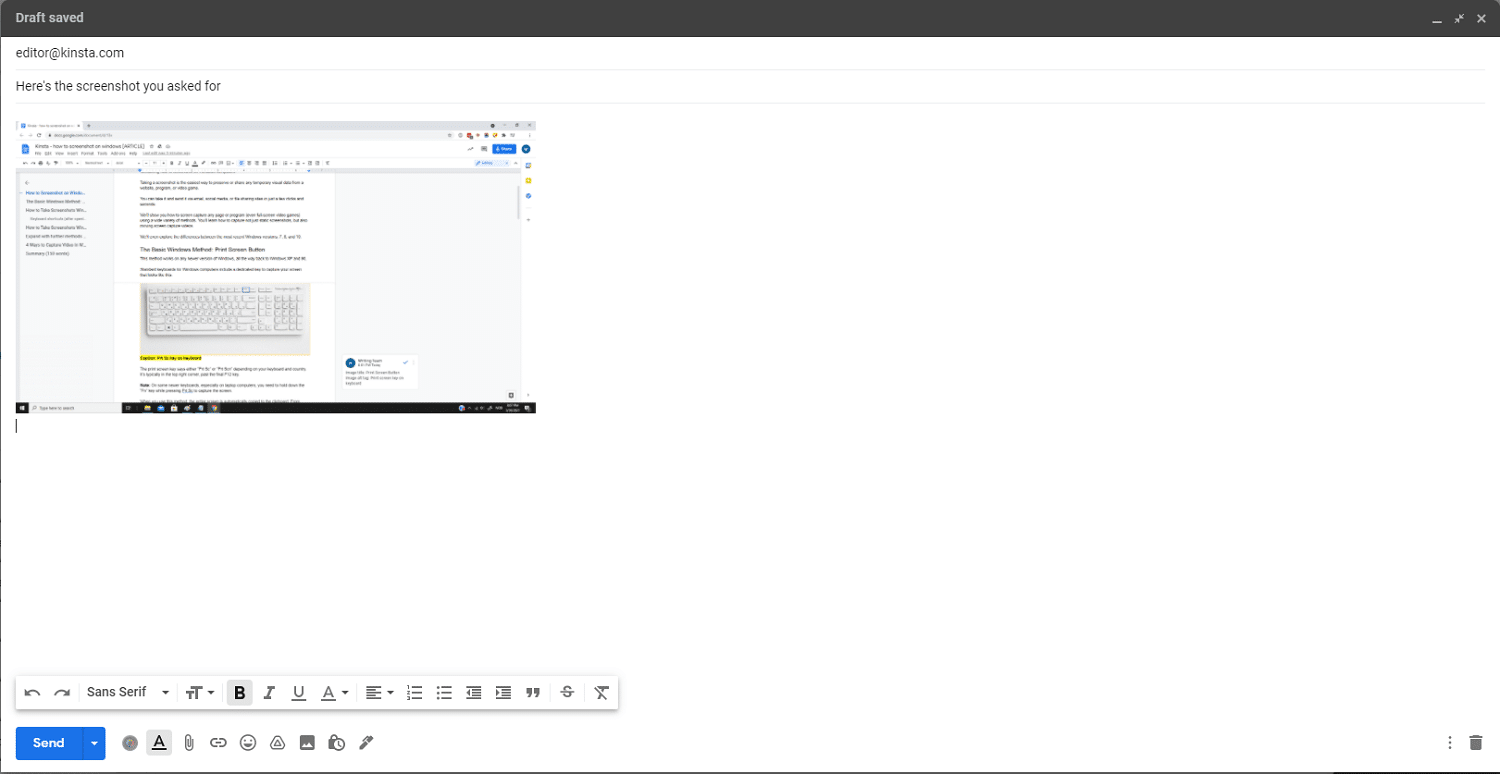
It’s one of the fastest ways to share what’s on your screen without jumping on a call. Press the print screen key, paste it in, press Send, and it’s on its way.
If you want more control over your screenshots, like capturing a tab, you can use the built-in Windows “Snipping Tool” or other third-party apps or software.
That way, you won’t have to crop away the toolbar or other elements manually.
How to Take Screenshots in Windows 7, 8, 10 with the Snipping Tool
All recent versions of Windows, including 7, 8, and 10, include the Snipping Tool. You can easily open it by searching for it in the toolbar search.
Press the Windows key to open the toolbar and jump to Windows search. Alternately, you can also use the Windows + S shortcut to summon Windows search. However, note that in Windows 7, you must manually select the search field before you can type out the keyword. Type in “Snipping Tool” and press Enter.
Note: There’s no keyboard shortcut to open the Snipping Tool. It would be best if you did that manually. In Windows 10, the updated version of this app can be opened with a shortcut—more on that later.
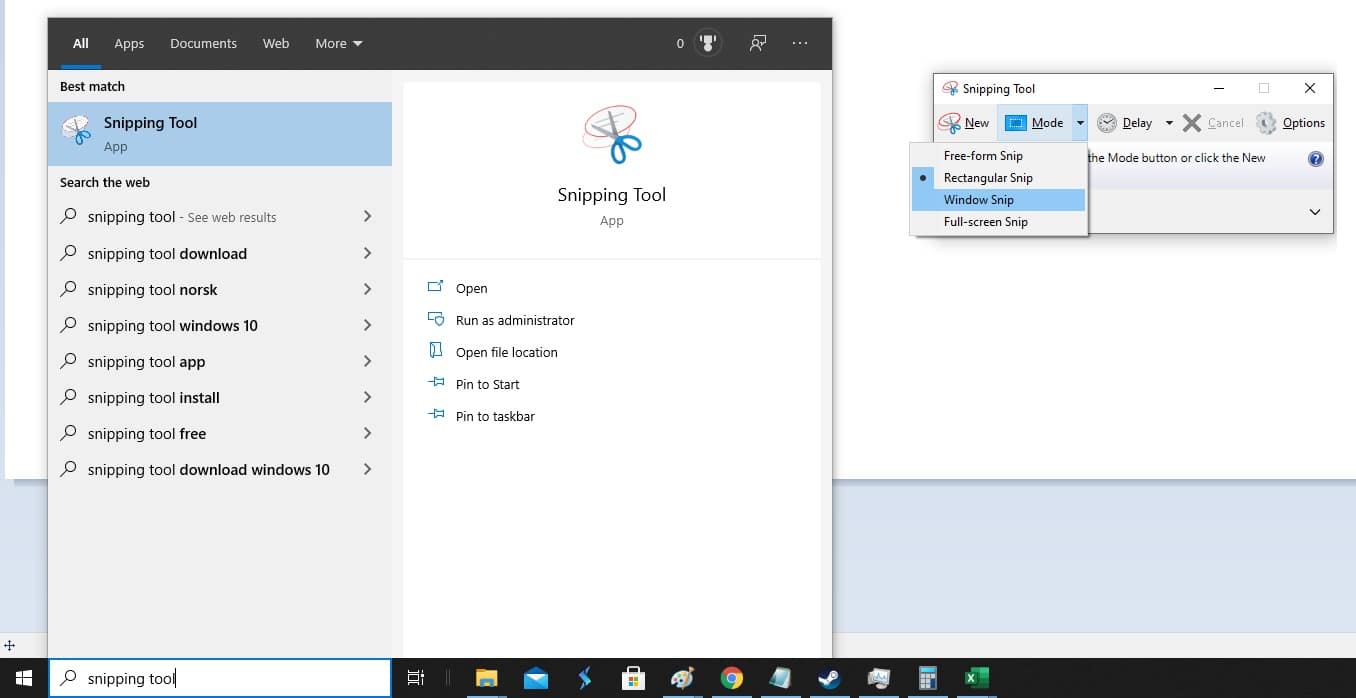
Pressing the Enter key after typing the correct phrase will open the program automatically.
It has various modes, including free-form screenshots, but the basic form is a rectangular screenshot shape. But at least it gives you more flexibility than just pressing the print screen key.
Once you initiate the “Snipping” by clicking the “New” button, the whole screen goes gray. You can then select the area you want to capture and save.
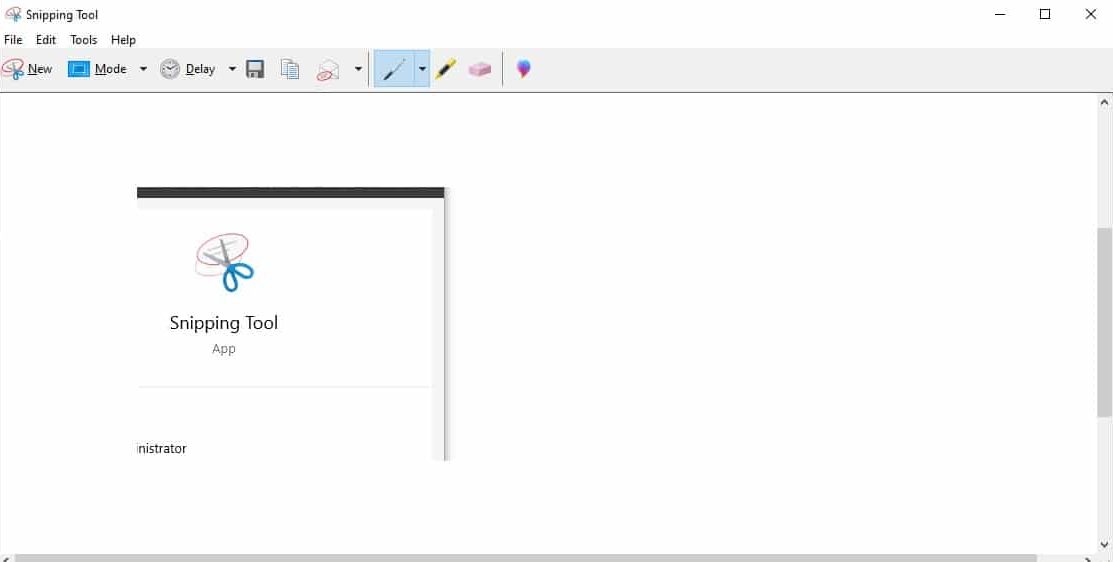
You can now edit the screenshot with the pen, highlighter, and eraser tools. It also offers a few unique options compared to copying and pasting something into Paint, such as the Delay mode for taking delayed (timed) screenshots. You can also highlight something in the screenshot and email it directly from the Snipping Tool.
Once it’s open, you can also use many shortcuts to work faster.
In the table below, we break down all the keyboard shortcuts (only available after opening the Snipping Tool):
| Keyboard Shortcut | What It Does |
| Ctrl + PrtScn / Alt + N | Takes a new screenshot with the Snipping Tool app (when it’s open). |
| Alt + M | Changes between different modes (free-form, rectangular, window, and full-screen). |
| Alt + D | Sets a delay for the screenshot. |
| CTRL + S | Saves the screenshot. |
| CTRL + C | Copies the screenshot to your clipboard. |
One feature we miss is the ability to take multiple screenshots with an identically sized and placed window.
All in all, it’s not a life-changing screenshotting app by any stretch of the imagination, but it’s sufficient for primary use.
How to Take Windows 10 Screenshots with Snip & Sketch Tool
In Windows 10, you also have access to the new and slightly improved Snip & Sketch app.
You can open it in the same way by searching the menu or use the built-in shortcut: Shift + Windows + S.
That’ll automatically open the app menu for taking a screen snip. Also, here, you can choose from window, free-form, full-screen, or rectangle options for your snapshot.
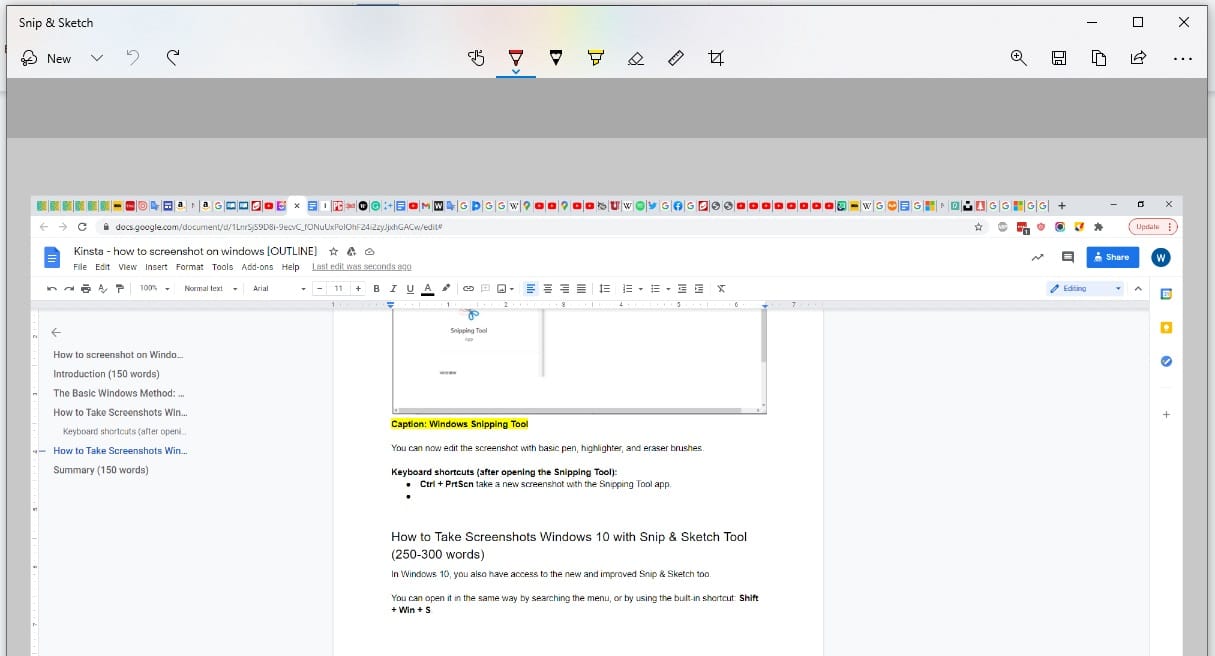
With the window snip option, it doesn’t automatically capture the active window. You can switch tabs with Alt + Tab and then click the specific window you want to capture.
Compared to the original version, there’s been a few changes:
- Screenshots automatically save to the dashboard (including changes you make, like highlights or annotations).
- Automatically add outlines to snips—helpful for partial screenshots.
- Share the screenshot via WiFi or Bluetooth.
- Change the settings, so the PrtScn button opens Snip & Sketch automatically.
- You can no longer set a delay for the screenshot to happen later.
Want to upload these screenshots to your website to spice up your latest blog post?
By default, the PNG format files saved by Windows screenshotting software are unnecessarily large. Once you’ve taken and edited these screenshots, you should make sure to optimize the images for the web.
If you want some extra features, like more powerful editing, automatic web optimization, or full-page website captures, you’ll need to use a third-party tool.
How to Screenshot Tabs and Entire WebPages in Google Chrome
Google Chrome doesn’t come with built-in screenshotting functionality, but there are plenty of great, free extensions available.
Just go to the Chrome Web Store and search for “screenshot,” filter the result by extensions, and you’ll see for yourself. You can then choose from dozens of chrome extensions for screenshotting webpages.

There are so many options that it can be hard to choose. To make things simple, we recommend any of the following:
- Nimbus Screenshot & Screen Video Recorder
- Awesome Screenshot & Screen Recorder
- LightShot (static screenshots only)
All of these tools go way beyond what you can do with Snip & Sketch. For example, you can capture a full-page screenshot instead of only the visible part with each of these.
In Awesome Screenshot, you can even use a Ctrl + Shift + E shortcut or manually open the menu to do this.
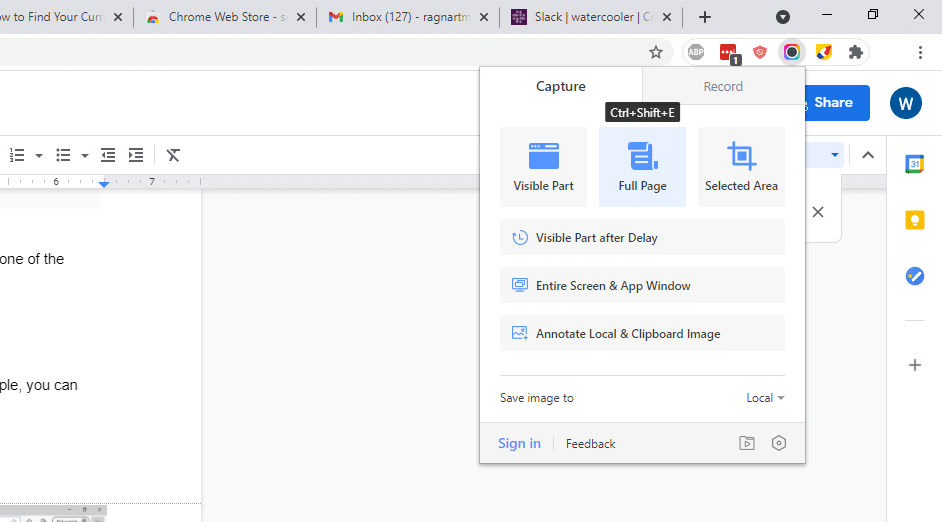
If you’re wondering what that looks like, take a peek at this full-screen capture of our homepage: one continuous shot perfectly representing what our site looks like in a browser. It’s an easy way to share what a test site on a local server seems like if there are errors that don’t show up in staging.
Another practical feature is that you can screenshot just the contents of any particular tab. That means you don’t have to crop out your 90+ tab windows or the full URL to your secret document.
In Awesome Screenshot, the shortcut for this is Ctrl + Shift + V.
It also means you can take screenshots with identical dimensions across multiple different pages. That’s perfect if you use screenshots as part of your blogging or content marketing and want to keep your visuals consistent.
Plus, most of these extensions, including Awesome Screenshot, come with a better image editor than what you’ll find natively in Windows.
You can, for example, blur out parts of the image, add in shapes, arrows, text boxes, and more. And these options are all available in the free versions.
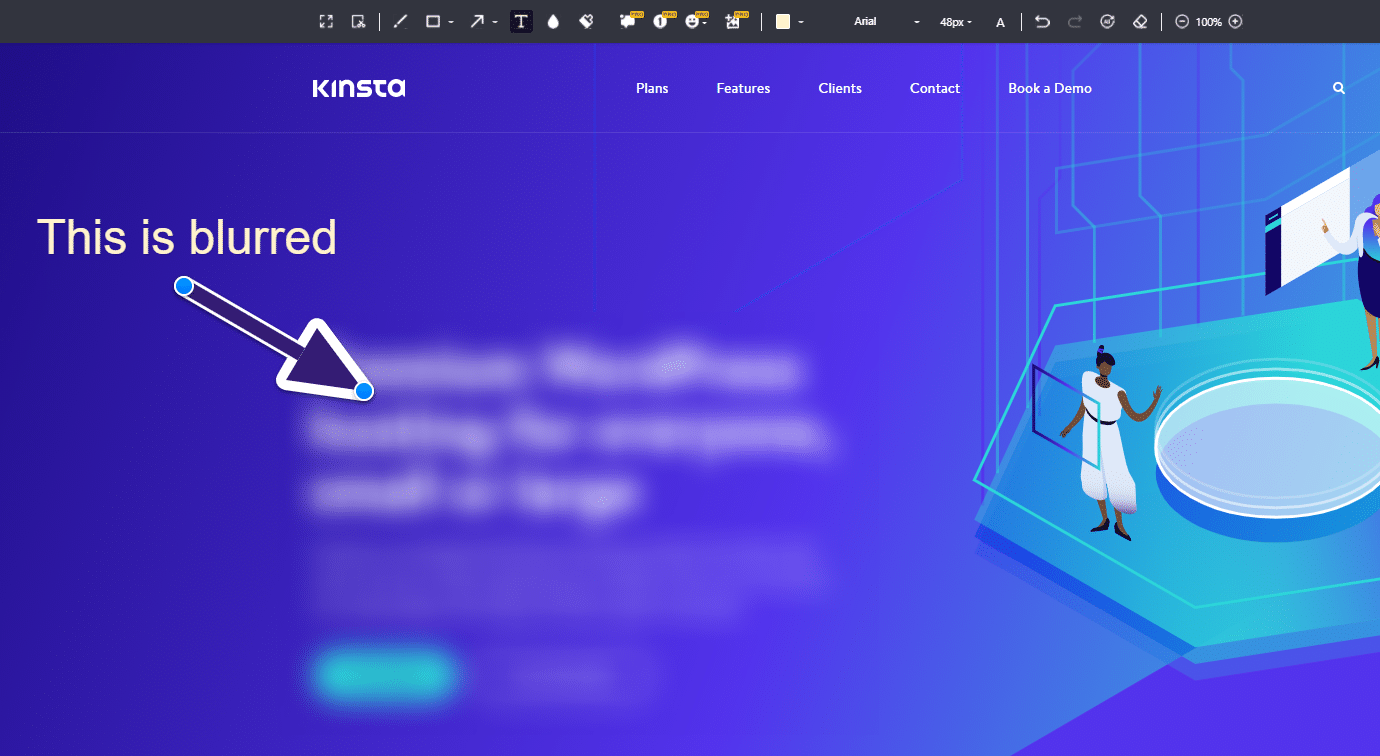
These features make it easy to edit and prepare tutorial-style screenshots to include in a how-to blog post.
(And if you want to become an even more productive blogger, check out our list of the best Chrome extensions for WordPress users.)
How to Screenshot in Microsoft Edge (Full Page)
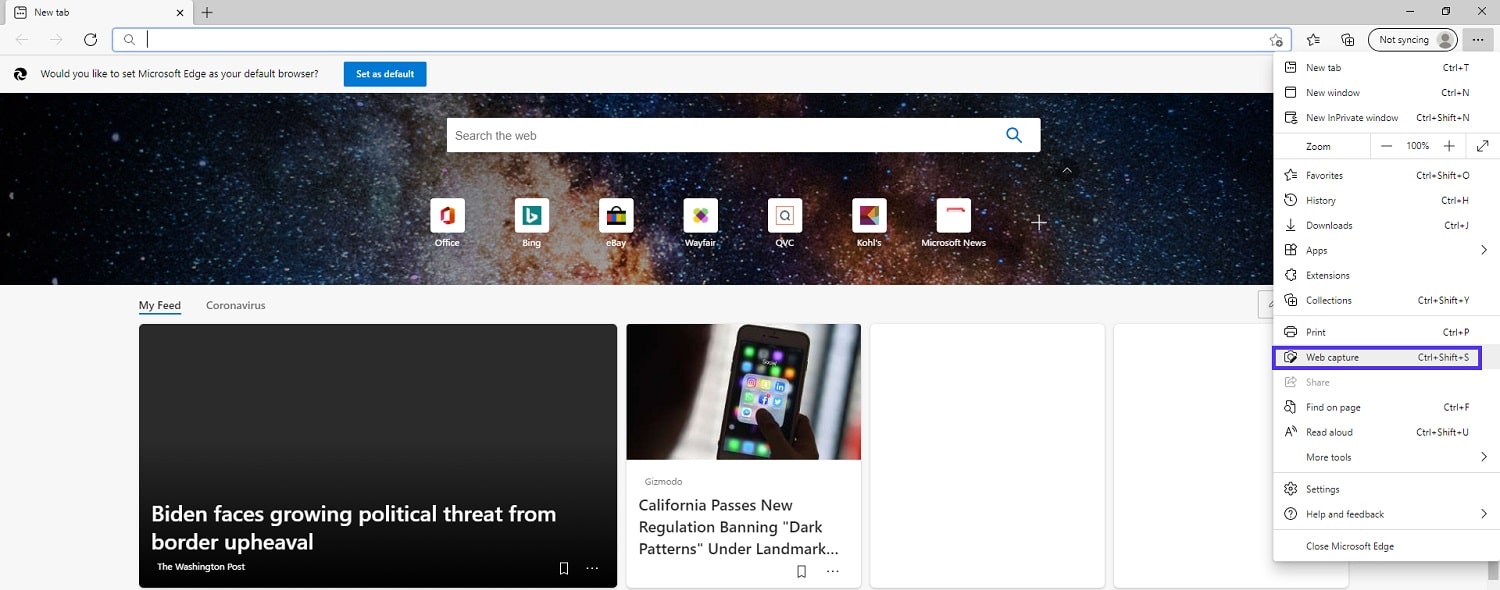
One interesting thing about Microsoft Edge is that the latest version has built-in screenshotting.
You don’t need to install any additional plugins. Just open up the browser, and start taking screenshots. Use the shortcut Ctrl + Shift + S to open the “Web Capture” overlay.
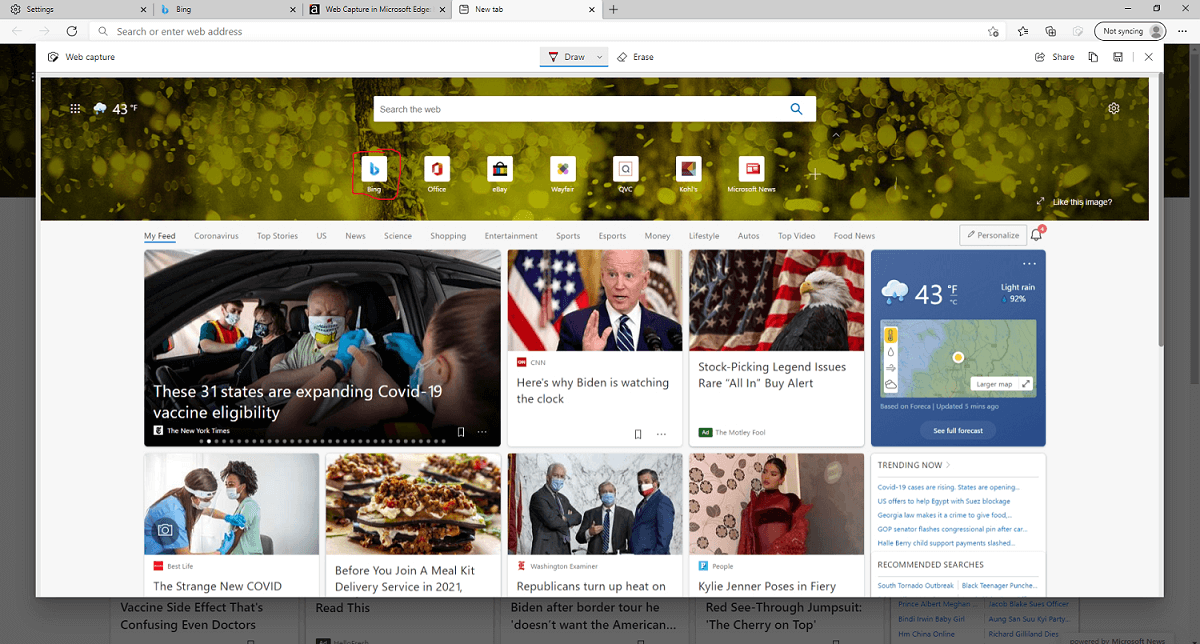
You can then choose between free selection or capture the whole page.
The full-page capture doesn’t rely on multiple partial screenshots and scrolling. So a floating bar won’t ruin your screenshot.
Once you’ve captured the page, you can then use the available draw and erase tools to highlight items on the page or make annotations.
Beyond that, you can share, copy, or save the screenshot (the default screenshots folder is /User/Downloads/).
The features are rudimentary, but the tool works perfectly to share a webpage with a friend or coworker.
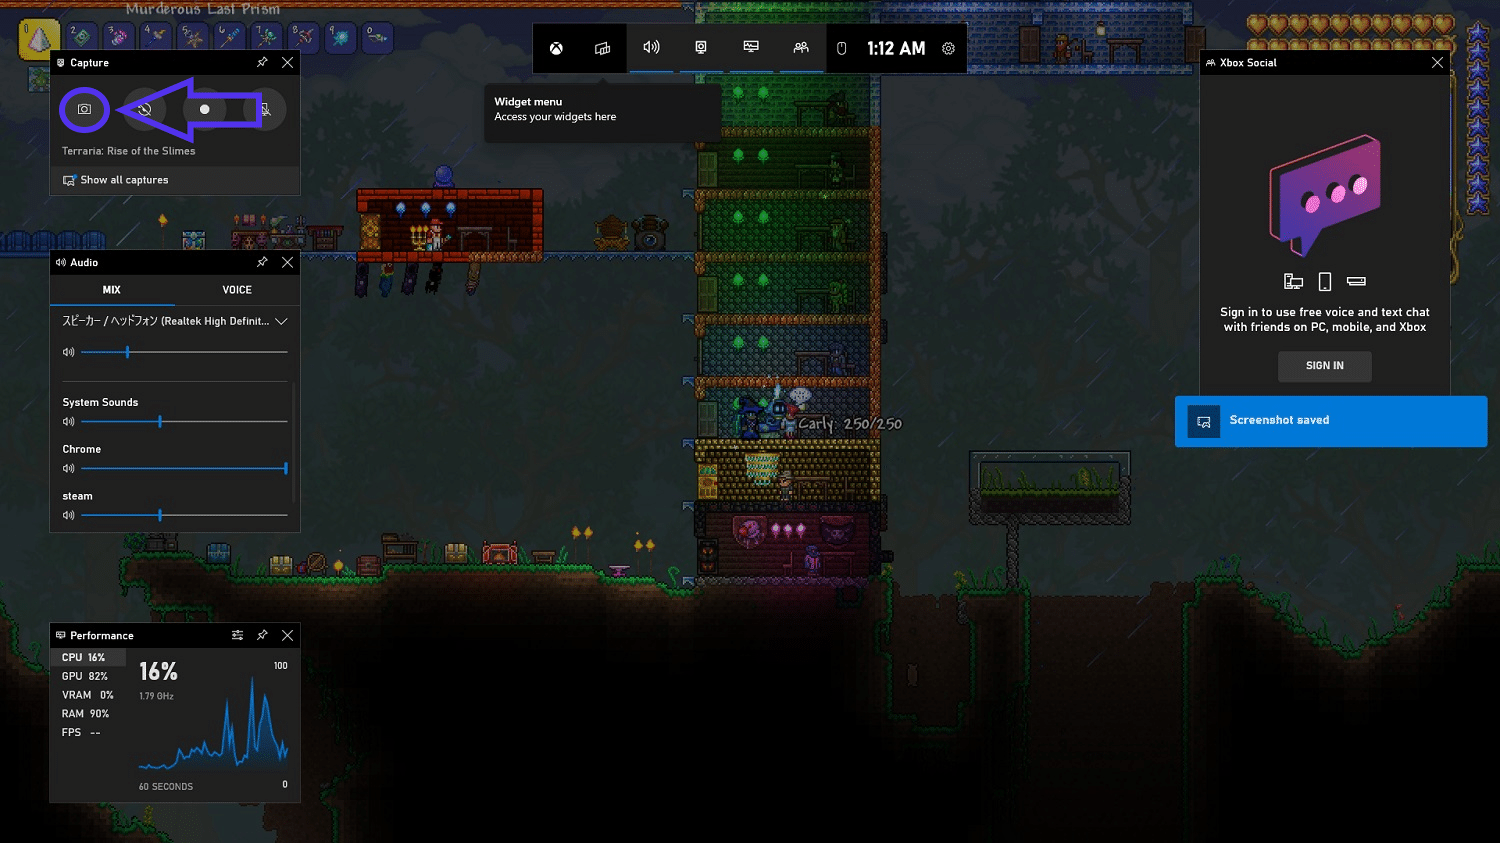
How to Screenshot a Game (or Anything Else) with Xbox Game Bar
In Windows 10, the Xbox Game Bar is installed and active by default (even if you don’t own an Xbox). You can open it at any time by pressing the Windows key + G.
Although it was built into Windows as a feature to screenshot and record video games, it works just as well for capturing movies, websites, or the content of any other program.
After opening the Xbox Game Bar, you can either press the camera button in the top-left corner or take a screenshot without opening the menu by pressing the print screen shortcut keys: Windows key + Alt + PrtScn.
Once you open the Game Bar, you can show recent screenshots by clicking the “Show all captures” button.
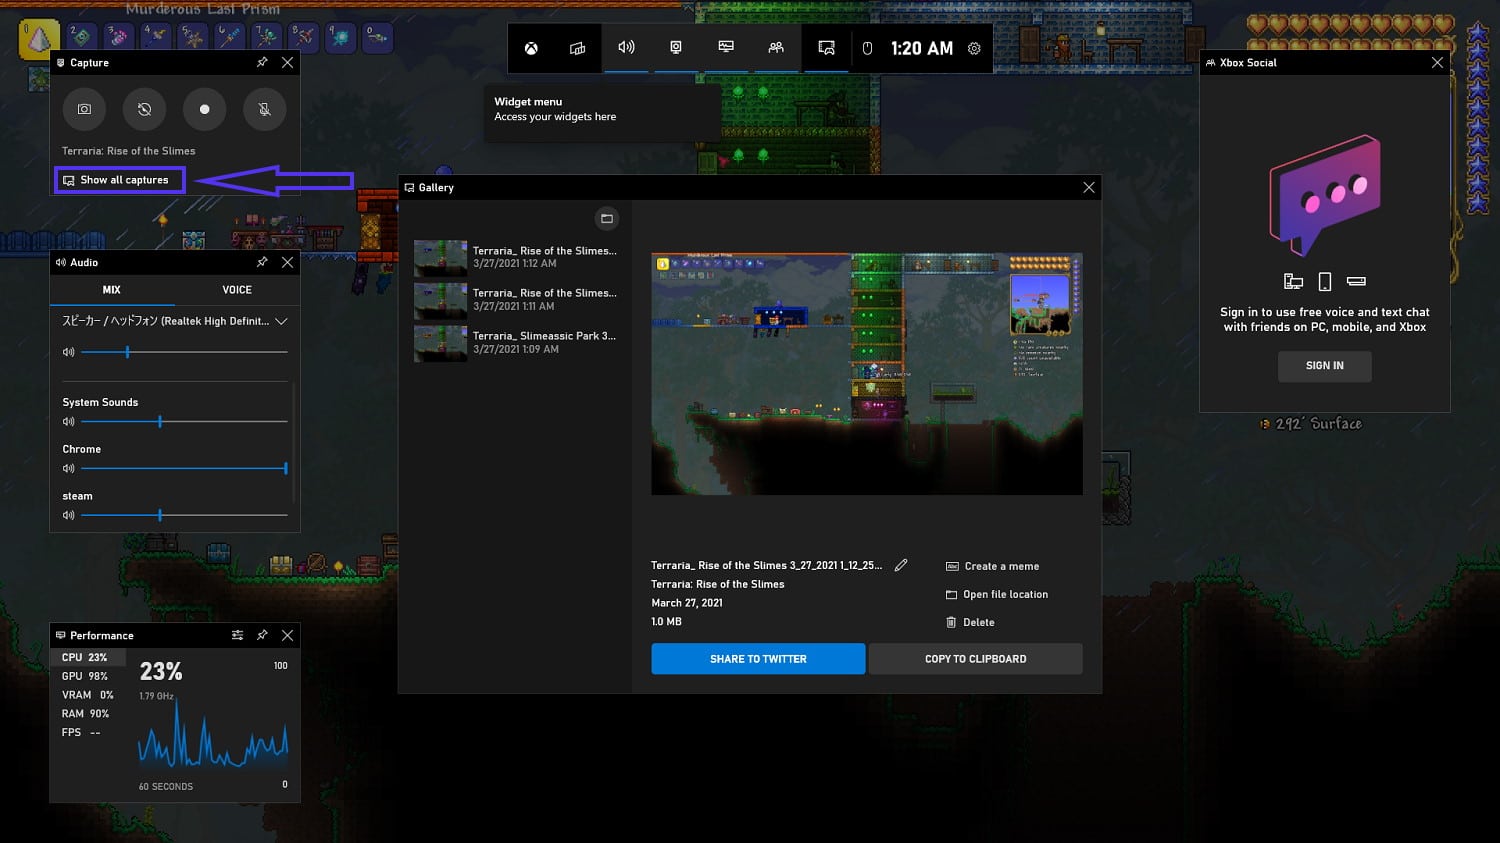
From here, you can browse and share all recent screenshots on Twitter. There’s even a super basic “meme editor” that lets you add a big block text to the top and bottom.
The Xbox Game Bar saves files to the /User/Videos/Captures/ folder by default. It has some unique features, like the ability to scale the screenshots up to 4K.
Note: You don’t have to be playing a video game to use the Game Bar to take screenshots.
How to Screenshot in PowerPoint
If you have the latest version of PowerPoint in Windows 10, it supports capturing screenshots.
Instead of using the PrtScn key and pasting it in, you can capture other windows while inside PowerPoint.
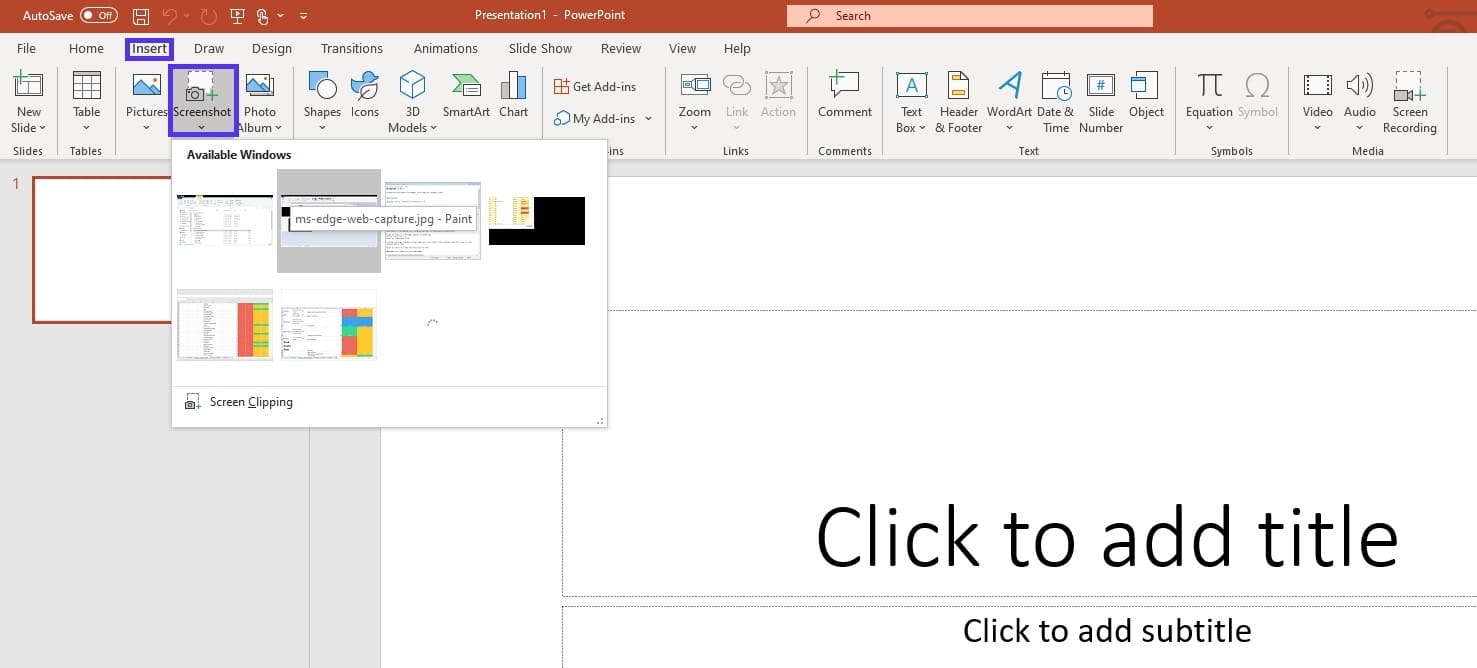
It will automatically insert a screenshot of the window you choose into the slide. If it’s a full-sized window, it’ll cover the entire page.
The newer versions of PowerPoint ship with a fairly powerful image editor. You can change colors, saturation, and even remove the background with a magic wand.
You can also customize the screenshot with shapes, borders, and text within PowerPoint and save the slide as an image.
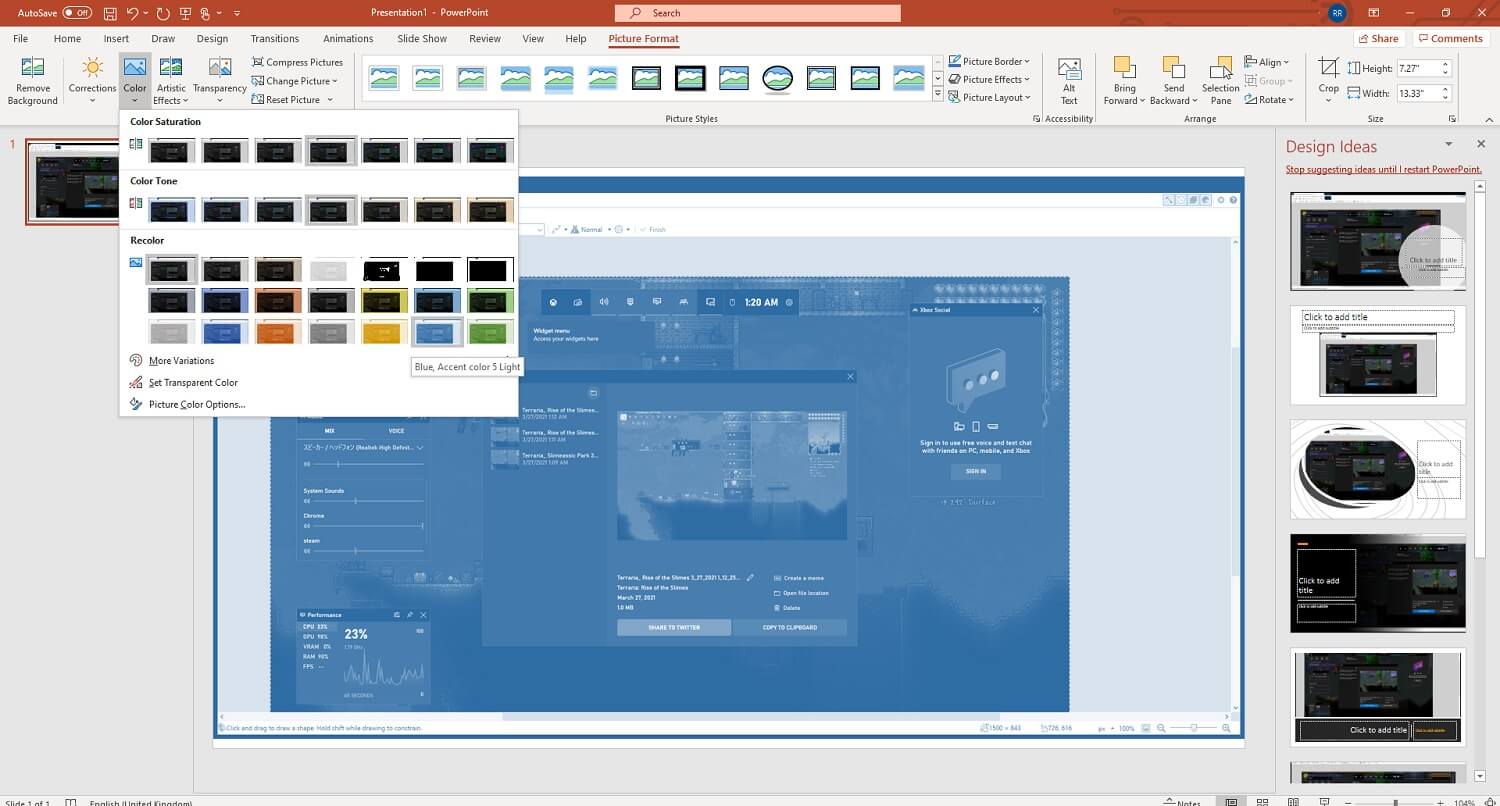
Combined, that probably makes PowerPoint the most potent official Microsoft screenshotting tool.
How to Screenshot with LightShot (and Other Third-Party Apps)
Lightshot is a lightweight—surprise—and easy-to-use screenshotting software. To use third-party software like LightShot, the first thing you need to do is download the program.
Visit the download page on the official website, and download the Windows version using the appropriate button or link.
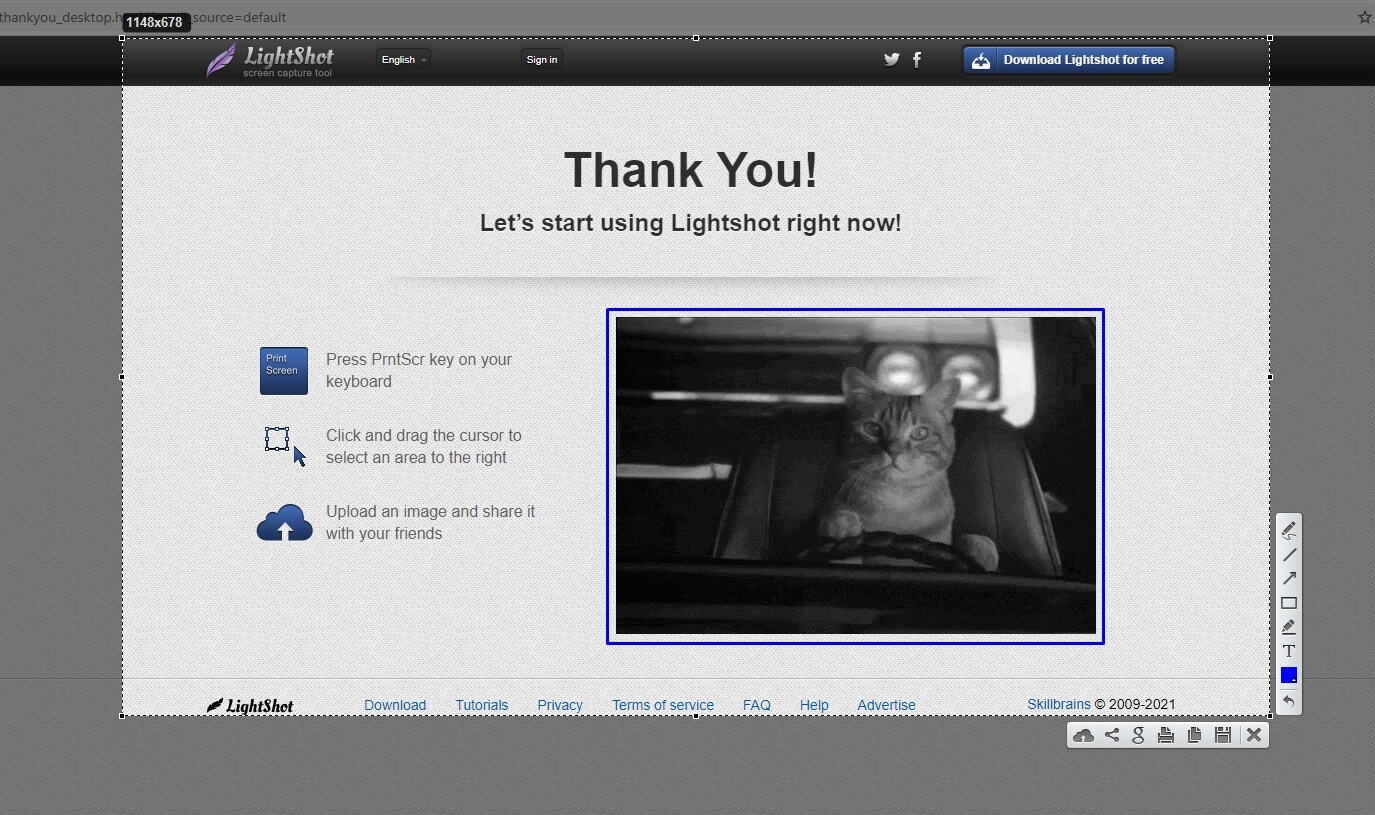
Once installed, it automatically overrides the regular PrtScn key command. Every time you press that key, now you open up the LightShot interface.
You can select an area of the screen to capture and add simple text, rectangles, or arrows. You can edit the thickness of the lines and elements by using your mouse scroll. If you don’t have a mouse plugged in, try swiping two fingers on your touchpad.
To save the files, you can either press the save icon or use the Windows standard Ctrl + S shortcut. It keeps the files in the /Documents/Lightshot/ folder by default. But you can change that folder and easily save files in other locations.
It’s not super powerful, but it’s fast and effortless to use.
How to Take a Screenshot on Microsoft Surface Devices
On a Microsoft Surface with Windows 10 installed, you can already use any of the ways we mentioned so far.
As if that’s not enough, there’s also a custom way to take screenshots—because it’s technically also a tablet.
To take a screenshot on your Surface device, press and hold the Windows button and simultaneously press the Volume Down button. When it takes a screenshot, the screen will get dimmer.
You’ll find the screen capture files in the /User/Pictures/Screenshots folder.
Some Surface owners complain that this option doesn’t work for their computer. If it doesn’t work, you can either troubleshoot the settings or use any of the eight other ways we’ve covered so far.
If you made it here, we’ve shown you all nine ways to take screenshots on your Windows computer. We’ll cover how to capture video from your computer screen in the next section.
4 Ways to Capture Video in Windows
Not satisfied with static images? Want some movement?
We’re not surprised. Video is often a better way to showcase tutorial steps, share gameplay, or give feedback on something.
Here are four different tools you can use to capture video in Windows.
Check Out Our Video Guide: How to Screen Record on Windows (7, 8, 10)
1. Xbox Game Bar
Recording the screen is just as easy as taking a screenshot. You can use the shortcut Windows key + Alt + R, or open up the Game Bar, to start recording.
Once the game bar is open (Win + G), you can press the recording button to start recording the screen.
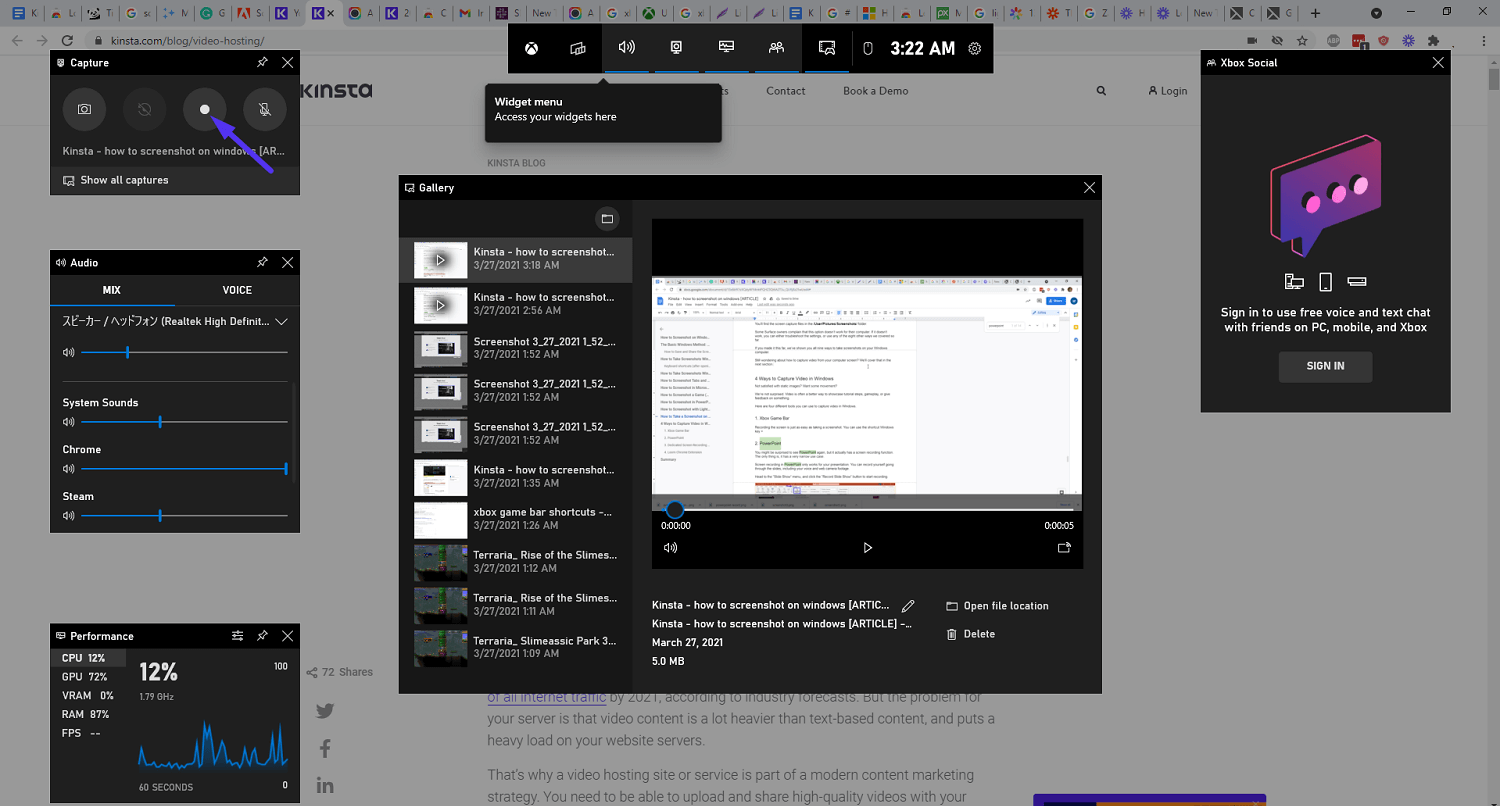
Easy, right? It stores all video files in the /User/Videos/Captures/ folder.
But before you upload a step-by-step video tutorial to your site, be warned. Video files are huge. You’re much better off using one of these video hosting solutions instead.
2. PowerPoint
You might be surprised to see PowerPoint in this article again, but it has a screen recording function, too. The only thing is, it has a minimal use case.
Screen recording in PowerPoint only works for your presentation. You can record yourself going through the slides, including your voice and web camera footage.
Head to the Slide Show menu, and click the Record Slide Show button to start recording.
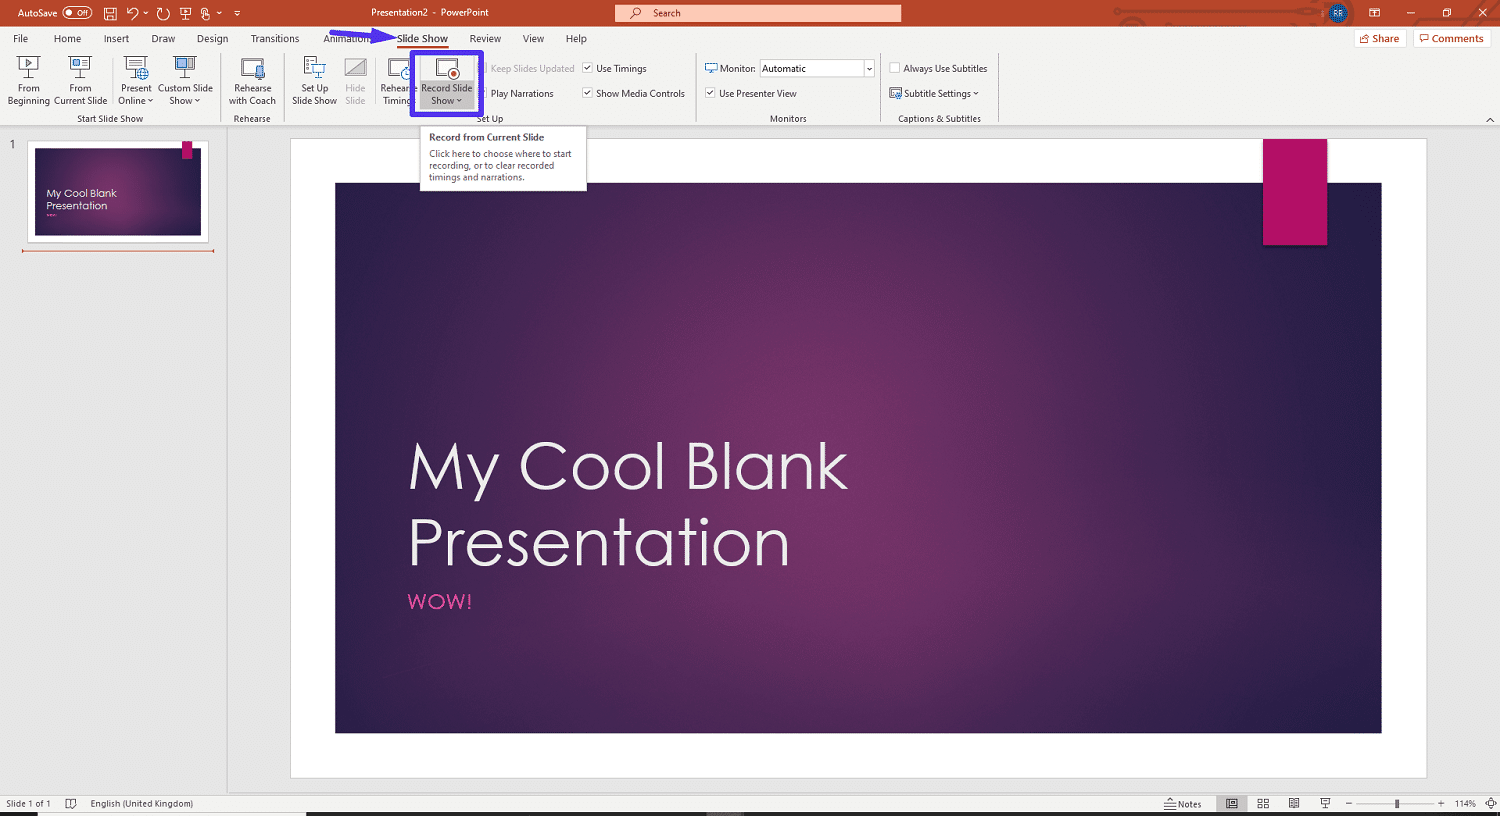
It’ll then record your voice and camera, and you can use drawing tools to aid your explanations.
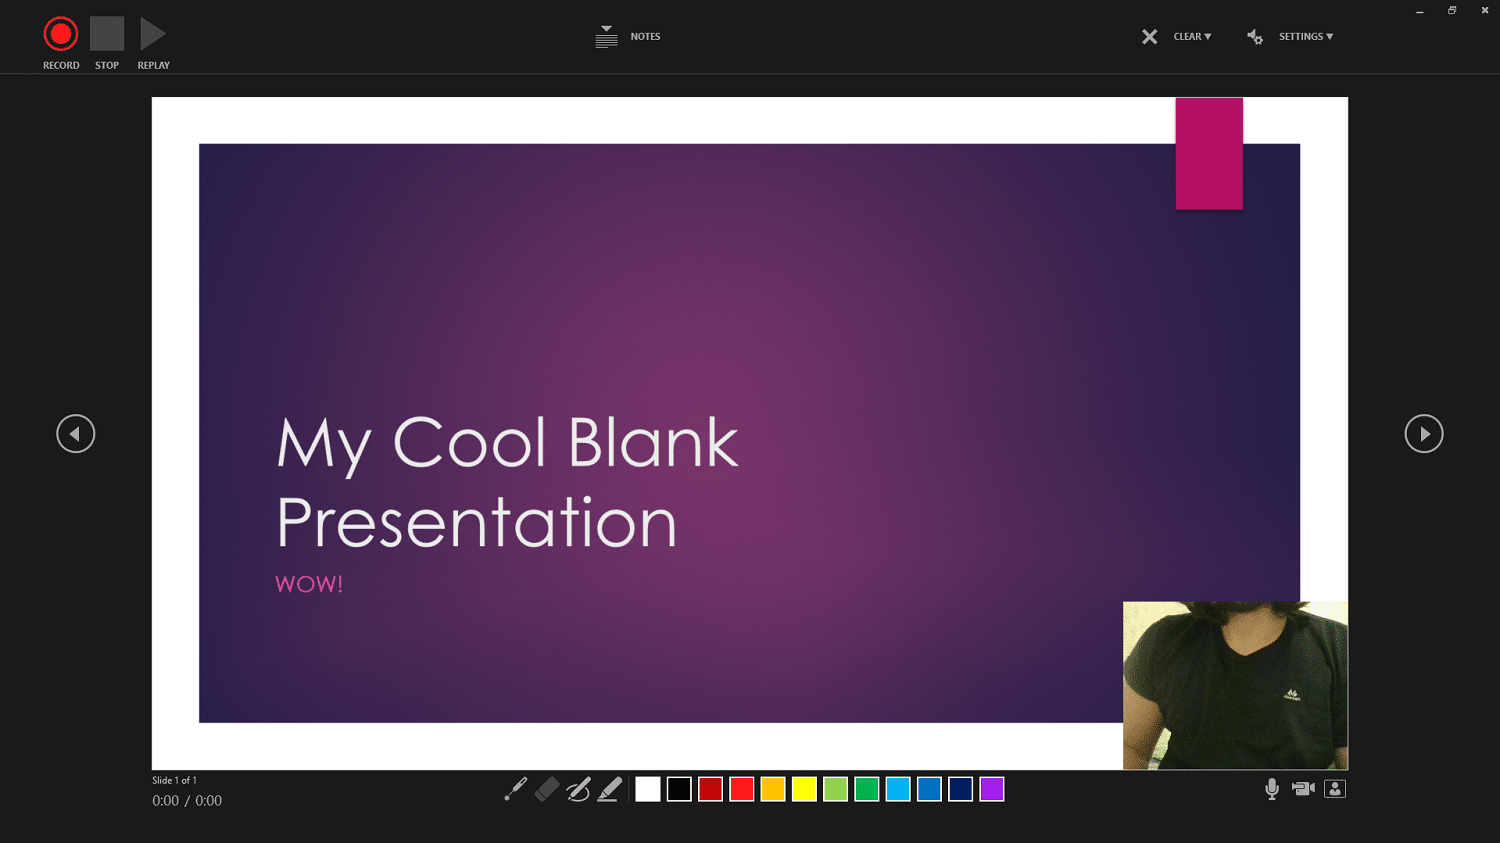
Note: If you don’t have a powerful computer, fancy animated transitions in PowerPoint presentations can cause a lot of lag and a choppy final video. Keep animations to a minimum to avoid choppy results.
3. Dedicated Screen Recording Software
You can also use a dedicated third-party software solution to record your screen.
For beginners, we’d recommend a simple tool like Snagit or Zappy. However, you’re probably just as well off with the already-installed Xbox Game Bar (if you’re on Windows 10).
For advanced users and experienced video editors, you may want more functionality and customizability.
Camtasia is a powerful screen recorder and video editor in one, making it easy to create detailed tutorial videos from scratch.
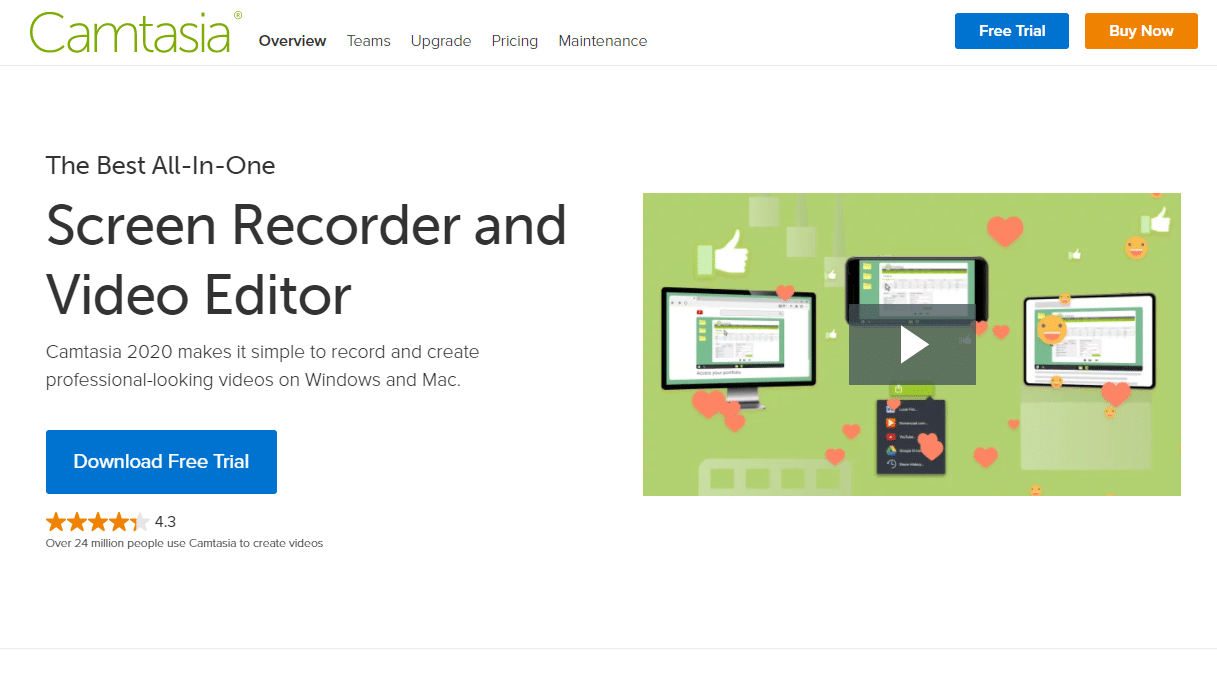
At $300, it’s probably out of the budget range in non-professional use cases.
If you want a little bit more functionality than Zappy or the Game Bar without having to pay, we’ve got you covered.
The last option on this list is 100% free. Plus, it’s an excellent fit for a range of professional uses.
4. Loom Chrome Extension
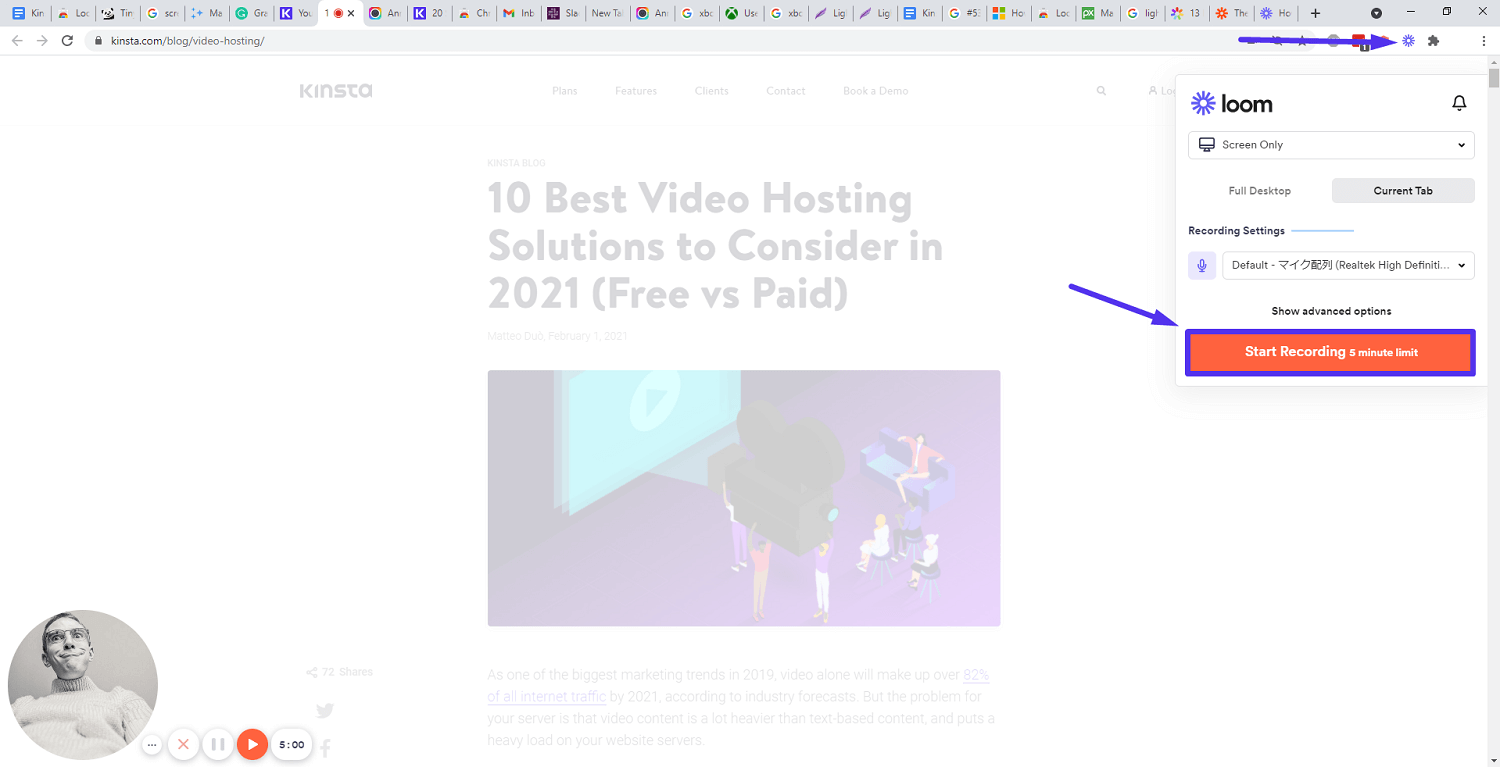
Loom is a simplistic, easy-to-use screen recording tool that you can download as a Chrome extension. It records your screen, voice, and face for up to five minutes (in the free version).
You can open Loom up by clicking on the icon in the start menu or using the Alt + Shift + L shortcut.
It’s the perfect tool for sharing feedback or communicating difficult things with remote coworkers, clients, or business partners.
If you install the desktop version, you can even use a confetti effect with Ctrl + Alt + C to congratulate someone on a job well done.
What makes Loom unique is that it isn’t just a screen capture tool. It’s a free SaaS solution that automatically uploads your screen capture videos with shareable links.
You can easily install it by visiting the Loom Chrome extension page.
Summary
Whether you’re working with an old version of Windows 7, or the newest version of Windows 10 on a brand-new Surface laptop, you have tons of options for taking screenshots.
You can use the built-in keyboard key shortcuts, Windows tools like Snip & Sketch, or a third-party app in Chrome. Even PowerPoint has a built-in function for taking screenshots and including them in your presentation.
Like with Windows, the same holds for taking a screenshot on your Mac.
Static screenshots are only the beginning. You can even capture videos showing what you’re doing step-by-step and instantly sharing it online, including commentary.


