WordPress developers have more control than ever before as the WordPress ecosystem continues to evolve. Full site editing (FSE) levels the playing field for all users to build a theme from the ground up, especially when using the theme.json file.
Developers can also leverage the theme.json file. This configuration file allows for granular customization of your WordPress theme without the tedium and complexity of more complex programming languages.
In this comprehensive guide, we’ll explore what the theme.json file has to offer, including its relationship with full site editing. By the end, you’ll understand how to harness its capabilities to create modern, performant websites regardless of your development ability.
Introducing the theme.json file
At its core, theme.json is a configuration file that defines the settings and styles for your WordPress theme. It uses JavaScript Object Notation (JSON), which is structured data that inherits the key-value pairings of its parent language to let you write your code.
The theme.json file is key for control over various aspects of your theme. This includes color palettes, typography settings, layout options, styles per Block, custom CSS properties, and much more. We’ll give greater details on these aspects throughout the article.
While this doesn’t sound too revolutionary so far, theme.json is important for the future of WordPress development. The next section explains why.
Why theme.json is relevant to WordPress theme development
WordPress’ typical approach to theme development and creating plugins would often revolve around editing template files with PHP, using the functions.php file, and other technical tasks.
The theme.json file marks a significant shift, especially for developing themes. There are a few reasons for this:
- The file represents a single, organized location to define your theme’s settings and styles. This reduces the need for a scattered array of CSS and PHP files.
- This centralized approach of declaring styles and settings in
theme.jsonmeans WordPress can generate more efficient CSS. Compared to using a framework such as jQuery, there’s a potential for performance improvement. - You have more control over styling your site and individual Blocks than ever before. This democratizes theme development for users with less technical knowledge.
- As FSE continues to evolve, the
theme.jsonfile will have a crucial role in how themes, Global Styles, and the Block Editor all interact.
Combining all of these aspects results in a standardized way of defining settings and styles for your theme. For anyone who wishes to understand and work with different themes, embracing theme.json will let you create more robust, flexible, and user-friendly WordPress themes. Even better, these creations will align with the platform’s future direction.
Where to find the theme.json file
First off, you won’t find a theme.json file in ‘traditional’ or ‘classic’ themes. To find and use this file, you need a dedicated Block Theme. That being said, you can create the file in any theme as long as you run WordPress 5.8 or greater.
The typical location for the theme.json file is within wp-content/themes/[your-theme]. If the file isn’t there, you should open your favorite coding editor and create the file as necessary. Don’t worry about the contents for now — we’ll get to that shortly.

If you need to create a new file from scratch but also want to see the intricacies of what it contains before you customize your own, check out the default Twenty Twenty-Four theme.

As a Block Theme, this will have a theme.json file to view. It may come in handy to have it open as we look at the structure over the next few sections.
What you need to work with theme.json
Of course, not everyone will be able to open up the config file and get to work. You’ll still need some fundamental skills and knowledge to build and customize a theme:
- Basic JSON knowledge. We think it’s something you can pick up fast, but still, familiarity with JSON syntax and structure is crucial.
- Understanding of CSS. You’ll find that many
theme.jsonobjects and properties correspond to its CSS counterparts. CSS ‘chops’ will be a benefit here. - WordPress Block Editor knowledge. Understanding how Blocks work, along with their customization options, will help you as you build.
While it isn’t strictly necessary, we’d encourage you to understand at least the key FSE concepts, which will help you leverage the theme.json file in a more effective way. You may also get to unravel how your edits will impact the end user’s ‘tinkering.’ Also, there will be cases where you’ll need to still use HTML and JavaScript to realize your vision.
Finally, there are a couple of technical ‘extras’ we’d recommend:
- A code editor. Choosing a quality editor that offers JSON syntax highlighting and validation will make your workflow more pleasurable to run through.
- Local development environment. Using a tool such as DevKinsta to work on your theme will let you experiment and test out your changes fast and without impacting a live site.
With these tools and knowledge in place, you’ll be well-equipped to start customizing your WordPress theme using theme.json.
Looking at the anatomy, structure, and hierarchy of theme.json
The theme.json file will obviously have a structure in place that you need to understand. It also has a hierarchy, along with some unique elements that need further explanation.
This is likely the most complex part of using the configuration file, but even then, you’ll grasp the concepts easily.
Let’s start with structure, then move on to the other elements of theme.json.
Basic structure
Given that the file follows the JSON format, you may already understand the general concept of the structure. First of all, the entire file object wraps in curly braces, as will some of the various other objects within. Each object consists of key-value pairs, use single or double quotes for keys, and commas to end the line.
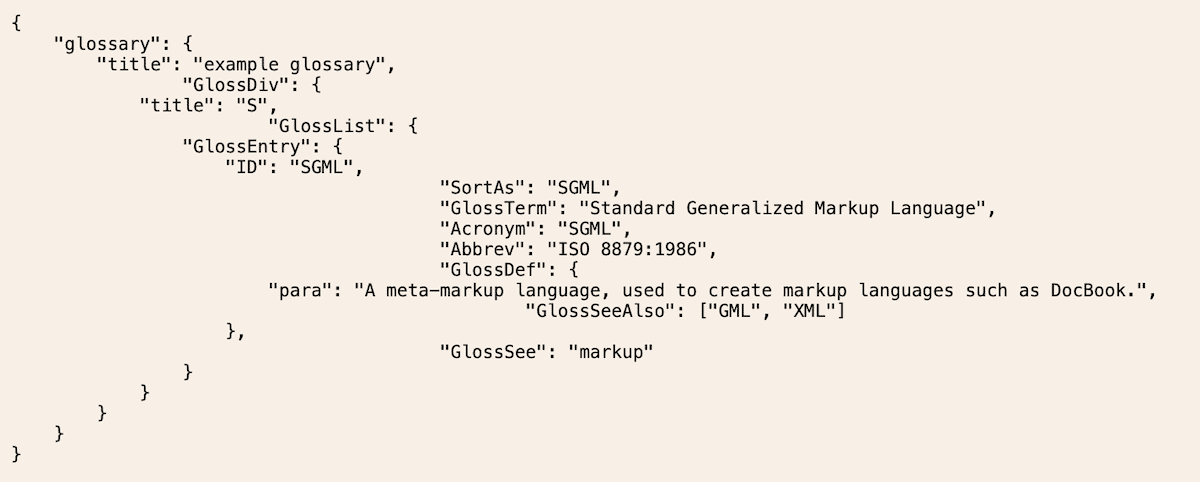
The bare minimum a theme.json file needs are version, settings, and styles objects:
{
    "version": 2,
    "settings": {
      // Global settings go here
    },
    "styles": {
      // Global styles go here
    }
}
The settings and styles objects are straightforward, but version requires more explanation. This value will be an integer that matches the API version you use to read your file. The current API version is 3, although version 2 is also common, and you can migrate from older versions.
Most theme.json file structures will also include a schema. In a nutshell, this lets you work with auto-completion within code editors and provides validation for the file. You’ll add this at the top of the file:
{
    "$schema": "https://schemas.wp.org/trunk/theme.json",
    "version": 2,
    "settings": {
    },
    "styles": {
    }
}
From here, you’ll add various properties and objects to settings and styles to build upon your file.
Hierarchy
The theme.json file follows a hierarchical structure and is only one level of the overall hierarchy for settings and styles on your site. If you have CSS knowledge, understanding this will be easier for you, as this file is similar in complexity to CSS.
In short, the customizations you make to theme.json may not always show on the front end of your site. User configurations take priority over everything. This means whatever changes take place on the Appearance > Editor screen within WordPress will show up on the front end:
If you use a child theme and include a theme.json file, this will override every change other than those made with the Site Editor. Likewise, anything you define within the parent theme’s configuration file will override WordPress’ default settings and styles. It’s this file we’re focusing on within this post, although WordPress has its own theme.json file, too.
While it won’t be a focus for this post, you can also override values using hooks and filters. These dynamic filters let you create plugins and themes that also change theme and platform settings and styles.
Block grammar
If you head into the WordPress Block or Site Editor, open a post or page, and toggle the Code Editor, you’ll notice lots of what looks like HTML comments within the content:
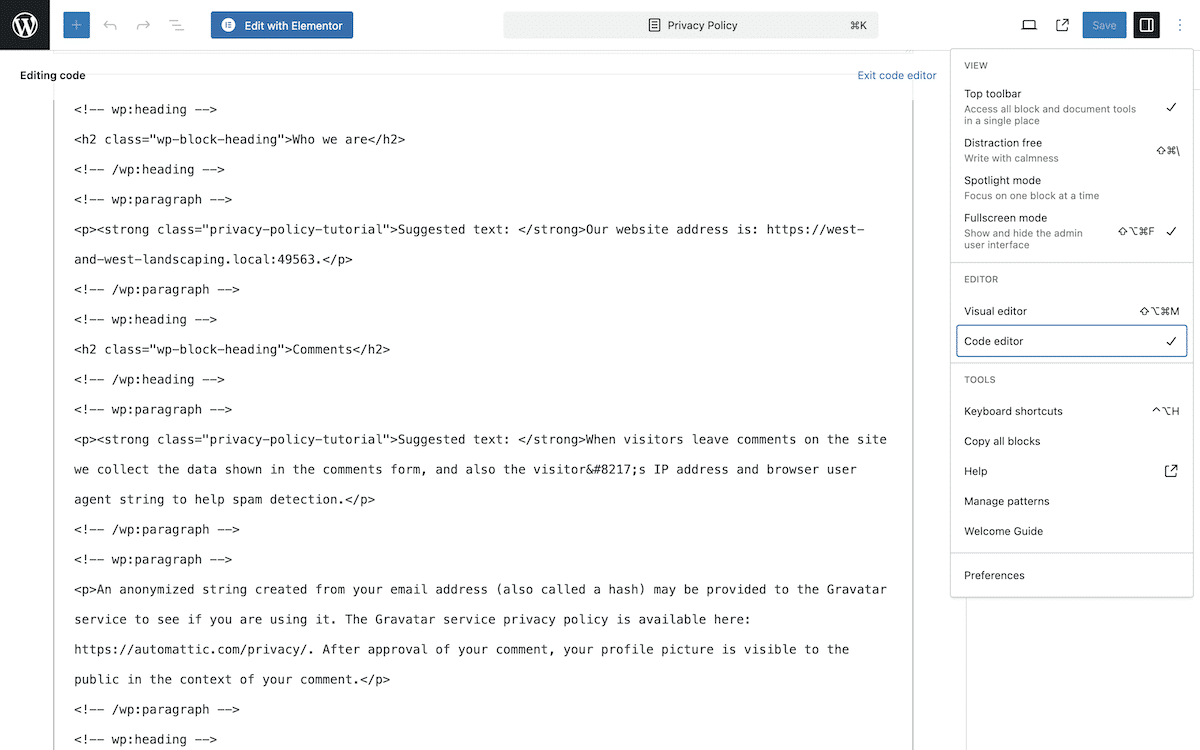
This is because instead of using PHP files, Block Themes use HTML files along with comments and Block markup to create your site. The combination of these elements results in the ‘Block grammar’ you need to write your theme.json file.
For Blocks that contain content, such as the Paragraph Block, you wrap that content:
<!-- wp:paragraph -->
    <p>Content goes here!</p>
<!-- /wp:paragraph -->
In other cases, you’ll only need single-line comments or those that self-close. With some Blocks, you’ll combine types to create your layouts and designs. You’re able to nest these comments, too:
<!-- wp:columns -->
<div class="wp-block-columns">
    <!-- wp:column -->
        <div class="wp-block-column"></div>
    <!-- /wp:column -->


    <!-- wp:column -->
        <div class="wp-block-column"></div>
    <!-- /wp:column -->
</div>
<!-- /wp:columns -->
Here, we create a Columns Block using a wrapper comment. Inside, we can begin to add HTML to design those columns and include individual column wrappers. This would be trivial on the front end, as you’ll often place Blocks inside of each other.
To find the markup for a particular Block, you could pick around the Block Editor Handbook until you find what you need. The easiest way, though, is simply to add the Block to WordPress, open the Code Editor, and copy the markup from there.
When it comes to changes you’ll make within that markup, we’ll cover that in a later section.
How theme.json and WordPress full site editing combine
From the discussion on hierarchy, you’ll understand that theme.json is a big part of FSE. Both work together to give you a comprehensive theming solution for WordPress. For instance, the Global Styles interface is essentially the visual representation of your theme.json settings.
You can modify settings either in the Global Styles panel or the configuration file, and WordPress will update the corresponding values as necessary. While the Site Editor settings will take precedence, theme.json will act as the foundation for your theme’s own styles. For the end user, Global Styles lets them replace your defaults with their own customizations without the need for code or to edit the theme.json file.
What’s more, the CSS custom properties you define in theme.json become available in the Global Styles interface. This lets users leverage these properties for more consistent styling across a site. This extends to being able to define specific Block styles and settings too, which you can tweak further from the WordPress dashboard.
In a nutshell, theme.json provides more granular control over settings, styles, and more. It’s a developer-level tool that offers a more straightforward and streamlined experience than classic approaches. In contrast, the Global Styles interface gives everyone the chance to customize a theme to their own liking. As you develop themes further, you’ll see how both work in tandem to help create site designs and layouts.
Working with the theme.json file properties
With an understanding of the basics, you can begin to work with the objects and properties within theme.json. We won’t be able to cover every use case or eventuality. However, by the end of this tutorial, you’ll be able to build themes that offer full functionality and look great on the front end.
Settings
The settings property lets you control which features you offer in the Site Editor and how they behave. It’s a top-level property, and you’ll usually find multiple levels of nesting.
Once we look at styles and their variations, you’ll see that there’s some crossover between these options, but both types have a role in creating your theme.
You have a select number of properties available:
{
    "version": 3,
    "settings": {
        "appearanceTools": false,
        "blocks": {},
        "border": {},
        "color": {},
        "custom": {},
        "dimensions": {},
        "layout": {},
        "position": {},
        "shadow": {},
        "spacing": {},
        "typography": {},
        "useRootPaddingAwareAlignments": false
    }
}
The official WordPress Theme Developer Handbook includes a reference for all of these settings (and styles). However, here’s a quick overview of a few important ones that need further clarification:
appearanceTools. This catch-all property enables a number of others and is meant as a time-saver. It will set border options, typography line-heights, padding, margins, and much more.blocks. While most of your work will look at global settings and styles, theblocksproperty lets you do this on a per-Block basis. The concept is not something we cover in more detail here, but the Theme Developer Handbook has excellent documentation on this facet oftheme.json.custom. This unique property has no functionality in that you decide what it does. You’ll use it to create custom CSS properties for your theme, and the scope you have on offer is wide.useRootPaddingAwareAlignments. Again, this is a complex property that we won’t cover in full. It essentially helps you place your theme’s horizontal padding styles and comes with a lot of power. You’d use it where you want to let full-width items stretch to the edges of the screen while using padding on the root element.
Note that you don’t need to add any properties to theme.json you don’t want to work with. For instance, if you don’t wish to work with appearanceTools, you can simply leave it out rather than define it with false.
How to define settings within theme.json
When it comes to defining settings, each property has a number of sub-properties of key-value pairs. For instance, you can create color palettes in this way:
{
    "version": 3,
    "settings": {
        "color": {
          "palette": [
            {
              "color": "#0073aa",
              "name": "Primary",
              "slug": "primary"
            },
            {
              "color": "#23282d",
              "name": "Secondary",
              "slug": "secondary"
            }
          ],
…
Other properties have simple Boolean values, which will toggle those features on or off within the Site Editor:
{
    "version": 3,
    "settings": {
        "color": {
            "background": true,
            "defaultPalette": true,
            "link": true,
            "text": true
        }
    }
}
Once you define your settings, you can introduce styling for them. Let’s examine this now.
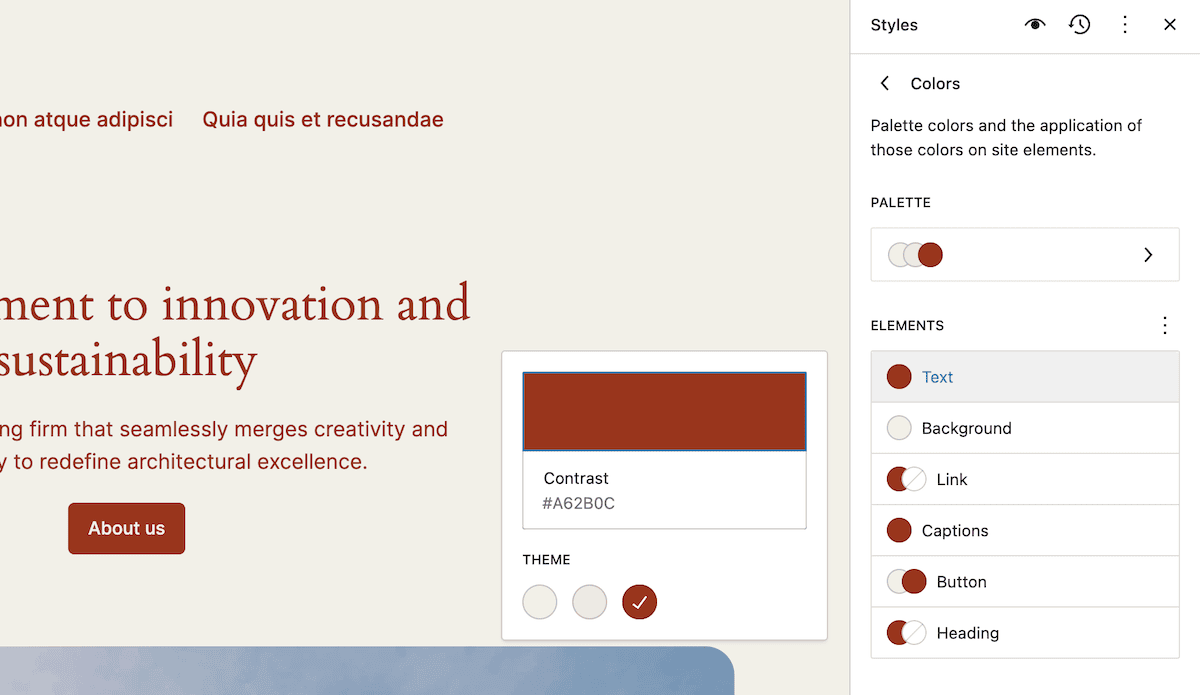
Styles and style variations
While settings defines access to certain styling options, the styles property enables you to define those global styles for your theme. Again, it is a top-level property that will use multiple levels of nesting. You’re able to target specific elements, Blocks, or even use custom CSS properties.
It’s important to define theme styles here so you can access and customize them from the Site Editor. You’re able to work with a number of elements:
{
    "version": 3,
    "styles": {
        "border": {},
        "color": {},
        "dimensions": {},
        "filter": {},
        "shadow": {},
        "spacing": {},
        "typography": {},
        "css": {}
    }
}
However, you won’t often use many of these as secondary-level properties. Instead, some will mainly work with Blocks or elements. For example:
…
"styles": {
"blocks": {
"core/group": {
"color": {
"text": "#000000",
"background": "#ffffff",
"link": "#777777"
}
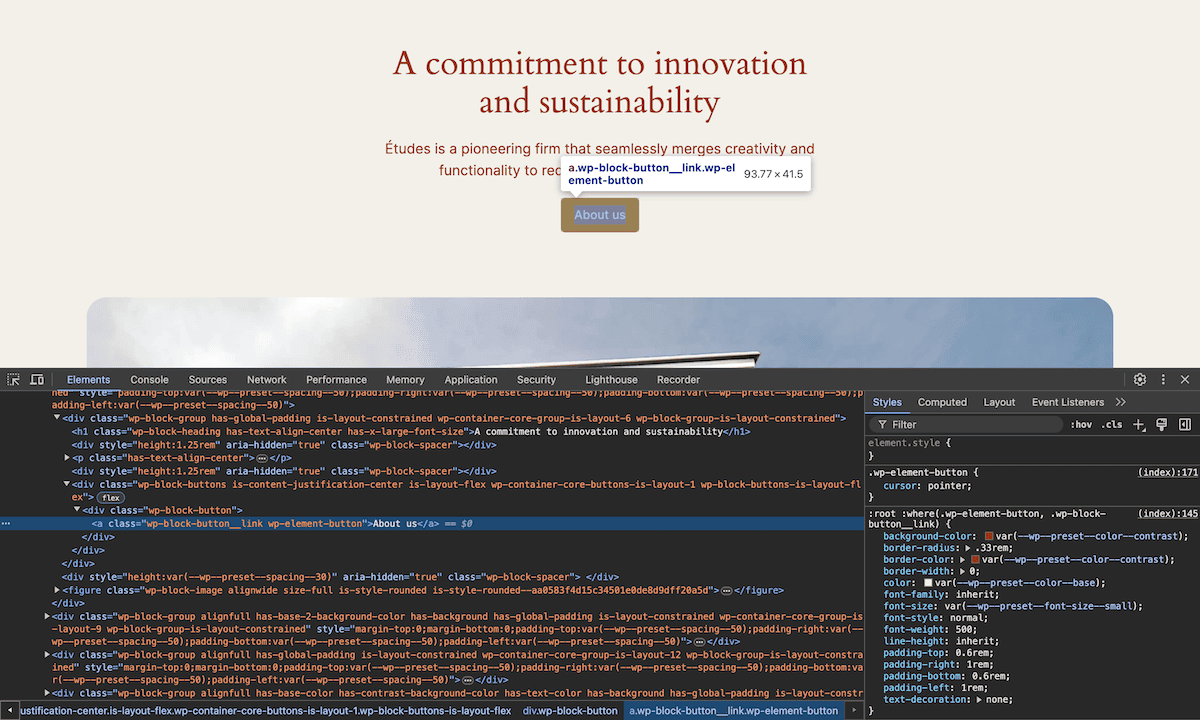
…For global styles, you’ll work on the root — which correlates to the <body> tag of your page. For specific elements, you can follow a similar structure to Blocks, this time using the elements property:
…
"styles": {
    "elements": {
        "button": {
            "color": {
                "text": "#ffffff",
                "background": "#aa3f33"
            }
…
If you look at any changes you make within the Site Editor, you should see them in place. The markup will also generate CSS for whatever styles you create:
Note that you can also style pseudo-classes for elements such as hover and focus styles:
…
"elements": {
    "button": {
        "color": {
            "text": "#ffffff",
            "background": "#aa3f33"
        },
        ":hover": {
            "color": {
                "background": "#822f27"
            }
…
Applying styles is even more in-depth than this, and that’s one of the fantastic positives about using theme.json.
Style variations
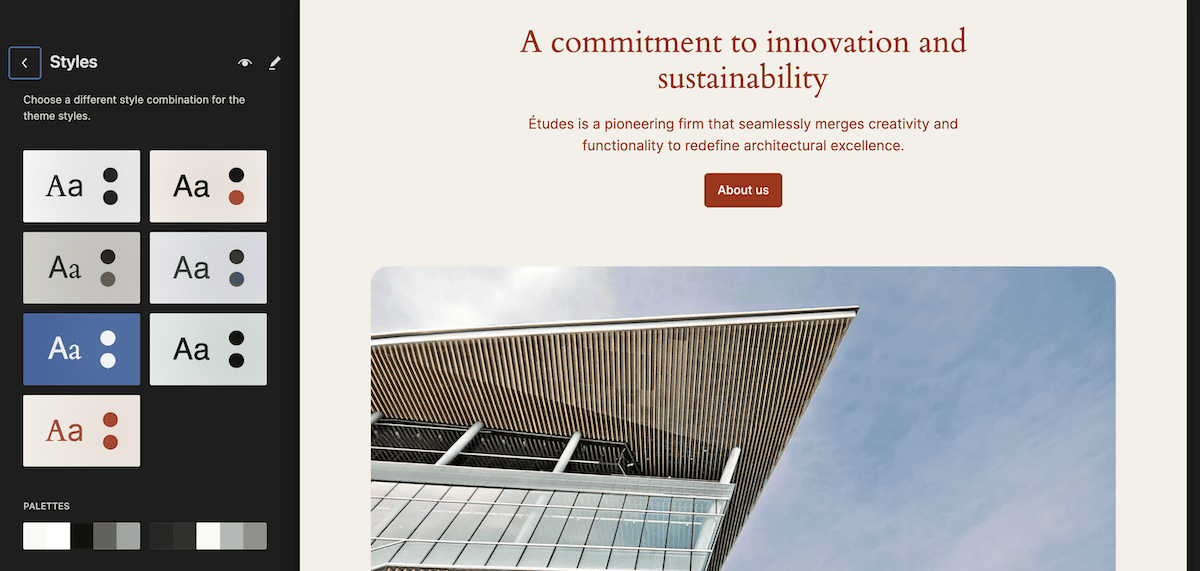
Before we move on, you’ll want to know about style variations. You can see these various color palettes and typography stylings within the FSE interface:
However, these aren’t something you code into theme.json. Instead, you’ll create alternative versions of the file, give them a unique name, and store them within a theme’s styles directory:
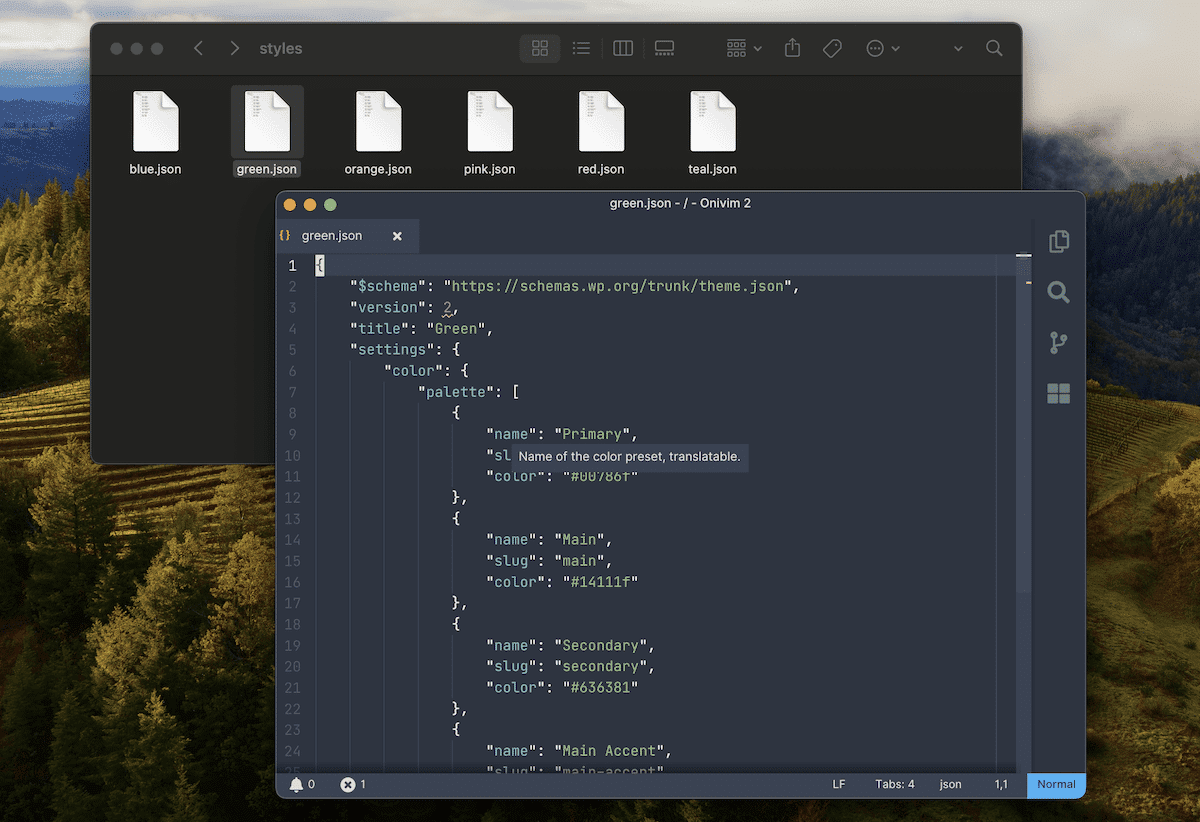
Note that the title within the markup is unique to each alternative JSON file. However, it’s an optional field — although we recommend you use it for clarity and the best experience.
Custom templates and template parts
Much like style variations, theme.json lets you register custom templates and associated template parts. To register the markup is straightforward:
"customTemplates": [
    {
        "name": "my-template",
        "title": "My Template",
        "postTypes": [
            "page",
            "post"
        ]
    }
]
The customTemplates property needs you to define three elements:
name. This will correspond to a template you create within your theme’s templates directory, such as /template/my-template.html.title. This is the human-readable version of the template’s name.postTypes. Without definition, this defaults to a page, but you can specify an array of post types that the template is suitable for.
Users will be able to select any templates you register from within the Site or Block Editor:
When it comes to template parts, you don’t need to register them, but we recommend it. The structure is similar to registering templates:
…
"templateParts": [
    {
        "area": "header",
        "name": "header",
        "title": "Header"
    },
…
Here, the name and the title match the same definitions as full templates. The area relates to where the part belongs: the header, footer, or uncategorized are the defaults, but you can assign template parts to any custom area.
We encourage you to look into how to display these template parts, too, as they won’t show up without some extra coding. Even so, registering them is straightforward.
Patterns
To finish up, let’s discuss Block patterns. You’re able to bundle any number of these within your theme.json file using a top-level array. Any suitable pattern from the WordPress Pattern Library is available to include in your file:
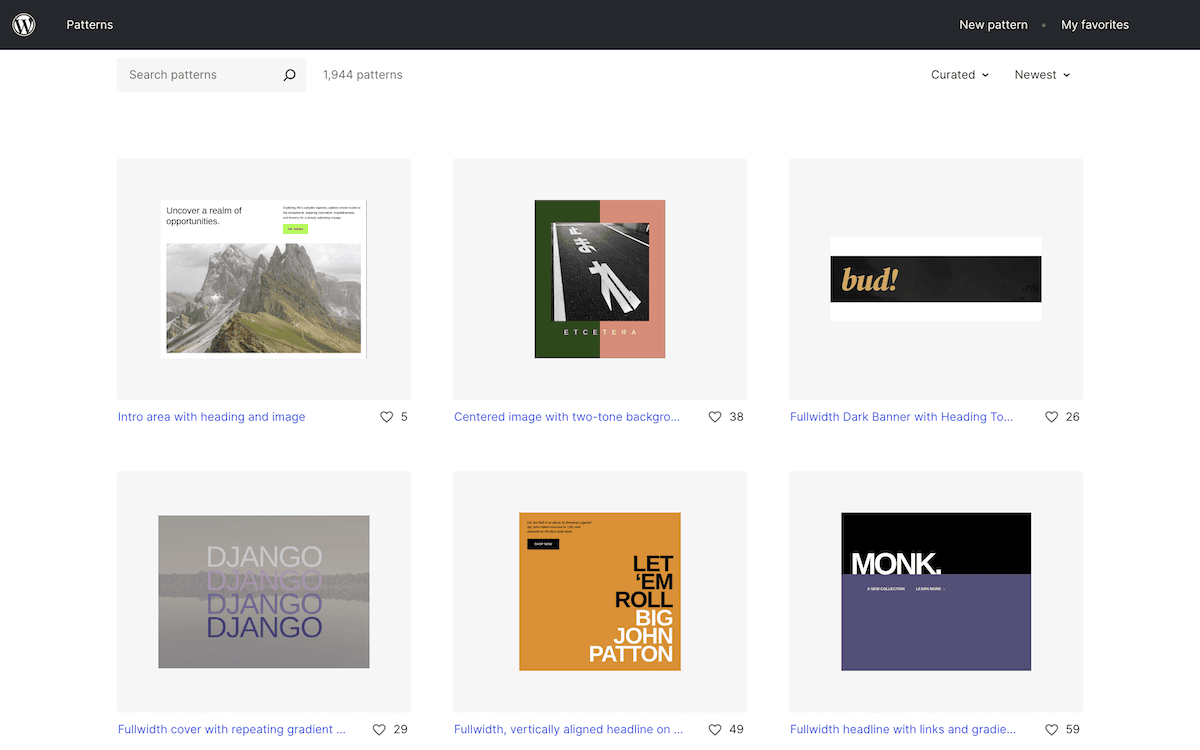
Defining the array is simple: you use the patterns property and the slug of the associated pattern from the library URL:
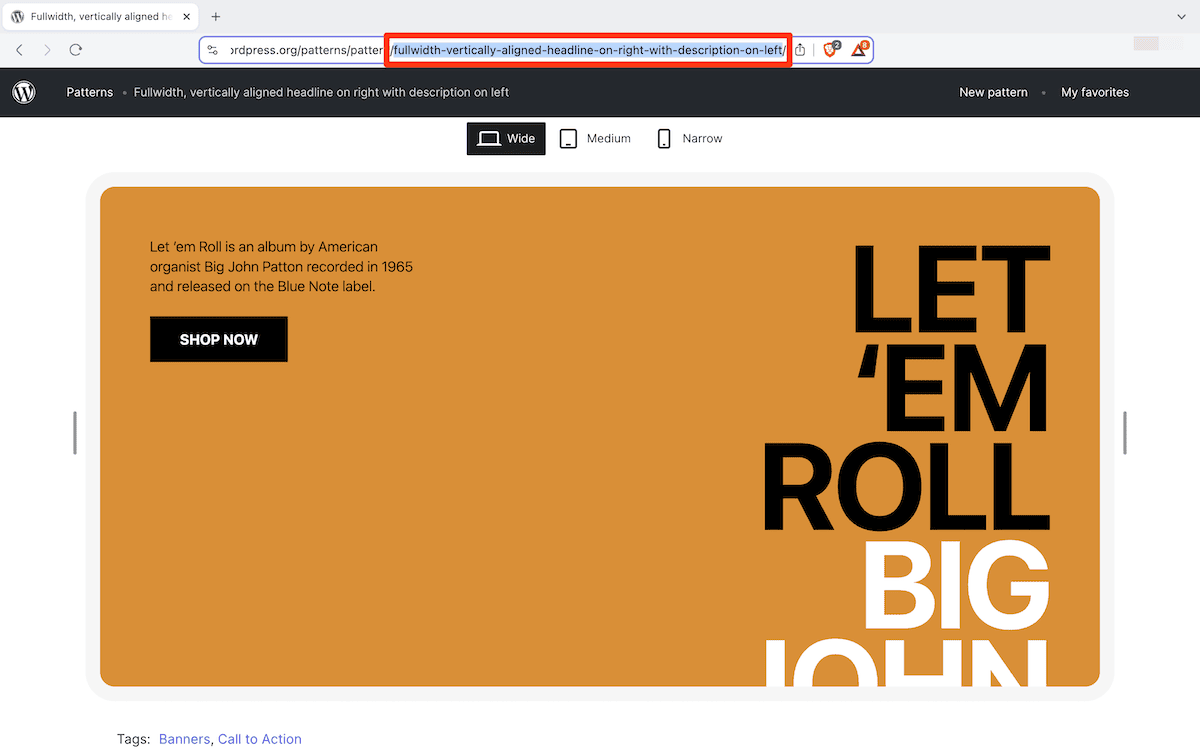
With this slug, you can populate the patterns markup:
{
    "version": 3,
    "patterns": [
        "fullwidth-vertically-aligned-headline-on-right-with-description-on-left"
    ]
}
You’ll be able to select them from within the Block Editor Pattern Directory:
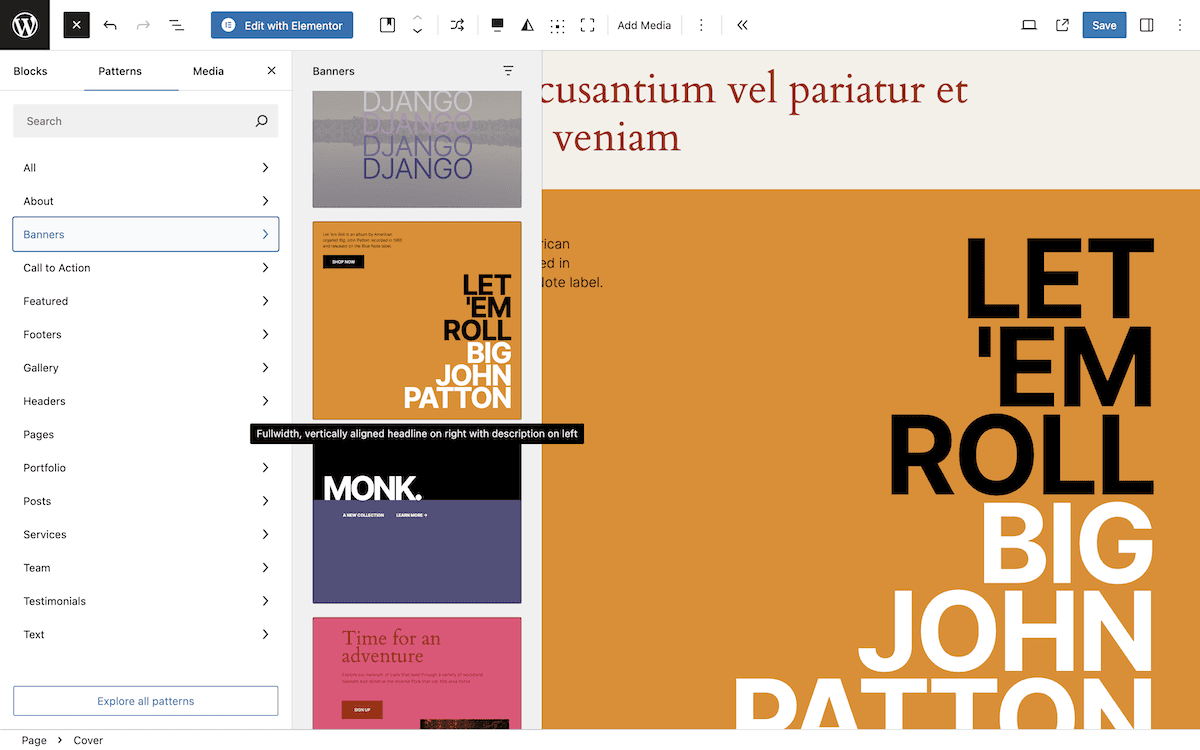
This simple way to bring Pattern Library assets into your themes is handy and valuable. It’s yet another reason that the theme.json file is fast becoming a favorite way to build among WordPress theme developers.
The workflow for customizing your WordPress website using theme.json
Once you understand the key components of theme.json, developing your workflow for using it is an important step. It represents a new way of developing themes, and as such needs handling in a different way than classic methods.
Our approach would be to set up the schema URL, pick an API version, and define your global settings first. This would include your color palette, typography options, and layout settings. In most cases, activating the appearanceTools would be beneficial, too:
"$schema": "https://schemas.wp.org/trunk/theme.json",
"version": 3,
   "settings": {
"appearanceTools": true,
     "color": {
       "palette": [
         {
           "name": "Primary",
"slug": "primary",
           "color": "#0073aa"
         },
         {
      "name": "Secondary",
        "slug": "secondary",
           "color": "#23282d"
         }
       ]
     },
     "typography": {
"fluid": true,
       "fontSizes": [
         {
           "size": "13px",
           "slug": "small",
           "name": "Small"
         },
         {
"size": "16px",
           "slug": "normal",
           "name": "Normal"
…
Next, you can look to create custom CSS properties using the slugs you define. For instance, you may have created custom font weights:
…
"custom": {
    "fontWeight": {
        "light": 300,
        "regular": 400,
        "medium": 500,
        "bold": 700
    },
…
Once you finish with your settings, it’s time to specify styles.
…
"styles": {
    "color": {
        "background": "var(--wp--preset--color--base)",
        "text": "var(--wp--preset--color--main)"
    },
…
Customizing your Block styles will come next, and this could represent a huge portion of your theme.json file.
…
"styles": {
    "block": {
        "core/separator": {
            "color": {
            "text": "var(--wp--preset--color--main)"
            },
        "typography": {
            "fontSize": "var(--wp--preset--font-size--large)"
            }
        },
        "core/site-tagline": {
            "spacing": {
                "margin": {
                    "bottom": "20px"
                }
            },
            "typography": {
                "fontSize": "var(--wp--preset--font-size--small)"
            }
        },
        "core/site-title": {
            "typography": {
                "fontSize": "var(--wp--preset--font-size--medium)",
                "fontWeight": "var(--wp--custom--font-weight--semi-bold)",
                "lineHeight": "var(--wp--custom--line-height--none)"
        },
…
Finally, you’ll want to design any custom templates and template parts and register them within theme.json. This is also the time to register any Block patterns you want to use and create them if necessary.
Using Kinsta as part of your theme development and customization workflow
Before you push any changes live, you will want to test everything out. So far, you’ll likely have been working within a local development tool such as DevKinsta:
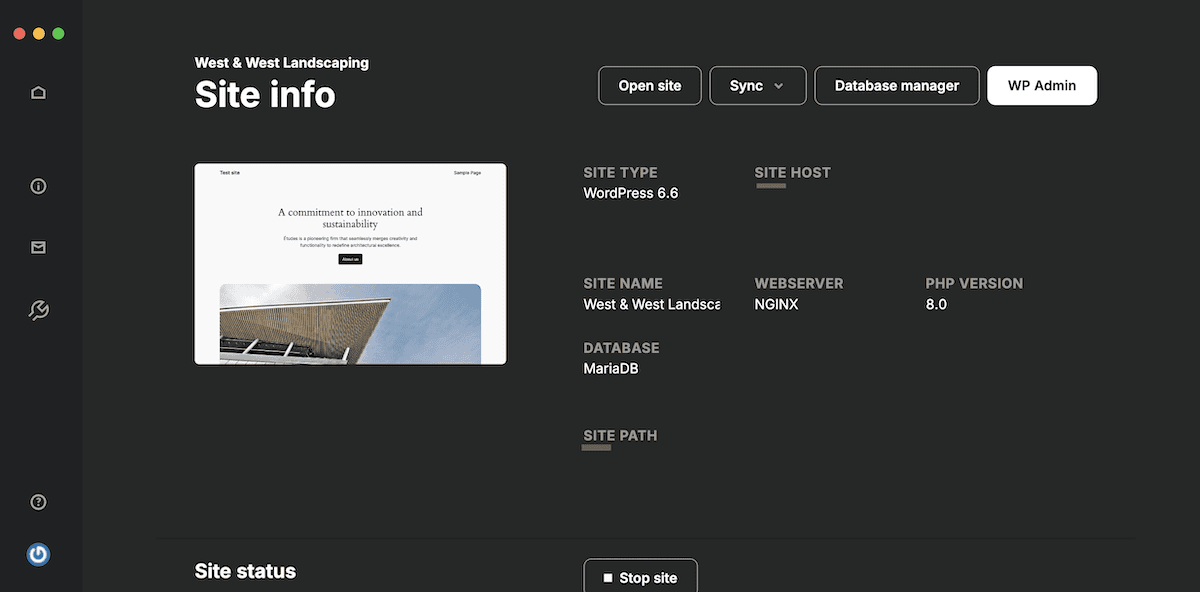
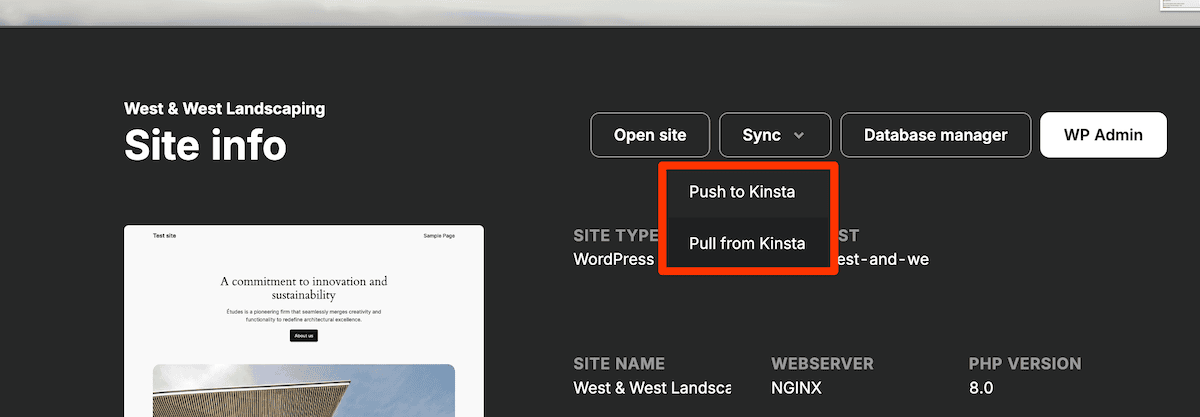
However, it’s also important to check out your development on a live site. DevKinsta’s Kinsta integration lets you push a site to a standard or premium staging environment:
From there, you can test your theme out on our best-in-class cloud architecture and enjoy full control over the changes you push live.
You can also leverage our complete backup management solution, which lets you restore daily automatic backups to both live and staging environments. What’s more, all our staging environments come with DevTools to help you monitor your site’s performance before you send it live.
Whether you should use theme.json or WordPress full site editing
Given the crossover between theme.json and full site editing, you might wonder why you’d use one over the other. In fact, both suit different scenarios and should be used in conjunction.
For instance, theme.json will be your go-to in the following situations:
- You develop themes and create a new theme from scratch.
- JSON is a language you understand and are comfortable working with.
- You want a programmatic method of defining default styles and settings for your theme.
- The styles and settings you want to implement need more control than what you can find by default in the Site Editor.
Granted, this last point will be niche, as FSE mirrors theme.json functionality almost exactly. As such, full site editing will make more sense to most users in the following scenarios:
- You’re a site owner who wants to customize an existing theme.
- JSON is not something you have familiarity with.
- Visual interfaces make more sense for your customization and development workflow.
- You want to make quick adjustments without the need for extensive coding.
In practice, the theme will need a configuration file to define its foundations. From there, the hierarchy takes over, and site owners can use FSE to make further customizations.
Summary
The theme.json configuration file is revolutionary for WordPress theme development. It gives you a centralized home for your theme’s settings and styles and enables you to create more flexible, maintainable, and customizable themes.
You’ll use the file alongside the Site Editor within WordPress to come to the final design of a site. The options you set within theme.json serve as the default, which the end user will customize further. The good news is that coding this file is more straightforward than tweaking an array of PHP and CSS files — and it’s the future of WordPress design.
Do you have any questions about using the theme.json file in WordPress? Let us know in the comments section below!