
This hands-on article harnesses WordPress’s flexibility and React‘s powerful user interface (UI) for theme development. It demonstrates how integrating WordPress and React elevates your WordPress projects by walking you through the steps needed to create a theme.
Prerequisites
To follow along with this article, you should have the following:
- A WordPress site. Kinsta provides multiple setup options, including local development with DevKinsta, a user-friendly MyKinsta dashboard, or programmatically via the Kinsta API.
- Node.js and npm (Node Package Manager) or yarn installed on your computer
Create a basic WordPress theme structure
Creating a basic WordPress theme structure involves setting up a series of files and directories that WordPress uses to apply your theme’s styles, functionalities, and layouts to a WordPress site.
- In your DevKinsta environment, access your site’s folder. Navigate to the wp-content/themes directory.
- Create a new folder for your theme. The folder name should be unique and descriptive — for example, my-basic-theme.
- In the theme’s folder, create these essential files and leave them empty:
- style.css — This is the primary stylesheet file. It also contains the header information for your theme.
- functions.php — This file defines functions, classes, actions, and filters to be used by your theme.
- index.php — This is the main template file. It’s required for all themes.
If you are not using React, you must also create the following files. But with React we would create components for them later.
- header.php — Contains the header section of your site.
- footer.php — Contains the footer section of your site.
- sidebar.php — For the sidebar section, if your theme includes sidebars.
Next, open style.css and add the following to the top of the file:
/*
Theme Name: My Basic Theme
Theme URI: http://example.com/my-basic-theme/
Author: Your Name
Author URI: http://example.com
Description: A basic WordPress theme.
Version: 1.0
License: GNU General Public License v2 or later
License URI: http://www.gnu.org/licenses/gpl-2.0.html
Tags: blog, custom-background
Text Domain: my-basic-theme
*/
This code snippet is the header section for a WordPress theme’s style.css file, containing essential metadata like the theme’s name, author details, version, and license. It helps WordPress recognize and display the theme in the dashboard, including its description and tags for categorization.
Integrate React into WordPress
Integrating React into a WordPress theme lets you use React’s component-based architecture to build dynamic, interactive UIs within your WordPress site. To integrate React, you’ll use the @wordpress/scripts package.
This is a collection of reusable scripts tailored for WordPress development. WordPress provides it to simplify the configuration and build process, especially when integrating modern JavaScript workflows, such as React, into WordPress themes and plugins.
This toolset wraps common tasks, making it easier to develop with JavaScript in the WordPress ecosystem.
Adapt your theme
Now that you have a basic WordPress theme structure, you can adapt your theme.
- Inside your theme’s directory, paste the following code into the functions.php file:
<?php
function my_react_theme_scripts() {
    wp_enqueue_script('my-react-theme-app', get_template_directory_uri() . '/build/index.js', array('wp-element'), '1.0.0', true);
    wp_enqueue_style('my-react-theme-style', get_stylesheet_uri());
}

add_action('wp_enqueue_scripts', 'my_react_theme_scripts');
The functions.php file integrates React with your WordPress theme. It uses
wp_enqueue_scriptandwp_enqueue_stylefunctions to add JavaScript and cascading style sheet (CSS) files to your theme.The
wp_enqueue_scriptWordPress function takes several arguments:- The handle name (
'my-react-theme-app'), which uniquely identifies the script - The path to the script file
- The array of dependencies,
array('wp-element'), which indicates the script depends on WordPress’s wrapper for React('wp-element'). - The version number
('1.0.0') - The position
true, which specifies that the script should be loaded in the footer of the HTML document to improve page load performance
The
wp_enqueue_stylefunction takes the following arguments:- The handle name
'my-react-theme-style', which uniquely identifies the stylesheet - The source
get_stylesheet_uri(), which returns the URL to the theme’s main stylesheet (style.css) and ensures the theme’s styles are applied
- The
add_actionelement, which hooks a custom function'my_react_theme_scripts'to a specific action ('wp_enqueue_scripts'). This ensures that your JavaScript and CSS are correctly loaded when WordPress prepares to render the page.
This code ensures that your React app’s compiled JavaScript file, located in <your-theme-directory>/build/index.js, and your theme’s main stylesheet are loaded with your theme.
The /build directory typically comes from compiling your React app using a tool like
create-react-appor webpack, which bundles your React code into a production-ready, minified JavaScript file.This setup is essential for integrating React functionality into your WordPress theme, allowing for dynamic, app-like user experiences within a WordPress site.
- The handle name (
- Next, update the content of the index.php file:
<!DOCTYPE html>
<html <?php language_attributes(); ?>>
<head>
    <meta charset="<?php bloginfo('charset'); ?>">
    <meta name="viewport" content="width=device-width, initial-scale=1">
    <?php wp_head(); ?>
</head>
<body <?php body_class(); ?>>
    <div id="app"></div>
    <?php wp_footer(); ?>
</body>
</html>
The code in the index.php file defines the basic HTML structure of the WordPress theme, including hooks for WordPress to insert necessary headers (
wp_head) and footers (wp_footer) and adivwith the IDappwhere the React application is mounted.
Set up React with @wordpress/scripts
- Open your terminal and navigate to your theme’s directory:
cd wp-content/themes/my-basic-theme - Initialize a new Node.js project:
npm init -y - Install
@wordpress/scriptsand@wordpress/element:npm install @wordpress/scripts @wordpress/element --save-devNote that this step can take a few minutes.
- Modify your package.json file to include a
startand abuildscript:"scripts": { "start": "wp-scripts start", "build": "wp-scripts build" },The
'@wordpress/scripts'is used to start a development server with hot reloading for development purposes (start) and to compile the React application into static assets for production (build).
Create a React project
- Create a new directory named src for your React source files within your theme.
- Inside the src folder, create two new files: index.js and App.js.
- Place the following code into index.js:
import { render } from '@wordpress/element';
import App from './App';
render(, document.getElementById('app'))
The code above imports the
renderfunction from@wordpress/elementand theAppcomponent. Then, it mounts theAppcomponent to the Document Object Model (DOM). - Next, paste this code into App.js file:
import { Component } from '@wordpress/element';
export default class App extends Component {
  render() {
    return (
      <div>
        <h1>Hello, WordPress and React!</h1>
        {/* Your React components will go here */}
      </div>
);
    }
}
Finalize and activate your theme
To activate your theme:
- Run the development server with
npm start. - Activate your new theme in the WordPress dashboard by navigating to Appearance > Themes, locating your theme, and clicking Activate.
- Ensure your React project’s build process is properly configured to output to the correct theme directory, allowing WordPress to render your React components.
- Visit your WordPress site’s frontend to see the live changes.

Develop React components for the theme
Next, follow a component-based approach to extend the basic React setup in your WordPress theme with specific components, like a header.
Create the header component
In your theme’s src directory, create a new file for the header component. Give it a name, such as Header.js, and add the following code:
import { Component } from '@wordpress/element';
class Header extends Component {
    render() {
        const { toggleTheme, darkTheme } = this.props;
        const headerStyle = {
            backgroundColor: darkTheme ? '#333' : '#EEE',
            color: darkTheme ? 'white' : '#333',
            padding: '10px 20px',
            display: 'flex',
            justifyContent: 'space-between',
            alignItems: 'center',
        };
        return (
            <header style={headerStyle}>
                <div>My WP Theme</div>
                <button onClick={toggleTheme}>{darkTheme ? 'Light Mode' : 'Dark Mode'}</button>
            </header>
        );
    }
}
export default Header;
This code defines a header component using '@wordpress/element' that dynamically styles the header based on darkTheme prop. It includes a button to toggle between light and dark themes by invoking the toggleTheme method passed as a prop.
Create the footer component
In your theme’s src directory, create a new file for the footer component. Give it a name — for example, Footer.js — and add the following code:
import { Component } from '@wordpress/element';
class Footer extends Component {
    render() {
        const { darkTheme } = this.props;
        const footerStyle = {
            backgroundColor: darkTheme ? '#333' : '#EEE',
            color: darkTheme ? 'white' : '#333',
            padding: '20px',
            textAlign: 'center',
        };
        return (
            <footer> style={footerStyle}>
                © {new Date().getFullYear()} My WP Theme
            </footer>
        );
    }
}
export default Footer;
This code defines a footer component that renders a footer with dynamic styling based on the darkTheme prop and displays the current year.
Update the App.js file
To make use of the new header and footer, replace the content of the App.js file with the following code:
import { Component } from '@wordpress/element';
import Header from './Header';
import Footer from './Footer';
export default class App extends Component {
    state = {
        darkTheme: true,
    };
    toggleTheme = () => {
        this.setState(prevState => ({
            darkTheme: !prevState.darkTheme,
        }));
    };
    render() {
        const { darkTheme } = this.state;
        return (
            <div>
                <Header darkTheme={darkTheme} toggleTheme={this.toggleTheme} />
                <main style={{ padding: '20px', background: darkTheme ? '#282c34' : '#f5f5f5', color: darkTheme ? 'white' : 'black' }}>
                </main>
                <Footer darkTheme={darkTheme} />
            </div>
        );
    }
}
The development build process, which watches for changes and recompiles your code, should still be active. So, your last version of the template should look similar to this:

How to handle WordPress data in React
Integrating WordPress content within React applications offers a seamless bridge between WordPress’s robust content management capabilities and React’s dynamic UI design. This is possible with the WordPress REST API.
To access the WordPress REST API, enable it by updating the permalink settings. On the WordPress admin dashboard, navigate to Settings > Permalinks. Select the Post name option or any option other than Plain and save your changes.
In your theme’s src directory, create a new file named Posts.js and add this code:
import { Component } from '@wordpress/element';
class Posts extends Component {
    state = {
        posts: [],
        isLoading: true,
        error: null,
    };
    componentDidMount() {
        fetch('http://127.0.0.1/wordpress_oop/wp-json/wp/v2/posts')
            .then(response => {
                if (!response.ok) {
                    throw new Error('Something went wrong');
                }
                return response.json();
            })
            .then(posts => this.setState({ posts, isLoading: false }))
            .catch(error => this.setState({ error, isLoading: false }));
    }
    render() {
        const { posts, isLoading, error } = this.state;
        if (error) {
            return <div>Error: {error.message}</div>;
        }
        if (isLoading) {
            return <div>Loading...</div>;
        }
        return (
            <div>
                {posts.map(post => (
                    <article key={post.id}>
                        <h2 dangerouslySetInnerHTML={{ __html: post.title.rendered }} />
                        <div dangerouslySetInnerHTML={{ __html: post.excerpt.rendered }} />
                    </article>
                ))}
            </div>
        );
    }
}
export default Posts;
The fetch('http://127.0.0.1/wordpress_oop/wp-json/wp/v2/posts') URL could be slightly different depending on the WP deployment name — that is, the folder where you installed WP. Alternatively, you can take the site hostname from the DevKinsta dashboard and append the suffix /wp-json/wp/v2/posts.
The Posts component is a prime example of this integration, demonstrating the process of fetching and managing WordPress data — specifically posts — using the WordPress REST API.
By initiating a network request within the component’s lifecycle method, componentDidMount, the component efficiently retrieves posts from a WordPress site and stores them in its state. This method highlights a pattern for dynamically incorporating WordPress data, such as pages or custom post types, into React components.
To make use of a new component, replace the content of the App.js file with the following code:
import { Component } from '@wordpress/element';
import Header from './Header';
import Footer from './Footer';
import Posts from './Posts'; // Import the Posts component
export default class App extends Component {
state = {
darkTheme: true,
};
toggleTheme = () => {
this.setState(prevState => ({
darkTheme: !prevState.darkTheme,
}));
};
render() {
const { darkTheme } = this.state;
return (
<div>
<Header darkTheme={darkTheme} toggleTheme={this.toggleTheme} />
<main style={{ padding: '20px', background: darkTheme ? '#282c34' : '#f5f5f5', color: darkTheme ? 'white' : 'black' }}>
<Posts /> {/* Render the Posts component */}
</main>
<Footer darkTheme={darkTheme} />
</div>
);
}
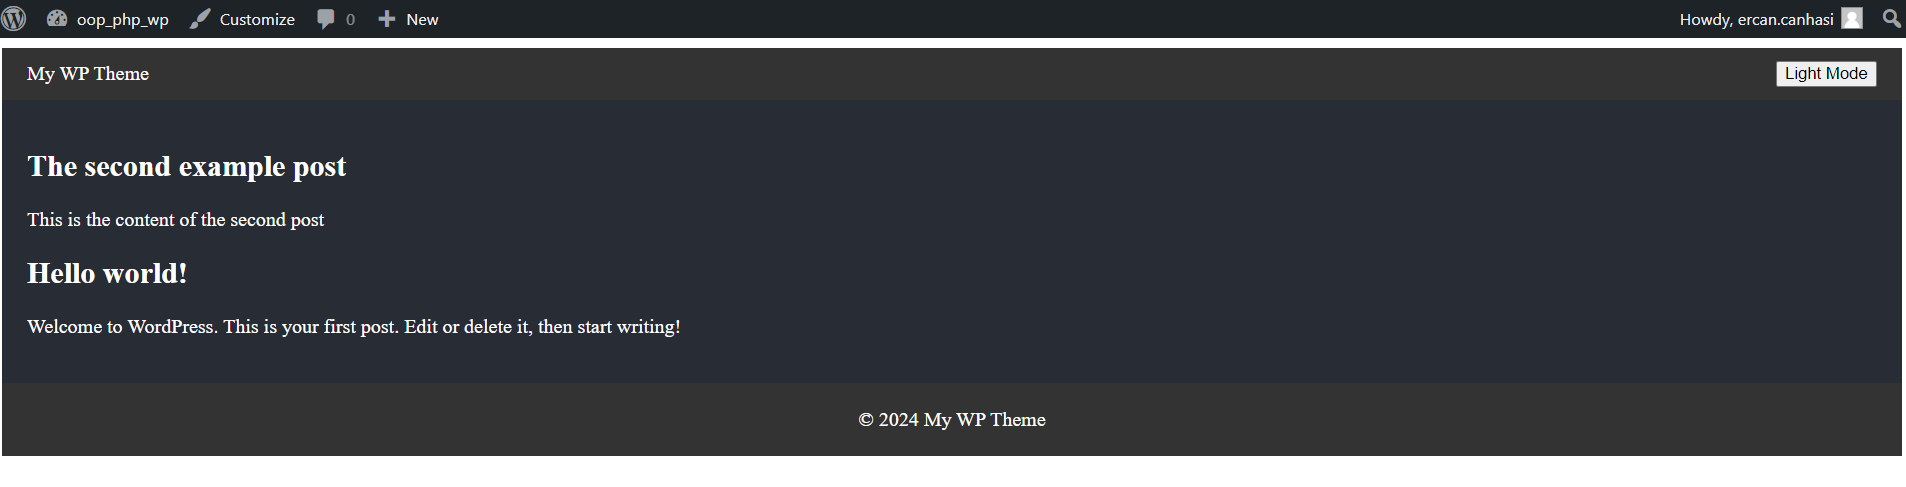
}You can now check the latest and final version of your theme. In addition to the header and footer, it consists of a dynamic content area that presents the posts.
Use the React WordPress theme in a WordPress project
Integrating a React-based theme into a WordPress project begins with transforming React code into a WordPress-compatible format, leveraging packages like @wordpress/scripts. This tool simplifies the build process, letting you compile React applications into static assets that WordPress can enqueue.
Building the theme is straightforward with the npm commands provided by @wordpress/scripts. Running npm run build in the theme directory compiles the React code into static JavaScript and CSS files.
You then place these compiled assets in the appropriate directory within the theme, ensuring WordPress can correctly load and render the React components as part of the theme. Once integrated, you can activate the React WordPress theme like any other, instantly bringing a modern, app-like user experience to the WordPress site.
Summary
By building and integrating a theme into WordPress using React’s powerful UI capabilities, you can unlock the potential for creating flexible, highly interactive, and user-centric web experiences.
If you’re ready to take your React WordPress themes live, Kinsta offers a managed WordPress Hosting service with a secure infrastructure, edge caching, and other features that boost your site’s speed and performance.
Are you considering building a WordPress theme with React? Please share some tips on why you think it’s best and how to go about it.