
With code reuse comes the problem of dependency management, historically a rather manual and error-prone process. Fortunately, recent years have seen most programming languages solve this problem by introducing various tools for dependency management. In the PHP ecosystem, Composer become the standard thanks to its ease of use, flexibility, and wide adoption.
Even though Composer was built for dependency management, you can also use it for tasks like:
- Autoloading: Automatically load classes and functions from external libraries to make them readily accessible from your code and simplify the process of integrating external code into your project.
- Code generation: Generate boilerplate code for your project, such as configuration files or other commonly used code snippets to speed up the development process and ensure consistency.
- Scripting: A built-in scripting system can automate common tasks, such as running tests or generating documentation from your code base. This can help streamline your development workflow and reduce manual work.
This step-by-step tutorial guides you through creating your own Composer package and publishing it to Packagist, a repository for PHP packages that developers across the globe can use in their own projects.
How does Composer work?
First, let’s make sure we understand Composer. In simple terms, Composer works by using a composer.json file that contains the definitions for the dependencies in your PHP project. It looks up those packages from a centralized repository and then automatically downloads and installs those dependencies using the package repo.
Assuming you already have Composer installed in your PHP working environment, here’s what its dependency download and installation process looks like:
- Define the required dependencies for your project in a composer.json file in your project’s root directory. This file includes information about required libraries and their versions and any other configuration settings or dependencies for those libraries.
- Resolve dependencies in Composer with commands like
installto install the required dependencies;updateto update existing dependencies; andrequireto add new dependencies to the composer.json file. When you run a command, Composer reads the composer.json file to determine required dependencies, checks the package repo for the latest version of each dependency appropriate for your PHP environment, and then checks for any conflicts or version constraints. - Composer downloads and installs required dependencies, including libraries, into the vendor directory of your project. Composer creates a composer.lock file recording the exact versions of the dependencies installed.
- Composer sets up an autoloader that loads classes and functions from the installed dependencies automatically. This makes it easy to use the installed libraries in your project without having to manually include each file.
Long story short, Composer simplifies managing dependencies in PHP projects, making it easy to install, update, and use external libraries and frameworks.
Creating and publishing a Composer package
This tutorial shows you how to create a simple PHP library called tempconv that converts Celsius temperature to Fahrenheit and vice versa and wraps up by publishing it as Composer package.
Prerequisites
You’ll need a couple of things in place before you begin:
- PHP and Composer installed properly on your system At the time of writing, the latest Composer version is v2.6.6, but these instructions should work with any v2 variant.
- A GitHub account to create a repository for hosting your code.
- A Packagist account to publish your library.
Create a project repository
Create your own GitHub repository for this tutorial, where you can push your finished library code and files.
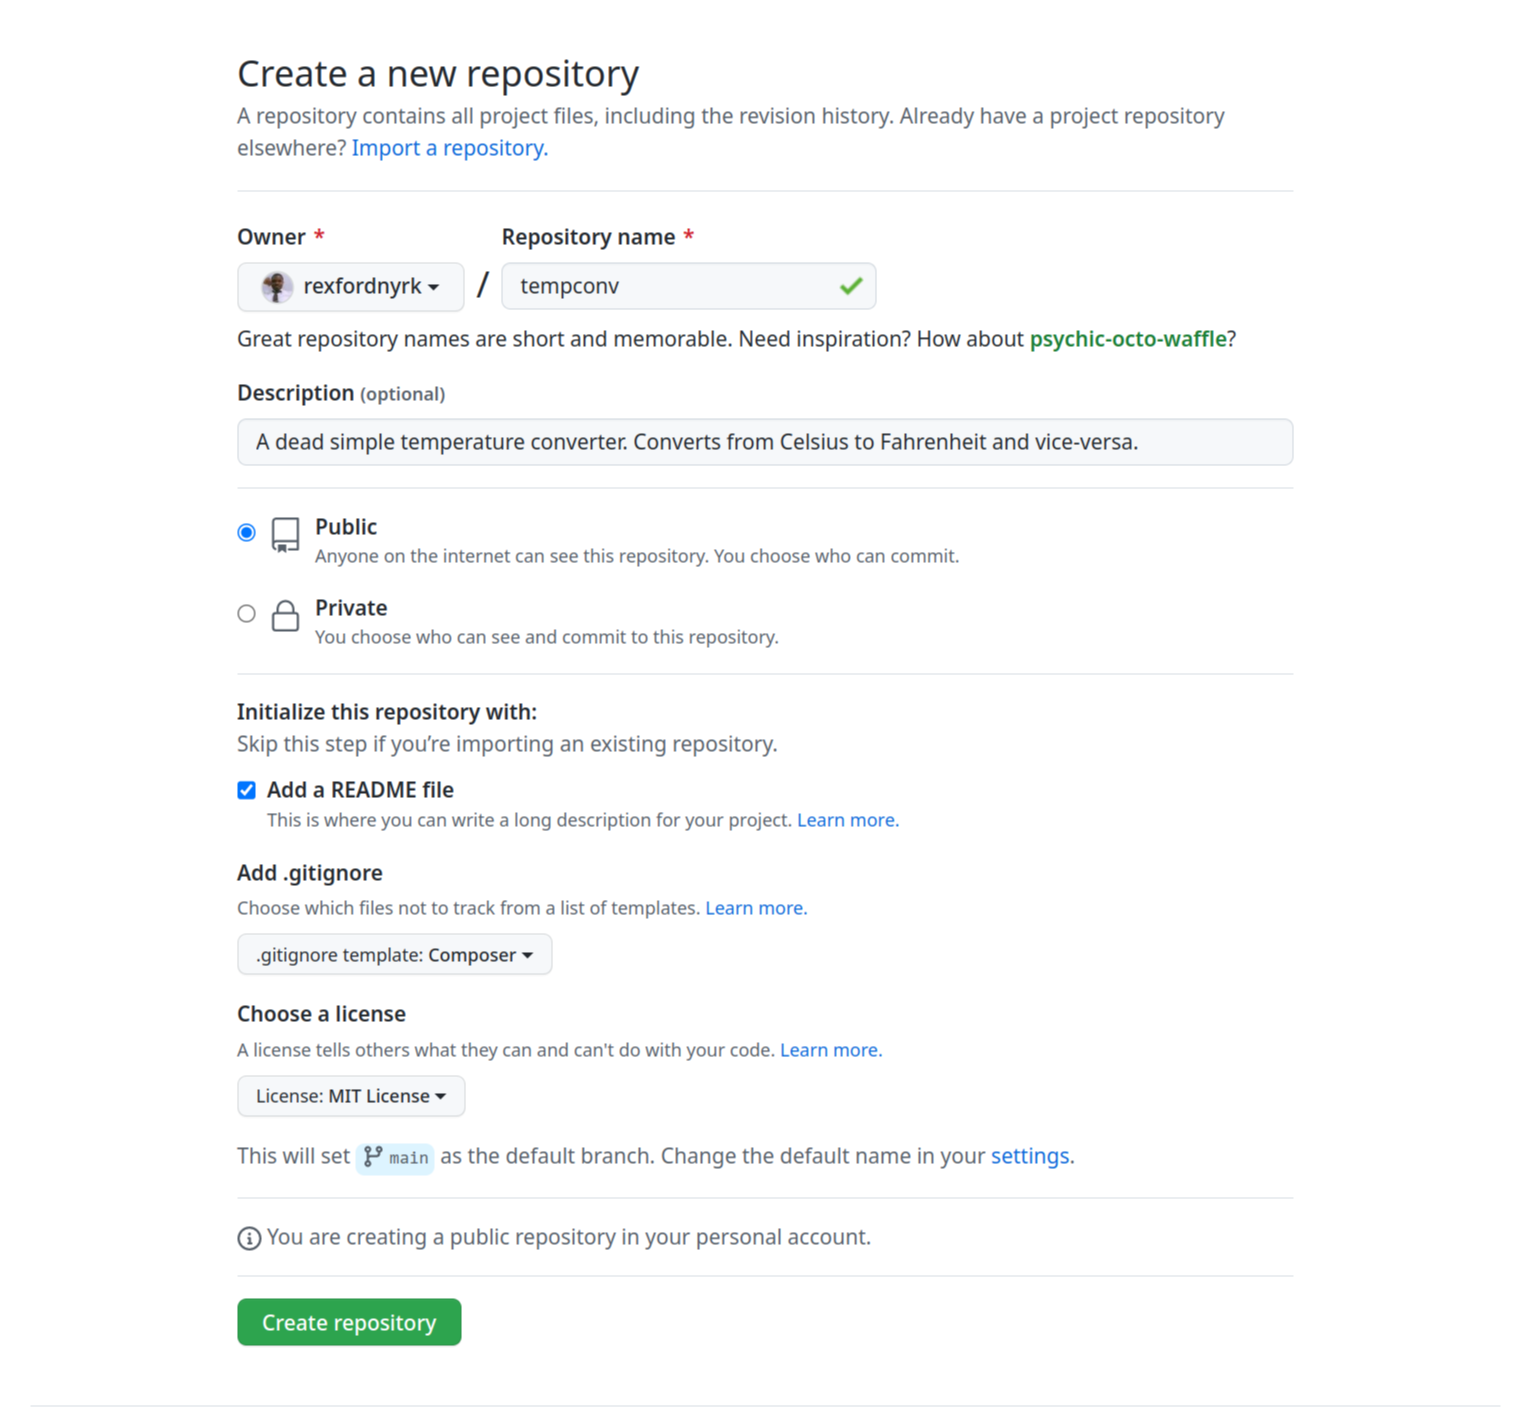
This tutorial uses the project name tempconv. In the Description field, provide brief details about the application. Check the box to add a README file, choose the Composer template for the Add .gitignore option, and select a license of your choice—this tutorial uses MIT License. Finally, click Create repository.
Clone the repository
Clone the repository you just created to your local machine. Don’t forget to replace the URL with your own, both here and throughout this tutorial:
$ git clone https://github.com/rexfordnyrk/tempconv.gitThis creates a directory called tempconv in your current working directory. At this point, it only contains README.md, LICENSE, and .gitignore files, but you’ll create your package files here as well.
Creating your PHP library
In your project directory, add a file named TemperatureConverter.php with the following code:
<?php

namespace Rexfordnyrk\Tempconv;

class TemperatureConverter
{
    //Caller must provide the temperature value and the unit either C Celsius or F Fahrenheit
    public function convert($temperature, $unit)
    {
        //Checking whether the unit we're working with is Celsius or Fahrenheit
        if ($unit === 'C') {
            $fahrenheit = ($temperature * 9 / 5) + 32;
            return $fahrenheit;
        } elseif ($unit === 'F') {
            $celsius = ($temperature - 32) * 5 / 9;
            return $celsius;
        } else {
            //Throwing error if the unit provided is neither C nor F
            throw new \InvalidArgumentException('Invalid unit, only C (Celsius) or F (Fahrenheit) are allowed');
        }
    }
}
This class has a single method called convert that takes the temperature and the unit as arguments and returns the converted temperature. It throws an exception if the unit is invalid.
That’s enough for now. In a real-world scenario, you would likely write unit tests to ensure your code works as expected after modifications or updates.
Creating your composer package.
With your library code in place, it’s time to make it a Composer package. You’ll generate a composer.json file for your package using a step-by-step wizard, and we’ll cover some best practices for organizing your code as a package before pushing it to your repository.
Generating a composer.json package file
While you could manually write the content of a composer.json file in the root of your project directory, it’s better to generate it using the following Composer command:
$ composer initThis command runs you through a small step-by-step wizard. The answers you provide to prompts like the package name, description, author information, and license type will generate your package’s composer.json file.
Composer’s documentation outlines the expected values, as well as other options you can use to define your project’s composer.json.
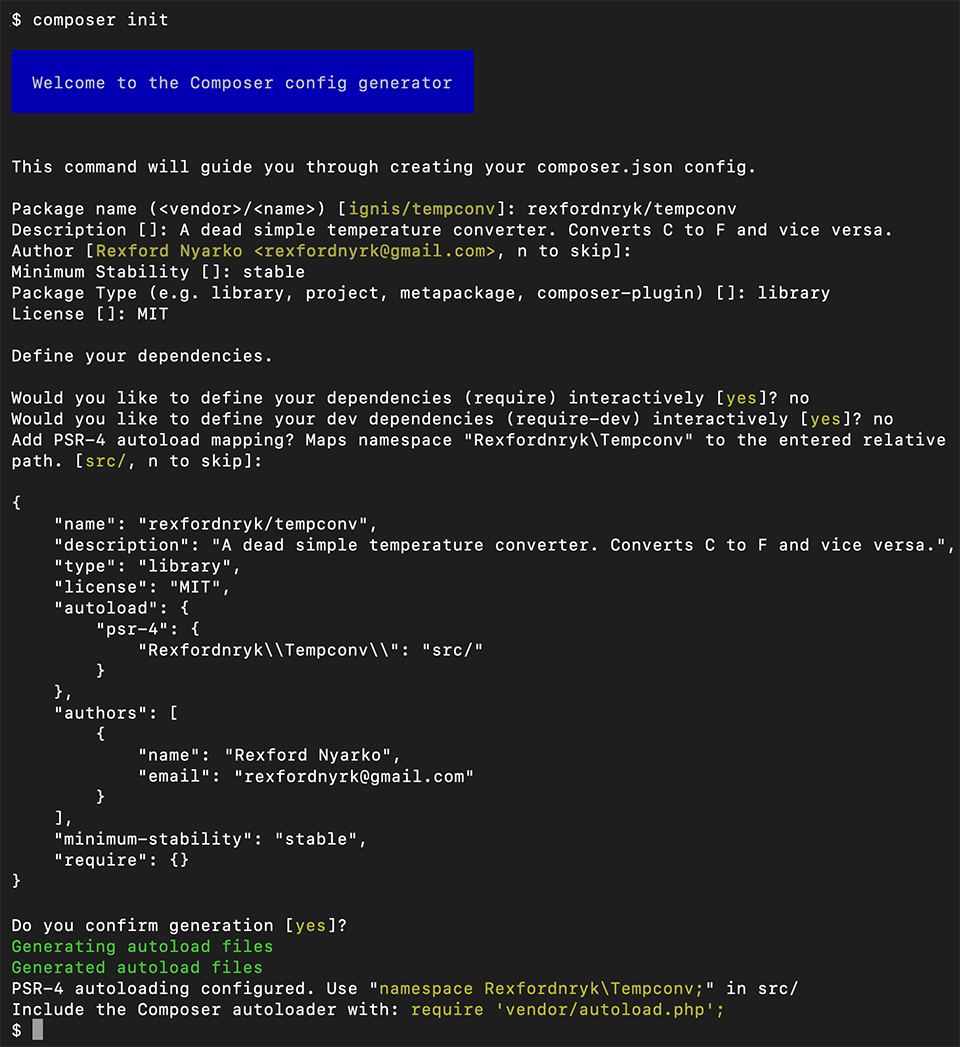
Notice that the wizard provides predefined answers to the questions where applicable, such as deriving your name and email from git. Feel free to change them if you like.
This library isn’t dependent on any other packages for functionality, so you can answer No to questions specifying dependencies.
The wizard shows you a preview of the generated file content and asks you to confirm it to complete the wizard.
Organizing package files
Completing the wizard creates two directories in addition to the composer.json file:
- src for your source code
- vendor for your downloaded dependencies
Move the TemperatureConverter.php file into the src directory. If your library has dependencies, run composer install to generate the autoloader and install the package dependencies.
Uploading code to GitHub
Add your changes and new files to git:
$ git add -ACommit changes made to the local repository and push it to the remote repo on GitHub so you can easily publish the project in the next section:
$ git commit -am "Initial Release" && git pushCreate a release version for your library
With your code in your repo, you can create a release of your library with a version number so other developers can keep track of your stable and significant updates.
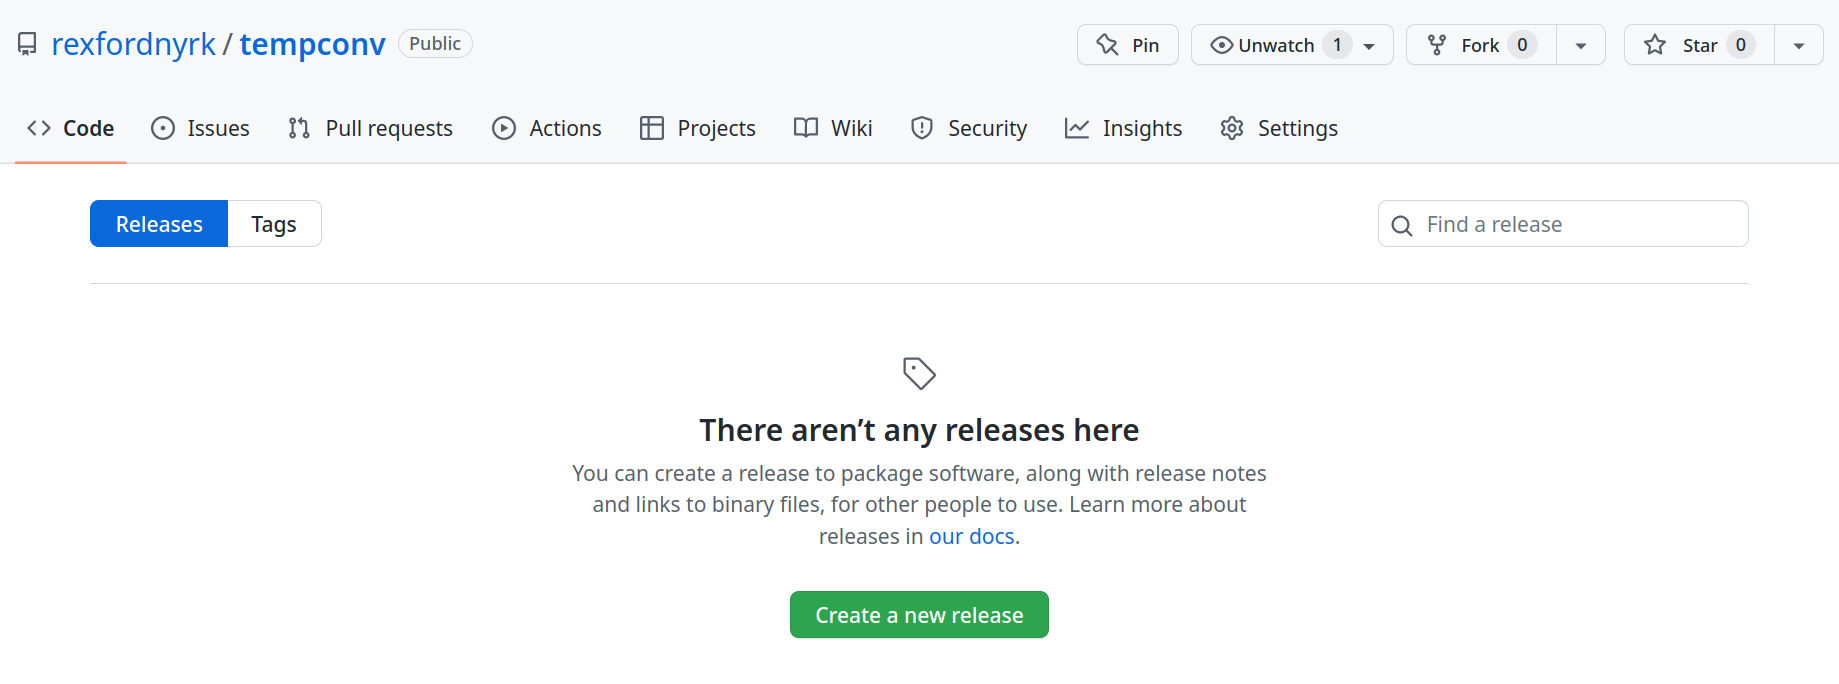
Navigate to your repo on GitHub, and click Releases beneath the About section. On the Releases page, where you’re expected to have nothing right now, click Create a new release.
Fill out a few details about your release, like the tag version and release title. The tag version should be a unique identifier for this release (example: v1.0.0), and the release title should describe the changes included in the release (example: Initial release).
Optionally, you can add a description of the release. If you want to upload a file, such as a compiled binary or a source code archive, drag and drop the file into the Attach binaries by dropping them here or selecting them area, but that’s not needed for this tutorial.
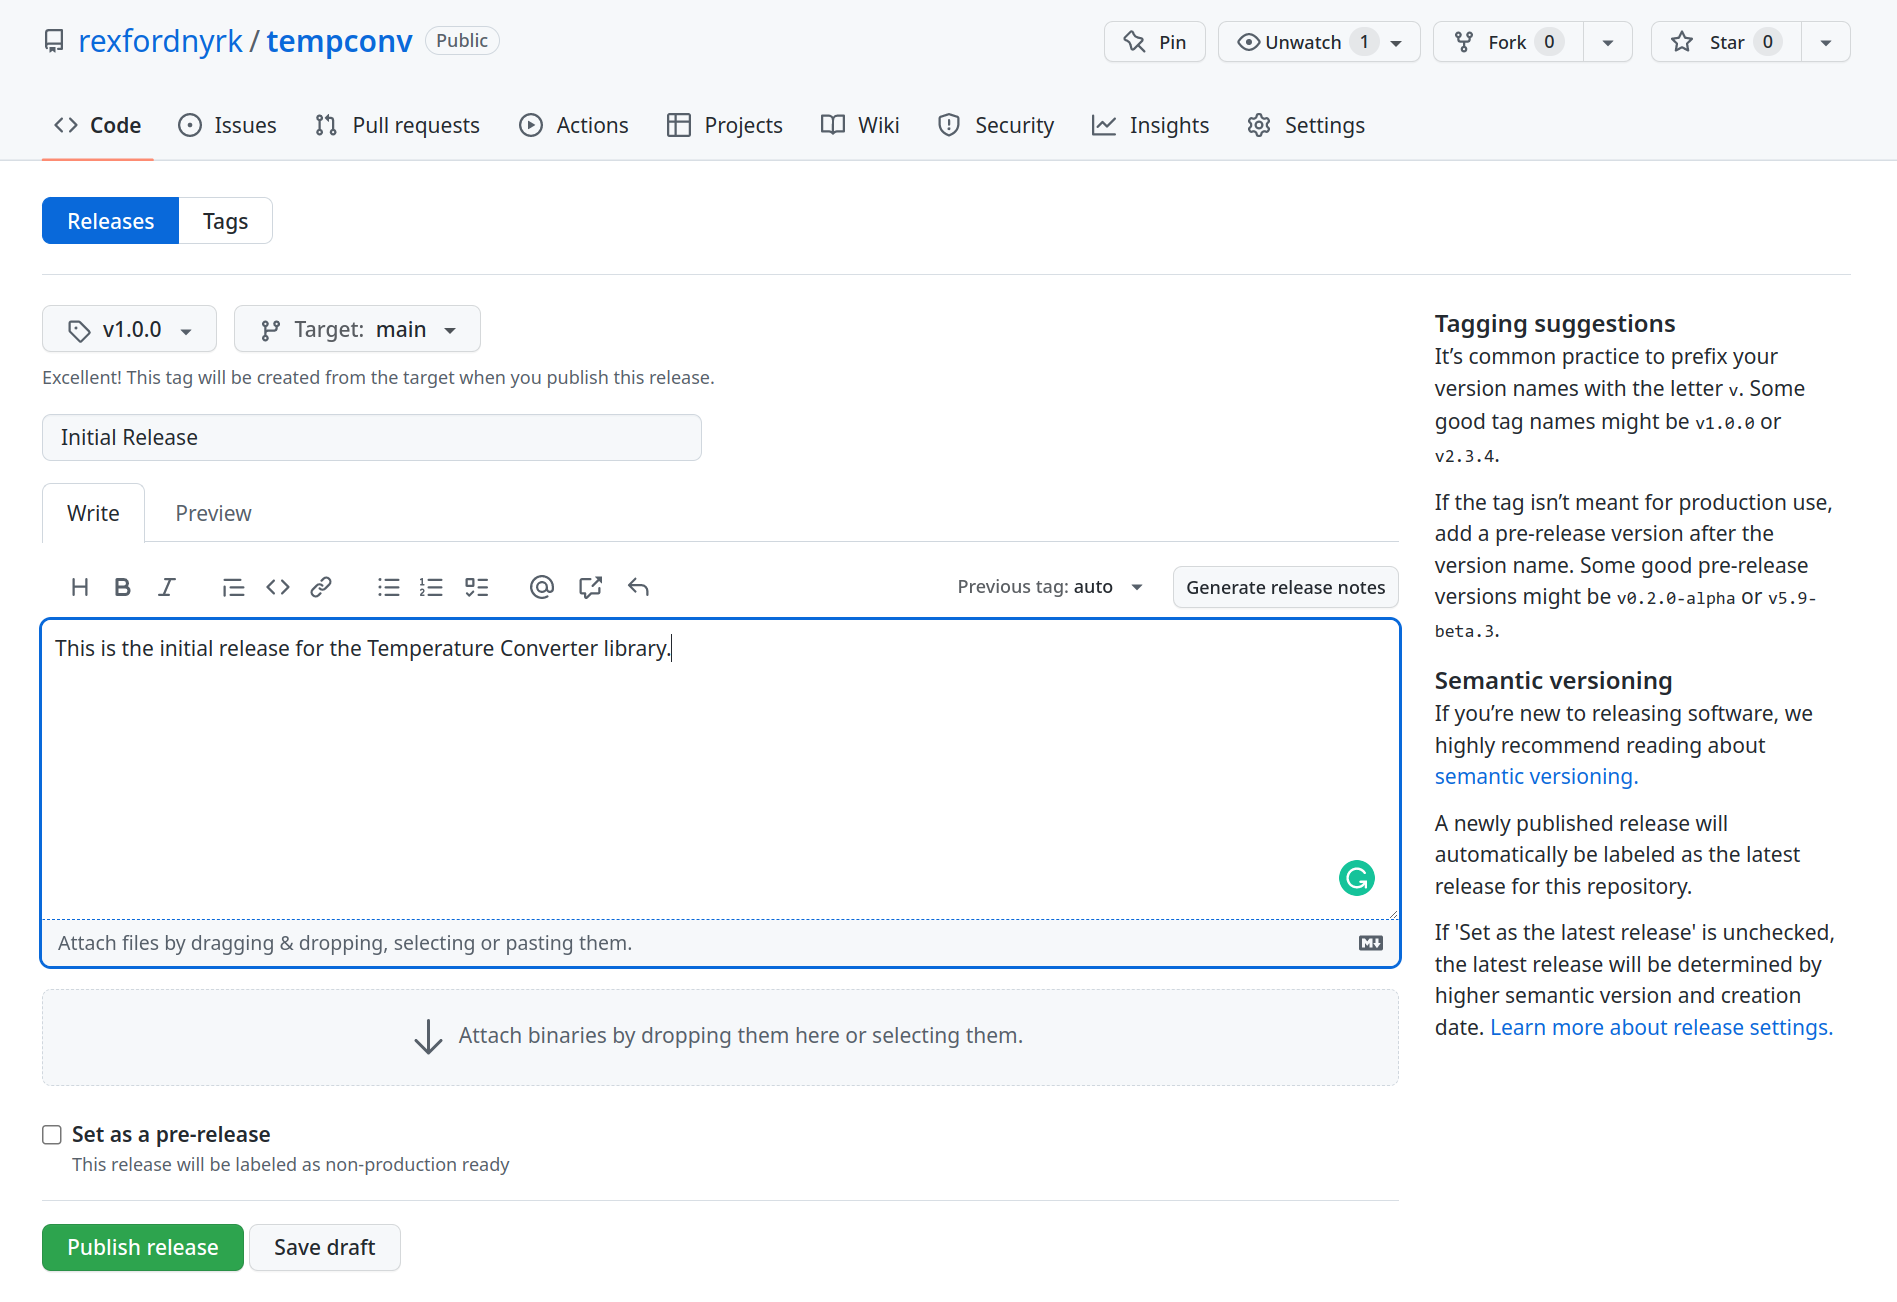
Click Publish release to create the release.
Your project should now be available on the Releases page of your repository. Users can download any files you attached and view the release notes. Additionally, if you added a tag for the release, other developers can use that tag to check out the exact code that was included in the release.
Your library is ready to share with the world. Let’s publish it as a package on Packagist.
Getting started with Packagist
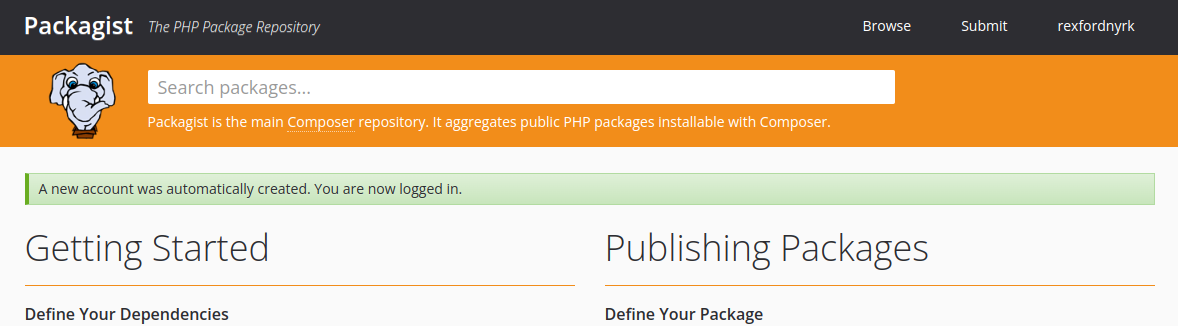
Packagist is the main package repository for PHP. It provides a central location for developers to publish and share their PHP packages, and for other developers to discover and use those packages in their own projects. Let’s get your package published!
Navigate to the Packagist website, click Login, and select GitHub as the login method to use your GitHub account for authentication.
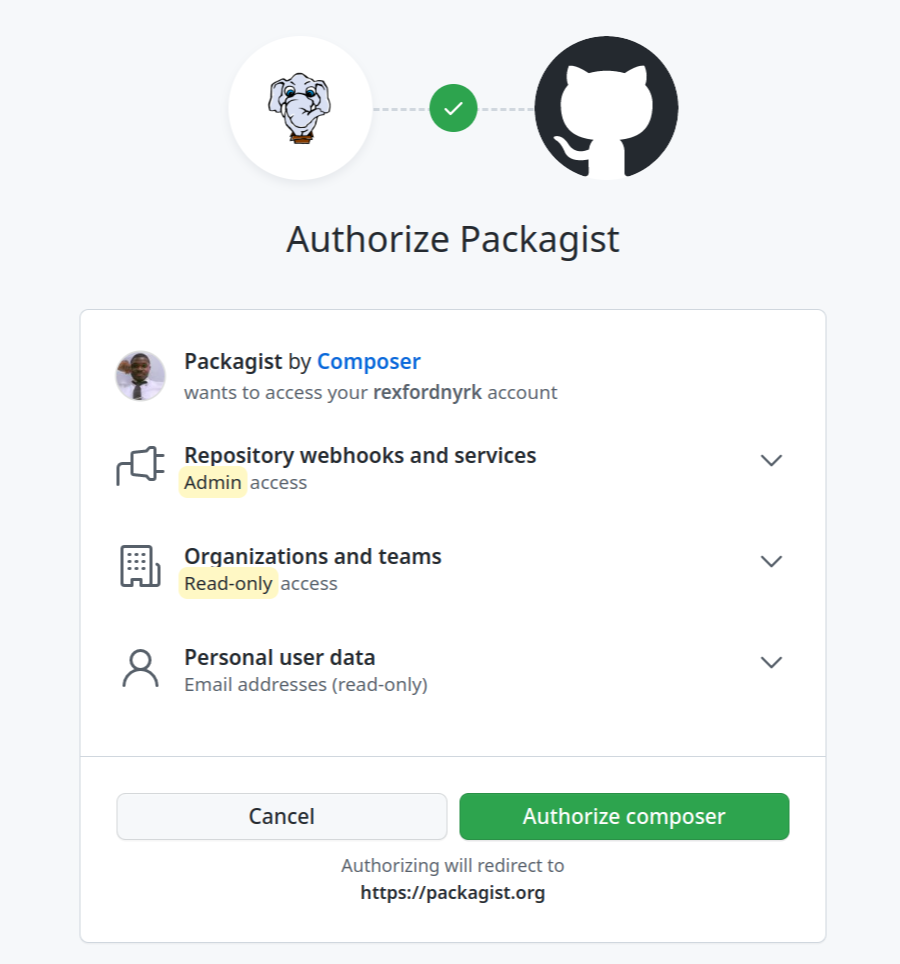
Click Authorize to grant Packagist permission to access your account.
Submitting your Composer package on Packagist
To publish a package on Packagist, submit the GitHub repository containing the composer.json file that describes your package and its dependencies. Click Submit on Packagist’s site, provide your repo’s URL on the page that appears, and click Check to validate it.
If the repository is valid, Packagist detects the name of the package, and the Check button becomes Submit.
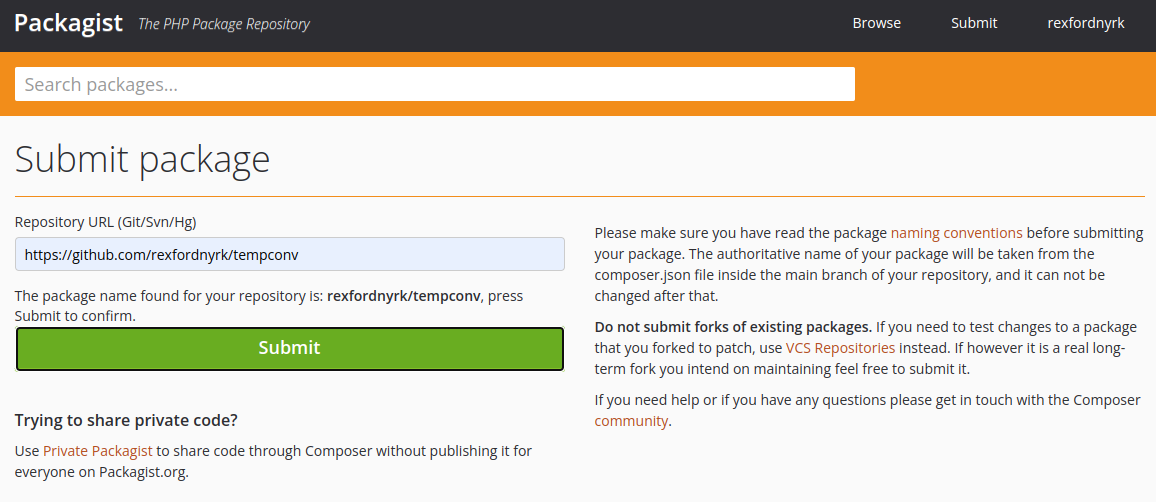
Click Submit, and Packagist takes a moment to set up and publish your project.
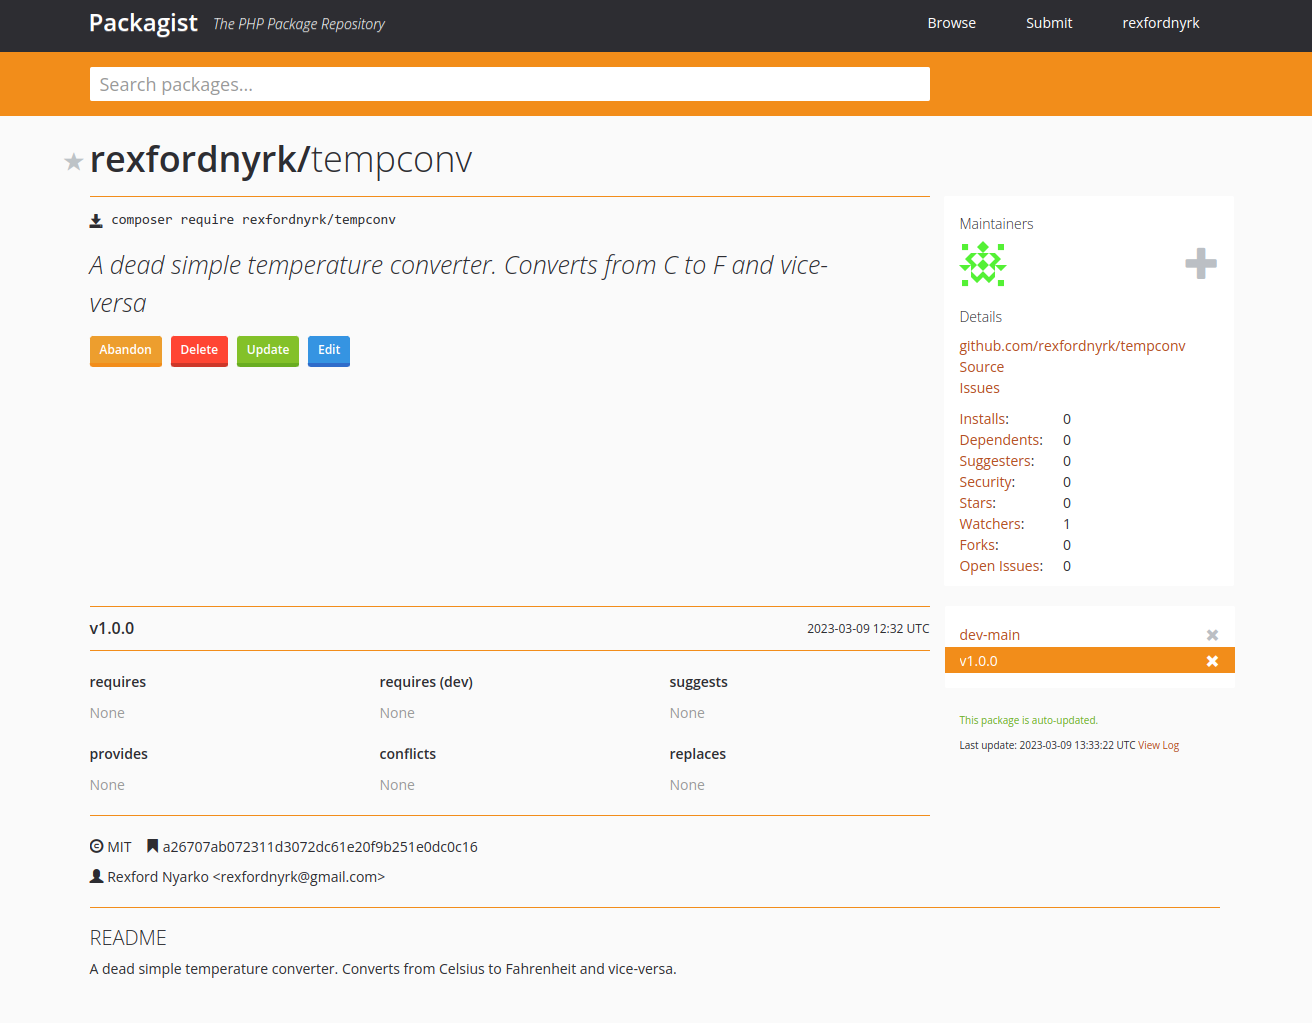
That’s it! Your package is now available on Packagist for other developers to use as a dependency in their own projects.
Using your Composer package in other projects
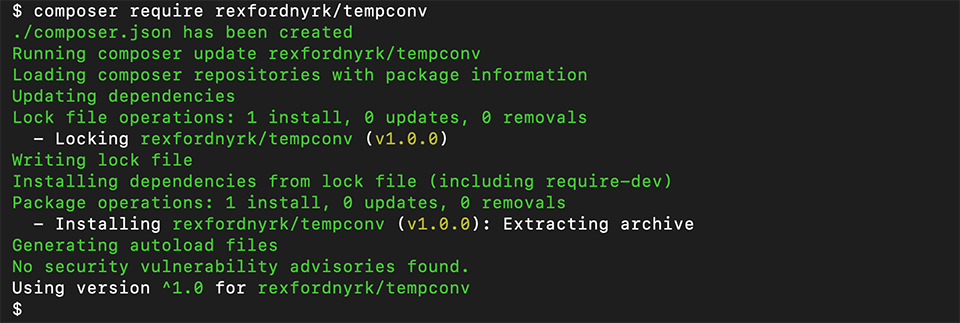
You can use your published package in other projects by adding it as a dependency in the composer.json file. You can manually create and edit the file, but it’s better to use the Composer command as follows:
$ composer require rexfordnyrk/tempconvComposer creates the composer.json file automatically if it doesn’t already exist, then it finds, downloads, and autoloads the package from Packagist. The output should look something like this:
Create a demo.php file to contain your demo application code to work with your library.
You can then use the TemperatureConverter class in your application code like this:
<?php
use Rexfordnyrk\Tempconv\TemperatureConverter;

require_once './vendor/autoload.php';

$converter =  new TemperatureConverter();

$fahrenheit = $converter->convert(20, 'C');
echo "20°C is equivalent to $fahrenheit °F\n";

$celsius = $converter->convert(68, 'F');
echo "68°F is equivalent to $celsius °C\n";
This code uses the TemperatureConverter class to convert temperatures 20 Celsius and 68 Fahrenheit and output the results. The imported autoloader.php file was created by Composer to load all the dependencies you require. That takes care of loading the class automatically when necessary.
Finally, run this code in your terminal:
$ php demo.phpYou should have an output similar to this:
$ php demo.php
20°C is equivalent to 68 °F
68°F is equivalent to 20 °C
Summary
You’ve just created a simple PHP library that converts temperature from Celsius to Fahrenheit and vice versa in an object-oriented class that can be reused in other applications.
You saw how to use Composer to create a package from the class with the Composer Init command, and you learned some basic code organization best practices for your library. You published your library on Packagist, so you and other developers could use it as a dependency in other projects.

Rexford Nyarko is a solution architect with a background in software and network systems, cloud environments, server administration, and various database technologies. Rexford particularly enjoys explaining technical concepts to non-technical audiences.

