
Docker is a popular open-source platform for developing, shipping, and running applications. It encapsulates applications and their dependencies in containers to promote consistency across different environments. This consistency helps prevent issues related to dependency conflicts and “it works on my machine” discrepancies.
With Docker, you can define the necessary dependencies and extensions using Dockerfiles. This means your applications have all the required libraries and tools in a reproducible, isolated environment.
Kinsta Application Hosting offers dynamic support for custom Dockerfiles, which allows you to have greater control of your application’s environment. With a Dockerfile, you can use almost any language—you’re not restricted to the languages supported by Nixpacks or Buildpacks.
This hands-on article walks you through how to install and use PHP dependencies and extensions in Docker.
Why use Docker for installing dependencies?
Using Docker to install dependencies has several benefits:
- Environment consistency — Docker allows you to package your application, its dependencies, and its configurations into a container. This approach ensures that the environment in which your application runs remains consistent across different configurations and systems, including development, testing, and production environments.
- Ease of setup and dependency resolution — Docker lets you set up your app’s environment on any machine that supports it by specifying all its required dependencies and configurations. As a result, you avoid compatibility issues and the hassle of manually installing dependencies.
- Version control and isolation — Docker containers encapsulate all dependencies, including their specific versions within the container. This means you can version control your application and its dependencies, promoting reproducibility and eliminating conflicts between different dependency versions.
Additionally, Docker containers provide isolation, which helps eliminate conflicts between dependencies of different applications running on the same system.
Set up your application on Kinsta
Setting up your application on Kinsta is straightforward. Visit MyKinsta and follow the sign-up process. Once registered, you can access a powerful hosting dashboard and a suite of features designed to optimize performance and security.
Kinsta’s Application Hosting supports a range of programming languages, including PHP, Python, Node.js, and Ruby. This extensive language support ensures compatibility with diverse applications, empowering you to choose the language that best suits your project requirements.
For instance, if you’re developing a dynamic web application with PHP, Kinsta’s optimized hosting environment ensures high performance and reliability for your PHP-based projects. Or, if you’re building a RESTful API with Node.js or a data-driven web application with Python, Kinsta provides the infrastructure and support necessary for your application.
To experience how to deploy an application using a Dockerfile on Kinsta, use this application, a basic PHP-based authentication system that uses MariaDB to store data. This application also leverages a few composer packages, including respect/validation for input validation and ircmaxell/password-compat for password hashing.
Prepare your Docker environment
A Dockerfile is a text file containing all the commands, arranged in the necessary order, that you need to build the required image. A basic Dockerfile for a PHP application would look like this:
FROM php:8.3-cli
COPY . /usr/src/myapp
WORKDIR /usr/src/myapp
CMD [ "php", "./your-script.php" ]
This Dockerfile creates a container environment for running a PHP script from a command-line interface (CLI). It starts by using the official PHP image with the CLI variant, ensuring that only the PHP runtime is included in the container.
It then copies the contents of the local directory — which contains the Dockerfile — into the /usr/src/myapp directory within the container. After setting the working directory to /usr/src/myapp, it specifies the PHP script to execute, your-script.php, using the php command.
The image contains many pre-compiled PHP extensions. So, start by checking if the extension you need is installed by running the php -m command.
If your required extension isn’t available in the base image, Docker provides the following helper scripts to help you install additional extensions more easily:
docker-php-ext-configuredocker-php-ext-installdocker-php-ext-enable
For example, the demo application for this tutorial uses the MySQLi extension to interact with the MariaDB database. This extension isn’t compiled into the image by default, so install it using the following command in your Dockerfile:
RUN docker-php-ext-install mysqliTo write a Dockerfile for the demo application, create a new file named Dockerfile in the project root folder. Paste the following code in the file:
FROM php:8.3-apache

# Install MySQL client, server, and other dependencies
RUN apt-get update && \
	apt-get install -y \
	default-mysql-client \
	default-mysql-server \
	git \
	&& apt-get clean \
	&& rm -rf /var/lib/apt/lists/*

# Install mysqli PHP extension for MySQL support
RUN docker-php-ext-install mysqli
This code specifies the official PHP image — specifically version 8.3 — with Apache installed as the base image for the container. This image provides a preconfigured environment for running PHP applications with Apache as the web server.
It then installs the additional dependencies the demo application requires, including default-mysql-client and default-mysql-server, which create and interact with the MariaDB database.
Finally, the snippet above installs the mysqli PHP extension using docker-php-ext-install, which allows the demo application to establish a connection and perform operations on the MariaDB database.
Manage dependencies with Docker
Managing PHP dependencies with Docker involves using Composer, a popular dependency manager for PHP. By installing Composer in a Docker container, you can streamline the process of installing, updating, and managing PHP dependencies — all while facilitating consistency and reproducibility across different environments.
Follow the steps below to use Composer for dependency management within the demo application. Add the code in each of the steps to your Dockerfile.
- Install Composer in the Docker image using the command below:
# Install Composer
COPY --from=composer/composer:latest-bin /composer /usr/bin/composer
This command copies a pre-built Composer binary file from the Docker Hub repository into your image.
--from=composer/composer:latest-binspecifies the source image from which to copy files.The
/composerpath in the source image contains the files to copy, while your Docker image’s/usr/bin/composerpath is the destination for these files. - Next, set the working directory by running the following:
# Set working directory WORKDIR /var/www/html - Copy the composer.json and composer.lock files to the image.
# Copy composer.json and composer.lock COPY composer.json composer.lock ./ - Install the Composer dependencies listed in composer.json.
# Install Composer dependencies RUN composer install --no-dev --optimize-autoloader--no-devinstructs Composer to skip the development-specific dependencies.--optimize-autoloaderinstructs Composer to optimize the autoloader for better performance.
You can update and manage dependencies over time by modifying the composer.json file as needed, adding new dependencies, updating version constraints, and removing dependencies that are no longer required.
After making the necessary changes, you run composer install or composer update within the Docker container to install or update dependencies accordingly.
Apply final configurations
Before the application works with Docker, you must create the database and database user, set environment variables, and copy the project files into the Docker image.
To do this, follow the steps below and copy each code snippet to your Dockerfile.
- Set the environment variables the PHP application will use to connect to the MariaDB database. You can replace the
DB_USER,DB_PASSWORD, andDB_NAMEwith your preferred credentials.# Set environment variables ENV DB_HOST=localhost \ DB_USER=kinsta_user \ DB_PASSWORD=your_password_here \ DB_NAME=kinsta_docker_auth \ # Path to the Unix socket file used for connecting to the MariaDB server. DB_SOCKET=/var/run/mysqld/mysqld.sock - Copy the PHP application files to the Docker image:
# Copy PHP application files into the image COPY . . - Copy the startup script into the image:
# Copy the startup script
COPY scripts/start.sh /usr/local/bin/start.sh
This script runs when the container starts and is responsible for starting the database server, creating a database, table, and user, and starting the Apache server. You’ll create this script later.
- Make the script executable using the
chmodcommand:# Make the script executable RUN chmod +x /usr/local/bin/start.sh - Finally, execute the script using the command below:
# Execute the startup script
CMD ["/usr/local/bin/start.sh"]
Now that the Dockerfile is complete, you create the startup script discussed earlier.
Create a new file named scripts/start.sh in the project root folder and add the following code. Ensure you use the database credentials that you defined in the Dockerfile.
#!/bin/bash

# Start MariaDB server
service mariadb start

# Wait for MariaDB to be fully initialized (retry up to 30 times, waiting 1  second between each attempt)
attempt=0
while [ $attempt -lt 30 ]; do
		if mysqladmin ping &>/dev/null; then
    		echo "MariaDB is up and running."
    		break
		else
    		echo "MariaDB is not yet available. Retrying..."
    		attempt=$((attempt+1))
    		sleep 1
		Fi
done

# If MariaDB failed to start within the specified attempts, exit with an error
if [ $attempt -eq 30 ]; then
		echo "Error: MariaDB failed to start within the specified time."
		exit 1
fi

# Set the database name, username, and password
dbname="kinsta_docker_auth"
dbuser="kinsta_user"
dbpassword="your_password_here"

# Create the database if it does not exist
mysql -u root -e "CREATE DATABASE IF NOT EXISTS $dbname;"

# Create a database user and assign privileges to the database
mysql -u root -e "CREATE USER '$dbuser'@'localhost' IDENTIFIED BY '$dbpassword';"
mysql -u root -e "GRANT ALL PRIVILEGES ON $dbname.* TO '$dbuser'@'localhost';"
mysql -u root -e "FLUSH PRIVILEGES;"

# Create users table if it does not exist
mysql -u root -e "USE $dbname; CREATE TABLE IF NOT EXISTS users (
		id INT AUTO_INCREMENT PRIMARY KEY,
		username VARCHAR(20) UNIQUE NOT NULL,
		password_hash VARCHAR(255) NOT NULL
);"

# Start Apache server
apache2ctl -D FOREGROUND
This Bash script starts the MariaDB server. Then, when the server is fully initialized, it creates a database, a user with appropriate privileges, and a table within the database. Finally, it starts the Apache server.
Deploy on Kinsta
Before deploying your application to Kinsta, you must configure a few configurations for the Apache server. Kinsta’s Application Hosting service has ports 80 and 443 open, but we recommend using port 8080 if your application exposes any ports.
By default, the Apache server listens for connections on port 80, so you must configure it to listen to connections on port 8080. To do so, follow these steps:
- Create a folder named apache-conf in the project’s root folder.
- In the newly created folder, create a file named apache-config.conf. Add the code below to configure Apache to listen to connections on port 8080:
<VirtualHost *:8080> ServerAdmin webmaster@localhost DocumentRoot /var/www/html ErrorLog ${APACHE_LOG_DIR}/error.log CustomLog ${APACHE_LOG_DIR}/access.log combined </VirtualHost> - In the apache-conf folder, create a new file named apache-ports.conf and add the code below.
# Change the Listen directive to listen on port 8080
Listen 8080

# Keep the existing configuration for port 443
<IfModule ssl_module>
	Listen 443
</IfModule>

<IfModule mod_gnutls.c>
	Listen 443
</IfModule>
The
Listen 8080directive instructs Apache to listen for incoming connections on port 8080. - Now, you need to modify the Dockerfile to apply this configuration to the Apache server. In the Dockerfile, add these commands just after the command for setting the working directory (
WORKDIR /var/www/html). These are responsible for copying the custom configuration files into the appropriate directories.# Set up Apache virtual host COPY apache-conf/apache-config.conf /etc/apache2/sites-available/000-default.conf # Set up Apache ports COPY apache-conf/apache-ports.conf /etc/apache2/ports.conf - Finally, create a .dockerignore file in the project root folder. This file holds a list of folders and files that should not be copied into the Docker image. Add
vendorto exclude the vendor folder.
With all the configurations done, you can deploy to Kinsta. Upload your project files to your preferred Git provider (Bitbucket, GitHub, or GitLab), then follow the steps below.
- In your MyKinsta dashboard, select Applications on the sidebar and click the Add application button.
- On the Add application page, select your Git repository and branch, provide an application name, choose a data center location, and click Continue.
- On the Build environment page, select Use Dockerfile to set up container image. Provide “Dockerfile” as the Dockerfile path and a period (“.”) as the Context. Click Continue.
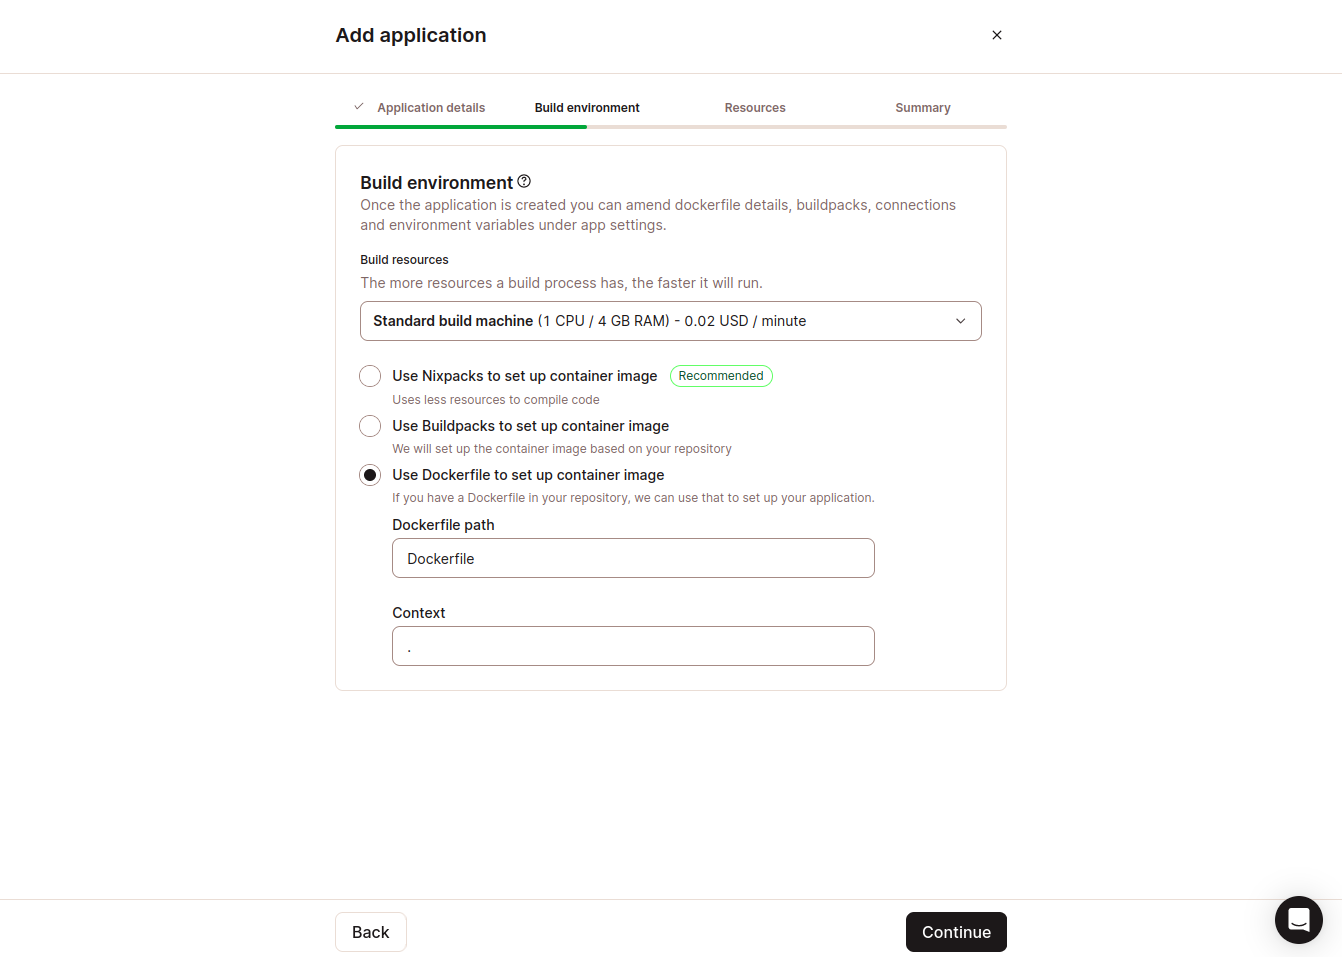
Build environment section of the Add application form. - Leave everything on the Set up your processes page and click Continue.Note: The database will lose data when you restart or redeploy the application. If you need to address this issue, check out Kinsta’s persistent storage and apply it on this page. This guide will not review setting up persistent storage.
- Confirm the payment details on the Summary page and click Deploy now.
- Once the deployment is complete, open your application’s domain to view the live site.
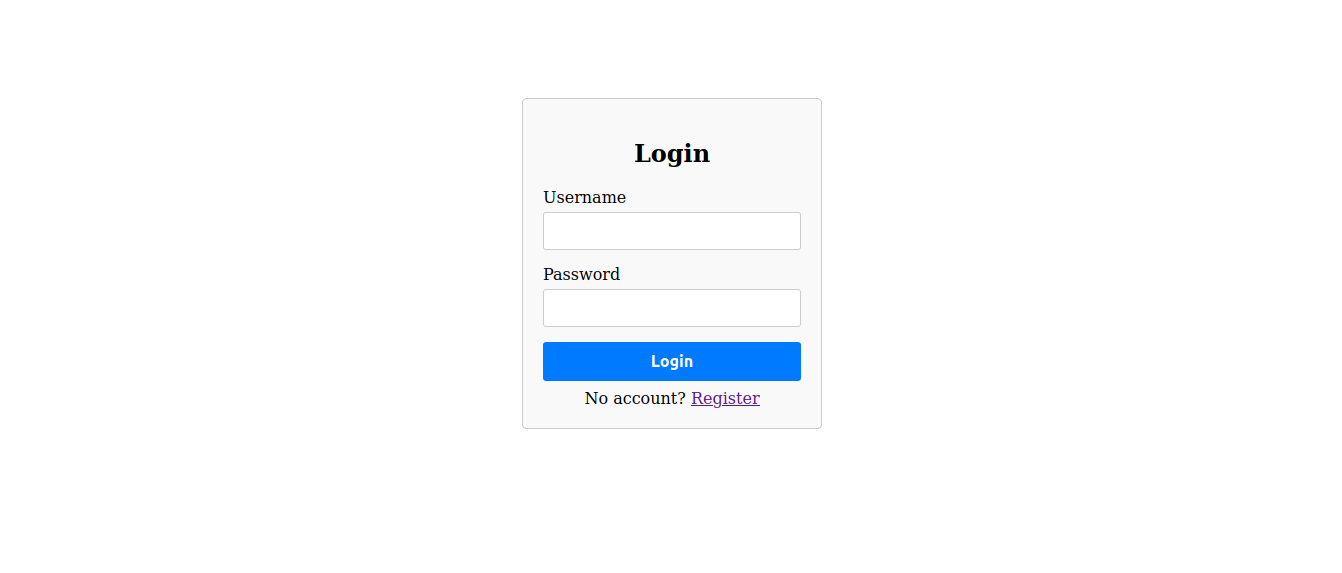
Login page on the live website. Register for an account, log in using your details, and check that you can access the protected page and that everything works as expected.

The application’s homepage once logged in.
Monitor and optimize your application
Once your application is up and running on Kinsta, monitoring and optimizing its performance is essential. It ensures your application can operate smoothly and use resources efficiently.
Optimizing your application’s performance is crucial for delivering a fast and responsive user experience.
Kinsta is always working on ways to optimize your application’s performance. We offer comprehensive monitoring tools to help you track various performance metrics, including bandwidth, total build time, CPU usage, memory consumption, network traffic, and response times. You can view all this information by navigating to your app’s Analytics section on the Kinsta dashboard.
If you encounter an issue or unexpected application behavior, you can navigate to your Logs section on the Kinsta dashboard. Its detailed overview of your application’s performance and behavior includes error and access logs.
By meticulously reviewing these logs, you can gain valuable insights into what might be causing the issue, such as error messages, stack traces, or patterns of abnormal behavior. This information can help you diagnose the root cause of the problem and take appropriate actions to resolve it.
Additionally, you can leverage performance optimization techniques within your Docker environment, such as optimizing Docker images and implementing best practices for application architecture and code optimization.
Summary
Docker’s lightweight and portable containers make it easy to package and deploy applications with all the required dependencies, regardless of the underlying infrastructure. By containerizing your application and its dependencies, you promote consistency across different environments, streamline setup processes, and gain better versioning control.
Leveraging Docker with Kinsta enhances your application’s deployment process. Its support for custom Dockerfiles and a wide range of programming languages, including PHP, ensures compatibility and flexibility for your projects.
With Application Hosting’s infrastructure and Docker’s containerization technology, you can achieve streamlined deployment, scalability, and reliability for your applications.
Have you used Docker for your project before? Do you have experience or insights on Docker? Share them in the comments below!


