Recently migrated your website from Bluehost to Kinsta and you need to point the traffic to your Kinsta hosted site? In this quick guide, we will show you how to do that in less than 3 minutes!
If you purchased your domain name through Bluehost, there are two ways to point your domain to Kinsta. The first option is to point your nameservers to Kinsta DNS, our premium DNS service. If you prefer to use Bluehost’s DNS service, the second option is to point an A record and CNAME record to Kinsta from Bluehost.
In this article, you’ll learn how to add an A record and CNAME record at Bluehost.
How to Point your Bluehost Nameservers to Kinsta
Here at Kinsta, all of our customers are able to take advantage of Kinsta DNS, our premium DNS service powered by Amazon Route 53. If you would like to use Kinsta DNS for your Bluehost domain, check out this guide on how to point Bluehost nameservers to Kinsta. Otherwise, if you prefer managing DNS at Bluehost, continue reading below.
How to Find Kinsta A Record IP (optional)
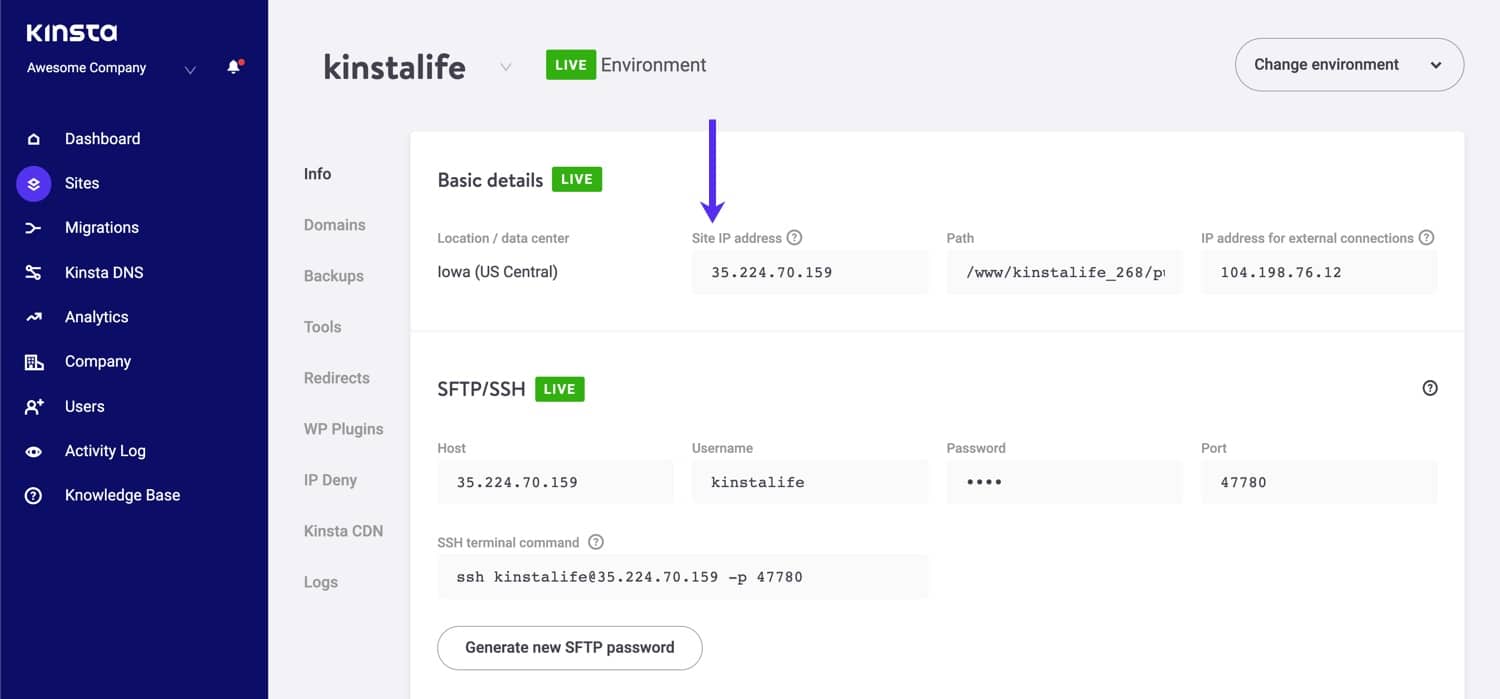
Before you can point your Bluehost A record to Kinsta, you’ll need to find the IP address of your Kinsta site first. If you are adding an A record for a non-Kinsta site or service and already have your IP address, feel free to skip to the next section.
To find the IP address of your Kinsta site, go to Sites > [your-site] > Info in MyKinsta, and look for “Site IP Address” under “Basic Details”. This is the IP address for your Bluehost A record.

How to Add an A Record at Bluehost
Let’s walk through how to add an A record at Bluehost.
Step 1: Go to the DNS Manager
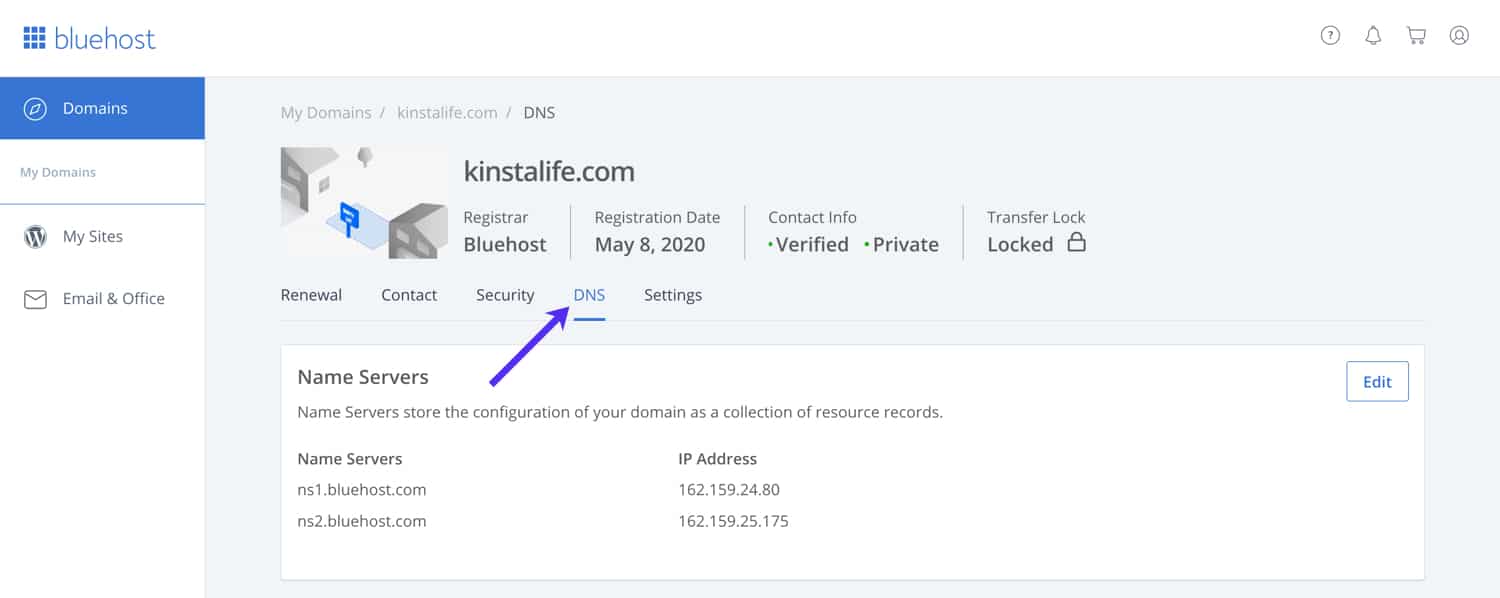
To get started go to the “Domains” page in your Bluehost dashboard, and click on the Manage button next to the domain you want to add an A record for.

Next click on the DNS tab to go to the DNS management interface.

Step 2: Add an A Record to Bluehost
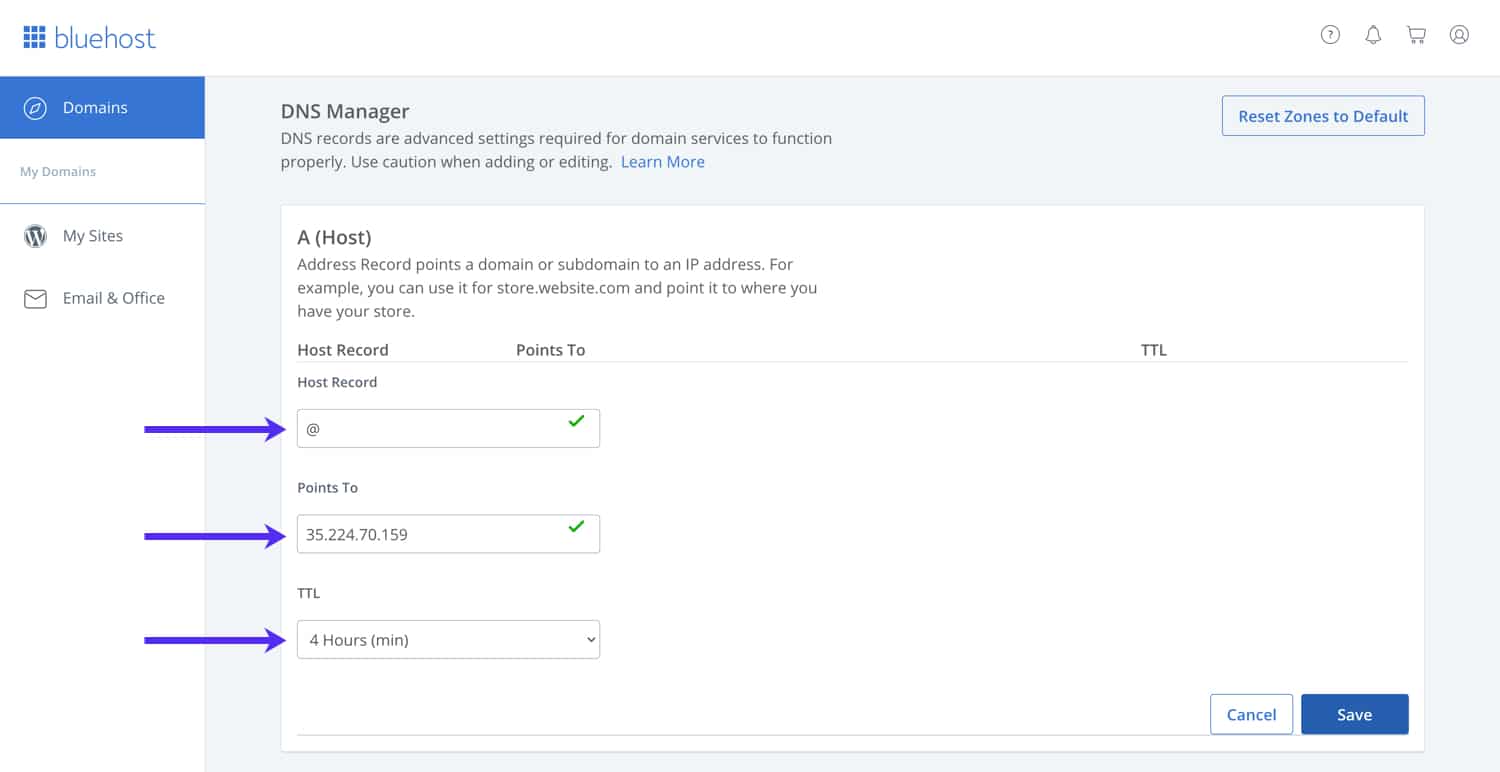
Next, you’ll need to configure the host record, destination (points to), and TTL for your Bluehost A record.
Host Record
If you are configuring an A record for your root domain (e.g. kinstalife.com), use “@” for the “Host Record” field in Bluehost’s DNS manager. If you are setting up an A record for a subdomain (e.g. awesome.kinstalife.com), use the subdomain for the host record.
Points To
In the “Points To” field, paste your Kinsta site IP address. If you’re not setting up an A record for your Kinsta site, use the IP address of your server instead.
TTL (Time to Live)
Leave the TTL setting at the default minimum duration of 4 hours.

Finally, click Save to finalize the configuration. After your Bluehost A record has been created, it may take up to 24-48 hours for it to propagate around the world.
How to Add a CNAME Record at Bluehost
Now that you’ve set up an A record for your root domain, it may be necessary to add a CNAME record as well.
For example, if you set up an A record for domain.com, you’ll want to set up a CNAME for www.domain.com if you want your site to respond to “www” requests.
Step 1: Go to the DNS Manager
Go to the “Domains” page in your Bluehost dashboard, and click on the Manage button next to the domain you want to add a CNAME record for.

Next click on the DNS tab to go to the DNS management interface.

Step 2: Add a CNAME Record to Bluehost
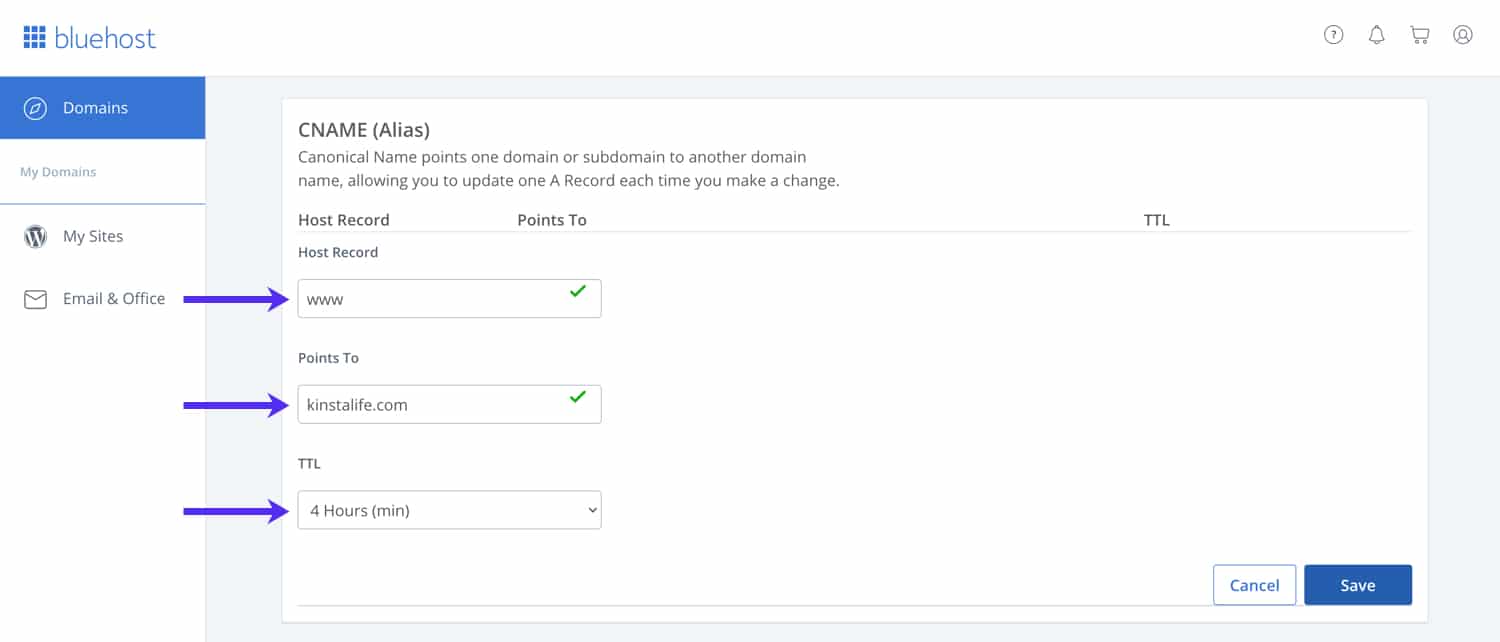
Next, you’ll need to configure the host record, destination (points to), and TTL for your Bluehost CNAME record. CNAMEs are useful for a variety of purposes such as aliasing www domains to non-www domains and domain verification for email authentication.
Host Record
In the “Host Record” field, specify the subdomain details for your CNAME. In the screenshot below, we are configuring a CNAME record for www.kinstalife.com, so we’ve set the host record to www.
Points To
In the “Points To” field, specify the destination domain for the CNAME. We set the destination to kinstalife.com. This means all requests to www.kinstalife.com will be aliased to kinstalife.com.
TTL (Time to Live)
Leave the TTL setting at the default minimum duration of 4 hours.

Finally, click Save to finalize the configuration. After your Bluehost CNAME record has been created, it may take up to 24-48 hours for it to propagate around the world.


