
Site navigation is key to helping your users get where they want to go. A well-designed menu can go a long way towards improving User Experience (UX), and even decreasing your bounce rate. However, a poorly-crafted one can do just the opposite.
Fortunately, WordPress enables you to create custom menus to fit the needs of your site. You can even use native functions to add a compact WordPress dropdown menu that saves space, while still providing clear direction for your visitors.
In this post, we’ll discuss why website navigation is important and how dropdown menus can be particularly useful. Then we’ll walk you through how to create them in WordPress, and share some plugins that can help.
Let’s dive in!
An Introduction to WordPress Navigation and Dropdown Menus
Although they may be unassuming, navigation menus are a vital element of any website. They help users quickly find the most relevant pages for accomplishing their goals, while also giving first-time visitors an idea of what you have to offer:

Having a well-designed navigation menu is key to boosting conversions and decreasing your bounce rate. When users can easily find the pages where your product, email signup form, or other converting content is located, you’ll have a simpler time getting them to make a purchase or sign up.
Plus, if users can confidently find their way throughout your site, they won’t have to bounce off your pages because they ended up in the wrong place. Helping them get it right the first time can both improve UX and minimize frustration.
In WordPress, menus are an inherent feature. Any site created with the platform can display one or more of them. However, WordPress themes also play an important role when it comes to styling and placing your menu or menus.
For this reason, your WordPress menu could take on many different forms. The most familiar is the standard header menu:

You can often also include an additional footer menu at the bottom of your pages. It may display the same content as your main menu, or offer slightly different options:

Another style is the menu overlay, which users can open and close at will:
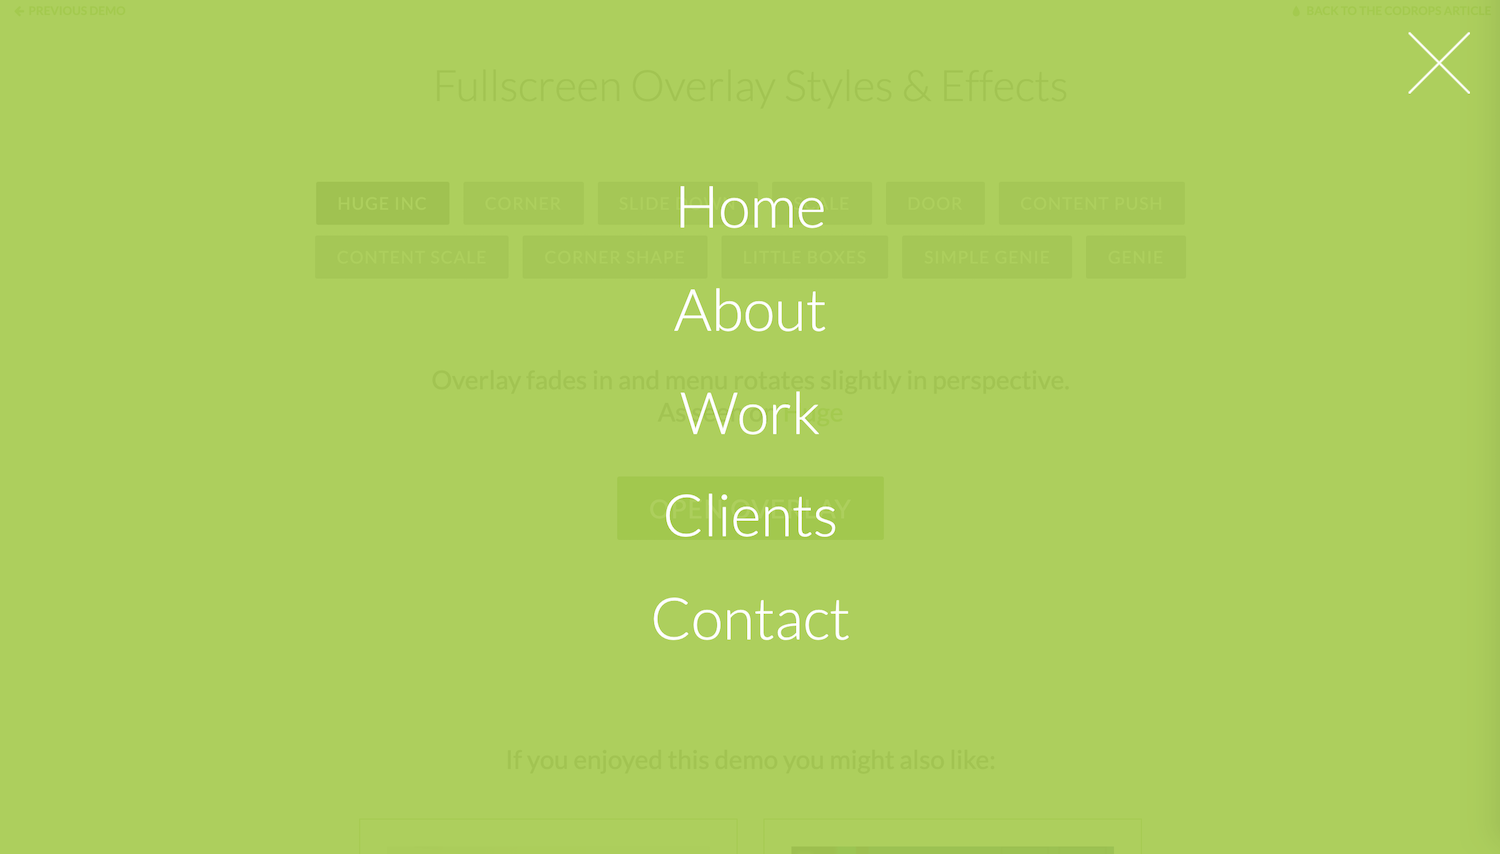
Alternatively, you might consider using a sidebar menu:

Or you can incorporate a dropdown menu, also sometimes called a “nested” menu:

This type of navigation is ideal for many types of sites. It won’t obscure your content like an overlay menu but is not as intrusive as a large header bar or a sidebar menu.
By concealing some content until it’s needed, you’ll save screen space while still providing users with an easy way to get around.
How to Create a Dropdown Menu in WordPress (In 5 Steps)
If you’ve decided that a dropdown menu may be a good fit for your WordPress site, setting one up is quite simple. By using the native menu features available in WordPress, you can create a custom navigation system that suits your needs in just five steps.
Step 1: Create Your Menu Items
The first step towards creating a menu is deciding what to include in it. Start by navigating to Appearance > Menus in your WordPress dashboard:
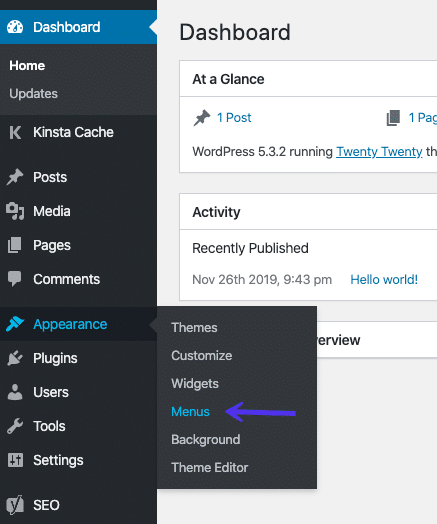
What you see in the menu editor will vary slightly depending on your theme.
However, what’s important to note for now is the first option in the Edit Menus tab. You should see an option where you can select one of your existing menus to edit, as well as an option to create a new menu:
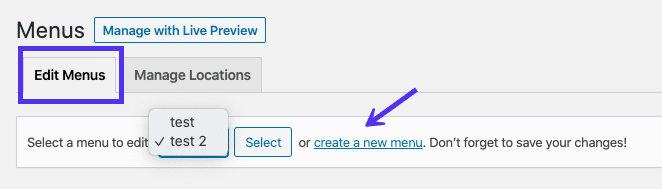
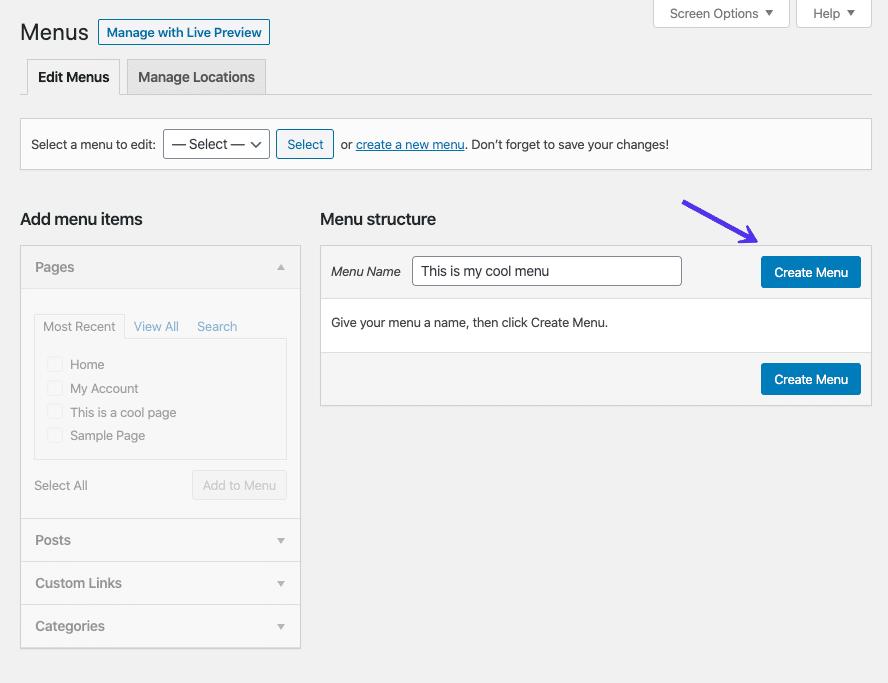
For this example, we’ll choose the latter option and create a new menu. This involves adding a title and then clicking on the Create Menu button:
Now you’re ready to start adding items to your WordPress menu. In most cases, it’s best to keep your menu as simple as possible, while still giving users enough information to get where they want to go.
Incorporating too many pages can overwhelm visitors and make navigation harder instead of easier.
There are a few different ways to go about adding your menu items. The first two are Pages and Posts, and they work very similarly.
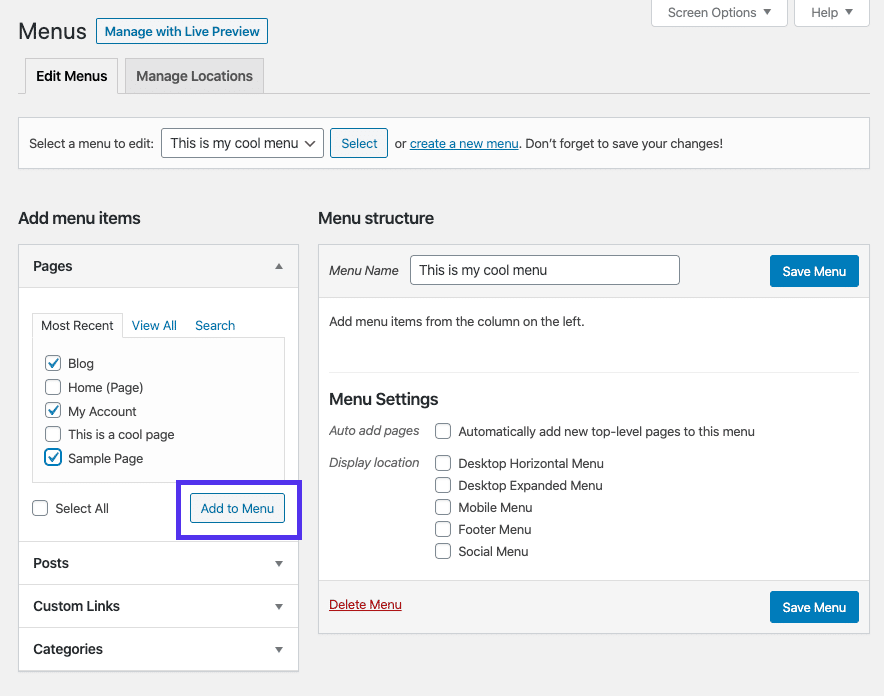
In the sidebar of the menu editor, simply select the checkboxes for each page or post you want to include, and click on the Add to Menu button:
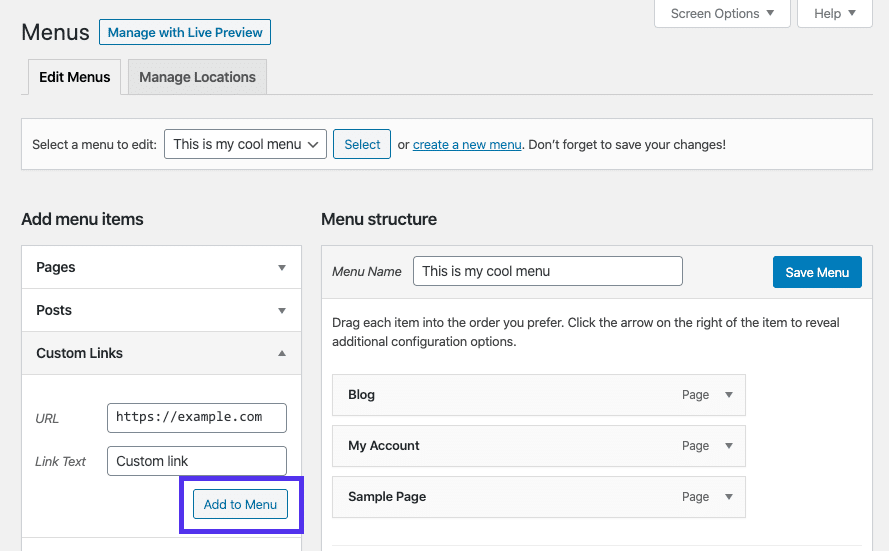
Your next option is to incorporate Custom Links. This involves providing the URL for the page you want to direct users to, and then creating a short but descriptive label for it. After that, you can click on Add to Menu again:
Finally, you can also add Page and Post Categories to your navigation menu. This will take users to an archive page where they can view all the content on a particular topic.
Blogs and other content-heavy sites may find this feature especially useful:
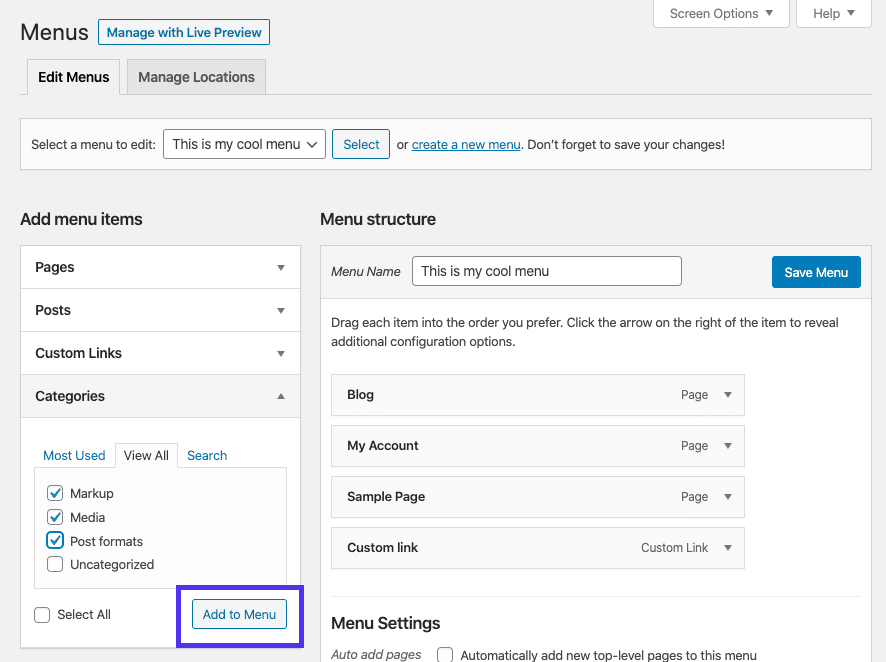
As with the Pages and Posts options, just select the checkboxes of the categories you wish to include and choose Add to Menu.
Step 2: Organize Your WordPress Menu
Once you’ve added all your menu items, you should see them listed in individual tiles under Menu Structure in the editor:
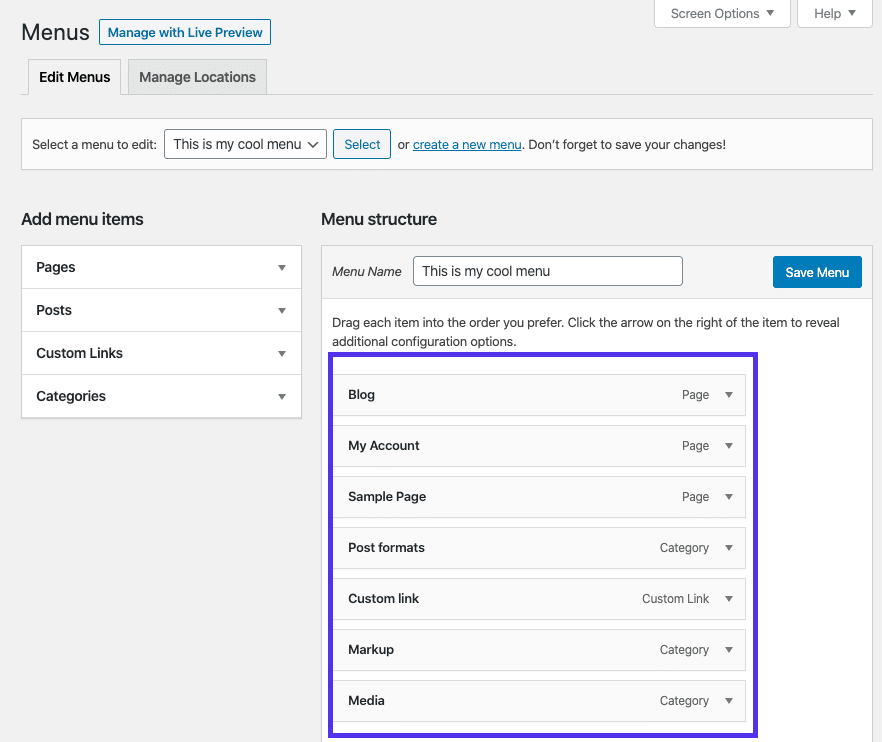
Initially, menu items will appear in the order in which you added them. However, you can easily modify their organization by dragging and dropping them into place. This will enable you to create a simple menu with no dropdown functionality.
There are a couple of ways to go about adding dropdowns to your WordPress menu.
The simplest is to continue dragging and dropping, but start nesting certain menu items under others:
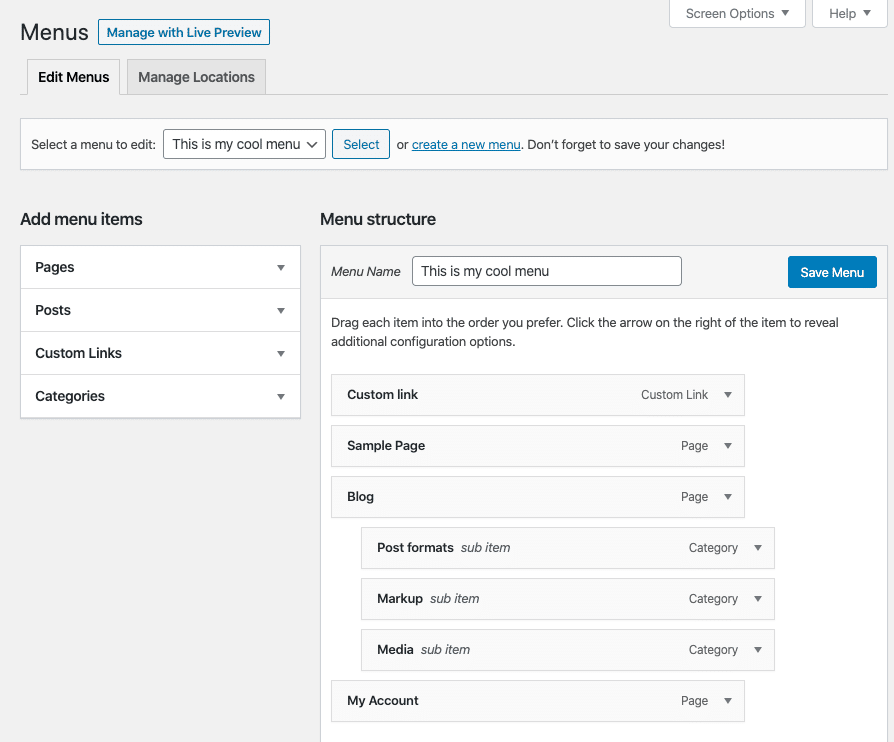
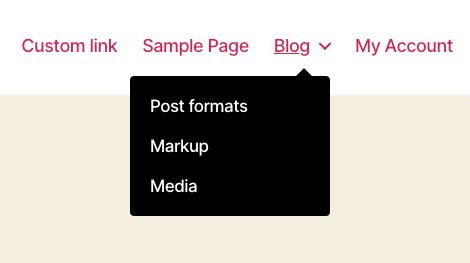
For example, in the image above, we’ve moved the three post categories we added to the menu under Blog, making them “sub-items”. On the frontend, this will create a dropdown menu that looks like this:
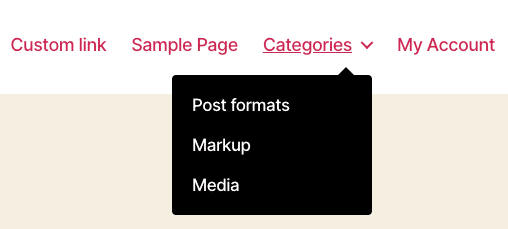
If you would like to add a dropdown menu that includes all of the categories on your site, you can do so by adding a Custom Link to your menu. Use “#” as the URL and “Categories” or something similar for the label:

You can then add all your categories to the menu and nest them under this label. Each category will be clickable, but the label won’t be:
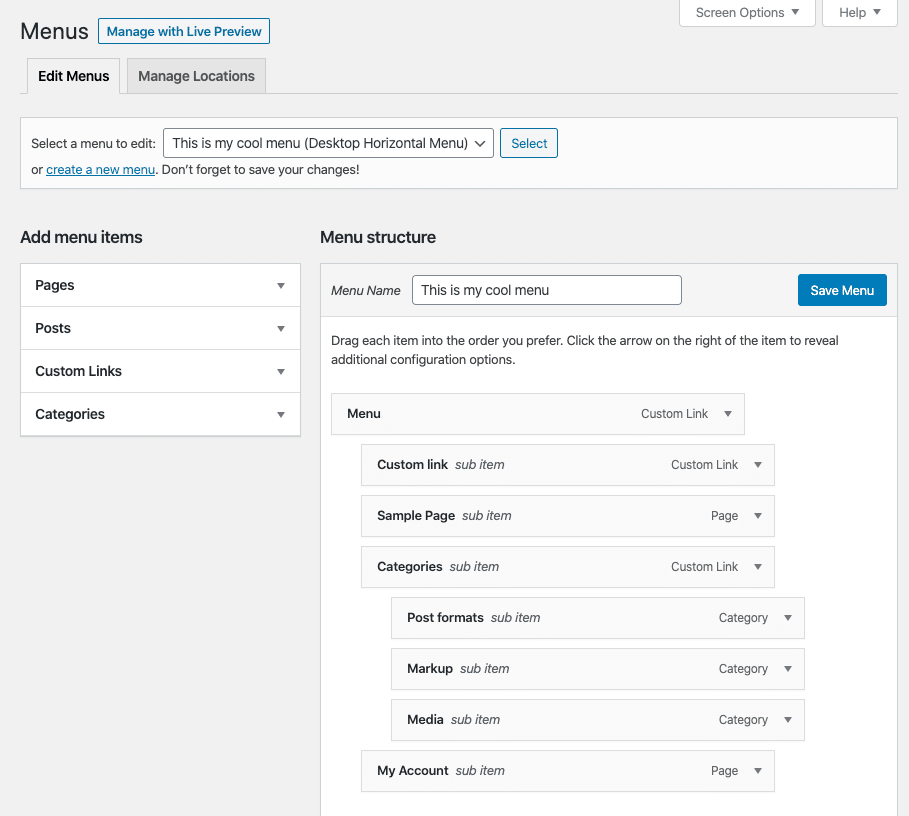
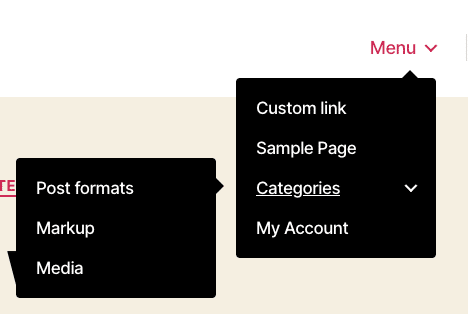
Using a similar technique, you can also hide all your menu items in a single dropdown menu.
Add another Custom Link, using “#” as the URL and “Menu” as the label. Then, nest all your other menu items under that one:
The result on the frontend will be a dropdown menu that includes your site’s key pages.
As you can see in the Categories item below, any content nested under a sub-item will show up in a sub-menu:
By using the drag-and-drop menu editor this way, you can create any style and combination of WordPress dropdown menus. Remember, however, that too many menu items can be confusing for users.
It’s also best to limit the number of sub-menus you incorporate, to avoid over-cluttering your navigation.
Step 3: Incorporate Images into Your WordPress Menu
If by the end of Step 2, your dropdown menu looks exactly like you imagined it, you can skip to Step 5 to publish it. However, there are additional steps you may want to take if you’d like to enhance your menu with customizations.
One tactic to consider is incorporating visual elements into your menus to provide further guidance for visitors. While descriptive labels are vital, sometimes an image or an icon can help users more quickly determine where a particular navigation link leads.
It is possible to add images using custom CSS, which we’ll discuss shortly. However, we recommend picking up a plugin such as Menu Image, Icons Made Easy:
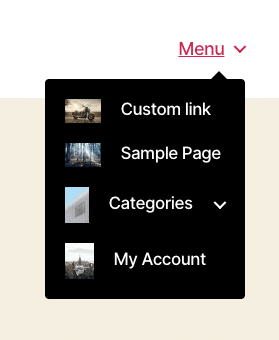
This way, you don’t have to worry about bothering with any code in order to add visual interest to your dropdown menu.
Simply install the plugin and then return to Appearance > Menus:
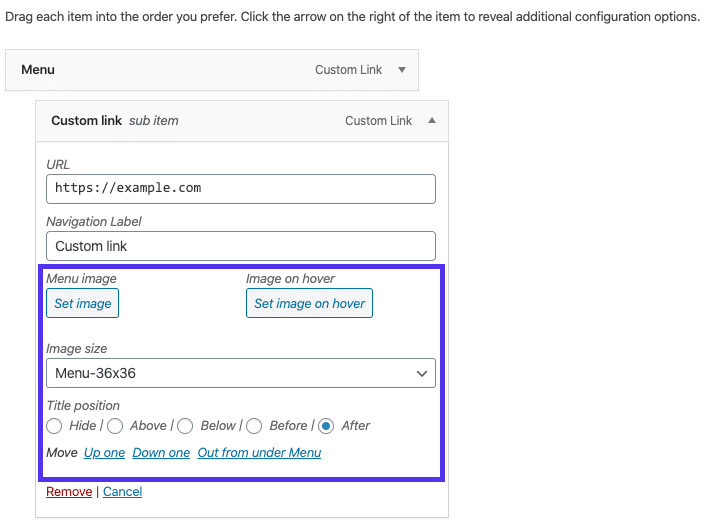
You’ll see that there are now image options for each page you’ve included in your menu. You can select each page’s photo, size, and position. Remember to save your changes when you’re done.
Step 4: Add Custom CSS to Your Dropdown Menu
While it’s not recommended for beginners, intermediate and advanced users may want to incorporate their own styling in their WordPress dropdown menus. Before you jump right into your CSS, however, you’ll need to add a class to your menu.
If you skip this step, your custom CSS may cause problems for any other menus on your site. For instance, you may inadvertently apply styling to your footer menu that you meant only for your main dropdown menu.
In the menu editor, click on Screen Options in the top-right corner:
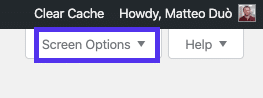
Then, check the box for CSS Classes:
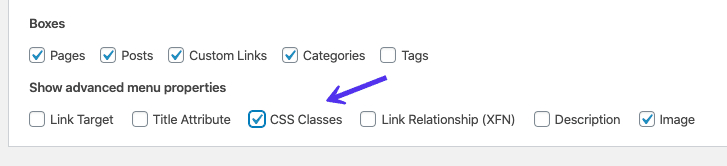
This will add a CSS Classes field to each page in your menu:
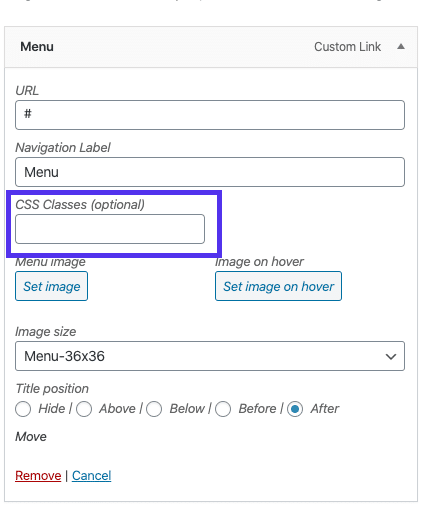
Once you add one or more CSS classes to your menu items, any custom code you include on your stylesheet will only apply to the items in your menu with the class you specify.
You can now head over to your stylesheet or the Customizer, and get to work on your custom styling.
Step 5: Publish Your Menu in Prime Locations
Once your WordPress dropdown menu is structured to meet your needs, and you’ve incorporated any customizations you want, you’ll be ready to publish it to your site.
This process will vary slightly depending on your theme and which menu locations it supports. For this example, we’re going to use the Twenty Twenty theme.
In the menu editor, scroll down to the Menu Settings section:
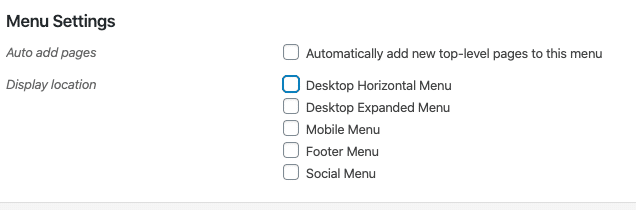
You can select the first checkbox if you wish for new pages to be automatically added to your menu. If you’re just getting started with your site and haven’t added all your key pages yet, this may be useful. However, be careful that you don’t accidentally add too many items to your menu.
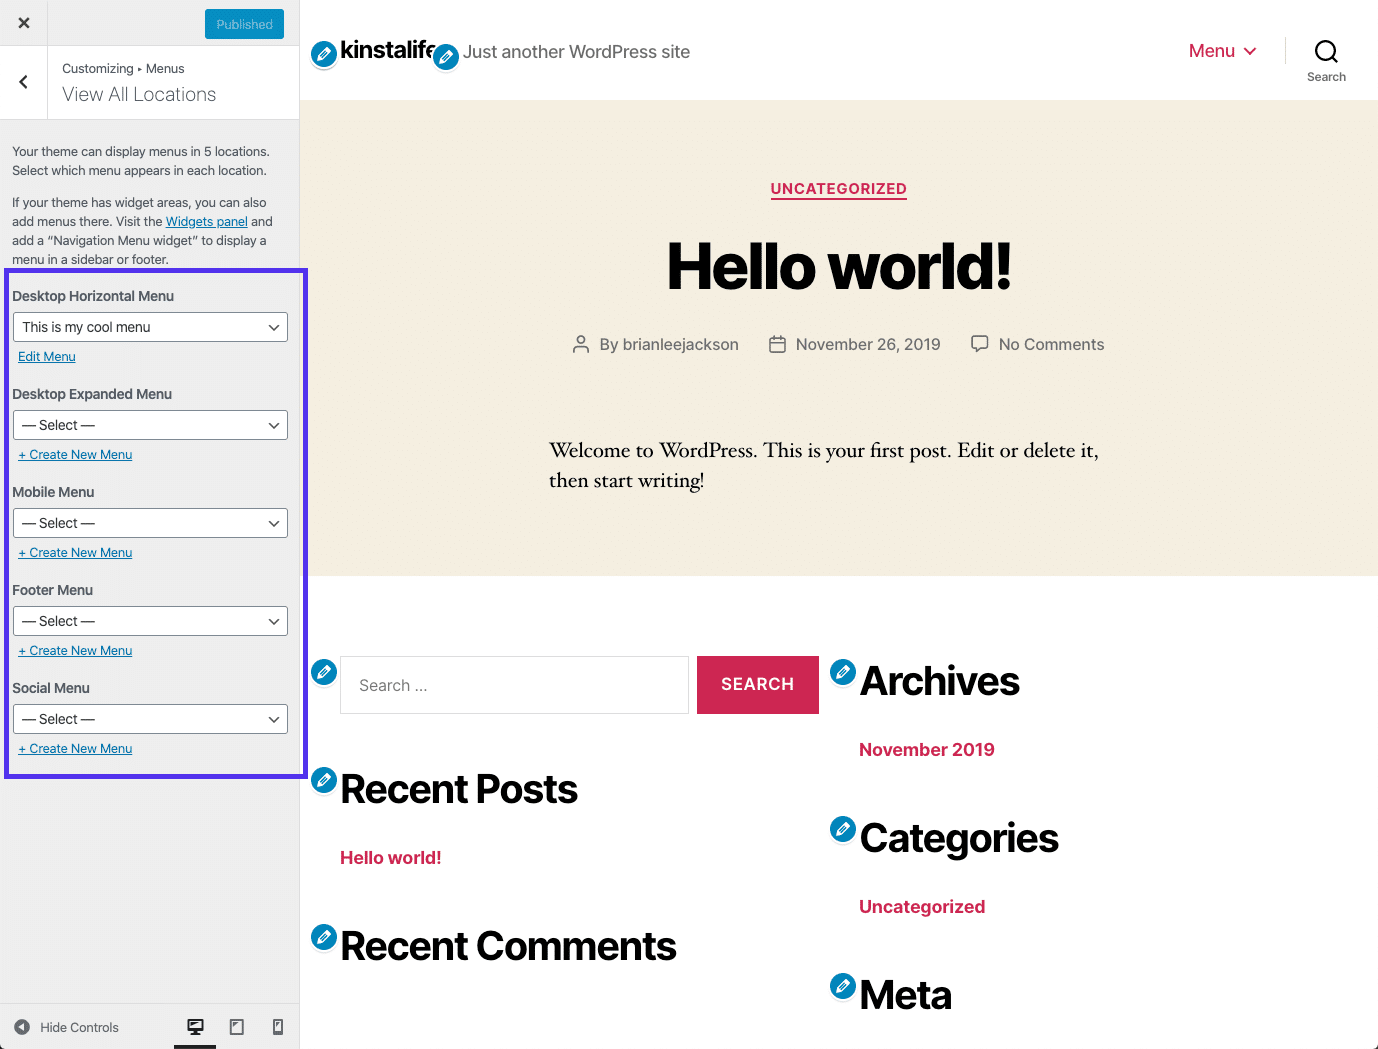
Below this option, you’ll see a list of checkboxes noting the different areas of your site where you can display your menu.
The Twenty Twenty theme includes different menu areas: Desktop Horizontal Menu, Desktop Expanded Menu, Mobile Menu, Footer Menu, Social Menu.
In this case, the menu we’ve created is best suited to the Desktop Horizontal Menu location, which is in the site’s header:

You might also consider navigating to the Manage Locations tab in the Menus area of your dashboard. Here you can see all the menu locations that are supported by your theme, as well as which menu you’ve assigned to each one:
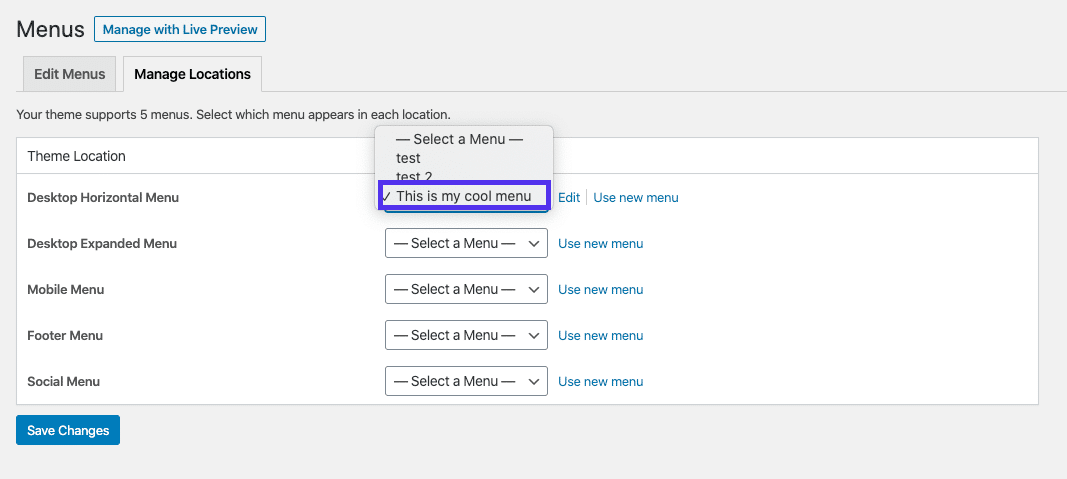
When placing your menus, it can be helpful to see what they’ll look like on the frontend.
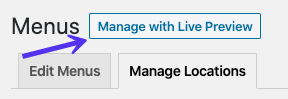
Click on the Manage with Live Preview button to see how your menu will appear in the location you’ve chosen for it, using the WordPress Customizer:
You can then publish your menu or menus directly from the Customizer. If you ever need to add or remove items from your dropdown menu, you can simply return to the menu editor and make the necessary adjustments.
WordPress Plugins for Enhancing Your Dropdown Menus
Although you can create fully-functioning WordPress navigation menus without any extra tools, it can sometimes be useful to extend your menu’s functionality. If that’s the case with your site, you may want to look into some popular WordPress menu plugins.
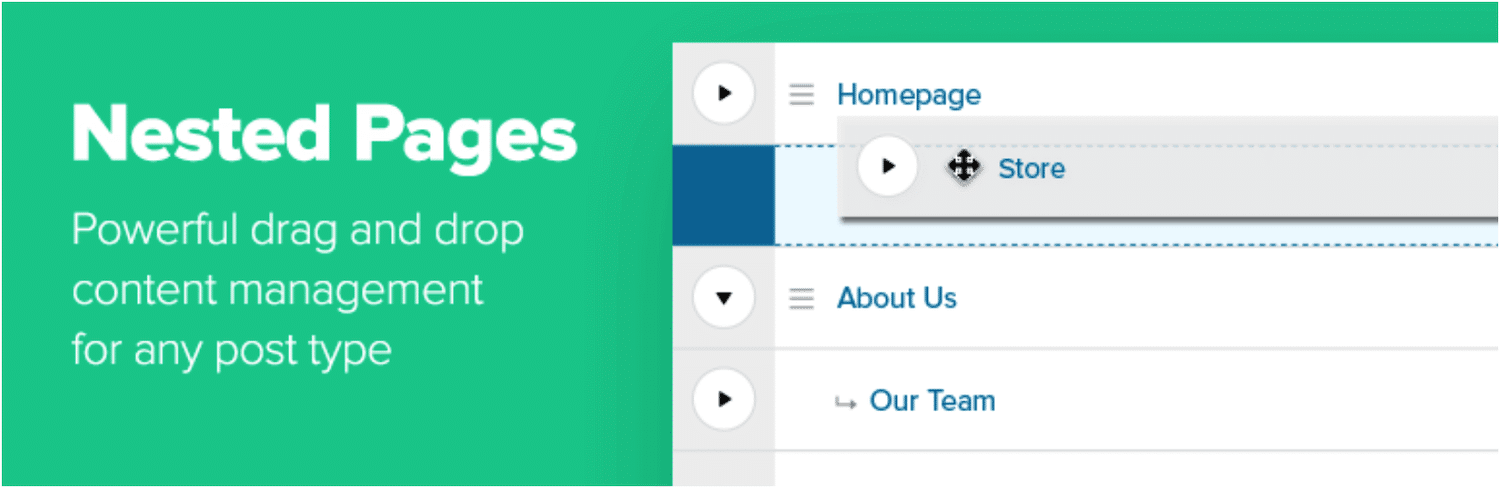
Nested Pages is an efficient way for content-heavy blogs to create dropdown menus. While it’s primarily used for organizing posts and pages, this plugin will also automatically generate a menu that mirrors your content’s structure:
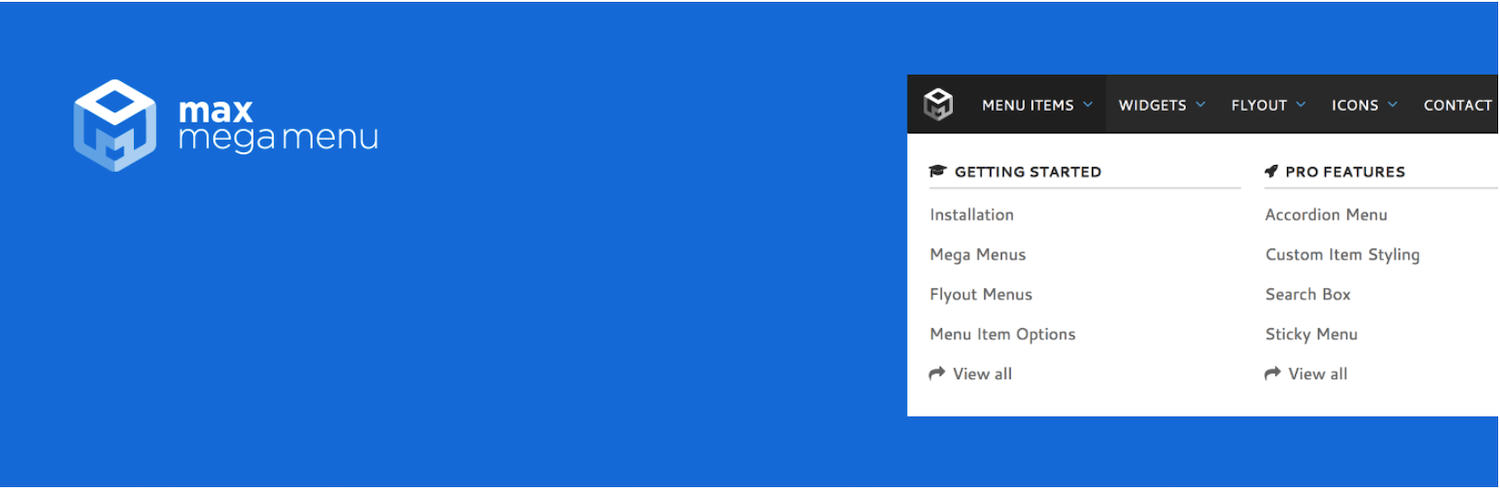
While it’s not necessarily advisable to incorporate a large number of items into your menus, sometimes it’s unavoidable.
If that’s the case with your site, Max Mega Menu can help you combine your existing WordPress menus to form one “mega menu”:
With mobile browsing on the rise, ensuring that your menus are still readable on mobile devices is key.
WP Mobile Menu pairs with any responsive theme to help you create a navigation system for your site’s users who are on the go:

Finally, as we’ve already discussed, there may be situations in which descriptive menu items aren’t enough. In these situations, you may want to look into using Menu Image, Icons Made Easy as we described in Step 3 above.
You can use any of these plugins to enhance your current navigation system and make your WordPress dropdown menu more effective. Just remember that sometimes, when it comes to navigation, simpler is better. Only add extra features if it will improve your UX and avoid cluttering your site.
Troubleshooting Your WordPress Dropdown Menu
If you’ve configured your menu as described above, but the dropdown functionality isn’t working, there are several possible causes.
While we can’t cover all of them here, we can help you narrow down the cause of your problem so you can find the proper solution.
Often, a malfunctioning menu is the result of conflicting code between your custom menu and your theme. The first thing you should do if your menu isn’t working is switch over to a default theme such as Twenty Twenty. If your menu starts functioning again, you’ll know the issue is related to your theme. You can then contact your theme’s developer to seek a solution.
A few other possible causes include:
- Mistyped code: Double-check that any custom CSS you’ve added is correct, and that you’re using CSS classes as described in Step 4.
- Plugin incompatibility: Try disabling any menu-related plugins you’ve installed, to see if that solves the problem.
- Outdated jQuery: Upgrade to the latest version of jQuery and try opening the dropdown menu again.
However, as we mentioned earlier, the potential causes behind your faulty menu are numerous. If none of the above solutions seem to be working, we recommend visiting the WordPress Support Forums, reaching out to our expert Kinsta WordPress Support Team, or hire a WordPress developer to fix it for you.
Summary
While it may seem like a small matter, your WordPress site’s navigation can make or break its success. Using dropdown menus can save space on users’ screens, while also enabling them to easily make their way around your site and improve your conversions.

Head of Content at Kinsta and Content Marketing Consultant for WordPress plugin developers. Connect with Matteo on Twitter.

