
Bounce rate is believed by many to be an influential search engine ranking factor that tells Google a lot about your site’s quality. Maintain a low bounce rate, and that’s at least one way Google will look at you with favor. Keep a sky-high bounce rate, however, and you might just find yourself ranking lower in search engines (SERPs). Having a high bounce rate also means you’ve got more problems than just rankings to worry about it. We’ll share some tips and strategies with you today to help keep visitors on your site! 😉
What is Bounce Rate?
Before we dive into ways to reduce bounce rate, it’s important to understand how it’s calculated. According to Google, a bounce in Google Analytics is recorded when a session is triggered on your site, such as when a user opens a single page and then immediately exits without triggering additional requests in that session. Bounce rate is simply the single-page sessions divided by all sessions. This comes, in turn, comes out to a percentage of the sessions on your site which only viewed a single page on your site.
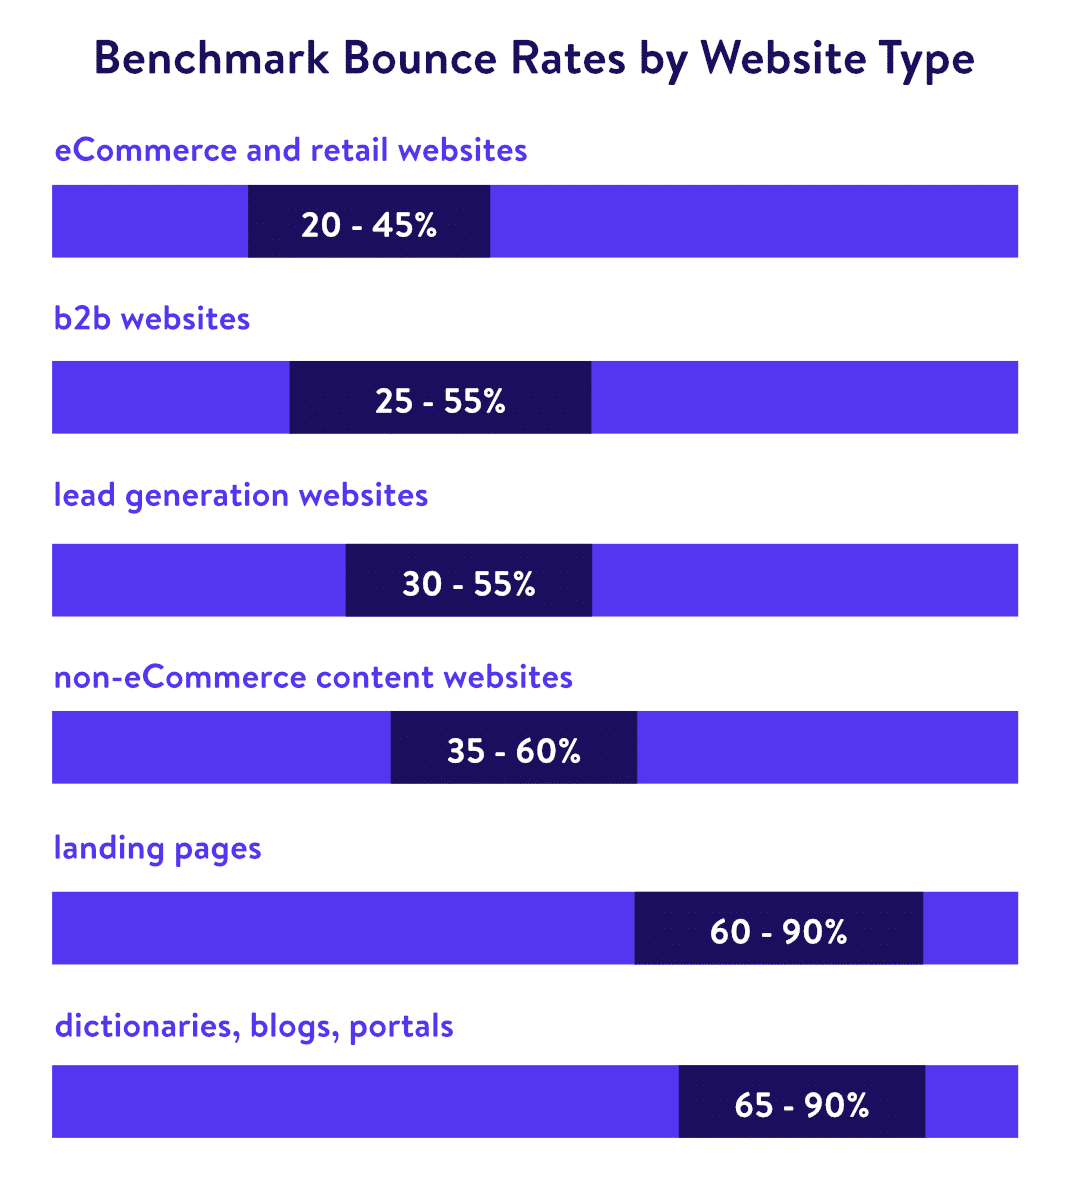
So what is a good bounce rate? Well, according to data from custommedialabs, bounce rates can vary quite a bit depending on the type of website or industry. For example, an average bounce rate for an eCommerce site might hover between 20-45%, while a landing page might be as much as 90%! Remember, lower is better. Blog posts usually have a higher bounce rate as people scan content and if they don’t find what they want, they will leave.
Some have also argued that using an adjusted bounce rate is better. This is slightly different than Google’s default implementation as you define a time limit after which you can consider a user to be “engaged.” After the limit the user would no longer count as a bounce. To implement it, you need to tweak your Google Analytic’s script, or you can use a free plugin like CAOS. But we don’t go down that rabbit hole today. 🐰
How to Find Your Bounce Rate
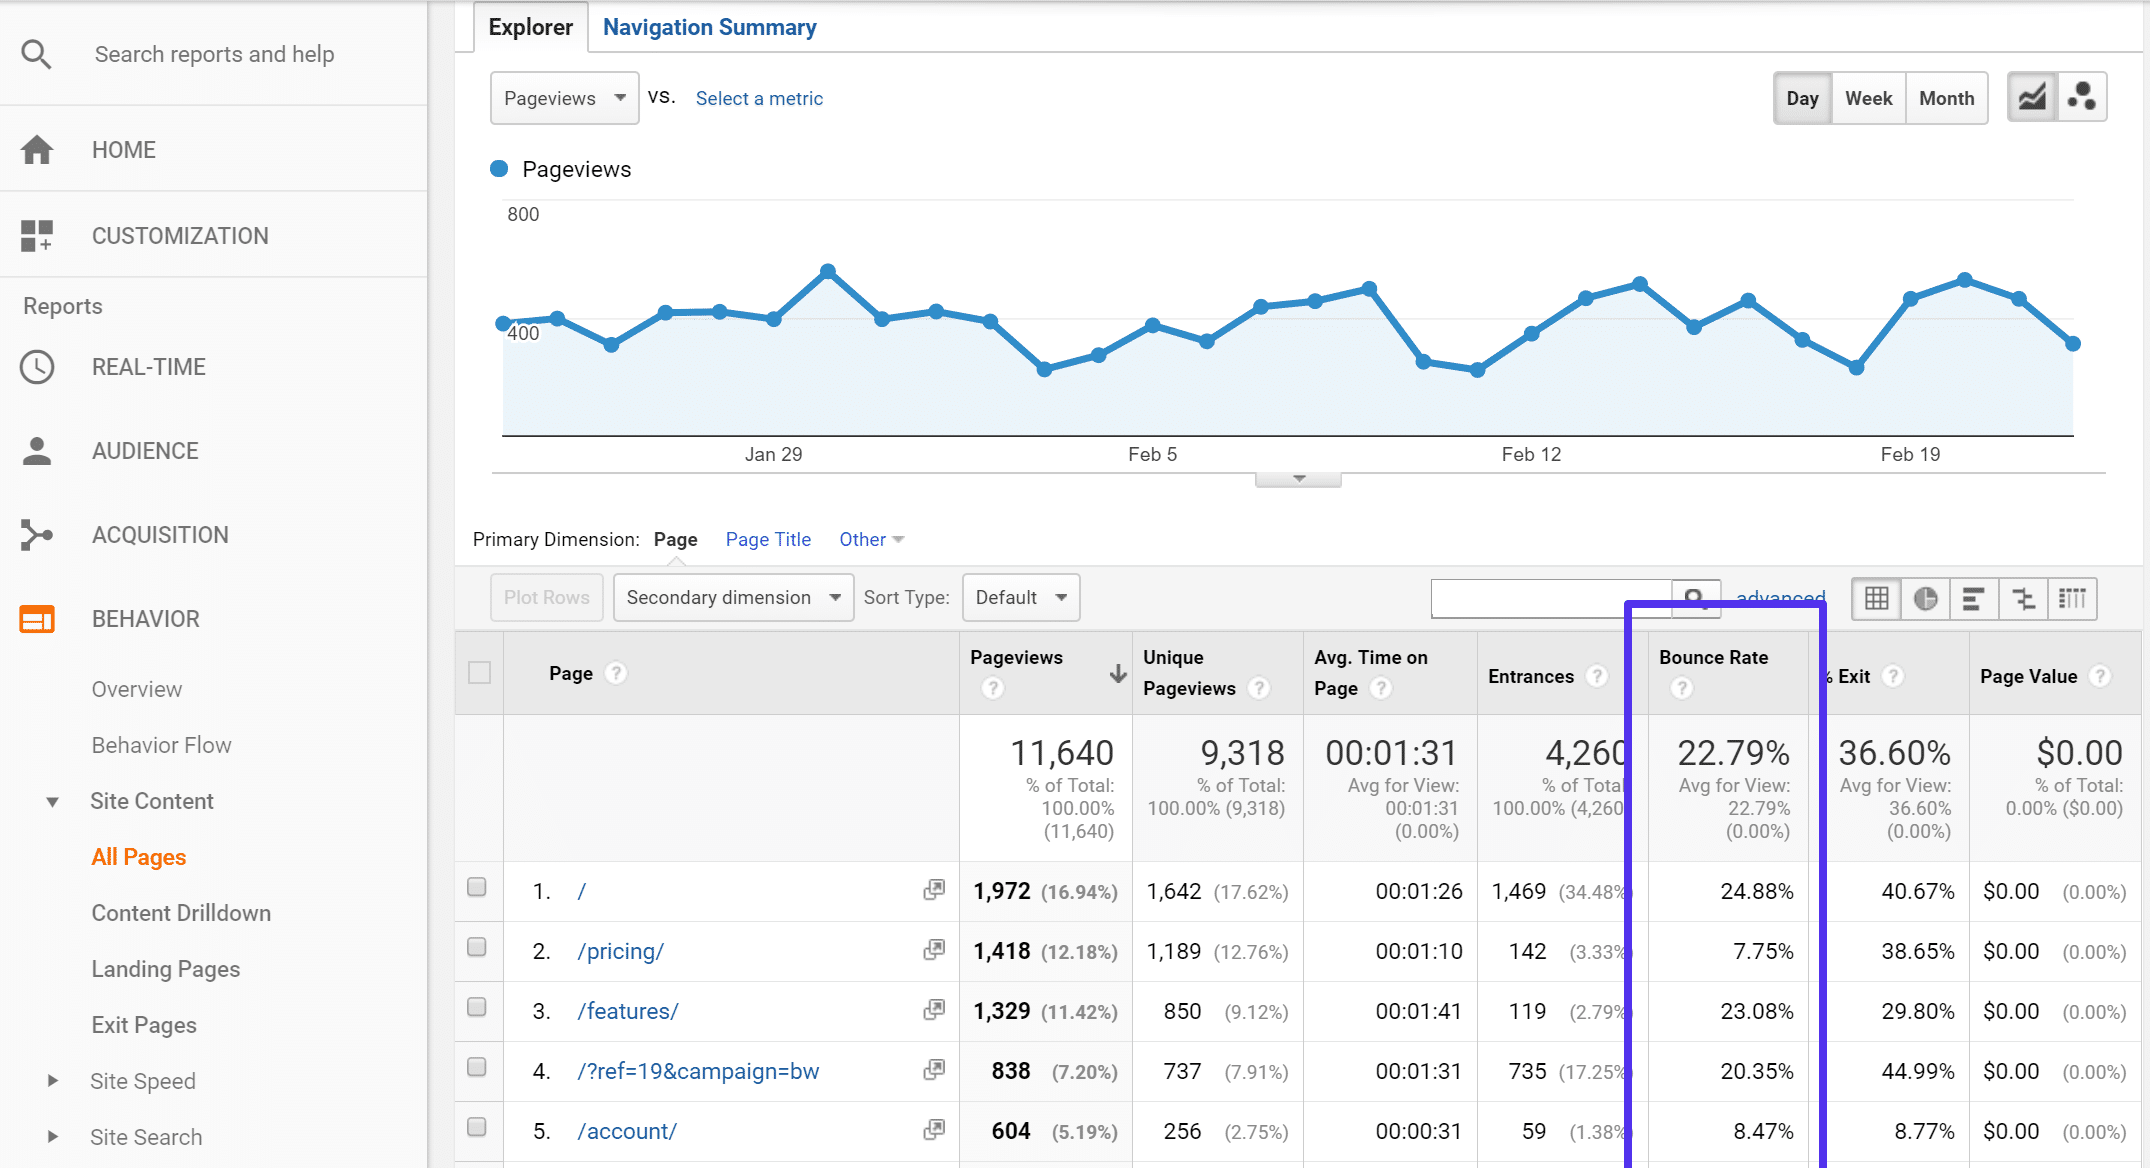
Bounce rate shows up in your Google Analytics account. There are quite a few places that you can see it as essentially it’s just a data point that you can correlate with any other piece of data. A couple of common places you might want to check are:
- Behavior > All Pages > Bounce Rate (see which pages have higher or lower bounce rate)
- Acquisition > Channels > Bounce Rate (see what type of traffic has the lowest bounce rate)
- Acquisition > Source/Medium > Bounce Rate (see which referral traffic and mediums have lowest bounce rate)
- Acquisition > AdWords > Campaigns > Bounce Rate (see how your AdWords campaign fare when it comes to bounce rate)
How to Reduce Bounce Rate
Below are 18 actionable tips we’ve compiled (a lot based on tests we’ve ran on our own site) on how to reduce bounce rate and boost user engagement on your site.
1. Optimize Your Traffic and Content First
Before optimizing your blog to reduce your traffic’s bounce rate, you need to first optimize your traffic and content. Here’s the deal: the traffic you drive to your blog must be interested in what you offer. So if you blog only about WordPress hosting and your traffic efforts are bringing in people that are interested in application hosting and database hosting, your bounce rate won’t decrease no matter how many of these following tips you implement, simply because your traffic couldn’t care less.
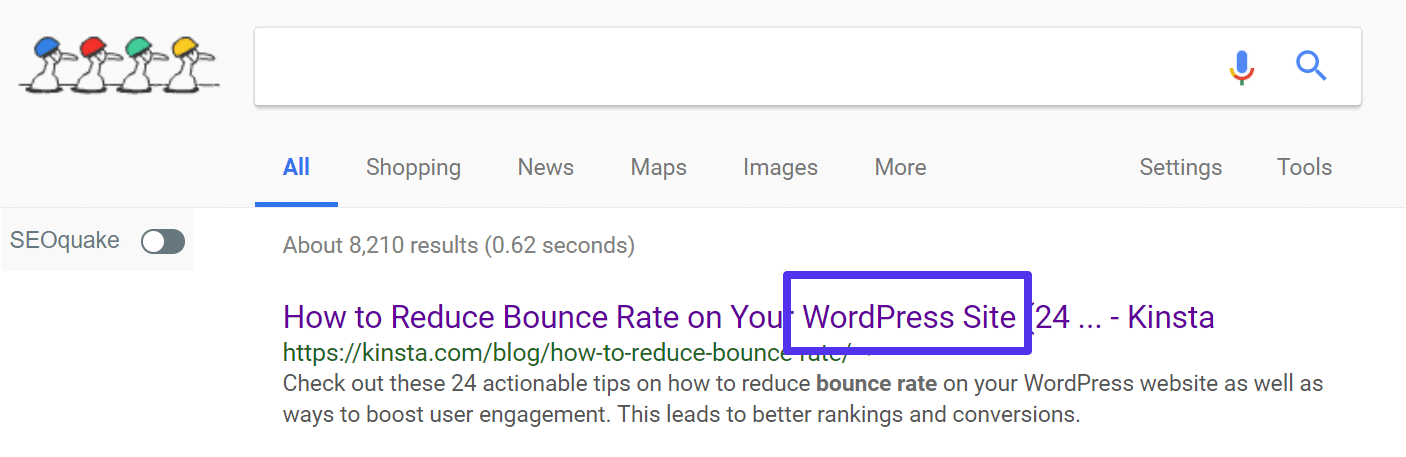
One super easy change you can make is to optimize all of your titles (both for blog posts and pages). For instance, for this blog post, we originally had the following title:
"How to Reduce Bounce Rate on Your WordPress Site (18 Actionable Tips)"
However, as Kinsta now offers application and database hosting as well, this title has become a little too specific for our blog audience. Why? Because our traffic and audience are people and businesses that care about cloud hosting in general, not only WordPress. So we renamed the title slightly to:
"How to Reduce Bounce Rate on Your Site (18 Actionable Tips)"
What does this do? It helps increase the quality of the traffic that comes in from Google (SERPs). People searching will see that this is a bounce rate article for website users, not just WordPress users. This might increase the total number of visits and the quality of the traffic. This, in turn, reduces the bounce rate. A simple change like this made across all of your content can have a huge ripple effect.
Another great traffic optimization is to find out in Google Analytics which traffic sources are already bringing you engaged visitors (lowest bounce rate and highest pageviews per visit and avg. visit duration), and then capitalizing on that information. Reach out to those sources and get them to share your content or collaborate on an article. In other words, take advantage of data you already have.
2. Avoid Popups
There is a great deal of debate in the blogging arena as to whether popups are harmful or beneficial to your site. There are definitely major advantages to popups, such as:
- Increased opt-in rates. David Risley of Blog Marketing Academy got a 250% increase in his mailing list opt-in rate using the Popup Domination plugin.
- The ability to highlight something specific to your entire audience (an upcoming webinar for example).
Both of those are benefits that can’t be ignored. However, there are several disadvantages:
- Some say they detract from the overall user experience of a website. And this is most likely true. Marketers definitely aren’t using them for the purpose of trying to improve the user experience. 😉 They also might just be causing banner blindness.
- Popups will most likely harm your bounce rate. The rate at which it does could also depend on the type of popup as well, such as a small one or full-screen one. Or even a setting, such as how many times you display it to new users.
If one of your major priorities is to decrease your bounce rate, then you will probably want to stay away from popups. But the last thing you should do is blindly take off whatever popup you have setup on your site without tracking the results. See the trade-off in terms of increased engagement and decreased opt-ins. You can then decided whether it is worth enabling or disabling.
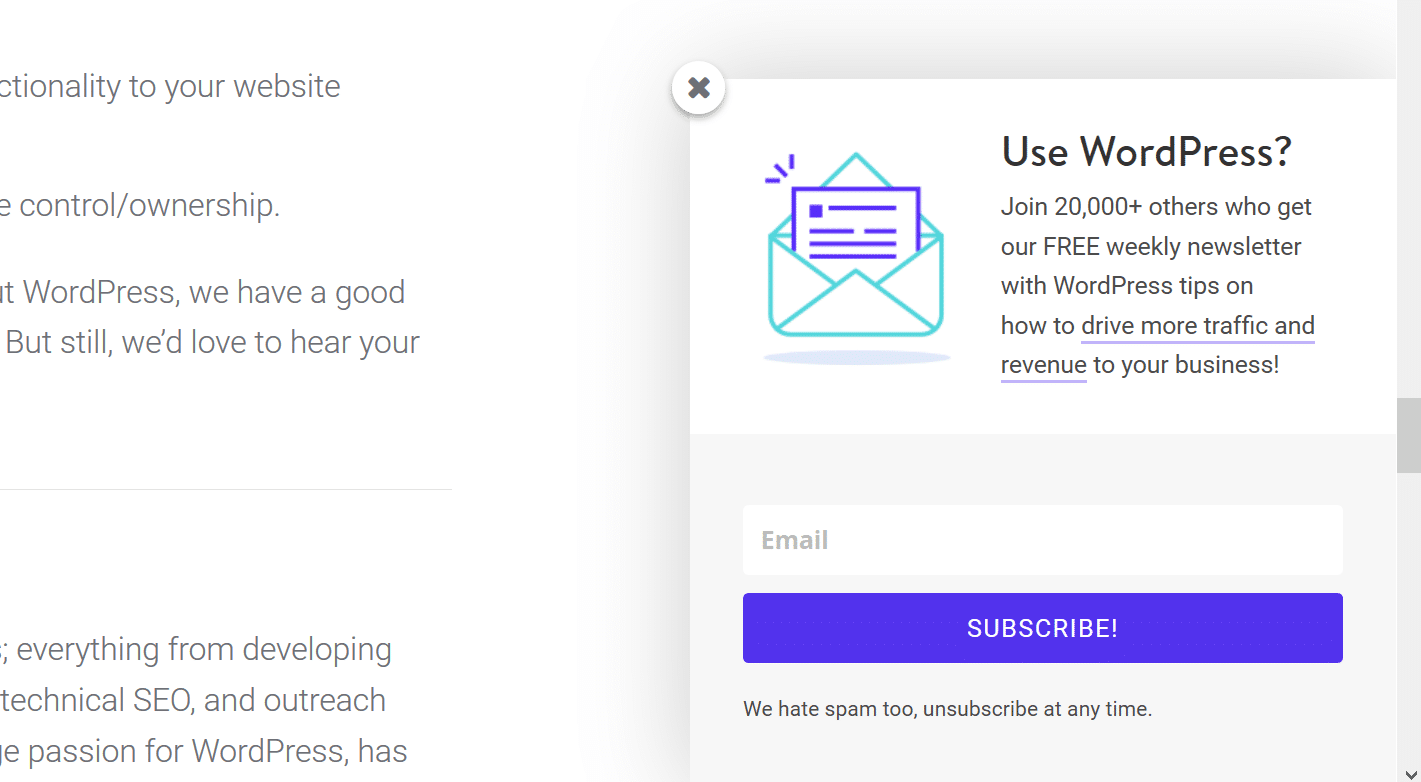
As you can see, at Kinsta we don’t use popups, but that’s our decision after weighing the advantages and disadvantages of enabling one. However, we do something similar, it’s just less obtrusive to the user. We use what they call a fly-in opt-in. This is done with the Bloom plugin from Elegant Themes. We have it set to only show on our blog and KB posts, and only after the user has scrolled 50% or more down the page. This can be a good middle ground.
3. Structure Your User Experience With Specific Menus
Your website’s menu is called the navigation for good reason: it’s the predominant way your visitors steer themselves through your site. If they don’t find answers fast they could bounce. Most website owners don’t give their navigation much thought, they simply throw up what they think needs to be there: about, services, contact, blog, etc. page, etc. However, it can be very important to test which menu items (both top navigation and footer) are actually used and needed by your visitors.
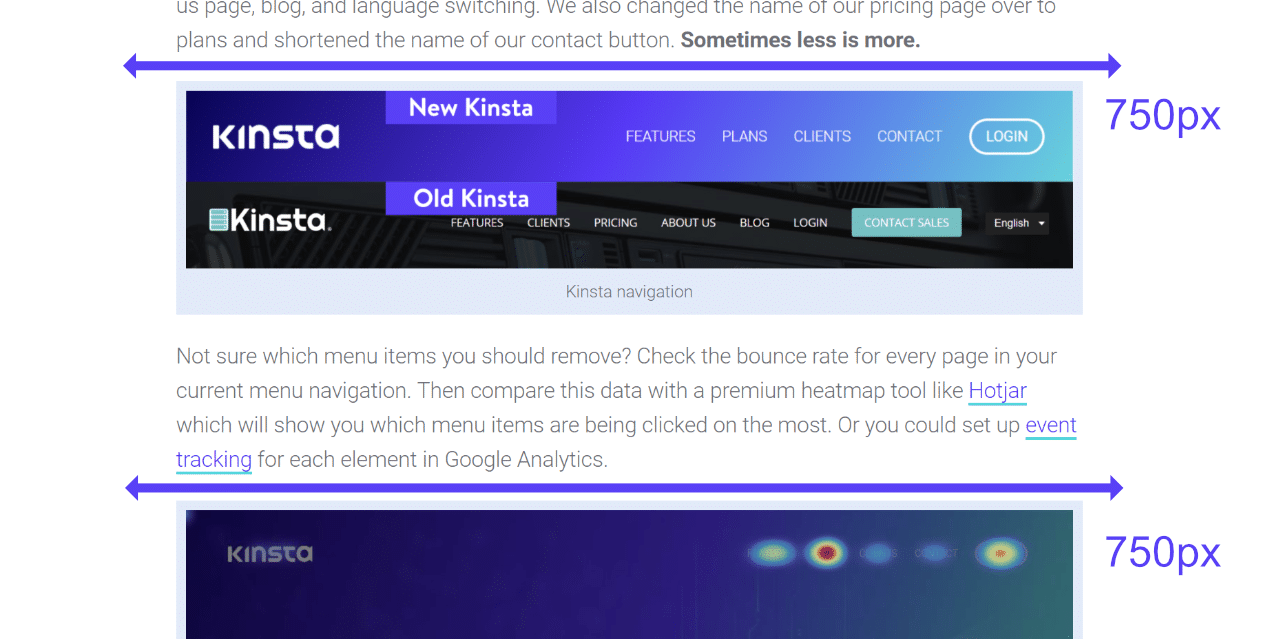
You don’t want to use too many nav items, but you also need them to easily find their answers. Also, consider which pages are important to you? If you’re an eCommerce site, is it your blog or converting customers on your products/pricing page? We redesigned the Kinsta site back in November 2017 and you can see changes we made to our navigation. We removed our about us page, blog, and language switching. We also changed the name of our pricing page over to plans and shortened the name of our contact button. Sometimes less is more.

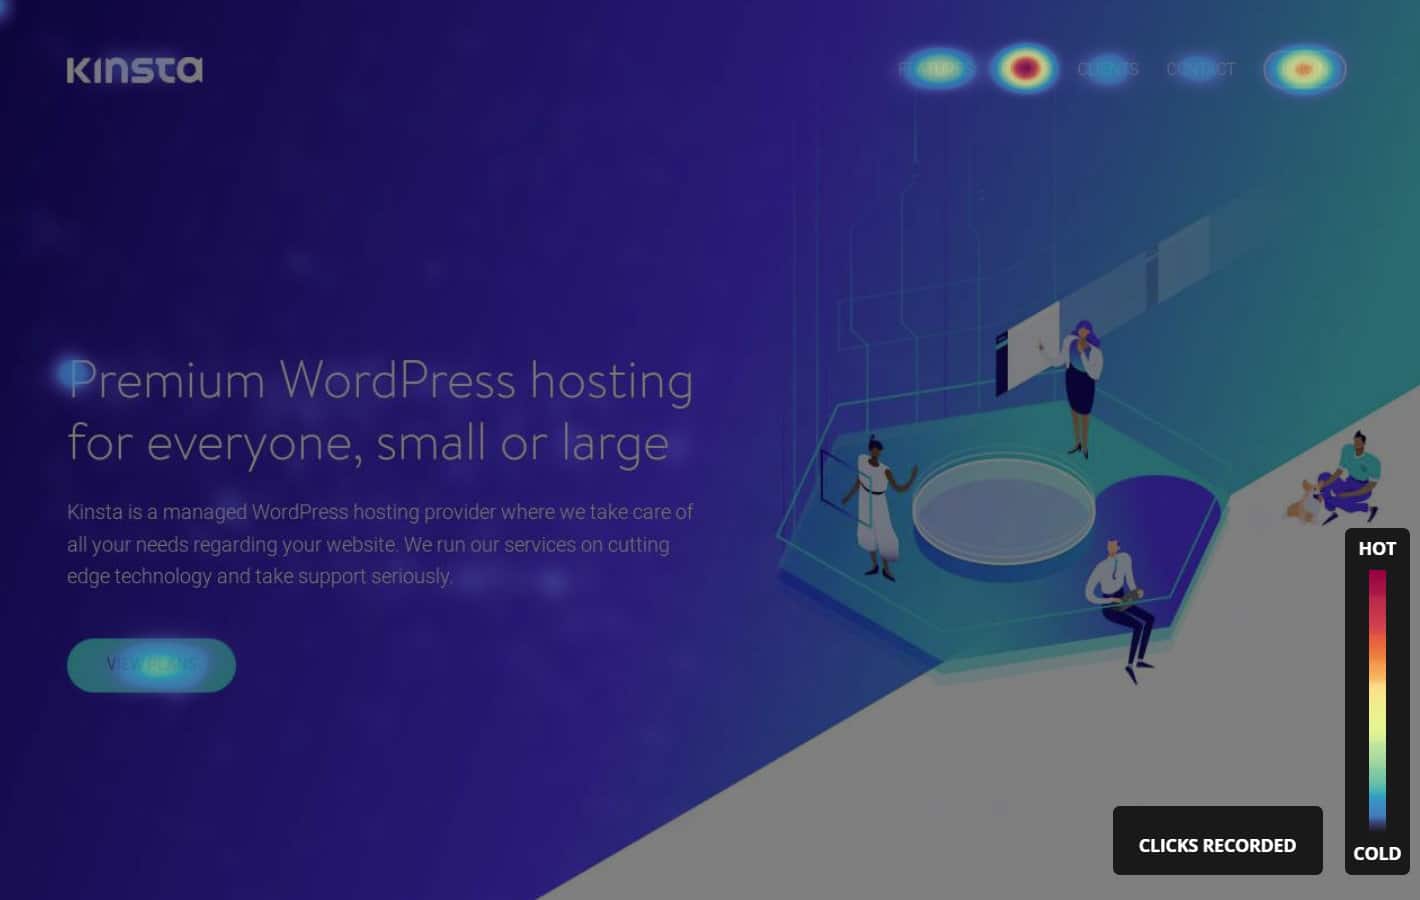
Not sure which menu items you should remove? Check the bounce rate for every page in your current menu navigation. Then compare this data with a premium heatmap tool like Hotjar which will show you which menu items are being clicked on the most. Or you could set up event tracking for each element in Google Analytics.
4. Utilize White Space
The “white space” phenomenon is all the rage nowadays, having spiked a huge rise in the development of minimal themes. White space is simply empty space on your website. There’s absolutely nothing there — no widget, no footer, no blog content; just your website’s background.
If you haven’t yet jumped on the white space bandwagon and your website’s design is completely full of various boxes, bars, and links, then you could be seriously hurting your bounce rate. Empty space gives your readers’ eyes a chance to rest. This also directs visitors to look at your important content or CTAs.
The greatest example of a company using white space to their advantage is Google. They want people to do one thing (search), and nothing should distract them from that.
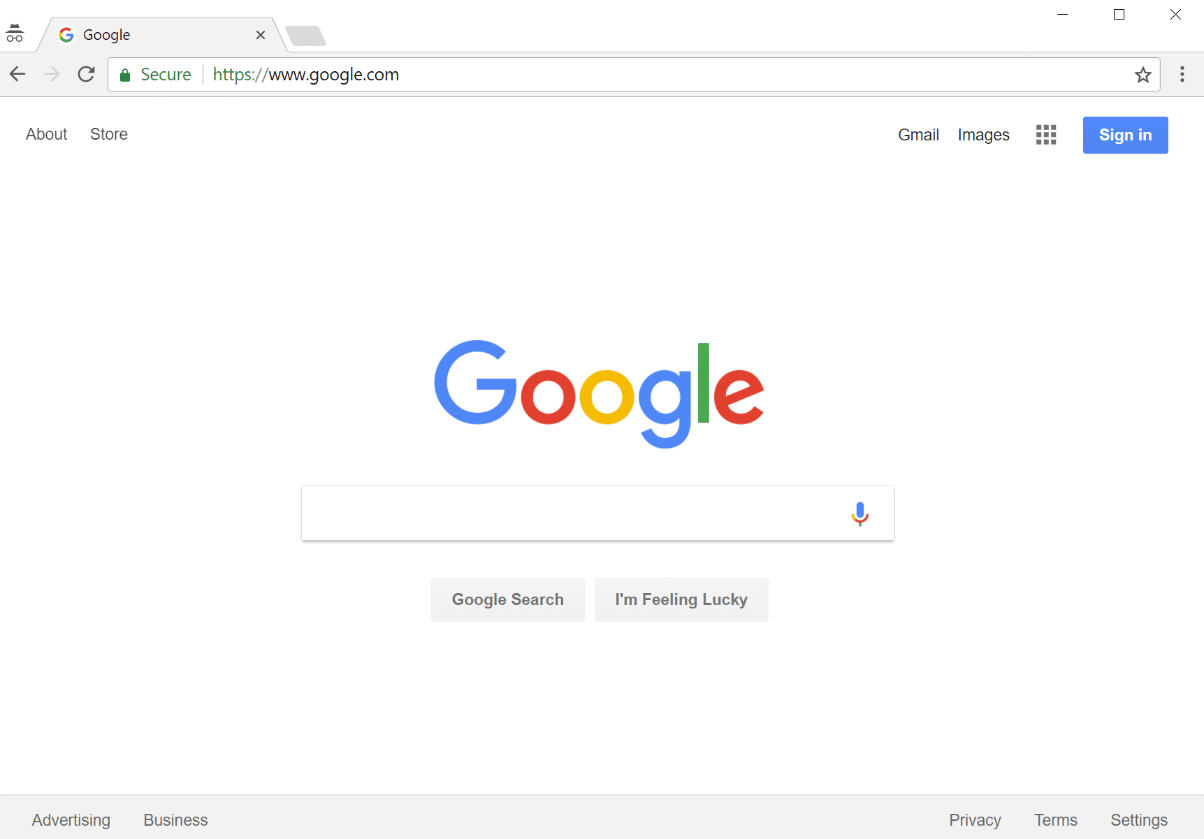
Read more about the power of white space.
5. Make Sure Fonts Aren’t Too Small
If there’s one thing people hate, it’s squinting their eyes trying to read content on your site. People aren’t going to adjust their focus just so they can read your blog content (no matter how awesome it is). Instead, they’ll most likely end up just bouncing. Your font should be easily scannable.
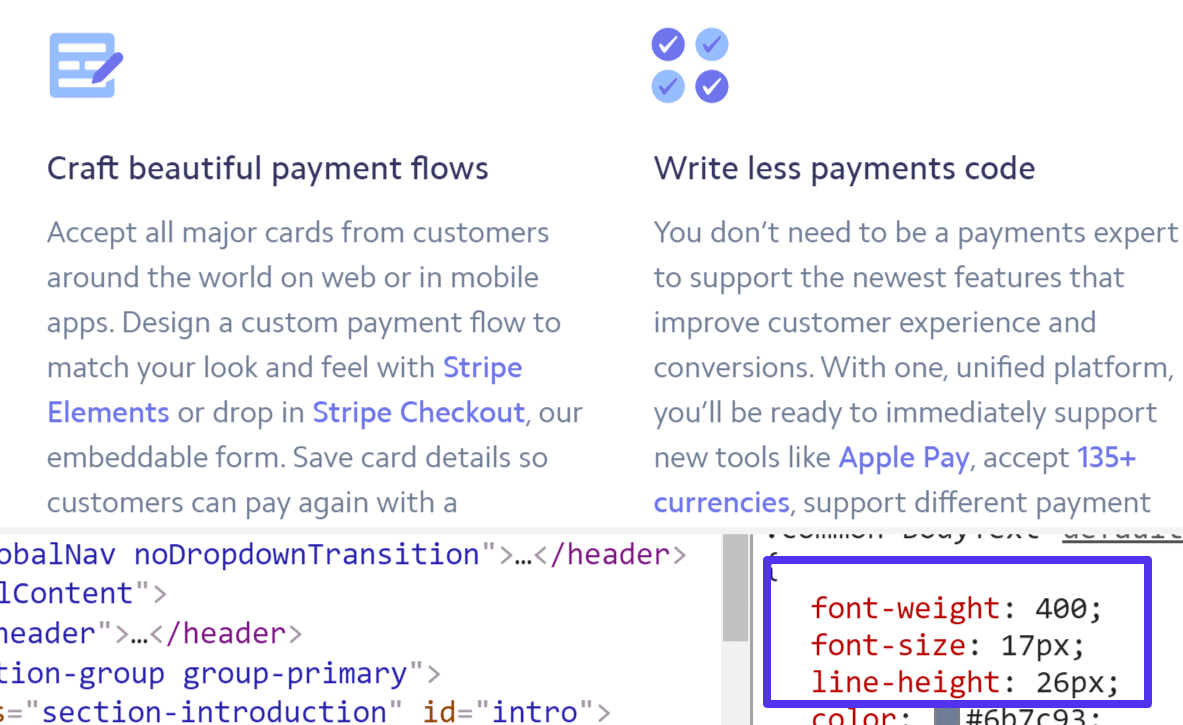
Make it big. This is typically where the trend has been heading. 14 px should be a bare minimum. We take this quite a bit further on the Kinsta blog and use 18 px for our font size. Other sites with great designs, such as Stripe, use a font size of 17 px. And as you can see, it’s very easy on the eyes.
If you have a WordPress site, one easy way to change your body’s font size is simply to drop the following code into the CSS section of the WordPress Customizer.
body {
font-size: 18px;
}
Make sure to also check out our detailed guide on additional how to change font and web font optimization.
6. Add Related Posts to Your Site
Keeping readers longer is always a good idea! Perhaps the post they landed on wasn’t exactly what they were looking for or they want to read more. So you can try and keep them on your site with some of your other related content. This is typically done at the end of your blog posts.
There is a big catch here though, and that is the fact that a lot of the WordPress related post plugins are not great when it comes to performance. In fact, they can be downright horrible. This is typically due to heavy sitewide queries to the database. And speed, as we’ll dive into a little further below, also impacts bounce rate.
The team at Yoast dove into this very topic, and here’s what they had to say:
Let me start by asking a very simple question: On a content page, what would be the fastest implementation of related posts you could think of? The (somewhat dull) answer: Simple, old-fashioned links.
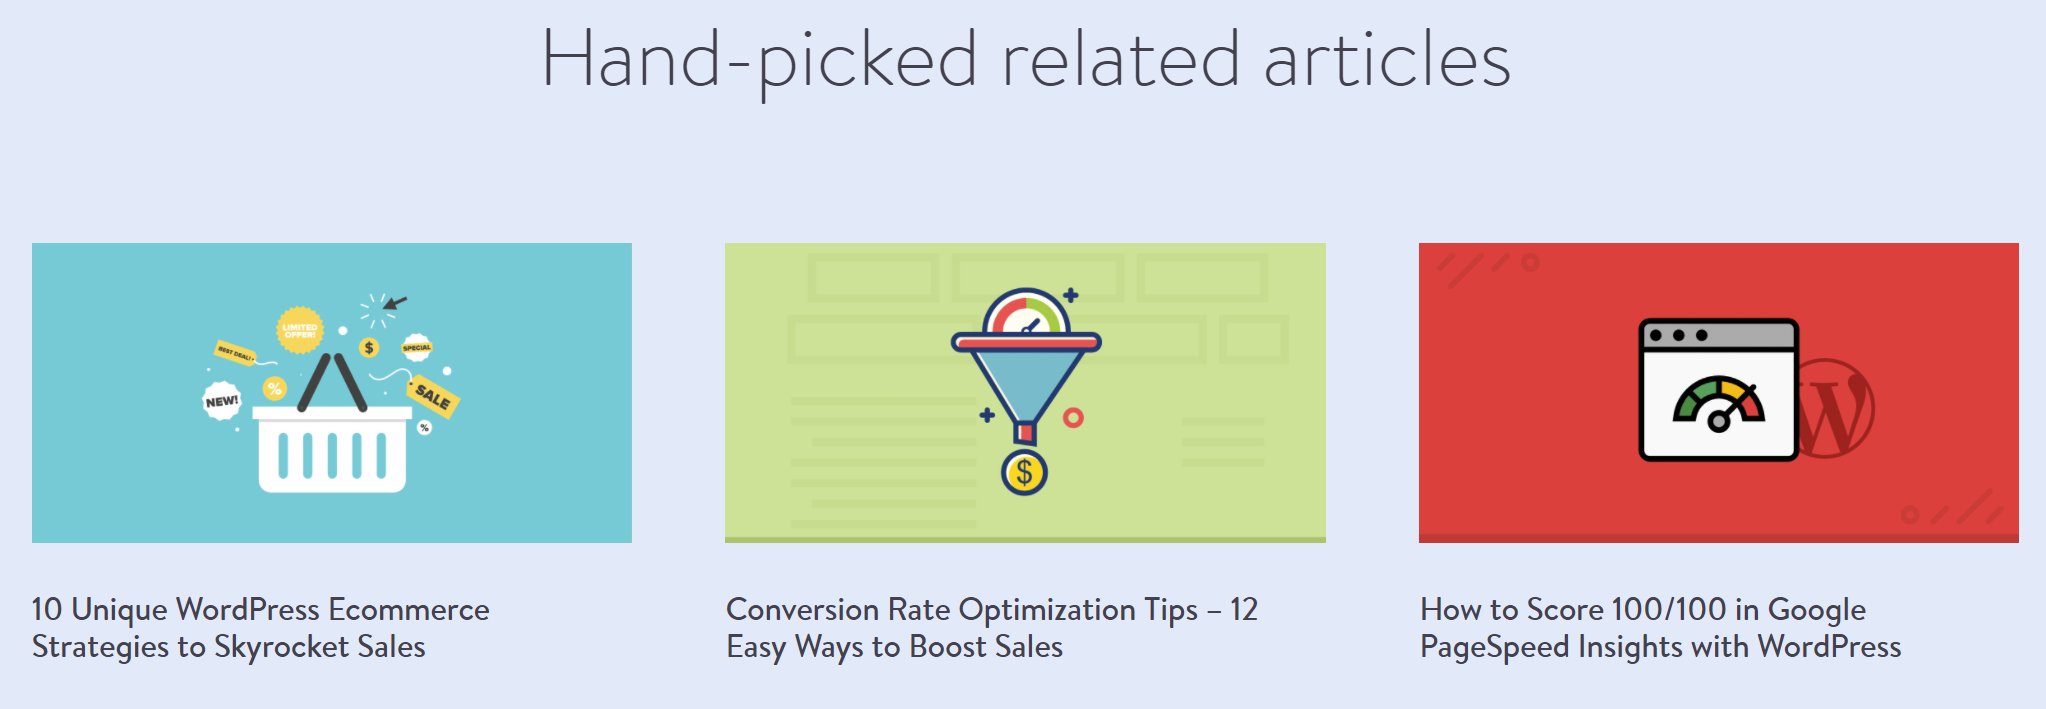
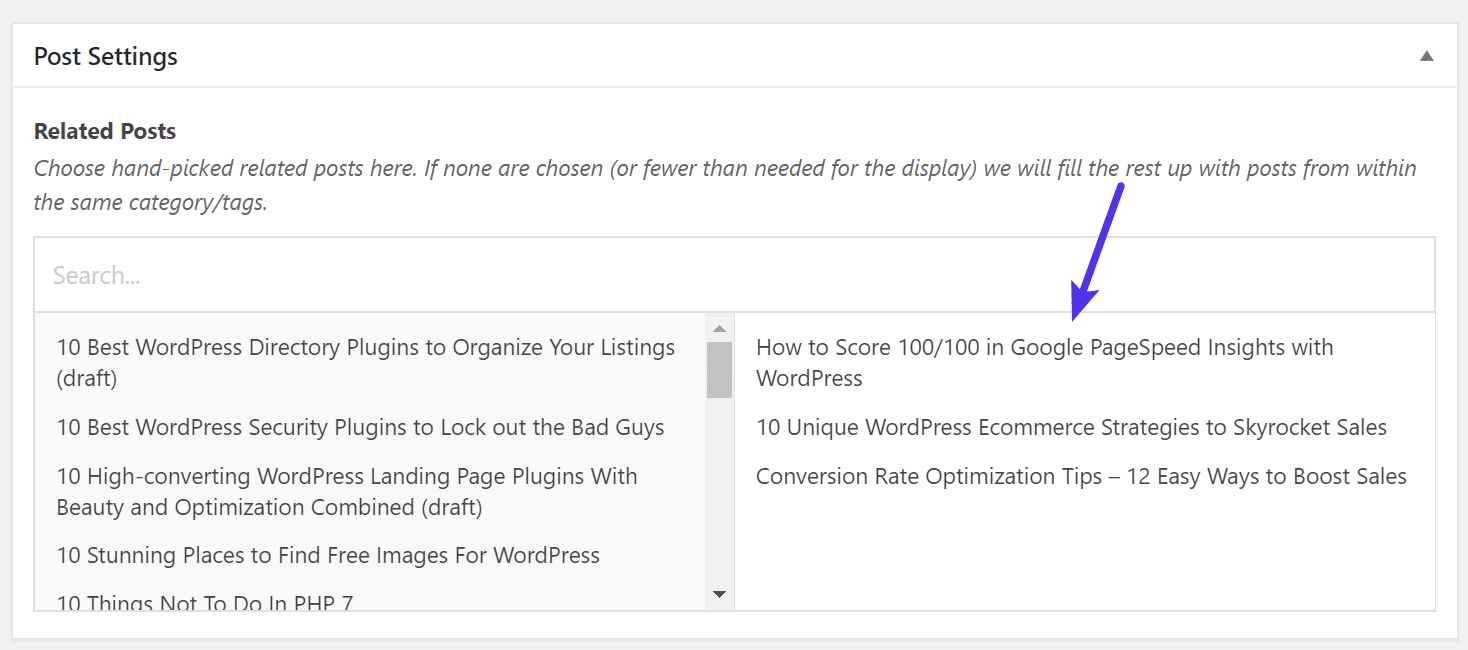
And we completely agree! Now if you scroll down to the end of this blog post, you’ll notice that we have what we call “hand-picked” related articles. And these are in fact selected by us manually and assigned to the post. This dumbs down the query to almost nothing and therefore won’t hurt the performance of your entire site. Does it take more work? Yes, but it can actually be even better as you can choose what you really want readers to see.
So just how did we accomplish this? Well, unfortunately, that is for another post which is coming down the pipe. Make sure to subscribe to our newsletter so you don’t miss it. We can tell you that we used the Advanced Custom Fields plugin and then assigned these fields to our blog post type. This allows us to search and assign whatever related content we want to each of our blog posts (as seen below). We’ll be publishing a full walkthrough on how to set this up yourself.
7. Customize Your 404 Error Page
A 404 error page is the page that shows up when a visitor follows an invalid link to your website — a link that does not yet have any content up on it, which triggers a 404 error. The default WordPress 404 error page, for example, says the following:
OOPS! THAT PAGE CAN’T BE FOUND. It looks like nothing was found at this location. Maybe try a search?
Depending on the theme your running it might also list links to the website pages, categories, authors, posts, and posts by month. It’s not really all that helpful because it just provides too much information, instead of giving the misguided visitor a simple, easy action they can follow. The goal of a 404 page is to prevent a bounce and get them the info they were looking for.
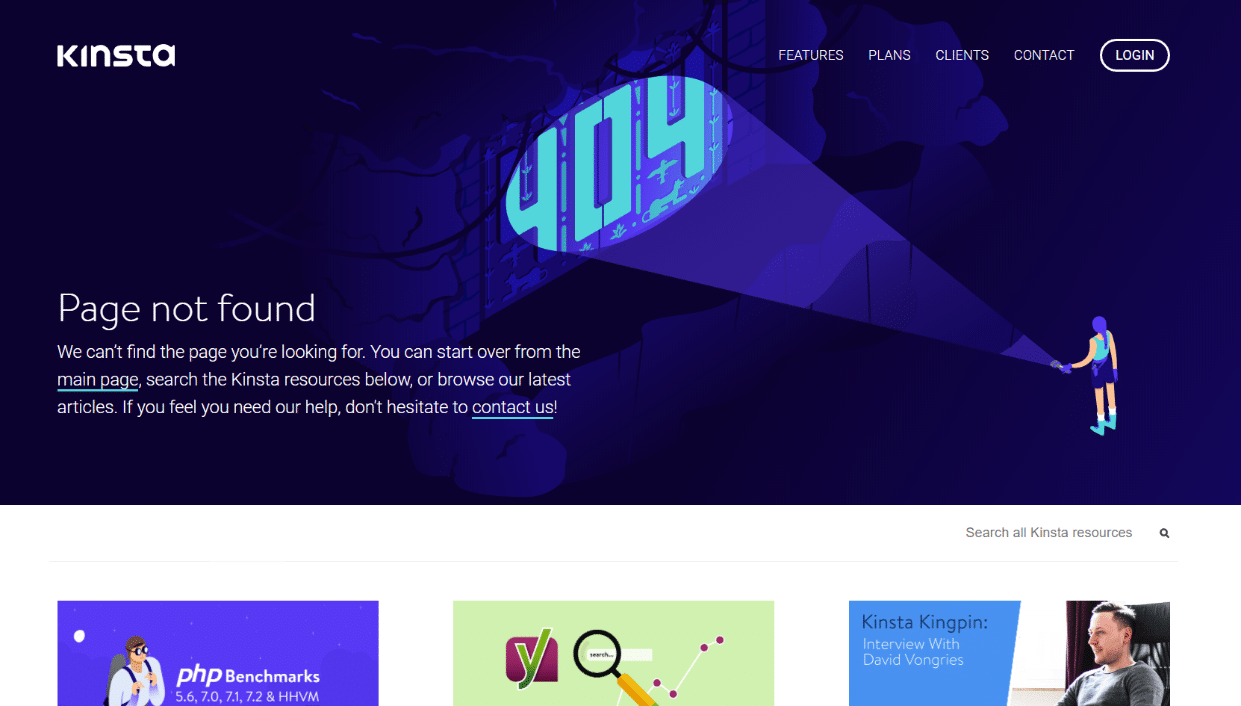
Here at Kinsta, we try to get a little creative with our 404 image and yet still provide the user with useful information. We let them know the page was not found and that they can go back to the main page or use the search below. We also display our most recent blog posts and provide a way to contact us if they need additional help.
To customize your 404 page, you can create or edit your theme’s 404.php page. Most include a pre-built template. Or use a free plugin such as 404page which allows you to easily customize it without having to know any code.
8. Check for Spelling Errors and Typos
Common typos and spelling errors in your blog posts tell your visitors one thing: you don’t care enough about your content (or them) to proofread your post a couple times. This can and will most likely resolve in a higher bounce rate. It also reduces your credibility and is simply unprofessional.
Now, of course, everyone makes mistakes. We publish a lot of content, and no matter how careful we are, typos happen. The important thing is to implement a system or workflow to reduce these mistakes. Here are a few suggestions.
- Make a habit of checking over your post for grammar, typos, and spelling errors at least twice before hitting that publish button.
- If someone sees a typo on your site and calls you out, don’t freak out, just fix it right away. (And don’t forget to clear the cache of that page on your site afterward. This is especially important if you’re promoting your content on social media, as there could be a lot of eyeballs on it.)
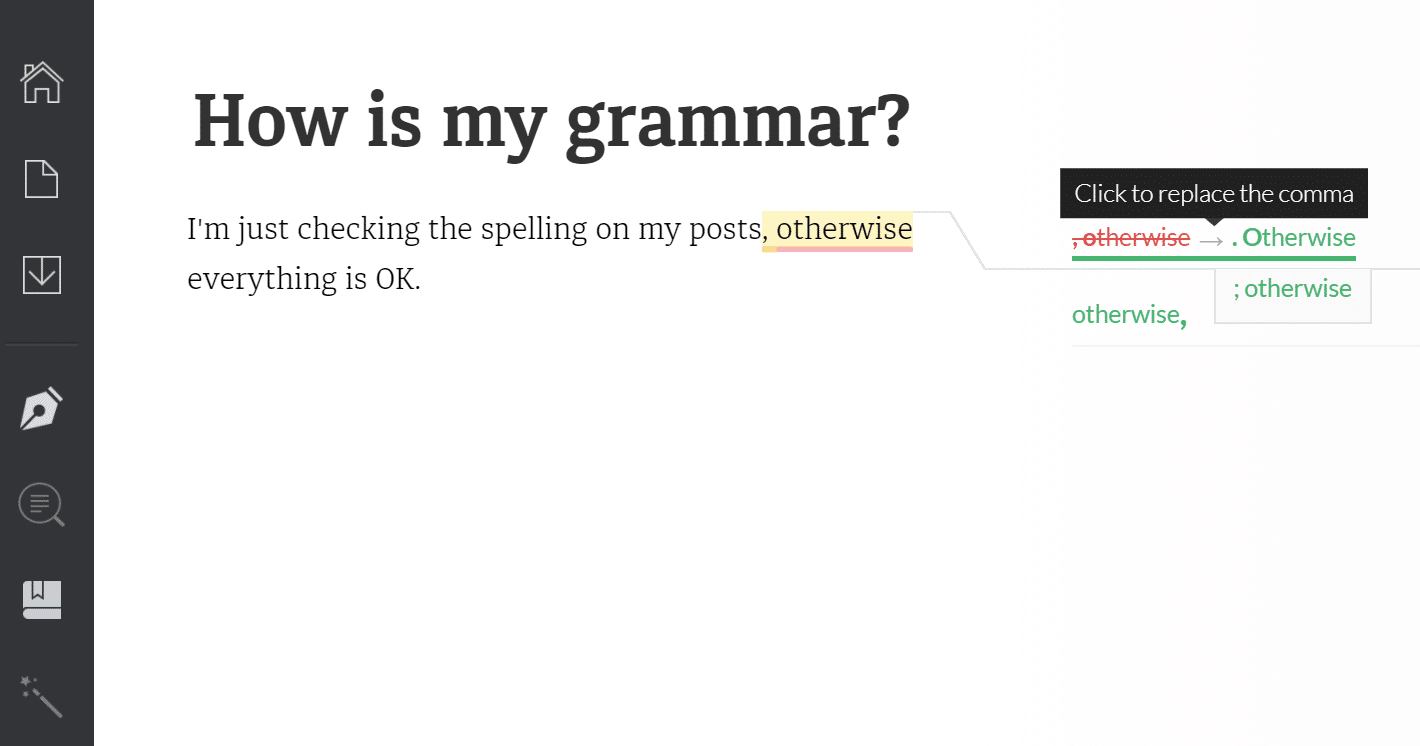
- Use a browser extension like Grammarly. Being avid writers, even we utilize this amazing tool here at Kinsta. Why? Because it will simply help catch things you might otherwise miss. It will speed up your writing workflow. The Hemingway App is also another great free grammar checking tool!
Grammarly
9. Open External Links in New Tabs/Windows
Linking out to other people is great — it allows you to build rapport with them, make connections, and provide more valuable content to your reader. Linking to high-quality external resources can even be beneficial for SEO. But it also takes your visitors away from your site. Unless you set the links to open in a new window or tab.
This can be a very controversial topic for some, and there are definitely good arguments on why you shouldn’t have links open in new windows. However, as the site owner, this is really up to you to decide which method you prefer. Here at Kinsta, we do have links open in new tabs. This helps reduce our bounce rate and keeps readers eyes on our content longer.
To make your links open in a new tab, simply check the “Open link in a new tab” when adding your destination URL in the editor (as seen below).
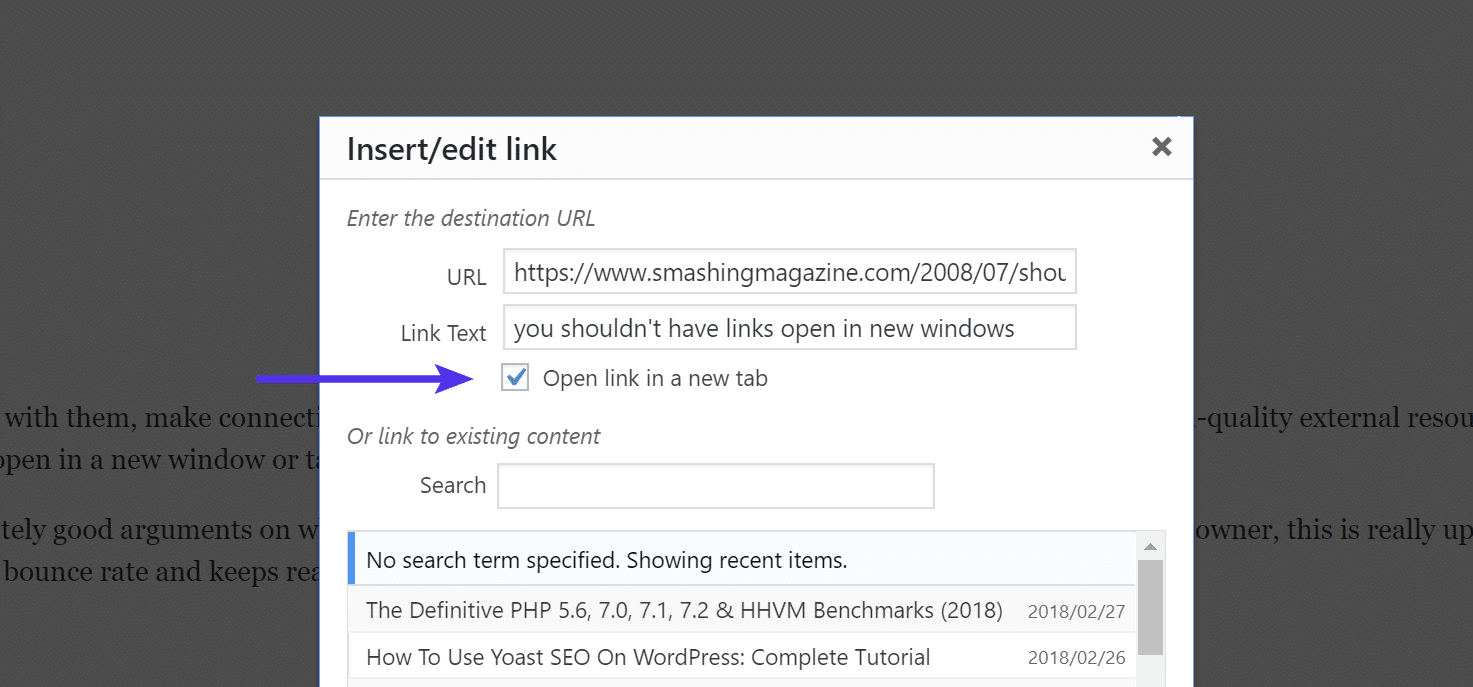
To do this manually in the “Text” view, you can add a "target="_blank" to the link.
Example: <a href="https://domain.com" target="_blank">external site resource</a>
10. Internal Link Often
Not only is internal linking a great SEO practice, but it can also help to reduce bounce rate on your site in a major way. For those unaware, internal linking is simply linking from one webpage on your website to another. You’re directing your readers to another resource on your website so they have something to browse after that first pageview.
Internal link within your blog posts phrases that pop up in a post relevant to another post’s headline. An easy way to do this is simply by searching through your existing content when adding a link. For example, below we searched for SEO, and we internally linked our SEO checklist post. You can of course always link internally with HTML as well.
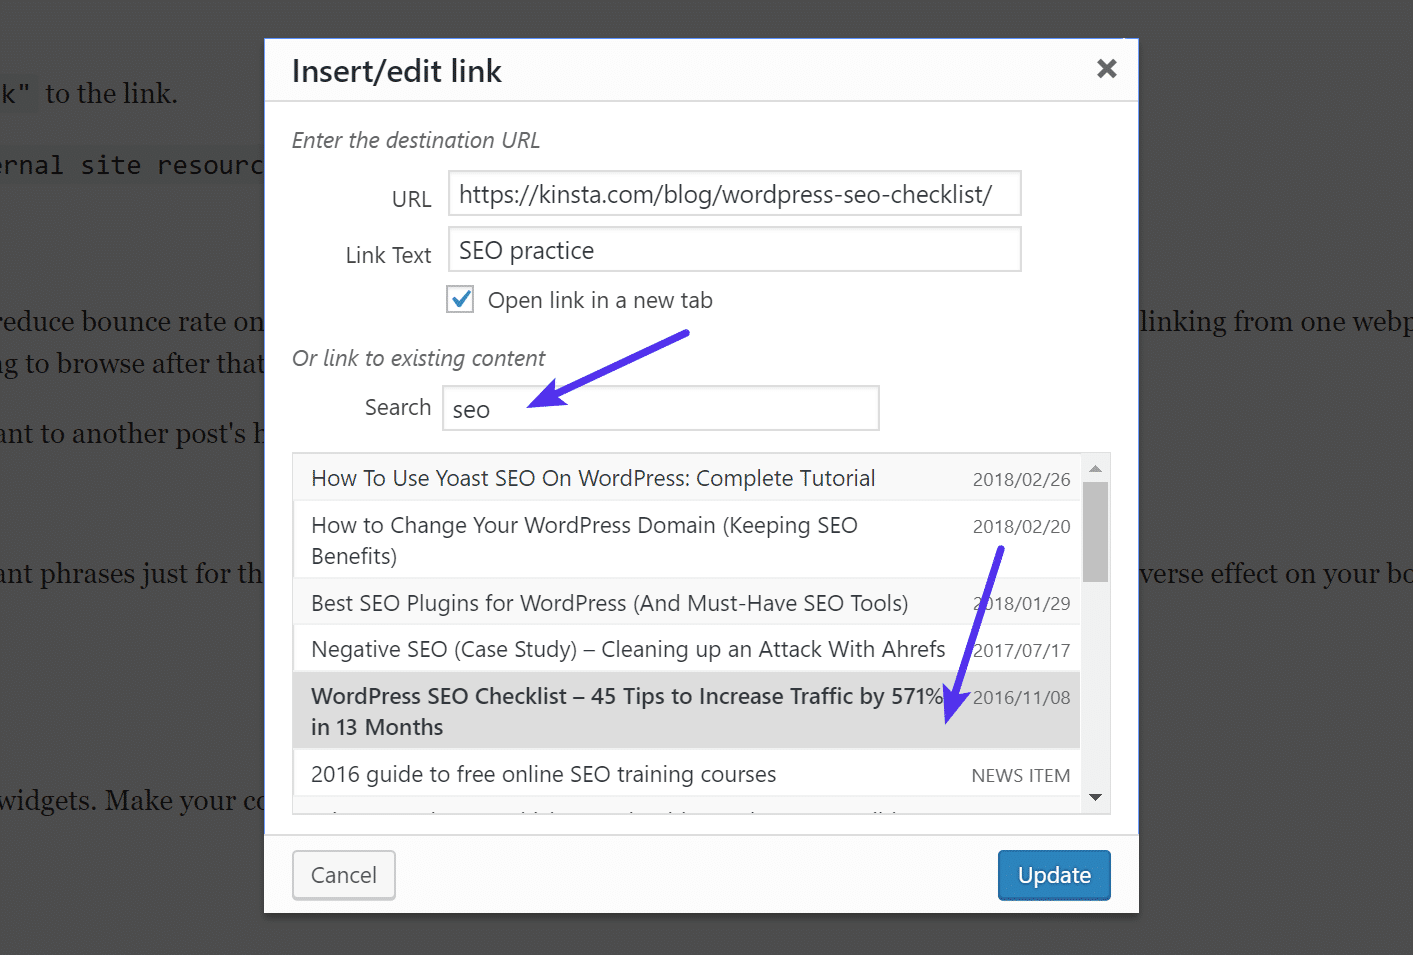
However, as with all things, internal link in moderation — don’t try to link irrelevant phrases just for the sake of adding a few more links. Too much and it could actually an adverse effect on your bounce rate and SEO.
11. Be Cross-Browser Compatible, But Not Too Much
Just because you have a favorite browser, that doesn’t mean your visitors are using the same one. This is why it’s important to check. Some website designs can render a little weird on less popular browsers, such as Internet Explorer. If something appears broken on your site, you could be racking up easily avoidable bounces.
Here are a couple handy tools you can use to test your site in all of the browsers at once:
However, it’s also important to take into consideration your development time and how big of an audience there is pertaining to a particular browser issue. For example, let’s say your site gets half a million visitors per month. If there is an issue with IE 8 rendering something incorrectly, and you know it will take some hefty development time to fix, you might be better off focusing on more important tasks. At some point, you do have to let old browsers die.
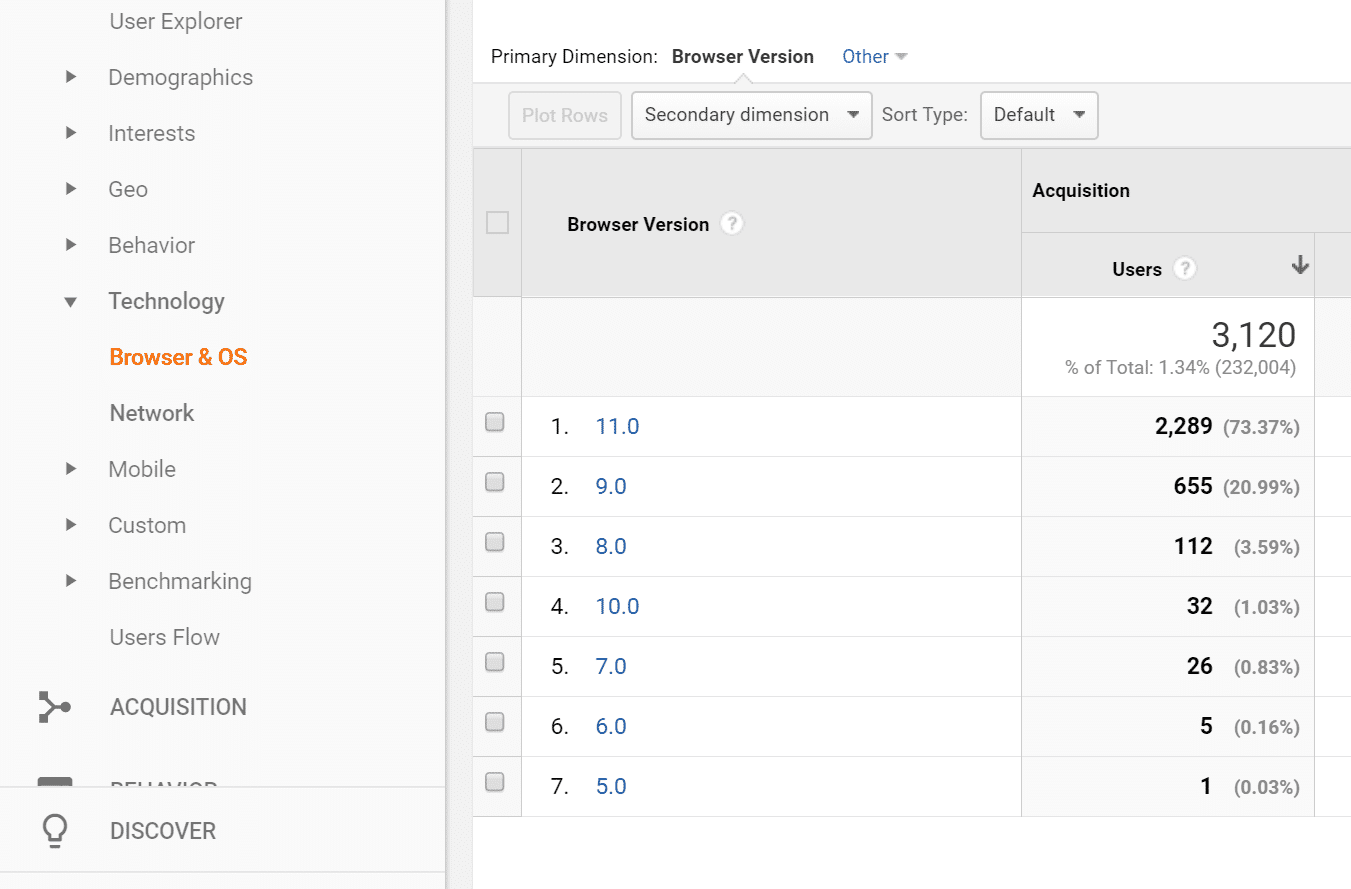
But make that decision with data! You can easily look in Google Analytics under the “Audience → Technology → Browser & OS” report and see just how many visitors are coming from each browser and their specific version.
12. Mobile is Everything
Here are some scary stats for you, especially if you have still not optimized your site for mobile devices:
- As of the fourth quarter in 2017, 57% of all internet traffic is from mobile devices. This is up from just 15% in 2013. 😲
- According to Think with Google, 61% of users said that if they didn’t find what they were looking for right away on a mobile site, they would quickly move on to another site. Additionally, 79% of users who don’t like what they find on one site will go back and search for another site, often benefiting competitors.
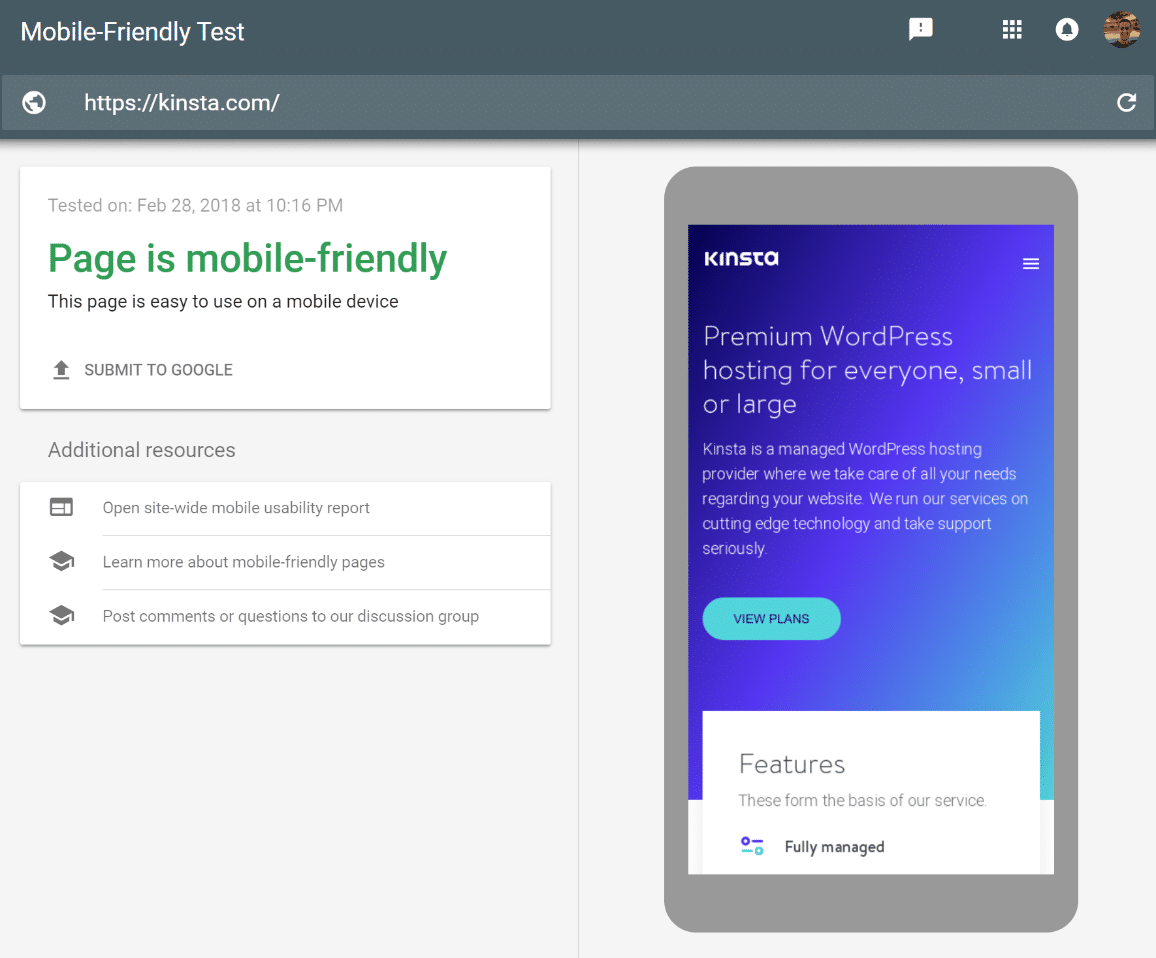
That’s huge! Over half of your traffic could be bouncing just because they can’t navigate correctly through your website. Thankfully, most themes today are responsive out of the box. But you should always test this yourself. We recommend using Google’s Mobile-Friendly test tool. This will also help reassure you that your site is safe for mobile-first indexing (SEO).
If you’re in a pinch, you can also use a plugin to make sure that it’s mobile & tablet responsive. Although we always recommend going down the responsive route first. Responsive simply means your site scales down automatically for all devices with code and no plugin. You can also always hire a developer to assist you in making your site responsive.
13. Be Careful With Advertising
A lot of sites rely on advertising to make money, which is perfectly understandable. However, it’s so important to remember that obtrusive and annoying advertising can seriously impact your bounce rate. Especially auto-playing ads. Remember, not everyone has popup blockers installed. Although most browsers are now trying to enforce this.
Here is an example below of some very annoying advertising. First off, we have the “cookie warning.” This is needed for legal reasons which is fine, however, it should also be taken into consideration when pairing with ads due to screen space. There is then a very large banner ad at the top of the site and another after the intro article thumbnails. Over half of the entire website is ads when you first land on it. Not good!

This is where A/B testing can come in very handy. Try using fewer ads in various placements and see how it impacts the bounce rate of that page. You might discover visitors are hitting your homepage and suddenly leaving. So in fact, removing some ads, could possibly increase your revenue. WordPress plugins like Ad Inserter allow you to easily test different ad placements. Or you can use a free A/B testing tool like Nelio.
14. Structure Your Content Wisely
There are a lot of things you can do to structure your content wisely to help decrease bounce rate. The first is to use blog post headings and subheadings. Blog posts — especially huge, in-depth posts like this one — can carry a lot of information. All that information needs some sort of structure to eat, otherwise, it will be mighty difficult for visitors to digest all of it, triggering a bounce.
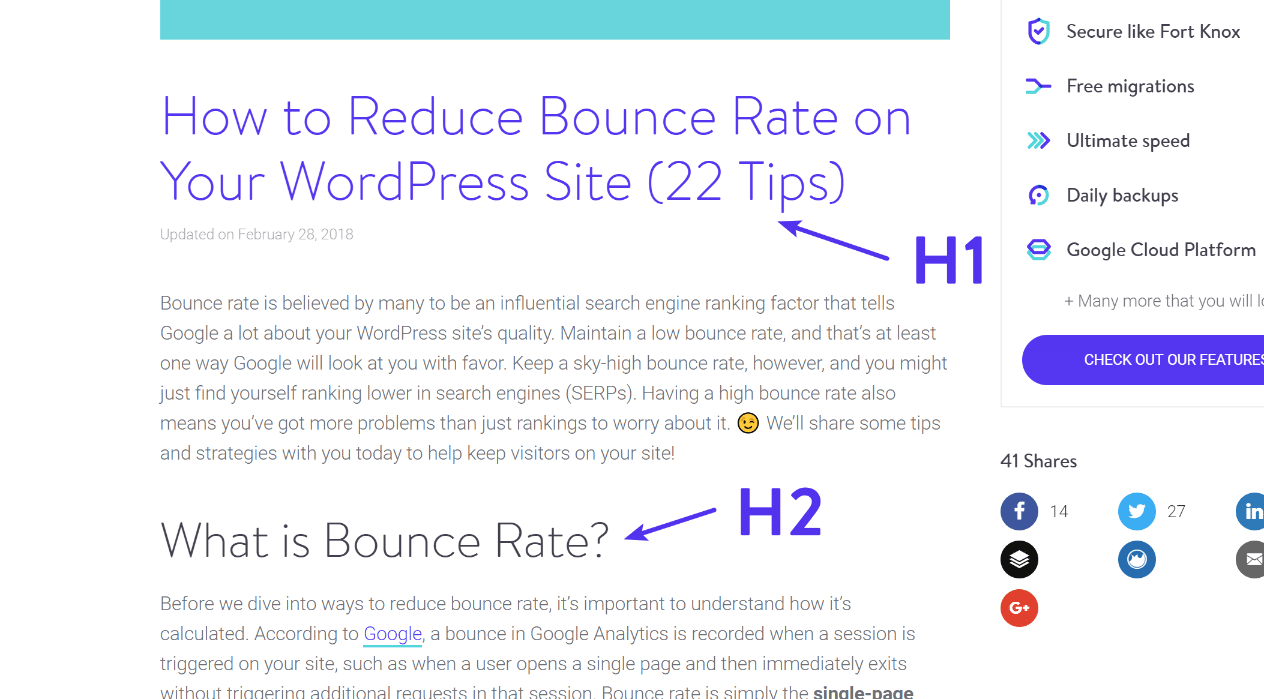
Structure your blog posts with headings (H2) and subheadings (H3, H4, and H5). For instance, in this post, we are using a combination of H2 and H3 headings. And always have one H1 heading at the top of the page.
After you have the headings down, make sure to also use shorter paragraphs. This isn’t high school English, where paragraphs had to be a minimum of five sentences. This is blogging, where paragraphs above five sentences could sometimes get ignored.
If you really want your readers to read your content and not just skim it, then you need to break up your content into shorter paragraphs. Four sentences usually the recommended length. Some bloggers go even as low as two. This can also vary based on the type of content your publishing.
15. Images Tell All
We probably don’t need to expand on this too much, but pictures speak a thousand words. So instead of boring your audience with 4,000 words (hint: content length is not the most important factor), inspire them with an image. If you scroll up in this post, you’ll notice that for every bounce rate tip we’ve shared, there is always an image with an example.
Having trouble finding images? Check out these 10 awesome places to find royalty-free images for your site. We are also big fans of Iconfinder, and in fact, use them a lot in our featured images.
Also, make sure that your image plays nicely with your content layout as well. We recommend always using full-width images when possible that fill up the entire content area. This is usually easier on the eyes and makes content more easily scannable. And don’t forget to optimize your images for better performance.
16. Focus on What’s Important
Your content is the most important part of your website. Period. Direct your users’ attention to the content. Don’t distract them with 20 widgets or CTAs. Make your content visibly the most important part of your page. If there are too many distractions, you can kiss your bounce rate goodbye.
After you direct their attention, make sure your content is actually valuable and beneficial to the reader in some way. Otherwise, they’ll leave and there is no reason for them to return. In short, create useful and evergreen content that you yourself would want to read. So the next time a visitor hits up your site, they’ll love it so much they just won’t be able to bring themselves to bounce. Instead, they’ll just want more.
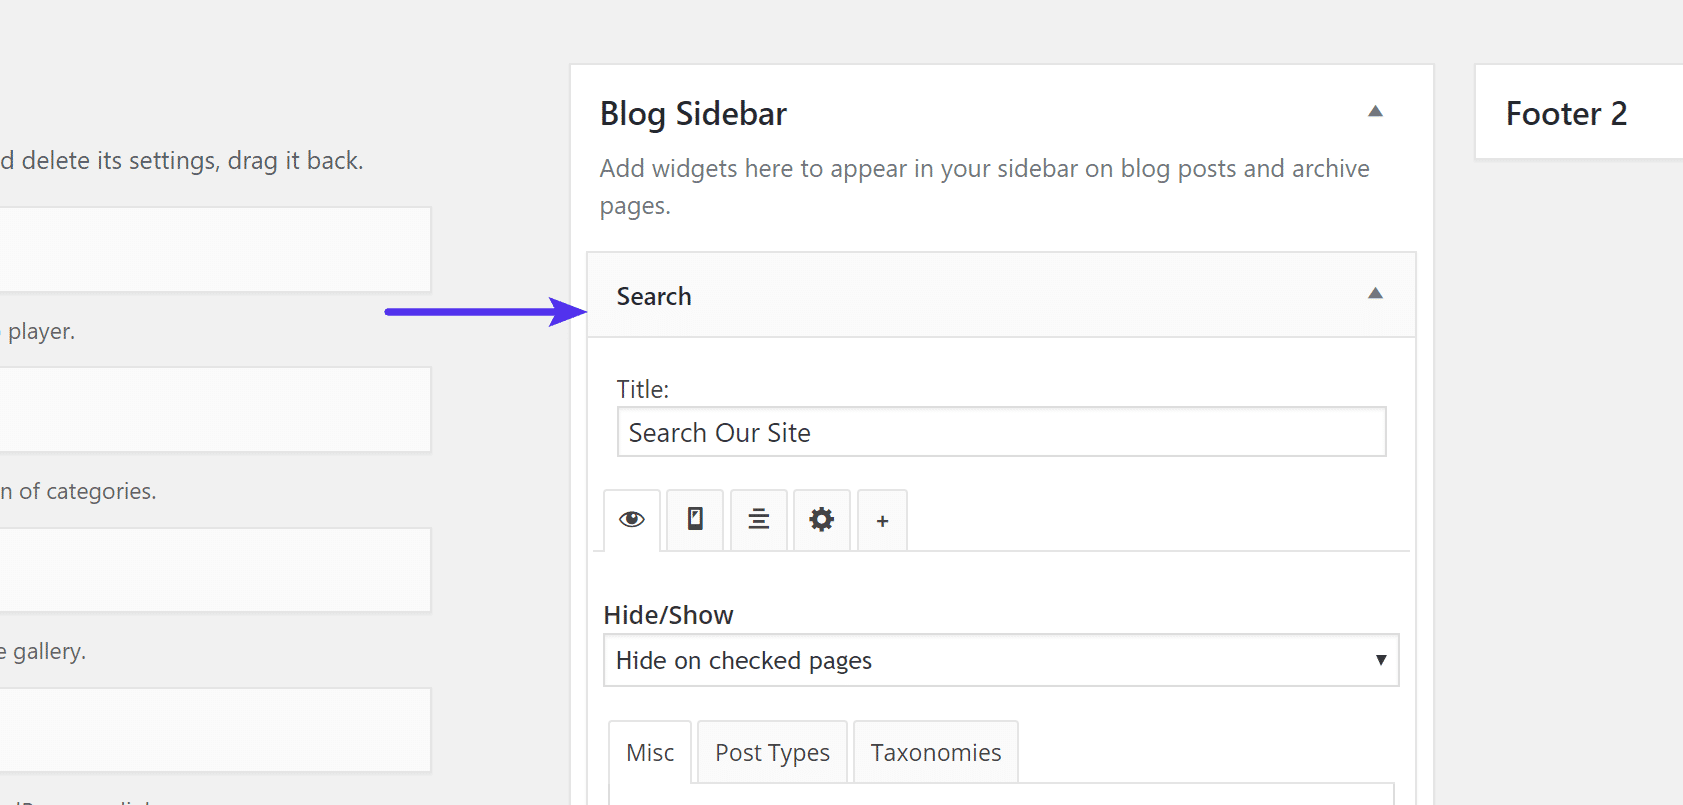
17. Always Implement Internal Search
If a visitor hits your site and can’t find what he’s looking for, then you’ve probably already done something wrong. But, the way to redeem yourself and keep that visitor from bouncing is to implement internal search on your site. This is most likely the last thing that visitor will try before leaving.
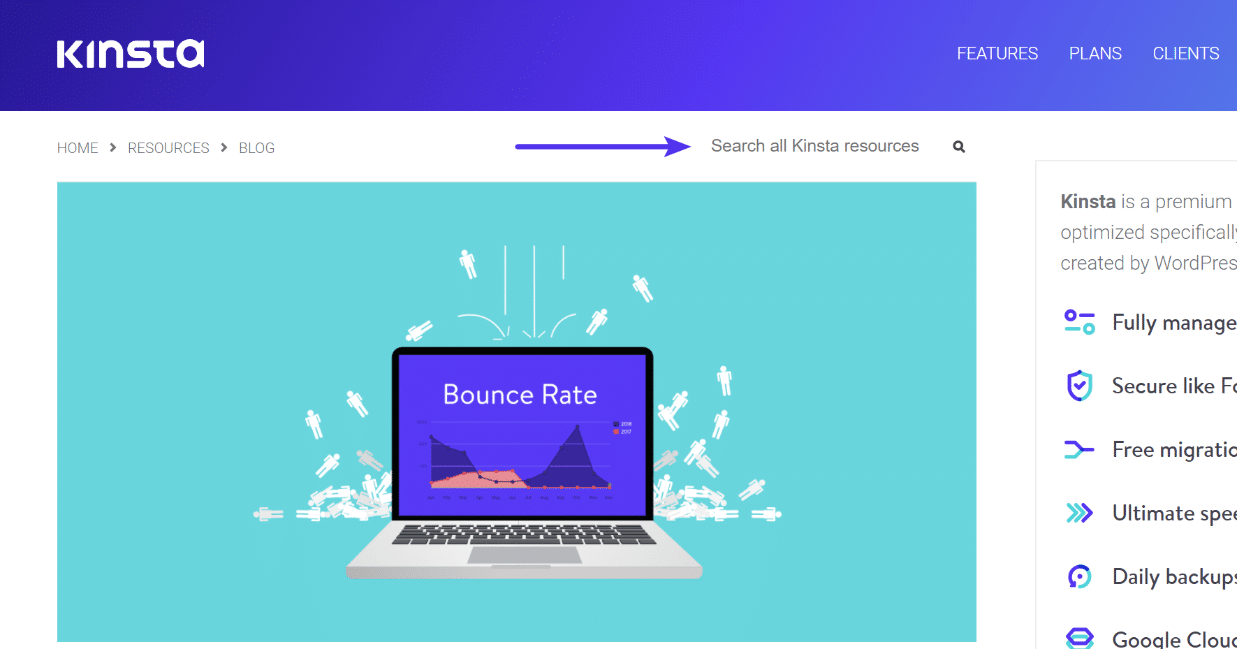
By default, your WordPress installation should include an available search widget you can set it up in any widgetized location. Your theme might also have additional locations built-in that you can utilize search. But whatever you do, don’t ever remove search functionality from your site!
18. Have Lightning-Fast Page Load Speeds
Page load speed is a very influential factor in your bounce rate. Simply put, the faster your website loads, the lower your bounce rate will be (if all other variables are constant). Websites taking more than 3 seconds to load immediately lose 40 percent of the traffic. And 79 percent of dissatisfied visitors almost never return to slow sites!
For truly lightning-fast speeds, you need a premium application, database, and managed WordPress host and that is where Kinsta can help. We are powered by a powerful cloud hosting infrastructure which means your sites are delivered over one of the biggest networks in the world, and load from low-latency data centers close to your visitors. We also have an HTTP/2 CDN integration which allows you to further speed up delivery of your assets around the globe.

Let us show you the Kinsta difference. Or read a little more about why we are different from every other host you’ve tried.
Summary
Hopefully, these tips on how to reduce bounce rate on your site were helpful. If you made it this far, we’ve done our part on reducing our own bounce rate. 😉 Now it’s your turn. Which ones will you be implementing on your site today? Or have you seen any other optimizations that make a huge difference? If so, let us know below in the comments.

Brian has a huge passion for WordPress, has been using it for over a decade, and even develops a couple of premium plugins. Brian enjoys blogging, movies, and hiking. Connect with Brian on Twitter.

