
If you want to create truly custom content on your WordPress site, using custom post templates is a great way to ensure that everything you publish is unique. Templates like this save time and ensure consistency across your site.
Fortunately, specific templates for specific purposes enhance the user experience and your workflow. You can design post templates that fit your needs rather easily. Whether you’re using the Block Editor, Elementor, Divi, or custom code, the possibilities are yours to take.
Today, we’ll cover how to do it with step-by-step instructions for creating custom WordPress post templates using each of these tools.
What is a WordPress post template?
A WordPress post template is a predefined layout and design that you can use to provide structure to your blog posts. Rather than a standard layout (or blank page), these templates offer a predetermined way for content to be displayed.
But if your content needs to stray outside of the standard single-post option—that is, if you want to structure your content differently—you can make your own templates. Then, each time you want to create a post using that format, all you need to do is select that template, and the post will be formatted that way. No inserting blocks or rearranging is required.
Benefits of using post templates
As you can imagine, there are a handful of benefits associated with creating your own post templates. These include:
- Consistency. Post templates ensure that every post adheres to the same style guidelines, making your blog look professional and cohesive. Whether it’s the font style, header size, or placement of images, templates keep everything uniform.
- Efficiency. With post templates, you can speed up the content creation process by a great deal. Instead of manually setting up the structure for each new post, you can select a template and focus on writing. This is especially useful for bloggers and businesses that publish content frequently.
- Improved design. Templates allow for advanced customization and improved design without needing extensive coding skills. Tools like the Block Editor and Elementor let you create visually appealing layouts that enhance the reader’s experience – and save them for later and repeated use. For example, you can include dynamic widgets, custom headers, and footers tailored to specific post types or categories.
Post templates save time. When you create your own, you can ensure that your blog posts are easier to produce and more engaging for site visitors. But what can they be used for? Let’s cover that next.
What can custom post templates be used for?
Custom post templates in WordPress are versatile and allow you to tailor your content’s presentation. But without concrete examples, this can feel a bit abstract.
First of all, these templates can cater to specific content types. This makes each content type more engaging and appropriate for its purpose. For instance, you can create custom post templates for:
- Blog posts. Create a consistent look for all your articles, ensuring uniformity in fonts, headings, and image placement.
- Landing pages. Design templates that focus on conversions with prominent call-to-action buttons, minimal distractions, and persuasive elements.
- Product reviews. Develop templates that highlight key product features, pros and cons, and customer testimonials in an organized manner.
- Portfolios. Showcase your work with a template that emphasizes visual content, like images and videos, and provides a clean layout for project descriptions.
But beyond post types, you can also use templates to experiment with different layouts and incorporate various design elements. That way, you could pull up different templates when you’re working on different content types, like a post that’ll need a full gallery section or a review with comparison tables.
Here are a few commonly used layout options you might wish to add to your custom templates:
- Full-width layouts. Ideal for content that benefits from a spacious look, such as photography blogs or case studies.
- Sidebar layouts. Useful for blogs that need additional navigation or information, like recent posts, categories, or advertisements.
- Grid layouts. Perfect for portfolios or ecommerce sites, presenting multiple items in a neat, grid-style format.
- Custom headers and footers. Modify these elements to include specific information, navigation links, or branding that aligns with the content of the post.
Custom post templates save you time while ensuring that each type of content is presented in the most effective way possible.
Now that you’re convinced of the value of custom post templates let’s talk about how you can create them for yourself.
How to create a custom WordPress post template
We’ve already established that creating a custom WordPress post template is a powerful way to ensure your content stands out and meets your specific needs.
In this guide, we’ll walk you through the process of creating custom post templates using the following methods:
- Block Editor
- Elementor
- Divi
- Code
Let’s explore now how you can elevate your WordPress posts with customized designs that you can reuse repeatedly.
Method 1: Create custom post templates using the Block Editor
The Block Editor, introduced in WordPress 5.0, changed the way people make content in WordPress. Its modular, block-based approach lets people make visually appealing layouts without needing extensive coding knowledge – or without struggling with multiple widgets or plugins.
While you can create custom layouts using Blocks on the fly, creating custom post templates to reuse is a better idea. That way, you don’t need to manually build up each post’s layout before inserting your content. Just select the template and go.
Let’s take a look at the process of creating custom post templates using the Block Editor.
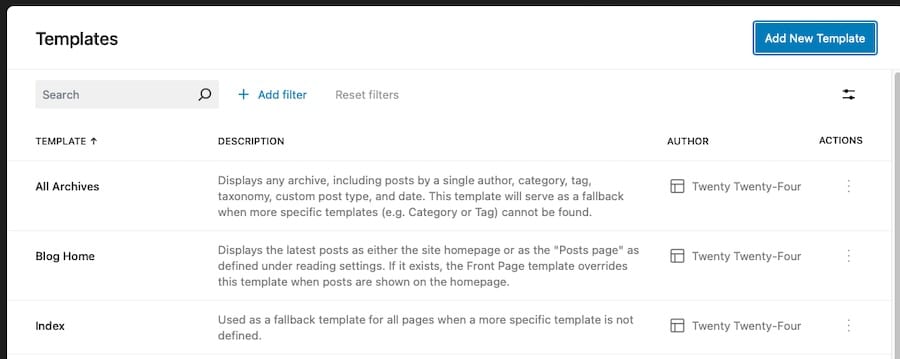
Step 1: Access the Template Editor
To get started, log into WordPress to access the dashboard.
Go to Appearance > Editor or Templates > Add NewTemplate to create a new template.
Step 2: Choose the template type
Select the type of template you want to create, such as a single post, page, or custom post type.
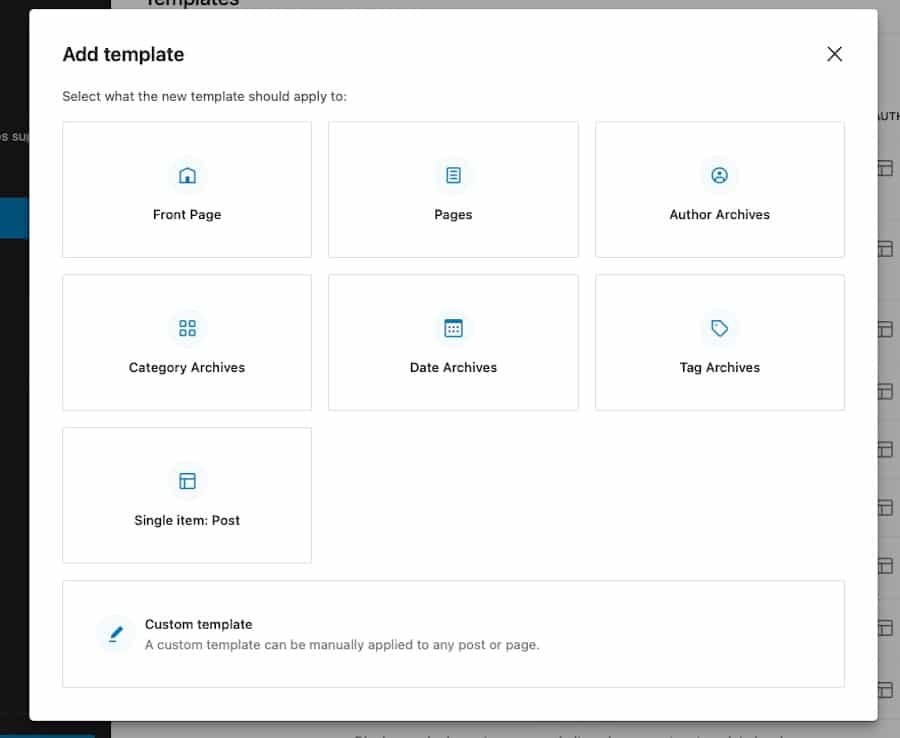
For this example, we’ve selected a Post template.
Step 3: Build your custom template
From here, customization follows the same process you’d use to build a standard post layout. Use the drag-and-drop interface to add blocks such as headers, footers, text, images, and other content elements. Get the design to look precisely how you’d like it to.
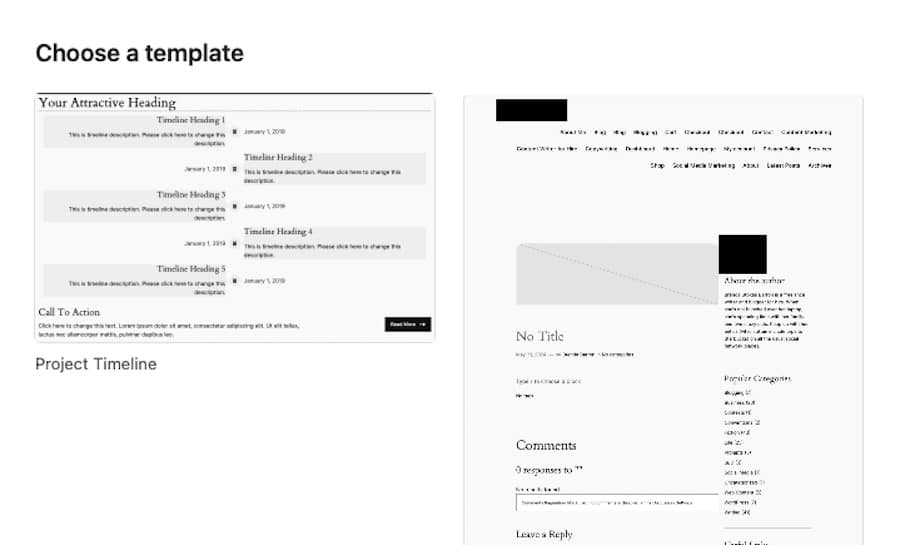
For this example, we’ve inserted blocks to create a template for describing a workflow process. That is a page that describes what new clients could expect when working with you on a project.
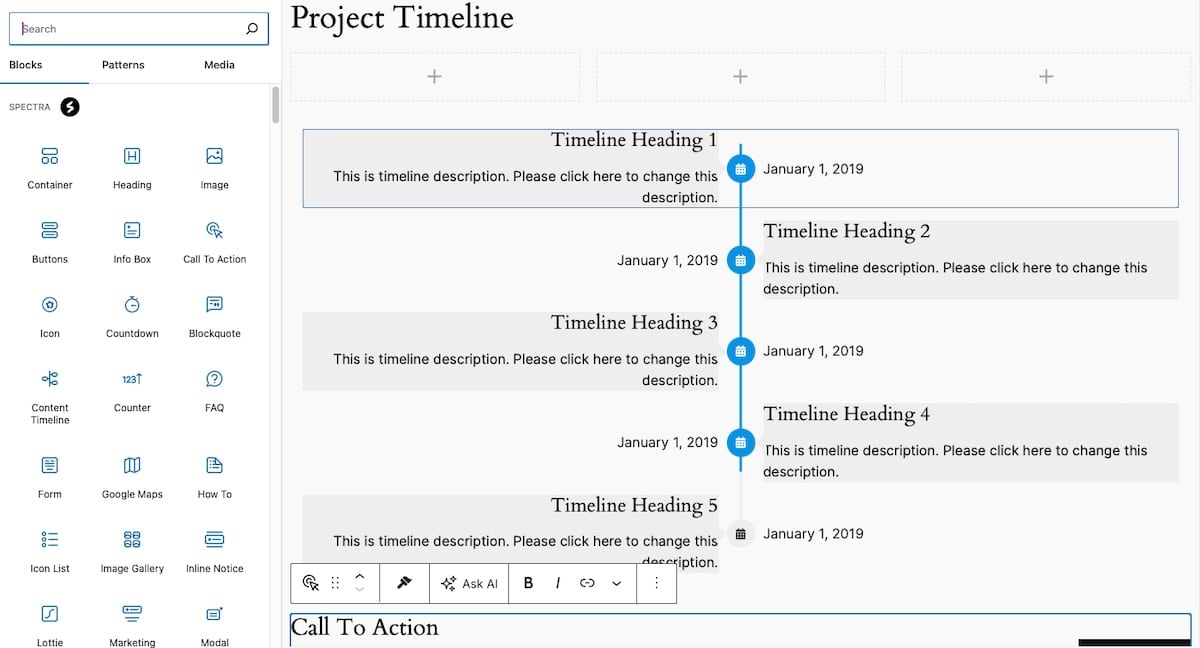
In this template, we’ve added blocks for a headline, a three-column container for adding either text or images, a timeline block for describing the work process, and a call-to-action block at the bottom.
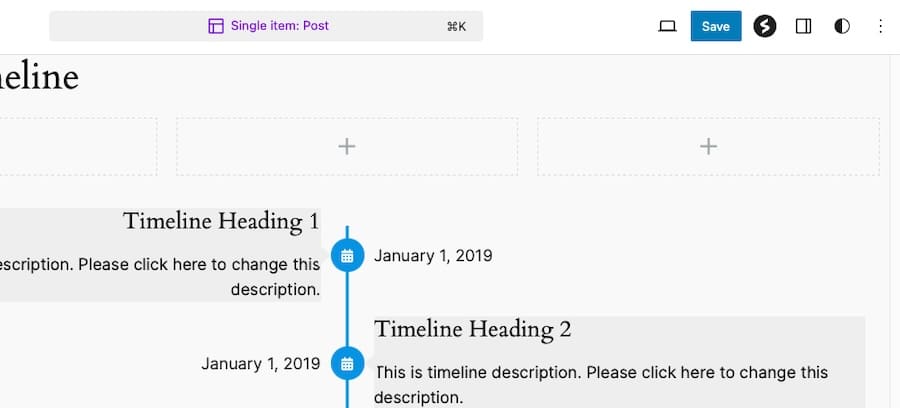
Once your template design is complete, click Save in the upper right-hand corner.
Step 4: Use the new template in a post
To apply the template to a post, open a post in the Block Editor and go to the Post Settings sidebar. Here, you’ll see a link that likely says Single Posts, as that’s the default post template in the Twenty Twenty-Four theme.
Click this, and new options will appear. Here, click Swap Template.
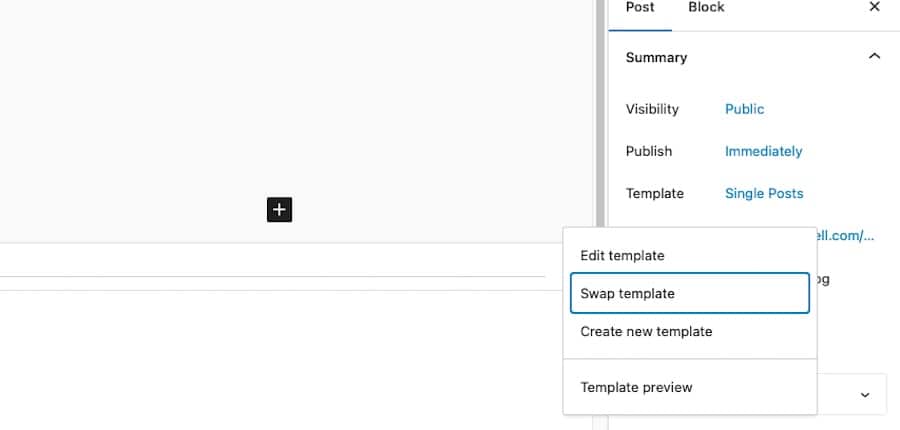
Then, choose your custom template on the next screen.
Pros and cons of using the Block Editor
This process is super straightforward and offers many benefits. But it does carry a few drawbacks as well. Let’s explore both sides of that coin now.
Pros:
- Simplicity. The Block Editor’s user-friendly interface makes it accessible to everybody of all skill levels. Creating and modifying templates is straightforward with the drag-and-drop functionality, too. And there are no extra tools required – just an up-to-date WordPress installation.
- Efficiency. Reusable blocks and the ability to save templates streamline the content creation process, saving time and ensuring consistency across posts.
Cons:
- Limited customization. While the Block Editor is great for basic customization, it may not offer the advanced features some users need. For more complex designs, additional plugins or custom coding might be required.
Using the Block Editor to create custom post templates is a practical way to enhance your WordPress site’s design without needing to know how to code. But if you need more flexibility, exploring tools like page builders or custom coding might be beneficial. Let’s discuss those next.
Method 2: Create custom post templates using Elementor
Elementor is a popular page builder plugin for WordPress. With it, you can create complex sites and make all sorts of customizations using just a drag-and-drop interface. As with the Block Editor, you can use Elementor to design WordPress post templates that fulfill your intentions.
Let’s walk through this process.
Step 1: Install and activate Elementor
Go to your WordPress dashboard and install the Elementor plugin. To do this, go to Plugins > Add New Plugin then type in “Elementor.” The plugin should be the first search result.
Click Install, then Activate.
You’ll need the premium version of the plugin to create custom post templates.
Step 2: Access the template builder
With the installation complete, go to Elementor > Templates > Add New.
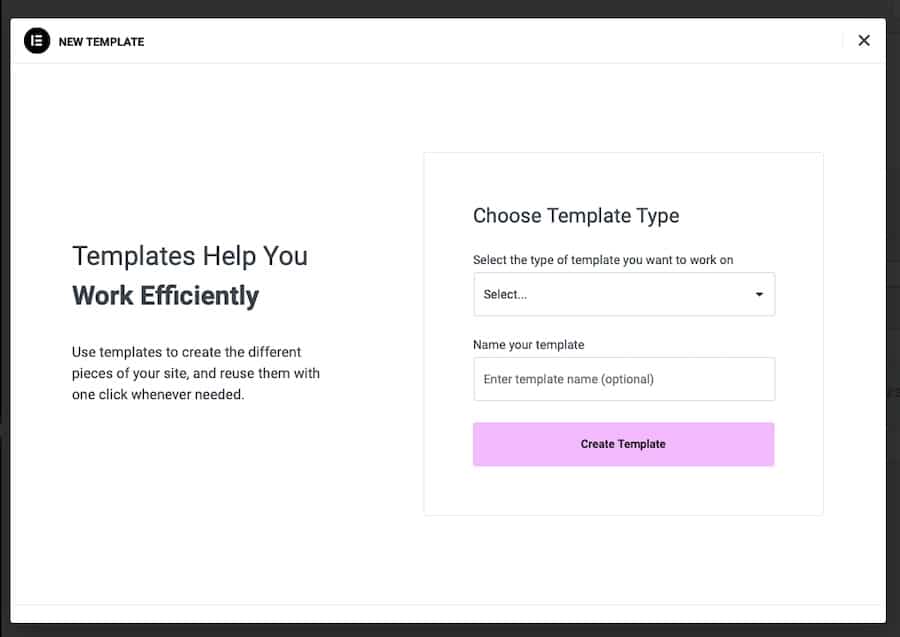
Choose Single Post as the template type, then give your template a name and click Create Template.
Step 3: Customize the layout
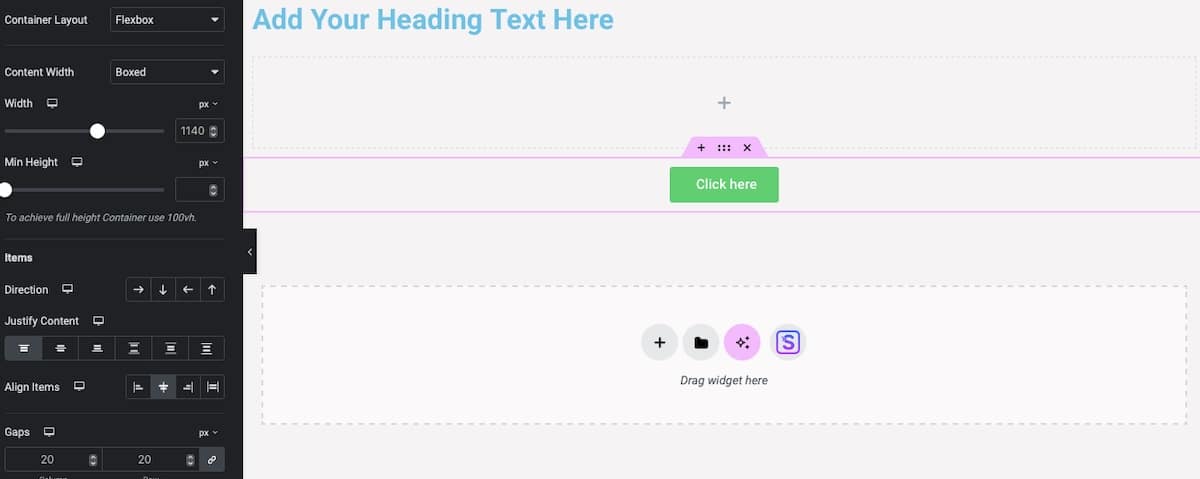
You can add and arrange different post elements using the drag-and-drop editor. Common options for post templates include Post Title, Post Content, Featured Image, Post Excerpt, Post Meta, and Author Box.
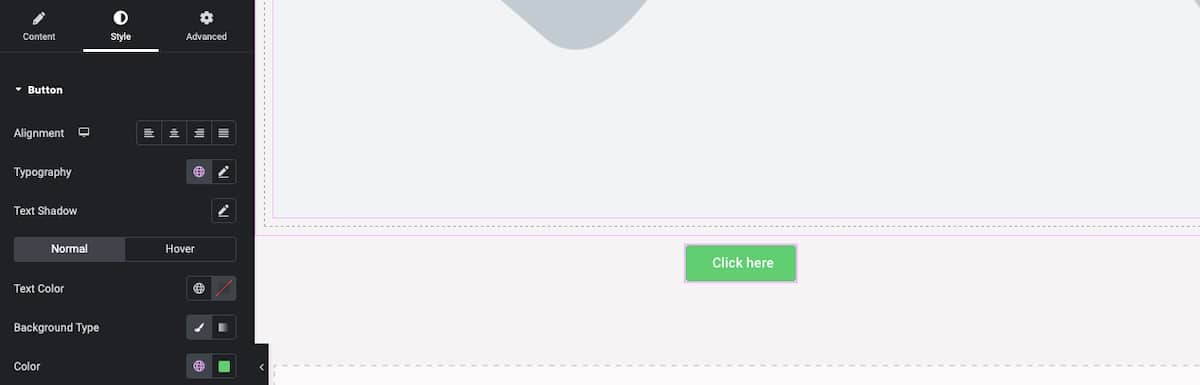
But you can choose whichever best suits your needs. Customize each element’s settings to fit your design needs. For example, you can adjust typography, colors, and spacing in the Style tab for each element.
Consider adding dynamic elements like Related Posts, Comments, and Social Share Buttons as well.
Step 4: Apply the template to a post
Once you are satisfied with your design, click Publish.
Elementor will prompt you to set conditions for where this template should be used. You can apply it to all posts, posts in specific categories, posts by specific authors, or even individual posts.
Pros and cons of using Elementor
Elementor generally makes creating post templates simple. But as with the Block Editor, it has both positive and negative aspects.
Pros
- Advanced customization. Elementor provides a high level of design flexibility. You can achieve more complex layouts and unique designs that might not be possible with the default Block Editor.
- Easy to use. The drag-and-drop interface is relatively easy to use. You drag and drop elements into place where you want them to appear. Real-time previews make the design process intuitive, too.
- Dynamic content. Elementor allows you to add dynamic content as well, which is helpful for those who want post sections to automatically update with new content.
Cons
- Difficulty. While Elementor is user-friendly, the sheer number of options and settings can be overwhelming for beginners. There is a definite learning curve to fully utilize its features.
- Performance concerns. Using too many elements can sometimes impact page load times. So you’ll need to be mindful not to overdo it so as to not compromise site performance.
Elementor is a solid option for creating highly customized WordPress post templates. Its advanced features allow you to design templates that look great and enhance the user experience.
Method 3: Create custom post templates using Divi
The Divi Theme Builder, part of the Divi theme by Elegant Themes, offers yet another way to create custom post templates using a drag-and-drop editor. It allows you to design complex layouts and easily apply them across your WordPress site.
Step 1: Access the Divi Theme Builder
To use this method, you will need to purchase Divi. Assuming that you’ve bought the theme and its accompanying Divi Builder Plugin, you can install the theme as you would any other premium option. Just go to your WordPress dashboard, then Appearance > Themes > Add New Theme. Then select the Divi .zip file and upload it to your site. Click Install.
Once this process is completed, go to Divi > Theme Builder.
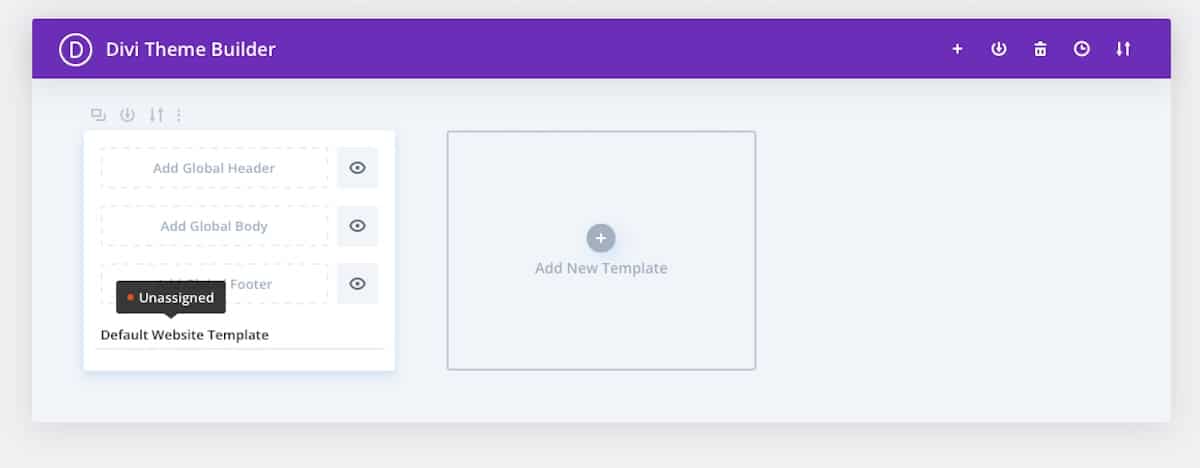
Click on Add New Template, then Build New Template to create a new template.
Step 2: Adjust template settings
In the Template Settings, select where you’d like your new template to be used. Since we’re creating a post template, you’ll want to choose one that appears under the Posts section.
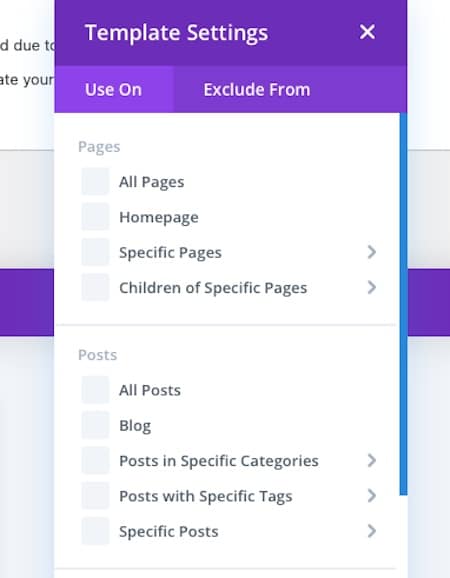
For our example here, we’ve selected Blog.
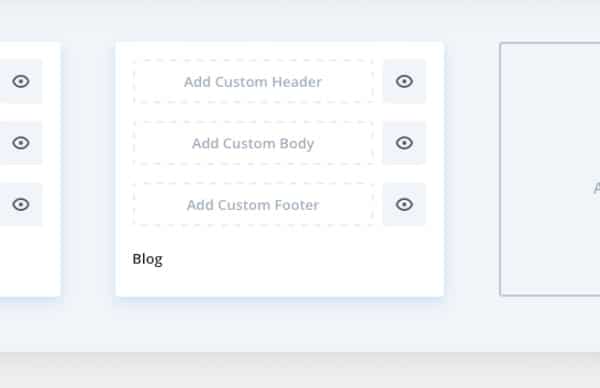
Next, select Add Custom Body and choose Build Custom Body.
Step 3: Customize the layout Using Divi Modules
Design your post template using the Divi Builder. Then, use the built-in Divi Modules to create your desired layout.
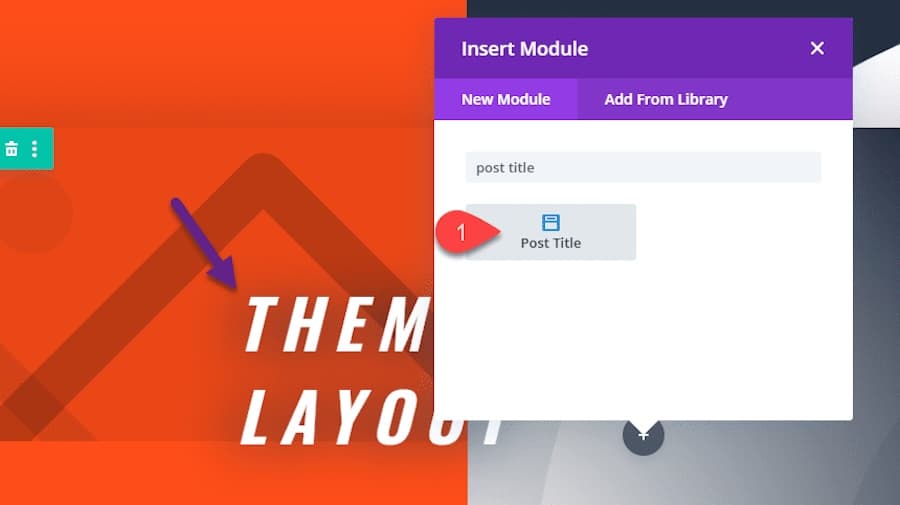
Divi offers a wide range of modules you can use to customize your template, such as Post Title, Post Content, Post Excerpt, Post Meta, and Comments.
You can also use any others to achieve the look and functionality you want.
Drag and drop these modules into your layout and customize their settings to fit your design. Adjust typography, colors, spacing, and more to achieve the look you want.
You can also add dynamic content like related posts and author information to keep the template’s features more in line with a traditional Post template.
Step 4: Save and apply the template
Once your template design is complete, save it by clicking the Save button in the Divi Builder.
To apply the template to your posts, set the display conditions in the Theme Builder settings. You can choose to apply the template to all posts, specific categories, tags, or individual posts.
Pros and cons of using Divi
Working with Divi to create custom post templates is pretty straightforward. It offers a clean interface we quite like. As with all the methods discussed here today, there’s some bad with some good.
Pros
- High-level of customization. Divi offers extensive customization options, allowing you to create unique post templates. Its wide range of modules and design settings gives you complete control over your template’s appearance.
- Intuitive interface. The visual drag-and-drop editor is user-friendly and makes it easy to design complex layouts. Real-time previews help you see exactly how your design will look on the front end.
Cons
- Dependency on the Theme Builder. Using Divi’s Theme Builder means you are tied to the plugin. Though you can use the Divi Builder plugin separately from the theme, it can feel limiting to stray outside of this pairing.
- Too many options. While Divi is powerful, it can be overwhelming for beginners. Yes, it’s all easy to use, but using it means you’ll quickly become overwhelmed with options. Too many possibilities can be paralyzing.
Divi is another good choice for making custom WordPress post templates. But if you’re looking for top-tier customization, manual coding will always be where it’s at.
Method 4: Creating custom post templates manually using code
Custom coding in WordPress provides full control over the design and functionality of your post templates. By creating custom templates manually, you can tailor every aspect of your posts to meet your exact needs. This method involves working directly with WordPress theme files, HTML, CSS, and PHP.
Step 1. Create a child theme
First, create a child theme to ensure your customizations are preserved when the parent theme is updated.
In your WordPress directory, go to wp-content/themes and create a new folder for your child theme. Something like mytheme-child will suffice.
Inside this folder, create a style.css file and a functions.php file.
In style.css, add the following header to link it to the parent theme:
/*
 Theme Name: My Theme Child
 Theme URI: http://example.com/my-theme-child
 Description: My Theme Child Theme
 Author: Your Name
 Author URI: http://example.com
 Template: mytheme
 Version:
*/

In functions.php, enqueue the parent theme’s styles:

<?php
function mytheme_child_enqueue_styles() {
    wp_enqueue_style('parent-style', get_template_directory_uri() . '/style.css');
}
add_action('wp_enqueue_scripts', 'mytheme_child_enqueue_styles');
Once you’ve made these files, go to your WordPress dashboard and go to Appearance > Themes. Your new child theme should be listed there. Activate the child theme as you would any other.
2. Add a new template file
In your child theme folder, create a new file named single-custom.php. This file will serve as your custom post template. Start by adding the necessary template header:
<?php
/**
 * Template Name: Custom Post
 * Template Post Type: post
 */
get_header();
if ( have_posts() ) :
    while ( have_posts() ) : the_post();
        // Your custom template code goes here
    endwhile;
endif;
get_footer();
?>
3. Customize the template using HTML, CSS, and PHP
You can now customize the single-custom.php file to design your post layout. Use HTML and CSS for the structure and styling and PHP to dynamically fetch post content.
Here’s a quick example of what customization can look like:
<div class="post-wrapper">
    <h1><?php the_title(); ?></h1>
    <div class="post-meta">
        <span>Published on: <?php the_date(); ?></span>
        <span>by <?php the_author(); ?></span>
    </div>
    <div class="post-content">
        <?php the_content(); ?>
    </div>
</div>
<style>
    .post-wrapper {
        max-width: 800px;
        margin: 0 auto;
        padding: 20px;
        background: #fff;
    }
    .post-meta {
        font-size: 14px;
        color: #555;
    }
</style>
4. Apply the template in the Post Editor
To use your custom template, open a post in the WordPress editor.
In the Post Settings sidebar, find the Template dropdown menu. And just as you did when creating a template with the Block Editor, click the name of the current template (likely Single Posts) and click Swap Template. Your newly created template should appear in the popup modal.
Click it, and this will apply the single-custom.php template you just made to your post.
Pros and cons of custom coding a post template
This last method involves coding to create a post template, which is a bit more involved, but it offers real benefits.
Pros
- Full control. Custom coding offers complete control over the design and features of your post templates. You can add any feature or style without restrictions.
- Total flexibility. You can create highly specific layouts and features that suit your exact requirements. No compromises are required. This gives you real flexibility to create precisely the sort of site you want.
Cons
- Complexity. Custom coding requires knowledge of HTML, CSS, and PHP. It’s a real challenge for those without coding experience.
- Maintenance. Manually coded templates can be harder to maintain and update. If the parent theme or WordPress itself updates, you may need to manually adjust your custom templates to ensure compatibility.
Creating custom post templates manually provides unmatched flexibility and control. So if you need a highly customized solution, this should be your go-to. But if you lack coding experience, another approach would be best.
Tips for creating effective blog post templates
Creating effective WordPress post templates can help you guarantee consistency across all of your content without having to manually recreate its look each time you make a post. It also opens up some flexibility in terms of the features you can add and the user experience you can provide.
No matter which approach you choose, however, there are some essential tips to keep in mind as you’re creating your post templates:
Use a child theme when appropriate
When customizing your WordPress theme in any way, you should always create a child theme to protect your changes from being overwritten during theme updates. This practice ensures that your custom post templates remain intact and functional over time.
If you’re using the Block Editor or a page builder tool, you might be able to get away with skipping this step, as they provide built-in template-making functions. But it’s still a best practice.
Keep the design user-friendly
Focus on creating a clean, intuitive design that enhances readability and navigation. Avoid clutter and ensure that important elements like headings, images, and call-to-action buttons are easily accessible.
User-friendly designs make it easier for site visitors to navigate your site, engage with your content, and complete your CTAs. Yes, you can create any template you’d like, but make sure it still follows site design best practices.
Regularly update templates to match current design trends
Design trends evolve, and it’s important to keep your templates up-to-date to maintain a modern and professional look. Regularly review and update your post templates to incorporate the latest design trends while still sticking to your overall brand design. Staying current helps maintain the appeal and functionality of your site as well.
Have a clear idea of what the template will be used for
Before designing a template, clearly define its purpose. Different types of content require different layouts. For example, a product review might need sections for pros and cons, ratings, and detailed descriptions, while a blog post might focus more on readability and visual elements.
Knowing the specific use case ensures that your template effectively serves its intended purpose.
Maintain accessibility
Any post template you create should be accessible to all users, including those with disabilities. Use proper HTML tags, provide alt text for images, and ensure that your site is navigable via keyboard. Also, use sufficient color contrast in your styling and stick to using readable fonts.
Maintaining accessibility broadens your audience and aligns with best practices and legal requirements.
Experience true customization by making your own post templates
Creating custom post templates in WordPress gives you great control over the site design and content creation processes. Whether you use the Block Editor, Elementor, Divi, or custom code, each method offers unique benefits and caters to different skill levels and needs. If you’re unsure which to go with, experiment with these methods to find the best fit for your site, skill level, and needs.
For an overall seamless WordPress experience, consider trying Kinsta managed hosting. With top-tier performance and support, Kinsta can help you focus on what you do best: creating great content.


Leave a Reply