
Your WordPress theme is one of the most important aspects of your WordPress site. It governs how your site looks, how your content is displayed and makes your site look modern, professional, and on-brand.
Which is why it’s important to keep your theme updated and ensure it always works as it should.
But sometimes that isn’t entirely straightforward. If you’ve customized a WordPress theme, updating it means you risk losing your work. If the plugins in your site aren’t compatible with a new version of a theme, you need to decide which code to update and which not to. And if you’re running a WooCommerce store with a theme that you’ve customized, you’ll need to make sure this works after the update.
In this post, I’m going to walk you through the process of how to update a WordPress theme.
Ready? Let’s get started!
Check out this video guide to updating a WordPress theme:
Why You Should Keep WordPress Themes Updated
Keeping the code in your WordPress site up-to-date is very important. New versions of plugins, themes, and WordPress itself are released for good reason. Not taking advantage of an update could put your site at risk. Let’s take a look at the three reasons you should always keep your site updated: security, compatibility, and features.
#1 Security
The most important reason to ensure that the code in your site is always updated is security.
A significant proportion of updates to themes, plugins, and WordPress core are security patches: minor releases designed to overcome any security vulnerabilities.
Because WordPress is an open source system, with an active community that monitors the software for security issues and other problems, any weaknesses will be publicly discussed and a fix will be made for them as soon as possible.
This is one of the benefits of WordPress: that active community ensures that vulnerabilities can be identified and fixed very quickly.
But there is a downside: the public nature of all this means that anyone wanting to attack your site will know about the problem with a given version of a theme, for example. And they could target sites using that version of the theme.
So you need to update themes, plugins, and WordPress core as soon as updates are released, to avoid becoming a target.
If you install a good security plugin, you’ll be alerted when there’s a new version of a theme, so you have no excuse not to run the update. Below, I’ll look at how you do that safely so that your site will still run smoothly during and after the update.
But, by now, you should be convinced: keeping your site up to date will enhance its security.
#2 Compatibility
Themes are also updated to ensure that compatibility with the latest version of WordPress. This will either happen as soon as the new WordPress release comes out or after a short period of time. A good theme developer will test their theme(s) against new versions of WordPress (and against the development version while it’s being created) and make any changes needed for compatibility.
Over time, though, new versions of WordPress will be released and your theme may develop compatibility problems. In my experience, it’s far less common for themes to become incompatible than it is for plugins, but it is still something you need to be aware of.
When updating your theme, you should always ensure you’re running the latest version of WordPress first.
#3 Features
The third reason for keeping your theme up to date is to make the most of any new features the developer might have added to it.
From time to time, themes are updated with new features, either because users have requested extra features, or because the theme can take advantage of new aspects of WordPress itself (I’m talking about you Gutenberg) and add extra features to the theme that makes use of those.
If your theme has new features that could enhance your site, why not take advantage of them?
How to Update a Theme in WordPress (Two Ways):
Updating your theme is a critical task of your site maintenance routine. Before running any updates, always do a backup of your site.
Here’s how to update your theme in WordPress:
- If your theme has no customizations, go to: Appearance > Themes > click “Update Now” on your active theme.
- If your theme features custom code, updating it with the latest versions will overwrite all your customizations. To safely update a customized theme, use a child theme.
How To Safely Update a WordPress Theme
Updating your theme in WordPress is made very simple for you. Just go to Dashboard > Updates and select your theme, then click the Update Themes button.

But wait! You might think that all you need to do is click the Update button and you’re done, right? Sure, this will update your theme. But it won’t do it safely.
Every time you update any element of a WordPress website (themes, plugins, or WordPress core) you should make a backup of your site and test the updated software to check whether everything clicks. To do this without touching your live WordPress site, you should run the update on a WordPress staging version of your site first.
Let’s look at how you do this in more detail.
Backing Up First
Stop! Before you run an update on your site, you must always, always take a backup. This is so that you have something to restore your site from if the update breaks your site.
If you follow the advice below and always test on a staging server first, then it’s highly unlikely you’ll run into any problems: after all, you’ve already tested things out. But it’s better to be safe than sorry.
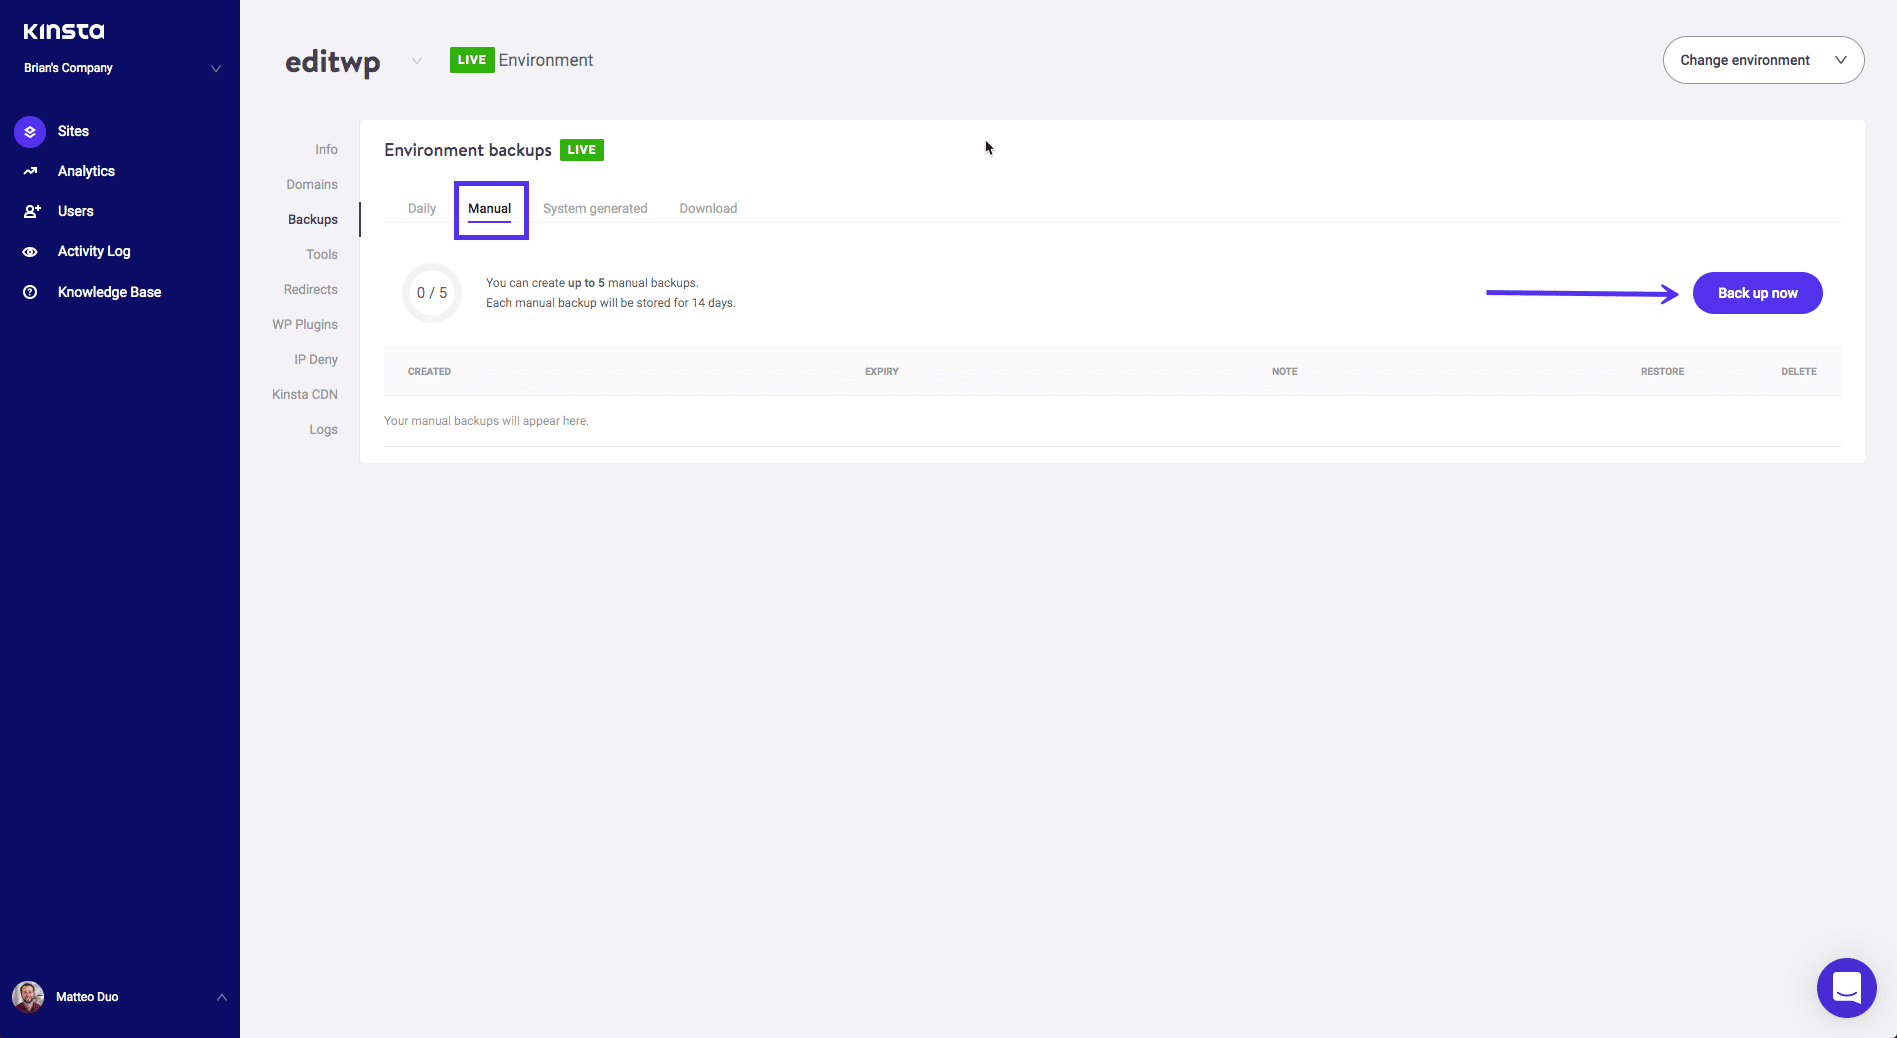
With Kinsta hosting, you can access daily automated backups of your site. But you can also take a manual backup immediately before updating. This is something I recommend, as there may have been changes to your site since the last automatic backup.
To take a manual backup, go to your site in your Kinsta dashboard, select the Backups option in the menu, then select the Manual tab. From here, you can take up to five manual backups, each of which will be kept for 14 days.
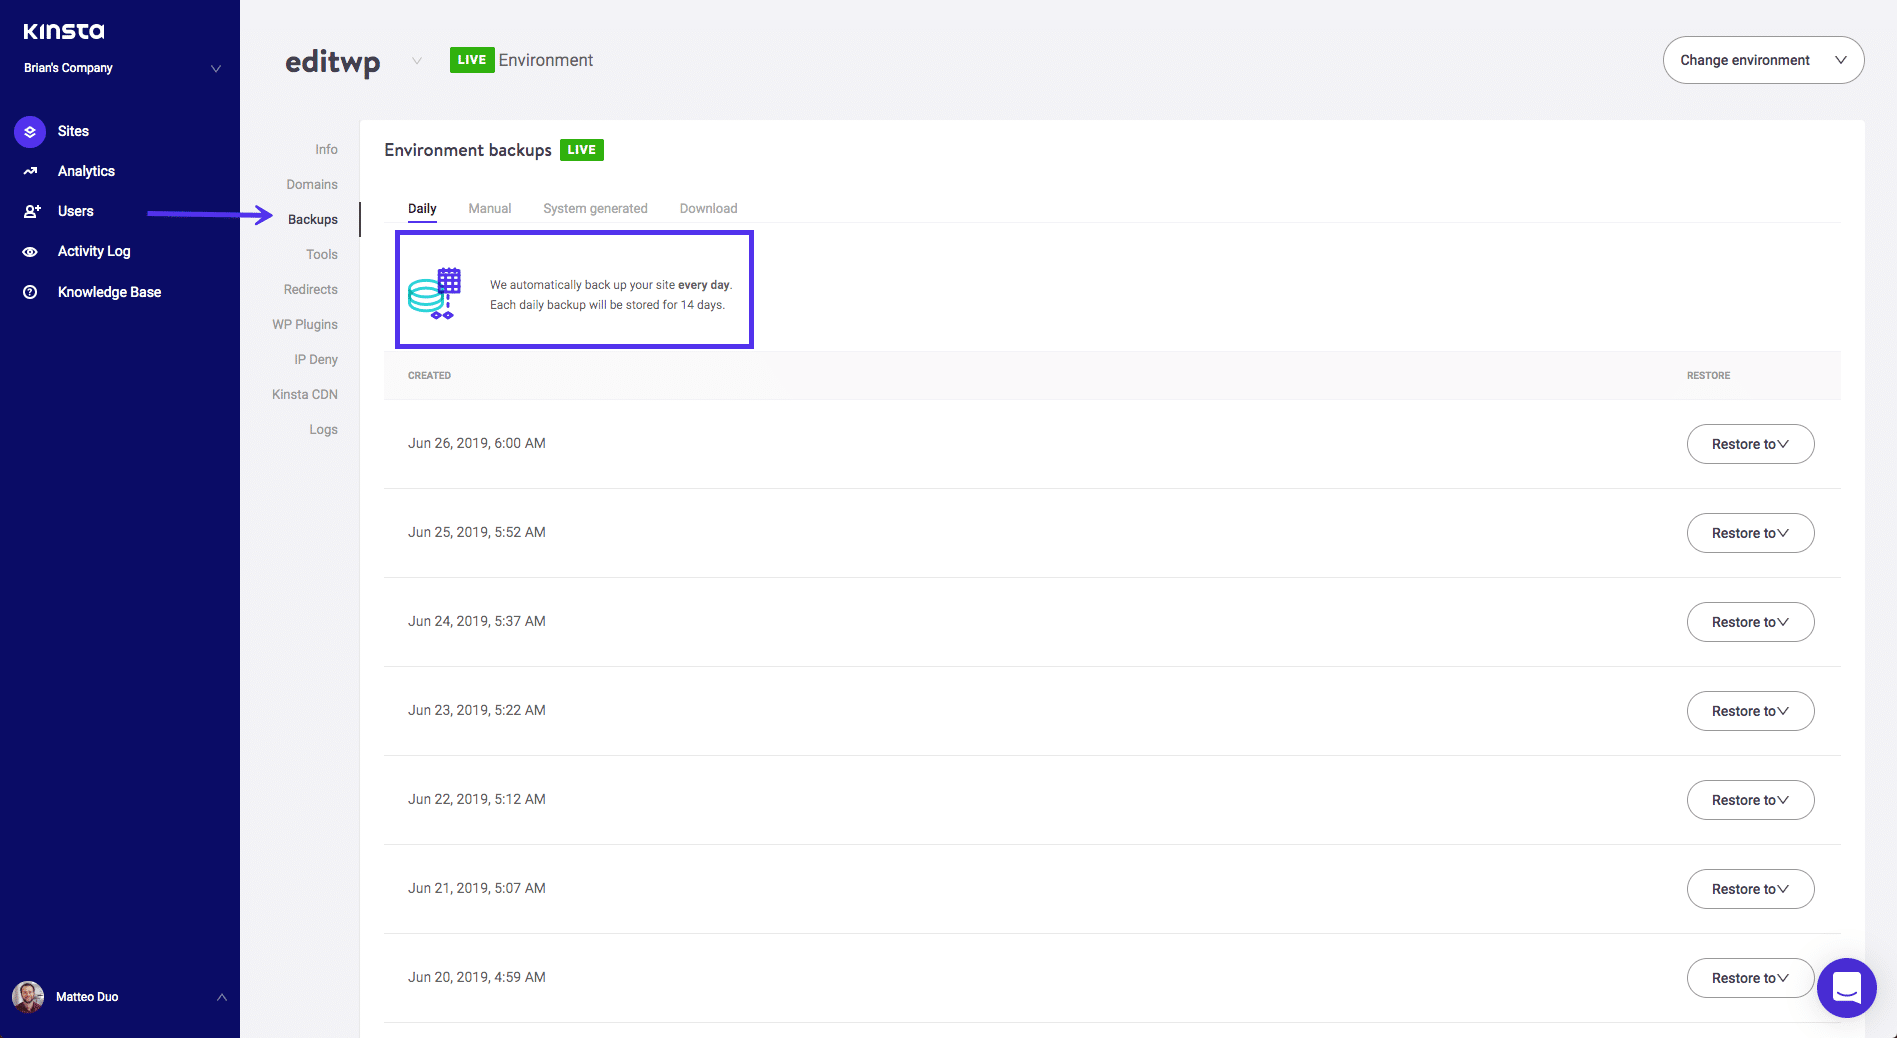
If anything goes wrong during the update and you need to restore your site, you can restore your backup with one click.
Visit the Backups screen in your Kinsta dashboard, select the backup and click the Restore to button. You have the option of restoring to your staging or live site. Make sure you do this quickly as you don’t want to lose any changes that are made to your site after running the backup (such as another user adding content).
If you’re not with Kinsta and your hosting provider doesn’t provide easy backups of your site, then you’ll need to use a backup plugin. The free Updraft Plus and BlogVault plugins let you run automatic and manual backups, and makes restoring relatively simple. But if you’re with Kinsta you won’t need a backup plugin, as all Kinsta plans include automatic backups.
When to Run Updates
Firstly, it’s worth identifying the best time to run an update. You want to minimize any downtime or disruption to your site visitors, which means it makes sense to run updates at a time of day (or on a day of the week) when your visitor numbers are at their lowest.
Don’t assume that this is at the time of day when you’re least likely to be using your site: if you have a significant number of visitors from overseas, it could be that numbers spike when you’re asleep.
Use a tool like Google analytics to identify when your site gets the fewest visits and schedule updates accordingly.
Once you have this information, you can schedule site updates for that time of day or day of the week. You don’t need to do your testing on the staging site at this time: you can do that whenever it’s convenient for you. But the update to the live site will cause some downtime, so schedule it for a time when that will be least disruptive.
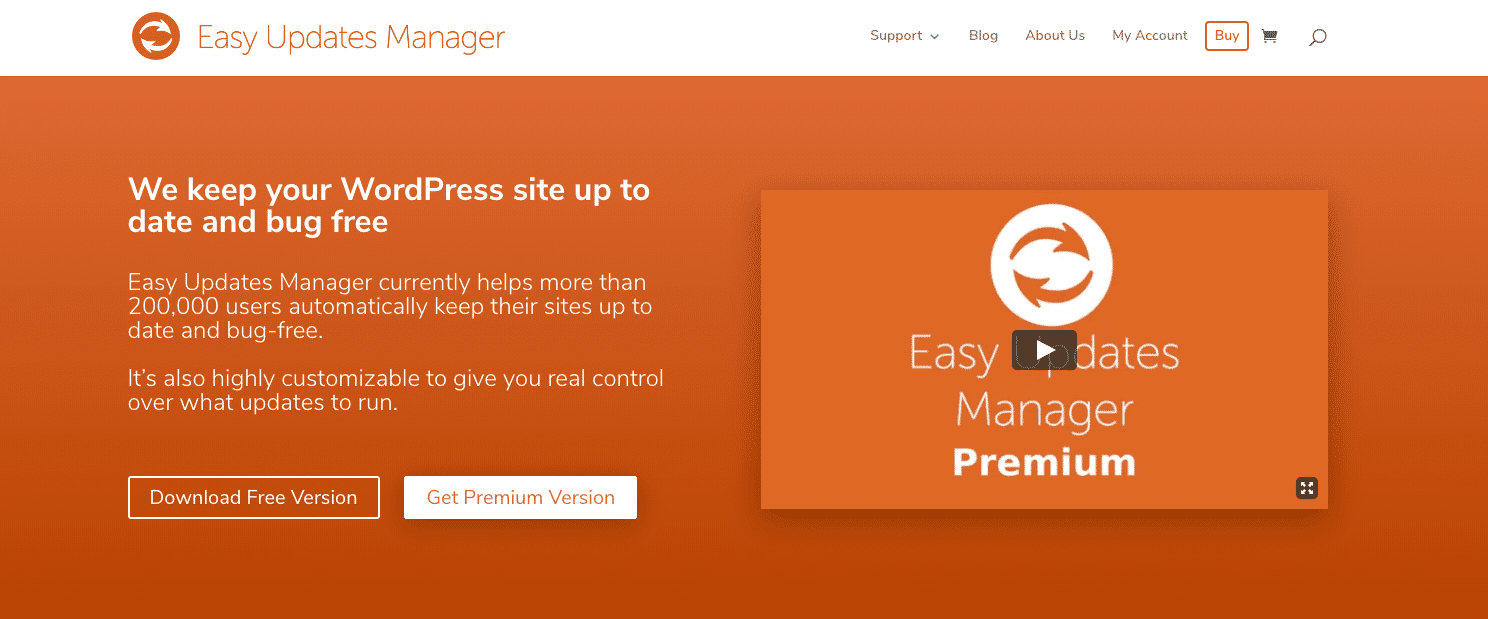
The premium version of the Easy Updates Manager plugin lets you automate updates or schedule them manually.
Using a Staging Site for Updates
Before making an update to your theme, you should always test that the update works as it should, doesn’t clash with any other code in your site and that the site still works after the update.
To do this, you’ll need a copy of your site that’s invisible to the general public and that you can safely break without any undue consequences.
The best place to test is on a staging site. This is because a staging site is on the same server as your live site, and it’s a carbon copy of it. This means that whatever works on your staging site will also work on your live site.
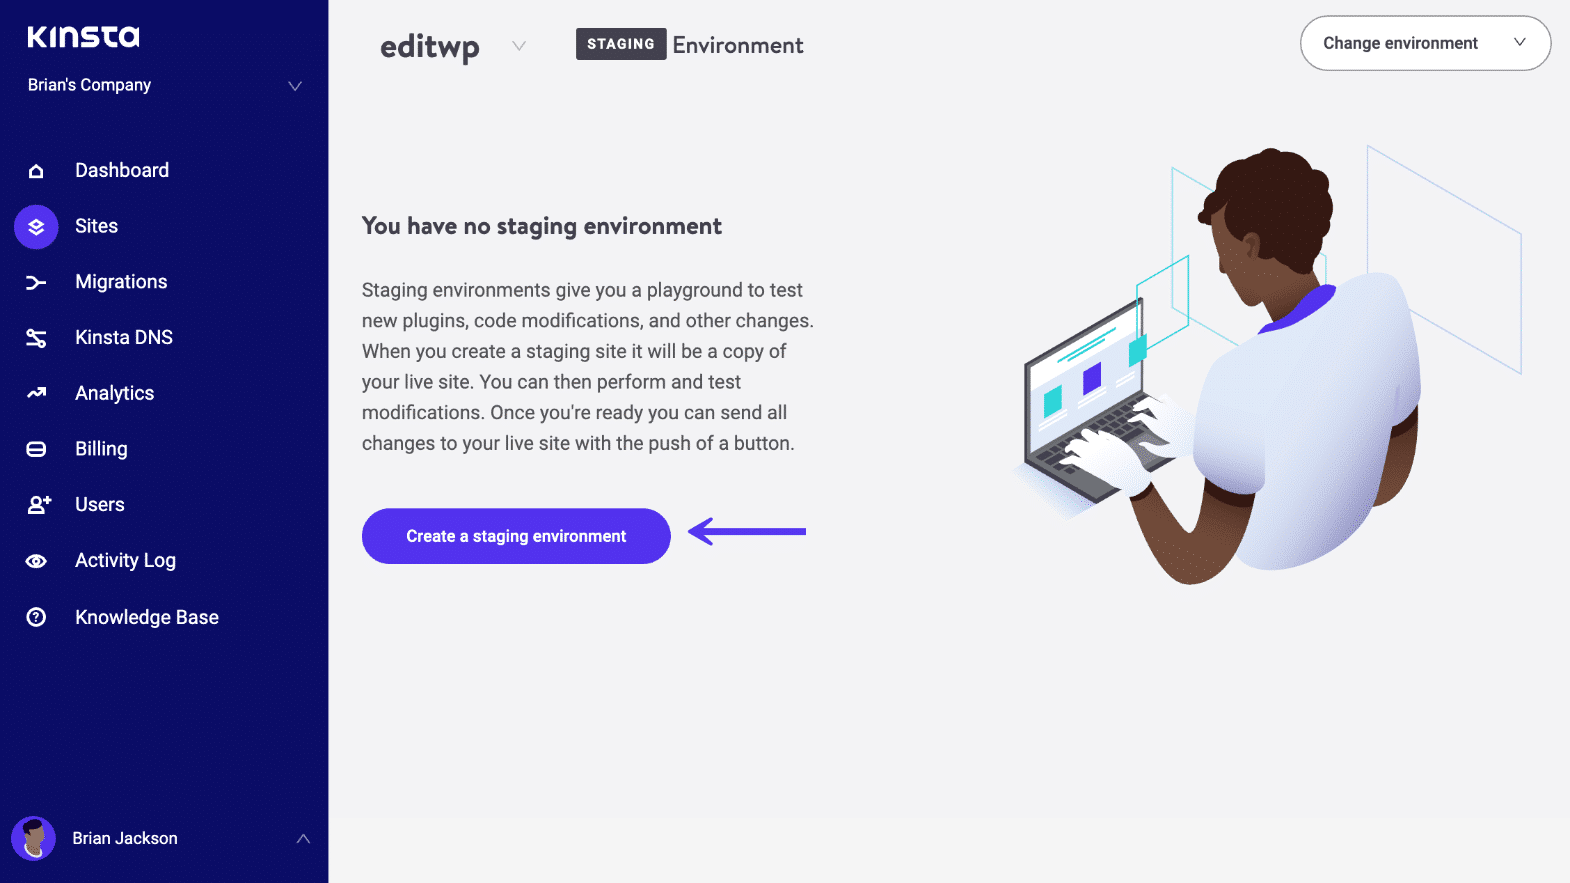
Kinsta provides a staging environment for each of your sites, and you can add up to five additional Premium Staging Environments if you need more. Before you test your theme update, you’ll need to refresh your staging site. You do this by deleting the existing one and creating a new one. Alternatively, you can use that backup you just took of your live site and restore it to your staging site instead.
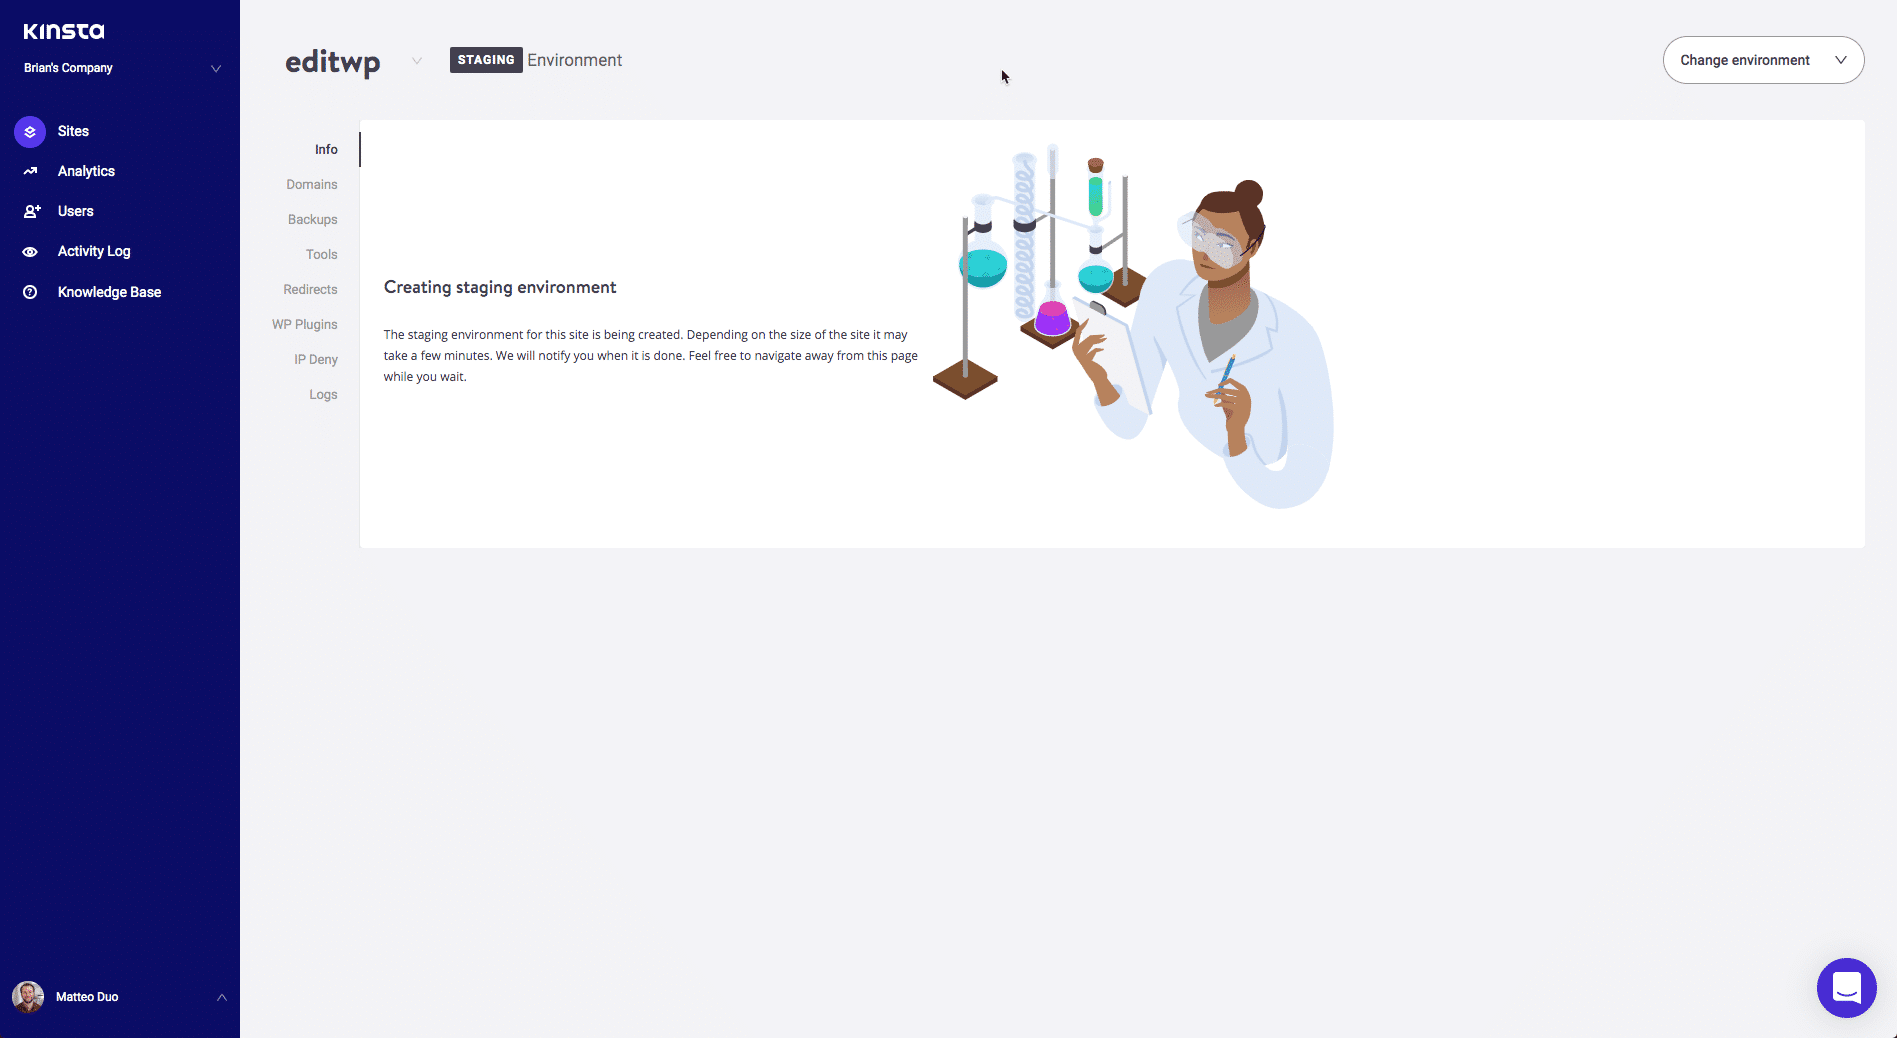
Once you have a copy of your live site in staging, you’ll need to use the URL https://staging-sitename.kinsta.cloud, where sitename is the name of your site. This will take you to the staging site, which you can log into, update, and test.
Once you’ve tested the update on the staging site (more of which shortly), you can go back to the staging environment in your MyKinsta dashboard and click the Push Staging to Live button. This will copy all the changes that you made to your staging site across to your live site. Don’t forget to run final checks on your live site to be 100% sure everything’s working.
Testing the Update
So you’ve created your staging site, you’re ready to install the theme update and you want to test it. What next?
Follow these steps.
- Check that the theme is compatible with your version of WordPress. If not, you may need to update WordPress (which always takes priority). Follow this testing process for that update, using your staging site to test the update and then pushing to live.
- Update the theme from the Themes screen in the WordPress admin, either by clicking the Update link below the theme’s name or by uploading the new version if you bought the theme from a third-party provider.
- Test that the staging version of the site works. Test different content types (home page, individual posts and pages, archive pages, any custom post types or taxonomies). Check that there aren’t any issues with widgets or menus. Test processes such as form submission or purchasing. Exactly what you need to test will depend on your site, but it’s important to be thorough; if you skim your site quickly and don’t test all the content types and processes, you could find that your users find any problems before you do, maybe when they’re making a purchase or filling out a form.
- If the theme update has broken the site, check the support forums for the theme to see if there are any known issues. You can access this by opening the Themes screen in your admin and clicking on the theme to access information about it. Click the link for details of this version and then in the right-hand sidebar, you’ll find a View support forum button. Check this to see if anyone else has had a problem.
- If you have a problem and no one else has reported it, report it to the theme developer. This will help them fix it. Then you’ll need to repeat this process when they release a subsequent version of the theme, hopefully with a fix.
- If everything works as it should, you can push the staging site to live, safe in the knowledge that you’ve thoroughly tested it.
How To Update a Custom WordPress Theme
But what if you’ve already edited the theme, and want to update it without losing your changes?
That’s a bit trickier to deal with but not impossible, as long as you can remember what the changes were, or more specifically which files you edited.
Using a Child Theme to Avoid Problems When Updating Your Custom WordPress Theme
The safest way to update a custom WordPress theme is by creating a child theme and adding your customizations there. If you’re not sure whether your site uses a child theme, you can inspect your site with our WordPress theme detector tool to find out.
To do this, you’ll need to create a child theme with the theme files that you’ve edited. Follow these steps in your staging site (as if you don’t get it 100% right, you could break your live site).
- Make a backup of the parent theme and copy it to your local machine. This means you have a copy of your amended version of the theme in case you should miss anything and have to make edits after updating the theme.
- Create a child theme for your existing theme. Add the stylesheet with details of the parent (see above) and a functions file that enqueues styles from the parent.
- Identify any changes you made to the parent theme’s functions file. Copy your new functions into the child theme’s functions file.
- Identify any changes you made to the parent theme’s stylesheet. Copy this code to the child theme’s stylesheet. This will override styling on the same elements, classes or IDs in the parent theme.
- Identify any template files or include files you’ve edited. Copy these into the child theme, making sure you use the same file structure if any files are in subdirectories.
- Activate the child theme instead of the parent theme.
- Test your site. Check any customizations you made to the theme and in particular, check pages that are displayed using the template files that you edited and copied across.
- Double check your files to be sure you haven’t missed any files that you edited.
- Update the parent theme in your staging site, either via the Themes screen or by uploading the theme if you didn’t get it from the theme directory.
- Test the site again. Make sure any template files that you edited are still working as they should. If anything is missing, revisit your backup of the edited version of the parent theme and copy anything across to your child theme that you need to.
- Test again. When you’re happy that your staging site is working, you can push your staging changes to live (making sure you take a backup of your live site first). Test your live site and you’re good to go.
Once you’ve done this, you won’t need to repeat it next time you update the parent theme. But remember: if you need to make more changes in the future, make these to the child theme and not the parent theme. Take backups of your child theme before making any changes, test everything on your staging site and to be completely thorough, use a version control system such as Github.
Updating a Parent Theme: Making any Changes to The Child Theme
Sometimes you might find that you update a parent theme and it breaks your site because of changes you made to a child theme.
Maybe you attached a function to a hook in the parent theme that’s been altered or even removed. Maybe your child theme’s template file isn’t consistent with the parent theme template files anymore, meaning that the pages generated by your child theme are inconsistent with the rest of the site.
If this happens, you’ll need to do one of two things:
- Stop using the relevant file(s) from the child theme by removing them from the child theme. Sometimes an update to the parent theme will mean it works in a way you prefer to what you did in the child theme, so you no longer need that file. Once you remove the file from the child theme, WordPress will use the one from the parent theme.
- Edit the files in your child theme so they’re consistent with the parent theme.
If you go with the first of these options, make sure you test on your staging site and that you keep a backup of your child theme before you edit it. Again, using Github will help you keep on top of your changes.
If you need to use the second method and edit your child theme files, you’ll need to identify exactly what changes you made, what the changes are to the parent theme, and how they interact. It pays to compare the code from the previous and new versions of the parent theme, and also from the child theme. This way you can see where any problems arise and fix them.
Read the documentation for this release of the parent theme: the release notes on the theme repository, or any more detailed documentation on the developer’s website. This will help you identify any changes to the theme that impact your child theme.
And once again, make sure you keep backups and test thoroughly.
How To Customize a WordPress Theme so You Can Safely Update It in Future
If you haven’t yet customized a theme, but are planning to do so, you can make things simpler for yourself by adding your customizations to a child theme from the start.
If you directly edit a theme from the theme directory or from a theme vendor, any changes you made to the theme will be lost when you update the theme. The new theme files will override your edited files and all your work will be gone.
This is why you should never directly edit a third party theme. The correct way to edit a third party theme is by creating a child theme of that theme and adding your edits there.
Let’s look in more detail at child themes: how they work and how you use one to safely update (and edit) your custom WordPress theme.
Using a Child Theme to Avoid Problems When Updating Your Theme
A child theme is a theme that works in tandem with your parent theme to run your site. It adds extra features to the parent theme such as design elements and functionality, without overriding the parent theme. Instead, you create specific files in the child theme that will override the specific files with the same name in the parent theme. This combines with the WordPress template hierarchy to tell WordPress which theme template file to use to display a given page on your site.
If you know nothing about theme template files and you’re feeling confused, let me illustrate with an example.
Your existing theme has three files for displaying archive pages:
- the category.php file, which will display archive pages for categories.
- the archive.php file, which will display all archive types unless a more specific file exists (such as category.php). This means that this file will be used for tag archives (for example) but not category archives.
- the index.php file, which is a fallback file for any content types that don’t have a more specific file. In this case, because there is an archive.php file, no archive pages will use the index.php file.
When displaying an archive on your site, WordPress runs through this hierarchy and chooses the file it comes to first. In the case of category archives, that will be category.php. In the case of tag archives, it will be archive.php, because the theme doesn’t have a tag.php file.
But if you create a child theme, WordPress will always choose the highest file in the hierarchy that’s in the child theme, instead of one in the parent theme.
This means if you created a child theme with an archive.php file, the following would happen:
- For categories, WordPress would use category.php from the parent theme, as it’s higher in the hierarchy.
- For tags, it would use archive.php from the child theme, because a file with the same name in the child theme overrides a file with that name in the parent theme.
This means that if you want to edit a file in your theme, you create a child theme, copy that file from the parent theme to the child theme, and edit that instead. The original files from the parent theme are untouched, so when you update the theme, you won’t lose any work. And it also means that even after an update, the archive.php file from your child theme will be used by WordPress instead of the updated archive.php file from the parent theme.
This has two implications for updating themes:
- Creating a child theme means you can update your parent theme without losing your edits.
- When you update the parent theme, you need to check for any changes to the code that will conflict with your child theme.
We’ll come to the second point shortly. But how do you go about using a child theme to hold any edits you might want to make to your theme? Let’s take a look.
- Create your child theme, which will need a stylesheet and a functions file from which you enqueue the styles from the parent theme.
- Identify which files in the parent theme you want to edit.
- If the files you want to edit are the functions file or the stylesheet, don’t copy them, but instead add your new code to the stylesheet and functions file you’ve already created in the child theme.
- If the themes you want to edit are template files or include files, make a duplicate of those files in the child theme, copying them exactly from the parent theme. Copy them using the same file structure, so if for example the loop file is at parent-theme-folder/includes/loop.php, copy it to child-theme-folder/includes/loop.php.
- Edit the files in the child theme.
- Activate the child theme in your WordPress admin screens, instead of the parent theme.
And that’s it! The only extra work is creating the child theme, which is quick and easy. Now whenever you need to make changes to the theme, you simply edit the child theme instead. That way when you update the parent theme, you won’t lose your work.
How To Update a WordPress Theme on a WooCommerce site
If you’re using WooCommerce, then you may have edited your theme to make it compatible with WooCommerce.
This is only necessary if you’re using a version of WooCommerce prior to Version 3.3. The advice from the team at WooCommerce is to upgrade the plugin and then you’ll find that you don’t need the extra code in your theme to ensure compatibility.
But if for some reason you’re unable to update to the current version of WooCommerce (something I don’t recommend), you’ll need to copy the changes you made to your theme into a child theme before you can update the theme.
You’ll need to approach this in one of two ways:
- If you added the woocommerce_content() function to a woocommerce.php file that you created in your theme, just copy that file over to a child theme, using the current theme as the parent theme.
- If you used WooCommerce hooks, copy the code from your theme’s functions file to the functions file in your child theme. Don’t copy the whole file; just that code.
A more common scenario is if you’ve added extra template files to your theme to override WooCommerce’s template files. This is something relevant to any version of WooCommerce.
If you’ve done this, you’ll need to create a child theme and then copy those template files to your child theme. Make sure you use the same file structure as in the original theme. Then activate the child theme as in the instructions above, test, and update the parent theme.
Once you’ve done this, you’ll need to engage in more thorough testing than for a site without a store. As well as testing your site more generally (see above), you should test the working of your store. Test the main shop page; the product category pages; the individual product pages; and the checkout process. Make sure everything works as it should before you push your changes to the live site.
Summary
You now know why it’s important to keep your WordPress theme updated and, most importantly, how to update it based on different scenarios. An up-to-date theme will be more secure, will be compatible with WordPress core, and will benefit from any new features.
But it’s important to update properly. Always take a backup before running an update (you don’t have to worry about this if you’re with Kinsta), test on your staging site first, and only then should you push changes to live.
Furthermore, with the Kinsta Automatic Updates add-on, automatic theme and plugin updates can be handled quickly and easily based on a set of rules you put in place.
If you’ve made any changes to your theme, there will be extra work. Create a child theme first, and add any changes you’ve made or need to make to that. That way, your changes won’t be lost when you update the parent theme.

Rachel McCollin has been helping people build websites with WordPress since 2010. She's a huge fan of self-hosted WordPress and wants to help as many people as possible create an awesome website with it.

