
In the Gutenberg era, the design process is not strictly tied to WordPress themes. Out of the box, the CMS provides users with all the design tools needed to build a great website layout and the theme aims to be something that adds even more building and design tools.
Block templates are a feature that unlocks even more powers in site building. According to the Block Editor Handbook:
A block template is defined as a list of block items. Such blocks can have predefined attributes, placeholder content, and be static or dynamic. Block templates allow specifying a default initial state for an editor session.
In other words, block templates are pre-built collections of blocks used to set a default state dynamically on the client.
👉 Block templates are different from Template files.
Template files are PHP files such as index.php, page.php, and single.php, and work the same way with both classic and block themes, according to the WordPress template hierarchy. In classic themes, these files are written in PHP and HTML. In block themes, they are entirely made of blocks.
👉 Block templates are different from Block patterns.
Block patterns need to be manually added to your pages while block templates automatically provide the initial layout and defaults when you or your team members create a new post.
You can also bind specific block templates to your custom post types and lock some blocks or features to force users to use your defaults or prevent errors.
You have a couple of ways to create block templates. You can use the block API to declare an array of block types via PHP, or you can create a custom block type using the InnerBlocks component.
Let’s dive in!
How To Build a Block Template Using PHP
If you’re an old-school developer, you can define a custom block template using a plugin or your theme’s functions.php. If you decide to go with a plugin, launch your favorite code editor, create a new PHP file, and add the following code:
<?php
/*
* Plugin Name: My Block Templates
* Plugin URI: https://example.com/
* Description: An example plugin
* Version: 1.0
* Requires at least: 5.5
* Requires PHP: 8.0
* Author: Your name
* Author URI: https://author.example.com/
* License: GPL v2 or later
* License URI: https://www.gnu.org/licenses/gpl-2.0.html
* Update URI: https://example.com/my-plugin/
*/
function myplugin_register_my_block_template() {
$post_type_object = get_post_type_object( 'post' );
$post_type_object->template = array(
array( 'core/image' ),
array( 'core/heading' ),
array( 'core/paragraph' )
);
}
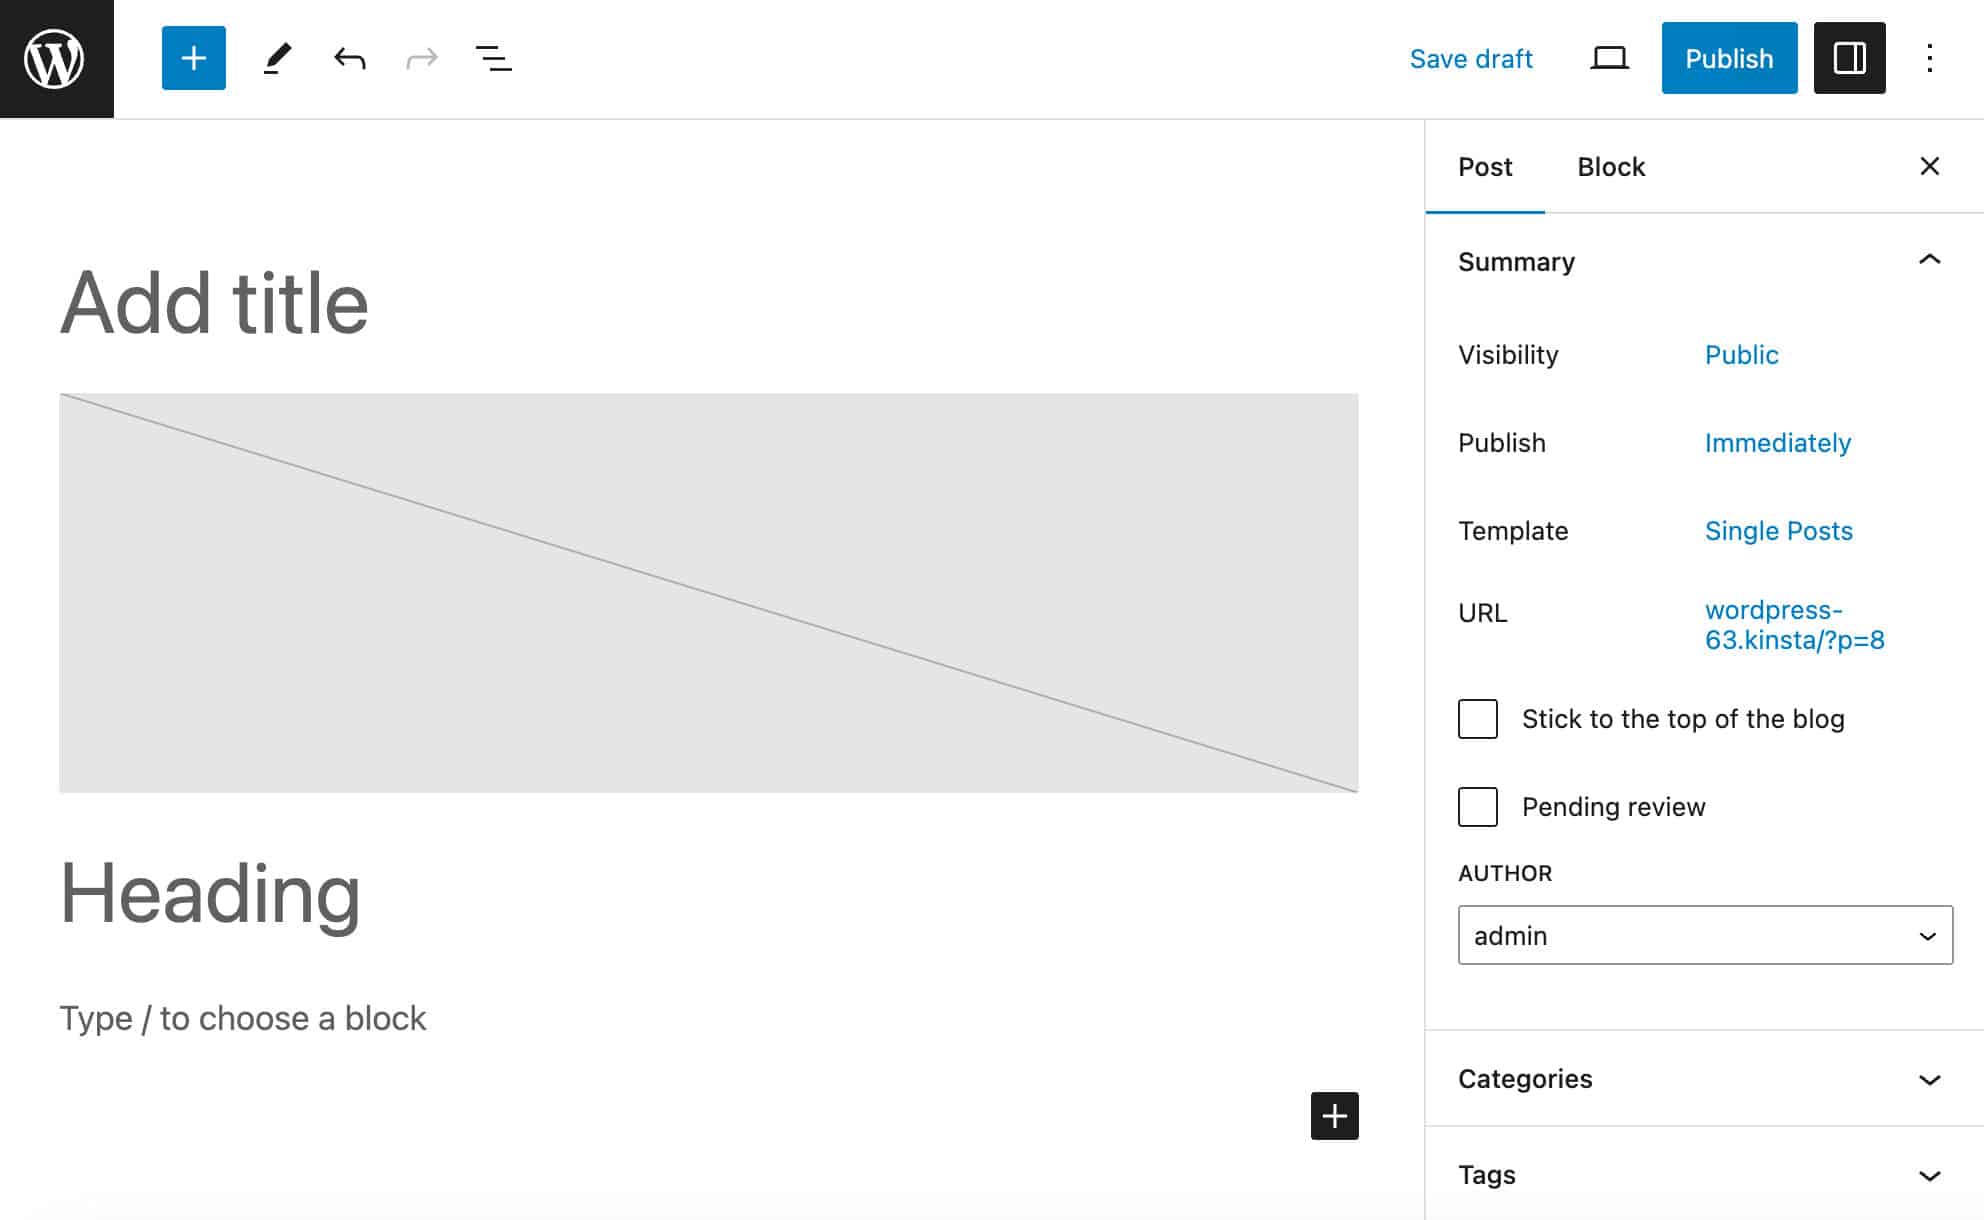
add_action( 'init', 'myplugin_register_my_block_template' );In the code above, get_post_type_object retrieves a post type by name.
Save your file in the wp-content/plugins folder, navigate to the Plugins screen in your WordPress dashboard, and activate the My Block Templates plugin.
Now, when you create a new post, the editor automatically launches your block template with an image block, a heading, and a paragraph.
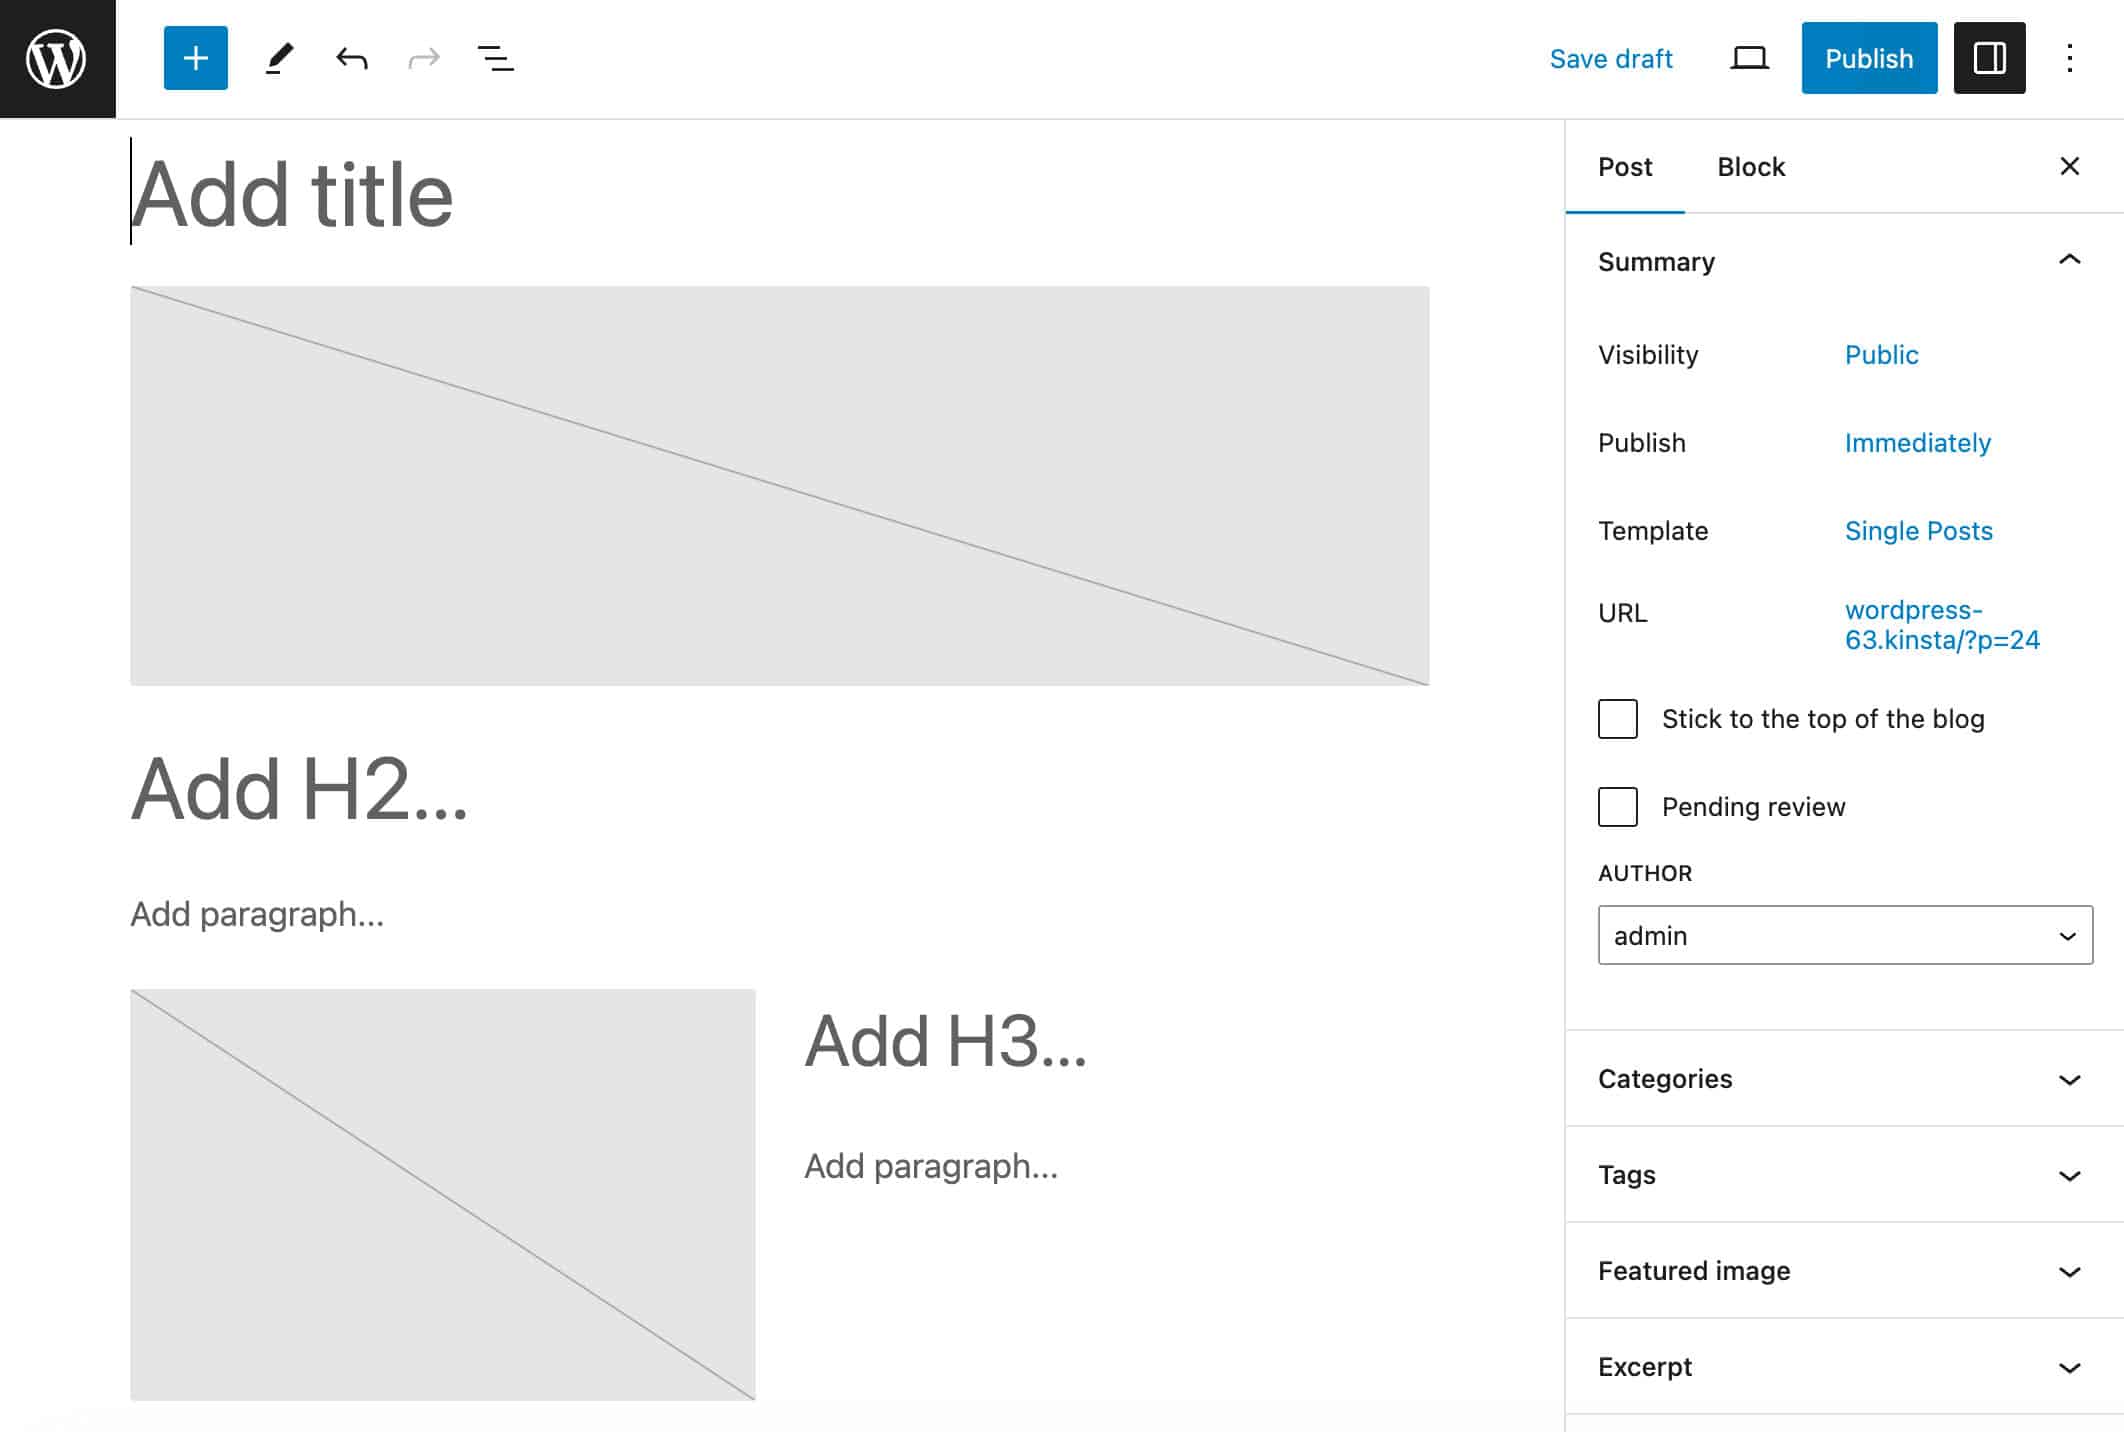
You can also add an array of settings for each block and also create nested structures of blocks. The following function builds a more advanced block template with inner blocks and settings:
function myplugin_register_my_block_template() {
$block_template = array(
array( 'core/image' ),
array( 'core/heading', array(
'placeholder' => 'Add H2...',
'level' => 2
) ),
array( 'core/paragraph', array(
'placeholder' => 'Add paragraph...'
) ),
array( 'core/columns',
array(),
array(
array( 'core/column',
array(),
array(
array( 'core/image' )
)
),
array( 'core/column',
array(),
array(
array( 'core/heading', array(
'placeholder' => 'Add H3...',
'level' => 3
) ),
array( 'core/paragraph', array(
'placeholder' => 'Add paragraph...'
) )
)
)
)
)
);
$post_type_object = get_post_type_object( 'post' );
$post_type_object->template = $block_template;
}
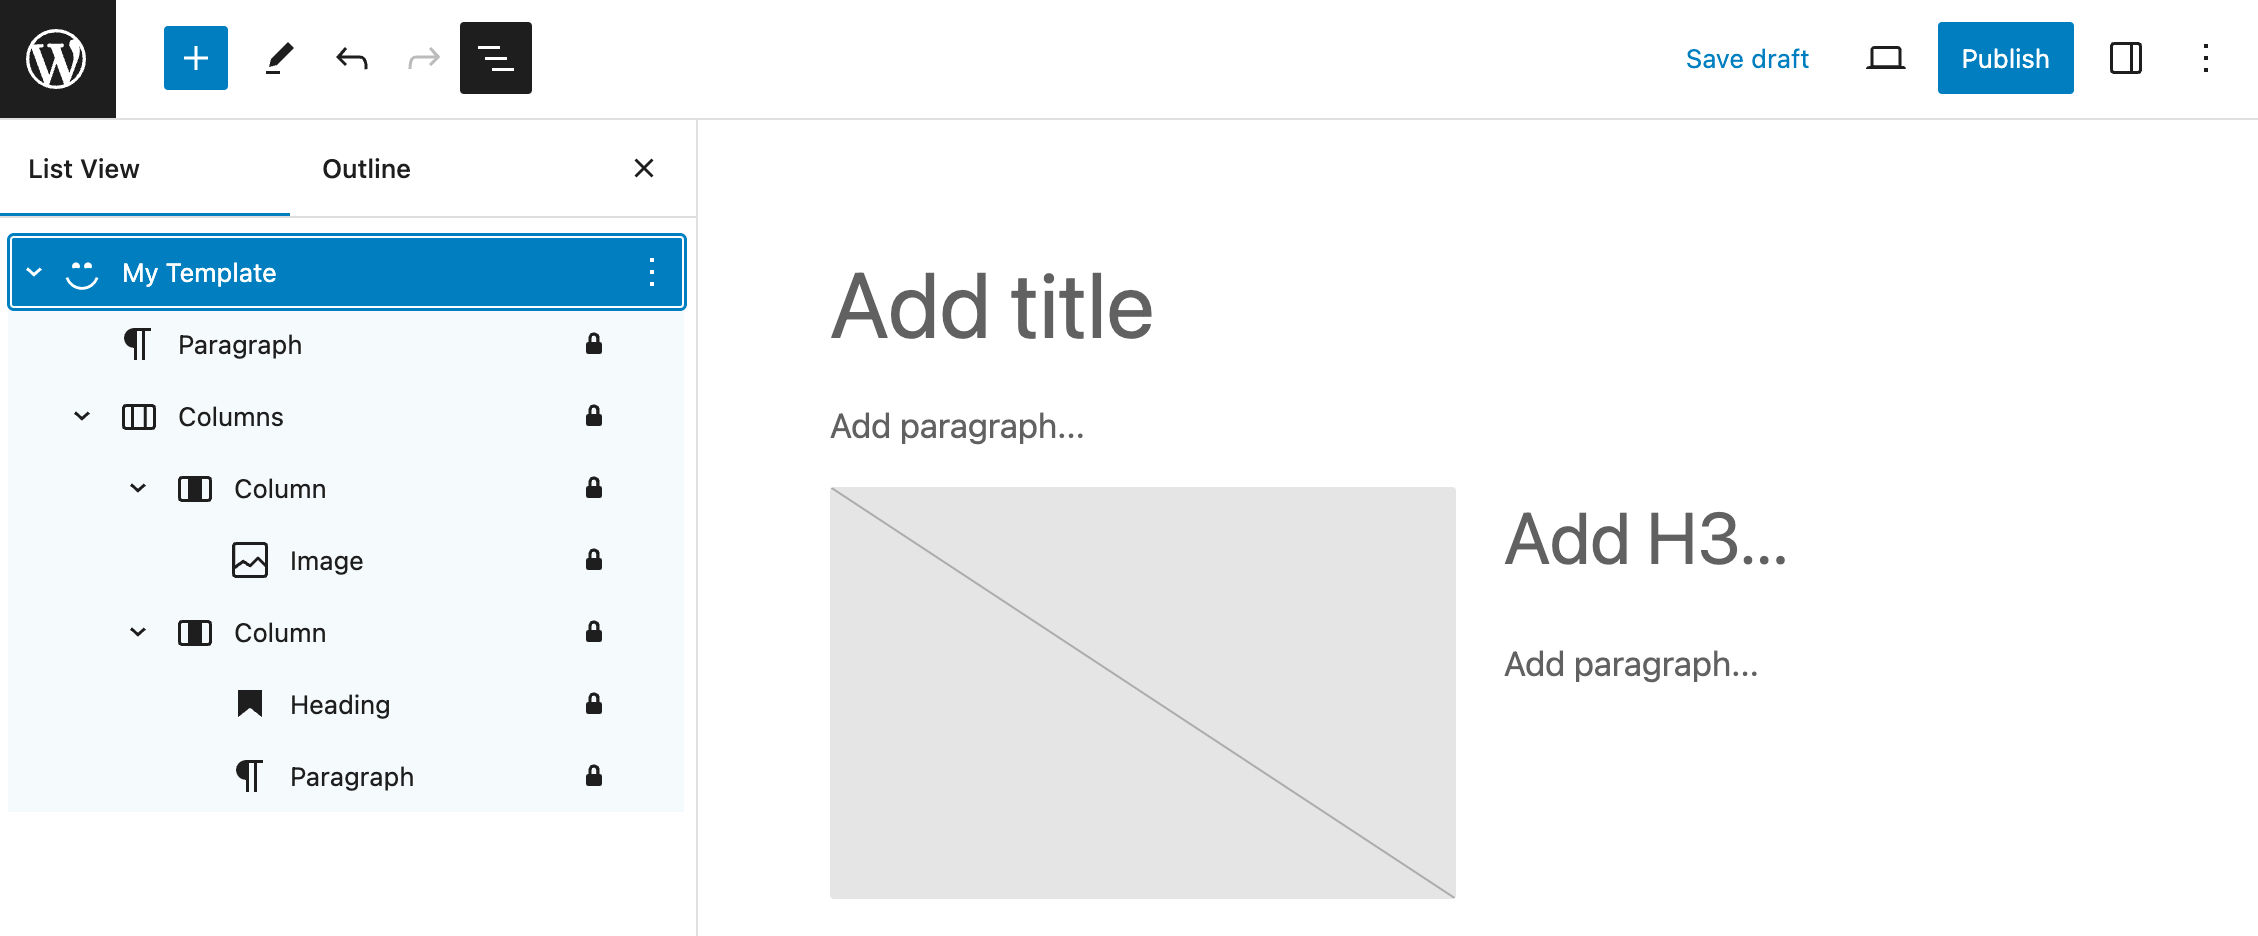
add_action( 'init', 'myplugin_register_my_block_template' );You can see the output of the code above in the following image:
So far, we have only used core blocks. But you can also include custom blocks or block patterns in your block templates, as shown in the following example:
function myplugin_register_my_block_template() {
	$post_type_object = get_post_type_object( 'page' );
	$post_type_object->template = array(
		array( 'core/pattern', array(
			'slug' => 'my-plugin/my-block-pattern'
		) )
	);
}
add_action( 'init', 'myplugin_register_my_block_template' );
There’s not much difference in case you decide to create a default block template for an already registered custom post type. Simply change the post type of get_post_type_object to your custom post type name, as shown in the following example:
<?php
function myplugin_register_my_block_template() {
	$post_type_object = get_post_type_object( 'book' );
	$post_type_object->template = array(
		array( 'core/image' ),
		array( 'core/heading' ),
		array( 'core/paragraph' )
	);
}
add_action( 'init', 'myplugin_register_my_block_template' );
Now that you know how to create block templates, we can move forward and explore more use cases. Let’s dive a little deeper.
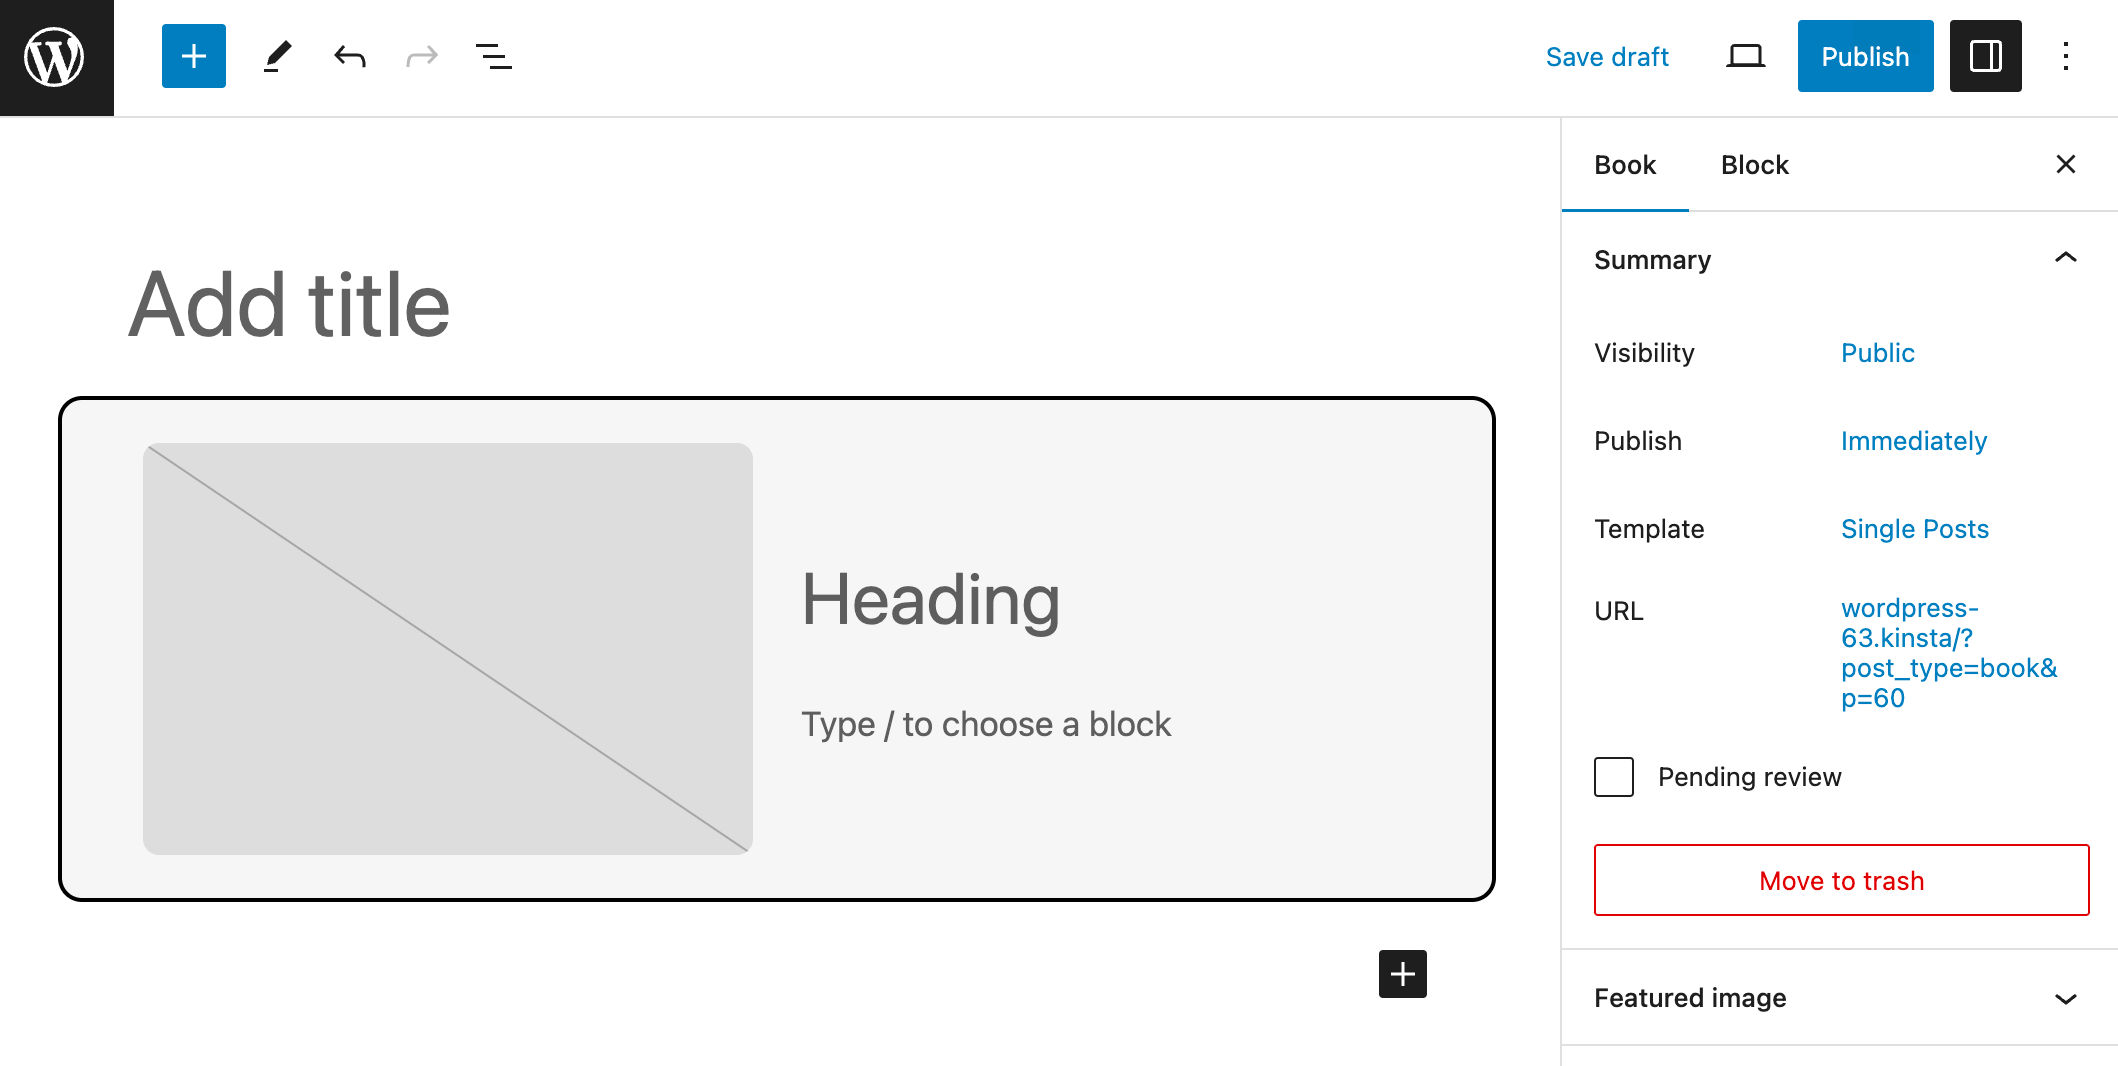
Block Templates With Custom Post Types
As we mentioned earlier, you can attach a block template to a custom post type. You can do that after your custom post type has already been registered, but you may prefer to define a block template on custom post type registration.
In this case, you can use the template and template_lock arguments of the register_post_type function:
function myplugin_register_book_post_type() {
	$args = array(
		'label' => esc_html__( 'Books' ),
		'labels' => array(
			'name' => esc_html__( 'Books' ),
			'singular_name' => esc_html__( 'Book' ),
		),
		'public' => true,
		'publicly_queryable' => true,
		'show_ui' => true,
		'show_in_rest' => true,
		'rest_namespace' => 'wp/v2',
		'has_archive' => true,
		'show_in_menu' => true,
		'show_in_nav_menus' => true,
		'supports' => array( 'title', 'editor', 'thumbnail' ),
		'template' => array(
			array( 'core/paragraph', array(
				'placeholder'	=> 'Add paragraph...'
			) ),
			array( 'core/columns',
				array(),
				array(
					array( 'core/column',
						array(),
						array(
							array( 'core/image' )
						)
					),
					array( 'core/column',
						array(),
						array(
							array( 'core/heading', array(
								'placeholder'	=> 'Add H3...',
								'level'			=> 3
							) ),
							array( 'core/paragraph', array(
								'placeholder'	=> 'Add paragraph...'
							) )
						)
					)
				)
			)
		)
	);
	register_post_type( 'book', $args );
}
add_action( 'init', 'myplugin_register_book_post_type' );
And that’s it. The image below shows the block template in the editor’s interface for a Book custom post type.

When you are finished with the layout, you may want to play around with block settings to fine-tune the behavior and appearance of your block template.
Fine Tuning the Block Template With Block Attributes
We defined a block template as a list of blocks. Each item in the list should be an array containing the block name and an array of optional attributes. With nested arrays, you may want to add a third array for children blocks.
A template with a Columns block can be represented as follows:
$template = array( 'core/columns',
	// attributes
	array(),
	// nested blocks
	array(
		array( 'core/column' ),
		array( 'core/column' )
	)
);
As mentioned above, the second array in the list is an optional array of block attributes. These attributes allow you to customize the appearance of your template so that you or your users can focus on the post content without caring about the page layout and design.
To start, you can use the block editor to create a structure of blocks you can use as a reference for your template.
Add your blocks, customize the layout and styles, then switch to the code editor and find block delimiters.

Block delimiters store block settings and styles in key/value pairs. You can simply copy and paste keys and values from the block markup to populate your array of attributes:
$template = array( 'core/columns',
	array(
		'verticalAlignment'	=> 'center',
		'align'				=> 'wide',
		'style'				=> array(
			'border'	=> array(
				'width'	=> '2px',
				'radius'	=> array(
					'topLeft'		=> '12px',
					'topRight'		=> '12px',
					'bottomLeft'	=> '12px',
					'bottomRight'	=> '12px'
				)
			)
		),
		'backgroundColor' => 'tertiary'
	),
	array(
		array( 'core/column' ),
		array( 'core/column' )
	)
);
Repeat the process for each block in the template and you are done.
$template = array(
	array( 'core/paragraph', array(
		'placeholder'	=> 'Add paragraph...'
	) ),
	array( 'core/columns',
		array(
			'verticalAlignment'	=> 'center',
			'align'				=> 'wide',
			'style'				=> array(
				'border'	=> array(
					'width'		=> '2px',
					'radius'	=> array(
						'topLeft'		=> '12px',
						'topRight'		=> '12px',
						'bottomLeft'	=> '12px',
						'bottomRight'	=> '12px'
					)
				)
			),
			'backgroundColor' => 'tertiary',
			'lock' => array(
				'remove'	=> true,
				'move'		=> true
			)
		),
		array(
			array( 'core/column',
				array( 'verticalAlignment'	=> 'center' ),
				array(
					array( 'core/image',
						array(
							'style'	=> array( 'border' => array( 'radius' => '8px' ) )
						)
					)
				)
			),
			array( 'core/column',
				array( 'verticalAlignment'	=> 'center' ),
				array(
					array( 'core/heading', array(
						'placeholder'	=> 'Add H3...',
						'level'			=> 3
					) ),
					array( 'core/paragraph', array(
						'placeholder'	=> 'Add paragraph...'
					) )
				)
			)
		)
	)
);
Locking Blocks
You can lock specific blocks or all the blocks included in your template using the template_lock property of the $post_type_object.
Locking templates could be super useful when you have a multi-author blog and want to prevent all or specific users from changing the layout of your block template.
In the following example, we are locking all blocks in the block template:
function myplugin_register_my_block_template() {
$post_type_object = get_post_type_object( 'post' );
$post_type_object->template = array(
array( 'core/image' ),
array( 'core/heading' ),
array( 'core/paragraph' )
);
$post_type_object->template_lock = 'all';
}
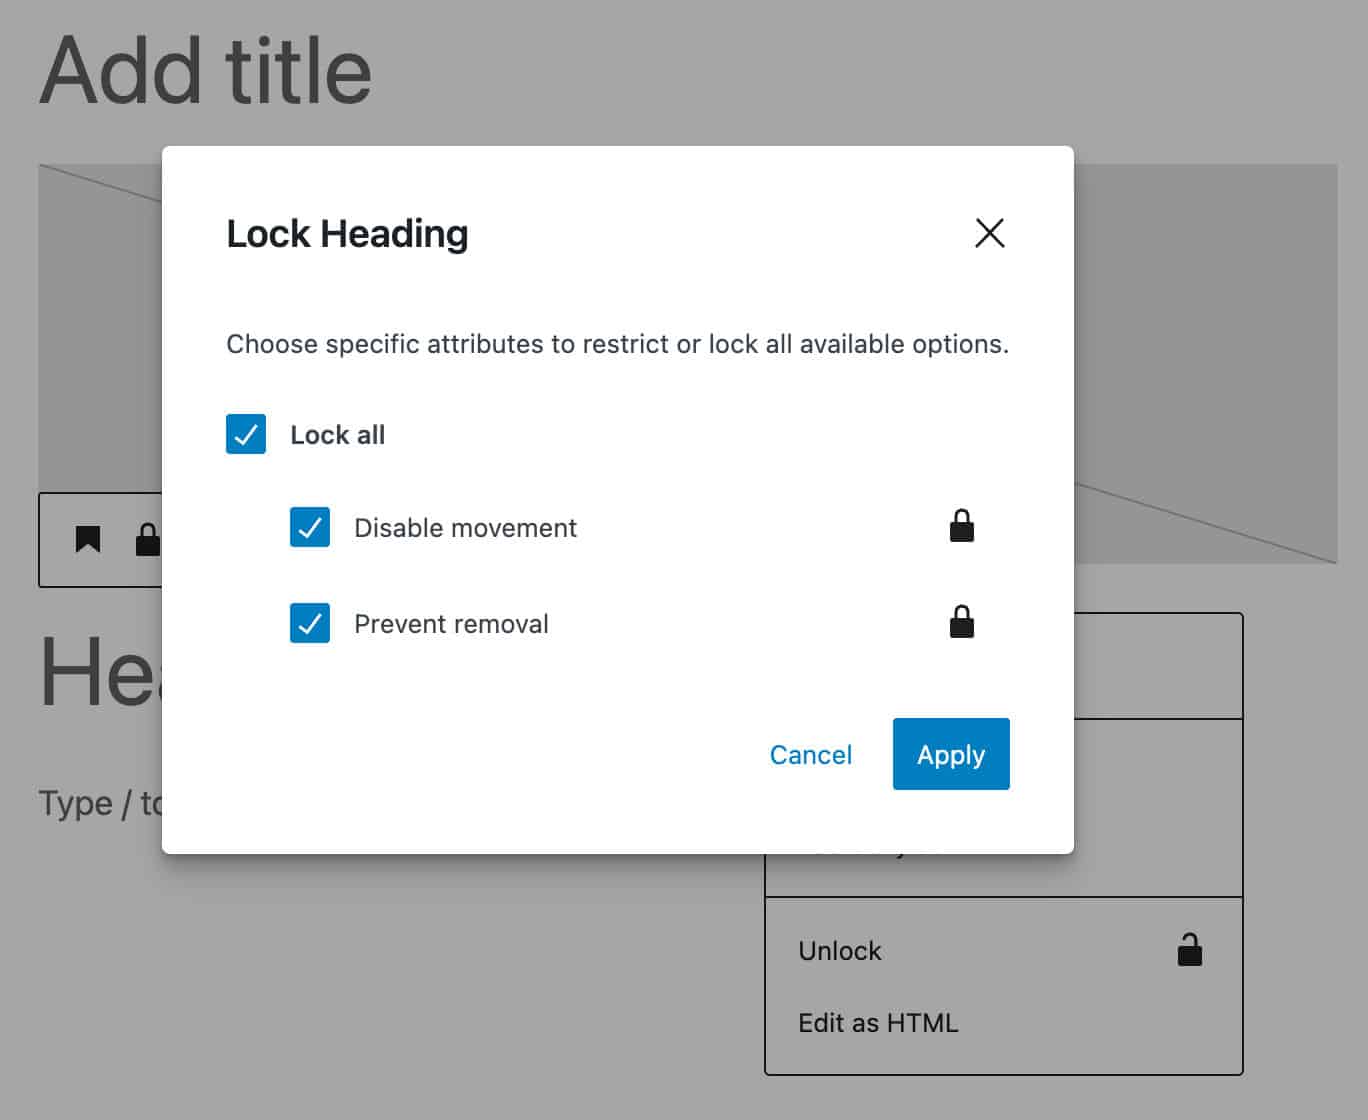
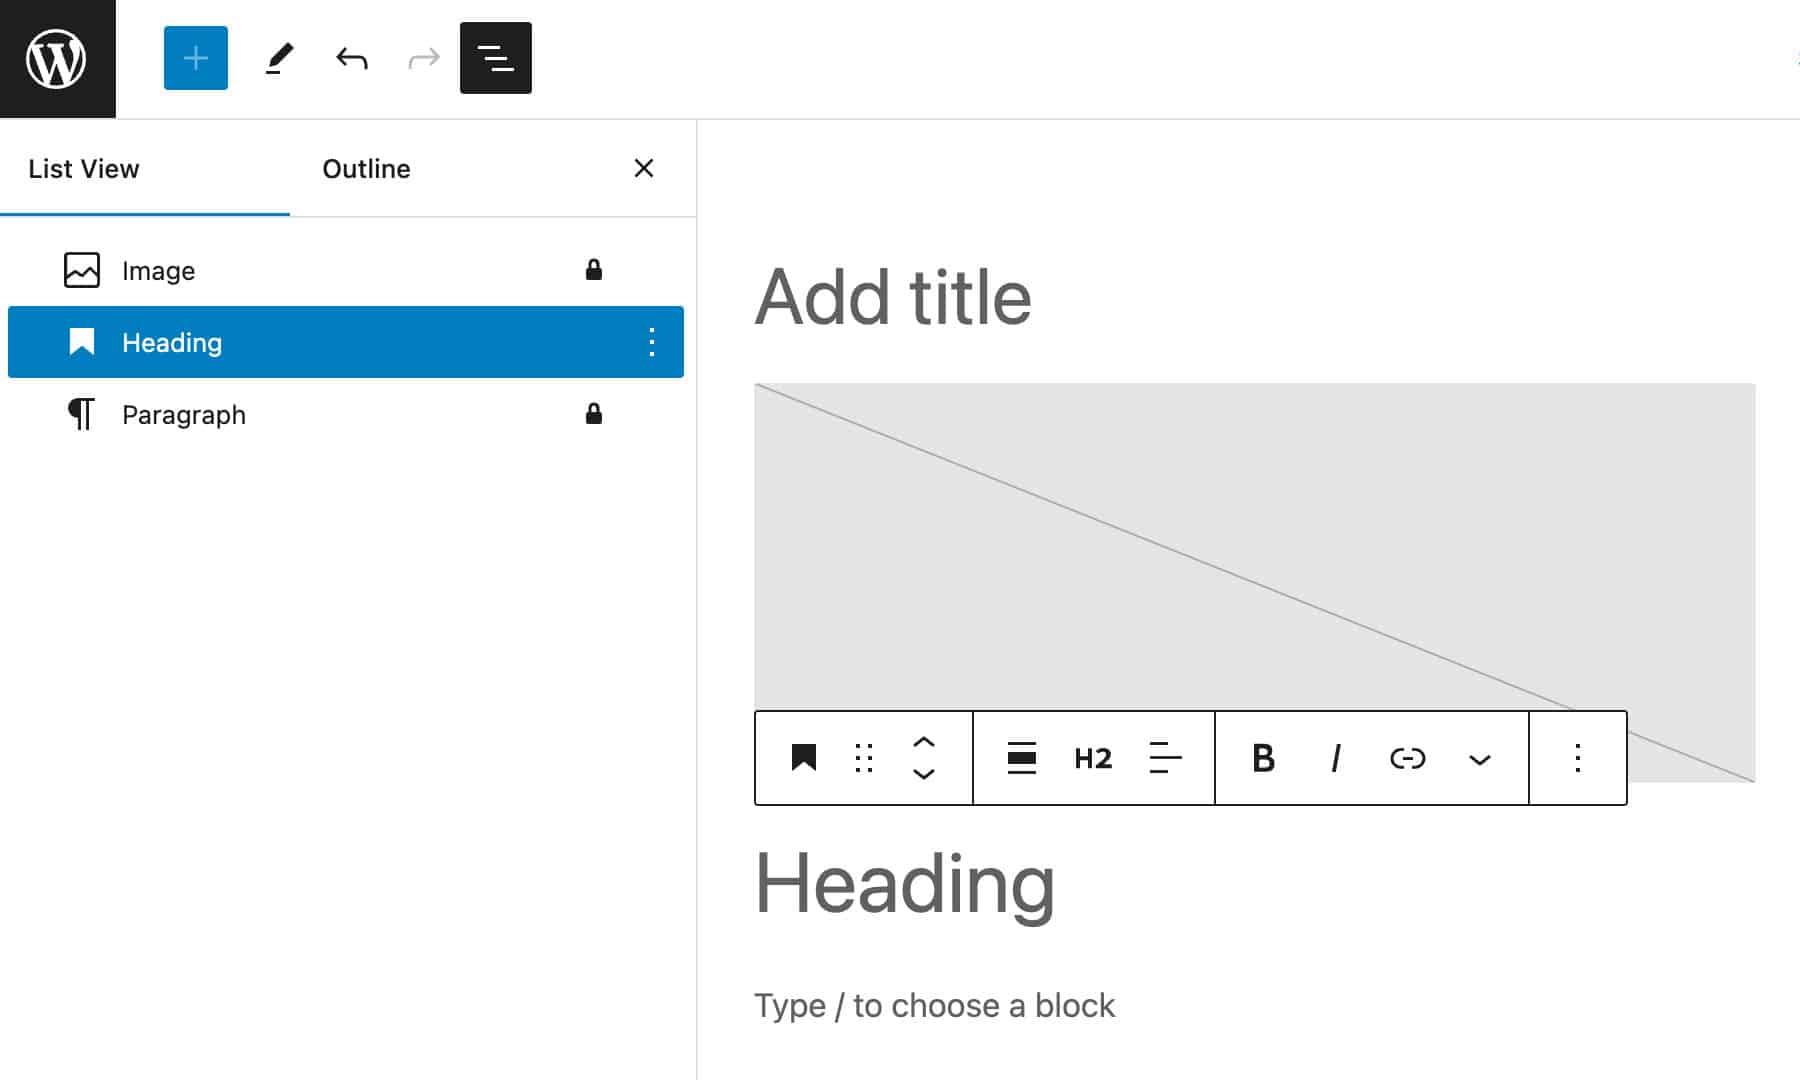
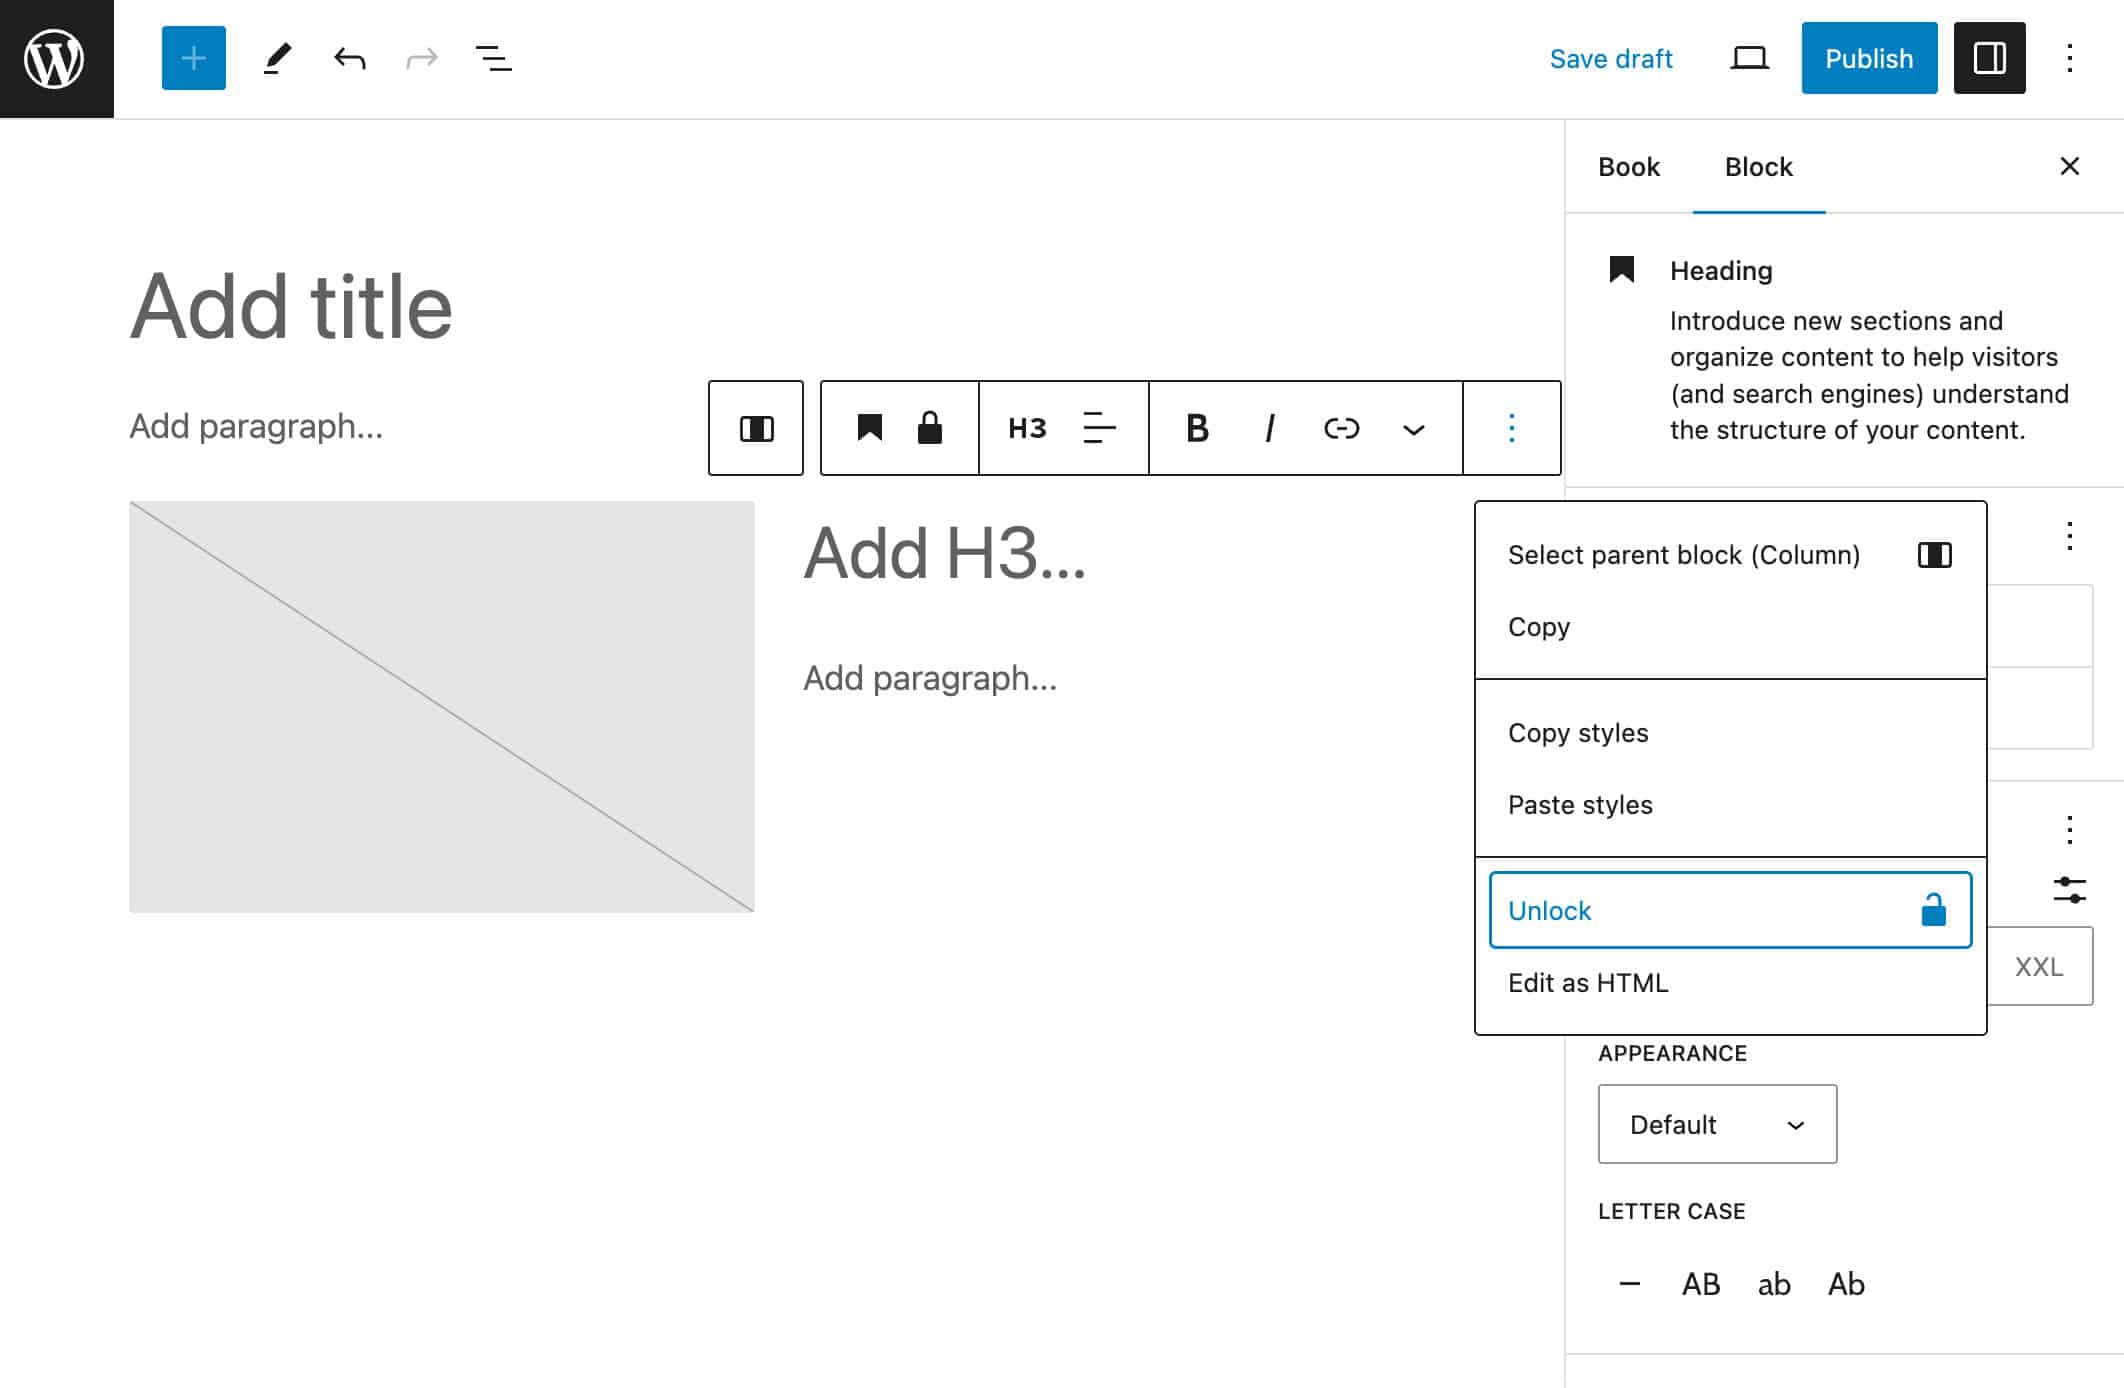
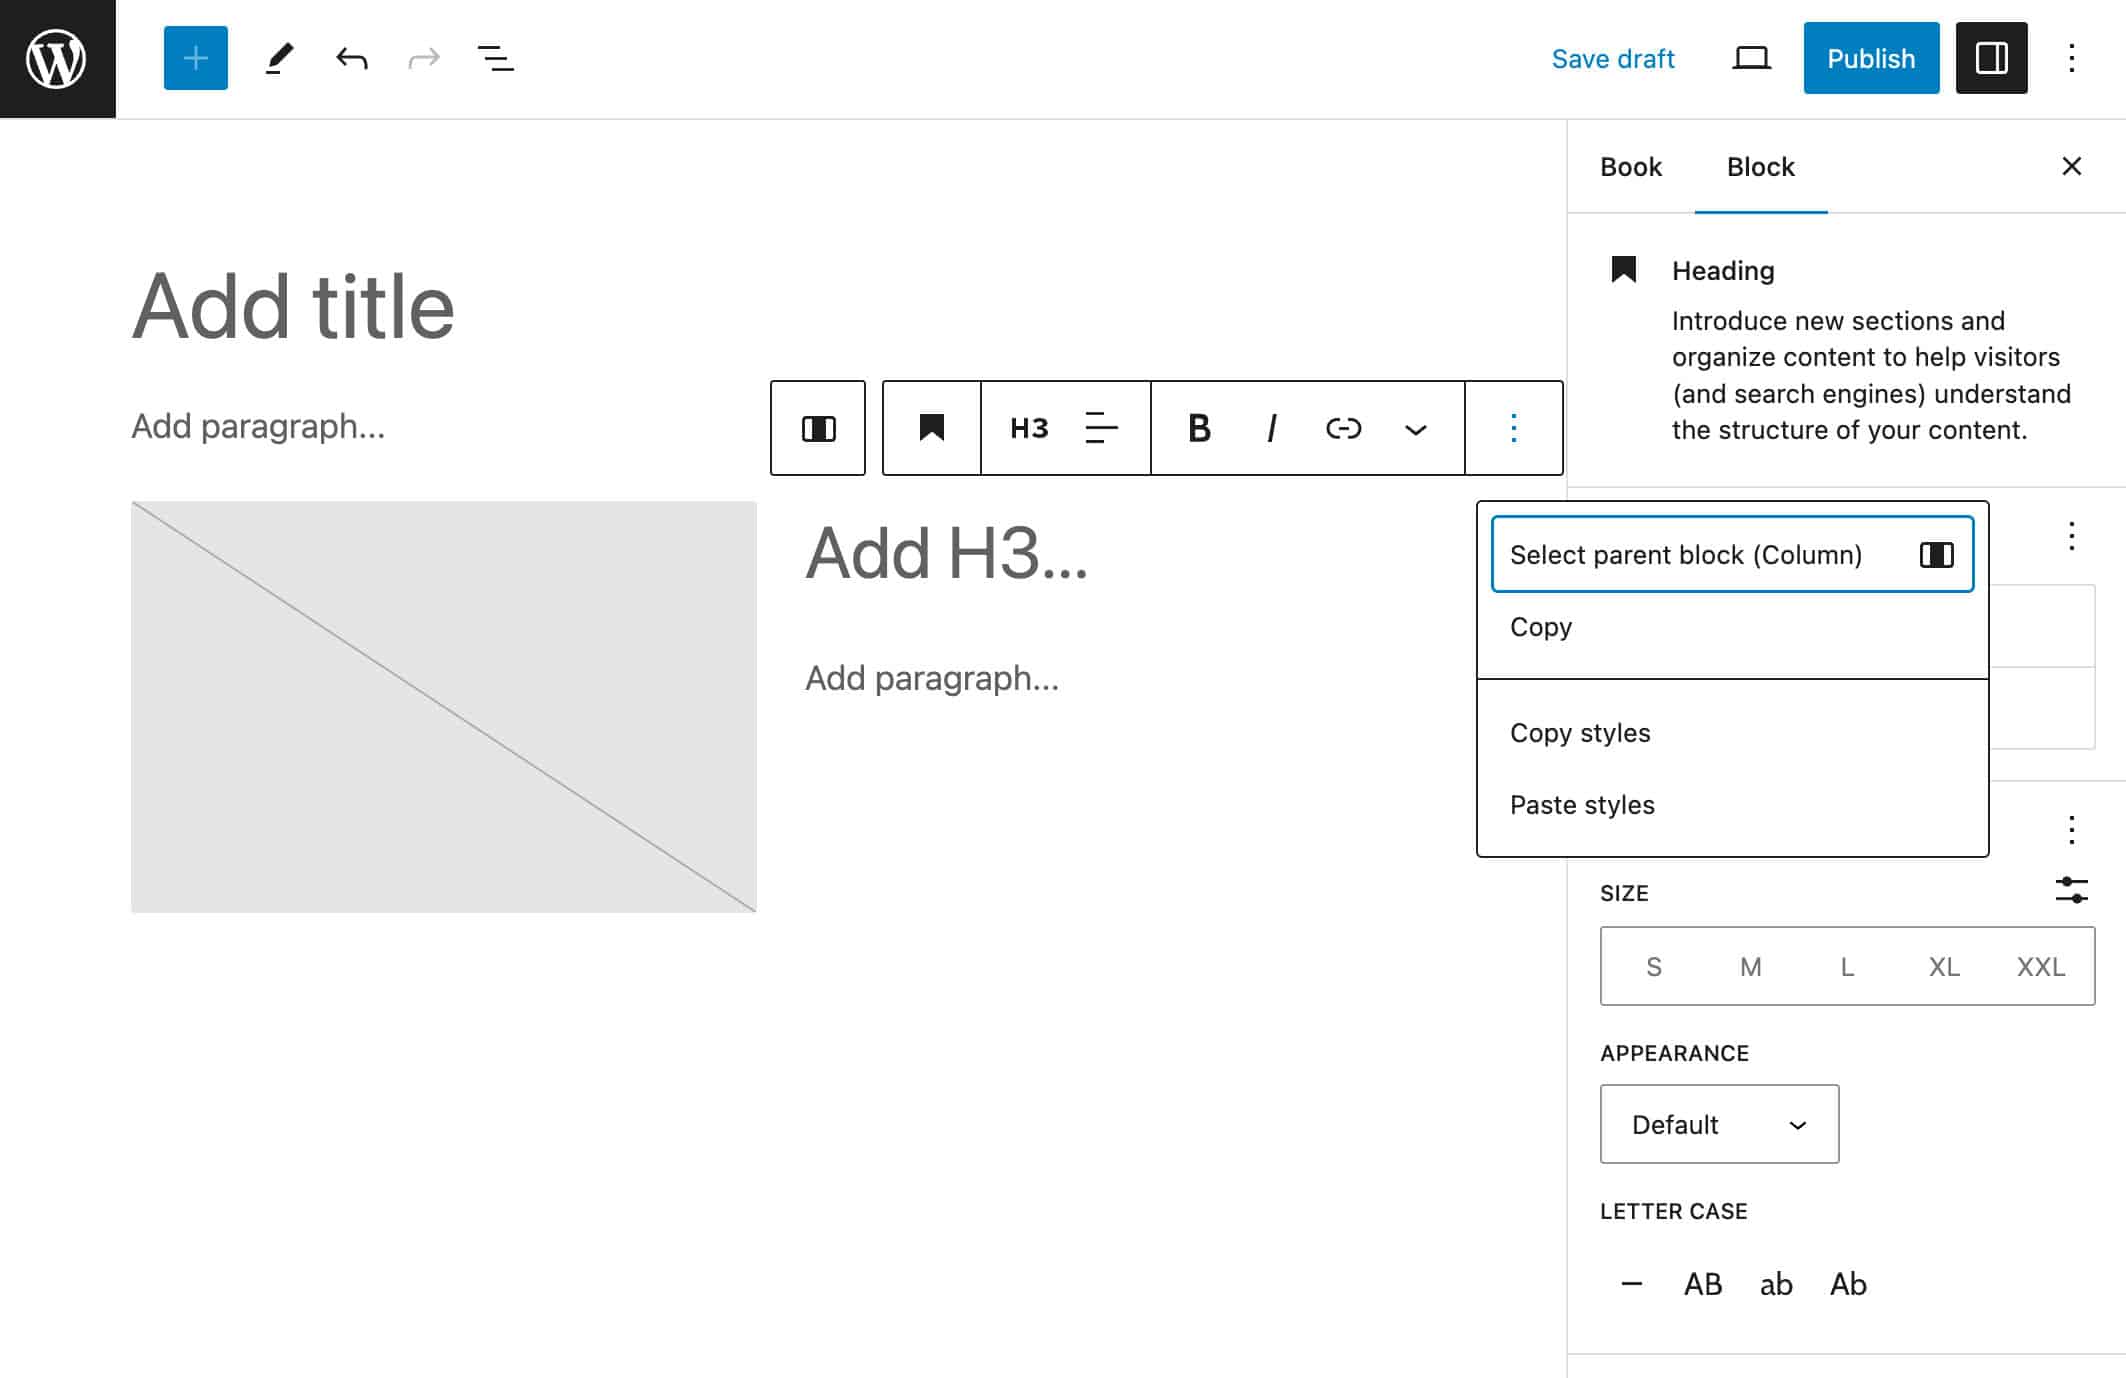
add_action( 'init', 'myplugin_register_my_block_template' );Locked blocks show a lock icon in the block toolbar and list view:
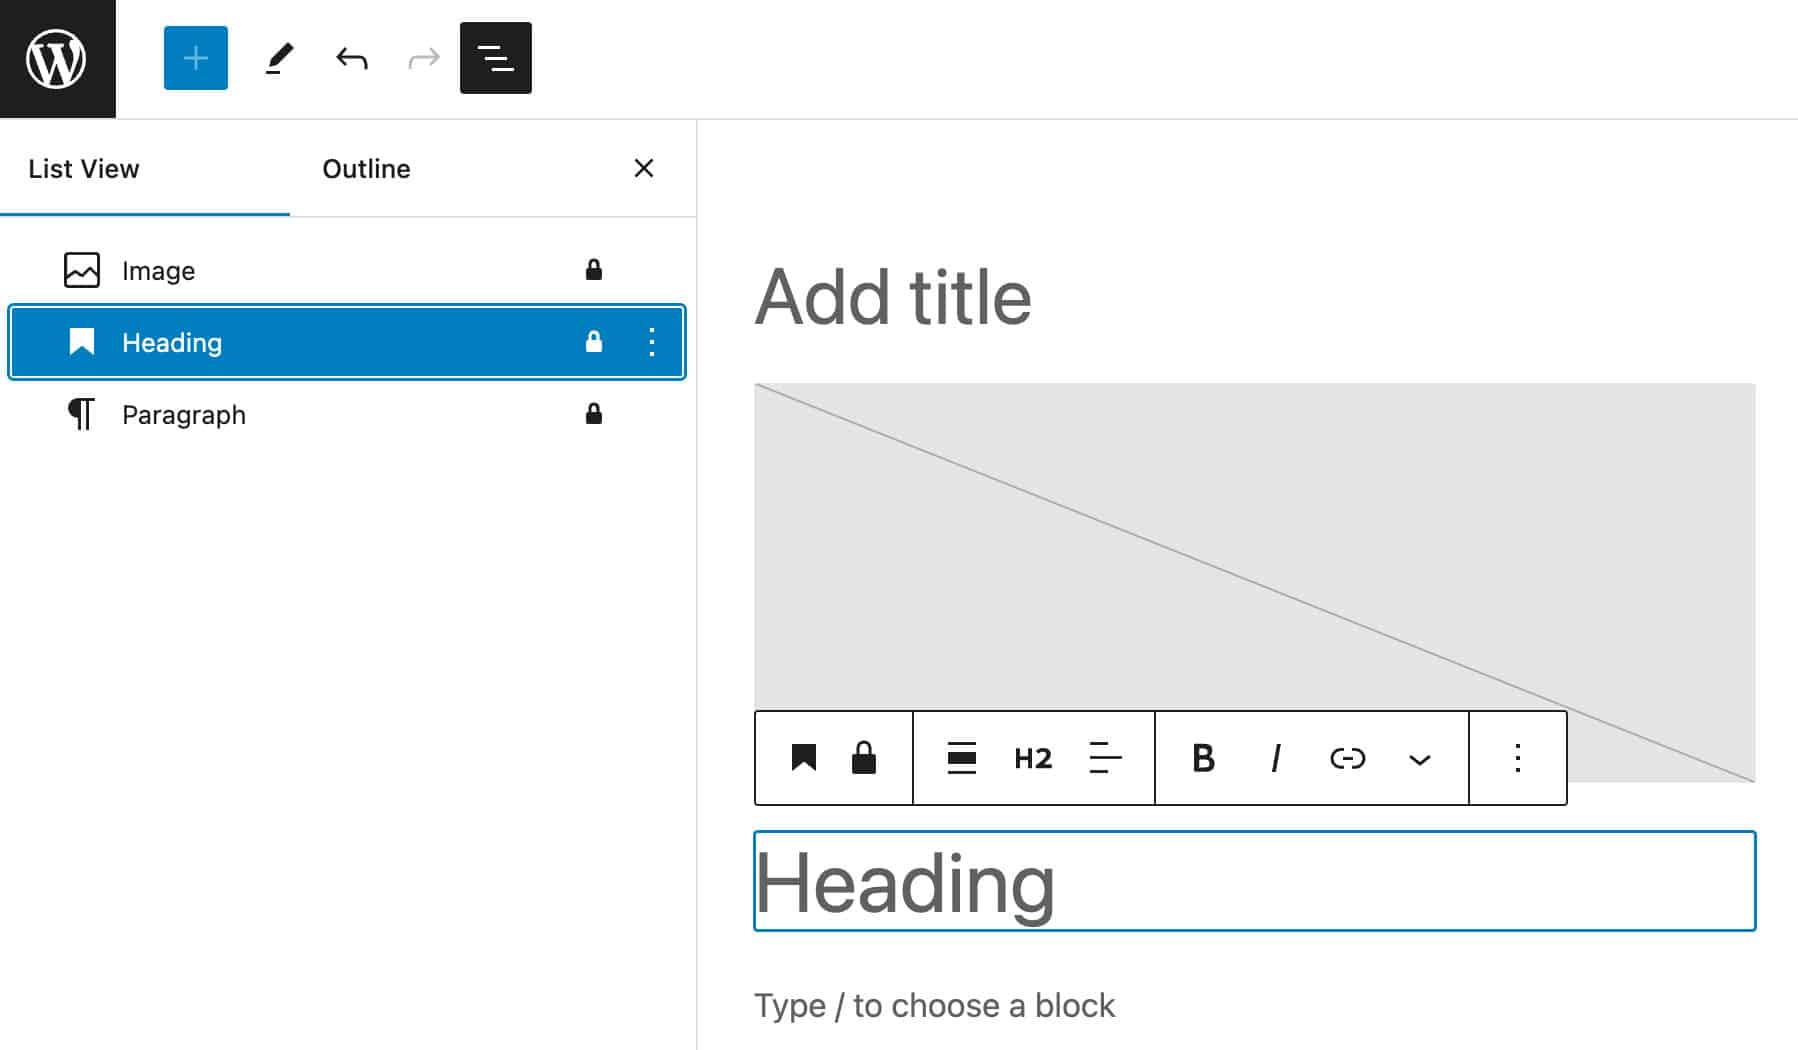
Users can unlock blocks from the Options menu available in the block toolbar.
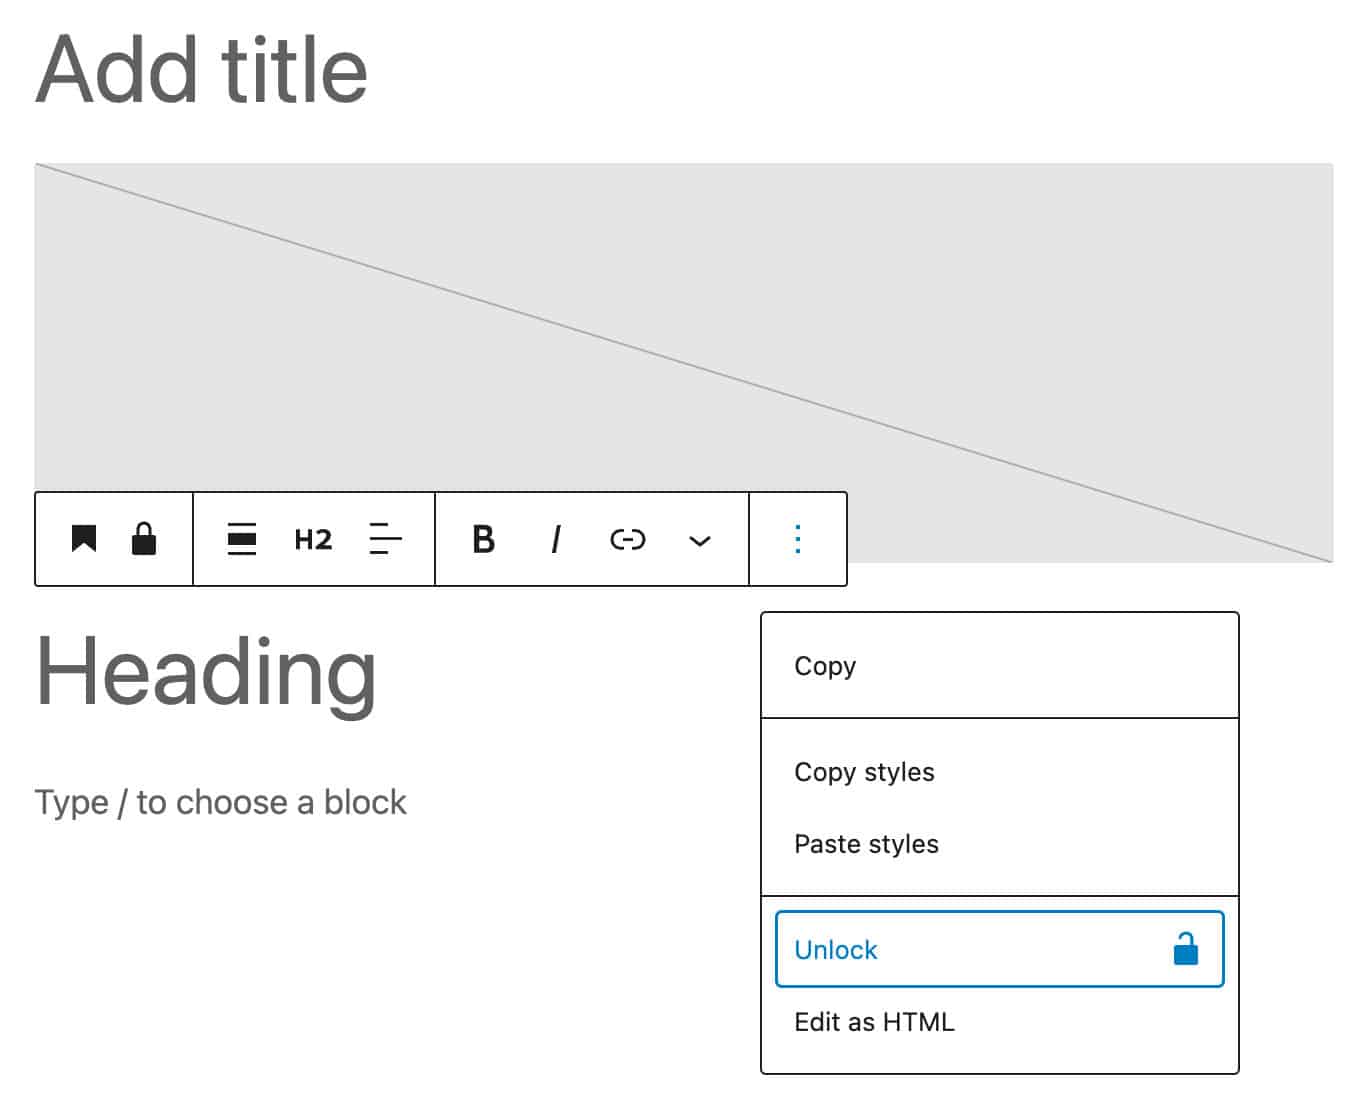
When you click on Unlock, a modal popup allows you to enable/disable movement, prevent removal, or both:
template_lock can take one of the following values:
all– Prevents users from adding new blocks, moving and removing existing blocksinsert– Prevents users from adding new blocks and removing existing blockscontentOnly– Users can only edit the content of the blocks included in the template. Note thatcontentOnlycan only be used at the pattern or template level and must be managed with code. (See also Locking APIs).
If you want to lock specific blocks, you can use the lock attribute on each block:
function myplugin_register_my_block_template() {
	$post_type_object = get_post_type_object( 'post' );
	$post_type_object->template = array(
		array( 'core/image' ),
		array( 'core/heading' ),
		array( 'core/paragraph', array(
			'lock' => array(
				'remove'	=> true,
				'move'		=> true
			)
		) )
	);
}
add_action( 'init', 'myplugin_register_my_block_template' );
The lock attribute can take one of the following values:
remove: Prevents users from removing a block.move: Prevents users from moving a block.
And you can also use lock in conjunction with template_lock to fine-tune the behavior of the blocks included in your block template. In the following example, we are locking all blocks but the heading:
function myplugin_register_my_block_template() {
$post_type_object = get_post_type_object( 'post' );
$post_type_object->template = array(
array( 'core/image' ),
array( 'core/heading', array(
'lock' => array(
'remove' => false,
'move' => false
)
) ),
array( 'core/paragraph' )
);
$post_type_object->template_lock = 'all';
}
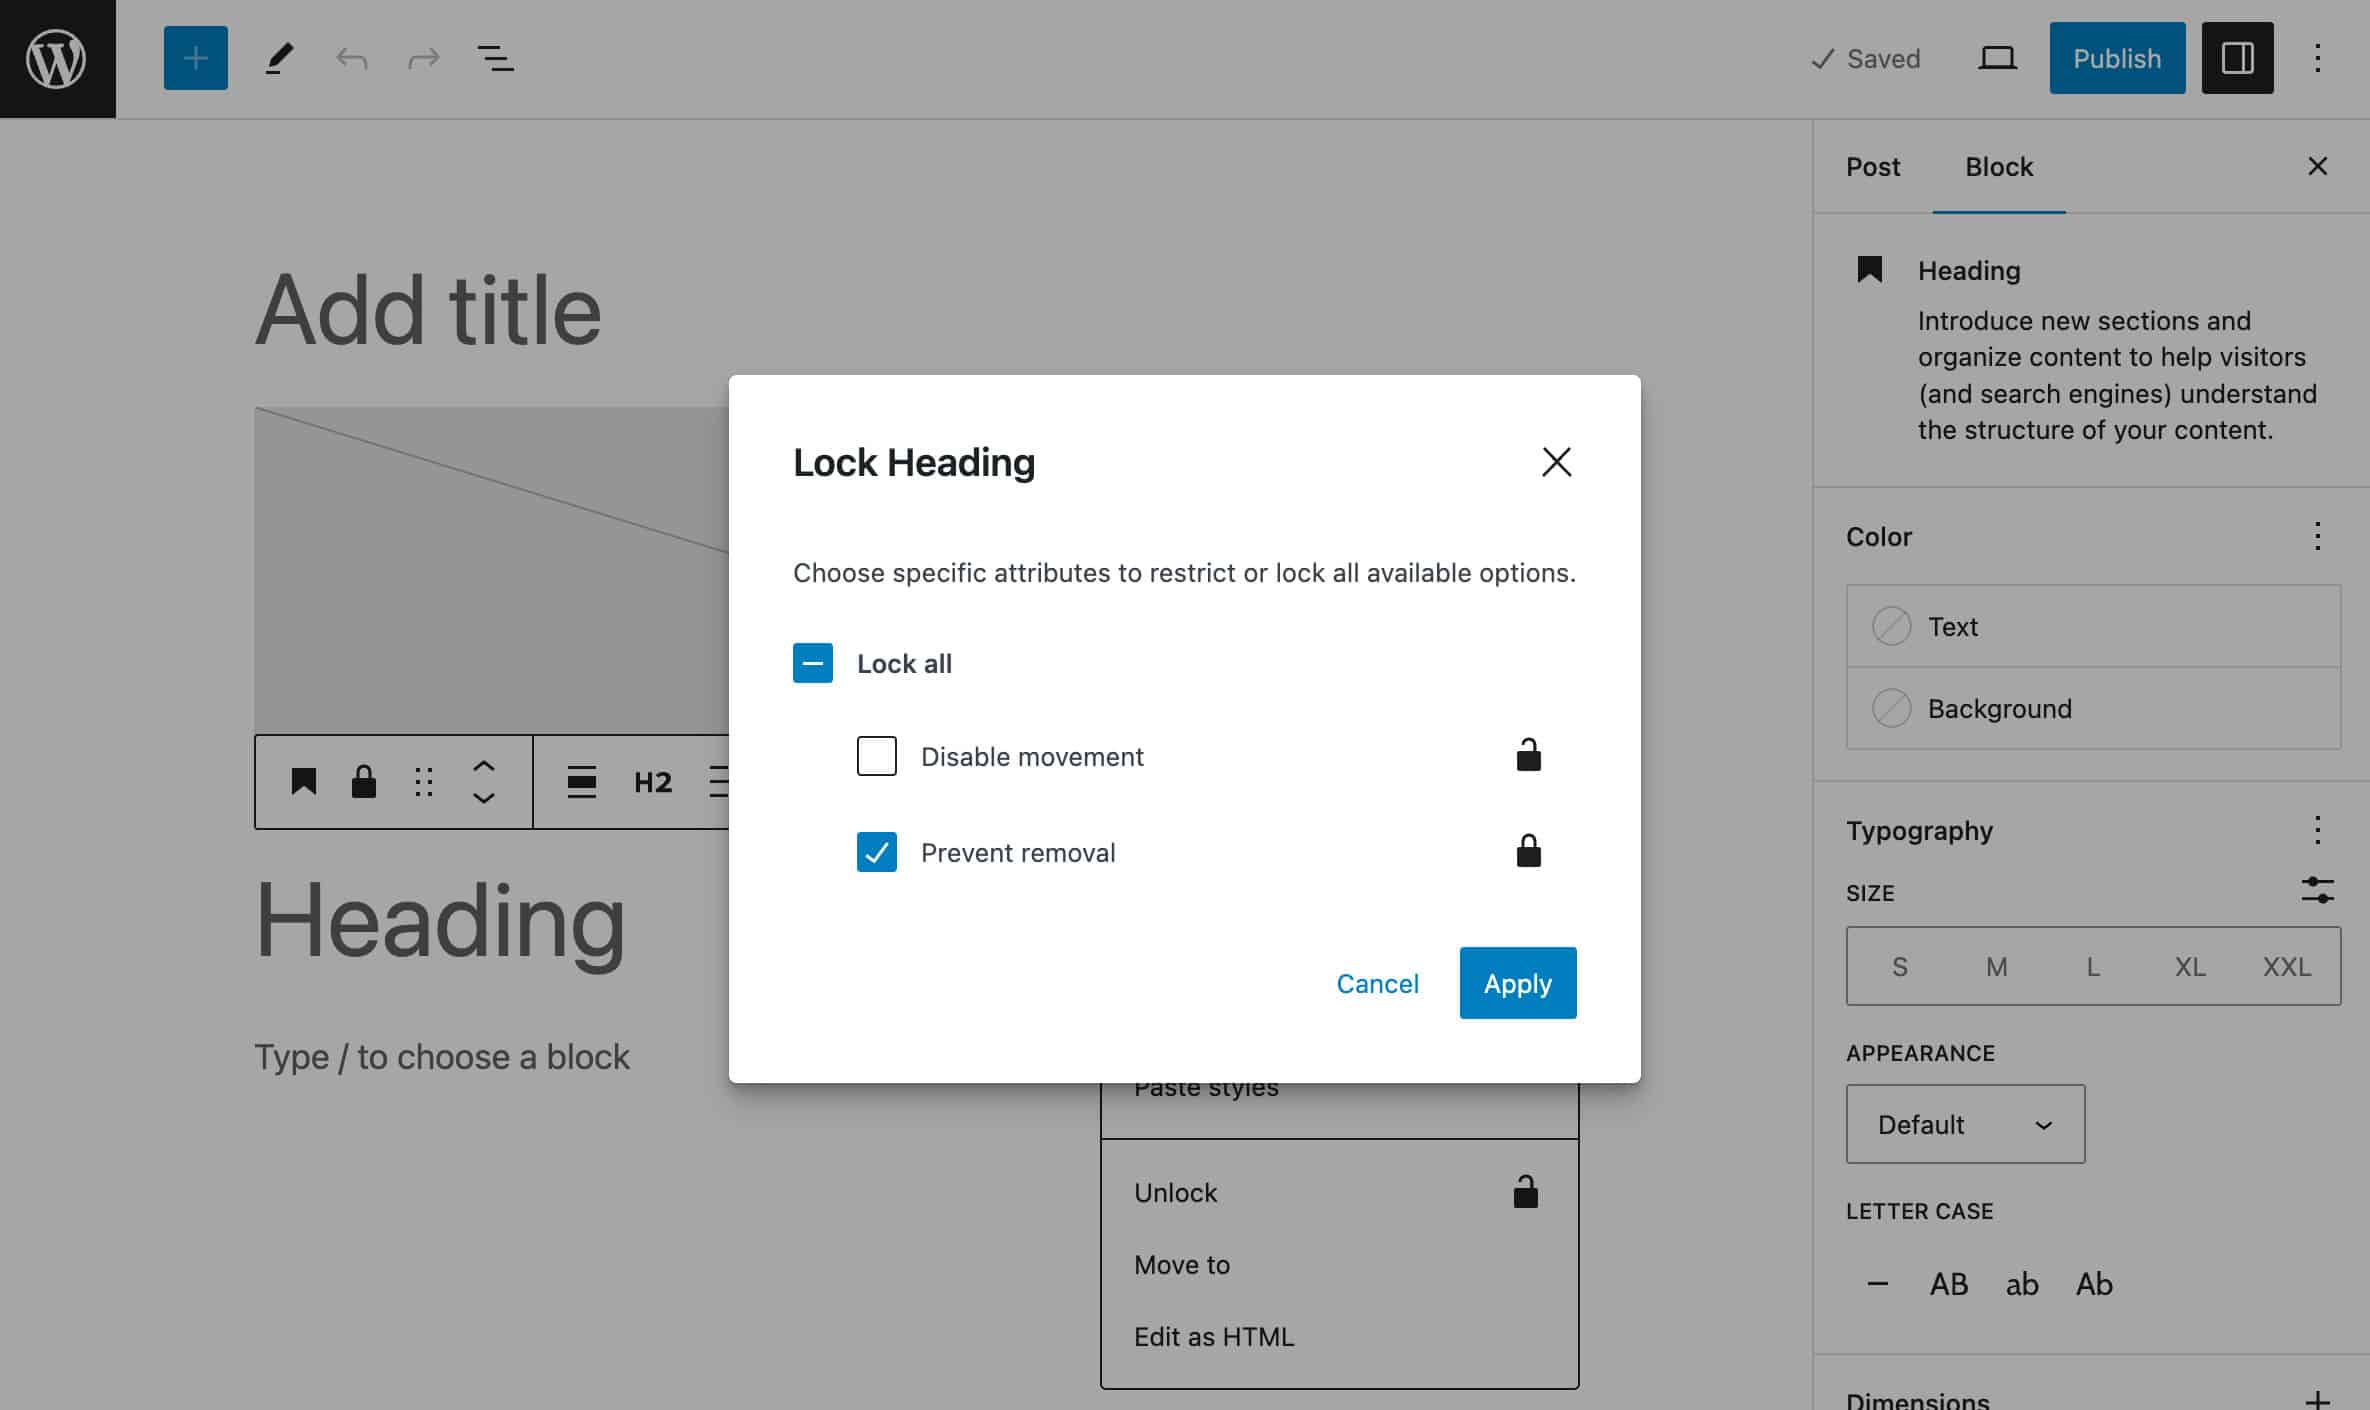
add_action( 'init', 'myplugin_register_my_block_template' );The image below shows the block template with locked and unlocked blocks:
Block developers can also use the lock attribute in the block definition on the attributes level (see also Individual block locking).
Preventing Users From Unlocking Blocks
If you tested the code discussed so far in the article, you may have realized that you can unlock the blocks included in your template (or any other block) from the editor’s interface. By default, all users with editing access can lock or unlock blocks, and doing so bypass your template settings.
You can control whether blocks can be locked or unlocked using the block_editor_settings_all filter.
The filter will send any setting to the initialized Editor, which means any editor setting that is used to configure the editor at initialization can be filtered by a PHP WordPress plugin before being sent.
The callback function you will use with this filter takes two parameters:
$settings: An array of editor settings.$context: An instance of the classWP_Block_Editor_Context, an object that contains information about a block editor being rendered.
What you have to do is to filter $settings['canLockBlocks'] setting it to true or false as shown in the following example:
add_filter( 'block_editor_settings_all',
	function( $settings, $context ) {
		if ( $context->post && 'book' === $context->post->post_type ) {
			$settings['canLockBlocks'] = false;
		}
		return $settings;
	}, 10, 2
);
You can exclude specific user roles from locking/unlocking blocks by running a conditional check on the current user capabilities.
In the following example, we are checking if the current user can edit others’ posts (in other words, if the current user role is Editor or higher):
add_filter( 'block_editor_settings_all',
	function( $settings, $context ) {
		if ( $context->post && 'book' === $context->post->post_type ) {
			$settings['canLockBlocks'] = current_user_can( 'edit_others_posts' );
		}
		return $settings;
	}, 10, 2
);
The following images compare the editor’s initial state for an Admin and an Author. First, Admin:
Now, Author:
And you can check any condition on the current user. In the following example, we are preventing a specific user from locking/unlocking blocks:
add_filter( 'block_editor_settings_all',
	function( $settings, $context ) {
		$user = wp_get_current_user();
		if ( in_array( $user->user_email, [ '[email protected]' ], true ) ) {
			$settings['canLockBlocks'] = false;
		}
		return $settings;
	}, 10, 2
);
You can combine more conditions to have granular control over who is allowed to lock/unlock blocks in your template and who is not. That is one aspect of what is called Curated experience.
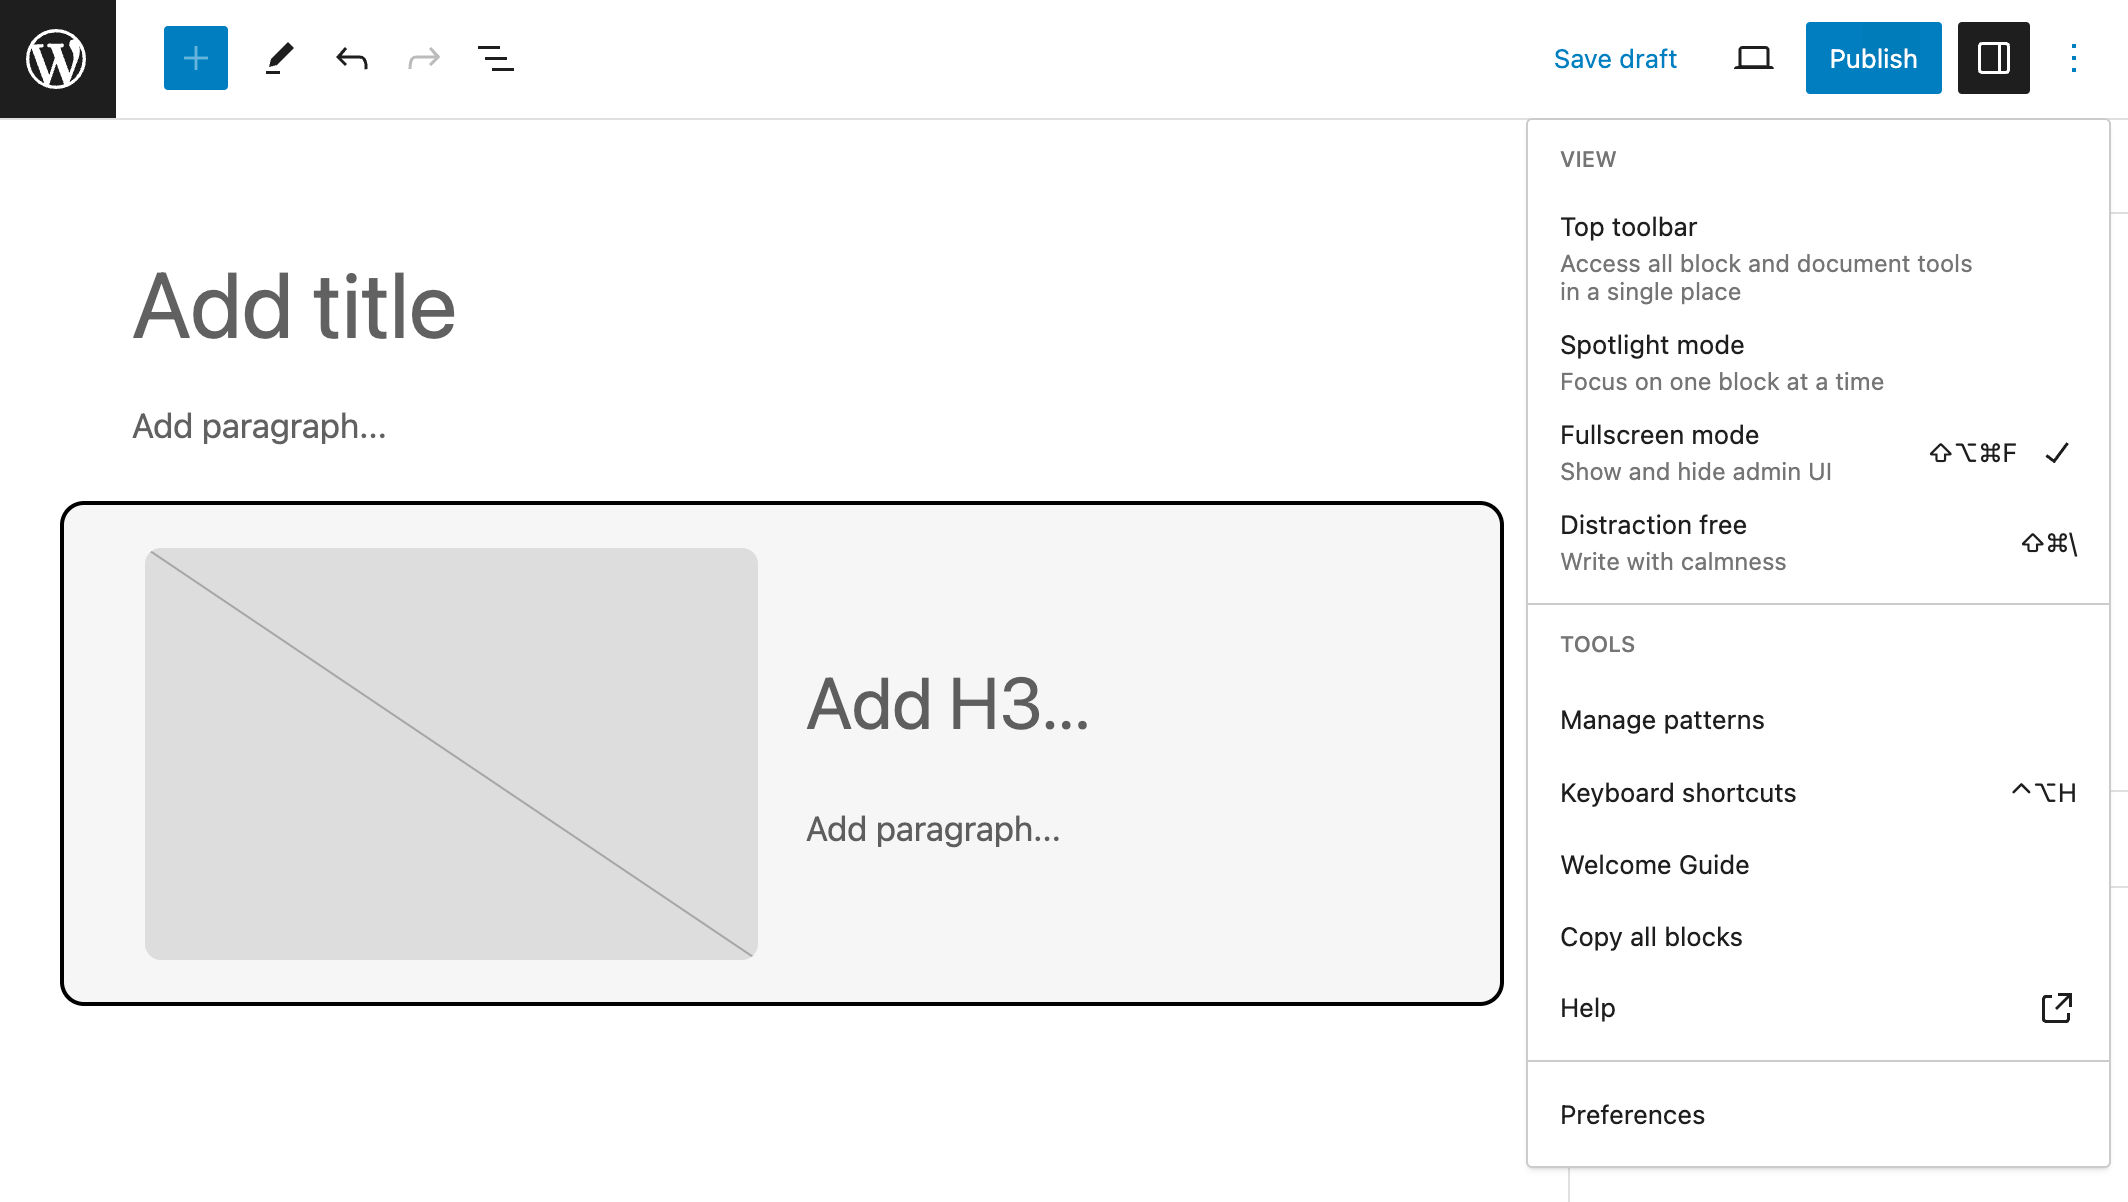
But wait. Have you tried to edit your post content using the code editor? Well, you may be surprised to see that users not allowed to unlock blocks from the UI can still change the content from the code editor.
Disabling the Code Editor for Specific User Roles
By default, all users who can edit content can access the code editor. This could override your locking settings and some users could ruin or delete your template layout.
You can also use block_editor_settings_all to filter the codeEditingEnabled setting to prevent specific user roles to access the code editor. Here is the code:
add_filter( 'block_editor_settings_all',
	function( $settings, $context ) {
		if ( $context->post && 'book' === $context->post->post_type ) {
			$settings['canLockBlocks'] = current_user_can( 'edit_others_posts' );
			$settings['codeEditingEnabled'] = current_user_can( 'edit_others_posts' );
		}
		return $settings;
	}, 10, 2
);
With this code in place, users who don’t have edit_others_posts capability won’t be allowed to access the code editor. The image below shows the Options toolbar for an Author.
That’s what you need to know to build block templates via PHP. Now, if you are a Gutenberg block developer and love to work with JavaScript, you may prefer to opt for a different approach.
How To Build a Template Using JavaScript
Adding a block template to a post works differently if you decide to go with JavaScript. You can still build a template, but you need to create a custom block and use the InnerBlocks component as discussed in our Gutenberg block development guide.
InnerBlocks exports a pair of components which can be used in block implementations to enable nested block content. – Source: InnerBlocks
How does it work?
You can use InnerBlocks in your custom blocks the same way as any other Gutenberg component.
You first need to include it from a package along with other dependencies:
import { registerBlockType } from '@wordpress/blocks';
import { useBlockProps, InnerBlocks } from '@wordpress/block-editor';
Next, you will define InnerBlocks properties. In the following example, we’ll declare a TEMPLATE constant we’ll then use to set the value for the template property of the InnerBlocks element:
const TEMPLATE = [
	[ 'core/paragraph', { 'placeholder': 'Add paragraph...' } ],
	[ 'core/columns', { verticalAlignment: 'center' },
		[
			[
				'core/column',
				{ templateLock: 'all' },
				[
					[ 'core/image' ]
				]
			],
			[
				'core/column',
				{ templateLock: 'all' },
				[
					[
						'core/heading',
						{'placeholder': 'Add H3...', 'level': 3}
					],
					[
						'core/paragraph',
						{'placeholder': 'Add paragraph...'}
					]
				],
			]
		]
	]
];
registerBlockType( metadata.name, {
	title: 'My Template',
	category: 'widgets',
	edit: ( props ) => {
		return(
			<div>
				<InnerBlocks
					template={ TEMPLATE }
					templateLock="insert"
				/>
			</div>
		)
	},
	save() {
		const blockProps = useBlockProps.save();
		return(
			<div { ...blockProps }>
				<InnerBlocks.Content />
			</div>
		)
	}
} );
This code is quite straightforward. You should notice that we used the templateLock attribute twice, first at the block level, then inside the InnerBlocks element. For the complete list of available props, see the InnerBlocks reference and the Block Editor Handbook.
Now try it yourself.
First, create a local WordPress install using DevKinsta or any other local development environment.
Next, launch your command line tool, navigate to your plugins folder, and run the following command:
npx @wordpress/create-block template-blockYou can change the name of the block to whatever you want. If you prefer to control any and every aspect of your starter block, just follow the instruction provided in our definitive guide to block development.
Once the installation is complete, run the following commands:
cd template-block
npm start
Launch your WordPress admin dashboard and navigate to the Plugins screen. Find and activate your Template Block plugin.
In your favorite code editor, open the index.js file you find under the src folder. Copy and paste the code above, save your index.js, and back in the WordPress dashboard, create a new post or page.
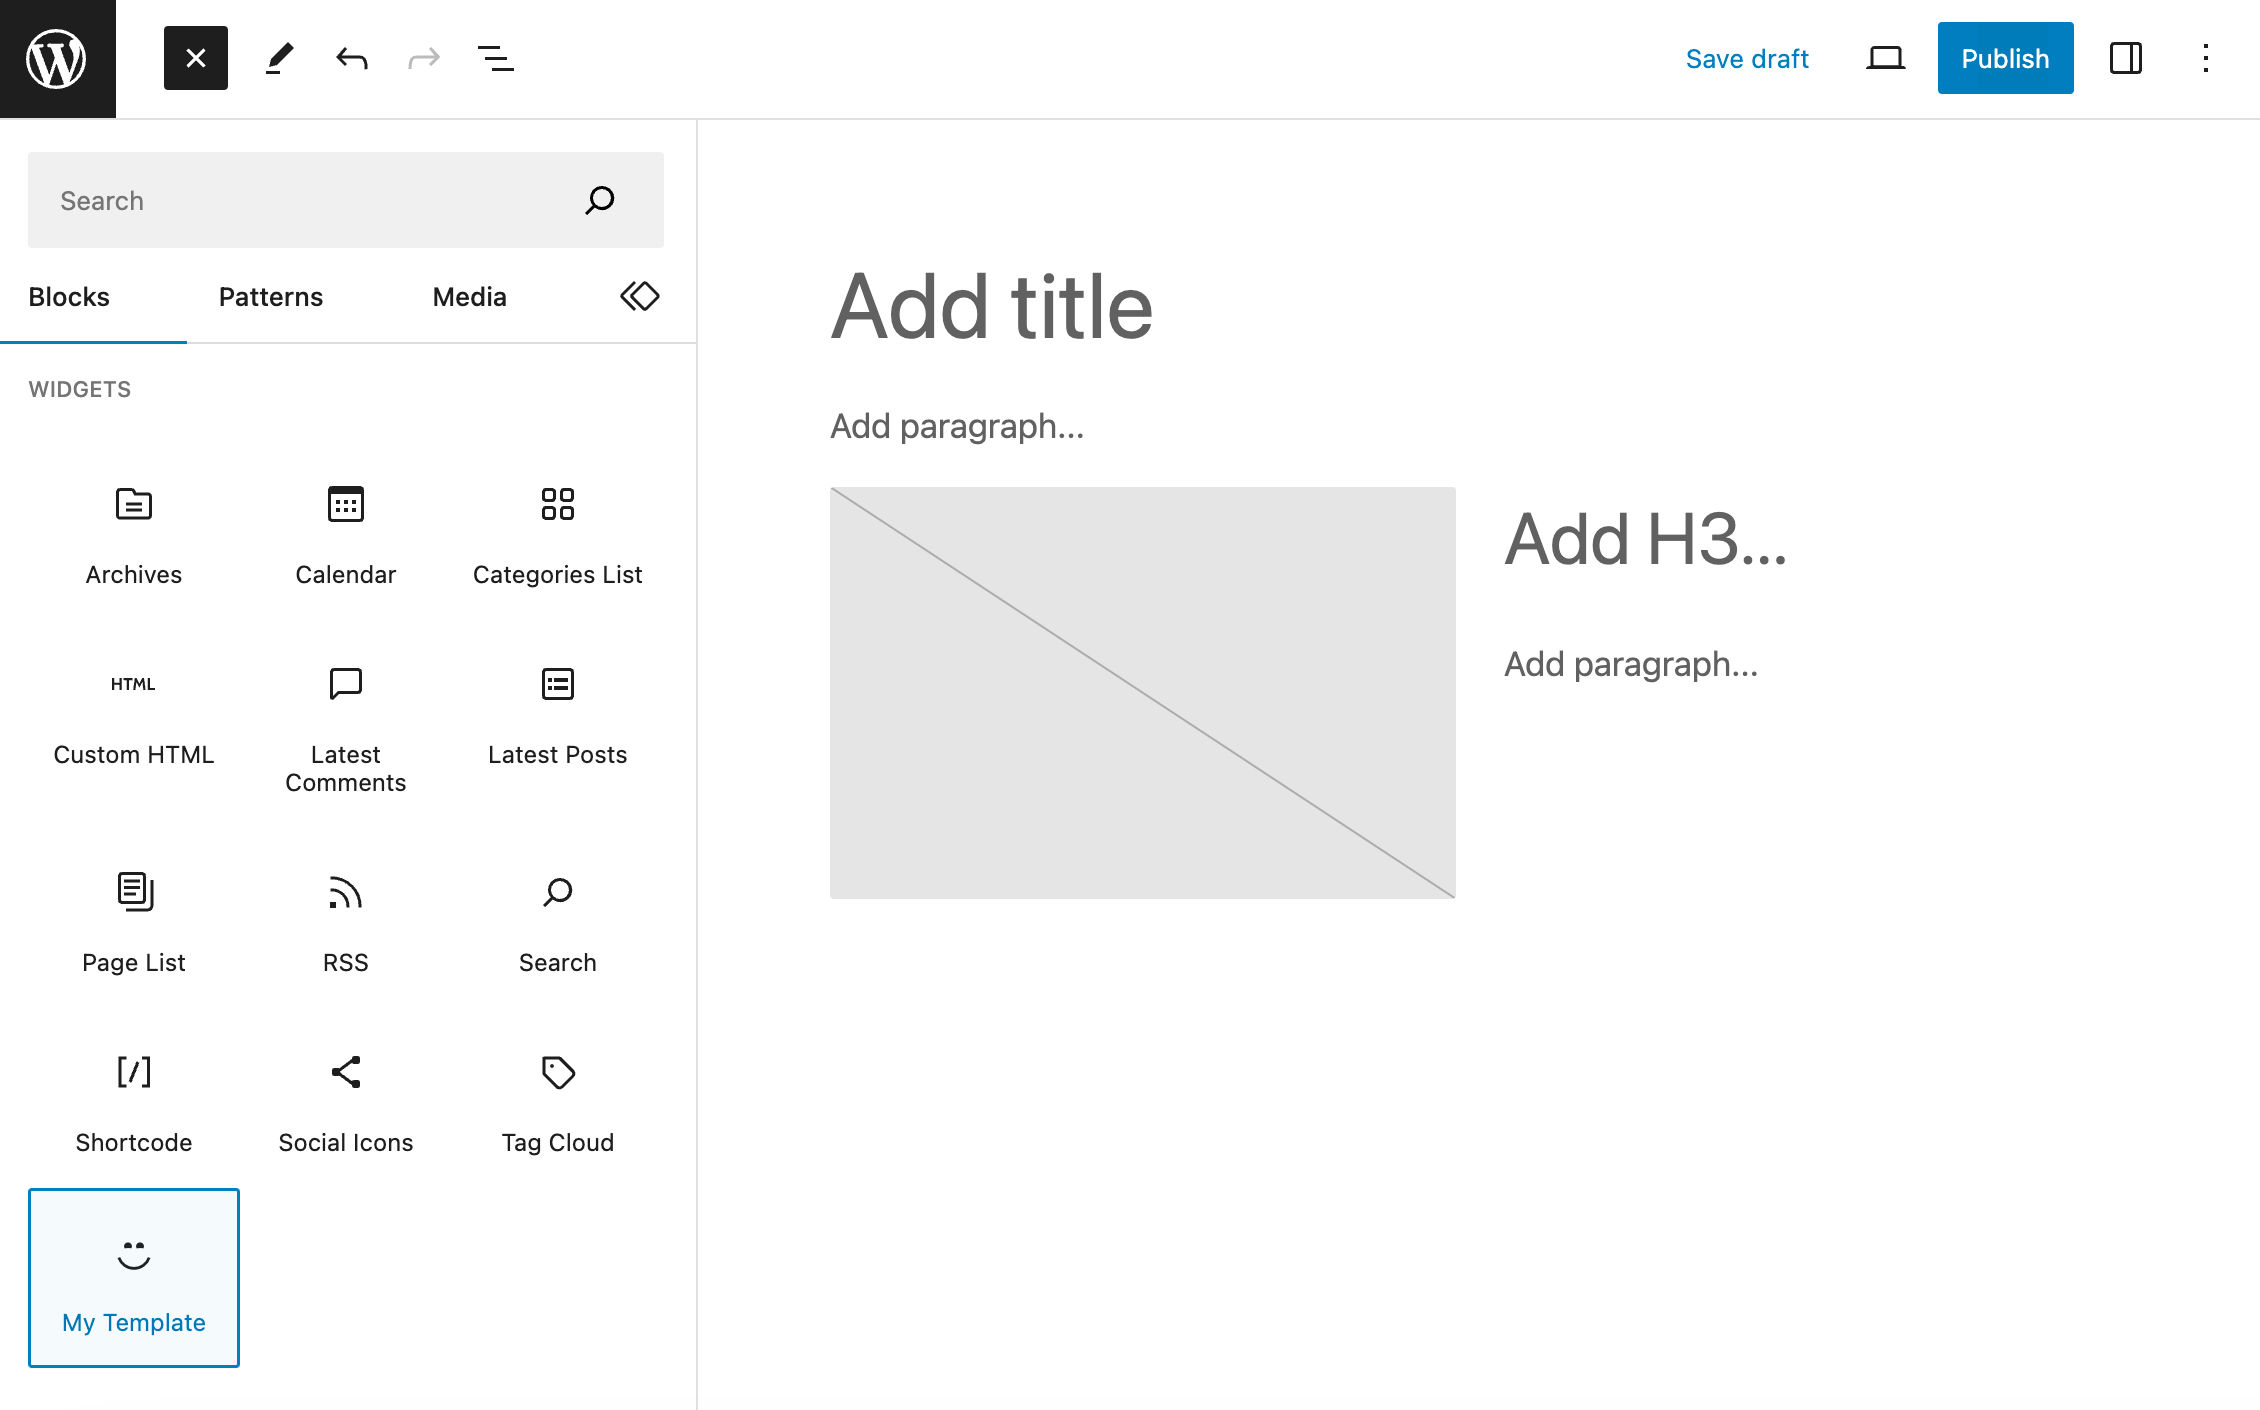
Open the block inserter and scroll down to the Widgets section. There you should find your custom block.
Add it to the post, customize the content, and save the post.
If you switch to the code editor, you’ll see the following markup:
<!-- wp:create-block/template-block -->
<div class="wp-block-create-block-template-block"><!-- wp:paragraph {"placeholder":"Add paragraph..."} -->
<p></p>
<!-- /wp:paragraph -->

<!-- wp:columns {"verticalAlignment":"center"} -->
<div class="wp-block-columns are-vertically-aligned-center"><!-- wp:column {"templateLock":"all"} -->
<div class="wp-block-column"><!-- wp:image -->
<figure class="wp-block-image"><img alt=""/></figure>
<!-- /wp:image --></div>
<!-- /wp:column -->

<!-- wp:column {"templateLock":"all"} -->
<div class="wp-block-column"><!-- wp:heading {"level":3,"placeholder":"Add H3..."} -->
<h3 class="wp-block-heading"></h3>
<!-- /wp:heading -->

<!-- wp:paragraph {"placeholder":"Add paragraph..."} -->
<p></p>
<!-- /wp:paragraph --></div>
<!-- /wp:column --></div>
<!-- /wp:columns --></div>
<!-- /wp:create-block/template-block -->
Now preview the result in your favorite browser. If your block appearance needs to be improved, you can simply change the styles in your style.scss file.
Once you are happy with your customizations, stop the process and run npm run build. All the files of your project will be compressed and available for production in the new build folder.
That’s easy and powerful, isn’t it?
Now you can create advanced templates of blocks that you can include in your content with just a few clicks.
Summary
Adding a block template to your post or custom post types can dramatically speed up and improve the creation and editing experience on your WordPress website. Block templates are especially useful on multi-user websites, where multiple users are enabled to create content and you need them to adhere to the same format.
This also allows you to create uniform layouts without having to manually add a block pattern each time you create a new post. Think of a review or recipe website, where each page should respect the same structure.
By combining the knowledge you will have gained in creating static or dynamic custom blocks, block patterns, and block templates, you will be able to always identify the most efficient and effective solution for building any type of WordPress website.
Up to you now. Have you already explored block templates? Which case use do you find them most fit for? Please, share your experience in the comments below.

Carlo is a passionate lover of webdesign and front-end development. He has been playing with WordPress for more than 20 years, also in collaboration with Italian and European universities and educational institutions. He has written hundreds of articles and guides about WordPress, published both on Italian and international websites, as well as on printed magazines. You can find him on LinkedIn.

