
Running into errors on your site can be intimidating. However, most errors give you some clue as to what caused them, which can make troubleshooting these common issues a lot easier. The 503 error is not as polite, unfortunately, and doesn’t give you much information to go on.
It helps to understand what the most common causes are for the 503 error. After that, you’ll need to be methodical when it comes to troubleshooting the error, which means following several steps in order to locate the root cause.
What's the HTTP 503 Service Unavailable Error?
The HTTP 503 Service Unavailable error means that a website can’t be reached at the moment because the server is not ready to handle the request. This could happen because it’s too busy, under maintenance, or something else which requires a deeper analysis.
In this article, we’ll cover what the 503 error is and how it typically manifests. Then we’ll guide you through six steps in order to troubleshoot it. Let’s get to work!
What Is an HTTP Error 503?
The Internet Engineering Task Force (IETF) defines the 503 Service Unavailable as:
The 503 (Service Unavailable) status code indicates that the server is currently unable to handle the request due to a temporary overload or scheduled maintenance, which will likely be alleviated after some delay. The server MAY send a Retry-After header field to suggest an appropriate amount of time for the client to wait before retrying the request.
When you encounter the 503 error, it means that the server in question is unavailable. That could be because it’s too busy, for example, or it’s under maintenance. Unlike other similar error codes, 503 signifies that your website is online and running, but can’t be reached at the present moment.
What’s so vexing about this particular error is that it barely gives you any information to go on. Most of the time, it just shows up with a “Service temporarily unavailable” message. That’s the equivalent of calling a restaurant via phone, only to have them tell you that they’re closed but refuse to let you know when they’ll be open again.
If you’re lucky, the 503 error code will have occurred because your website is under maintenance. WordPress very briefly sets your site to maintenance mode when you’re updating a plugin, a theme, or the core software:
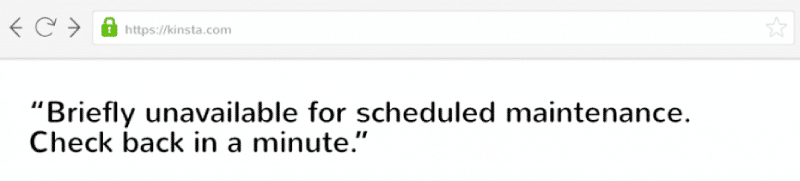
Usually, this timeout is so brief that no one will notice it. However, in those cases where the 503 error persists, you’ll have a bigger problem to deal with. After all, not only will users be unable to visit your site, but you’ll lose access to your WordPress admin area as well. That means you can’t update your site in any way, and in order to troubleshoot it, you’ll need to dig into its files.
| Error Code | 503 service unavailable error |
| Error Type | Server-side error |
| Error Variations | 503 Service Unavailable 503 Service Temporarily Unavailable HTTP Server Error 503 HTTP Error 503 |
| Error Causes | Unexpected traffic spikes Server communication problems Resource usage exhaustion DDoS attack Plugin or theme incompatibility |
503 Error Variations
The 503 error can show up in a lot of ways. However, almost every variation comes accompanied by that 503 code, making it easy to identify.
Here are some of the variations you might encounter, depending on your server configuration and browser:
- 503 Service Unavailable
- 503 Service Temporarily Unavailable
- HTTP Server Error 503
- HTTP Error 503
- Error 503 Service Unavailable
- The server is temporarily unable to service your request due to maintenance downtime or capacity problems. Please try again later.
Whatever the code you run into might look like, it means you need to get to work fast before it affects your users negatively.
What Causes an HTTP Error 503?
These are the most common reasons why a server is temporarily unable to handle a request:
- There is a high number of requests being sent to the server, exhausting all the available resources.
- The server is experiencing technical issues or maintenance work.
- The server could be under a Denial of Service (DDoS) attack.
There are also other technical issues that cause a 503 error, such as plugin or theme issues. To find these pages, as well as monitor your site for other errors, you can use the Sitechecker tool.
Checking up to 900 pages is free with an auto crawling every 3 days. If you get a paid plan, you are able to set up monitoring daily or even every 12 hours.
How to Fix the 503 Error?
Since you often can’t be sure what caused the 503 error in any given situation, you’ll need to troubleshoot it methodically. The following six sections each cover a potential fix aimed at resolving the different potential root causes.
After each step, take a moment to return to your website and see if the 503 error is gone. If it is, you’ve successfully fixed the issue. If not, continue on to the next step in the process.
1. Temporarily Deactivate Your Plugins
One of the most common causes of the 503 error in WordPress is plugin compatibility issues. To determine if that’s what’s happening, you’ll need to disable all of your site’s plugins.
Since the 503 error prevents you from accessing the admin area, you’ll need to use an FTP client for this step. If you don’t have one set up, we recommend FileZilla.
Once your FTP client is ready, connect to your website through it and navigate to your root folder. In case you can’t find it, it’s usually called public_html, html, public, www, or your site’s name. If you’re a Kinsta client, it’s your public folder.

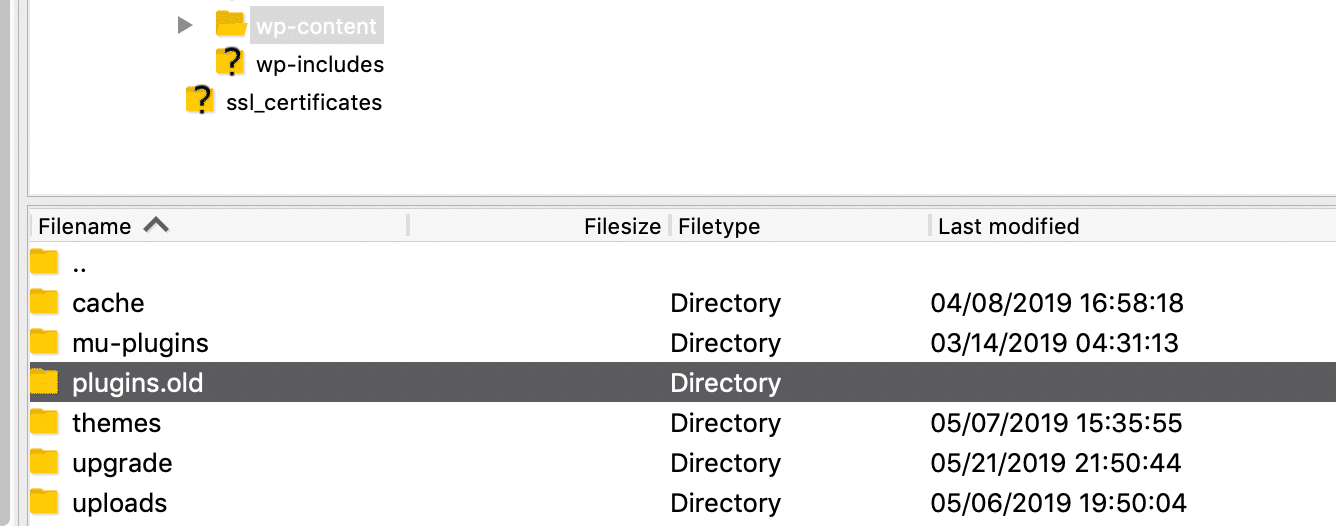
Open that folder and navigate to the wp-content directory. Inside, you’ll see a folder called plugins, which contains individual subdirectories for each of the plugins installed on your site (both active and inactive).
What you’re going to do now is right-click on the plugins folder and rename it to something else. We recommend plugins.old or plugins.deactivated, so you can easily recognize it later.
WordPress will now not be able to find any of your plugins. When that happens, it will automatically disable those plugins.
Now, try accessing your dashboard. If the 503 error is gone, then you can assume that one of your plugins was the culprit. All you have to do is figure out which one was at fault.
Return to the wp-content directory, and rename your original plugins folder correctly. Then, you’ll need to disable each of your plugins one by one, until you find the culprit.
To do this, open the wp-content/plugins directory. Inside, you’ll find one folder for each of your plugins. The process you’re going to follow is much the same as before:
- Start with the first folder, and rename it to anything you like.
- Check your website to see if the error is gone.
- If it isn’t, return the plugin folder from the previous step to its original name.
- Move on to the next plugin on your list, repeating the above steps.
This process can take a while if you have a lot of plugins, but it’s vital to check each plugin in turn. If at any point you identify the plugin that’s causing the error, you can uninstall it or replace it with another tool.
If you make it to the end of these steps without finding a solution, you can move on to the next stage of troubleshooting.
2. Deactivate Your Website Theme
Now that you’ve ruled out your plugins as the cause of the 503 error, it’s time to do the same with your active theme. In fact, your theme could also be creating compatibility issues.
Unfortunately, the process doesn’t work the same as above. WordPress won’t revert to the default theme if simply rename the theme folder, you would end up with an error like “The theme directory “theme name” does not exist.” Or if you try to rename the entire theme directory folder, you end up with “ERROR: The themes directory is either empty or doesn’t exist. Please check your installation.”

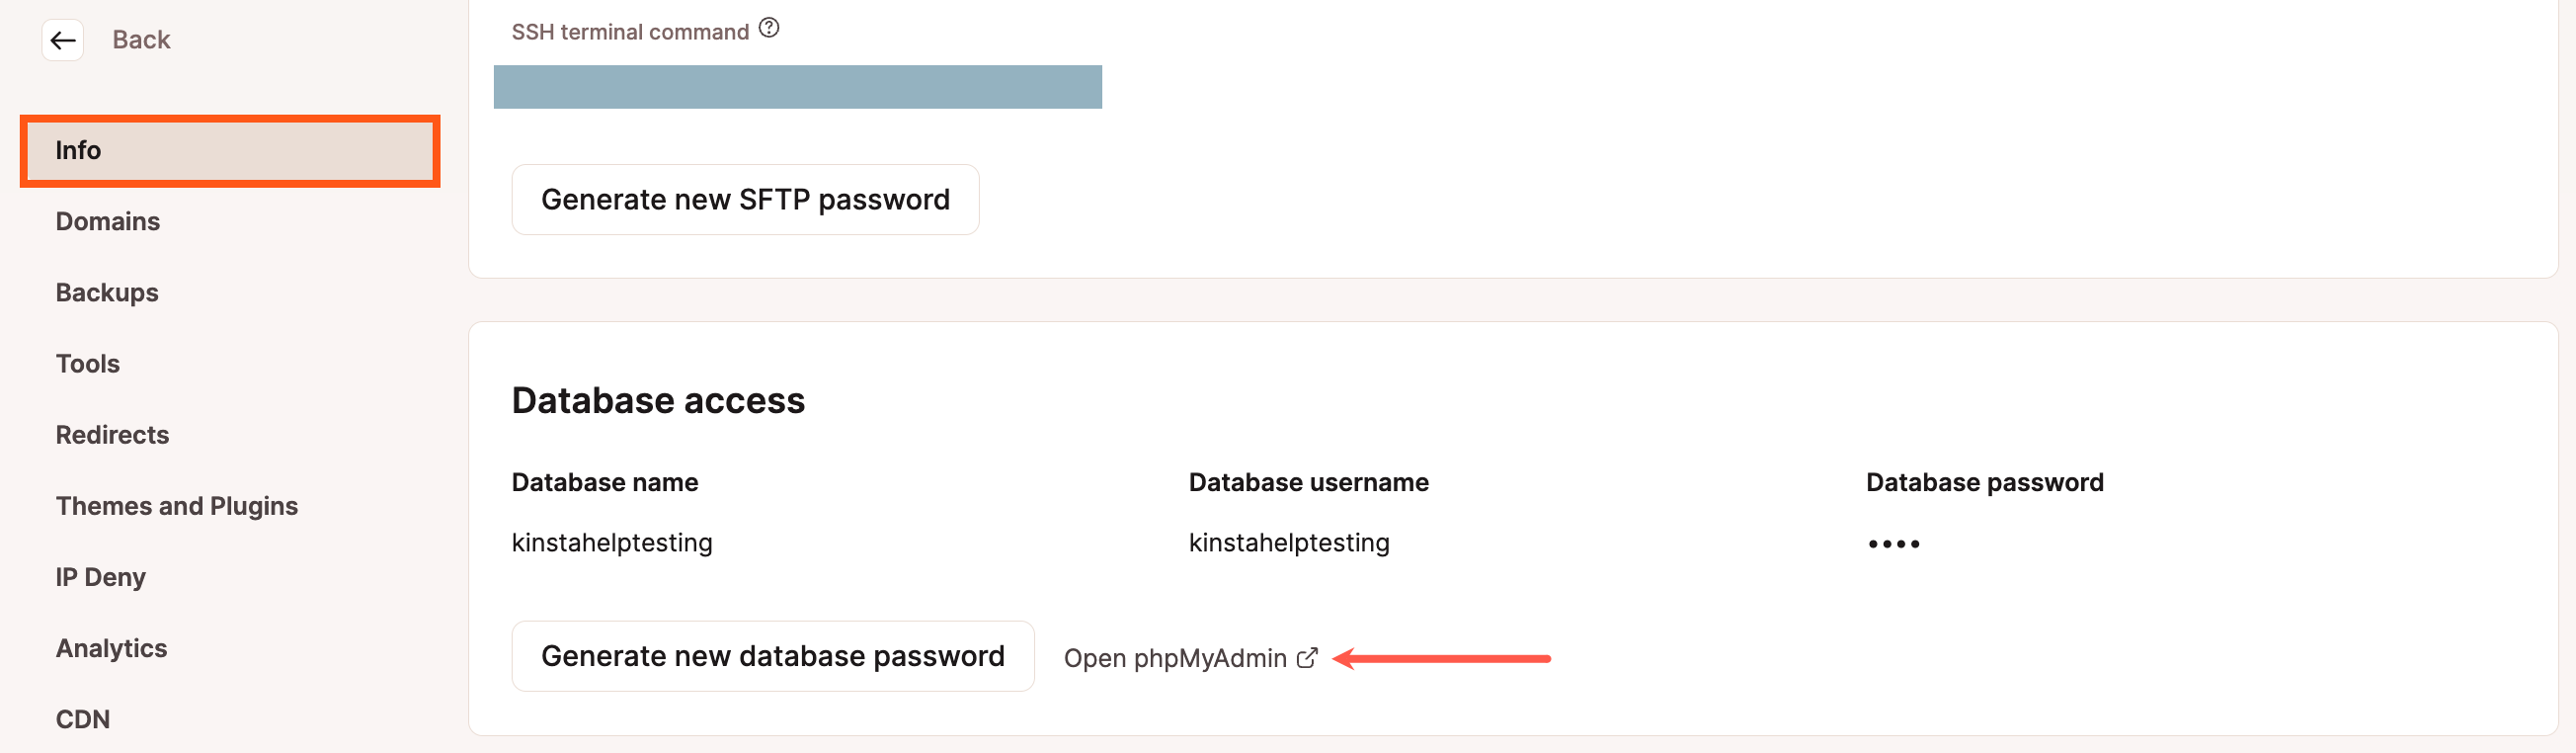
Therefore, you need to access your WordPress database by logging into phpMyAdmin. If you’re a Kinsta client, this can be found within the Info section of the MyKinsta dashboard.
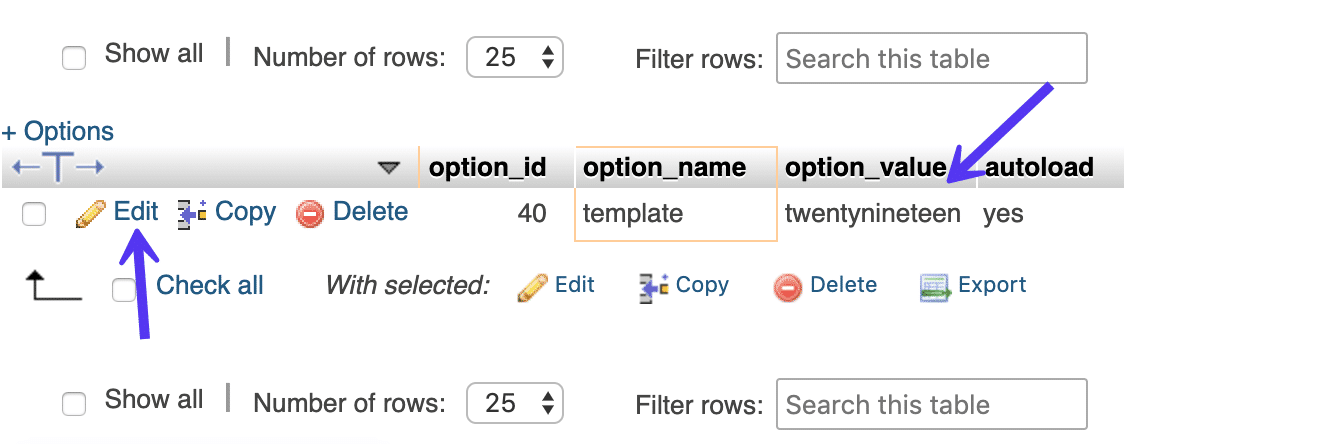
Once in phpMyAdmin, click into the “wp_options” table, then click on the “Search” tab. You will want to search under the “option_name” for template.

Under the “option_value” column you will see the current name of your theme. Change this to one of the default themes, such as “twentynineteen.”
Check your website again to see if this has fixed the error. If it did, it simply means it’s a problem with your website theme and you might want to try reinstalling it or reverting to your most recent backup.
3. Temporarily Disable Your Content Delivery Network (CDN)
Sometimes, the 503 error will show up not because of a problem on your website, but because of your Content Delivery Network (CDN). If you’re using a CDN, a quick way to figure out if that’s the case is to temporarily disable it.
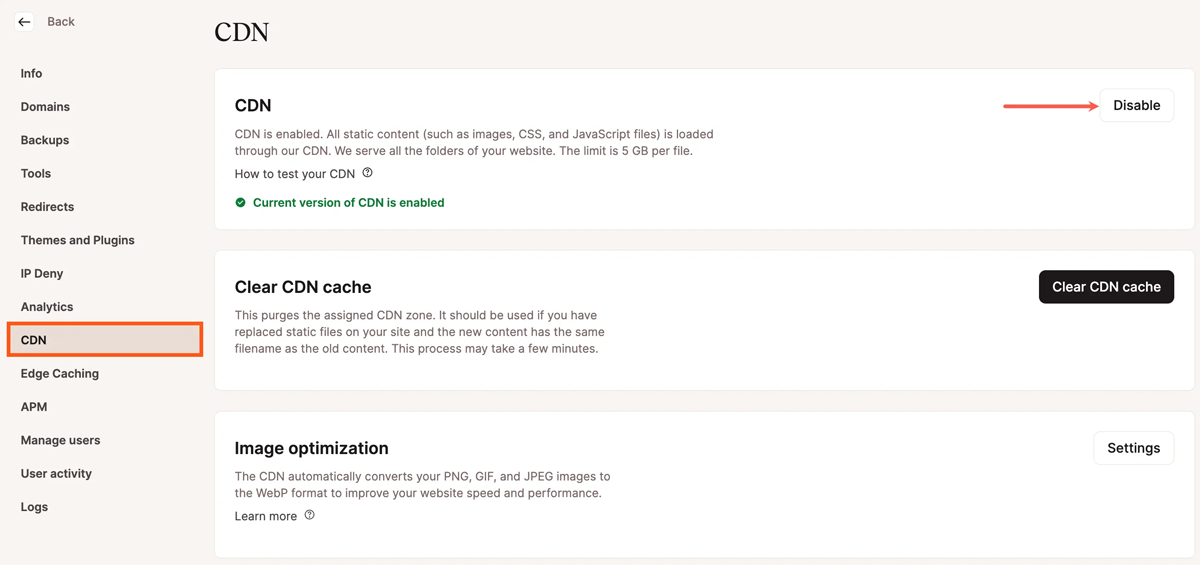
Every CDN should include some feature that enables you to pause its services. If you’re on Kinsta, you can disable your Kinsta CDN by navigating to CDN within your MyKinsta dashboard and clicking the Disable button.
The process you need to follow may be different depending on which CDN you’re using. Cloudflare has also been known to cause 503 errors sometimes. If you can’t find the option to pause yours, check out your service’s knowledge base, which will usually contain detailed instructions.
If you don’t use a CDN or find that pausing your service doesn’t help with your issue, there are still a few more fixes to try. Do remember to reactivate your CDN before moving on.
4. Limit the WordPress ‘Heartbeat’ API
The WordPress Heartbeat is an API built into WordPress, which the platform uses for auto-saving content, showing you plugin notifications, letting you know when someone else is working on a post you’re trying to access, and more.
Just like a regular heartbeat, the API works in the background with a high frequency so that it doesn’t miss anything. As you might imagine, this API consumes server resources. Usually, that’s not a problem but in some cases, it may lead to a 503 error if your server can’t handle the load.
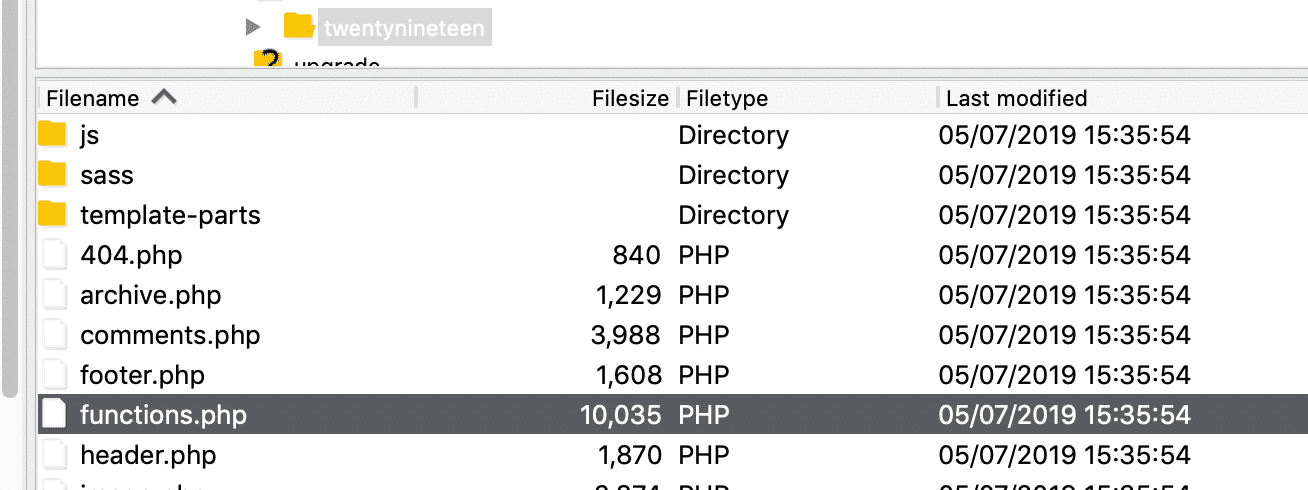
The quickest way to determine if the Heartbeat API is at the center of your problems is to temporarily disable it. To do that, connect to your WordPress website via FTP once more, and then open your current themes folder and look for the functions.php file within:
Right-click on the file and select the View/Edit option, which will open it using your local text editor. Once it’s open, you’ll need to add the following code snippet within:
add_action( 'init', 'stop_heartbeat', 1 );
function stop_heartbeat() {
wp_deregister_script('heartbeat');
}
Those three lines of code tell WordPress to disable the Heartbeat API. Save the changes to the functions.php file, close it, and try to access your website again.
If the 503 error is gone, you’ll know that the API was the problem. Disabling it altogether removes a lot of useful functionality, however. Instead, we recommend that you ‘slow down’ the Heartbeat, so that it doesn’t cause problems.
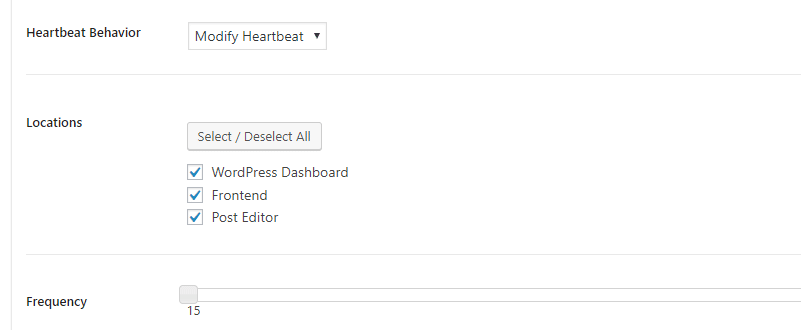
The easiest way to do that is by installing the Heartbeat Control plugin. Activate the plugin and navigate to the Settings > Heartbeat Control section. Look for the Modify Heartbeat options, and drop the frequency to the lowest possible number:
Save the changes to your settings and return to the functions.php file you tweaked a while back. For the above changes to work, you’ll need to remove the string of code you added before and save your changes to the file.
At this stage, the 503 error should be gone if the Heartbeat API was the problem. If it isn’t, then it’s time to try something different.
5. Increase Your Server’s Resources
If the 503 error is still occurring despite all your attempts to fix it so far, then there’s a good chance the problem might be due to a lack of server resources. That is to say, you’ll need to upgrade your hosting plan to see if that fixes the issue. This is especially true if you’re using cheap WordPress hosting, as they tend to throttle resources.
We don’t do this at Kinsta. We offer great Managed WordPress Hosting.
Upgrading your plan is a big decision, however. The smart move is to first contact your web hosting support service and discuss the 503 error with them, as well as the steps you’ve taken so far to try and solve it. The support team should be able to help you work out the cause and advise you on whether you need to upgrade your plan or not.
6. Review Your Logs and Enable WP_DEBUG
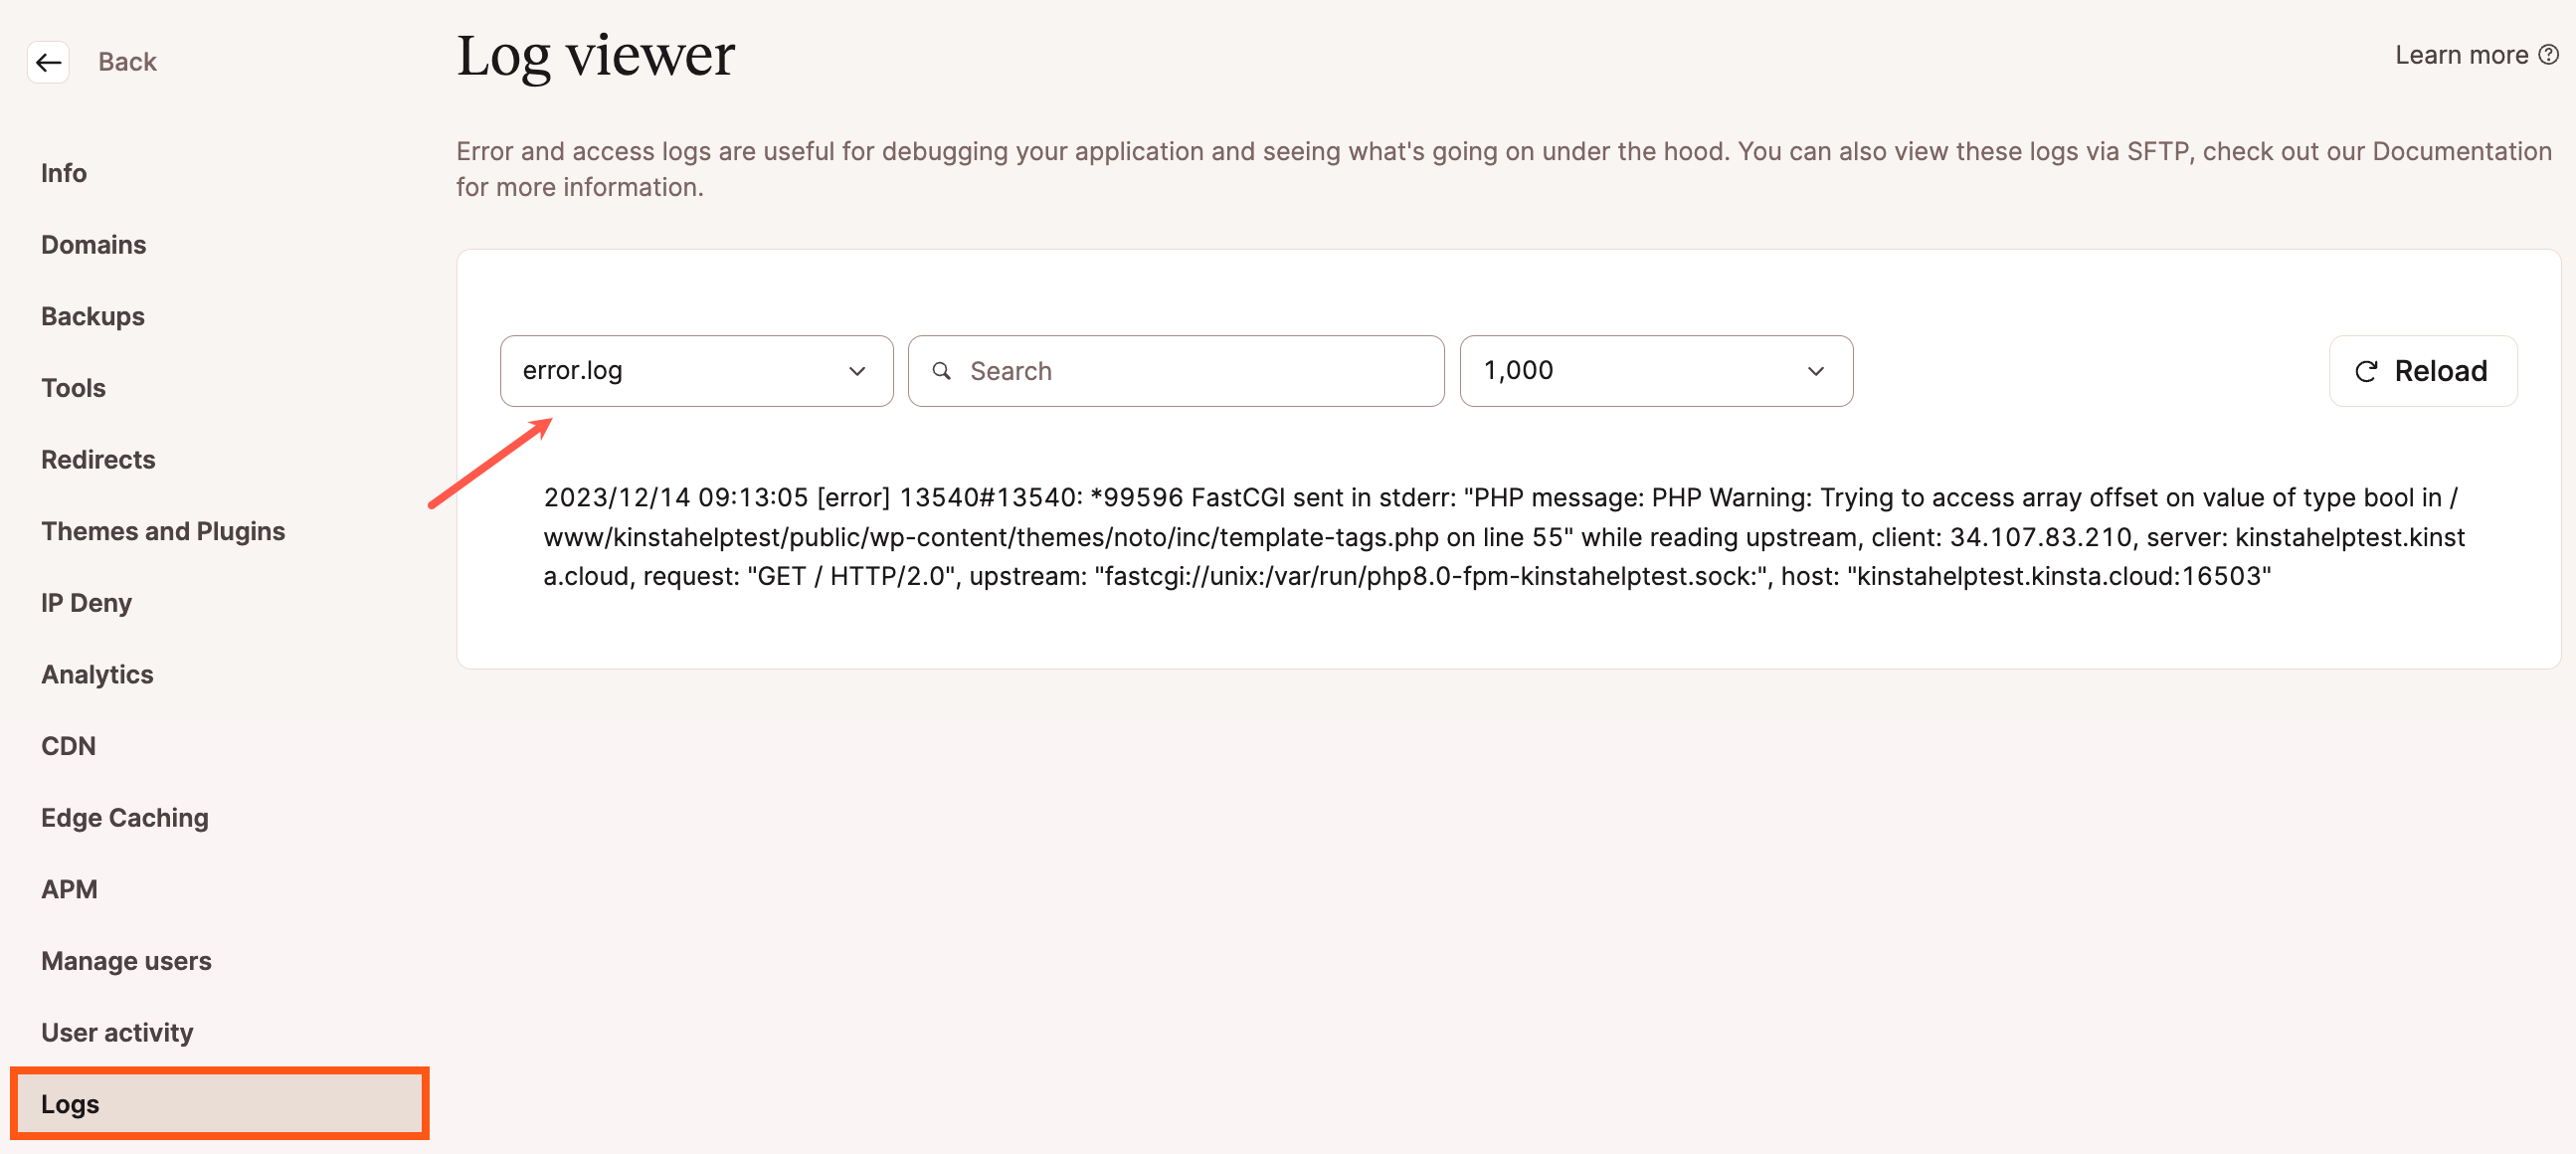
You should also take advantage of your error logs. If you’re a Kinsta client, you can easily see errors in the log viewer and enable WordPress debug mode in the MyKinsta dashboard. This can help you quickly narrow down the issue, especially if it’s resulting from a plugin on your site.
If your host doesn’t have a logging tool, you can also add the following code to your wp-config.php file to enable logging:
define( 'WP_DEBUG', true );
define( 'WP_DEBUG_LOG', true );
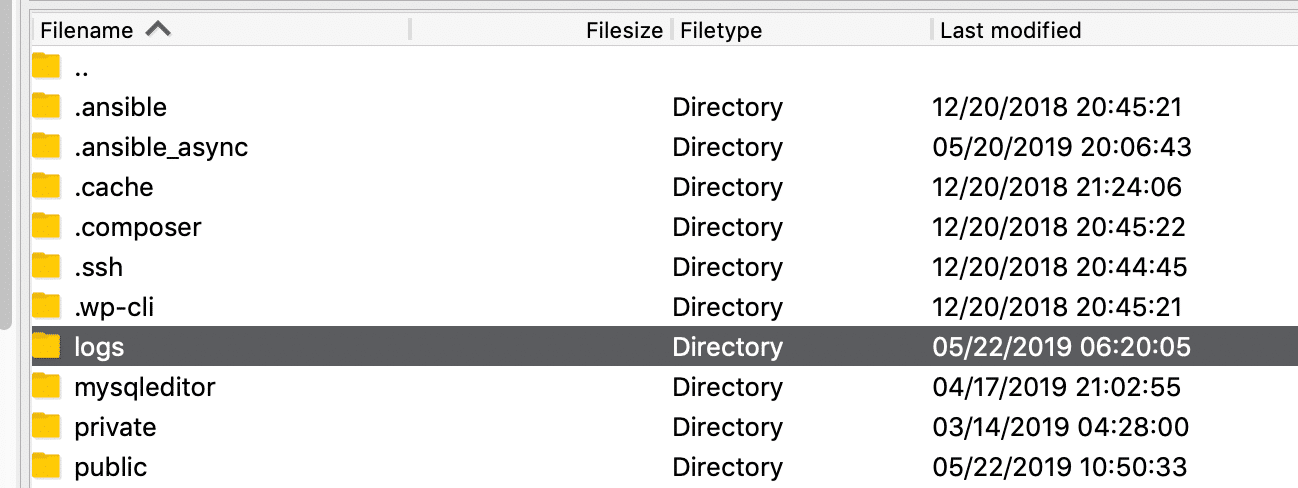
define( 'WP_DEBUG_DISPLAY', false );The logs are typically located in the /wp-content directory. Inside it, look for a file called debug.log and open it up.
Others, like here at Kinsta might have a dedicated folder called “logs”.
Interpreting your debug log can be a bit intimidating but it’s not as hard to read as you might imagine. In a nutshell, the log contains each error that pops up on your site in chronological order. It shows which file caused each error, as well as which specific lines of code were involved.
Beware: you’re not going to find direct references to the 503 error within your log. Even so, if all else fails, it can point you in the right direction by showing you what files are causing problems. That way, you’ll know where to focus your efforts next. As we mentioned in the previous step, now is a good time to get in touch with your hosting provider if you need further assistance resolving this error.
You can also check the log files in Apache and Nginx, which are commonly located here:
- Apache: /var/log/apache2/error.log
- Nginx: /var/log/nginx/error.log
To learn more, please check out our web server showdown: Nginx vs Apache.
If you’re a Kinsta client you can also take advantage of our analytics tool to get a breakdown of the total number of 503 errors and see how often and when they are occurring. This can help you troubleshoot if this is an ongoing issue, or perhaps something that has resolved itself.
If the 503 error is displaying because of a fatal PHP error, you can also try enabling PHP error reporting. Simply add the following code to the file throwing the error. Typically you can narrow down the file in the console tab of Google Chrome DevTools.
ini_set('display_errors', 1);
ini_set('display_startup_errors', 1);
error_reporting(E_ALL);
And you might need to also modify your php.ini file with the following:
display_errors = onSummary
If you’re lucky, the 503 error will only show up when you put your website into maintenance mode. However, if it appears without warning, then you’ll have to roll up your sleeves and do some troubleshooting.
To get at the root cause of the 503 error, you’ll need to follow these steps to fix it:
- Temporarily Deactivate Your Plugins.
- Deactivate Your Website Theme.
- Temporarily Disable Your Content Delivery Network (CDN).
- Limit the WordPress ‘Heartbeat’ API.
- Increase Your Server’s Resources.
- Review Your Logs and Enable WP_DEBUG.
Have you ever run into the HTTP 503 error? Share your experiences with us in the comments section below!