From nonprofit organizations to churches, and political campaigns to bloggers who need early support, several situations warrant asking for donations. Several WordPress plugins are available for collecting donations, but more often than not all you need is a simple PayPal Donate button.
You can post this button anywhere on your site, whether it be the sidebar, footer, homepage, or on your blog. It reveals a button that website visitors can click on to make donations through the PayPal system. The user get’s sent away from your website for a brief period. Once on the PayPal page, the user has the option to make the donation with a PayPal account or with a credit card. As for the pricing:
- Implementation of the PayPal Donate button is completely free.
- There is a 2.9% + $0.30 transaction fee.
- There are no monthly fees and contributors aren’t charged a thing.
- Collecting donations in person (with an iPad and swiper) carries a 2.7% transaction fee.
Two PayPal Donate Button Methods
Two PayPal button creation methods exist. The first option involves walking through the official PayPal website and taking one of the pre-made Donate buttons from the site. You would then connect your PayPal account and embed the button wherever you want on your site.
The second way to create a button is with a WordPress plugin. Either route works fine, so we’ve outlined the process for each below. As well as some additional plugins for eCommerce solutions.
- Option 1: PayPal Donate Button via PayPal Website
- Option 2: PayPal Donate Button with a WordPress Plugin
- Donate With PayPal in eCommerce Solutions
Option 1: PayPal Donate Button for WordPress via PayPal Website
Step 1
Navigate to the PayPal Fundraising page. This webpage lists all of the rates and features for when you add a PayPal Donate button to your website.
Don’t Have PayPal Account
If you don’t already have a PayPal account, click on the “Get Started Today” button (otherwise, skip down below).

Choose either a Personal or Business account. Click Next.

Type in your personal information such as first name, last name, and email address. Create a password and select the Next button to proceed.

Fill in your address and phone number, accept the terms and conditions, then select the Agree and Create Account button.

Already Have PayPal Account
If you already have a PayPal account, click on the link that reads “Learn About Creating a Donation Button.”

Select the Create a Button link.

Step 2
On the Create PayPal Payment Button page, choose the button type called “Donations.”

Step 3
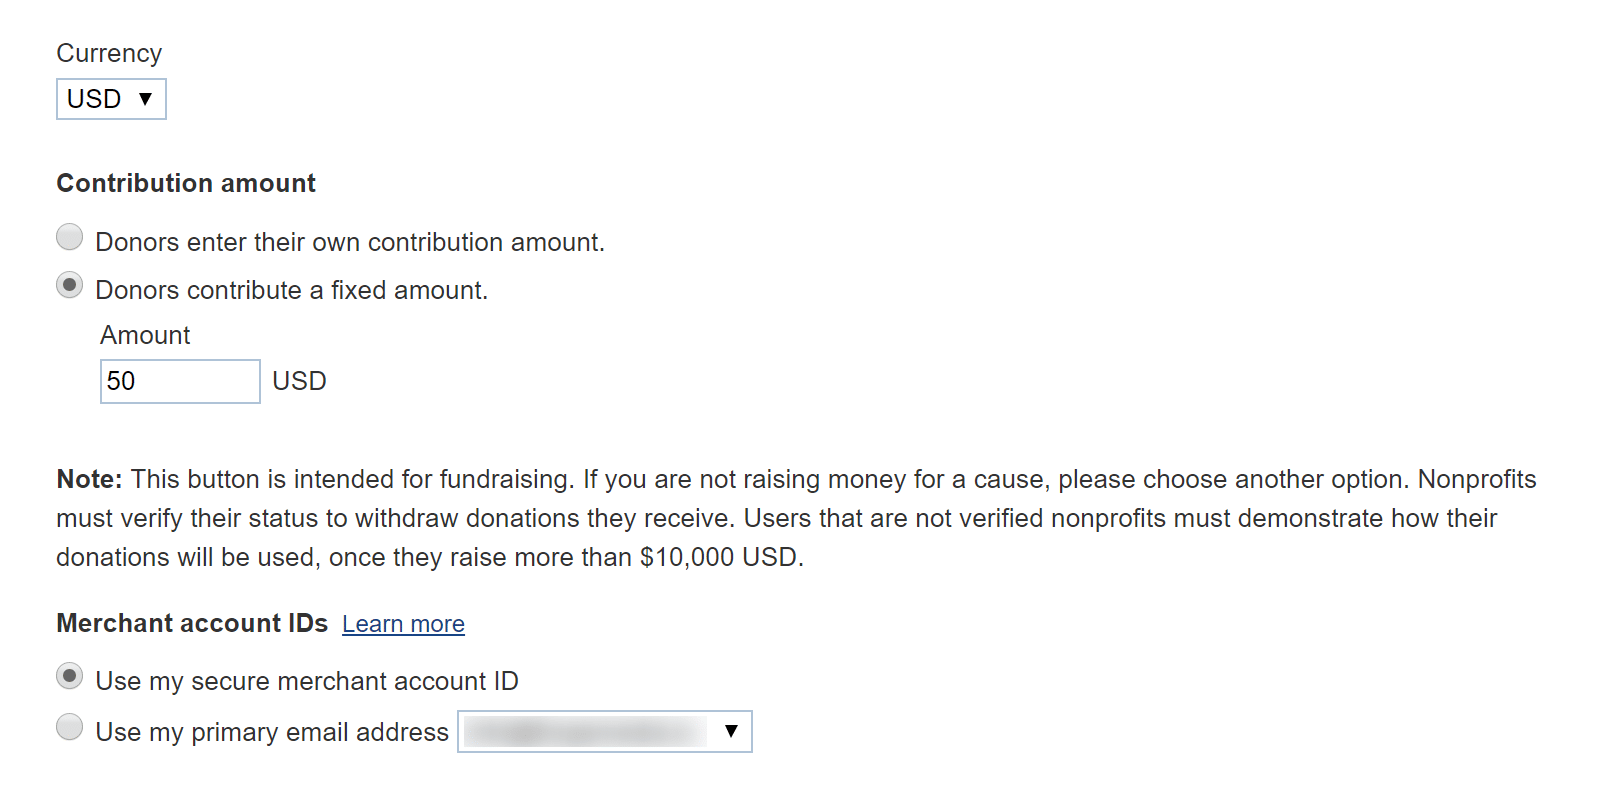
The organization name field must be filled in. Below that you can customize the way your PayPal Donate button looks to website visitors. This area has options for using small or large buttons, displaying credit card logos, and even for uploading your own button image.

Choose the type of currency you would like to accept. Then, select how you would like to accept contributions. One route to take is to have users type in how much they would like to donate. The other route is to display a fixed amount, which might result in higher donations since you give people a suggested number.
On this step, you should also check off whether you’d like to use your secure merchant account ID or your primary email address for accepting payments. We recommend using your merchant account ID if you want to keep your email address hidden.
Step 4
On the “Step 2” module in PayPal, make sure you check off the Save Button At PayPal box. This protects your button from fraudulent charges and saves the customized button for later use.

Step 5 (Optional)
This step isn’t required for the PayPal Donate button to work properly. However, you may need to adjust a few settings for your specific cause.
Here are the options:
- Allow contributors to send you messages – This comes in handy if donations can be used for certain tasks or items in your organization.
- Ask for the contributor’s shipping address – A shipping address is useful if you plan on sending out gifts or thank you notes for the donations.
- Send contributors to external URLs when they cancel or complete a donation – This means that instead of the default PayPal completion page they get sent to somewhere on your website. This feature is nice if you have a special thank you page or maybe a downloadable gift on your website.
After you’ve set up your advanced features (or skipped over them) click on Create Button towards the bottom.

Step 6
The next page reveals the website code you need to copy and paste into your WordPress site. Click on the Select Code button to highlight the entire block of code. Then, copy the code by right clicking with your mouse and selecting Copy. Another method is to use a keyboard shortcut (CTRL + C for Windows or Command + C for Mac).

Step 7
Open up your WordPress dashboard. The great thing about a PayPal Donate button is that you can paste the code into a page, post, or widget. For this example, we’ll walk you through adding it to a page.
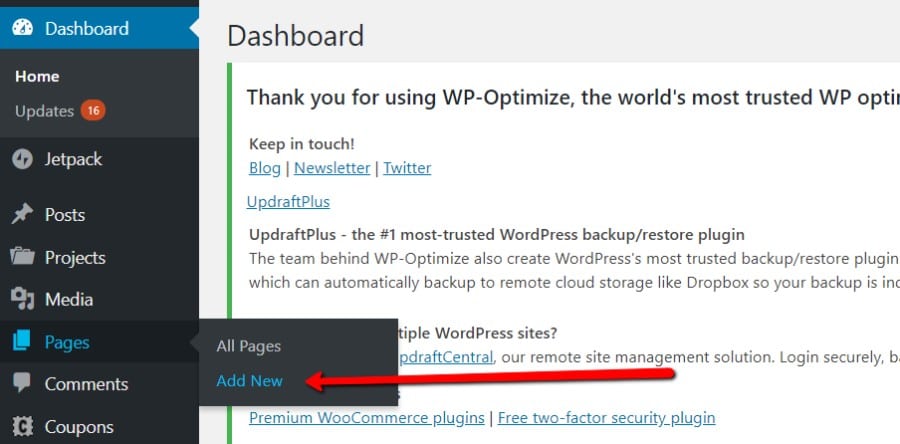
Therefore, go to Pages → Add New. If you already have a Donation page ready to go, simply go to All Pages and find the right one.
Create a title and fill in whatever description you would like to have on the page. The most important part is to have the “Text editor” open when copying in the button code. The Visual editor won’t work for adding code.

Paste the code into the text editor.

If you publish or preview the page, you’ll now see the PayPal Donate button on the frontend of your website.

Step 8 (Optional)
You could alternatively add your PayPal button in a widget. Widgets are smaller modules that go in the footer, sidebar, or the header of your website. They’re also useful for when you want to show the PayPal Donate button on multiple pages (without copying and pasting the code over and over).
Go to Appearance → Widgets.

Find the Custom HTML widget in your list of widgets. Drag that module into a sidebar, footer, or header area. Your choices for widget placement depend on your WordPress theme, but most of the time you at least get sidebars and footers.

Once the widget is in the right place (in this case, the Regular Page Sidebar,) click the downward arrow icon on that widget.

Fil in the title to talk about what the widget is all about. Then, go to the content area and paste the PayPal Button’s code that you copied before. Make sure you hit the Save button to complete the process and view it on your website.

Now, when you go to any page on your website, the sidebar should come up. This is the same if you were to place the widget in a footer or header.

If you’re not seeing the PayPal Button widget for some pages, it’s most likely because you don’t have a sidebar on that page or post. Therefore, you must find the page in your WordPress dashboard and scroll down to the area called Position of the Sidebar.
Choose Right or Left and click on the Publish button. This might vary per WordPress theme.

Option 2: PayPal Donate Button with a WordPress Plugin
The best way to create a PayPal Donate button is by using the method above. The reason for this is that you don’t have to worry about updating extra plugins or how it might impact performance. Having said that, we understand that some people enjoy working with plugins, or they find even the thought of code intimidating. If that’s the case, a lightweight PayPal button plugin does the trick.
Step 1
There are several PayPal donation plugins, but one of the more reputable and easier ones to manage is called PayPal Donations. As of writing this, it has over 50,000 active installs with an impressive 5 out of 5-star rating.

Either download that plugin from the WordPress repository or by searching for it within your WordPress dashboard under “Add New” plugins. Search by typing in “PayPal Donations.” Select the Install Now button. Make sure it’s the right plugin (with the logo below). Some other plugins look similar.

Click on the Activate button.

Step 2
Now it’s time to customize it. Go to Settings → PayPal Donations on your WordPress dashboard.

Under the General tab, fill in your PayPal Account email. This is the only field that has to be completed in order for the button to work. Other than that, you have additional options for currency, page style, and return pages.

The Defaults section is also optional, but many organizations like to fill this in for a better user experience. For instance, you may want to have a specific amount that people can donate. As mentioned in the previous method, this gives users an idea of how much is appropriate for a donation. You can also explain the purpose of a donation and include a reference.
The final area on this page asks what you would like your button to look like. Three buttons are available with different sizes. One option has the credit card icons included. You can also enter the URL of a previously designed button if you have one. Make sure you click on the Save button before leaving this page.

Step 3
The PayPal Donate button can be added as a widget or shortcode through this plugin. First, we’re going to explain how to insert the button on your website as a widget. Go to Settings → Widgets on the left side of your WordPress dashboard.

Locate the PayPal Donations widget in the list of theme widgets. You might have to scroll down depending on how many widget options you have. Left click and hold down that click to drag the PayPal Donations widget to a sidebar, footer, or header module.

Step 4
Now it’s time to customize the widget. For this example, the widget has been placed in the Blog Sidebar area. You can obviously choose which area is best for your website. After the widget has landed in the sidebar, several fields appear for you to fill in.
Feel free to type in a title and text explaining what people should do with the button or simply thanking them. There are also some other fields like the purpose of your cause and a reference area. Once everything is filled in, click the Save button.

Since this tutorial put the widget in the blog post sidebar, you would go to a published blog post to see the sidebar in action. In this case, we can now see the right sidebar with the PayPal Donate button, credit card icons, and the text we typed in. This widget now shows up on every blog post published on the site.

Step 5
The other way to create a PayPal Donate button with this WordPress plugin is by utilizing a shortcode. A shortcode is a small bit of code designed to be placed anywhere on your website. To start, copy the following shortcode:
[paypal-donation]
Find a page or post that’s going to have the Donate button on it. With a shortcode, there’s no need to have the text editor open. The visual editor is perfectly fine. Paste the shortcode into the editor.

After you click on the Preview or Publish button, you can then go to the frontend of your website and see what the button looks like.

Donate With PayPal in eCommerce Solutions
If you’re using an eCommerce solution such as WooCommerce or Easy Digital Downloads, you might want to also check out these following plugins as they can help integrate donations into your checkout process.
If you prefer Stripe over PayPal you can take a look at our another guide on the topic: How to Add a Stripe Donate Button in WordPress
Summary
You’re most likely going to customize the pages and posts to have more content and explain what the donations are for. However, these methods are the best options to create PayPal Donate buttons without any problems. You’ll also notice that the PayPal Donate buttons have several customization tools along the way. So, you might want to redirect users after they make contributions, or you may need to capture additional information from the people donating.
And that’s how to create a PayPal Donate button in WordPress!

Brian has a huge passion for WordPress, has been using it for over a decade, and even develops a couple of premium plugins. Brian enjoys blogging, movies, and hiking. Connect with Brian on Twitter.