
Want to add a Stripe donate button to your WordPress site? Stripe makes it easy to accept credit card payments, which is a convenient way for your visitors to donate to your site.
While there are plenty of more full-featured donation plugins, we’re just going to focus on creating a very simple Stripe donate button in this post.
To accomplish that, we’ll share tutorials for two different free plugins:
- WP Simple Pay: this plugin is good if you want to offer a fixed donation amount. But you need to pay if you want your visitors to be able to donate custom amounts. This one is the most popular Stripe payments plugin.
- Stripe Payments: this plugin lets you accept custom donation amounts for free, which might make it more attractive if you’re on a budget and want to accept custom donation amounts from your visitors.
We’ll start off with a quick tutorial on how to create your Stripe account and find the API keys that you’ll need to configure either plugin.
Then, we’ll dig into how to create a Stripe donate button with WP Simple Pay or Stripe Payments.
How To Get Your Stripe API Keys?
No matter which of the two plugins you choose, you’ll need to enter your Stripe API keys in order to create your Stripe donate button.
These API keys are what connect your WordPress site to the Stripe payment processing service. They’re essential, but they’re also easy to create with Stripe. So don’t worry!
Rather than trying to explain this in the step-by-step directions for each plugin, we’ll just explain it once now. That way, you’ll know exactly where to find your API keys when you configure either plugin.
1. Create A Free Stripe Account
To get started, you’ll need to sign up for a free Stripe account. There’s no complicated information – you just need to enter your email, name, and password (though you will need to provide more information to start accepting payments for real).
To do that, head here.
2. Find API Keys
To find your API keys, go here.
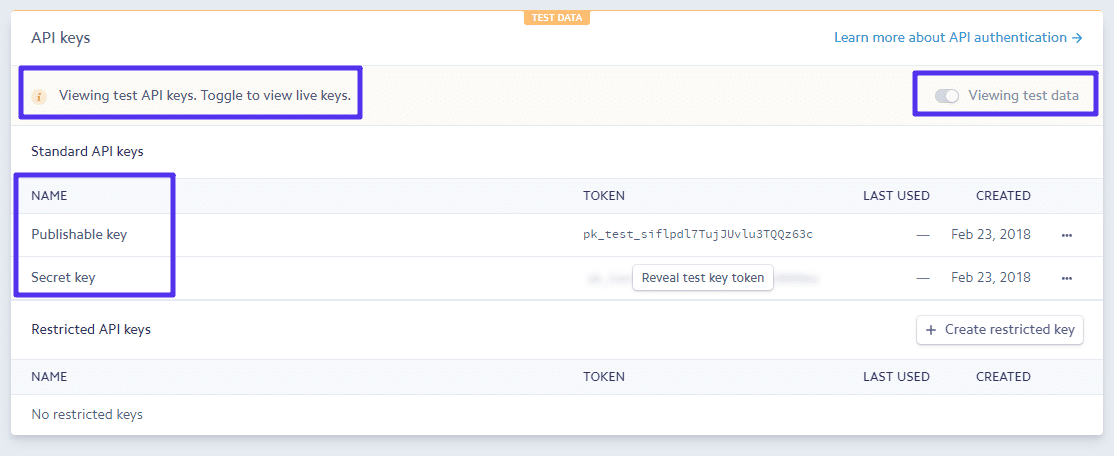
Pay attention to the difference between test API keys and live API keys:
- Test API keys help you safely test your donate button without sending any real payment details.
- Live API keys are for when you actually want to start accepting payments for real.
You can toggle between them by clicking the toggle button, and both plugins will include boxes to let you enter both your test and live keys, as well as a setting that lets you switch between test and live modes:
Keep these keys handy, because you’ll need them to configure either plugin.
How To Add A Stripe Donate Button With WP Simple Pay?
To get started, install and activate the free WP Simple Pay plugin from WordPress.org.
Then, here’s how to set up your donate button…
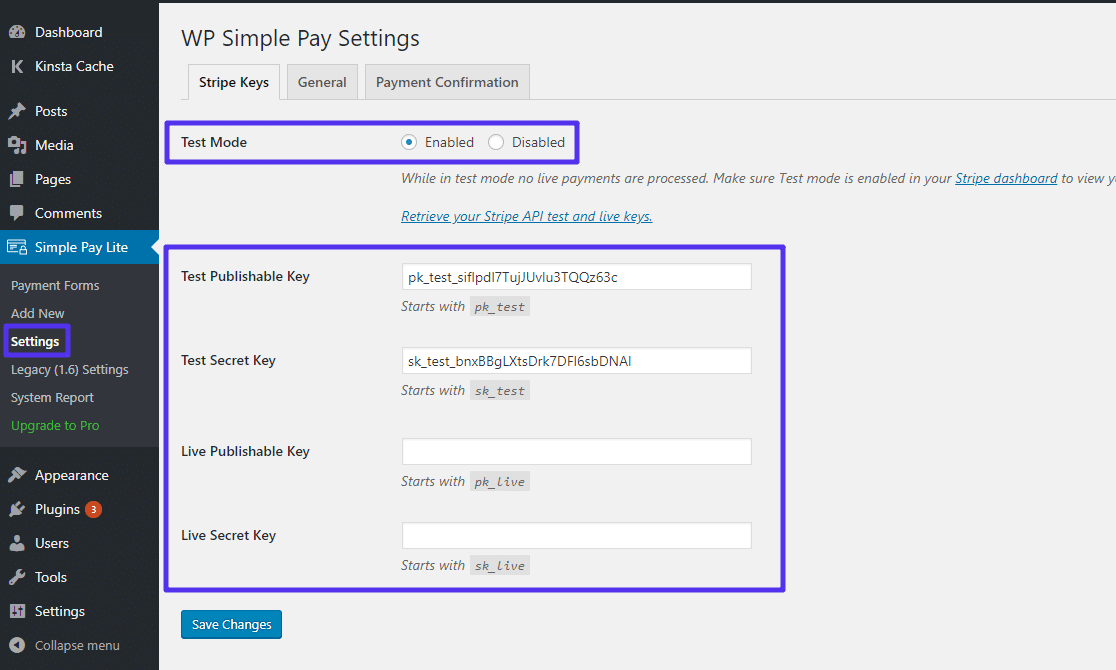
1. Enter API Keys
To get started, go to Simple Pay Lite → Settings and enter your test and live API keys. Make sure that Test Mode stays Enabled for now:
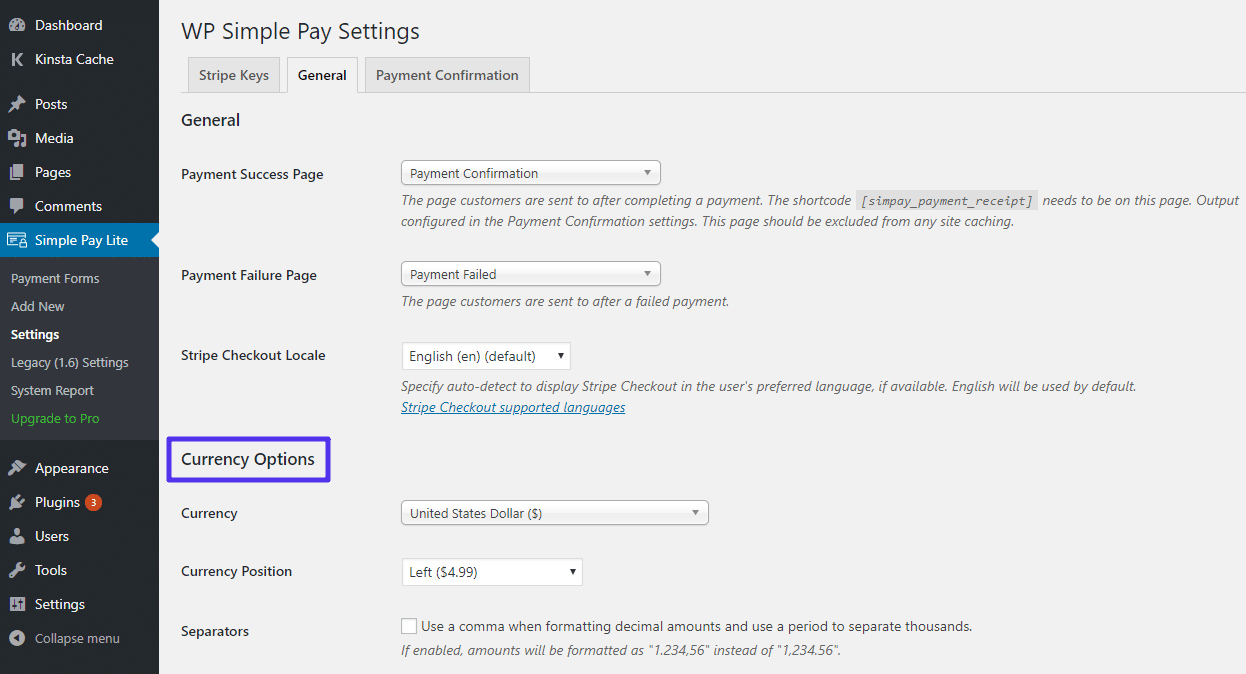
2. Configure Currency (Default Is USD)
By default, WP Simple Pay uses USD as the currency for your donate button. If you want to use a different currency, you can change it by going to the General settings tab:
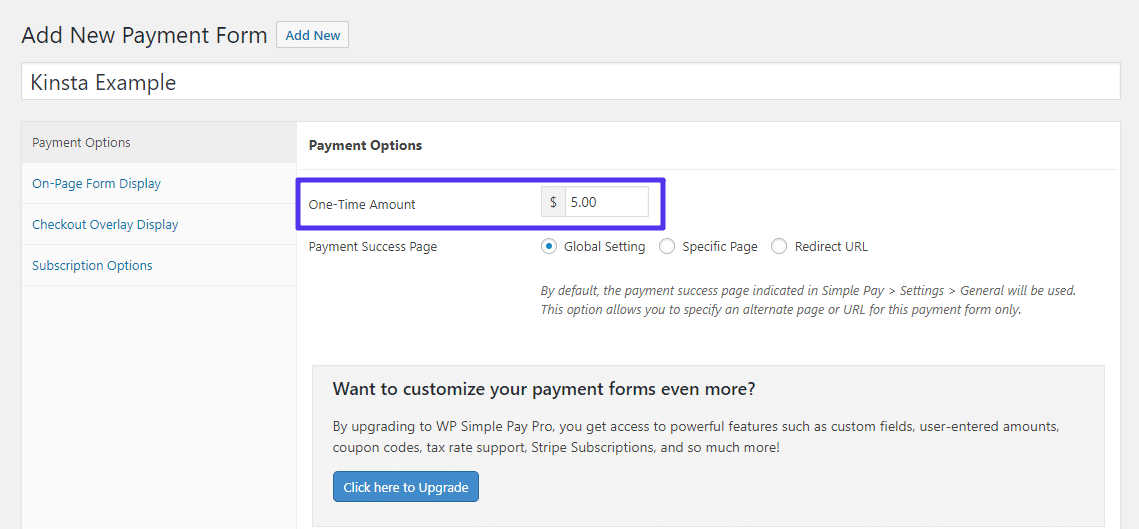
3. Create New Payment Form
A Payment Form is essentially a specific donate button that you want to use. To create one, go to Simple Pay Lite → Add New.
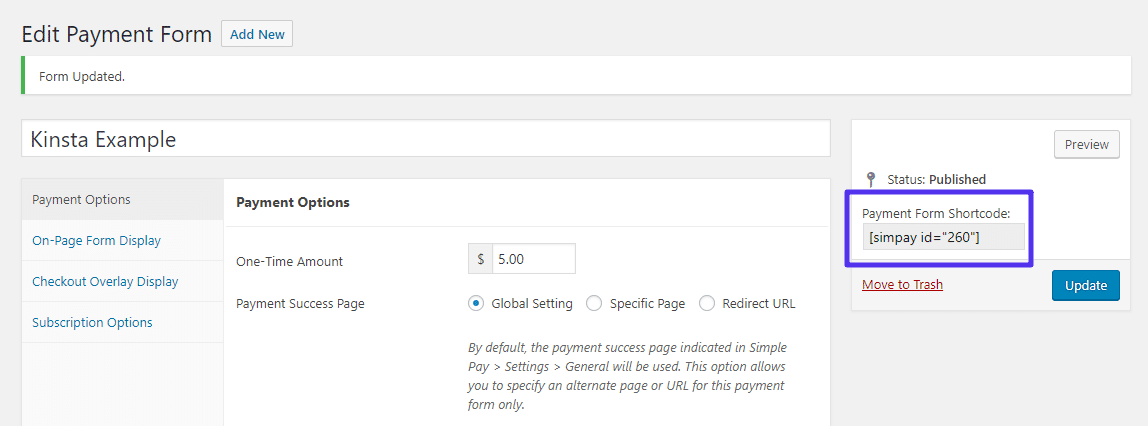
In the Payment Options tab, enter the amount that you want visitors to be able to donate (if you want visitors to be able to donate their own custom amount, you’ll need the paid version of the plugin):
That’s all you technically need to do. But to offer a more personalized form, you can change the text that displays on your form in the On-Page Form Display and Checkout Overlay Display tabs.
For example, in the On-Page Form Display area, you can change the text so that the button reads “Donate With Card” instead of “Pay With Card”:

Once you’re done, click Create to publish your form.
To display your form on the front-end of your site, you’ll need to add the shortcode to the post, page, or text widget where you want it to display:
4. Test Your Form Then Enable Live Mode
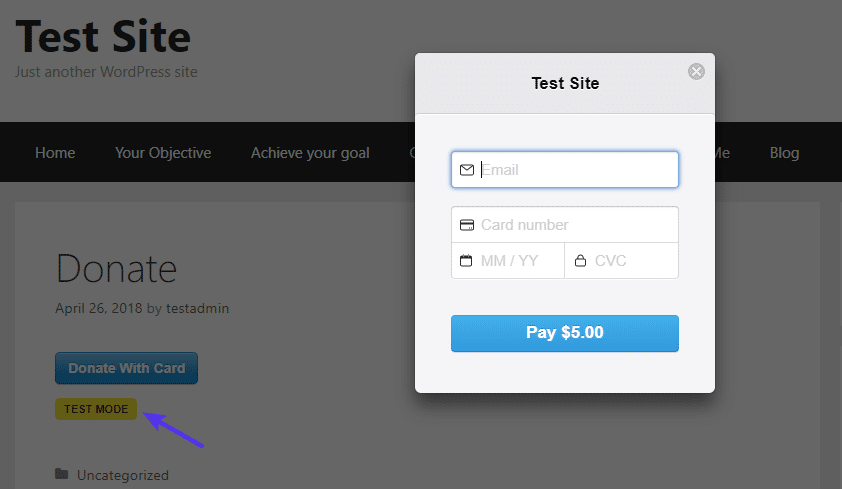
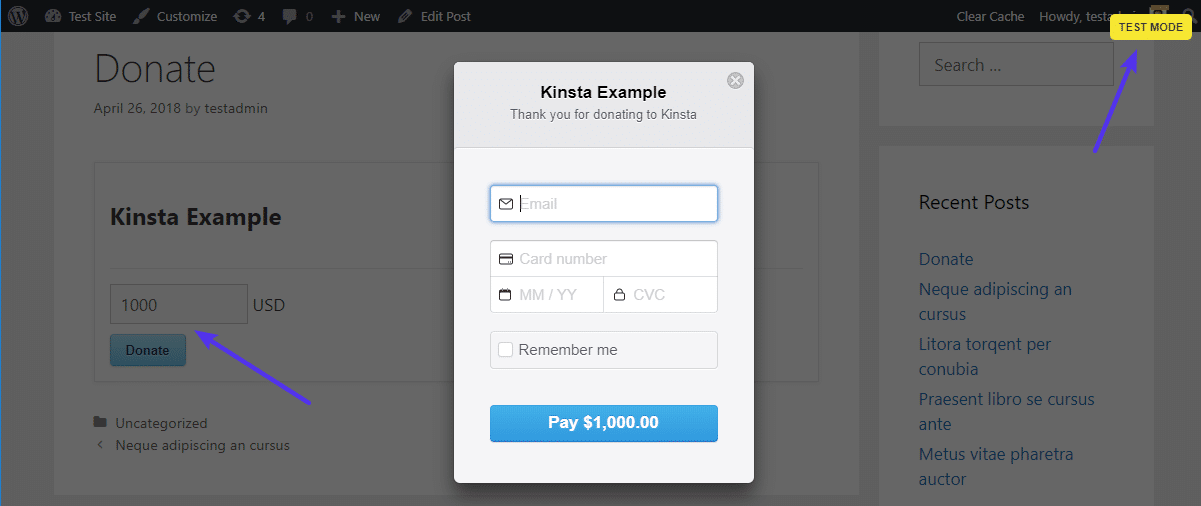
Because you have test mode enabled, you can test your form by entering some test data:
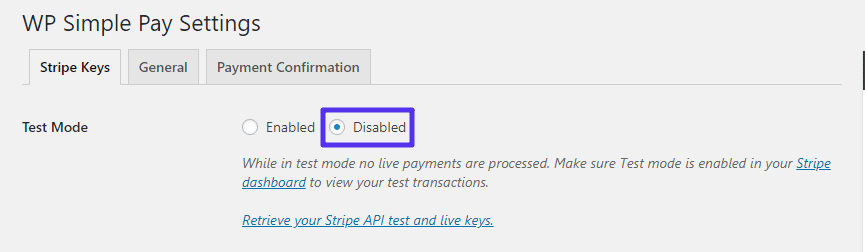
Once you’re happy with how everything is functioning, you can enable Live mode to start accepting real payments by going to Simple Pay Lite → Settings and disabling Test Mode:
And if you want to edit the page that users see after they submit a payment, you just need to edit the Payment Confirmation page that WP Simple Pay created.
How To Add A Stripe Donate Button With Stripe Payments?
While Stripe Payments isn’t as popular as WP Simple Pay, its advantage is that you can accept custom donation amounts without needing to pay for a premium version.
Once you’ve installed and activated it from WordPress.org, here’s how to use it…
1. Add API Keys And Configure Basic Settings
To get started, go to Stripe Payments → Settings to add your API keys:
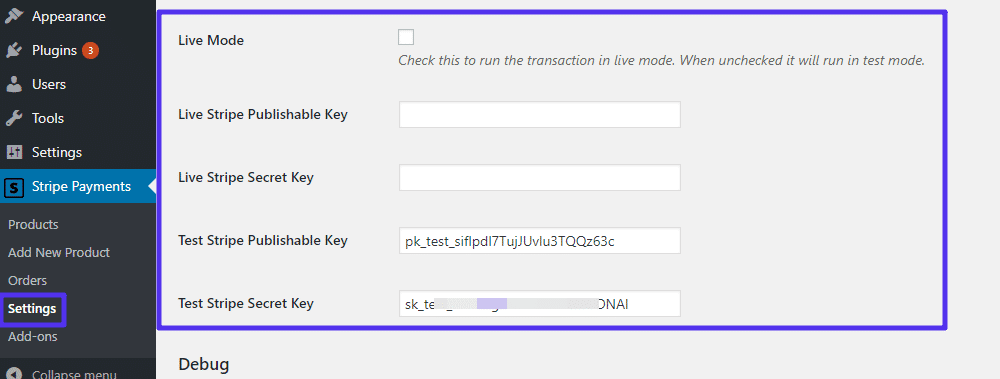
Make sure that Live Mode is not checked for now.
You can also configure the currency for your donate button in this area, as well as the button text. You’ll likely want to change the Button Text field to something like “Donate”:

2. Add A New Product
Next, go to Stripe Payments → Add New Product. There are a lot of options, but most of them are unnecessary for a basic donation button.
The sections that you should configure are:
- Short Description – this displays on the Stripe Payment window.
- Price & Currency – leave the Price blank if you want visitors to be able to enter a custom amount.
- Thank You Page URL – this lets you redirect users to a special thank you page after they donate.

Once you’ve finished configuring things, click Publish. Then, copy the shortcode from the bottom of the editor and add it to the post, page, or text widget where you want to display your Stripe donate button.
3. Test Donation Button Then Go Live
Because you’re still in test mode, you can safely test out your donation button by entering Stripe’s dummy data:
Once you’ve verified that everything is working properly, you can enable real payments by going to Stripe Payments → Settings and turning on Live Mode:

Summary
No matter which plugin you choose, adding a Stripe donate button to your WordPress site is fairly simple and pain-free. Both plugins also allow you to create multiple buttons, so you can easily create different donate buttons for different uses.
If you’re not happy with Stripe after creating your own button, you can also consider accepting donations via PayPal or Bitcoin. In this guide we collected all the pros and cons using Stripe or PayPal.
Have any other questions about adding a donate button to your WordPress site? Or need different functionality that we didn’t cover? Leave a comment and we’ll try to help out!

Brian has a huge passion for WordPress, has been using it for over a decade, and even develops a couple of premium plugins. Brian enjoys blogging, movies, and hiking. Connect with Brian on Twitter.

