HostGator is a popular web host that can be suitable for a wide range of sites. However, you might find that the service is not up to par or doesn’t meet your specific needs. If that’s the case, you’ll want to know how to cancel HostGator.
The good news is that you can cancel your HostGator account in a few simple steps. Once you determine which services you want to terminate, you can handle almost everything directly from your hosting account dashboard. You may even be able to get a refund.
In this post, we’ll explain why you might want to cancel HostGator’s services. Then, we’ll walk you through how to cancel HostGator in five steps. Finally, we’ll wrap up with some Frequently Asked Questions (FAQs) regarding this process. Let’s jump in!
HostGator Drawbacks (Why You Might Want to Cancel)
HostGator is a well-known web host, and therefore a common choice for many first-time website owners. However, there are some drawbacks to this web host that might make you want to cancel your account.
For instance, if you’re on a tight budget, you may want to consider a cheaper provider or one that offers free hosting. While HostGator is a relatively inexpensive option, it also lacks a lot of performance and security-related features that other hosts typically include. What’s more, you can often sign up for these superior alternatives at a comparable price.
It’s also not the best option if you have a large site with complex needs, such as an ecommerce shop. If you need a fast and reliable website, HostGator’s shared plans can be limiting.
How To Cancel Your HostGator Account (In 5 Steps)
If you’ve made the decision to cancel your HostGator account and/or migrate to a new host, the next step is learning how to go about it. Below are instructions on how to cancel HostGator in five simple steps.
Step 1: Prepare Your Account
If you’re planning on canceling your HostGator account, there are a few things that you’ll need to do first. To start, you’ll need to determine which services you want to cancel. You may only have a hosting plan, in which case you can skip this step.
However, HostGator also offers other services, such as domain registration. You don’t necessarily have to cancel both, but you can if you prefer. You can also transfer your domain after canceling your hosting.
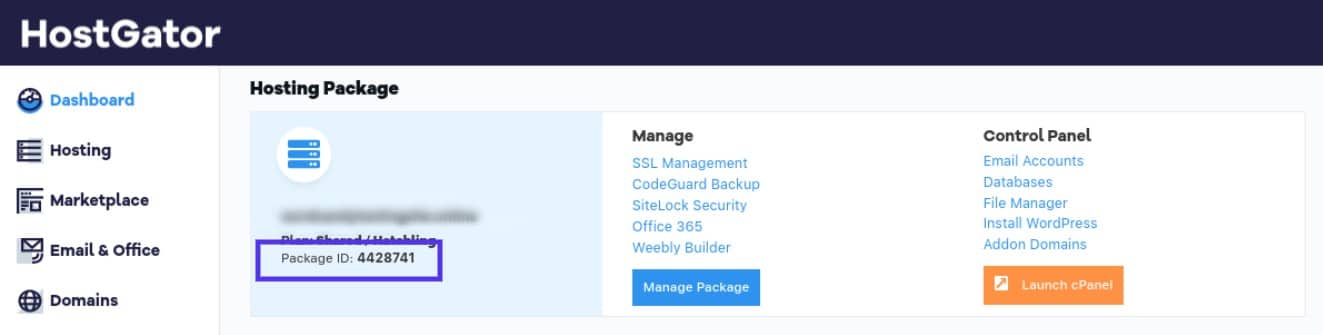
HostGator offers different packages. To ensure that you’re canceling the correct one, it’s important to go to your hosting account dashboard and make note of your Package ID:
Generating a backup of your site is also essential. Note that you’ll lose access to any website backups taken and saved with HostGator once you cancel your account. However, you can download your most recent backup and save it to your computer before you cancel.
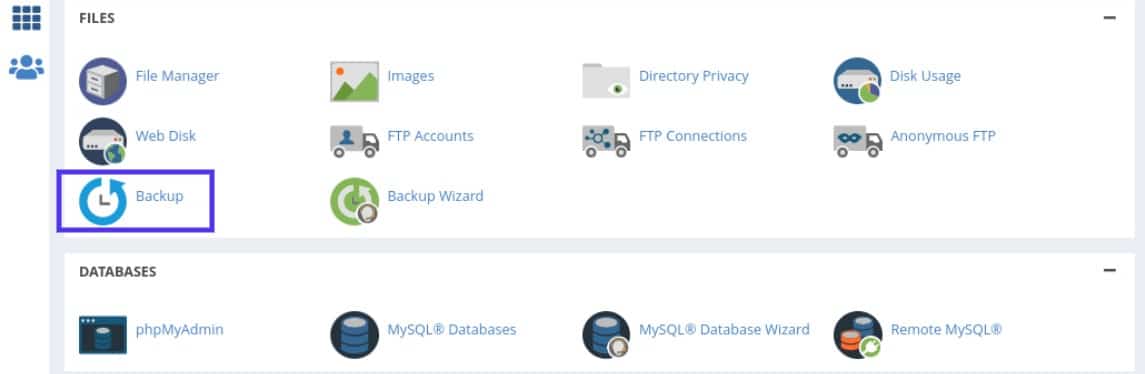
You can create a full backup, as well as a home directory backup from your HostGator account dashboard. To do this, navigate to cPanel, then locate Backup:
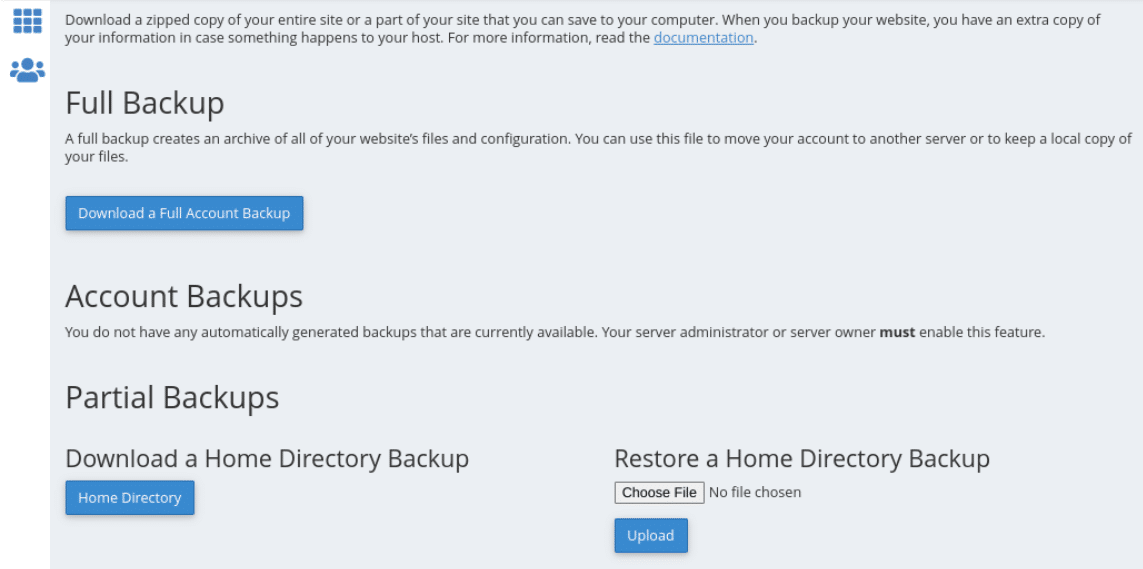
On the next screen, you can select the backups you want to download to your computer:
You will also need to transfer your site’s database from HostGator to your new host. You can do this using a Secure File Transfer Protocol (SFTP). Additionally, you will need to change your Domain Name System (DNS) settings to your new web host.
If this sounds a bit complicated, don’t worry, you can usually find this information in the welcome email from your new hosting provider. Plus, we’ll cover this in more detail a bit later.
Remember, preparing your website and account for cancellation can take some time, but it’s important to make sure that you do it properly. Otherwise, you could lose crucial data from your site.
Step 2: Initiate the Cancellation Process
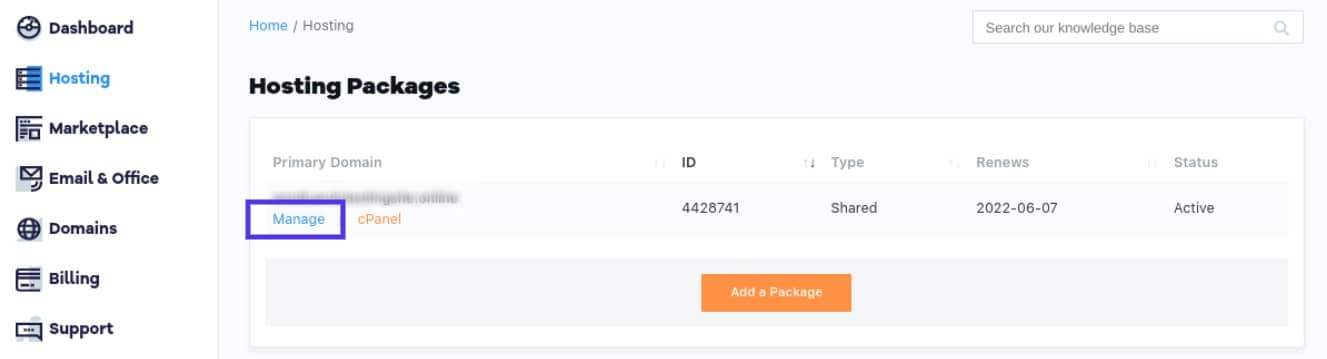
Once you’re done preparing, it’s time to begin the cancellation process. To get started, log into your account and navigate to Hosting. Under the plan you want to terminate, select Manage:
Next, click on the Billing tab, then select Cancel Package:
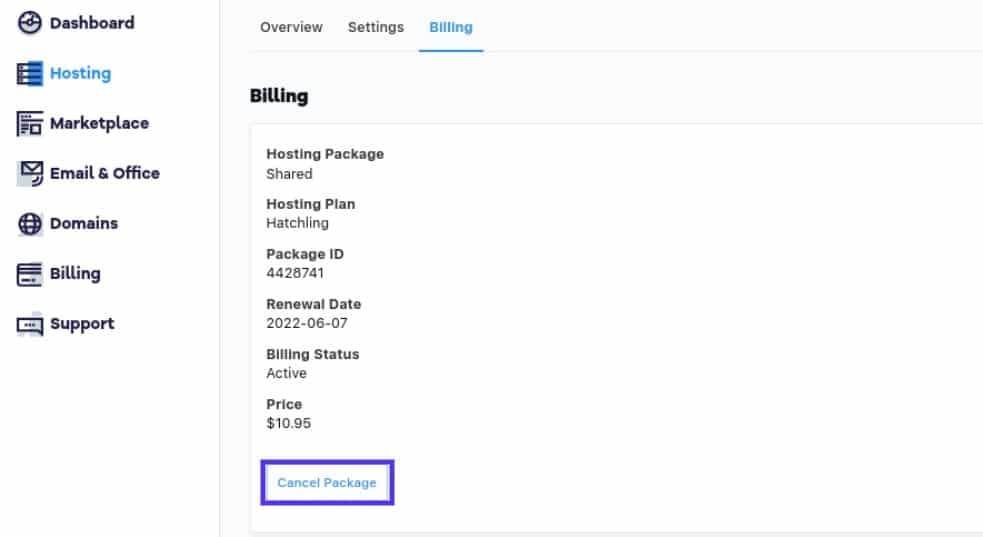
Once you’ve done this, you’ll be asked to provide a reason for canceling. After you select an option, click on Continue:
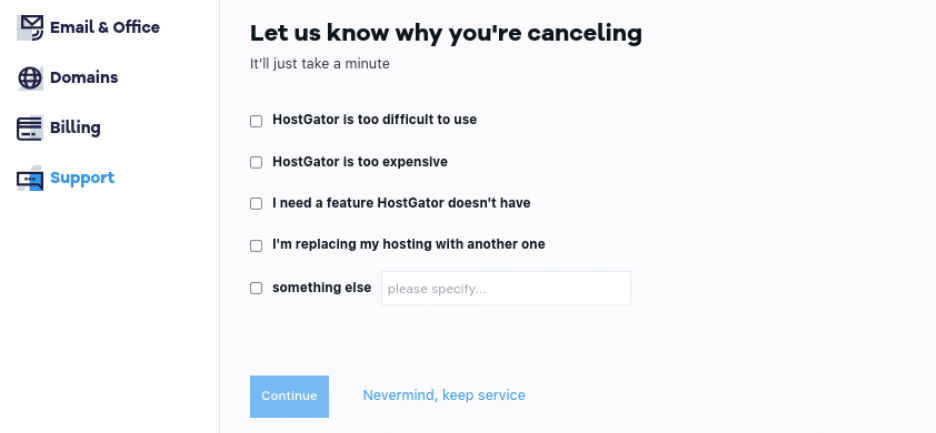
Complete the cancellation process by selecting Finish Canceling. Then, you should receive an email from HostGator confirming your cancellation and informing you of the actual date your plan will be active until. If you have a monthly plan, cancellation likely won’t be immediate.
Step 3: Transfer Your Site to a New Host
The easiest way to transfer your website from HostGator to a new host is to use a migration service. This will allow you to transfer your website from HostGator to your new host with ease.
However, the transfer process will depend largely on the hosting provider you’re moving to. At Kinsta, we offer WordPress hosting solutions that include free WordPress migrations.
You’ll even be able to track the progress of your migration directly from your custom MyKinsta dashboard. Once set up, you can use our Kinsta APM tool to monitor your site and ensure its running smoothly.
Step 4: Cancel or Transfer Your Domain
As we mentioned before, you may also want to cancel or transfer your domain with HostGator. If you plan to buy a new domain name through your new host, you’ll simply need to cancel it. Alternatively, if you want to maintain the same domain, you’ll have to transfer it over.
However, as you may recall, if you used HostGator as your domain registrar, you don’t necessarily need to cancel your domain. You can continue using HostGator as your domain registrar even if you’re hosting the site with a different provider.
In any case, to transfer your domain, you can log into your HostGator account and navigate to the Domains section from your left-hand panel:
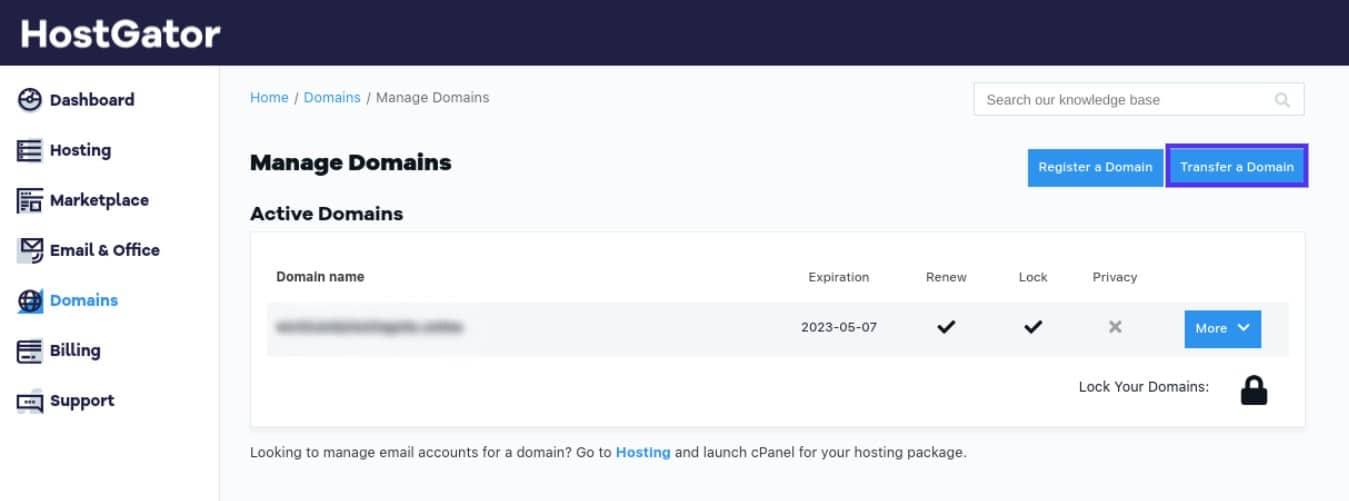
From here, you can click on Transfer a Domain. The site will then redirect you to the domain transfer page:
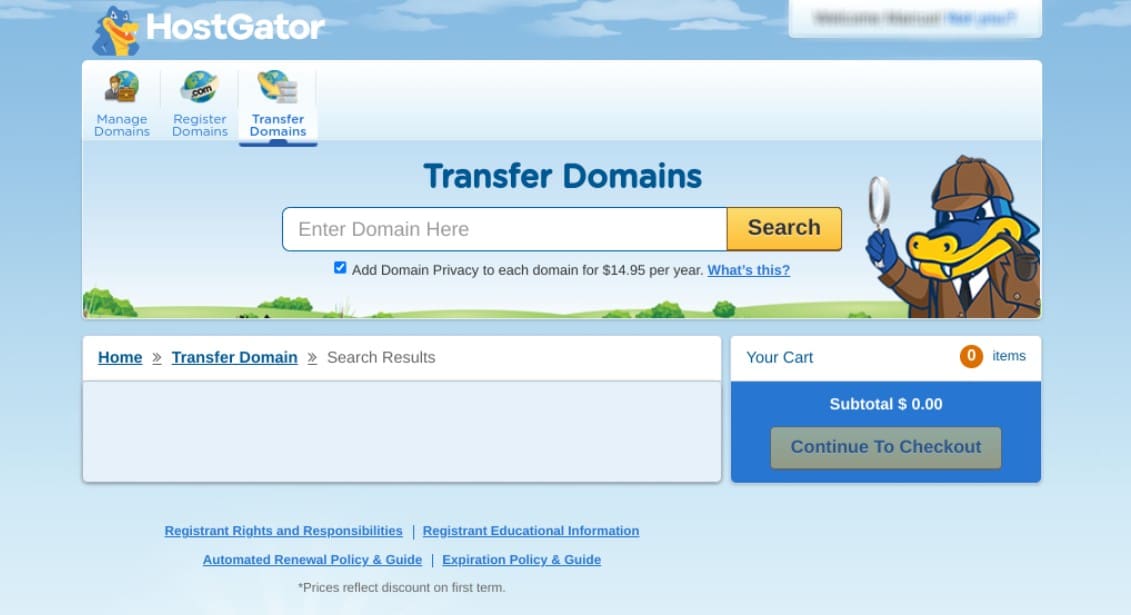
Here, you can insert your domain name, then click on Search. When it appears, you can select your domain name, then follow the instructions for preparing your domain for transfer. Be sure to check with your new host for details on updating your DNS settings. Additionally, note that you can only transfer your domain after 60 days of having it.
Step 5: Request a Refund (if Applicable)
HostGator offers a 30-day money-back guarantee to new customers. If you cancel within this time frame, you can request a refund by replying to the cancellation confirmation email you get.
HostGator should respond with the amount of your refund. If not, you’ll need to contact the billing department. Keep in mind that a refund could take as long as two weeks to process.
If you need to request a refund from HostGator, you can also contact their support team via phone or email.
HostGator Cancellation FAQs
At this point, hopefully, you have a solid understanding of how to cancel HostGator. However, to ensure we’ve covered all the essential details, let’s wrap up with some FAQs.
Can I Get a Refund for My HostGator Account?
Yes, you can get a refund for your HostGator account within 30 days of signing up. However, there are a few conditions that must be met in order to be eligible for a refund.
Firstly, you can only receive a refund for your first invoice. If you have multiple invoices, you will not be refunded for any subsequent ones.
Additionally, any add-ons or extras that you purchased (such as domain names) are not refundable. If you have used any of the services included in your plan, you will not be eligible for a full refund. Also, refunds are not available for dedicated hosting packages.
What Happens When You Cancel a HostGator Account?
When you cancel your HostGator account, you will no longer have access to the services covered in your plan. This includes hosting, email, and any other extras that you might have purchased.
When you cancel your HostGator account, your website will be taken down and you will no longer be able to use your domain name. If you have a monthly plan, your account will remain active until the end of the current billing cycle. However, if you have an annual plan, your account will be canceled immediately and you will not be able to receive a refund for any unused months.
What’s the Easiest Way to Migrate to a New Host?
The easiest way to migrate from HostGator to a new host is to use a migration plugin or service. There are even migration tools for multi-site networks if you have more than one website to move.
This will allow you to transfer your website and database from HostGator to your new host with minimal downtime. However, it can be helpful to hire a professional to help you with the migration process if you’re not comfortable doing it yourself.
There are a few things to keep in mind when migrating your website to a new web hosting provider. First, you will need to update your DNS settings to point to your new host. You’ll also need to export your database from HostGator and import it into your new host.
Migrating your website to a new host can be a bit daunting. However, if you use a provider such as Kinsta, the process is simple and seamless.
Summary
HostGator is a popular hosting provider. However, with so many quality web hosts available, you may want to switch to one that offers more coverage or better fits your unique needs.
To recap, here’s how you can cancel HostGator in five simple steps:
- Prepare your account by exporting a backup of your database and files.
- Initiate the cancellation process in the Billing section of your HostGator account.
- Transfer your site to your new hosting provider.
- Cancel or transfer your domain.
- Request a refund (if applicable).
Do you want to save time and money when it comes to running your website? You may be able to do just that when you switch to a reliable web host like Kinsta.
Check out our application hosting, database hosting, and WordPress hosting plans today!