
Favicons are most commonly known as the small icons that display next to website names in browser tabs. However, while that’s where they originated, your WordPress favicon is also used in other places such as browser bookmarks, iOS home screen buttons, and more.
As such, it’s an important part of your branding. When used correctly, your favicon or ‘site icon’ can help users easily identify your business. It can help with boosting brand recognition, and even enhance the site’s User Experience (UX).
In this article, we’ll discuss the benefits of using a favicon in a WordPress site. Then we’ll explain how to create one, and walk you through three easy options for adding it to your site.
Finally, we’ll wrap it up with some WordPress favicon tips and best practices. Let’s get started!
The Benefits of Using a WordPress Favicon
If you ever had too many tabs open at once (guilty!), you can likely appreciate the usefulness of a favicon. A favicon makes it easy for users to quickly identify your website when they have multiple tabs open in their browser:

Depending on the number of open tabs, your site’s title may not always be visible. Therefore, adding a favicon can help improve the UX for your visitors.
Beyond boosting brand recognition, using a WordPress favicon can also make your site appear more professional and credible. In turn, this can help increase customer trust.
In addition, if someone saves your website to the home screen of their mobile device, your favicon will appear as the icon. Using your brand logo or similar imagery can help make your site easier to recognize, and overall aid in creating a cohesive aesthetic.
How to Create a WordPress Favicon
If you already have a favicon you’re ready to use (most businesses use their logo or a variant of it), feel free to skip to the next section. Otherwise, let’s look at how to create your favicon picture.
In the past, you had to use a specific ICO file for your favicon. However, nowadays, all modern browsers support the use of ICO, PNG, and GIF files for your favicon. JPEG is widely supported as well (read: JPG vs JPEG), but not in all Internet Explorer versions, which makes it less ideal for favicon use.
If you’re familiar with Photoshop, you can use it to manually create a favicon. However, it’s often easier to use a basic cloud-based tool to create your favicon icon set from an existing image.
RealFaviconGenerator (the cloud-based version of the plugin we’ll discuss later) is a great option because:
- It also creates app icons.
- It provides favicon icons in both PNG and ICO formats.
- You can customize your favicon after uploading your image.
- All you need to do is paste in the code that the plugin gives you.
Other useful favicon generators are:
- Favicon.cc, which lets you create a favicon from scratch or upload an existing image.
- Favicon Generator, which functions similarly to RealFaviconGenerator.
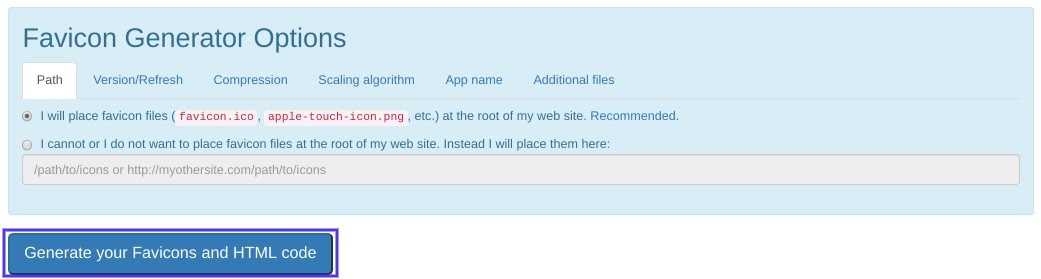
To use RealFaviconGenerator, start by uploading the image you want to use by clicking on Select your Favicon image:

On the next screen, you can configure specific details about your favicon set (if desired). When you’re finished, scroll to the bottom and click on Generate your Favicons and HTML code:
On the next page, click on Favicon package to download your favicon images:
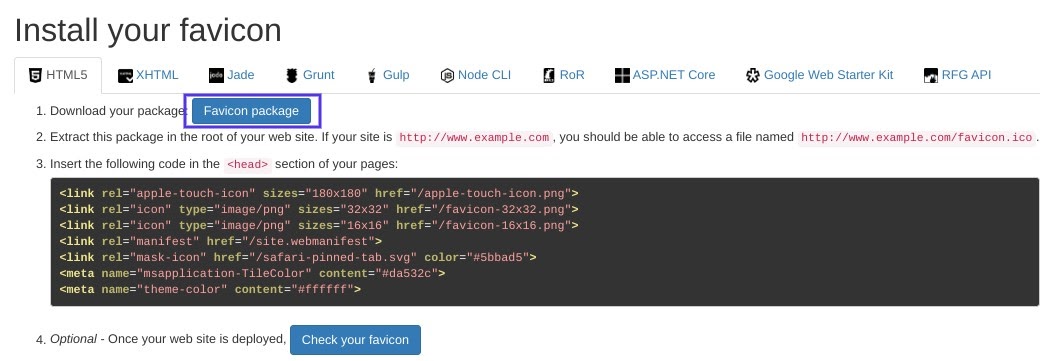
Make sure to leave this page open if you plan to manually add the favicon to your site.
Tips for Creating a WordPress Favicon
There are a few design and formatting tips worth mentioning and reviewing before creating your favicon. Most importantly, the recommended size for favicons is 512×512 pixels.
While your WordPress favicon will be a perfect square, you can also use a rectangular image and crop it either before or after uploading it to WordPress. WordPress comes with a built-in cropping functionality for site icons if you add them via the Customizer (which we’ll walk you through shortly).
Also, it’s important to note that your favicon will display as a 16×16 px square. Therefore, you want to choose an image that will look good once it’s shrunk down to those dimensions. Although it will display at that size, it should still have a height and width of at least 512 px.
Finally, it’s a smart idea to review some of the Google Guidelines for creating and using favicons. This will help ensure that your icon displays optimally in search engines and browser tabs.
How to Add a WordPress Favicon to Your Website (3 Easy Options)
Once you have your favicon, you’re ready to add it to your WordPress site. Let’s take a look at three methods you can use to do that.
1. Using the WordPress Customizer to Upload Your Favicon
As of WordPress 4.3, all WordPress sites include a site icon feature that makes it easy to upload and crop an image to use as a favicon. For most users, this is the simplest and quickest method for adding a favicon icon to WordPress.
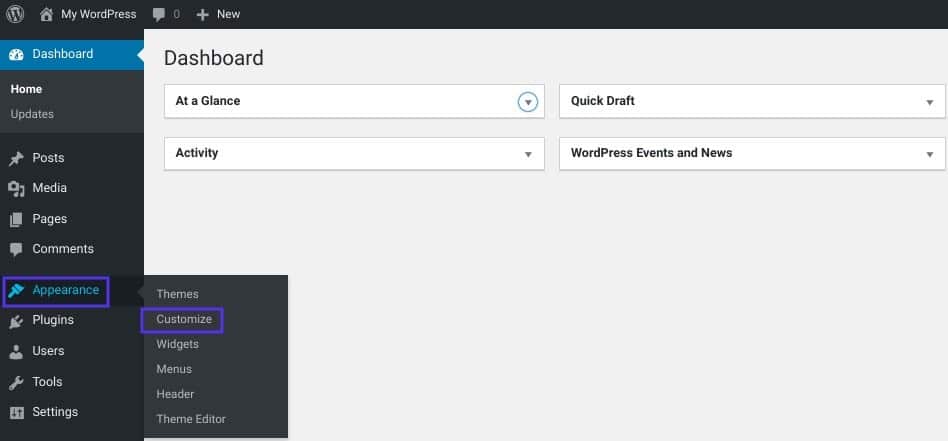
All you’ll need is an image that’s at least 512×512 pixels. WordPress will handle the rest of the process. To get started, go to Appearance → Customize in your WordPress dashboard:
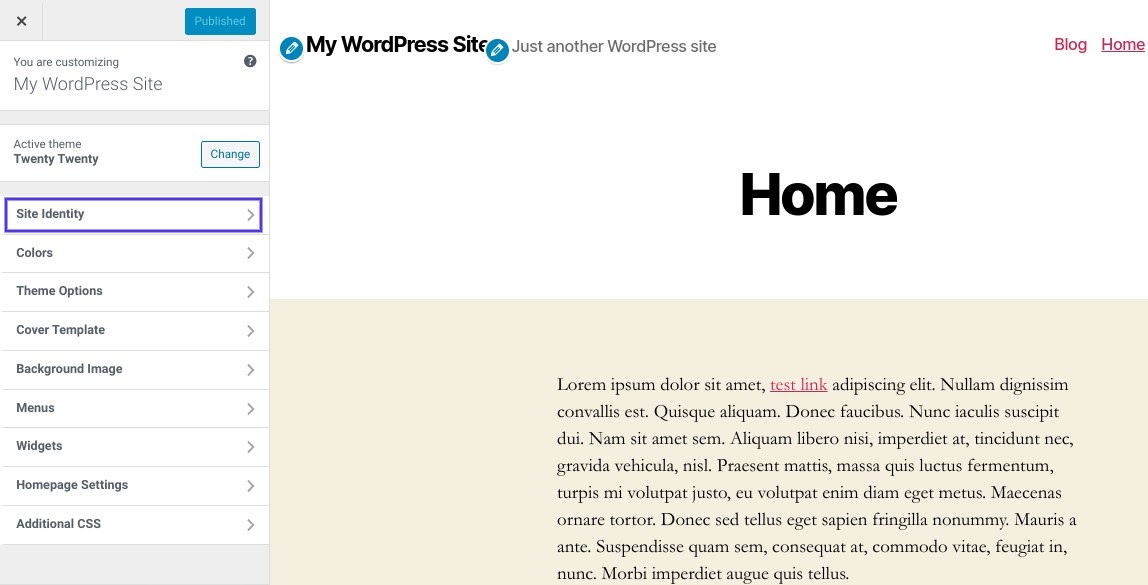
From there, navigate to the Site Identity tab:
Next, look at the bottom for the Site Icon section, and click on the Select site icon button:
The normal WordPress Media Library interface will open. You can either choose an existing image in your Media Library or upload a new one. If you used RealFaviconGenerator to create your favicon, make sure the package you downloaded is unzipped.
Once you have an image you like, click on it and choose Select in the bottom-right corner:

If your image isn’t already a perfect square (e.g. 512×512 px), WordPress will give you a chance to crop it on the next screen.
Use the box to highlight the portion of the image that you want to use for your icon. You can see a preview of how your cropped image will look on the right side of the interface.
Once you’re happy with how things look, click on Crop Image to finalize your choice:

That’s it! All you need to do is select Save & Publish to make your favicon live. If you ever want to change your favicon in the future, you can come back to this interface.
2. Installing a Plugin to Add Your WordPress Favicon
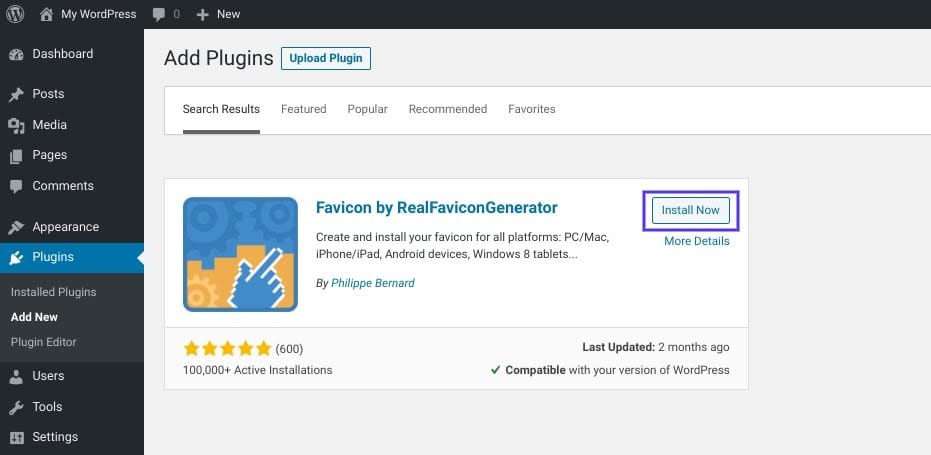
If you’d prefer a plugin solution to the native WordPress site icon functionality, you can use a popular free plugin called Favicon by RealFaviconGenerator (the cloud-based tool we discussed earlier).
This plugin is just as simple to use as the native WordPress Customizer. However, it offers additional compatibility options for various devices and app icons. To use it, install and activate the free plugin via your WordPress dashboard:
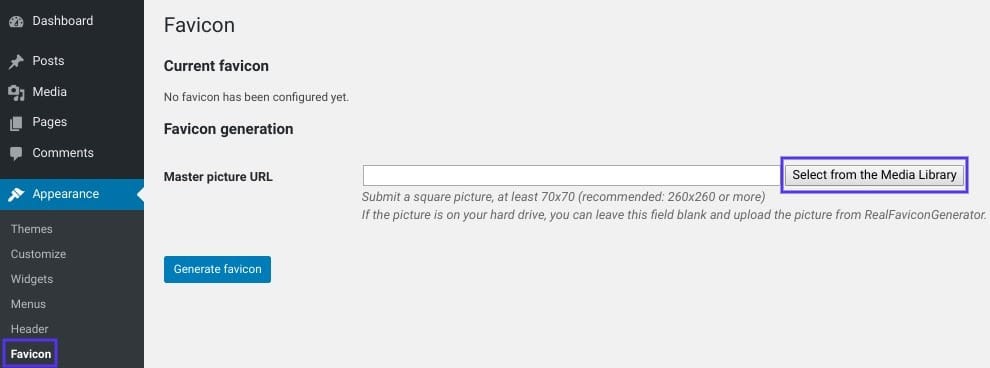
Once you activate the plugin, go to Appearance → Favicon to create your favicon set. All you need to do is select or upload an image that’s at least 70×70 px (ideally 260×260 px):
After you select your image, click on Generate favicon. When you select that button, the plugin will take you outside your WordPress site to the RealFaviconGenerator website.
At the bottom of the site, scroll down to select Generate your Favicons and HTML code (see the previous section). While the tool works, Real Favicon Generator will send you back to your WordPress dashboard:
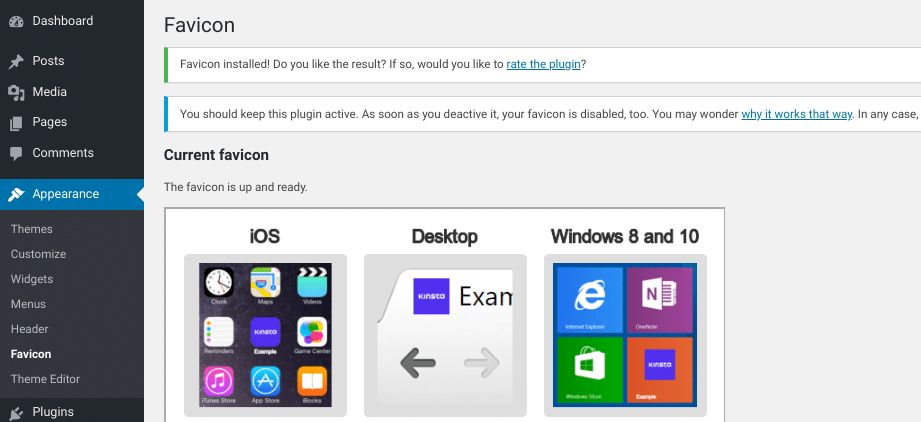
After that, your favicon will be set up and ready to go. You can view previews of how it will look on different devices in the plugin’s interface.
3. Manually Adding Your Favicon via FTP
If you’d prefer to do things manually, it’s possible to add a favicon to your WordPress site via File Transfer Protocol (FTP) or File Manager if your host uses cPanel.
If you go with this method, you’ll also need to create your own favicon image. You can do that by following the steps we outlined earlier in this post.
For this demonstration we’ll be using the package we created and downloaded from RealFaviconGenerator, the instructions apply even if you used a different tool to create your favicon.
To manually add a WordPress favicon to your website, you’ll need to:
- Access your site’s files, either via an FTP client or the File Manager in your hosting cPanel.
- Locate the root directory of your site and upload the contents of your favicon package (favicons.zip)
The files should be in the same folder as your wp-admin and wp-content folders. Next, take the code RealFaviconGenerator provided you with earlier, and either:
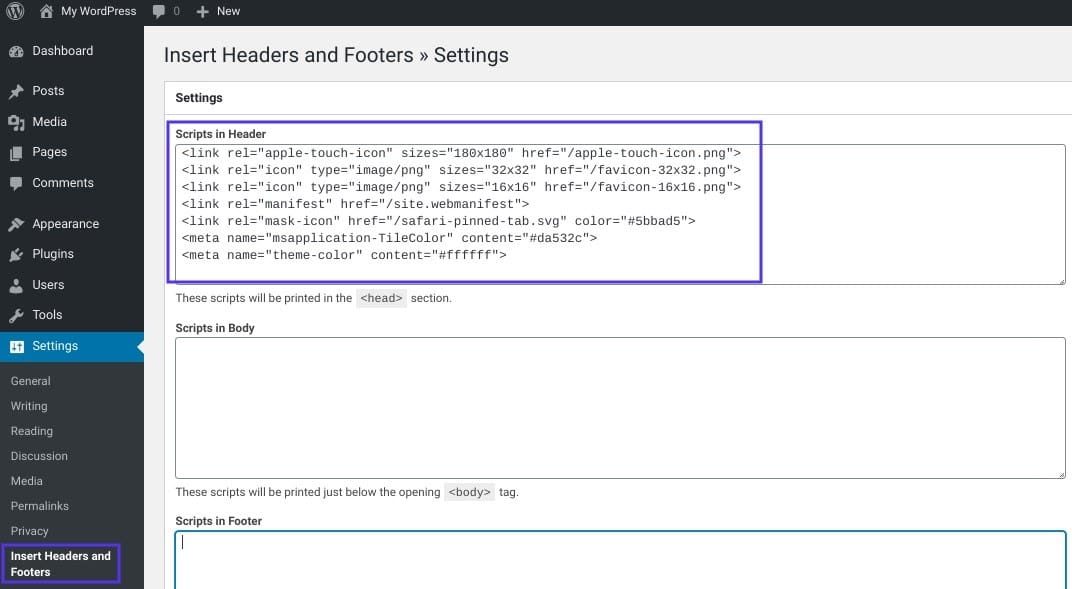
- Use a plugin like Insert Headers and Footers to add it to your theme’s header.
- Paste it directly into the <head> section of your theme, by editing your theme’s header.php file.
Using the Insert Headers and Footers plugin is optimal because it ensures that you won’t lose your favicon if you change WordPress themes down the road.
To do so, install and activate Insert Headers and Footers. Then go to Settings → Insert Headers and Footers, and paste your code into the Scripts in Header section:
Make sure to save your changes. Then you’re all done!
Additional Tips for Using WordPress Favicons
If you want each site in your multisite network to have a unique favicon, the easiest way to achieve this is to use a favicon plugin like the one featured above. While it’s possible to edit your theme’s files to enable unique favicons for each network site, the process is significantly more complicated than using a plugin.
You might also consider using a Content Delivery Network (CDN) to serve your favicon images. The three methods we discussed in this post all store your favicon images on your server. However, you can optimize your site even further by using a CDN to serve those images.
When you install Cloudflare or a service like KeyCDN, visitors’ browsers will load your favicon from your CDN instead of your site’s server. If you are using a plugin like CDN Enabler, it should automatically rewrite your WordPress favicon URL to work with the above methods.
Summary
A WordPress favicon can help boost your brand recognition and improve the UX for your website’s visitors. Fortunately, you have multiple options to choose from that make adding one simple.
The three main methods you can use to add a WordPress favicon to your site are:
- Using the WordPress Customizer to upload a site icon.
- Installing a plugin, such as Favicon by RealFaviconGenerator.
- Manually adding a favicon via an FTP client or your File Manager.

Head of Content at Kinsta and Content Marketing Consultant for WordPress plugin developers. Connect with Matteo on Twitter.

