
WordPress’ evolution has taken time to mature, but it’s gone from a simple blogging platform to a robust Content Management System (CMS) that almost runs the web. The biggest advancements have been in creating site designs. WordPress full site editing (FSE) is an ambitious way to put complex tools into every pair of hands.
This comprehensive guide will explore the history and functionality of WordPress full site editing. The ultimate goal is to show you how FSE works and let you develop your own site designs, just like the pros.
A brief history of design and layout creation within WordPress
Understanding the evolution of designing sites and layouts within WordPress is an essential part of appreciating the significance of FSE. The key tool that’s central to where we are now is the Classic Editor.
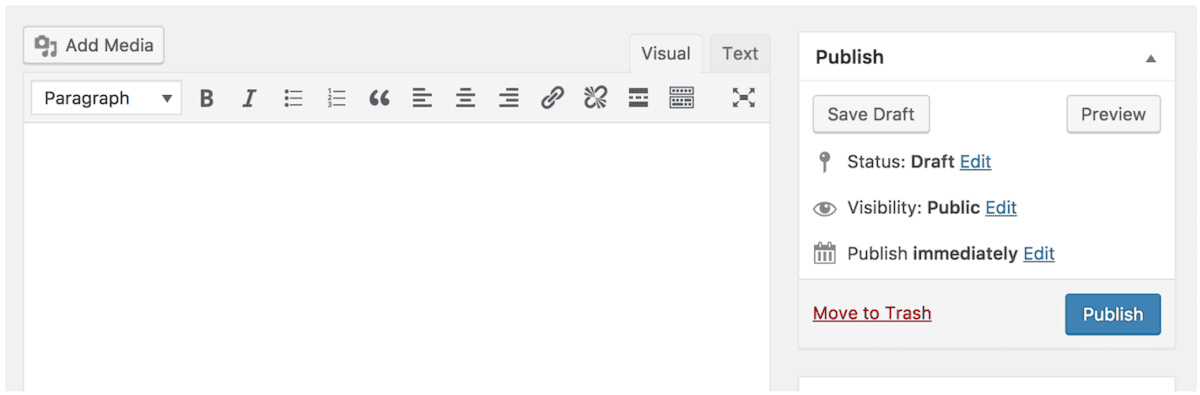
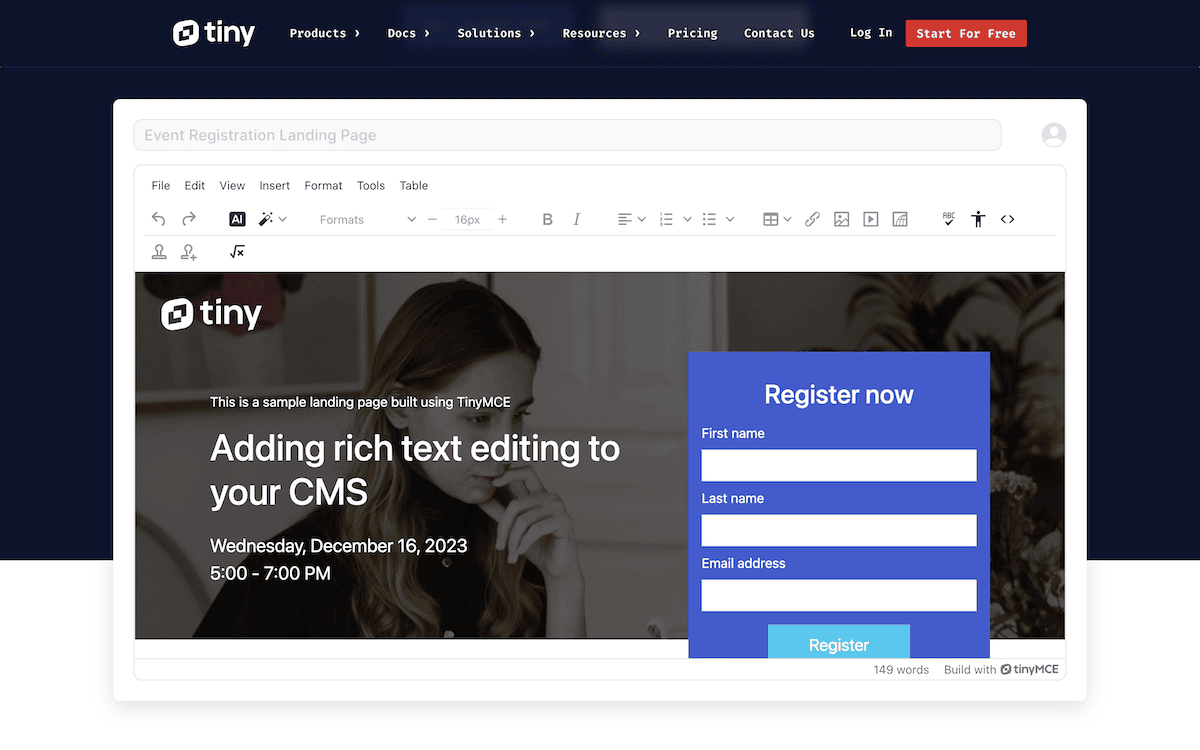
Of course, this wasn’t always “classic.” It was always the TinyMCE Editor – the default since the first version of WordPress up until around 2018. This is a simple What You See Is What You Get (WYSIWYG) text editor that lets you input content and basic HTML, along with some formatting styles. In fact, you can still obtain the TinyMCE Editor as it’s a commercial tool:
The main drawbacks of the TinyMCE Editor are a lack of front-end preview options and less flexibility than you’d sometimes like. Theme frameworks became a viable and powerful alternative. Of course, StudioPress’ Genesis Framework is still with us, but there were a few others, such as Thesis.
You can see how we move from text editing to visual web design here. The framework gives you options on the WordPress back-end, which lets you change aspects of the front end. In addition, you get more ‘bare metal’ functionality to make further changes, such as hooks and filters, template support, and more.
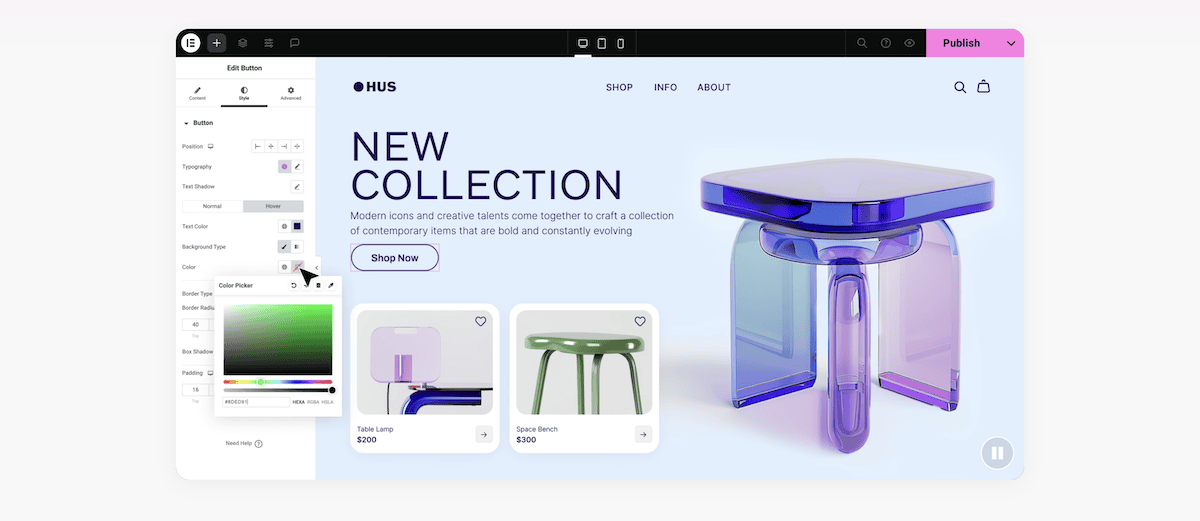
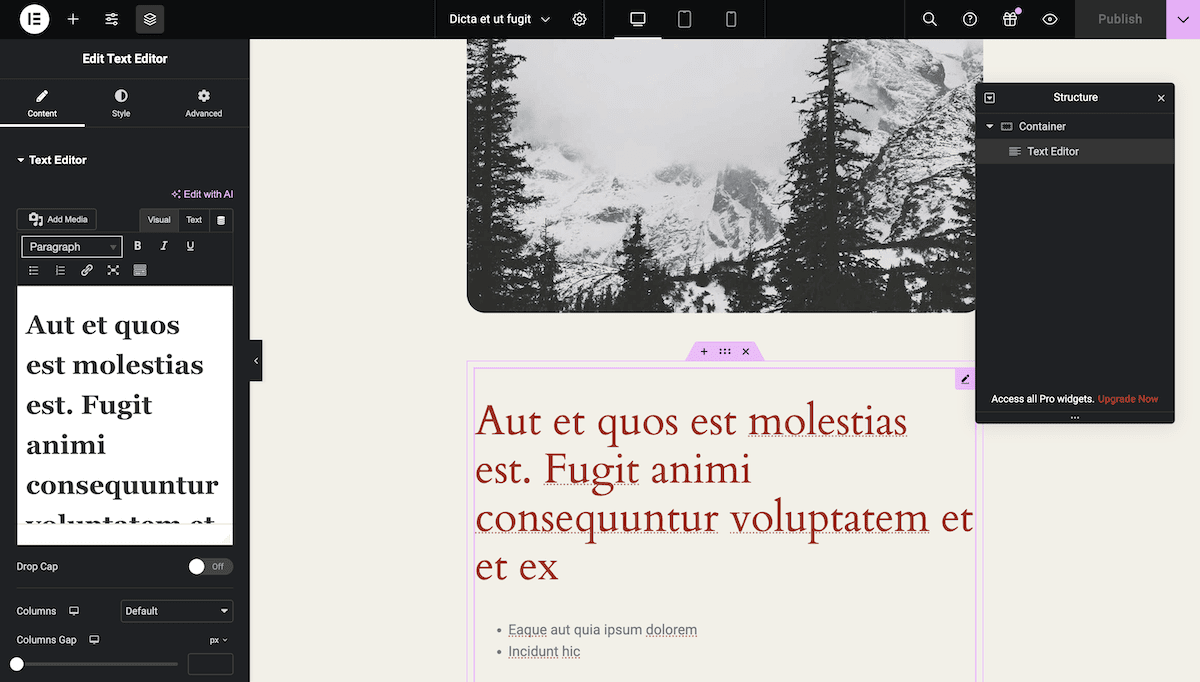
This still didn’t have great accessibility for a typical user, though, which is where page builder plugins would become popular. You’d use them alongside the TinyMCE/Classic Editor to give you a drag-and-drop system for designing your site. These plugins are largely the same as they were back around 2011. Divi and Beaver Builder still rule, although Elementor is a behemoth, too:
You’ll want to read the next section to understand why we have alternatives to the TinyMCE Editor and a page builder plugin.
The Block Editor and WordPress full site editing
WordPress is number one in popularity, but to get there, it has had to defend its title. Over the years, many other platforms have saturated the marketplace.
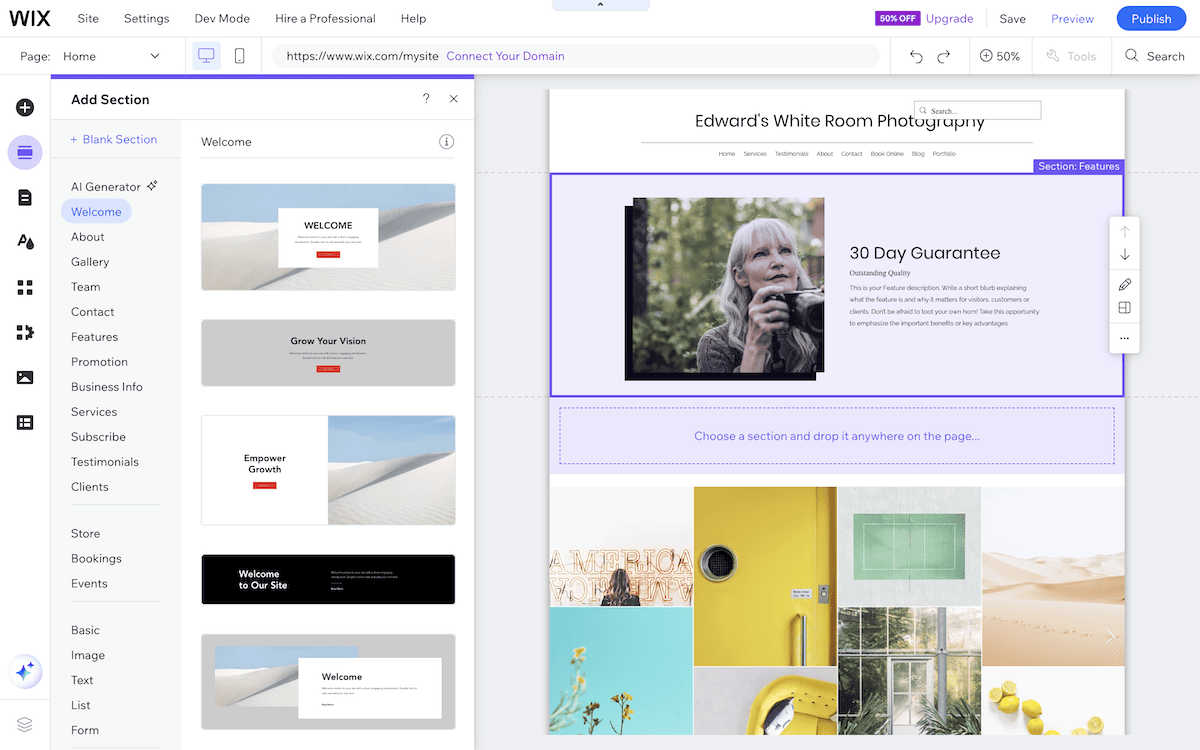
Squarespace, Wix, Medium, and many others all want the same audience and user base WordPress does, and up until the Block Editor, they all had a much better editing experience.
This was a big concern for WordPress management, as other platforms at the time were gaining more visible traction. The competition also had modern, visual, performant interfaces, even for simple layout control.
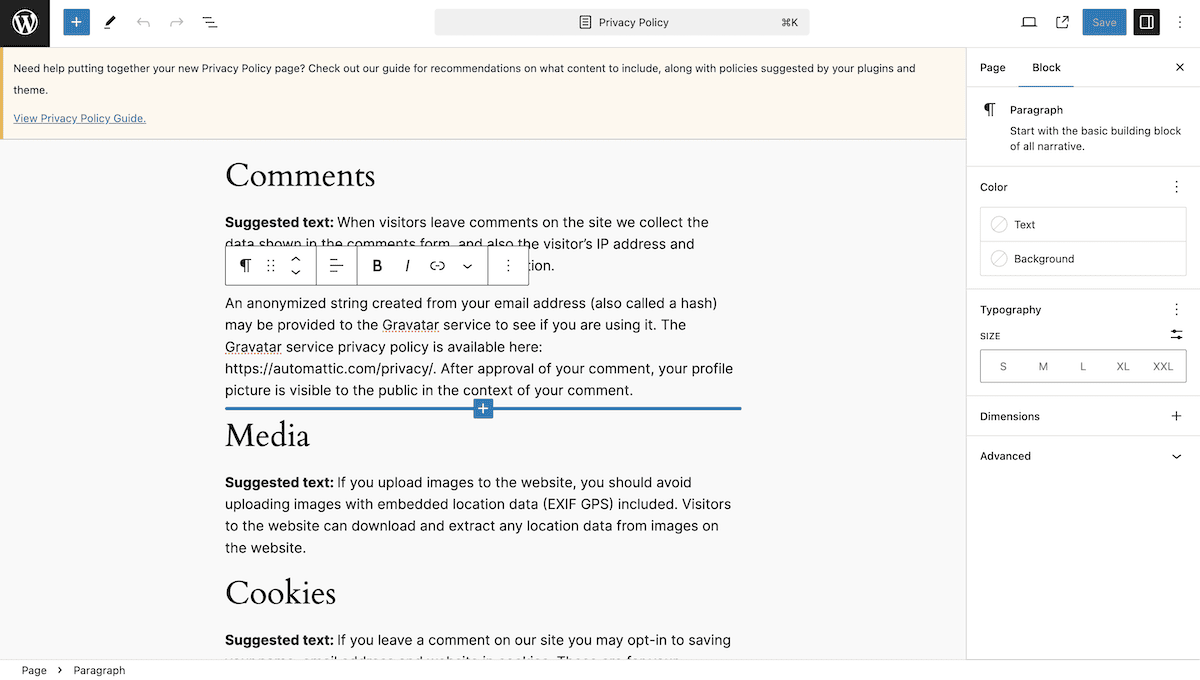
The Block Editor is a modular way to build your site’s posts and pages, although this also has drawbacks. For starters, its limited scope means using it likely requires a page builder plugin if you want to make any ‘deeper’ changes. You would also still need development knowledge to build a complete site, which is a creative barrier the WordPress team has a solution to.
What WordPress full site editing (FSE) is
WordPress full site editing represents the latest and greatest frontier for developing your site. It builds upon using Blocks to piece your design together, and encompasses more beyond individual posts and pages. At its core, FSE lets you manage every aspect of your WordPress website’s design using a unified and intuitive interface.
This is now the ‘official’ way to edit your site. It brings all aspects of your site under its wing:
- Navigation editing. The old method using the Appearance > Menus builder screen is now incorporated into the Site Editor.
- Global styles. You have greater control over the look and feel of your entire site. This includes colors, typography, spacing, and much more.
- Template editing. This used to need development and coding knowledge such as PHP, HTML, and CSS. Now, you can use the Site Editor to create and modify templates for the different parts of your site without the need for code.
- Block Patterns. Consider these to be reusable design elements using collections of Blocks you can insert into your layouts.
Given the evolution of the editor, some functionality is also disappearing. For instance, you don’t need widget areas anymore, although WordPress still uses them as legacy functionality for non-Block themes.
We’ll return to what WordPress full site editing can help you achieve later. Before that, let’s get more into why we need FSE in the first place.
Why FSE is in WordPress
The WordPress team has a few reasons to introduce FSE. Some of these are technical considerations. For example, the Block Editor doesn’t let us edit all aspects of the site when the functionality should be there in the first place.
It’s hard to understand why it’s taken so long to let us work on template styles without the need for code. Between the Classic Editor, frameworks, page builder plugins, and the Block Editor, we have never had the opportunity. FSE fixes this in a native way for WordPress.
This simplification unifies the editing experience and brings it under the control of the core WordPress team rather than third-party developers. It also means the learning curve is consistent. Between content, layout, and design, you have a familiar experience from one screen to the next.
This experience also brings longevity. WordPress full site editing won’t disappear; it will simply evolve over time. This gives the platform a foundation to adapt to whatever the core development team wishes to bring to WordPress.
Overall, this empowerment stretches from the developers to the end users. WordPress full site editing gives everyone greater control over the design changes they wish to make without relying on developers, complex customizations, or coding knowledge.
The alternatives to FSE
For the WordPress team, FSE is not only the present; it’s the platform’s future. However, you’ll need a compatible theme to use it (more of which later). What’s more, other WordPress businesses might not agree, especially those with competing products.
For instance, WordPress web developers would argue that trusting the design of your theme to someone with expertise is a sound idea. We’d agree in many cases, especially if you have complex needs, the right budget, and time.
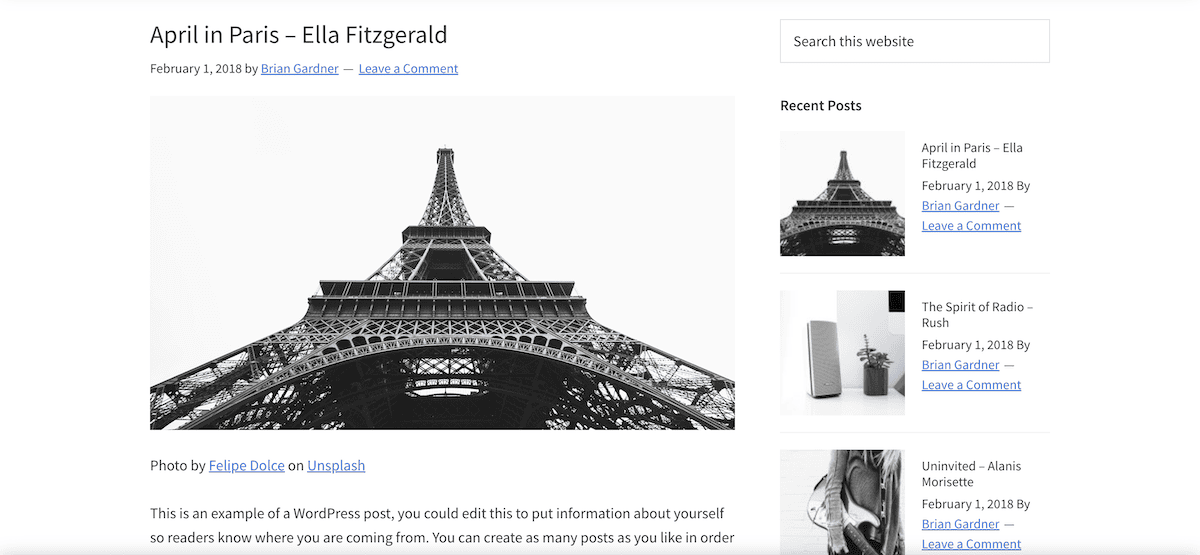
Of course, the Block Editor is still viable for the majority of content creation and customization. The leap from this to full site editing will be a mere short hop, and you’ll likely use it already:
Lots of users will turn to the Block Editor for the most part then bring in another solution. Adding a page builder plugin provides some of the functionality the Block Editor lacks. Divi, Elementor, Beaver Builder, Brizy, and many more have great feature sets and allow for deeper customizations and development:
For a polar opposite experience to WordPress full site editing and a return to where this all began, you could opt for a whole new CMS: ClassicPress.
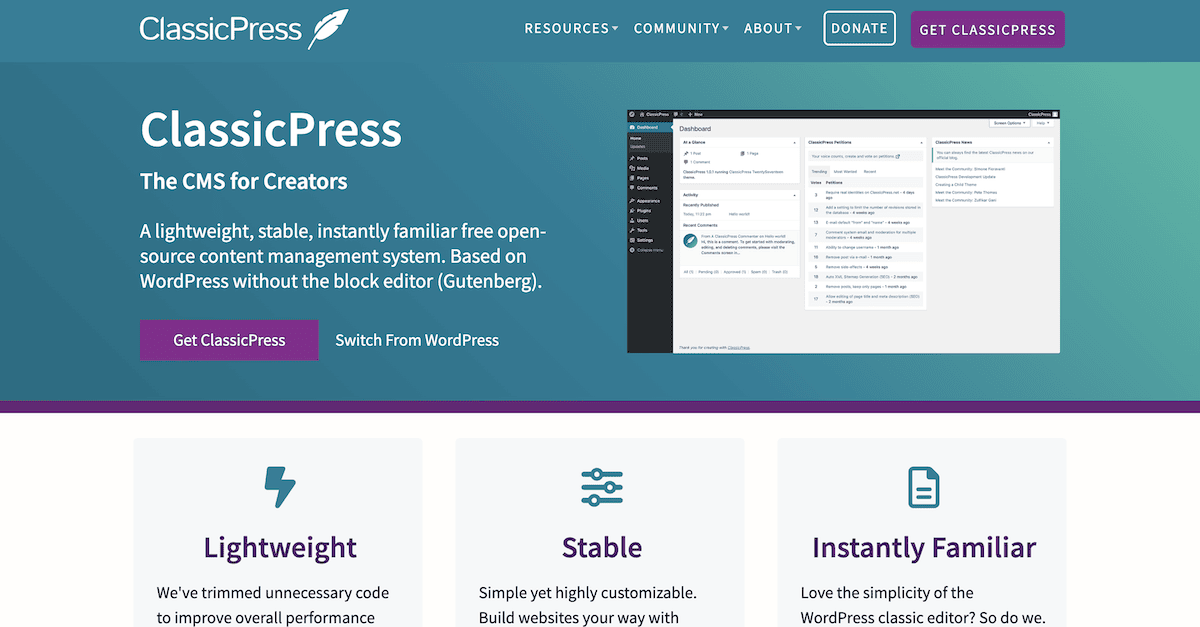
The project’s philosophy is that WordPress’ evolution is a great idea, apart from the Block Editor and, by extension, FSE. As such, the ClassicPress fork doesn’t include it. Instead, you’ll create sites using the Classic or TinyMCE Editor—just like in the past.
It’s essentially a single-issue solution to the Block Editor’s immaturity upon its first release. At the time, the concept made theoretical sense. Given WordPress’ current editing experience though, there’s little reason to opt for ClassicPress.
How WordPress full site editing works
In a nutshell, WordPress full site editing extends the Block Editor’s functionality across your whole site. To use FSE, you need a ‘Block theme’ or ‘FSE theme’ that supports it. We’ll talk more about this later.
The high-level overview of how FSE works is straightforward:
- FSE uses Blocks. Just like the current iteration of the WordPress editor, your entire site uses Blocks for each component. Here, both individual content elements and larger structural components (such as headers and footers) will use Blocks.
- You can edit page templates within WordPress. There’s no need for PHP knowledge any longer when altering template files. Instead, you can create and edit them from the Site Editor.
- There is access to site-wide design tools. We’ll look at the Global Styles panel later, but it lets you control design elements that affect your whole site. In many cases, you won’t need custom CSS to implement your vision.
- Block Patterns let you build quickly. As with the Block Editor, there are layouts for common site sections that you can insert and customize without restriction.
- The theme.json file is central to FSE. This configuration file will define the fundamental styles and settings for your theme. It’s a starting point for further customizing your site, but it can also be the ‘hub’ for your development.
Most users won’t run a version of WordPress older than 5.9, but if you do, you’ll need to update to leverage FSE. As we outline, you’ll also need a supporting theme. Let’s discuss this quickly.
Choosing a suitable FSE theme
Fortunately, choosing a Block theme takes the same level of care as any other type of theme. You’ll need to look at a few objective facets to ensure you download a strong solution:
- Check for regular updates to the theme’s codebase.
- Find out what other users think about the theme through ratings and reviews.
- Make sure the developer offers the right level of support for your needs.
Since WordPress full site editing is a new arrival to the platform, fewer theme options are available to you. This doesn’t mean quality is hard to find, though. Many bigger developers have their take on a FSE/Block theme. One of the first was ThemeIsle’s FSE version of Neve:
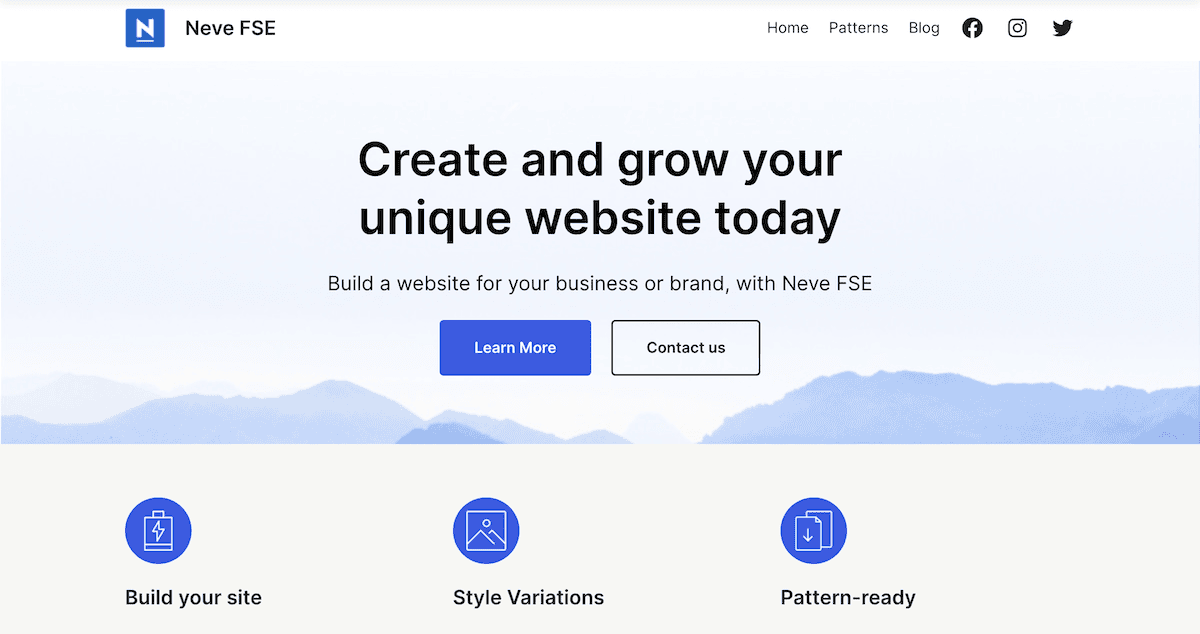
The ‘traditional’ or ‘classic’ version of the theme uses the old Customizer from the Appearance screen. This version incorporates the Site Editor in full and offers better subjective performance.
There are other Block themes to look at, such as Portfolio WP and Mugistore. However, Ollie is arguably the best of the bunch:
This commits to WordPress full site editing without wavering. It has a sweet onboarding wizard, and even has a premium version that includes lots of Pattern Library elements and templates.
Even the default Twenty Twenty-Four theme is a viable choice for your site now:
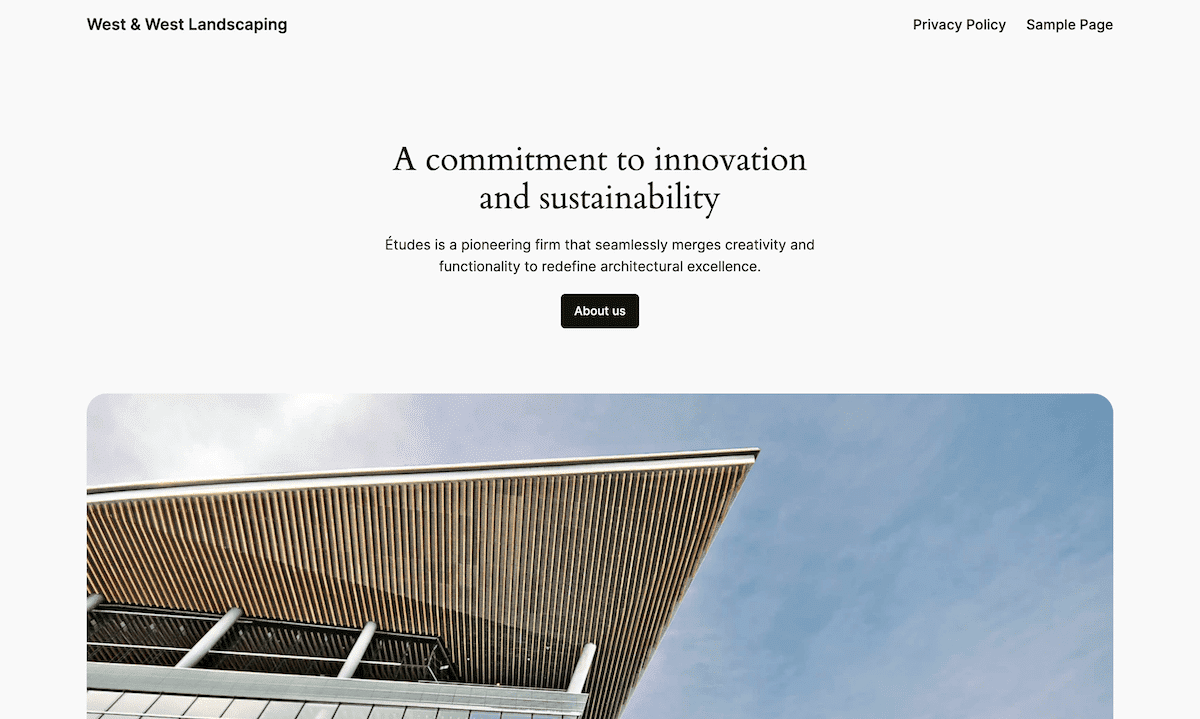
The Site Editor’s capability and depth enable us to build on top of (and extend) themes that often require lots of code and resources. It democratizes the ability to build and develop themes, and the main interface is the first point of contact for this.
Touring the main FSE interface
To find the Site Editor, navigate to Appearance > Editor within WordPress:
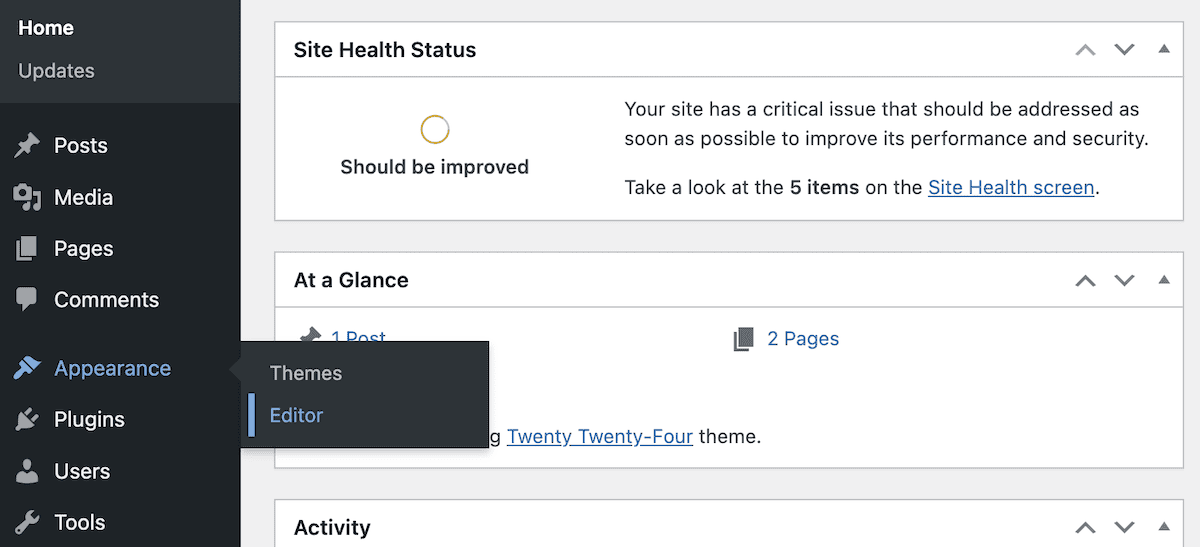
This screen is straightforward enough. On the right-hand side, you will see the layout preview. You can click this to open the Site Editor interface for your home page. On the left is a set of links to other editing pages for specific tasks. We’ll take a deep look at these screens shortly.
Before we get into each of the five screens of FSE, note that you can exit the Site Editor using the WordPress logo in the upper-left corner of the screen. As an alternative, you can click the ‘back’ arrow on the main Design page:
With this out of the way, let’s get into using FSE.
The 5 pillars of WordPress full site editing
Now, we’ll examine each screen of the site editor in the order it appears in its navigation. In fact, this leads us to discuss that screen!
1. Navigation
The Navigation page replaces the Appearance > Menus screen. Once you enter it, you’ll see a list of posts and pages on your site:
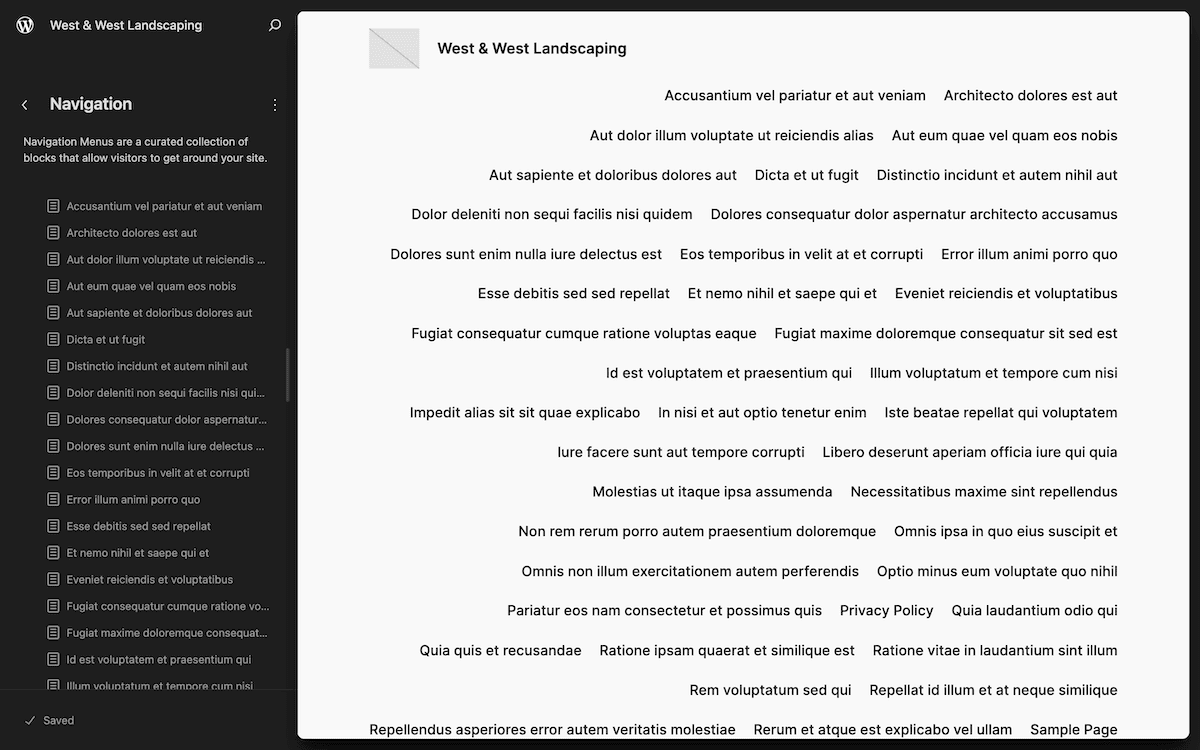
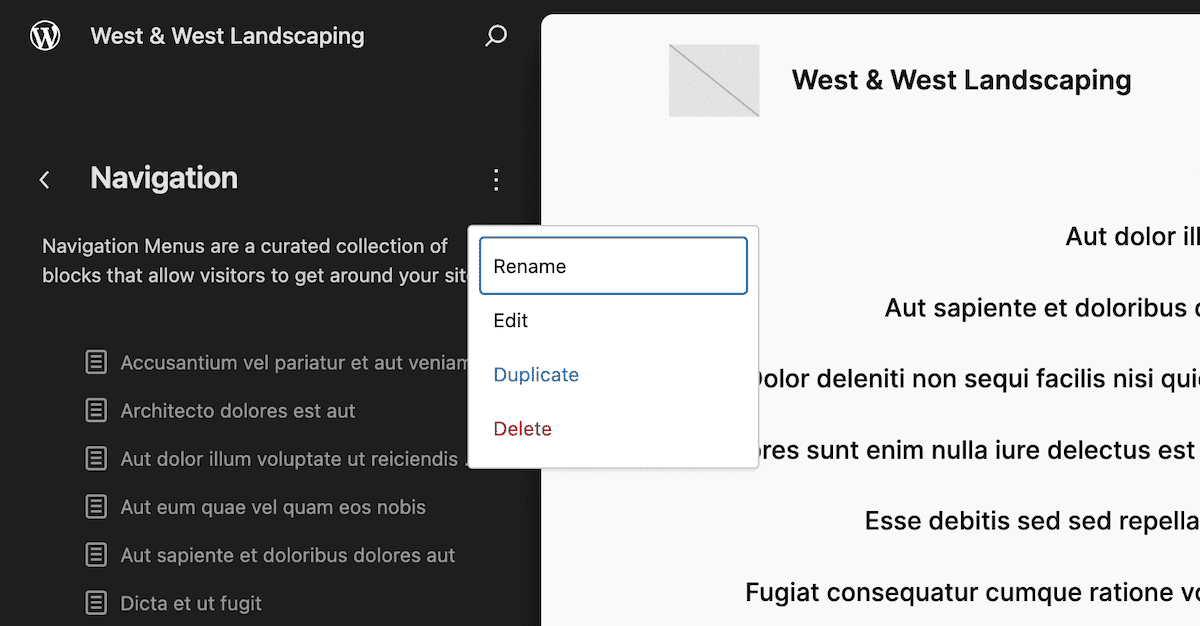
If this is a new site, you’ll see all of your posts and pages here. This could be confusing because it represents your primary navigation menu. Near the Navigation heading, open the Actions menu. This will give you options to edit the menu, change the name, delete it, or duplicate it:
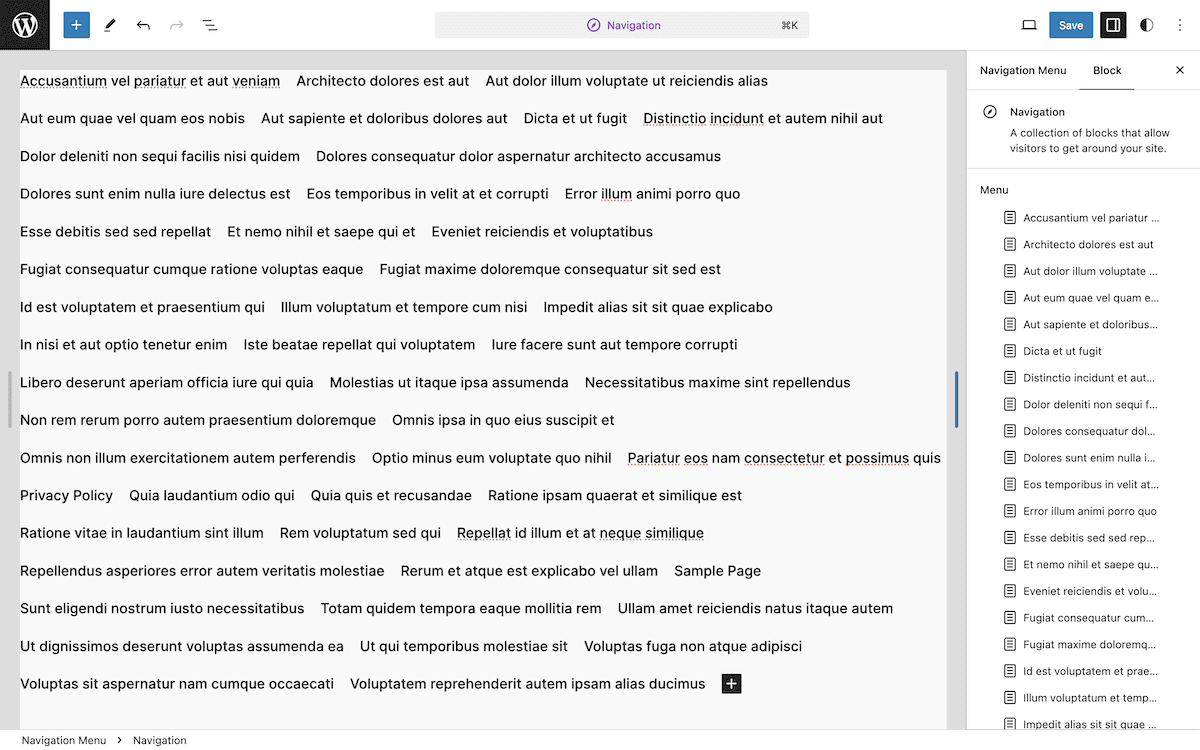
If you click on Edit, this opens a version of the Block Editor that contains your menu as a Navigation Block:
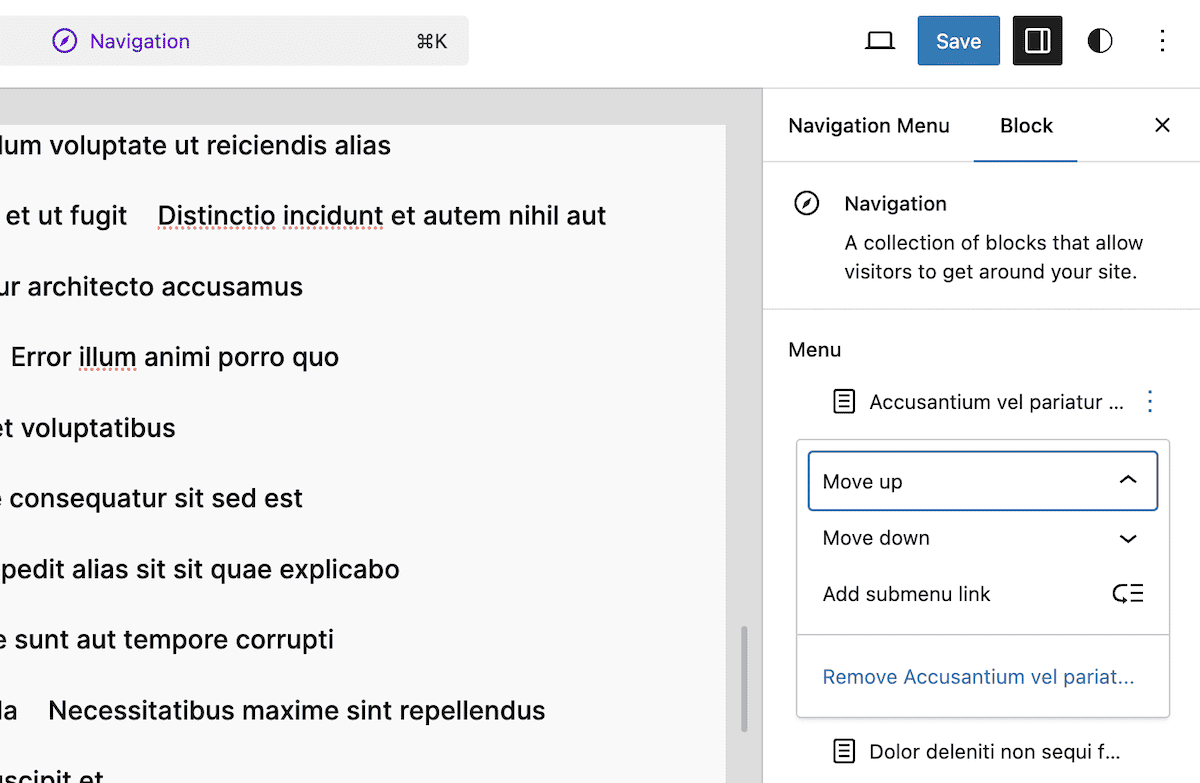
In the sidebar, you have options to move each entry up or down, remove it from the menu, or create a sub-menu from it:
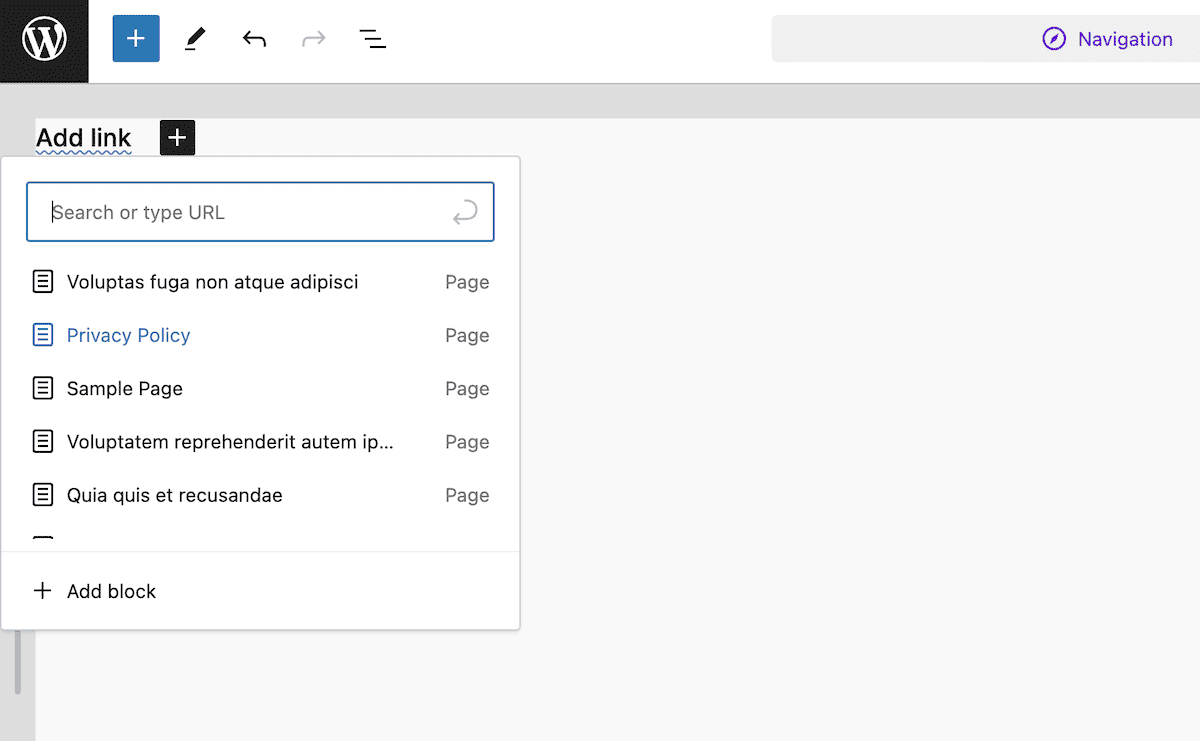
Each entry in the menu uses a Page Link Block, which will come with its own options. You have inline formatting tweaks, along with sidebar style settings:
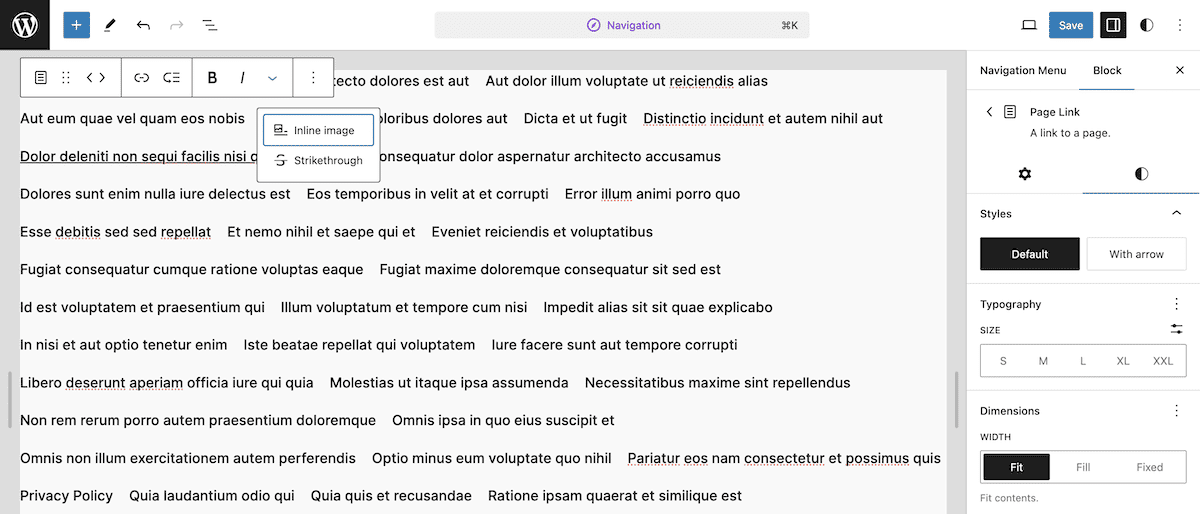
Note that you can add inline images, submenus, and more here. It’s more flexible than the classic way of creating navigation. To simply add an item to the menu, click the Plus icon and select your post or page:
Once you save your changes, you’ll see the navigation reflect your tweaks. To create further menus, you can use the Actions > Duplicate link back on the Navigation page.
2. Styles
The Styles screen is how you control the look of your site on a global level. The sidebar offers a few different palettes and typography settings for different designs:
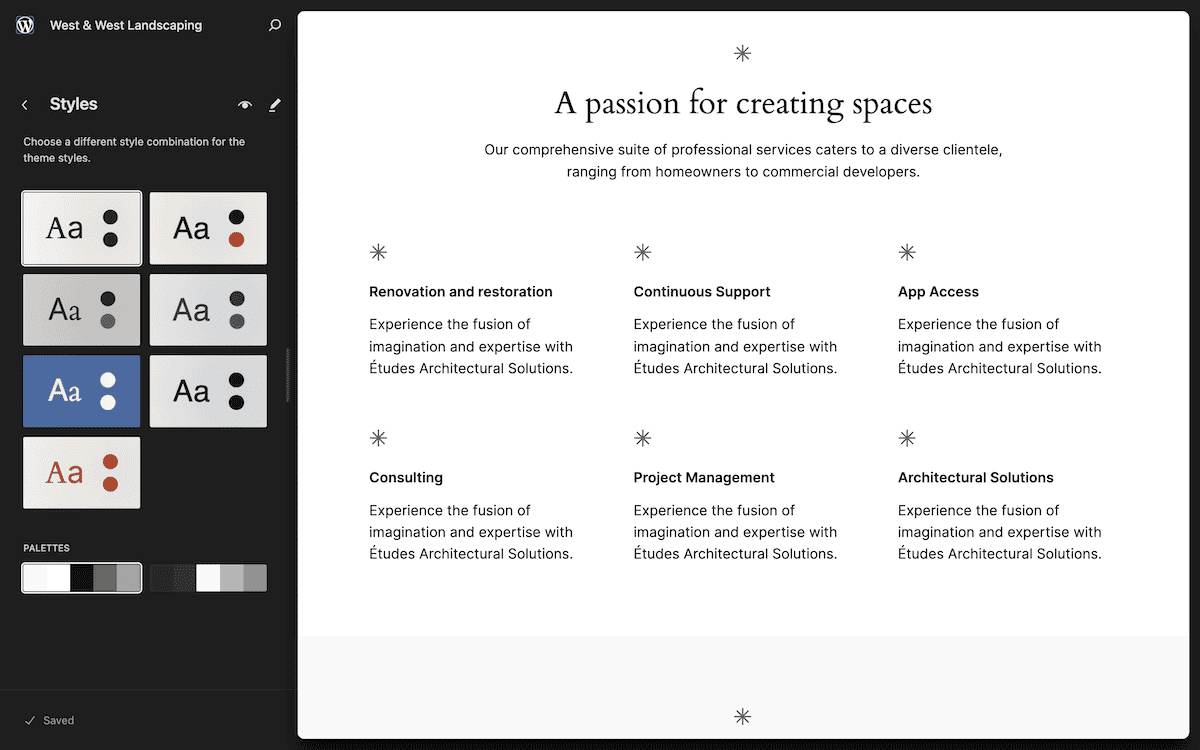
Clicking any of them will show you the design in place on your site. However, there’s an Edit ‘pencil’ icon at the top of the sidebar to further make changes in the Site Editor:
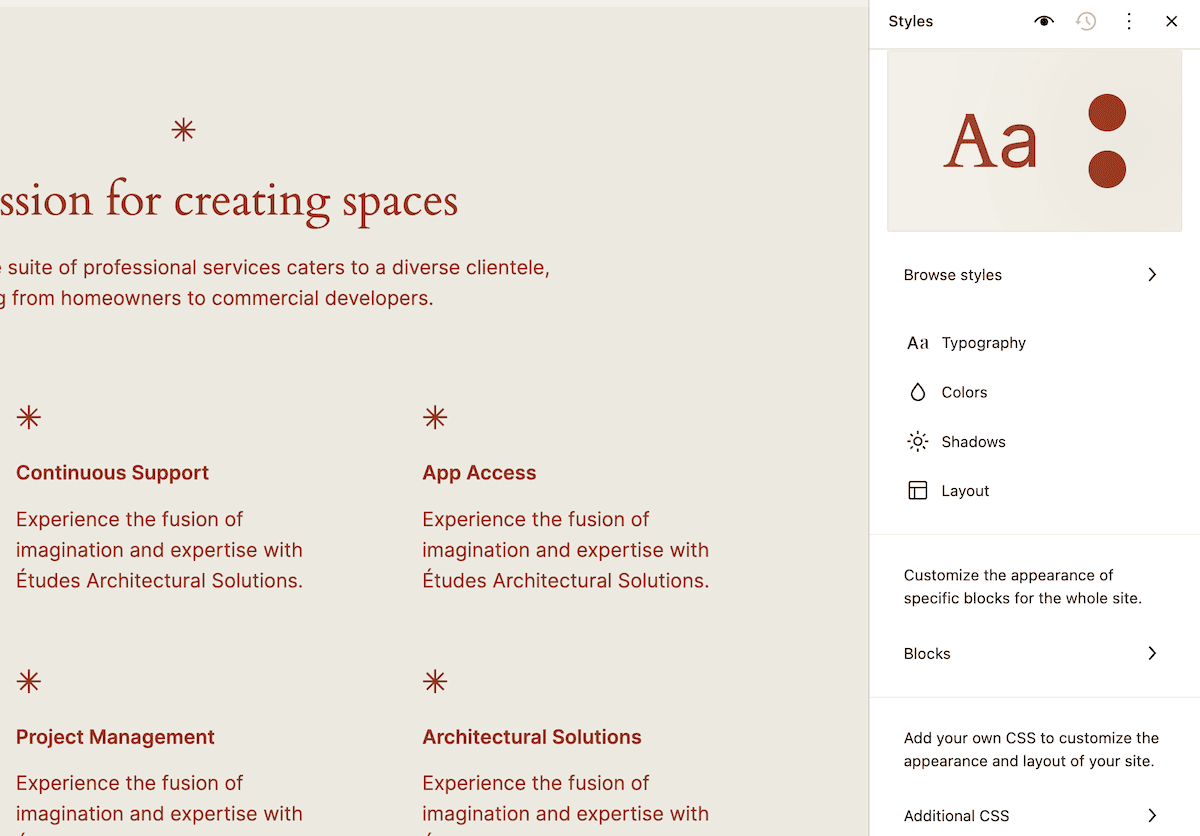
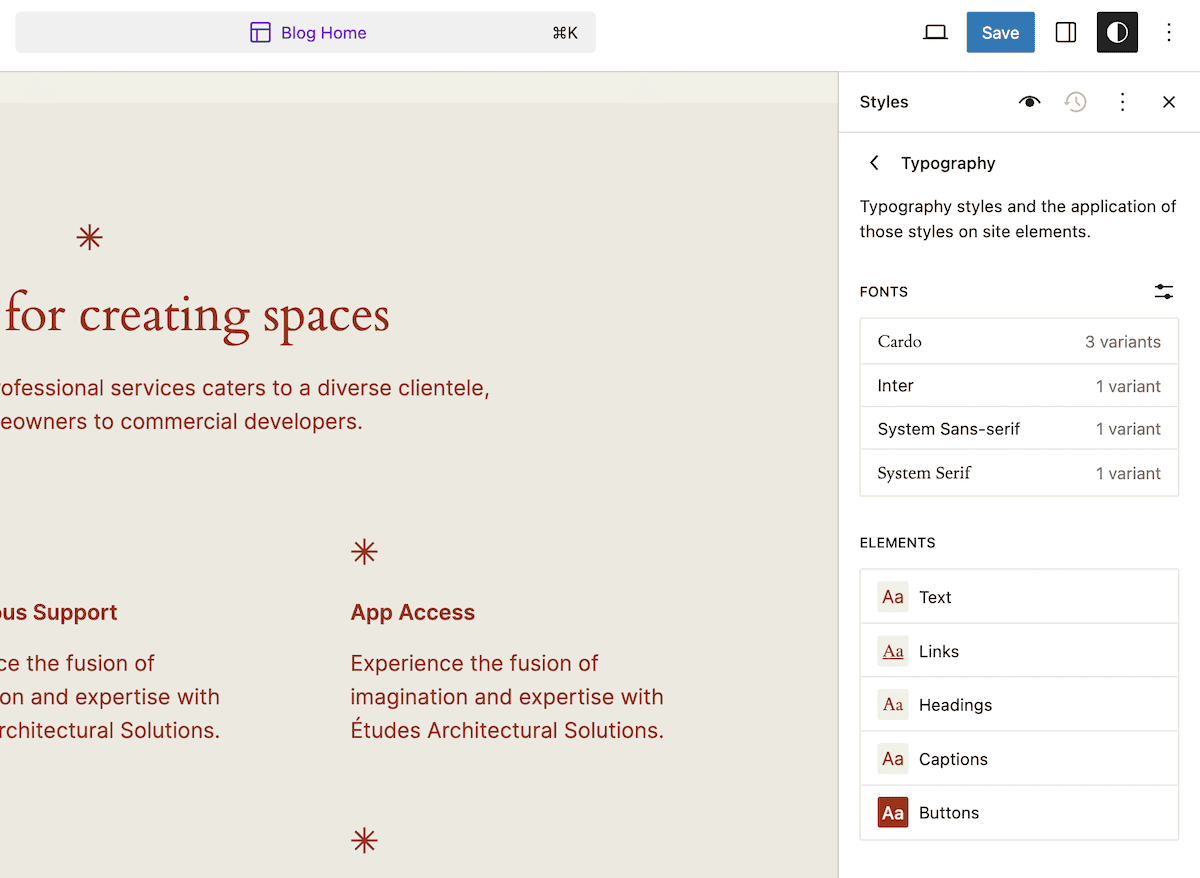
Each of the options within the sidebar here covers colors, layouts, typography, and even shadow settings. For instance, you can select site-wide fonts and apply them to various elements of your design:
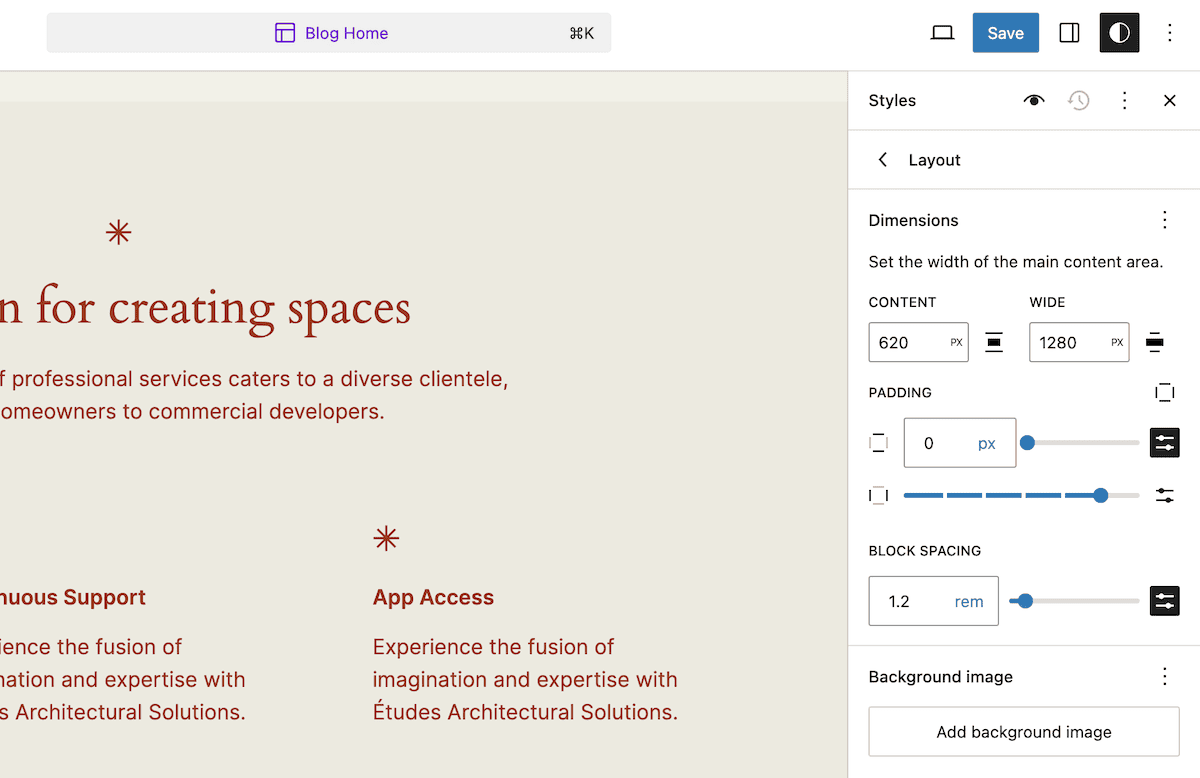
Going deeper into the menus will often give you further options to play with, such as spacing, colors, and more. The Layout section lets you customize the dimensions of your main content area, along with padding and Block spacing:
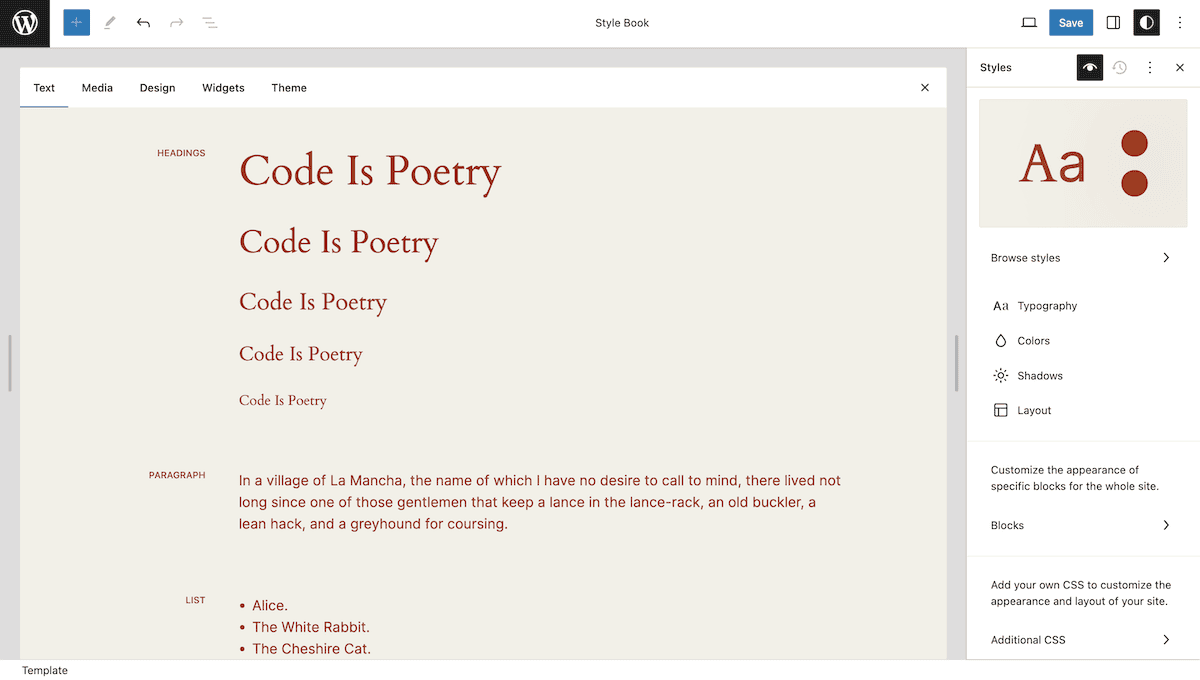
If you want to see how these changes look without browsing your site, you can use the ‘eye’ icon to open the Style Book. It’s a handy visualization tool that designers will love:
Finally, while we won’t focus on it here, you can also customize the look of each Block for your site. For example, you could build on a Paragraph Block’s global styling. Again, when you finish up, you can save your changes, and these will apply to your site.
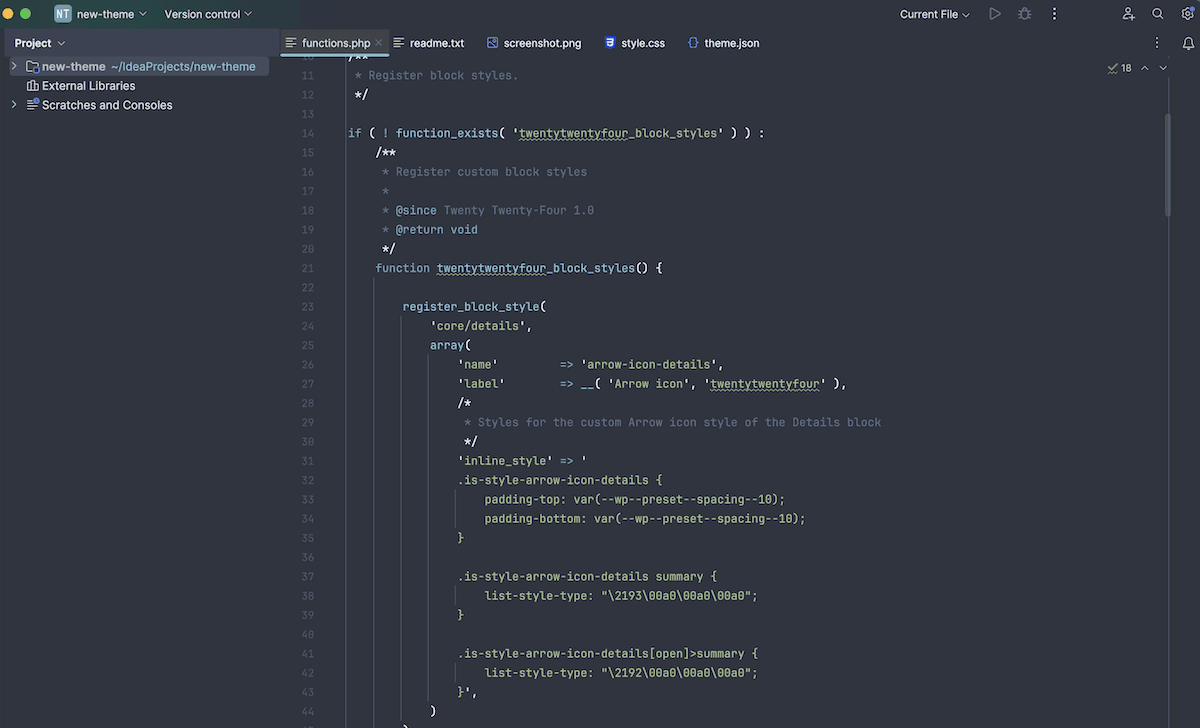
Using the theme.json file with WordPress full site editing
Before moving to the next FSE screen, you should know about the theme.json file. This is essentially the developer’s version of the Styles screens.
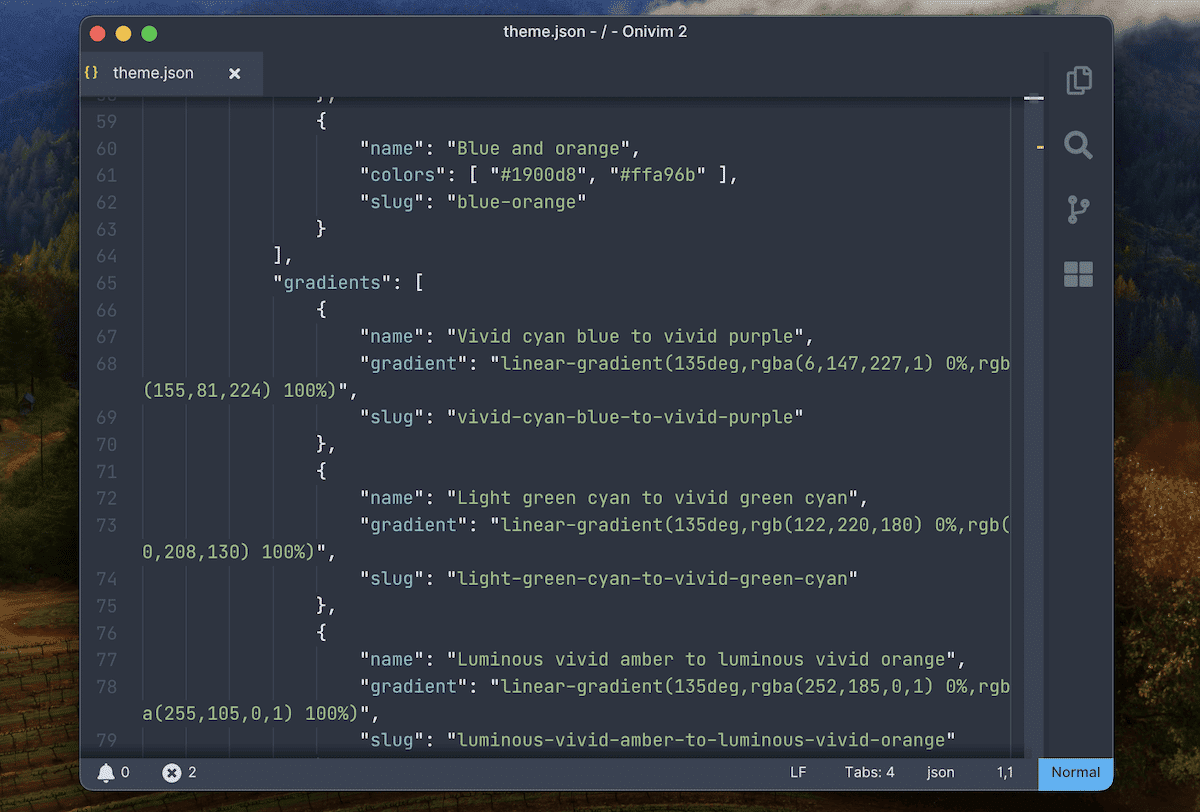
It lets you define the default styles for your site and its Blocks, and you’ll use it as a configuration file. Moreover, it uses the JSON format, so it offers a less code-heavy experience than in the past.
Ultimately, know that whatever you can do within theme.json, you can also do within the Site Editor.
3. Pages
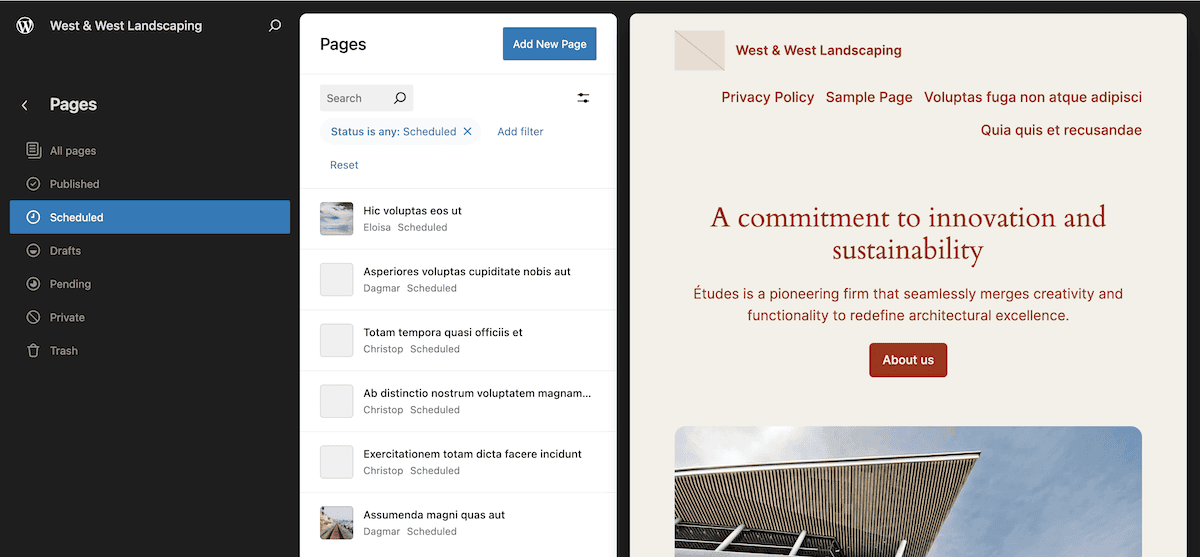
The Pages screen duplicates the functionality within the classic Posts and Pages screens within the WordPress dashboard. For example, you’ll see a list of statuses that filter your pages into Published, Scheduled, Drafts, and others:
Each page has extra actions, such as Edit, View, Rename, and Delete. You can also edit a page using the ‘pencil’ icon. At the top of the list, there’s an Add New Page button, which does the obvious.
If you already use the Block Editor, these screens will feel most at home to you. However, while you have the same functionality here as you usually do, the Site Editor gives you some extra Theme Blocks to help you build your site. These cover typical use cases such as adding a site logo, navigation, authors, comments, and more:
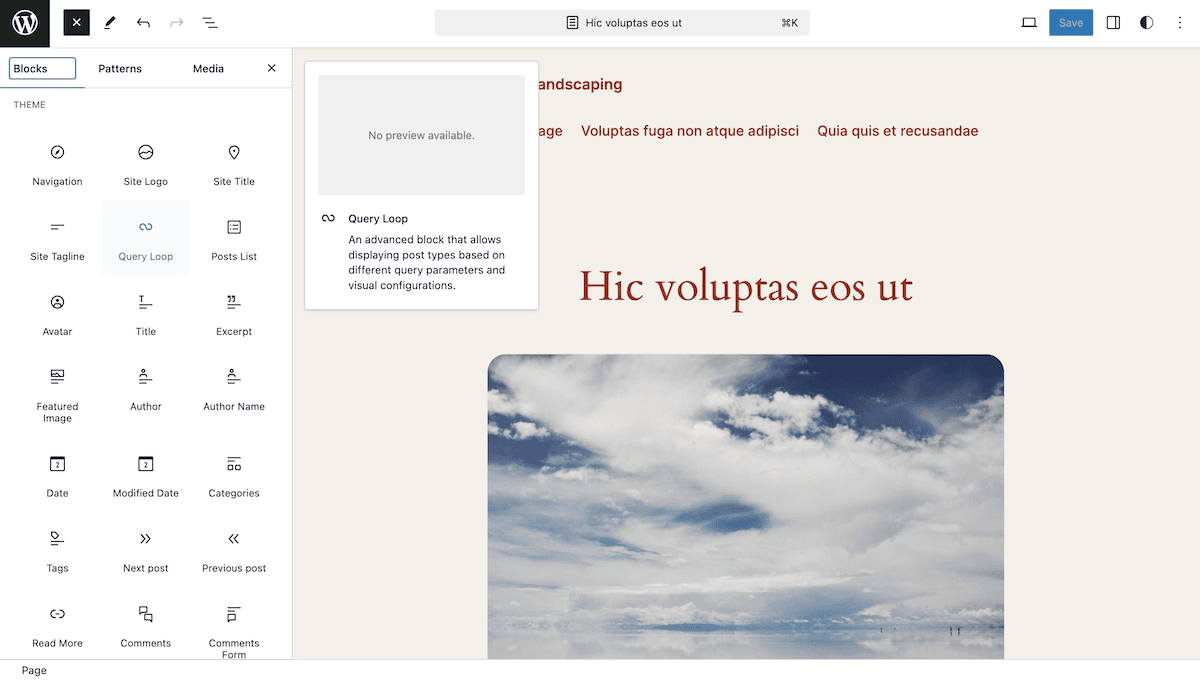
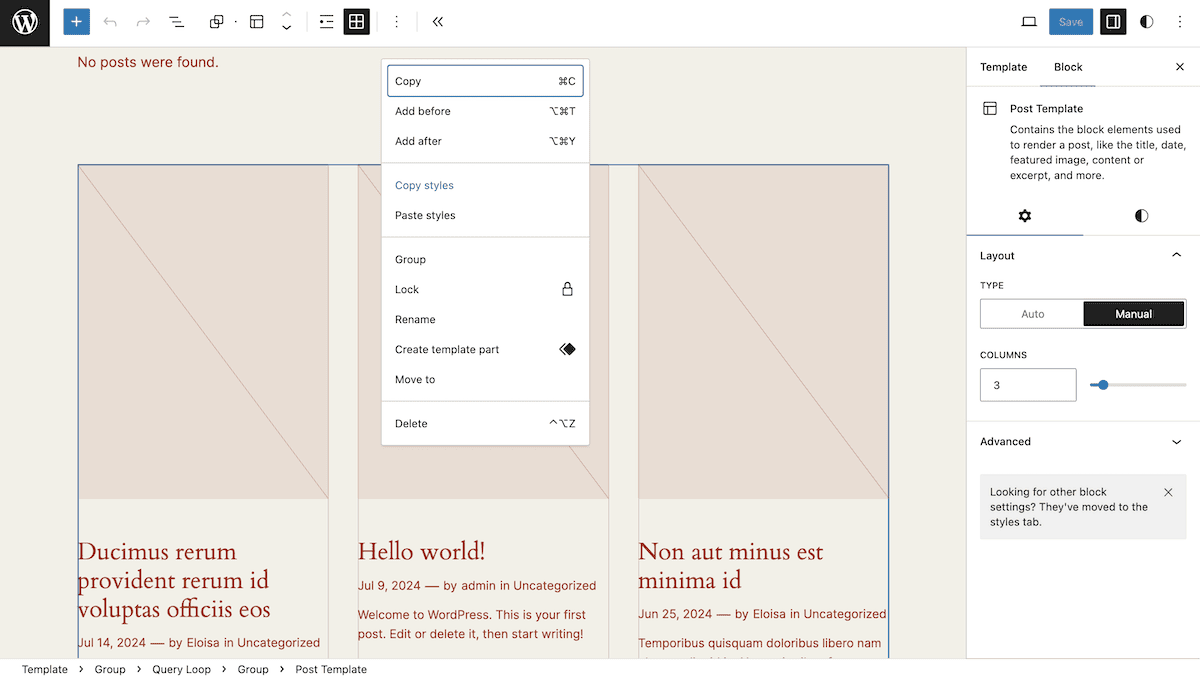
One of these – the Query Loop Block – can help you achieve tasks that you’d often need PHP to achieve. For instance, because it lets you display posts based on specific parameters, you could display your latest posts or even build a portfolio. However, none of this can happen without the final two screens within the Site Editor.
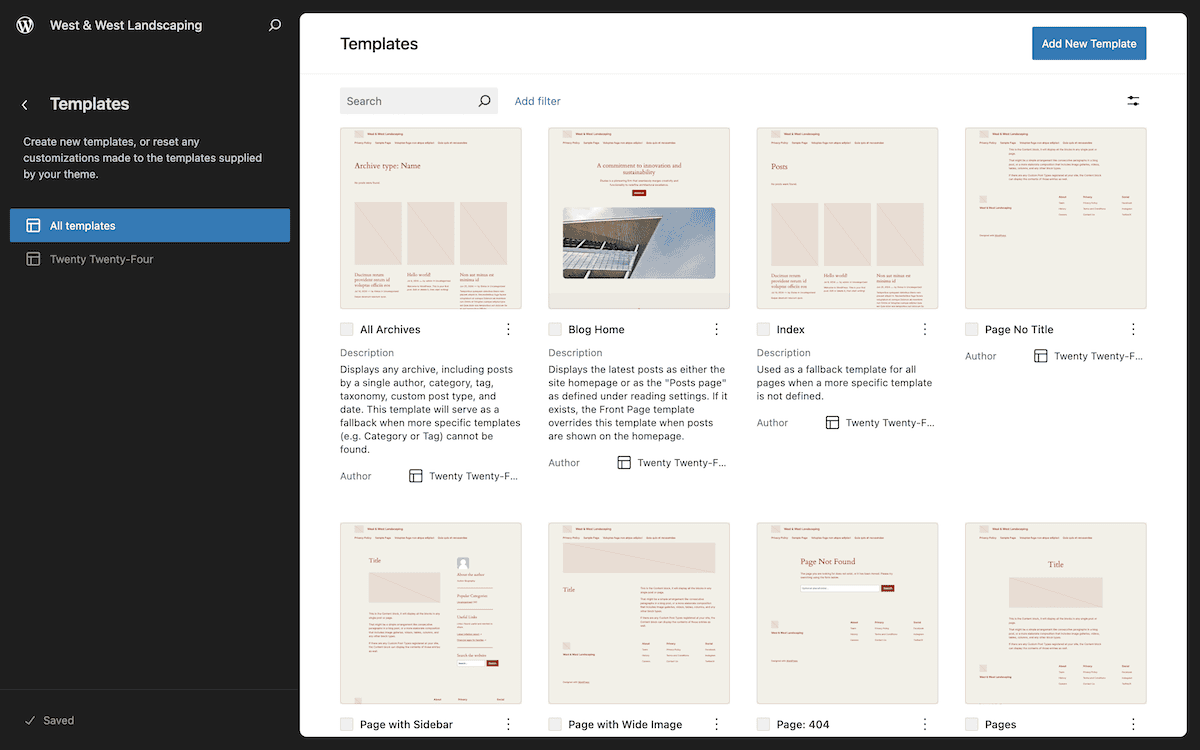
4. Templates
Templates are a staple of WordPress development. They are reusable layouts to help you define the structure of the various parts of your site. It would typically need expertise with PHP, but you can customize them all (and create new ones) without code within the site editor.
Working on templates follows the same approach as posts and pages: you’ll use the Site Editor to add Blocks to the template, then save the changes. Of course, these will apply to every page that uses the template in question.
To create a new template, click the Add New Template button:
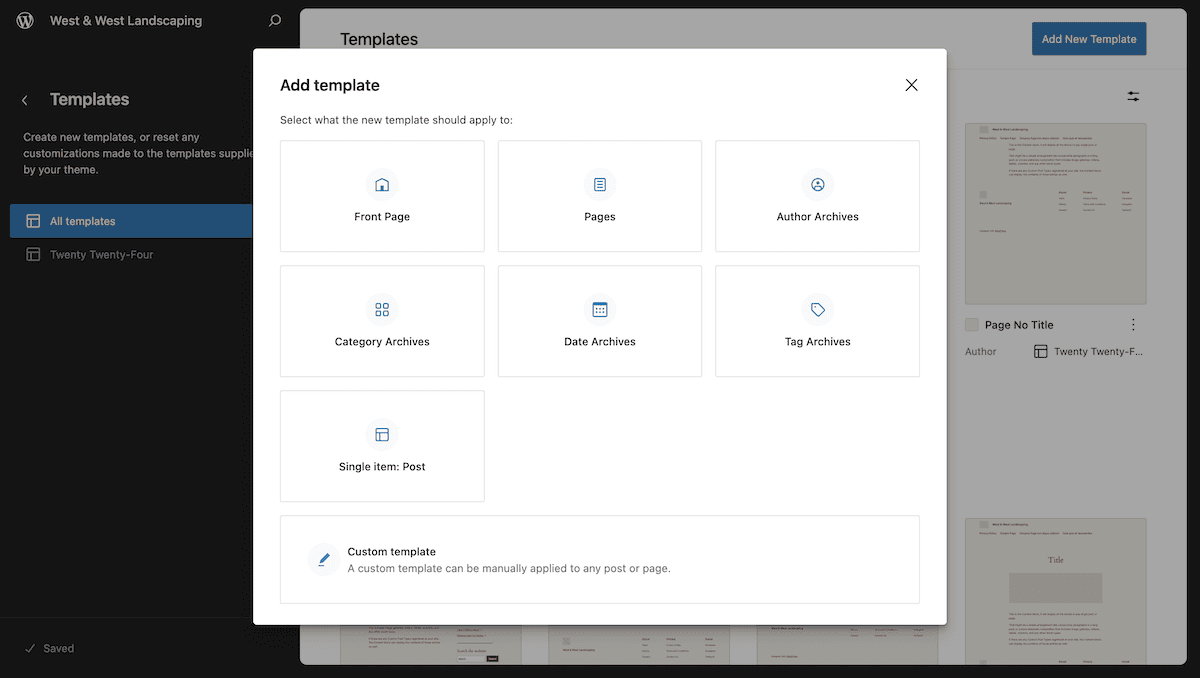
This will run you through a quick wizard to select a type of template you want to create and a suitable Block Pattern to start the design. These patterns are the focus of our last section.
5. Patterns
Block Patterns are related collections of Blocks that fulfill specific roles on your site. For example, you can slot in a header pattern complete with logo, navigation, and site title:

Creating them is straightforward, although, without the site editor, you’d need to register these patterns using PHP. Now, though, you can use the Patterns page:
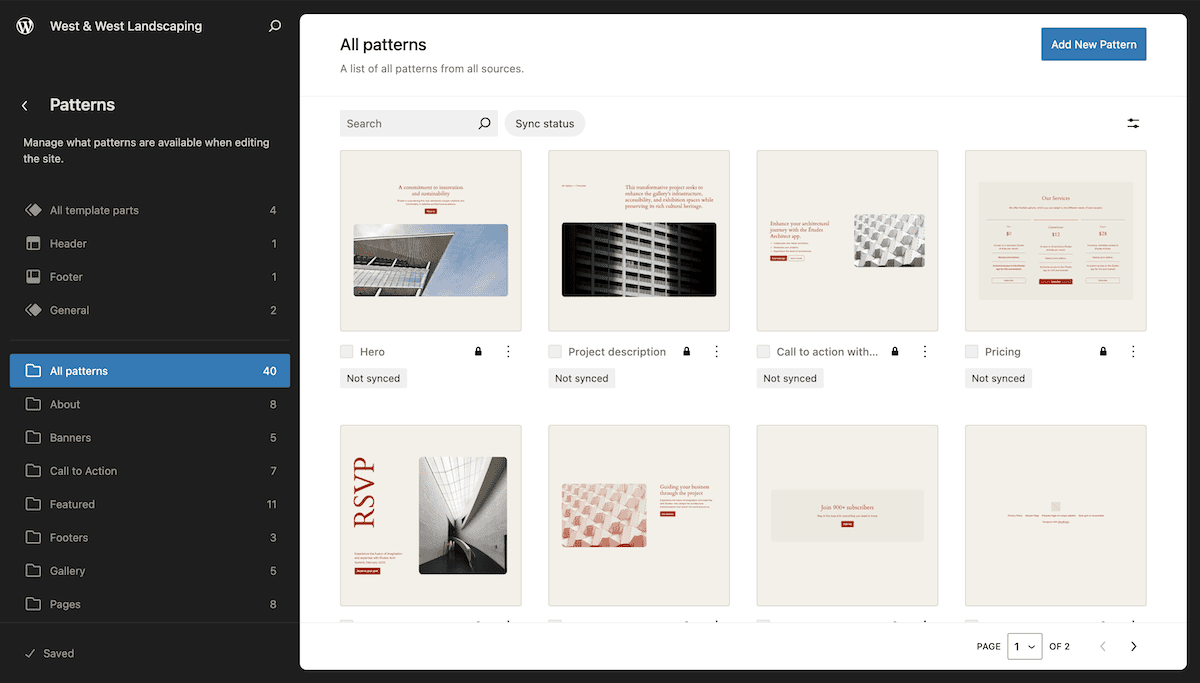
On the left-hand side, you’ll see all of the available patterns split into folders called ‘types.’ These are a great way to quickly build out a site design, and often look fantastic.
The Add New Pattern button opens the editor and lets you create those sections yourself. This allows you to create reusable elements for your site, which represents a sustainable and self-serving way to develop sites for yourself and anyone else you work with.
Tips on using WordPress full site editing to create designs
There’s plenty to dive into when it comes to WordPress full site editing, and we can’t cover everything you can do with it. However, we can pass on a few tips to make the most of FSE.
For example, you can export your templates and styles for reuse on other sites. To do this, head into the site editor for any post or page, then click the Options menu from the top toolbar. In the drop-down menu, choose Export:
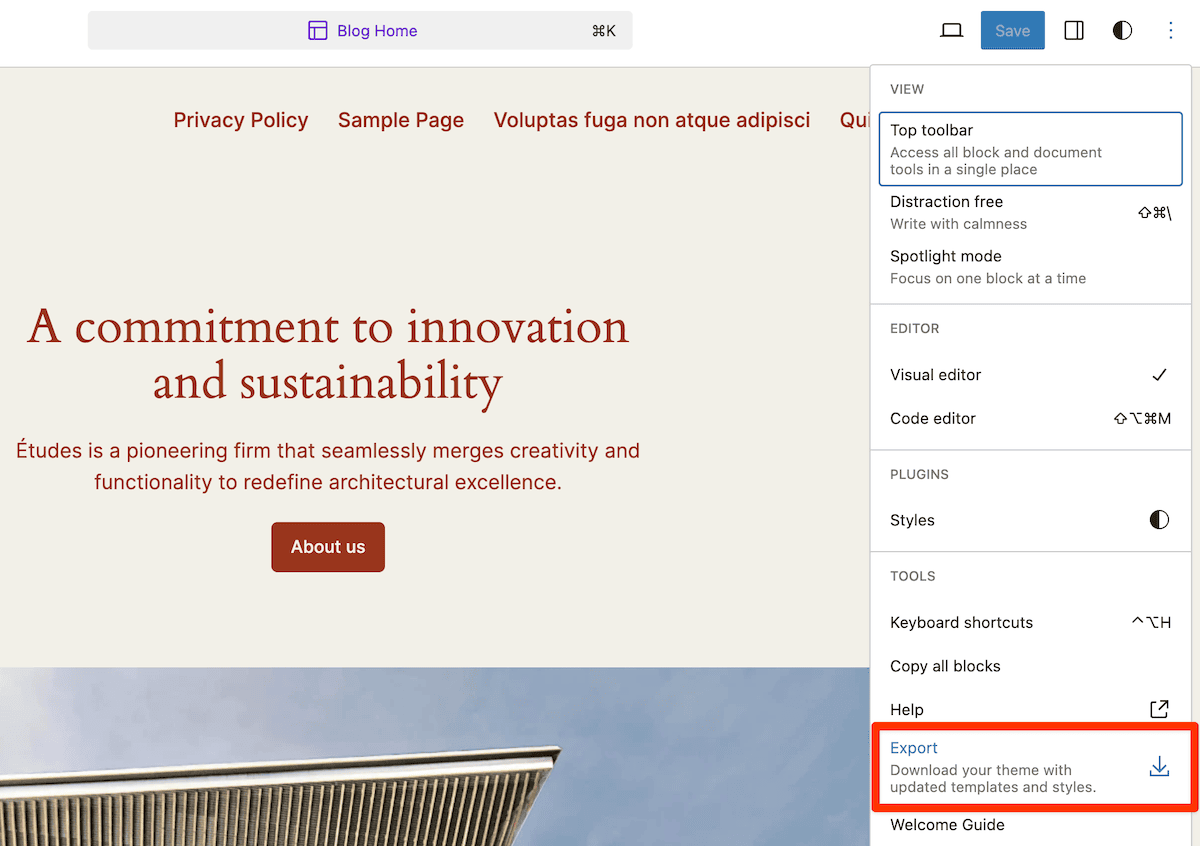
This will give you a ZIP file of your theme, and if you need to import it, you can do so using the WordPress Importer plugin.
The Search icon on the site editor screens and the search bar in the Block Editor toolbar gives you access to the WordPress Command Palette or Command Center. If you use coding editors, you’ll understand how this works. It’s a way to get to almost anywhere within the Site Editor using a contextual search query and even run commands:
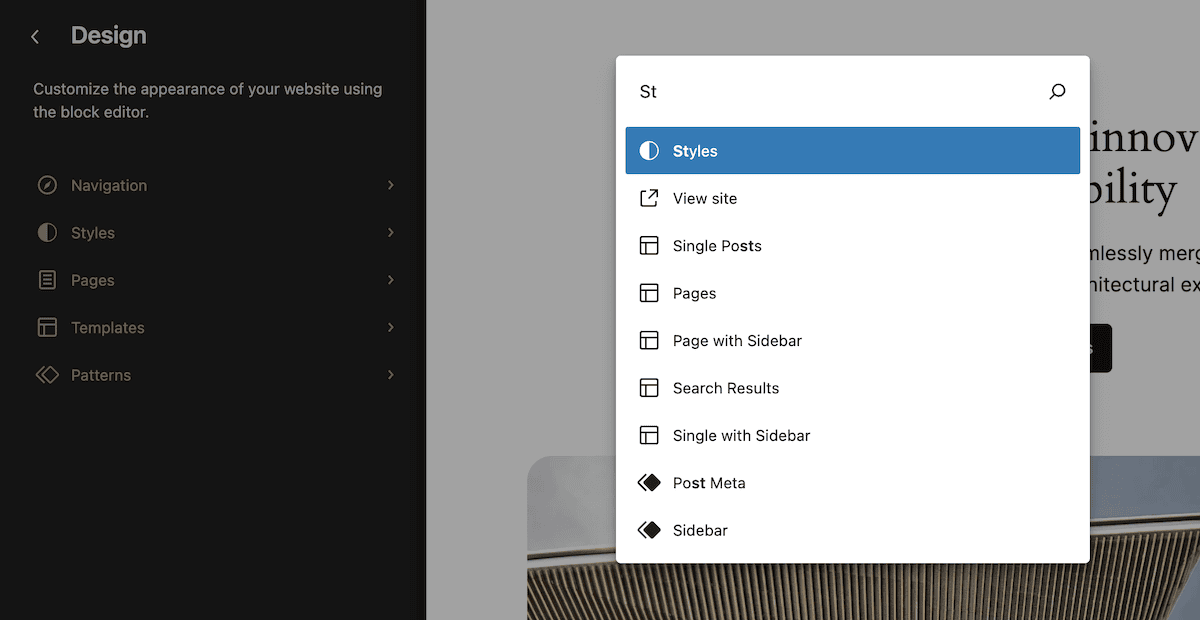
Using this can speed up your development and reduce the number of keyboard and mouse actions you need to take. You can add, delete, and edit all manner of site elements from here, along with toggling different views, and working with patterns.
For more on this topic, check out our article on how to customize the WordPress Command Palette.
Summary
WordPress full site editing represents the current way to design your site without code. It’s a significant step up from the previous content editing iterations, giving you a comprehensive set of options to play with.
We like how flexible it is: typical site owners won’t have to touch a line of code and can work in the Site Editor screens. Developers have access to the theme.json file, which we’ll cover in a future article. Regardless, right now we have the pinnacle of creating a WordPress website to your exact specifications.
Do you want to start using WordPress full site editing for your WordPress projects? Let us know your thoughts in the comments section below!


