
You know that saying about how the best time to plant a tree was twenty years ago and the second-best time is now?
It’s the same with email marketing. The best time to start building your list was the moment you had the idea for your business. The second best time is now. In fact, back in 2017 DMA discovered that the average return for each £1 (~$1.28) spent on email marketing was £32.28 (~$41.28), which is an incredible return on investment.
But that’s easier said than done. The number of email marketing software options out there can make your head spin. Which one should you go with?
Why Use Mailchimp:
Mailchimp is one of the most famous and used email marketing software in the world. Founded in 2001 by Ben Chestnut and Dan Kurzius, Mailchimp has now more than 20 million users and its valued $4.2 billion. Here’s why it’s a good starting point for beginners:
- It’s easy to use
- It has all the necessary features
- It’s reliable
- It’s free to start with
- It’s developed by an established business and committed founders
Today we are going to take a look at how to use Mailchimp, one of the most popular email marketing tools out there, and show you how you can use it to start building your email list today.
What is Mailchimp?
Mailchimp is an email marketing company that was founded by Ben Chestnut and Dan Kurzius in 2001.
Initially, it was just a side project meant to help Ben and Dan’s web design agency clients build email lists, and it remained such for the first six years of its existence, bringing in just a few thousand dollars a month.
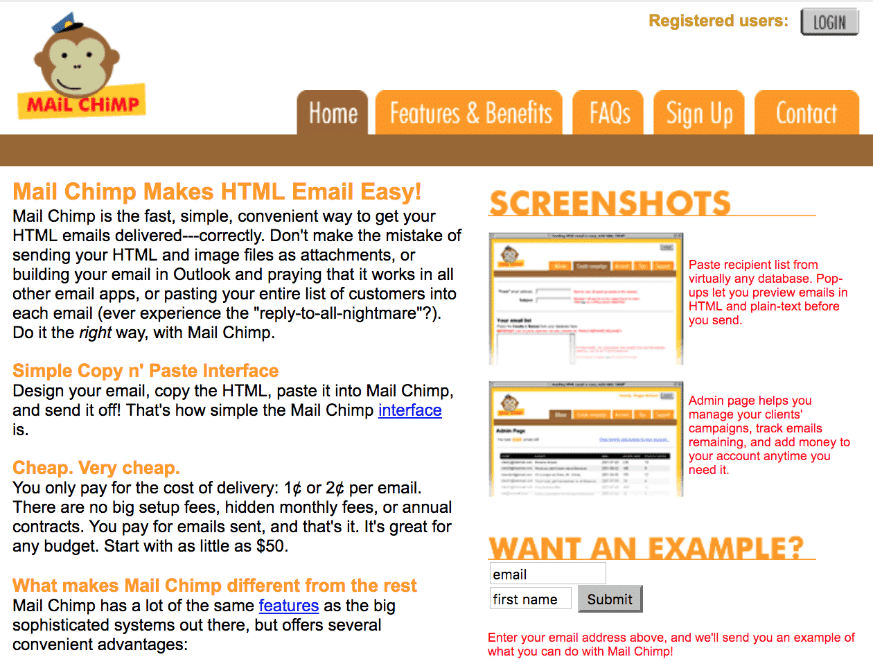
However, in 2007 Ben and Dan realized that their hearts weren’t in the web design agency business anymore, and decided to focus on Mailchimp full-time.
(Suggested reading: Your Guide to Starting and Running a Successful WordPress Agency).
They didn’t take any outside investment and financed the business growth by reinvesting its profits back into it.
Since then, Mailchimp has become one of the most popular and well-known email marketing software out there with recent changes that are turning it into a fully-fledged Marketing platform.
According to Forbes, in 2018 it had 20 million users, generated over $600 million in revenue, and was valued at $4.2 billion.
The co-founders remain committed to the business and have no intention to sell:
“Go public? Not worth the headache!” Chestnut says. Sell? The founders look incredulous.
“To this day, it’s just a funny feeling that we can help” explains Kurzius. Chestnut chimes in: “I want people to see that the past 17 years were just a warm-up.”
Pros and Cons of Mailchimp
What is the best email marketing software on the market today?
It’s impossible to answer this question. It all depends on the needs of your business. So what you really need to ask is: “Which email marketing software is the best for me?”
MailChimp, just like any other tool, has its pros and cons and works better for some people than for others. If you’re curious, we use and love Mailchimp at Kinsta.
Pros of Mailchimp
Established Business and Committed Founders
Going with a fledgling startup is always a risk because it might fold at any moment.
There’s something called Lindy Effect. It is a theory that says that the future life expectancy of a non-perishable thing is proportional to its current age. So, for example, if a company has been in business for one year, you can expect it to be in business for one more year, but if a company has been in business for 18 years like Mailchimp, you can expect it to stay in business for another 18 years.
This is an important consideration because an email marketing software provider going bust would disrupt your email marketing efforts which might cost you a lot of money in lost revenue.
Easy to Use, Has All the Necessary Features, Is Reliable
18 years in business also means that Mailchimp has a polished product.
Sure, software is always work in progress, but they have had the time to work out the user interface (though some would argue that there’s a lot of space for improvement there since learning how to use Mailchimp can take some effort), add necessary features, and ensure deliverability.
Free to start with
If you are just starting out, the chances are that the money is already tight, and paying $30+ monthly subscription fee to email your three subscribers might seem ludicrous.
However, with MailChimp, you don’t have to pay anything until you reach 2,000 email subscribers, at which point you are probably making enough money from your list to justify the expense of upgrading to a premium plan.
Cons of Mailchimp
It’s a Generic Email Marketing Software
Mailchimp’s target audience appears to be anyone and everyone who wants to build an email list.
And they are doing the whole casting a wide net thing really well. It doesn’t matter whether you are a hobbyist, an online creator, or an ecommerce entrepreneur, Mailchimp has got you covered.
However, serving such a broad target audience means that while it is an okay solution, it is not necessarily the best solution for your niche.
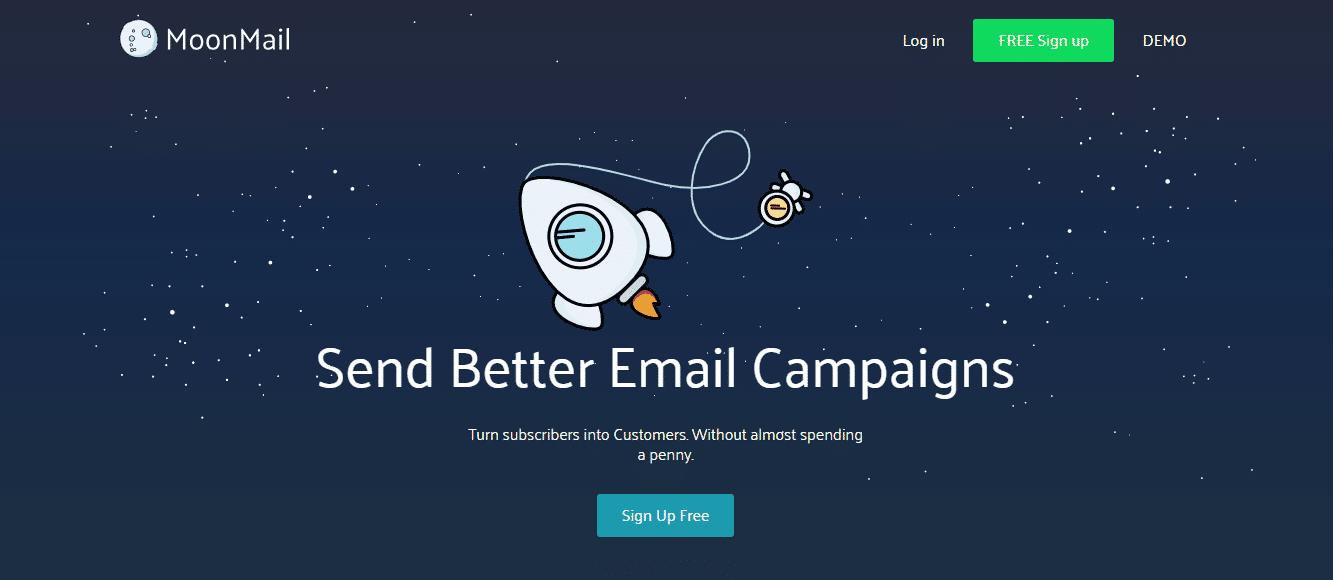
For example, if you are a hobbyist that only needs the most basic email marketing functionality, then MoonMail might be a better option.
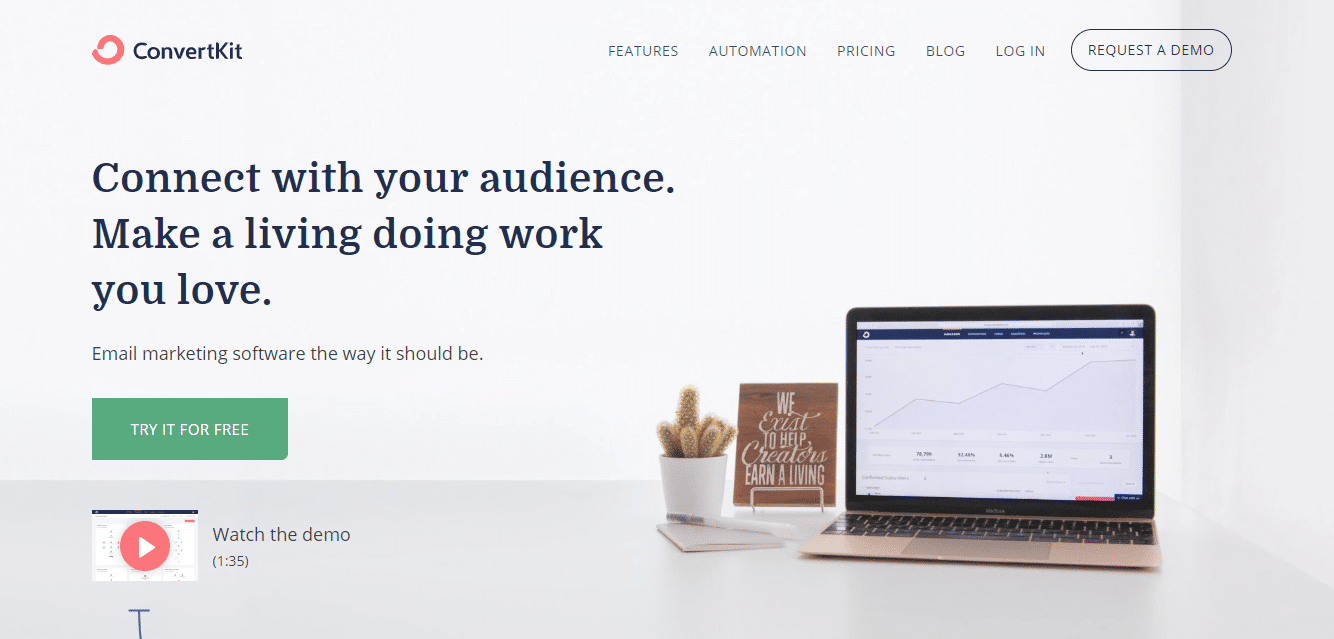
Meanwhile, if you are an online creator, then ConvertKit was built with you in mind, and their mission is to help creators earn a living online.
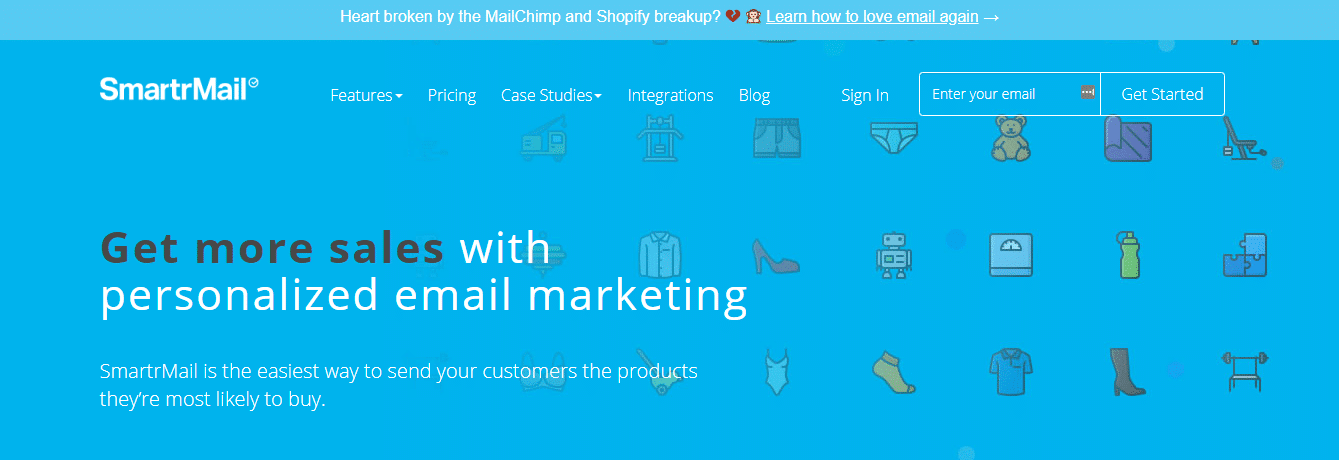
And if you have an ecommerce business, then you might want to check out SmartrMail or Drip:
So you need to see whether it makes sense to go with Mailchimp when there are niche options available.
While You Can Start for Free with Mailchimp, It Can Get Expensive as Your List Grows
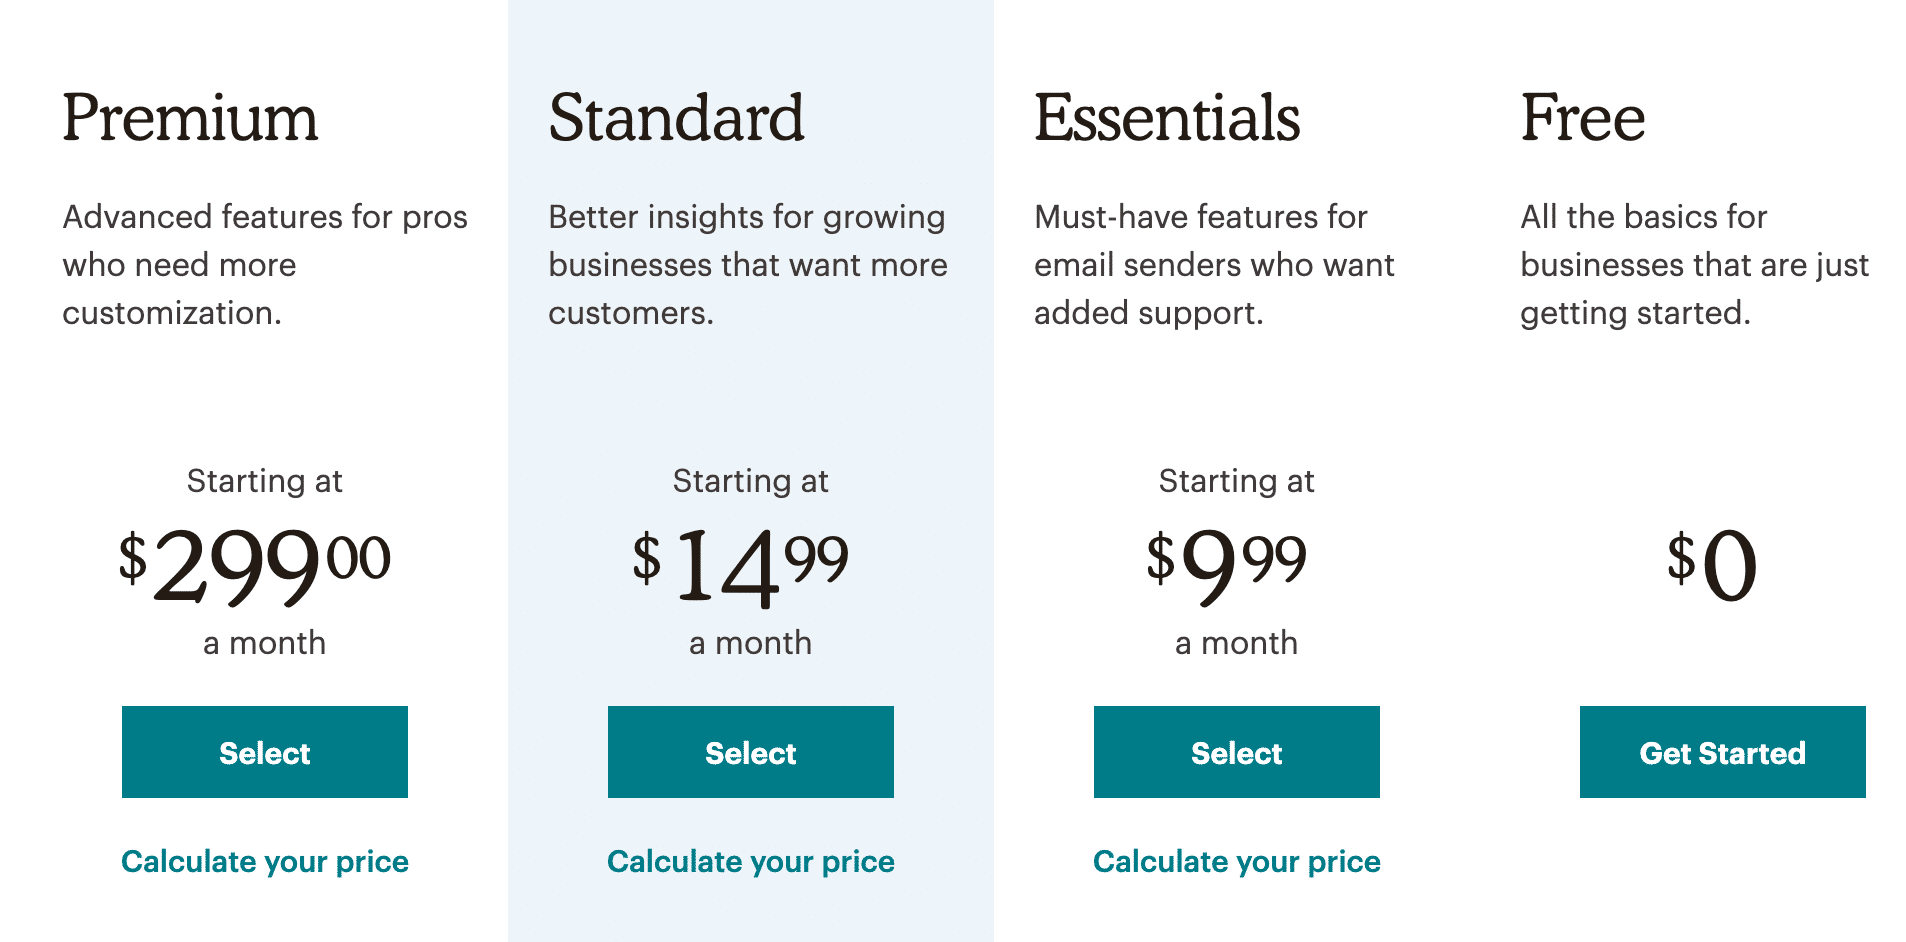
Mailchimp is free up to 2,000 subscribers, but how much does it cost after that?
You can use the cost calculator on their pricing page to work out how much you’d have to pay once you reach a specific number of subscribers.
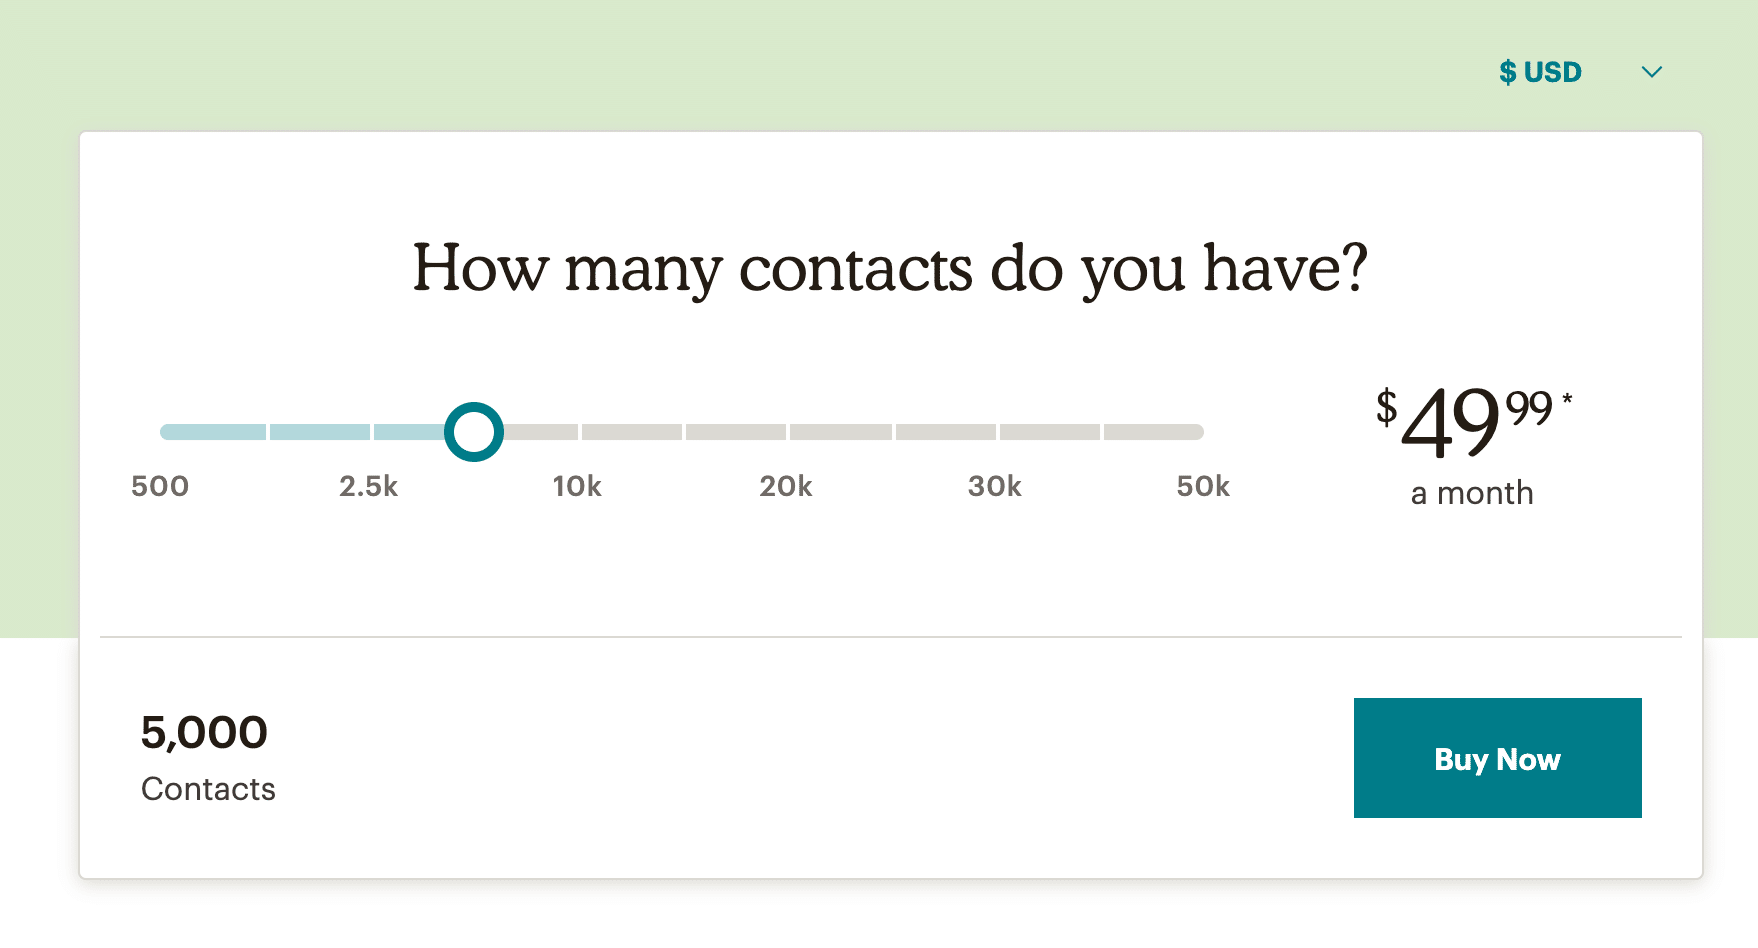
Mailchimp has drawn criticism over their pricing which some people consider to be unfair.
For example, the bootstrapping star Pieter Levels switched from Mailchimp to SendGrind in 2017:
Switched from 🐒 @MailChimp to 🐳 @sendgrid and I recommend them to everybody!
— @levelsio (@levelsio) November 12, 2017
His main reason for switching was that Mailchimp was charging him $250/month which he called “predatory”:
5 mins, yes I think MailChimp's pricing is predatory. $250/m to store my email subscribers, say what?
— @levelsio (@levelsio) November 13, 2017
However, to be fair to Mailchimp, their pricing isn’t that outrageous when compared to some of their competitors but it’s still something to keep in mind if the price is an issue to you.
Burning Question: Should You Use Mailchimp?
It depends.
If you have an established business and have money to invest in email marketing, then it probably makes more sense to go with one of the niche options on the market.
However, if you are just starting out, then Mailchimp is the most affordable option (at least in the short term) and a great way to learn the ropes of email marketing.
Moreover, the reality is that you should have started an email list the moment you had your business idea and now you are way behind schedule.
So, if you find yourself stuck in analysis paralysis, endlessly comparing various options without ever picking one, then it might be best to just go with Mailchimp.
You can always switch to another email marketing software provider later down the road (switching is a headache, but it’s doable).
What matters now is that you start building your email list. You can check out here 22 Mailchimp alternatives, including free options as well.
Get Started with Mailchimp
As you will see in this Mailchimp tutorial, getting started with Mailchimp is easy.
Step 1
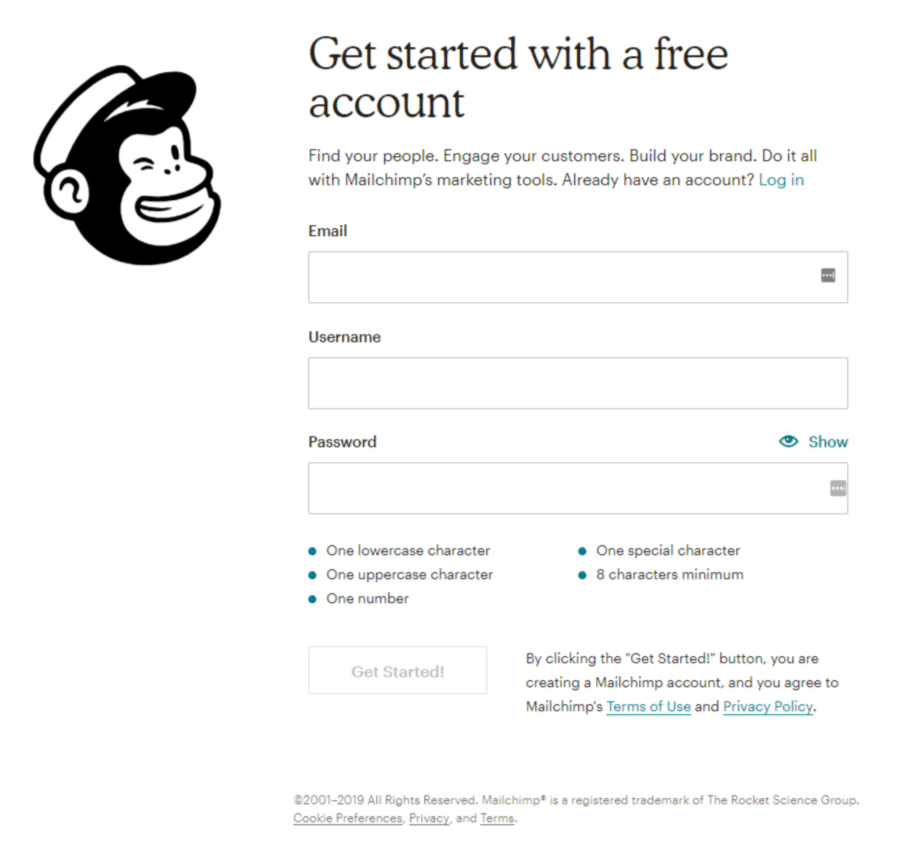
Go to the Mailchimp’s website and click the “Sign Up for Free” button in the top right corner.
You will be directed to a signup form that asks for your email, username, and password.
Step 2
Once you submit the required information, you will get an email from Mailchimp asking you to activate your account by clicking the “Activate Account” button.
Step 3
Then you will have to confirm that you are human by clicking the “I’m Not a Robot” button.
Step 4
You will then be taken through a series of set up screens asking you for more information (name, business details, physical address, etc.).
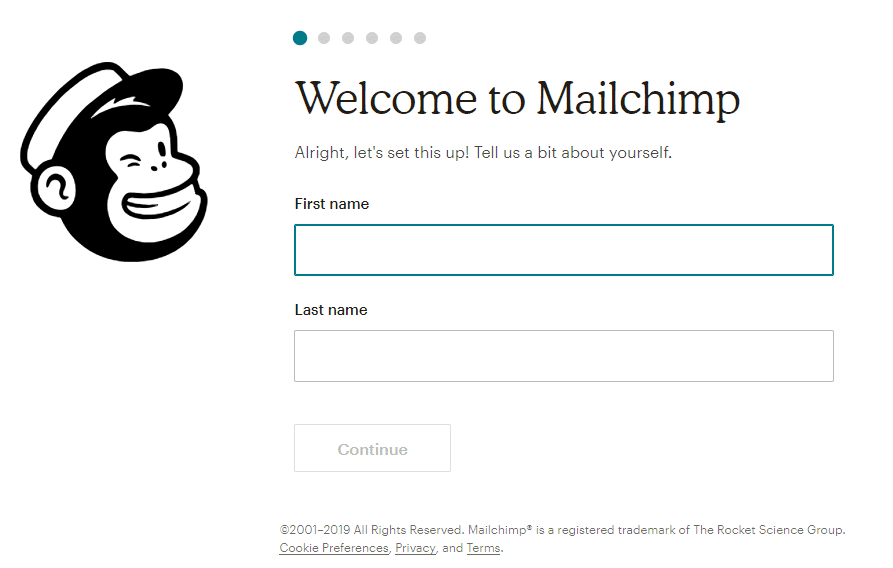
There’s even a “Let’s Find Your Marketing Path” quiz that provides Mailchimp with the information they need to make marketing suggestions in the future.
Once you are done with all that, you will continue the onboarding process by designing your first email.
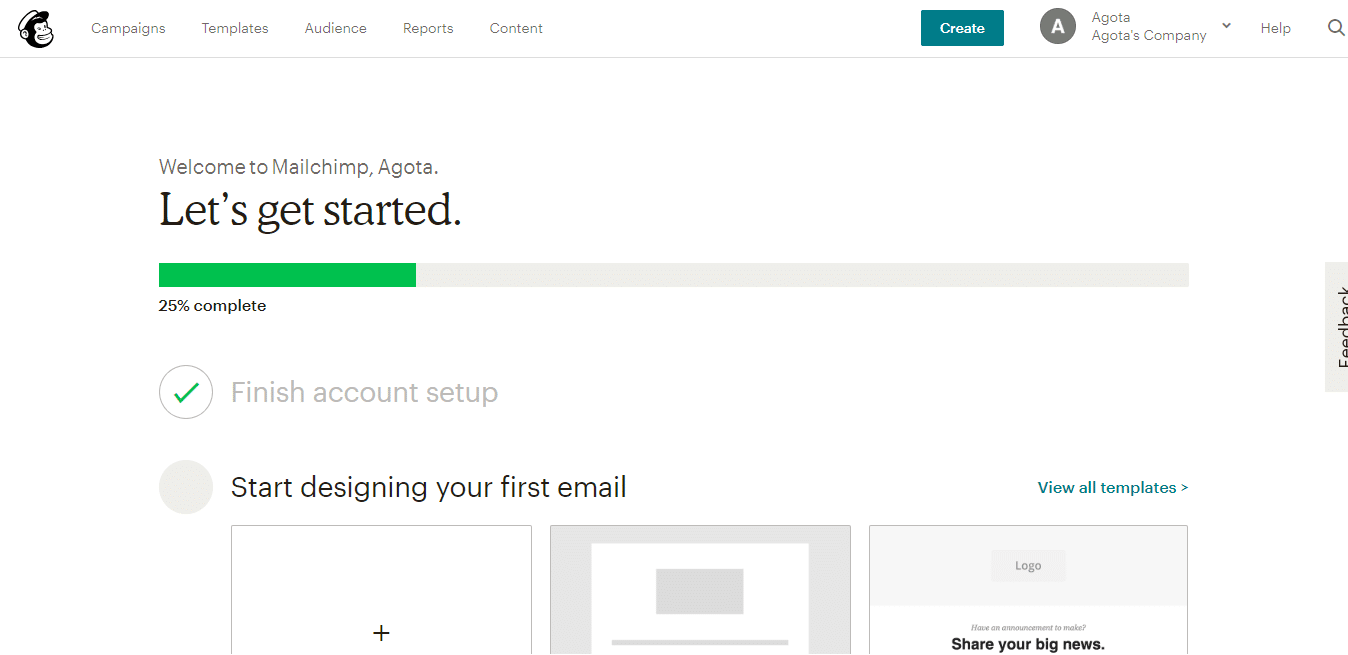
You can then add contacts by either importing them from a file or using a pop-up form to collect subscribers.
Finally, you can send your first email to the people you have just added.
You will then be presented with suggestions on what to do next which include creating a landing page, growing your audience with Facebook and setting up an automated welcome email.
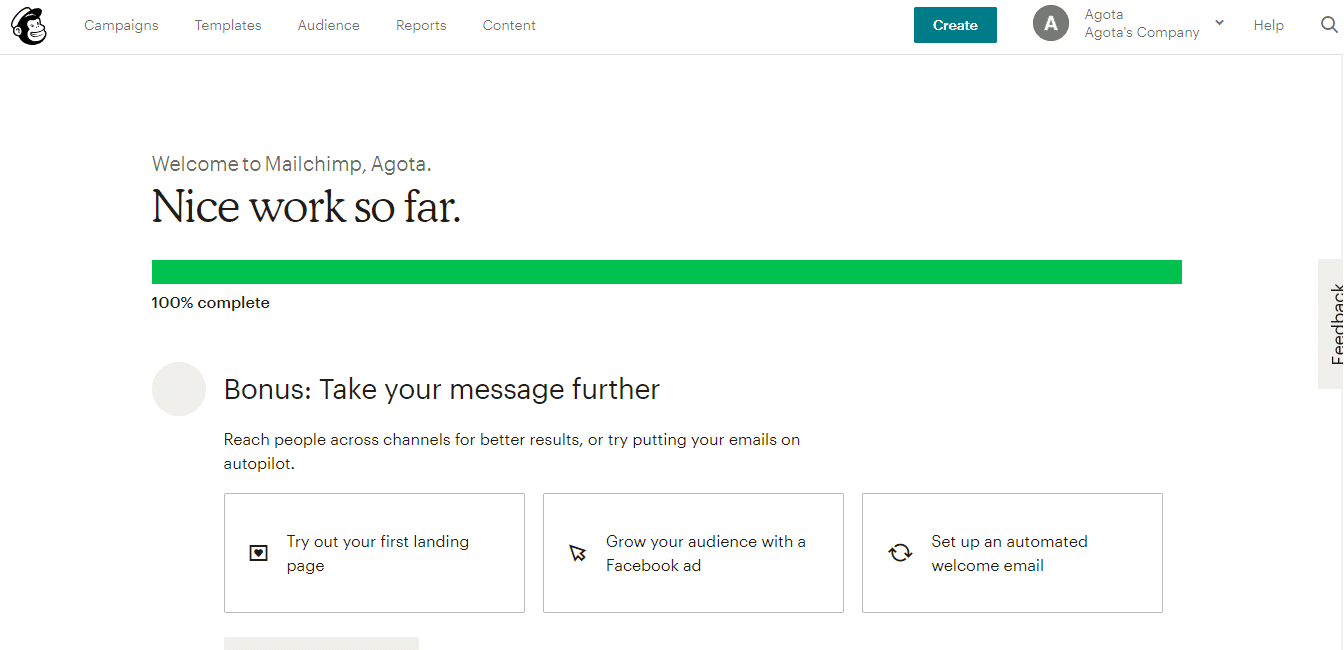
As you can see, the registration and onboarding processes are very straightforward, so you don’t have any excuses to delay signing up any longer. Do it today!
Learn How to Use Merge Tags
Mailchimp is an easy to use tool with pretty intuitive UI. The more you’ll use it, the more familiar you’ll get.
There’s one key thing, though, you need to learn right from the beginning because they’re super important: it’s Merge Tags.
Merge tags are dynamic tokens you can feature and use when it comes to crafting your emails to make them look and sound more personal. These tokens pull data from your audience and your account (audience merge tags and system merge tags).
Let me give you a few quick examples:
*|FNAME|* is a merge tag that stands for your recipient’s first name. So, given that you’re collecting your subscribers’ name, if you start your emails with “Hey *|FNAME|*“, all of them will receive a nice email with their name on. That’s a nice touch, isn’t it?
Here’s another one: let’s say you need to send an email confirmation to someone but before that, you need them to double-check whether their email address in your records is the correct one (btw, follow these tips if you need to find anyone’s email address). In this case, you might want to use *|EMAIL|* to pull your recipient’s email address in your own message. It should look something like this:
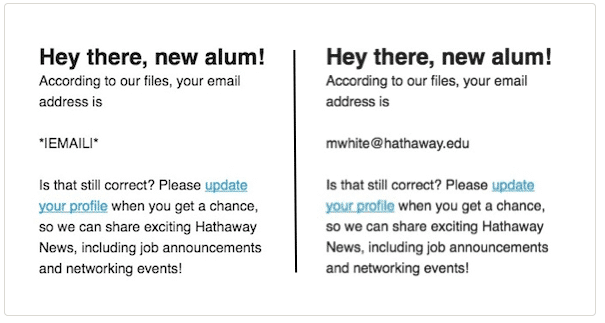
There are plenty of Merge Tags you could take advantage of, many of which will show their full potential when it comes to building automation sequences and segmenting your audience.
Set up Your Email Autoresponder Series
An email autoresponder series is a sequence of emails that automatically triggers based on a set of rules and criteria you set up.
Some of the most common uses of automated sequences are:
- Welcome email to freshly subscribed users
- Educational series to get new onboarded users learn more about your product/service
- Content upgrade email series for users who requested to receive an ebook, a cheatsheet, or any other freebie from your site
- Automated responses for prospects who requested a quote from you
The list could go on for days. The important aspect to understand here is that implementing some solid email automation can really help you manage and improve your business outcome.
You can do it in Mailchimp by pressing the “Set up an automated welcome email” tab.
You will then be presented with three options: “Welcome message”, ”Onboarding series”, “Education series”.
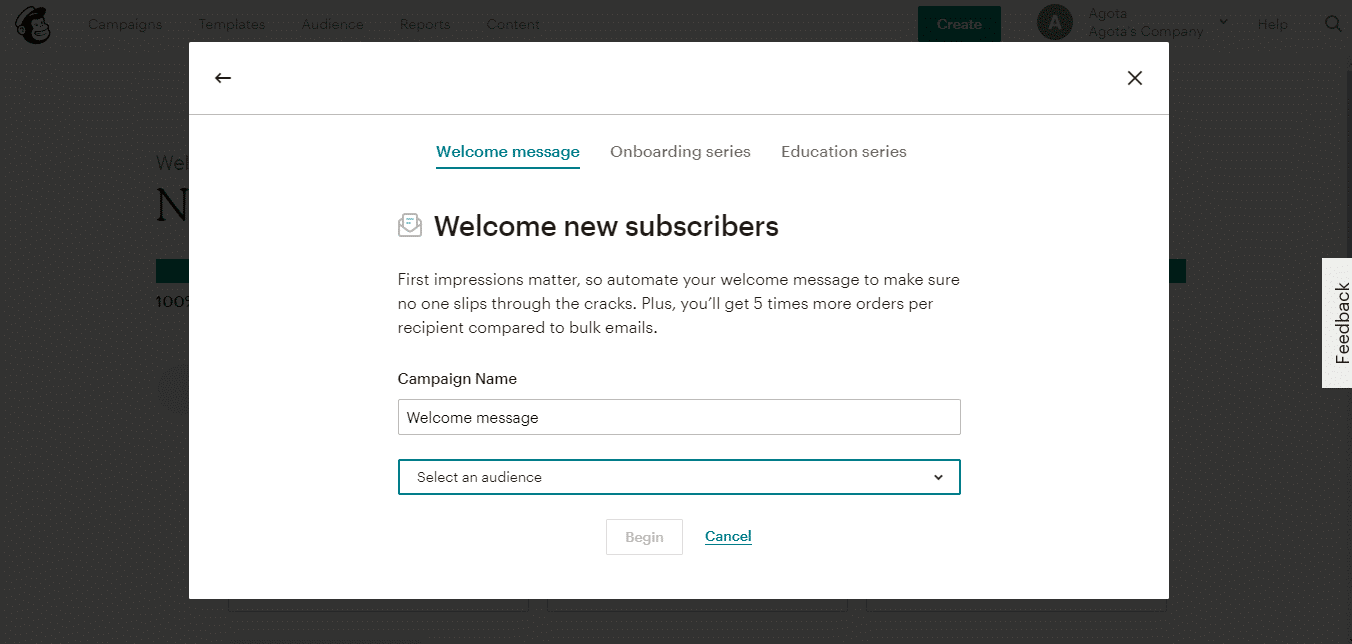
You can start with the welcome message. Once you click the “Begin” button, you will be taken to a page where you can edit your welcome email (including what is shown in the “From” field, the subject line, and the content and design of the email). You can also send a test message to yourself to be sure that it’s exactly the way you want it to be.
Online marketing expert Derek Halpern recommends asking a question along the “What are you struggling with right now?” lines in the welcome email.
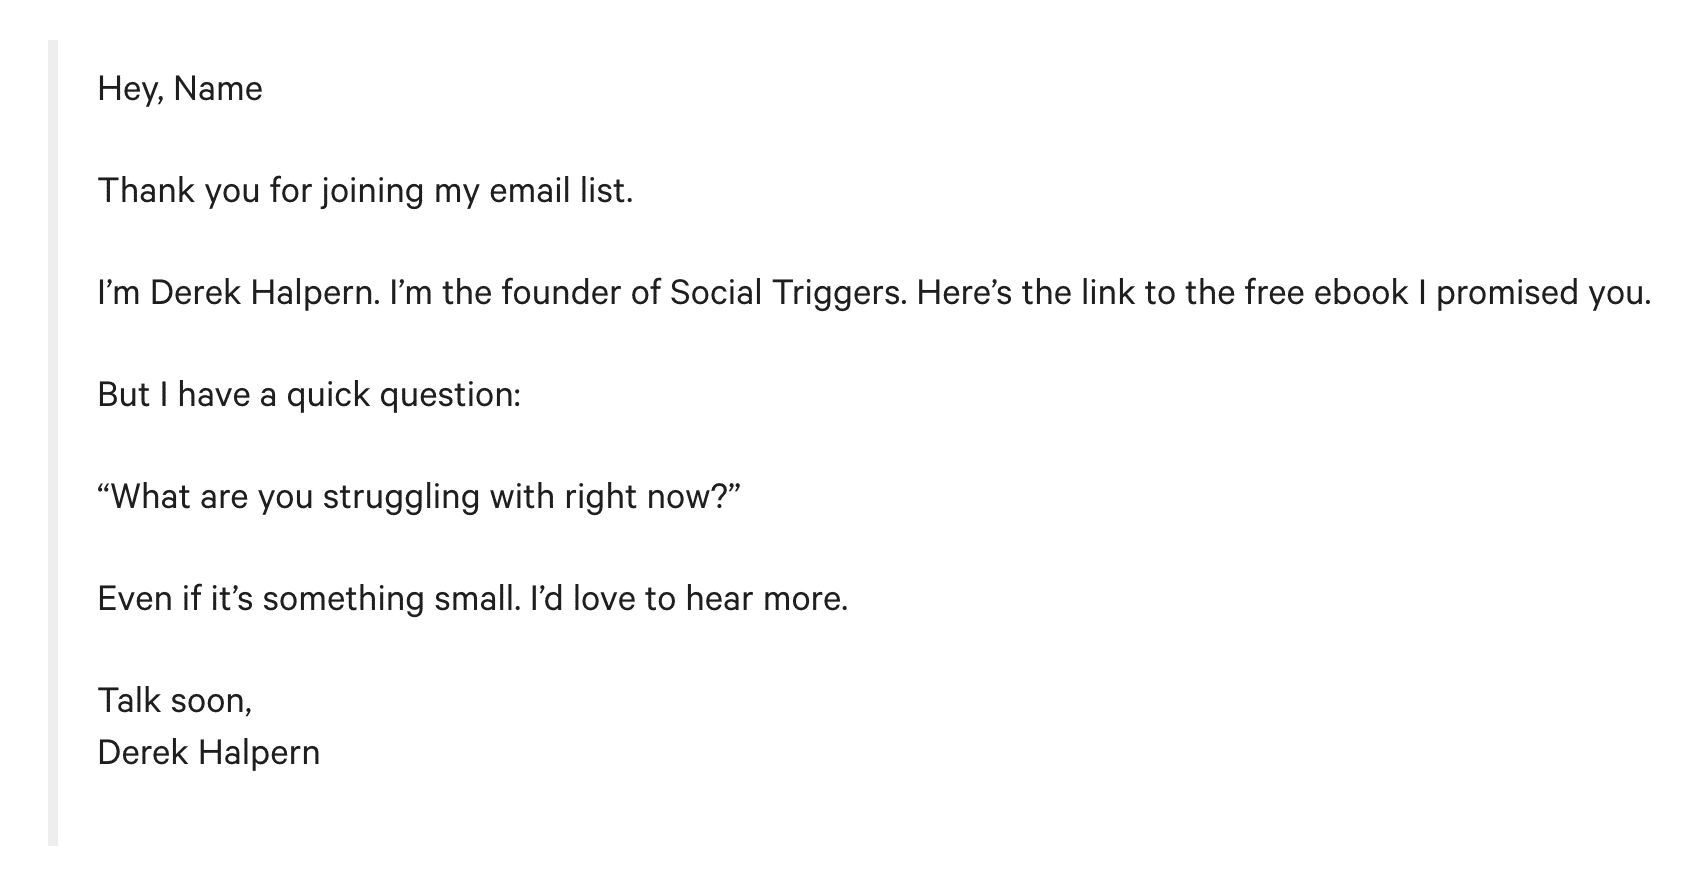
“Why do I ask this question? Well, when people tell me what they’re struggling with, it helps me figure out what content I can create for them (often times I turn this content into free giveaways to build my email list)” explains Derek. “It also helps me understand who my customer is a little bit better”.
Consider doing the same in your welcome email. It doesn’t cost you anything but helps with the market research.
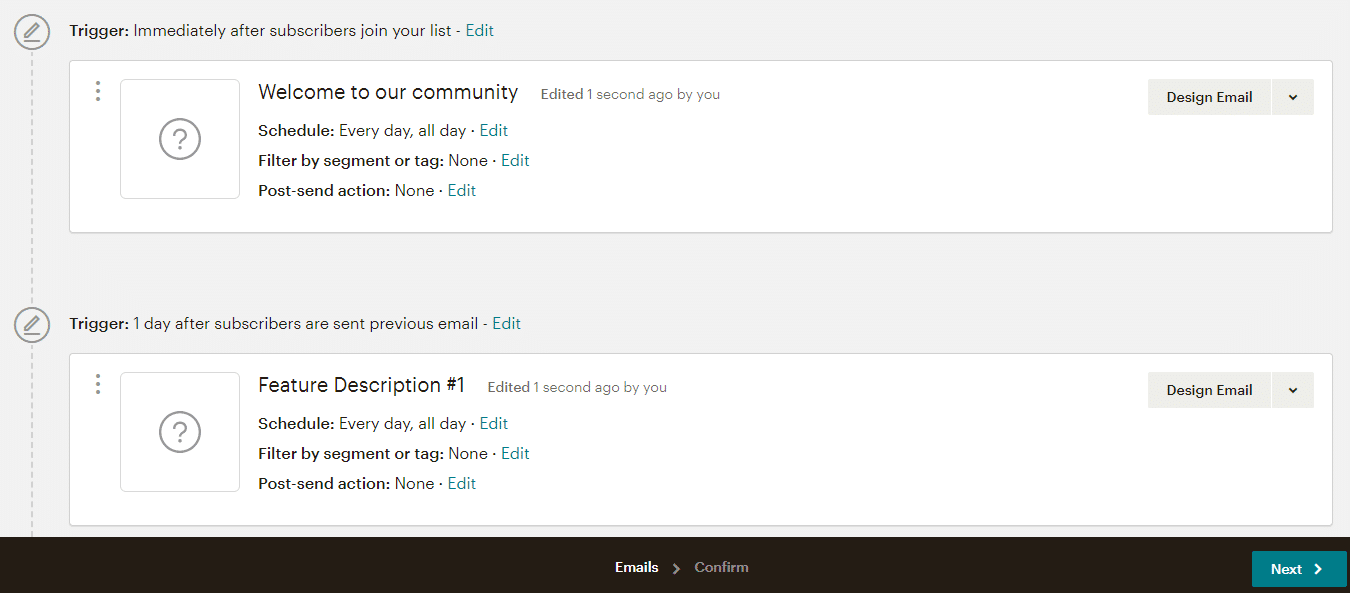
Once you are done with the welcome email, it’s time to set up either onboarding (if the new subscriber is also a new customer) or educational email series (if the new subscriber just wants to learn more).
You can do that by clicking the “Create” button in the top right corner of the screen, then clicking the “Email” tab, then “Automated” tab, then “Welcome new subscribers” tab, and finally either “Onboarding series” or “Education” series.
Mailchimp helpfully provides a template for the series in case you are at a loss of how to structure it.
All you have to do is fill out the template emails with your own content, add more emails to the series, and set up your triggers based on:
- Tags
- Subscriber Activity
- Ecommerce/Purchase activity
- Date based
- API call
- Custom settings
Automated email series is an essential element of email marketing because it allows you to engage with your subscribers, users, leads, and build a relationship with them on autopilot.
Don’t forget that you will be judged based on these emails so make an effort to leave a good impression by providing as much value in them as you possibly can.
Take Your Automation to the Next Level with Segments and Triggers
Segments are sub-sets of your contacts that satisfy one or more criteria like similar audience data, purchase activity, subscription status, interests, activity. Think of this simple example based on a customer’s purchase history:
- leads = 0 items purchased in the past 30 days
- new customers = 1 item purchased in the past 30 days
- VIP customers = 2+ items purchased in the past 30 days
- inactive cusomters = 1 item purchased in the past 90 days
You can use up to five conditions with Mailchimp’s free plan.
Now, with the right combination of automated series, triggers, and segments ready, it’s time to start thinking about how to collect more email addresses!
Create a Mailchimp Opt-In Form
An opt-in form is a form that asks for a name and email address (you can ask for more details but it’s not recommended) and then adds a person to the email list once they submit that information (suggested reading: How to Embed a Google Form on Your WordPress Site).
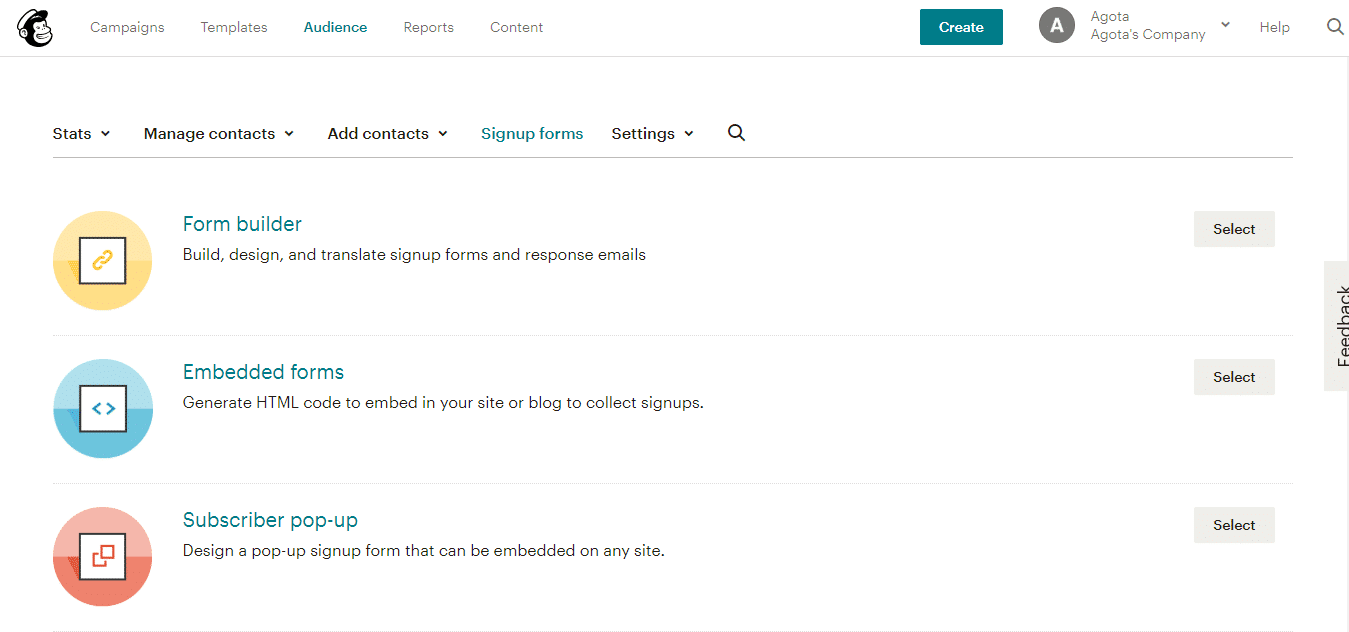
You can create one with Mailchimp’s form builder.
Click on the “Audience” tab and then choose “Signup Forms” in the drop-down menu on the left side of the screen.
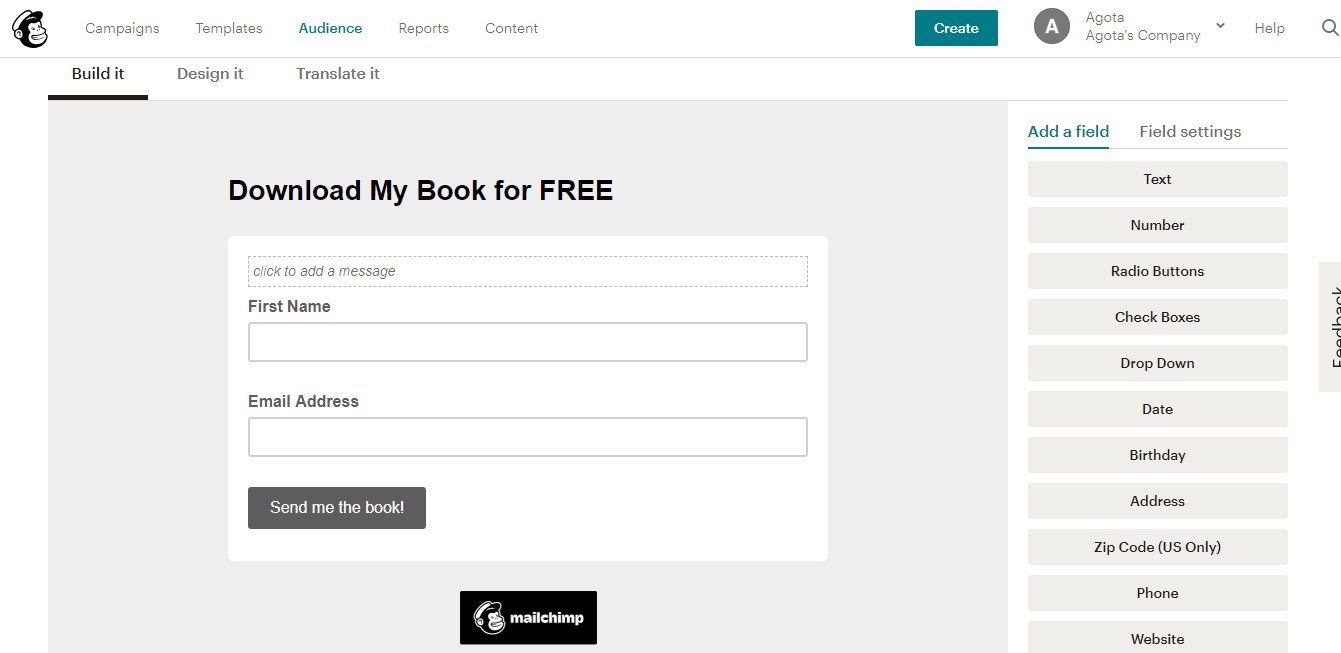
Now, the default form isn’t that great, and there are three things you should do immediately:
- Change the default headline to a user-centric headline that tells the potential subscriber what they will get if they opt-in.
- Remove all form fields except for “Name” and “Email Address” (yes, there are cases in which you might need more fields, but this is the standard practice).
- Change the default button copy to a user-centric copy that tells the potential subscriber what is going to happen once they click it (you can do that by clicking on “Translate” and then changing the text in the “Subscribe” field).
You can then use a link Mailchimp provides to direct people to your sign up form (like this).
Now, if you want to embed a form on your website, you need to click on the “Audience” tab, choose “Signup Forms” from the drop-down menu on the left side, and then click on “Embedded Forms”.
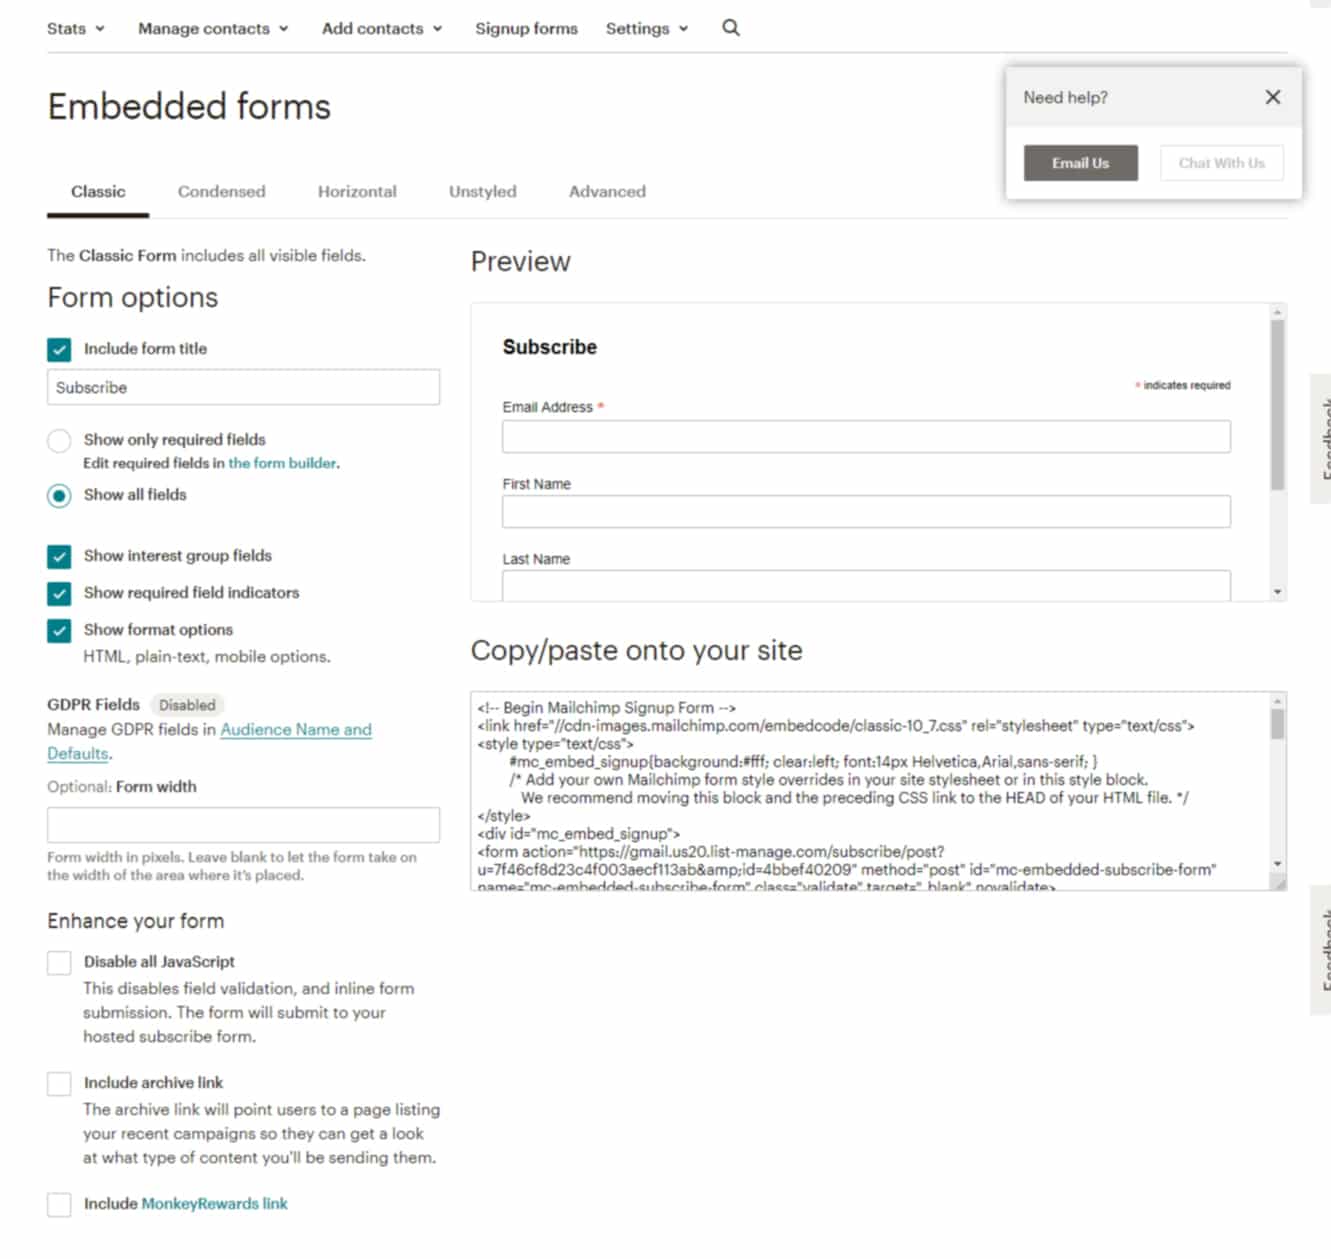
This is a bit more technical because once you are done editing the form you will have to copy/paste the code to your website.
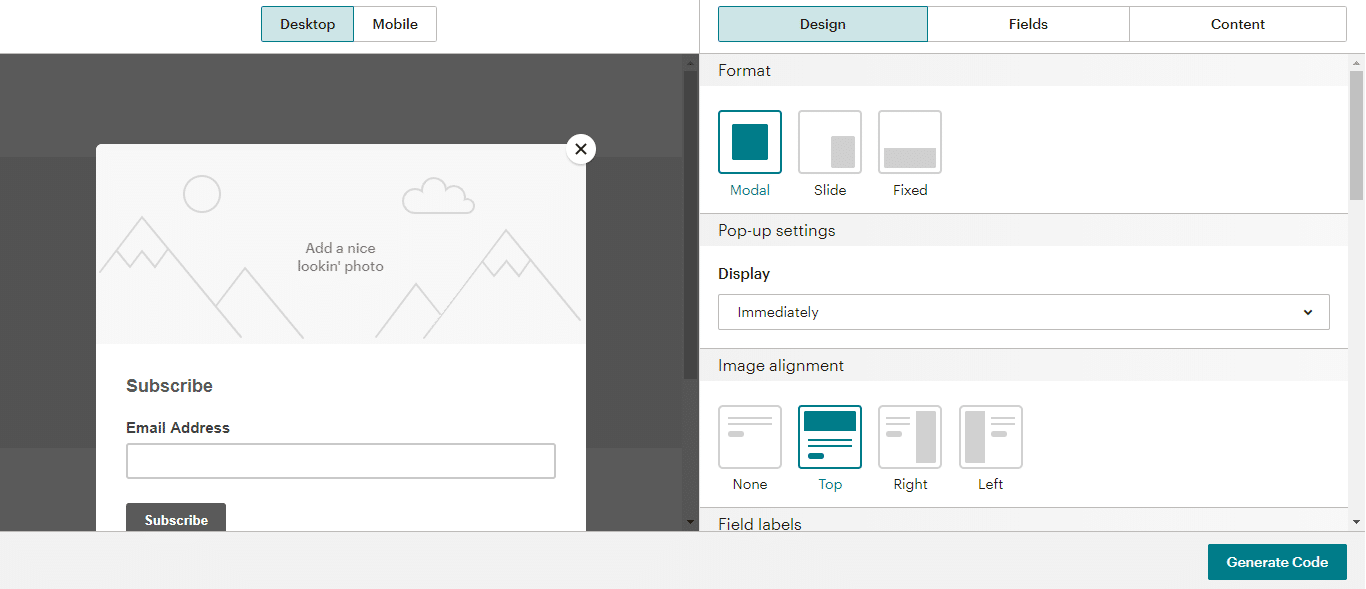
Finally, you can also create a pop-up form by clicking “Audience”, then choosing “Signup forms” from the drop-down menu, then choosing “Subscriber” pop-up.
You’ll then be able to design your form and generate the code that you can copy/paste to your website.
Here’s the main thing you need to know when it comes to opt-in forms: don’t be shy about using them.
Create a simple opt-in form that you can then link to immediately and start sharing it with people you think might be interested in your content so that you could collect email addresses on autopilot and start building a sizable email list.
Sending Broadcast Emails with Mailchimp
A broadcast email is an email you send out once (say, an announcement about a feature launch).
You can do that in Mailchimp by clicking the “Create” button in the upper right corner of the screen, then the “Email” tab, then choosing “Regular” tab, and clicking the “Begin” button.
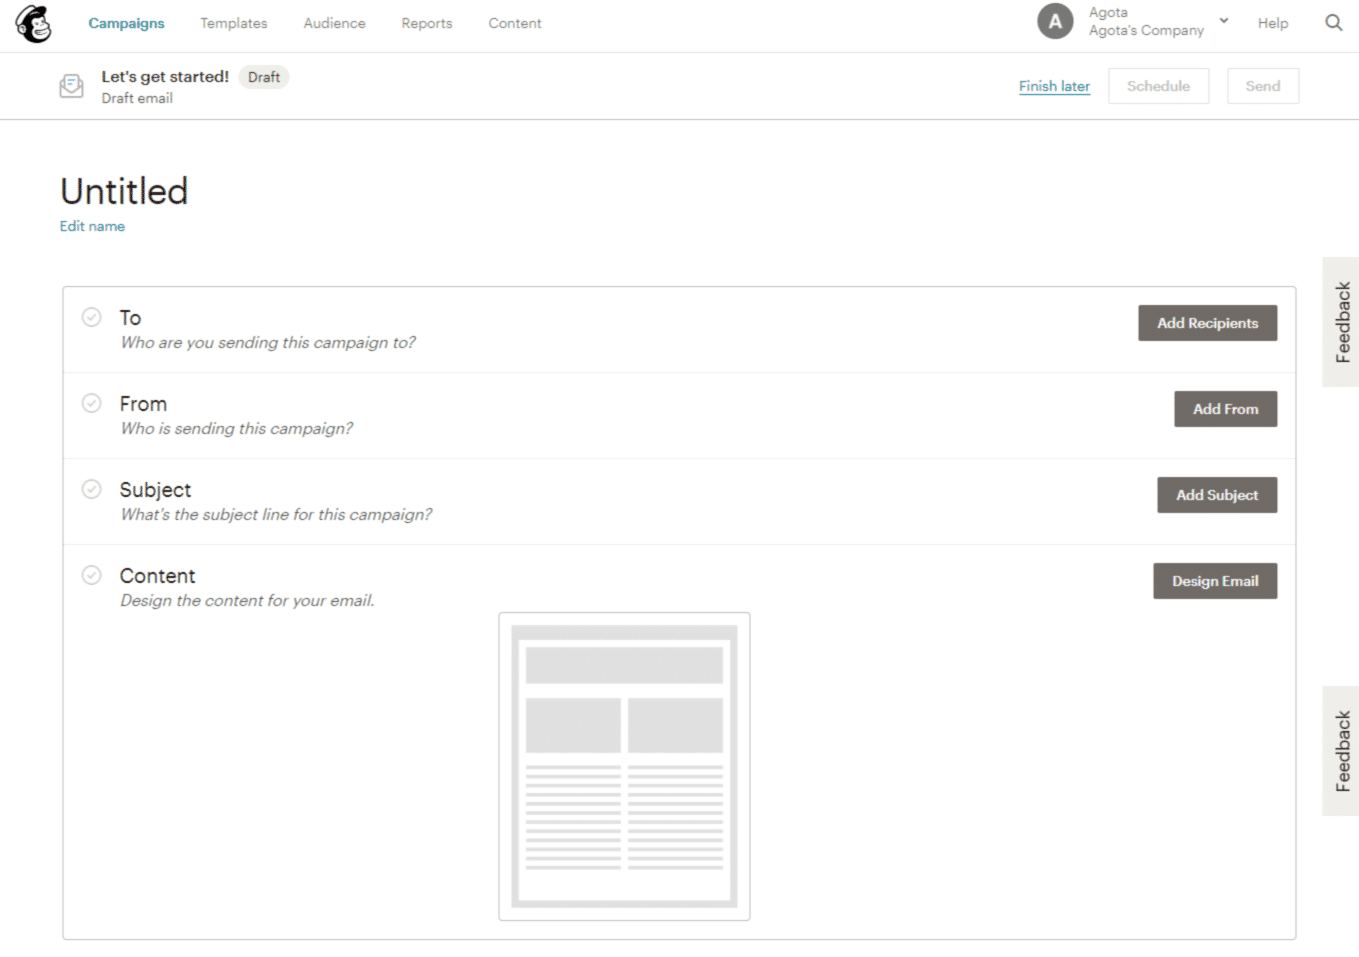
Then, simply choose the audience you want to send this email to, edit the “From” line, the “Subject” line and the body of the email, and press “Send” (or “Schedule” if you want it to go out later).
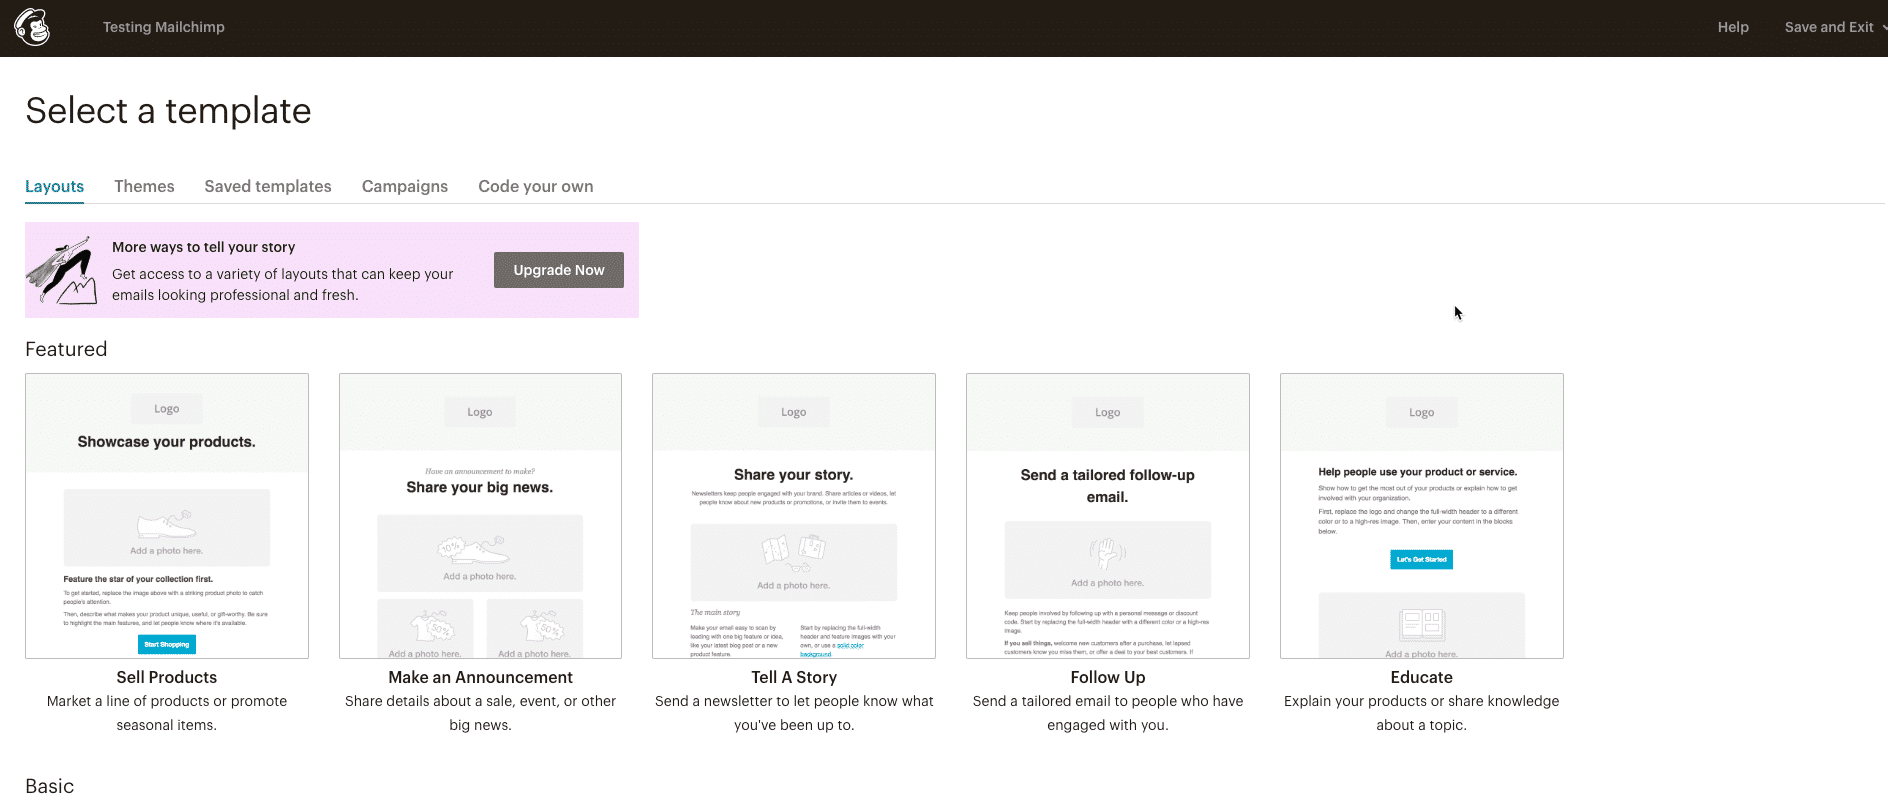
When it comes to the “Content” part, you’ll be asked to pick a layout and a design from those already available or upload your custom one:
The layout will set the basic structure of your email so that you can feature your content the way you like:
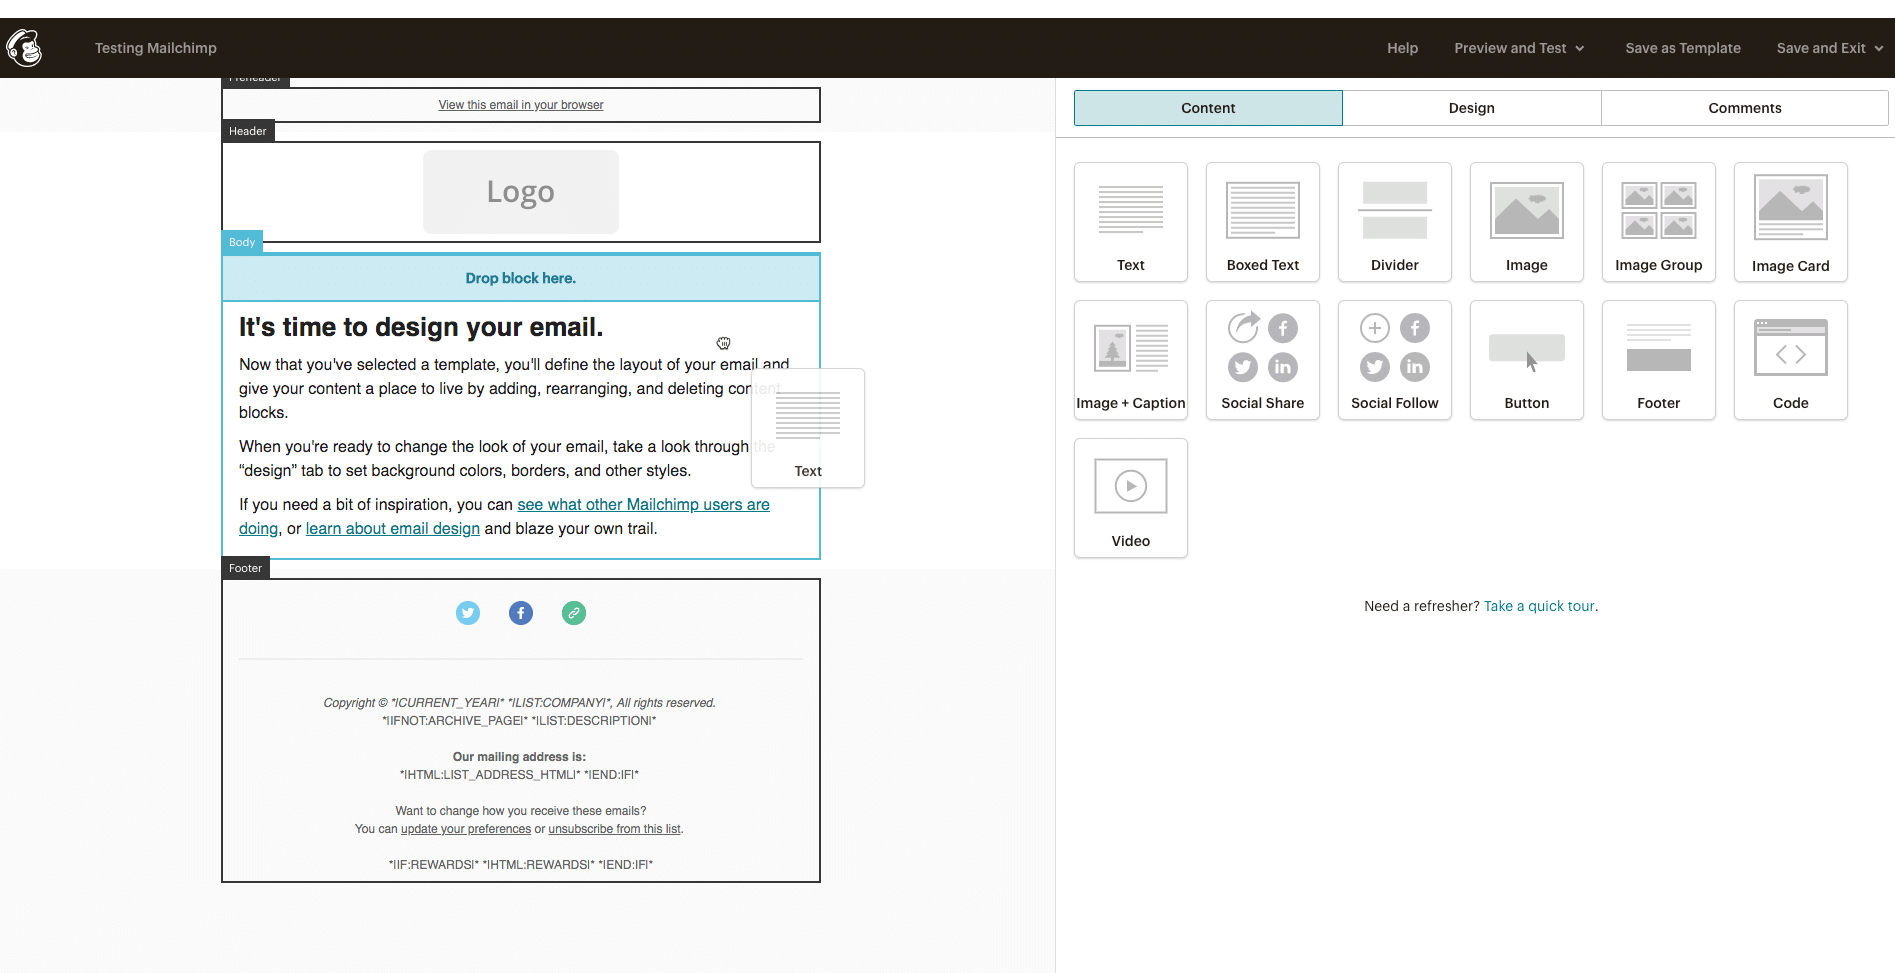
All layouts are fully customizable with a drag and drop interface that allows you to move elements around and place them wherever you prefer:
For those who need a fresh start with pre-made themes, you can browse through them by clicking the “Themes” tab at the top:

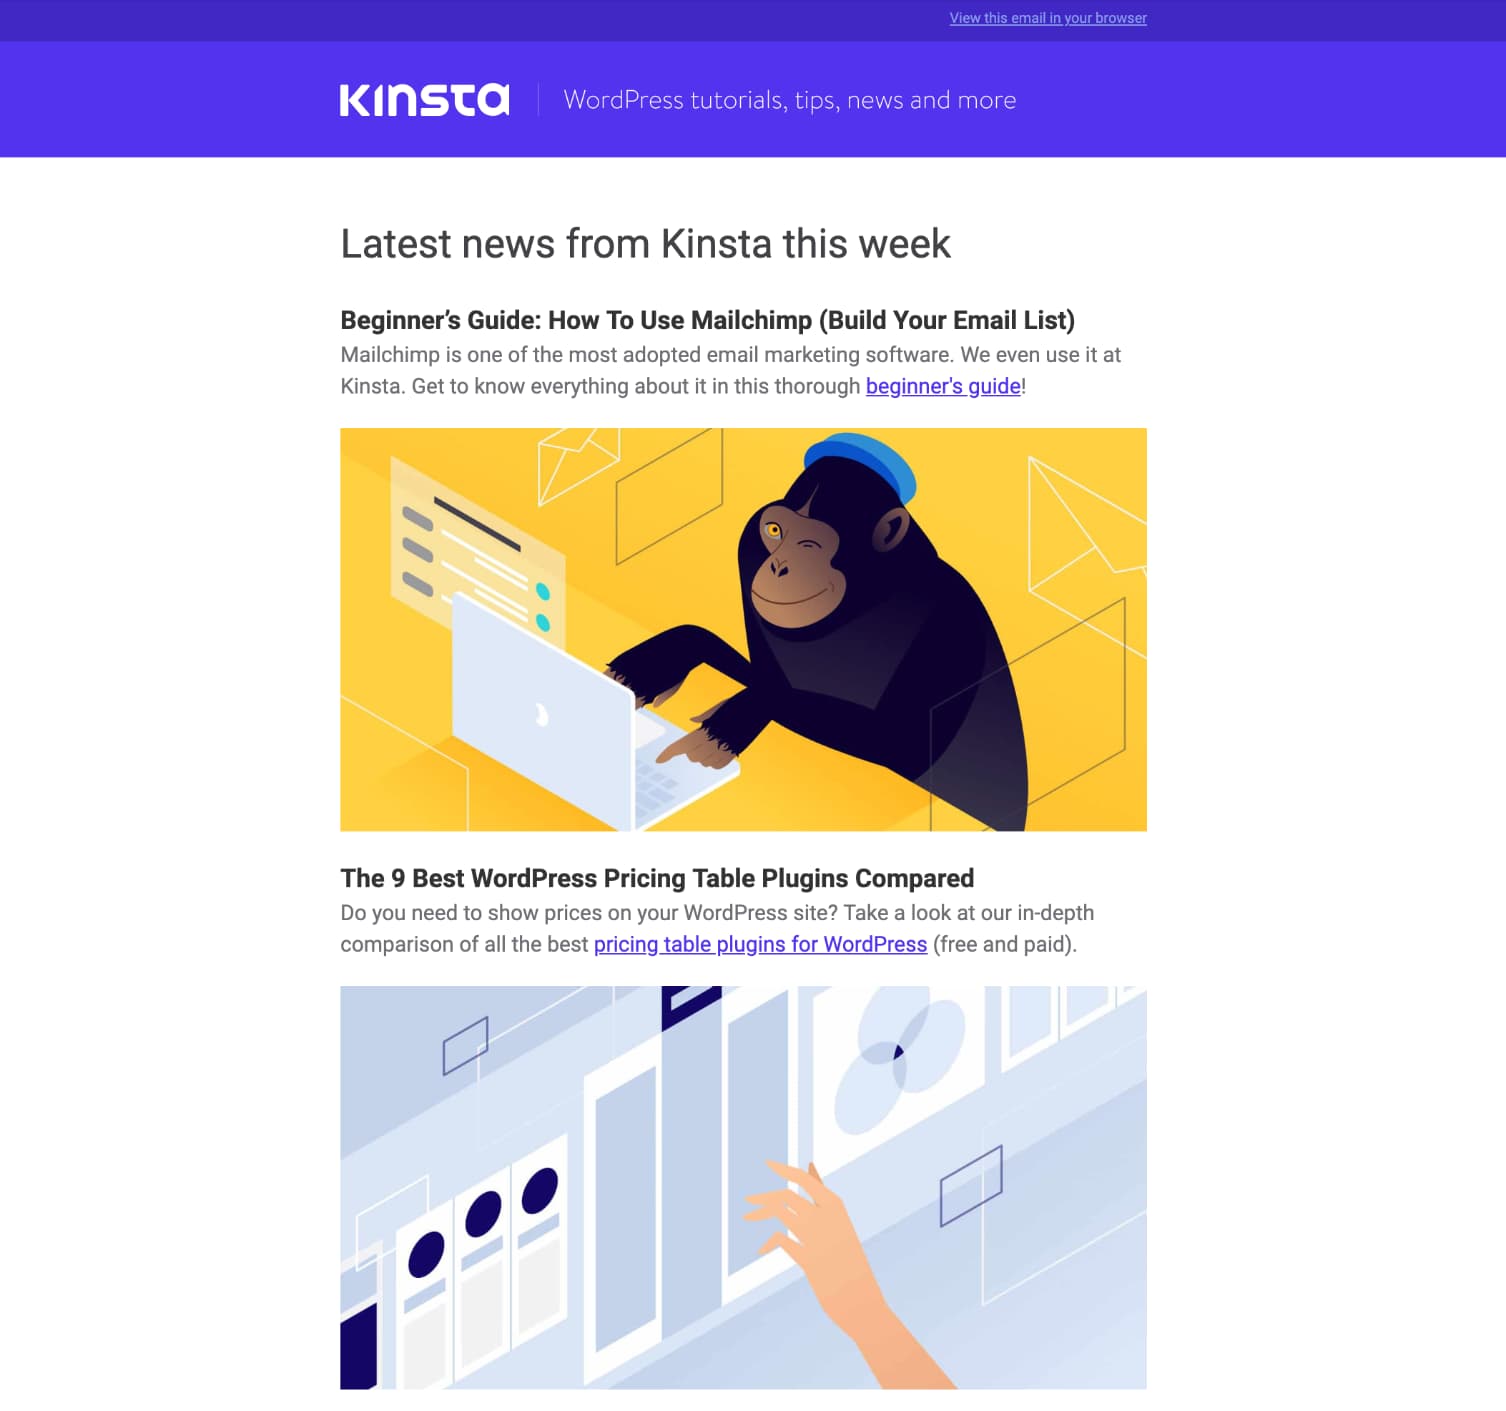
Our newsletter at Kinsta was easily built using Mailchimp’s easy drag and drop interface. There wasn’t any coding involved. Check out a few of our newsletters.
You’re now all set to get in the email marketing game. It’s now time to have a quick look at how to see how your emails are performing and learn to get better results!
Improve Your Email Marketing with Data
Mailchimp allows you to see how your emails and email sequences are performing, along with data related to your audience growth. This functionality is key here as you really need to understand what types of emails do better than others, what’s a good day/time to send out communications, what users are the most engaged with your business, and so on.
To do so, after you’ve sent out at least one email to your subscribers, you should start looking at the _Report_ section in Mailchimp you can find at the top:

Here you’ll find an overview graph showing how your emails’ open rate and click rate stack against the industry average:
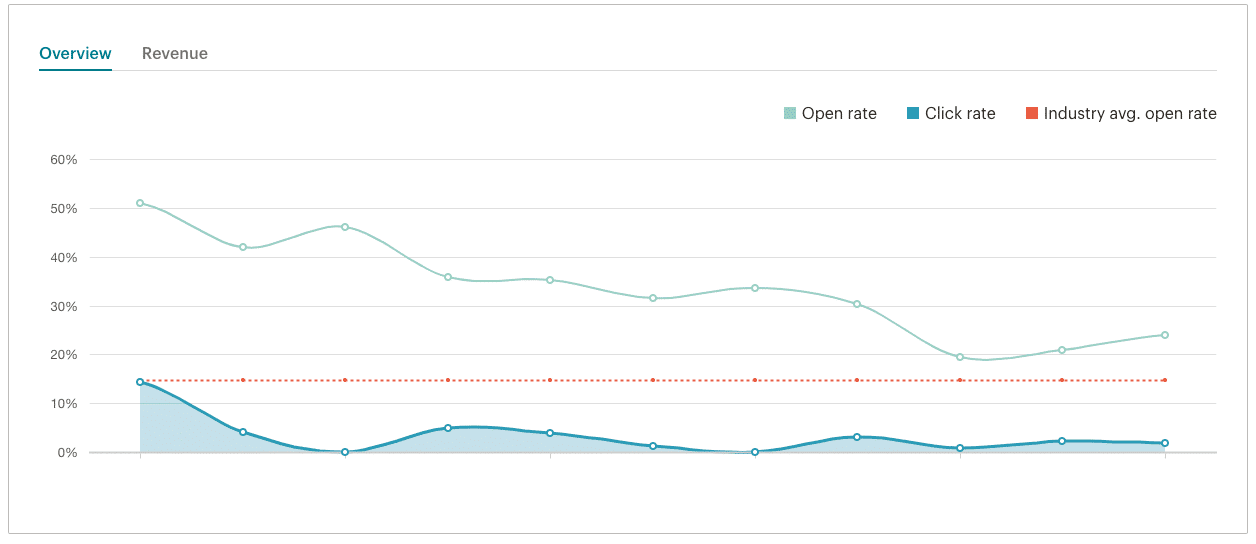
If I’m being honest, this data shown here isn’t the most useful. If you really want to dive deep and see email-specific data, you should scroll down a bit on the same page where you’ll get to see all email campaigns you’ve sent out and click on the “View Report” button on the right:
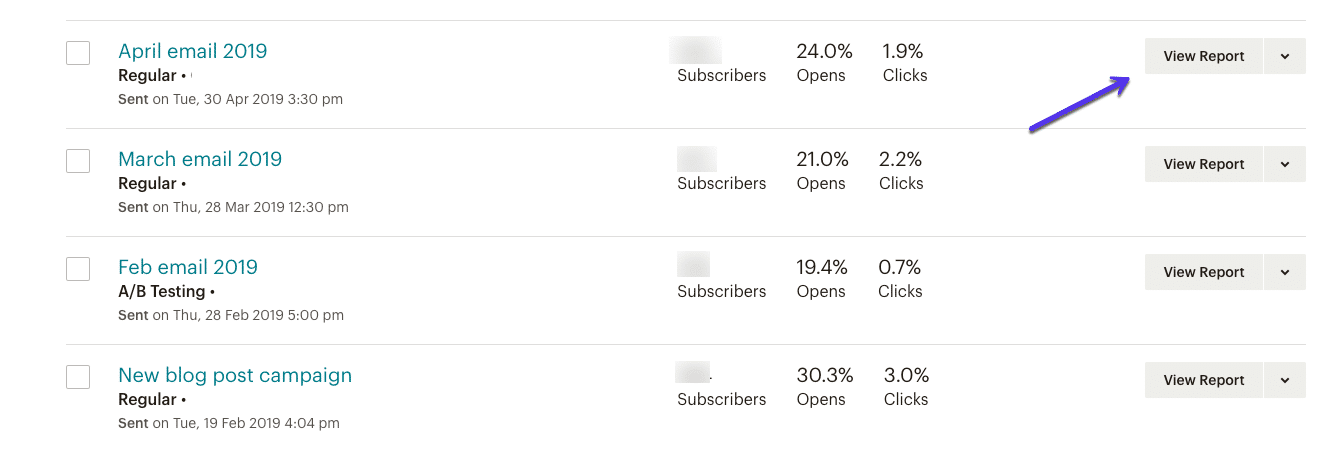
This will bring you to the specific email campaign’s data and will provide you with a more in-depth look at its performance.
What about your automated email sequences?
If you need to check how they’re performing, you’ll need head over to the top Mailchimp menu and click the “Campaign” tab:
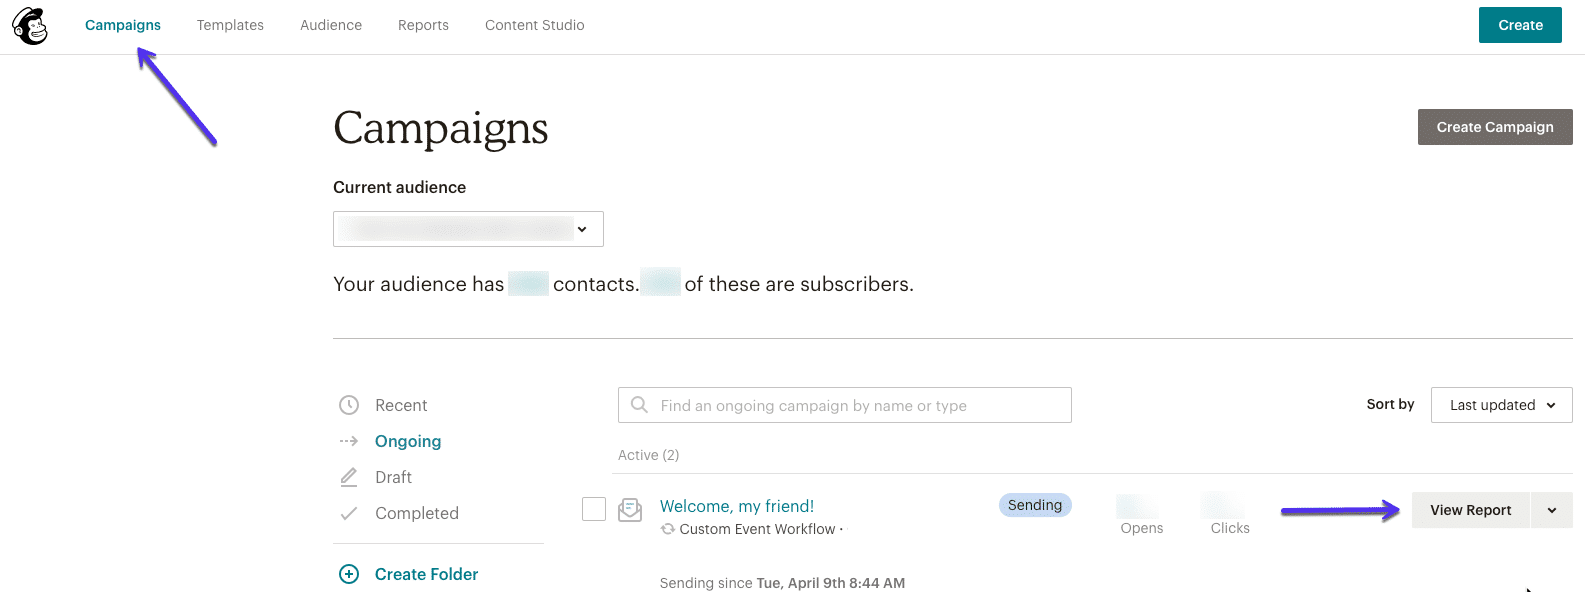
Once there, you need to click on “Ongoing” from the left sidebar to bring up your active campaigns and then hover over the one you want to look at to show the “Report” button, which you should click.
I know, it’s not the smoothest UX path but you’ll get used in a little time.
Now that you know how to create, set up, and check the performance of your email campaigns in Mailchimp, we have some additional tips to help you achieve the best results!
Bonus: How to Get People to Read Your Emails?
It’s important to understand that most people are overwhelmed by the number of emails they get which means that you have to earn your place in someone’s inbox.
You see, it’s not enough to just get someone to subscribe to your email list, you need to then build a relationship with that person in a way that makes them want to read your messages.
Otherwise, you’ll end up with a bunch of “ghosts” on your email list meaning people who are subscribed but never open your emails.
Now, the most important thing in email marketing is providing value, because there’s no way you can build an engaged email list without doing it.
Each and every email that you send must somehow make the subscriber’s life better. Otherwise, why should they even open them?
Think long and hard about what problems the people on your list are struggling with and how you can help solve them. Then offer those solutions in your emails.
(Asking “What are you struggling with right now?” in your welcome email like Derek Halpern suggested makes this much easier).
However, while content is king, how you present that content matters as well.
You also need to pay attention to subject lines, copy, formatting.
Subject Lines
You know how copywriters are obsessed with headlines? That’s because the headline is how you grab someone’s attention. Mess it up and no one is going to read the actual content.
Well, it’s the same with subject lines, if you fail to grab the subscriber’s attention, your email will simply get lost in the sea of other emails in their inbox.
What you should do is put a lot of thought into your subject lines, and think about how you can make sure that your email stands out among dozens of other emails in a crowded inbox.
Copy
In the world of copywriting, “copy” refers to a text that is meant to sell, whether it’s an ad, an email, a product description, whatever.
What you need to keep in mind when writing your email is that it’s not just a text, it’s copy, because you are trying to get your subscribers to do something (even if it’s just to read your next email).
So study copywriting. Learn how to draw people in, tell a story, and then tie it to the message that you want to convey. You won’t get anywhere if your emails are boring.
Formatting
Let’s keep it real: reading on a screen is a pain.
So don’t make it even more frustrating by sending your subscribers walls of text (hint: no one is going to read them).
Make your emails easy on the eyes by using white space, bold text and bullet points to break up the text.
It doesn’t have to be fancy. It just has to be readable.
For example, take a look this 5-Bullet Friday email from Tim Ferriss:
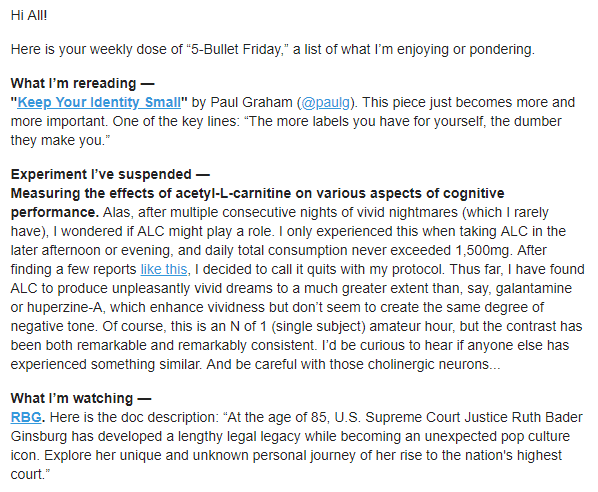
Do you see how the white space, the bold text, and the links make the email easy to read (that monstrous acetyl-L-carnitine paragraph would look better if it were broken into a few shorter ones, though)?
You should go for a similar look in your emails.
Finally, make sure that each email has one clear call-to-action, meaning tell people what you want them to do next. Answer a question? Click on a link? Participate in a survey? Whatever it is, make it clear and ask them to do it.
Keep Your List Clean
No matter what you do, even if you are the best copywriter in the world, you will end up with some “ghosts” on your list.
Again, by “ghost”, I mean people who are subscribed to your email list but never open your emails.
Think about your own inbox. Do you ever get an email from someone you are subscribed to, decide that you aren’t interested enough to read it, and just archive it without opening it? Well, congratulations, you are a ghost as well. We all are.
Rationally, this behavior doesn’t make much sense, because unsubscribing from a list takes less than a minute. So why stay and keep archiving the emails? Because it somehow seems easier to do that than to go through the “hassle” of unsubscribing.
Now, when you are an owner of an email list, it quickly becomes clear that there are three problems with ghosts:
- They feed your vanity. Say, you have a list of 100,000 subscribers, which sounds impressive. But what percentage of them are ghosts? It’s easy to delude yourself into thinking that you are doing much better than you actually are if you allow inactive subscribers to accumulate.
- They distort the statistics. When inactive subscribers make up a significant proportion of your email list, they affect the statistics such as open rates and click-through rates. While they make you overestimate the size of your email list, they also make you underestimate its engagement, because they bring the engagement numbers down. So you might look at your open rates, see that they are below average, and think that there’s something wrong with your subject lines, when in fact you simply have a bunch of people on your list who never open your emails.
- They cost you money. If you are using Mailchimp, then you are paying a monthly subscription fee based on the number of subscribers you have. Ghosts are not a problem when you have a small list, but as it grows all those inactive subscribers start adding up, and might cost you hundreds of dollars per month.
For example, Noah Kagan, the founder of AppSumo and Sumo, wasn’t happy about his $700+ Mailchimp bill and started to look for ways to cut it down.

He managed to reduce it by 47% (down to $375 per month) simply by removing inactive subscribers (which they defined as people who haven’t engaged with any of their emails for the last three months).
“Like many entrepreneurs, we enjoy the vanity of bragging about our email list size” admits Noah.
However, he still made the decision to clean up their main email list, as a result of which they went from 105,000+ subscribers down to 72,000+.
“Your ego will be hurt (…)” says Noah. “But at the end of the day, worry about results not vanity.”
So don’t hesitate to do the same. You can send a sequence of three emails to your inactive subscribers telling them that you are going to unsubscribe them if they don’t confirm that they want to keep receiving your emails (provide a link for them to click on). Then bulk unsubscribe everyone who didn’t do it.
Alternatively, you can simply pull the plug without warning, because it’s unlikely that someone who has not opened your emails in the last three months will be upset about (or even notice) this.
You can do that by clicking on the “Audience” tab, click “View Contacts”, then “New Segment”, then choose “Campaign activity”, “Did not open” and “All campaigns within the last 3 months” from the drop-down menus.
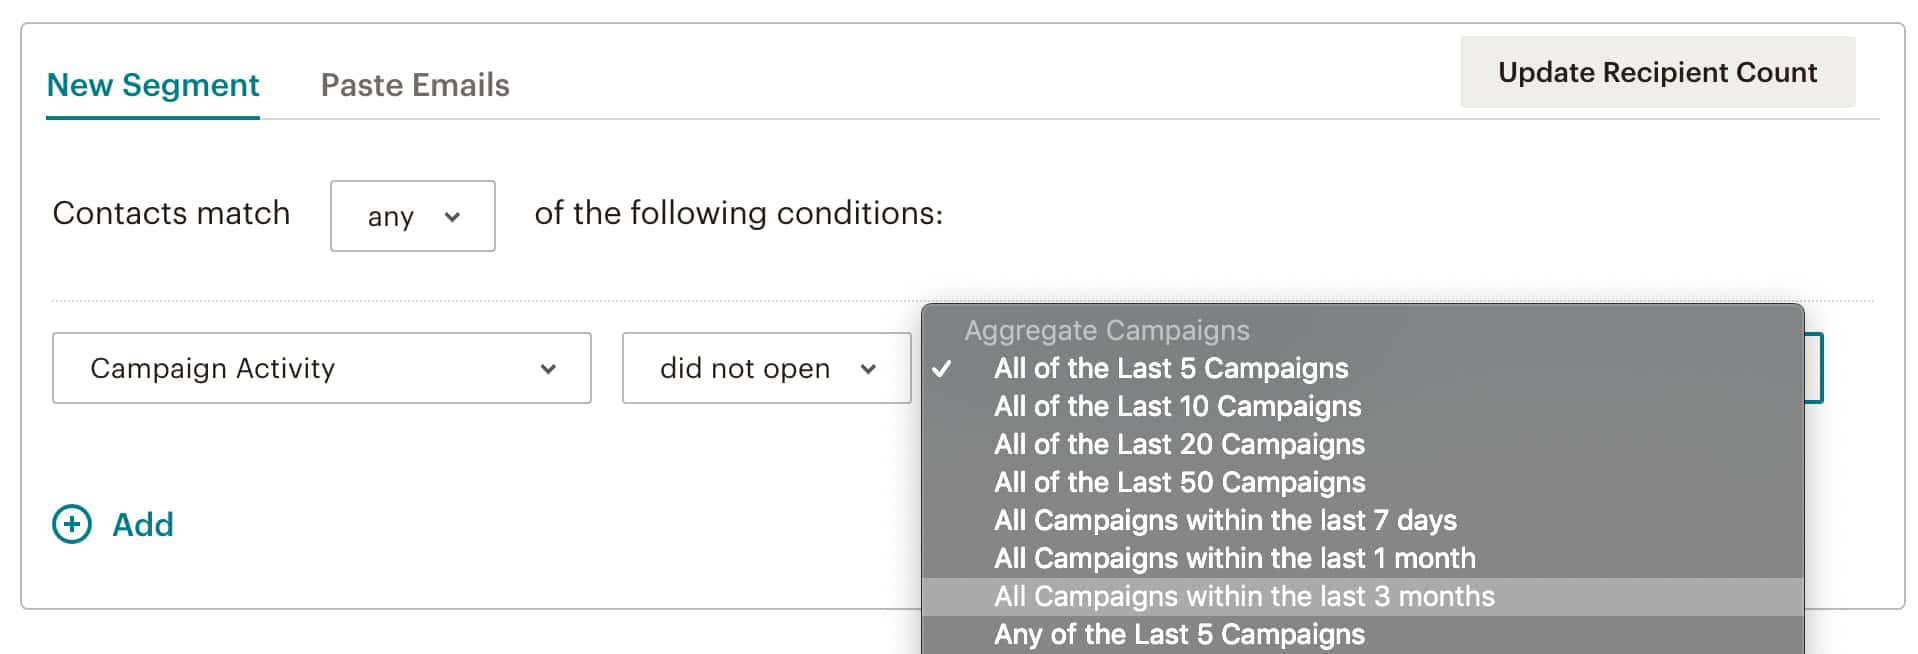
Then click “Add” to create a new condition, and choose “Campaign activity”, “Was sent” and “Any campaigns within the last 3 months”.
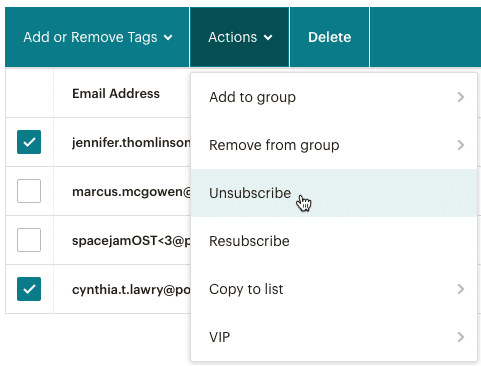
Click “Preview Segment”, then tick the box next to each contact that you want to remove, click “Actions” and choose “Unsubscribe” from the drop-down menu.
You can also bulk unsubscribe inactive subscribers by viewing the segment, clicking “Export Segment”, then “Export as CVS”.
Then click on the “Audience” tab, choose “Manage contacts” from the drop-down menu, click on “Unsubscribe people”, then open the CVS file on your computer, copy-paste the email addresses to the “Unsubscribe people” text field, and click “Unsubscribe”.
Ideally, you should do this every three months, that way you will keep your list clean and your Mailchimp bill manageable.
Also, if you clean up your list regularly, removing inactive subscribers won’t hurt as much as it would in a case like Noah’s where he removed over 30,000 subscribers from their main list.
Most importantly, remember that it’s the quality of the list that matters, not the number of email subscribers. Don’t let your vanity get in the way!
Want to learn how to use Email Marketing to drive more traffic to your website? Check out our video:
Summary
Remember how I compared starting an email list to planting a tree at the beginning of this article?
Well, the comparison works, because just like a tree, an email list requires time, attention, and care to grow into something big and powerful.
So set your expectations accordingly. Everyone wants to have an email list of 100,000 subscribers. Yet only a few people have the patience to work hard to get their first, 10th, 100th subscriber.
However, the same way an acorn won’t turn into a mighty oak overnight, your email list won’t go from zero to 100,000 subscribers in a month, a year, or even several years.
But you will get there if you work hard to provide genuine value to your subscribers and stay committed to growing your email list.
So, start today.

Head of Content at Kinsta and Content Marketing Consultant for WordPress plugin developers. Connect with Matteo on Twitter.

