WordPress is a powerful content management system (CMS) complete with a mammoth ecosystem of themes and plugins. This gives you an almost unlimited number of ways to expand your site’s functionality. However, “almost” is the keyword here. For those times when you want to extend your site’s capabilities in a different way, third-party APIs will be the answer.
In this article, we’ll explore the benefits of using third-party APIs with WordPress. Throughout, the post will look at the different types of APIs available, tips for choosing something suitable, and more. The main part of the post will explore how to use third-party APIs with a Kinsta-hosted WordPress website.
There’s a lot to get through, so let’s begin!
What third-party APIs are
An Application Programming Interface (API) is a set of rules and protocols to let different apps communicate and interact. APIs are intermediaries as they enable you to access specific data from external services.
Once you have access to the data available, you can bring it into your own applications. The typical approach is to use an appropriate language, such as cURL, JavaScript, Python, or PHP.
WordPress offers first-party APIs, such as the REST API. These expose ‘endpoints’ in the core code to let developers ‘hook’ into it. This often gives you more scope and flexibility than using a plugin.
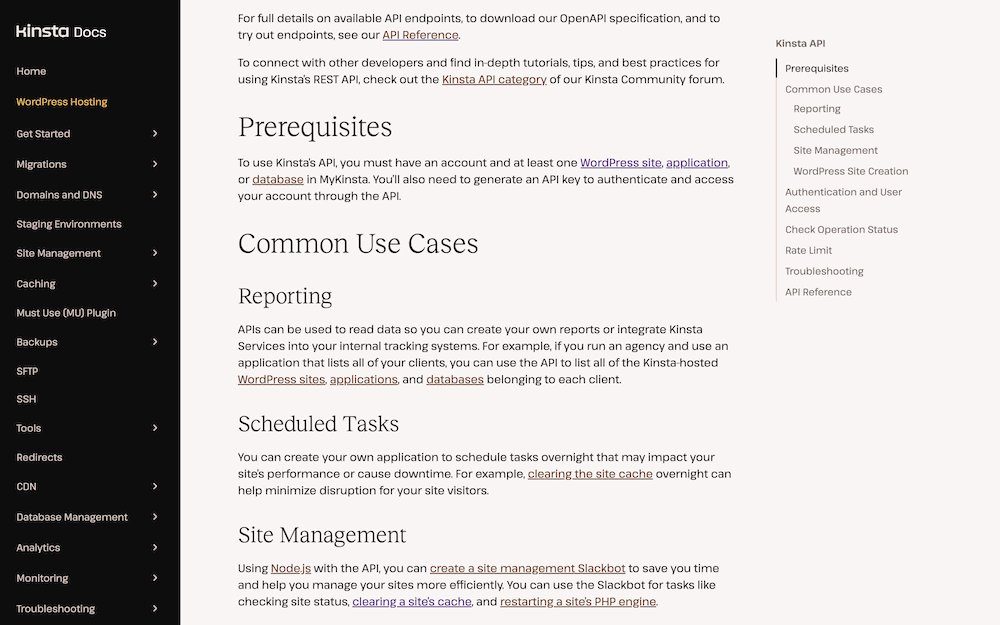
Of course, Kinsta also provides a REST API to connect and work with its platform away from the MyKinsta dashboard. This will let you achieve tasks such as retrieving server logs, setting up websites, and more.
When you use a platform’s API to access its endpoints, this is first-party. In contrast, using an API from one service within another makes it third-party. For example, you might access the endpoints for the OpenWeatherMap’s Weather API within your WordPress site’s code.
As you can expect, this can open up the scope of what you can achieve with WordPress, Kinsta, and your site.
The benefits of using third-party APIs with WordPress
Using plugins with WordPress is, of course, a major plus point for the platform. Even so, there are plenty of positives around integrating third-party APIs with your site also. The biggest is how you can ‘hard-code’ almost any functionality you wish into your site.
It’s not the full story, but in general, an API will give you more potential power and versatility than WordPress and its plugins can provide.
Here are some other key advantages:
- You can save on development time. It’s quicker to leverage an existing third-party API to build out functionality than doing so from scratch. This should save you time and let you focus on other project areas.
- You’re able to personalize the User Experience (UX). It’s possible to realize whatever functionality users want to see on-site to your exact specifications using third-party APIs.
- Project efficiency will get a boost. APIs let you automate and streamline processes. For instance, you could integrate an email marketing API to sync and automate user data to a relevant platform.
- Maintenance isn’t your responsibility. The developer of a third-party API will maintain and update it. This ensures you have access to the latest features and improvements without investing extra resources.
Third-party APIs will be valuable anywhere you want to have supreme integration, customization, and performance. Of course, this will be your only option if there is no WordPress plugin available to meet your needs.
In general, though, if the user would need to personalize the functionality, such as adjusting settings, a plugin would work better. Even so, you’ll have plenty of ways to integrate functionality into your site using third-party APIs too.
The types of third-party APIs you can find
The demand for APIs, on the whole, is huge. A Google Cloud report notes that around 60 percent of web apps use APIs. The same report notes how the majority of leaders believe APIs help them to build better products.
Even though it can be hard to judge the objective value of third-party APIs, it’s clear that they have many subjective use cases. By extension, the available third-party APIs cater to different needs and functionalities:
- Social media APIs. Almost all platforms, such as Facebook, Twitter, TikTok, and Instagram, provide APIs. This gives you the ability to integrate social sharing, login options, embedding, and other social features.
- Payment gateway APIs. You’ll find many different payment gateways with APIs. For instance, Stripe and PayPal will let you integrate those service offerings into your WordPress site.
- Mapping APIs. With services such as Google Maps and Mapbox, you can embed interactive maps, apply geolocation, and add routing to your site.
- Analytics APIs. You have plenty of choices when it comes to analytics. Google’s APIs are again popular here, as many site owners look to bring in Lighthouse and analytics data to WordPress.
- Email marketing APIs. Services such as Mailchimp and SendGrid let you integrate their APIs with WordPress too. This enables you to automate email campaigns, manage subscribers, track performance, and much more.
- Weather APIs. With APIs from sites such as OpenWeatherMap and Weatherbit, you can provide real-time weather data. Given the complexity you need, it’s possible to add elements such as geolocation too.
This isn’t a full list of API types, and there are countless other APIs available for various purposes. Given the wealth of options, choosing the right API to integrate is vital. We’ll do that next before we investigate how to integrate third-party APIs into WordPress.
How to choose the right third-party APIs for your needs
Much like you have a checklist of options when choosing a WordPress plugin, you’ll also do the same when choosing the right third-party API. It’s important to choose your integrations with care, as this will determine the direction of your project.
Your primary concern is to identify what functionality your site needs. It sounds obvious, but you should look for APIs that provide the right blend of features and functionality for you.
However, there are other factors to keep in mind when choosing third-party APIs:
- Reliability and reputation. This is where you check user reviews, ratings, and the provider’s track record. Combined, this will tell you whether they have a good reputation for delivering reliable services.
- Documentation and support. The quality of the documentation will help you when accessing endpoints. Along with the level of support you get from the API provider, you can save time and cut your troubleshooting efforts down too.
- Pricing. Not all APIs are free. Some offer free tiers with limitations, while others use a premium pricing model. As such, make sure you align your budget, the API cost, your expected usage, and access.
- Security and privacy. Protecting user data is crucial when using any third-party API. This is something you should assess with high standards. You should look at the security an API employs, as well as whether it adheres to industry data protection standards. Give out bonus points if it complies with relevant data privacy regulations.
An API is often a long-term solution, which means it also has to be useful regardless of the size of your site. Let’s look deeper at this now.
Scalability
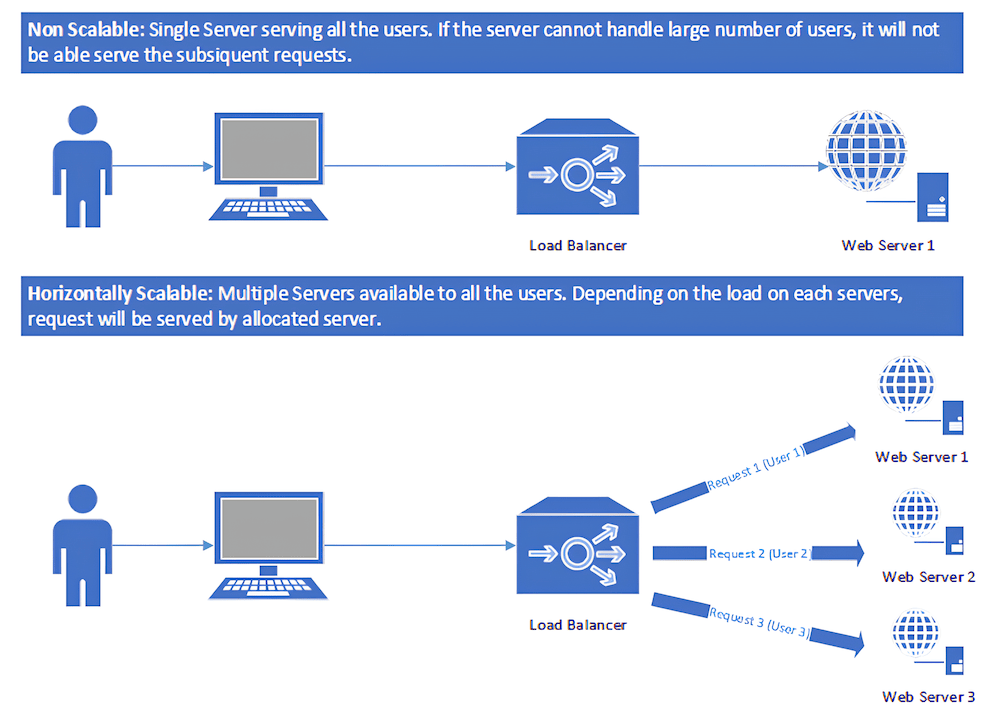
Your chosen API should be able to handle increased traffic and usage as your website grows. This scalability is a vital consideration, which is why we’re choosing to focus a little more on it here.
The API should be able to deliver no matter how much traffic your site sees. However, it’s often hard to figure out whether an API can deliver. It may need you to make an educated guess based on how the API provider describes its offering.
For instance, ‘stateless’ APIs use a simpler server design and have flexibility when it comes to processing resources. Horizontal scaling adds more nodes and machines to the server network. This gives you as much resource power as you need in comparison to vertical scaling. ‘Asyncing’ lets the server process multiple requests at once, which is more efficient.
You should also look at whether an API rate limits its request allowances. Over the long term, this will give you a more consistent, reliable, and stable service under heavy loads.
Even so, you will want to evaluate all these factors with care. Choosing the right third-party APIs that meet your requirements will be a benefit when you look to integrate them with WordPress.
Typical practices and tips to integrate third-party APIs with WordPress
Integrating an API into your site is often straightforward. Even so, you still need a systematic approach to ensure it’s a smooth integration.
Your first act should be to RTFM – read the full manual. The API’s documentation should be clear on the functionality you have to play with. This is besides details of available endpoints, parameters, and authentication methods.
However, there are plenty of other tips and typical practices to succeed in integrating your API with WordPress:
- Handling authentication. Most APIs need authentication credentials to access its services. Without it, you won’t be able to access any endpoints.
- Implementing API calls. WordPress gives you several methods to make API calls, such as the built-in HTTP API. It’s worth taking the time to choose the right method that best suits your needs. Again, the API documentation will help you here.
- Parsing API responses. APIs will return responses in various formats, such as JSON or XML. As such, you’ll have to parse and handle those API responses within your code to extract and use the data.
- Dealing with error handling. Using proper error handling mechanisms can help to handle API errors with grace. It also lets you display meaningful error messages to your website’s visitors.
- Testing and debugging. As with any app or implementation, test your API integration to ensure it works as you expect. Tools such as Postman or browser developer tools can help you test API calls and debug any issues.
Finally, it’s important to keep track of your API usage. Given that costs often relate to a usage allowance, you should aim to keep within those boundaries. Later on, we’ll show you how Kinsta’s tools can help with this.
Preparing WordPress and Kinsta for integration with third-party APIs
Before you integrate third-party APIs with WordPress, it’s vital that both the platform and Kinsta are ready to handle it. Configuring both your CMS and host might often be necessary, especially for a new site.
The good news is this step contains lots of typical and straightforward tasks. For instance, you’ll want to keep WordPress’ core up to date. Installing any necessary plugins should also be a priority. Some APIs may need specific plugins to function or use as a ‘bridge’ to your site.
Security considerations should also be part of your preparations. Enabling HTTPS on your site through installing a Secure Sockets Layer (SSL) certificate will be necessary.

Backing up your site should always happen before any major change, so taking this step here is good practice. What’s more, you’ll want to consider whether you begin your integration with a local development environment. It could be that some plugins don’t work with a local setup.
This is also the time to investigate your host’s limitations on using third-party APIs. This could be in the form of rate limits or blocked ports. Having this knowledge can help build the functionality you need in an optimal way.
For example, Kinsta blocks all standard SMTP ports, as we don’t provide email hosting. It also limits requests to 60 per minute. Once WordPress and Kinsta are optimal and ready to roll, though, you can begin to integrate your third-party APIs.
How to integrate third-party APIs with WordPress on Kinsta (2 methods)
The typical approach when it comes to third-party API integration is to hard-code it. This isn’t the only way to proceed, though.
We’re now going to look at the two primary approaches for integrating third-party APIs with WordPress on Kinsta. Let’s start with the manual approach, then look at WordPress plugins.
1. Make HTTP requests to the API through direct coding
The typical way to put API calls in place and handle the response is to code it into your site. This will need a good understanding of your chosen programming language and of WordPress’ structure.
For WordPress sites, you should use the routes and endpoints within the REST API. These are not only secure, but they’ll also offer the best integration with your site.
The TikTok APIs are all excellent as hard coding the functionality follows a typical approach. Let’s take a look at how to do this.
Integrating the TikTok API with WordPress
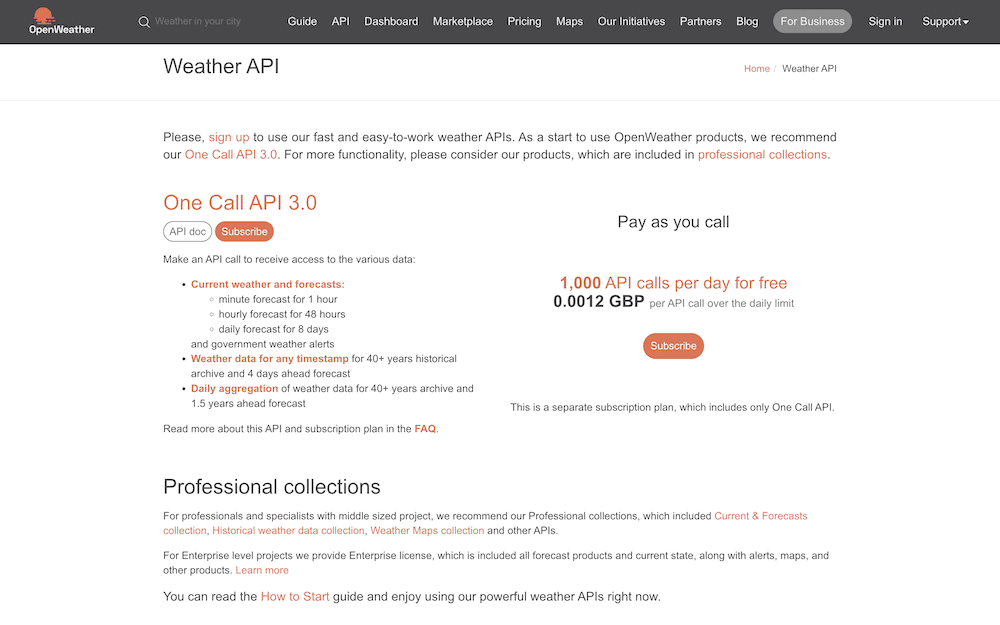
First, you need to have a developer account with the platform. This is a quick signup process, at which point you will see a list of available APIs:

Here, decide upon the right API to use for your needs and take a look at the documentation for it. We’re going to integrate the Display API in this example. It lets you showcase profile information and associated videos:

Another prerequisite is the TikTok Login Kit. This lets you authenticate your desktop app with the social media platform. Doing this is beyond the scope of this post but involves a registration and approval process.
Using Login Kit is also necessary to get the access token for the specific profile you want to display:
curl --location --request POST 'https://open.tiktokapis.com/v2/oauth/token/' \
--header 'Content-Type: application/x-www-form-urlencoded' \
--header 'Cache-Control: no-cache' \
--data-urlencode 'client_key=CLIENT_KEY' \
--data-urlencode 'client_secret=CLIENT_SECRET' \
--data-urlencode 'code=CODE' \
--data-urlencode 'grant_type=authorization_code' \
--data-urlencode 'redirect_uri=REDIRECT_URI'
With this access token, you can then call GET on the /v2/user/info/ endpoint. This returns basic information about a specific user:
curl -L -X GET 'https://open.tiktokapis.com/v2/user/info/?fields=open_id,union_id,avatar_url' \
-H 'Authorization: Bearer act.example12345Example12345Example'
This should return a dedicated response from the API containing all the relevant information in JSON format:
{
   "data":{
      "user":{
         "avatar_url":"https://p19-sign.tiktokcdn-us.com/tos-avt-0068-tx/b17f0e4b3a4f4a50993cf72cda8b88b8~c5_168x168.jpeg",
         "open_id":"723f24d7-e717-40f8-a2b6-cb8464cd23b4",
         "union_id":"c9c60f44-a68e-4f5d-84dd-ce22faeb0ba1"
      }
   },
   "error":{
      "code":"ok",
      "message":"",
      "log_id":"20220829194722CBE87ED59D524E727021"
   }
}
This response will need you to parse it to extract the specific data you want and display it on the front end. Once you have a working implementation, you can test, debug, and build error handling into the code. However, there’s also another way to set up third-party APIs in WordPress and Kinsta.
2. Use a WordPress plugin as a low-code solution to connect to third-party APIs
As is typical for WordPress, there are plugins to help you connect to third-party APIs in a fast and efficient way. What’s more, you often don’t need to be a developer to understand and use them. This means you can have all the benefits of hooking into APIs without the need for code.
There are a few plugins that can assist, such as Get Use APIs. Our preference is WPGetAPI, though, as it offers plenty of functionality with its free version.
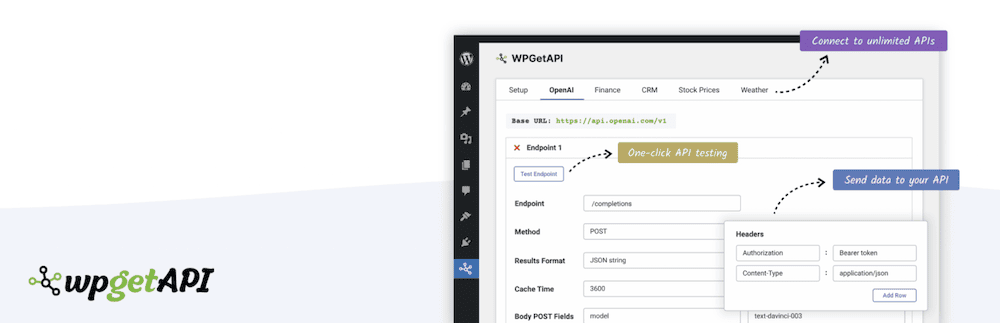
Next, we’ll look at how to use this plugin to connect to an API. However, these methods should be transferable to other plugins too. Regardless, after installation and activation, you can begin to add your API details to the plugin.
Using WPGetAPI to connect to third-party APIs
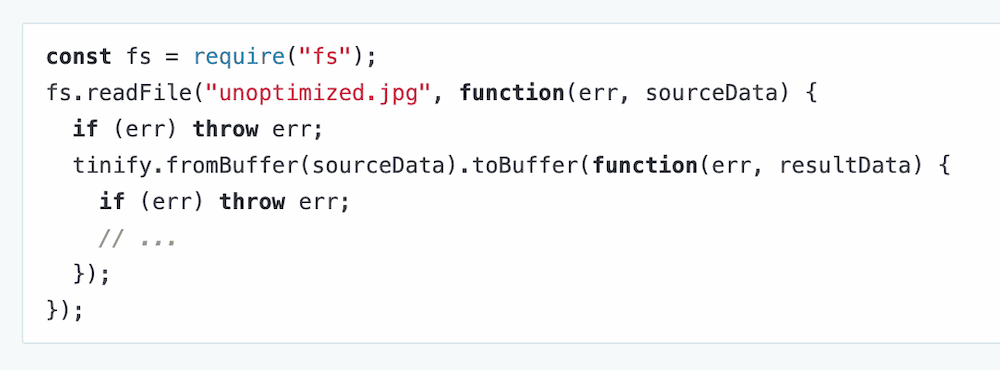
For this example, we’ll go with ShortPixel’s Image Optimization API. Head to the WPGetAPI > Setup screen, where you’ll see a host of blank fields:
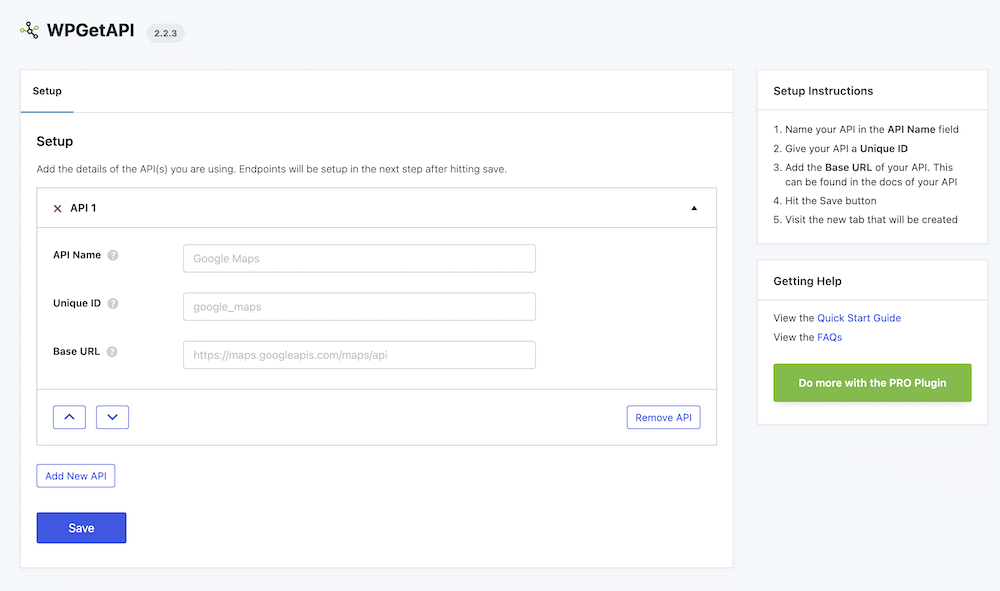
First, you’ll need to specify three elements: an API name, a unique ID, and the base URL of the API.
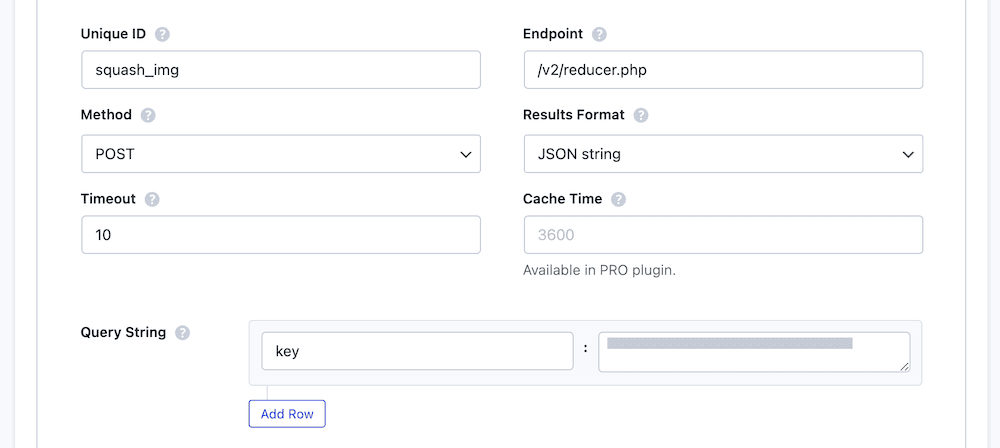
Once you fill these in and click the Save button, there will be a new tab for specifying endpoints. The first four fields on this screen are essential to fill in. You’ll need to provide a unique ID and endpoint URL, specify a request method, and set a results format:
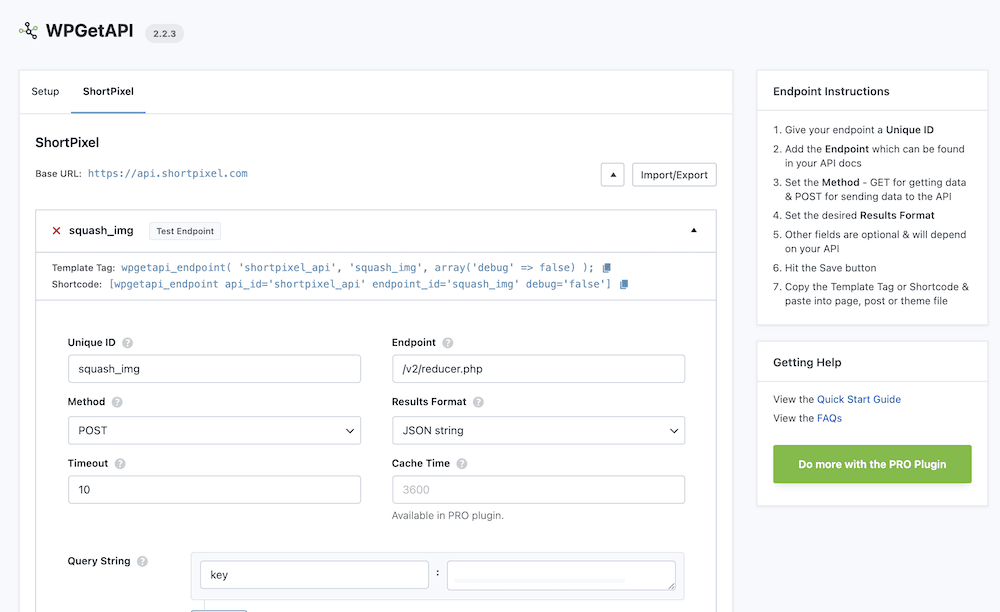
For the Request Method drop-down menu, you’ll often use only two – GET for fetching data from the API, and POST for sending data to it.
ShortPixel works by first sending it an image, so we’re using a POST method. Most API requests will need a GET method, too, so your site can receive data as well as send it.
There is a set of optional fields underneath the main four to set connection timeouts and caching. From there, and depending on your authentication method, you’ll enter your credentials into one of the Query String, Headers, or Body fields. ShortPixel uses an API key within the URL string, so we can add ours to the Query String fields:
Save your changes once more, then look back to the top of the screen at the Test Endpoints button. Clicking this will test the connection and return a report along with a connection status:
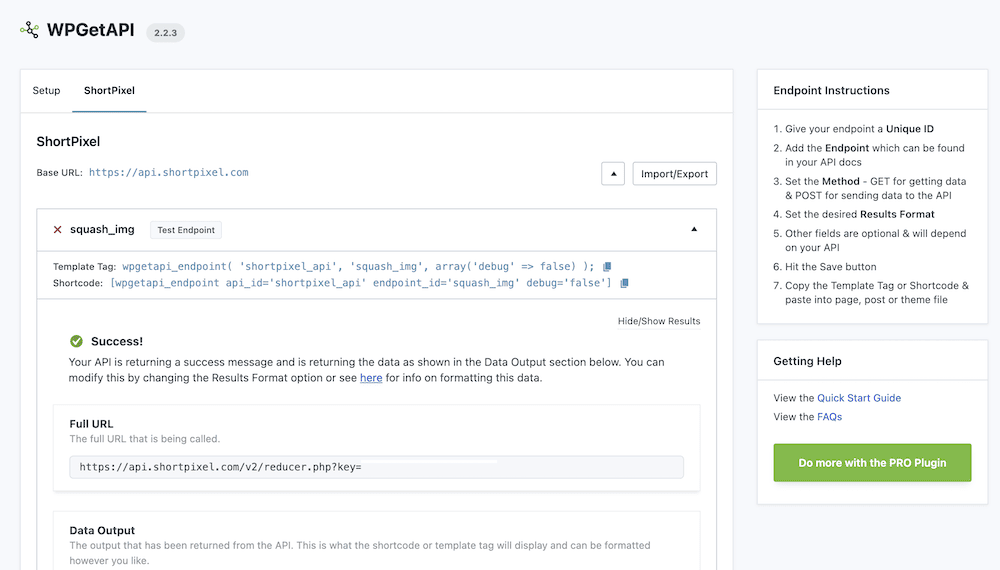
The last task to connect the API to WordPress is to copy either the shortcode or template tag at the top of the screen:

You can paste these into a relevant point in either your code or your page based on which one you prefer.
Assessing the performance of third-party APIs using Kinsta APM
One key element for integrating third-party APIs into WordPress is how performant they are. There’s no point in using an API if it has a negative impact on your site. This is where the Kinsta APM tool comes into play.
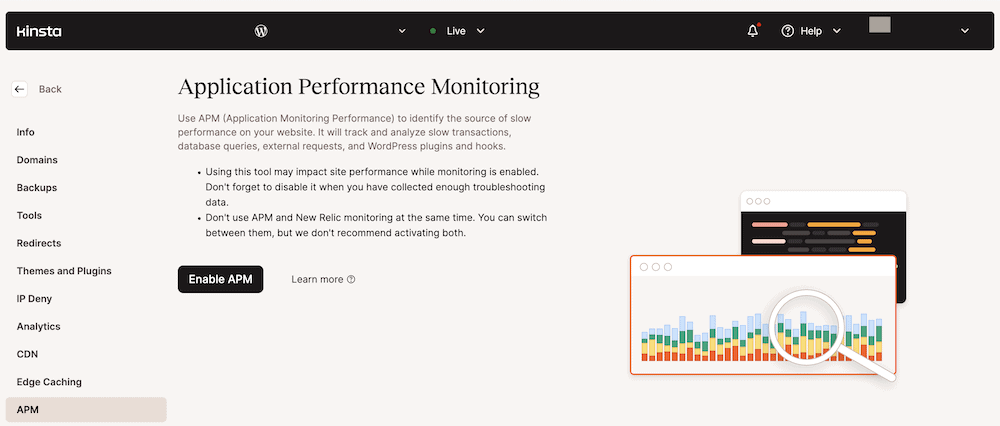
This lets you judge the objective performance of your site through the MyKinsta dashboard. It provides a handy set of charts and metrics to help you assess the efficiency of your site:
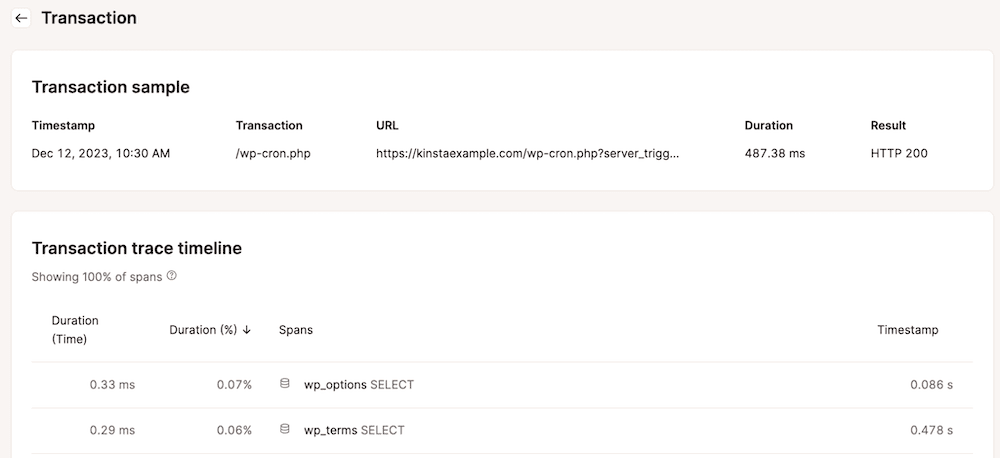
There’s plenty to discover with Kinsta APM, but using it to monitor your ‘transaction times’ is a key use case. This lets you see which parts of your site need the most resources.
Of course, you’ll want to look at the impact of any external HTTP requests and processes. If your API is resource-intensive, you can begin to work on refining it to better its performance. Having these metrics within touching distance within the MyKinsta dashboard can give you a near-constant reminder of where your site needs improvement.
Summary
Integrating third-party APIs with WordPress on Kinsta can help you extend your site’s functionality. This can save you further development time, improving UX, and increasing efficiency. Even better, WordPress gives you a few ways to hook third-party APIs up.
You can either use the WordPress REST API or even a plugin that does the heavy lifting for you. WPGetAPI is one of the best and uses a low-code approach, complete with a friendly interface. If you combine this with the Kinsta APM tool, you have an objective way to monitor the performance of your site using a ‘first-party’ solution.
Do you believe third-party APIs are worth implementing within WordPress? Let us know your thoughts in the comments section below!