
Sharing content is a fairly common practice. However, featuring another creator’s content on your site has potential legal ramifications, while hosting large files such as videos can hurt your site’s performance. Fortunately, iFrames provide a simple solution to these issues.
In this post, we’ll explain what iFrames are and how to use them with your WordPress site.
Ready to dive in? Let’s get cracking!
What are iFrames (And Why They’re Useful)?
An iFrame is a way to embed a web page into the content of another page. This is done using HTML tags, the external page’s URL, and specifications regarding how the window should appear on your site.
There are two situations in which iFrames are generally useful.
The first is when you wish to share content that doesn’t belong to you. In most cases, embedding content via an iFrame is not considered to be copyright infringement (also see EU ruling). Therefore, it’s generally a legal and more ethical method of sharing than most other options. Additionally, the code within an iFrame cannot be directly accessed. This means that a visitor to your site can’t copy the embedded content and share it elsewhere.
The second reason you may want to incorporate iFrames is for sharing large files, such as video, audio, or even images. YouTube is the perfect example here.
With an iFrame, you can display a file’s content on your site without having to host it in your WordPress Media Library. That’s important because these types of media files often take up a significant amount of storage space, and could even slow your site down.
By hosting your videos on a platform such as YouTube and then embedding them on your WordPress site with iFrames, you can avoid the drawbacks of uploading them to your site directly. This technique will help make you a more ethical member of the online community and keep your site fast and easy to use.
How to Use iFrames With WordPress (3 Methods)
Just as there are various scenarios in which you might want to use an iFrame, there are multiple methods for implementing one. Below, we’ll explore three of the most common ways to add iFrames to your WordPress site.
1. Add iFrames in WordPress Manually
The basic code for adding an iFrame to a page is fairly simple. All you need are the opening and closing HTML tags, and the URL of the web page you wish to embed:
<iframe src="example.com"></iframe>There are a couple of limitations to note regarding the source URL. First, iFrames can only display content from sites that use the same Hypertext Transfer Protocol as yours. In other words, if your site uses HTTPS, you can only embed content from other HTTPS sites. Likewise, if you use HTTP, you can only embed URLs that also use HTTP.
Additionally, some popular websites – such as Facebook and YouTube – disable manual iFrame embedding. Trying to display a page from a site that doesn’t allow iFrame embeds will display an error in your window:

If you are able to use this method, it’s important to know that you can also customize your iFrames to meet the needs of your site. That’s where iFrame parameters come in. A few of the most common ones include:
- Width: This parameter enables you to set a specific width for the iFrame in pixels.
- Height: Like the width parameter, the height determines the size of the iFrame window on your web page in pixels.
- Allow: With this parameter, you can set certain default behaviors or features for your iFrame, such as full-screen viewing or payment processing.
- Importance: You can use this parameter to specify when an iFrame should load.
For example, here’s what the code would look like for an iFrame with a window size of 900 pixels by 700 pixels, with full-screen viewing enabled, which is set to download after the rest of the web page:
<iframe src="example.com" width="900" height="700" allow="fullscreen"></iframe>On the frontend, this is what that iFrame might look like:

There are other parameters you may consider using as well. However, the ones listed above should enable you to create basic iFrames for sharing YouTube videos or other content on your site.
2. Use Embed Codes to Create iFrames
Some sites have restrictions on whether you can manually embed their content in iFrames. This can make it difficult to feature certain types of content, such as Facebook posts or YouTube videos. However, that doesn’t mean you can’t display content from these sources in iFrames.
Rather, you simply have to access the necessary embed codes in order to do so. Let’s look at how this works in YouTube as an example. Head over to the video you wish to embed, whether it’s yours or another creator’s. Underneath the video player, you should see a Share button:

Click on this button, and a window will open displaying the various sharing options that are available. One of them is Embed:
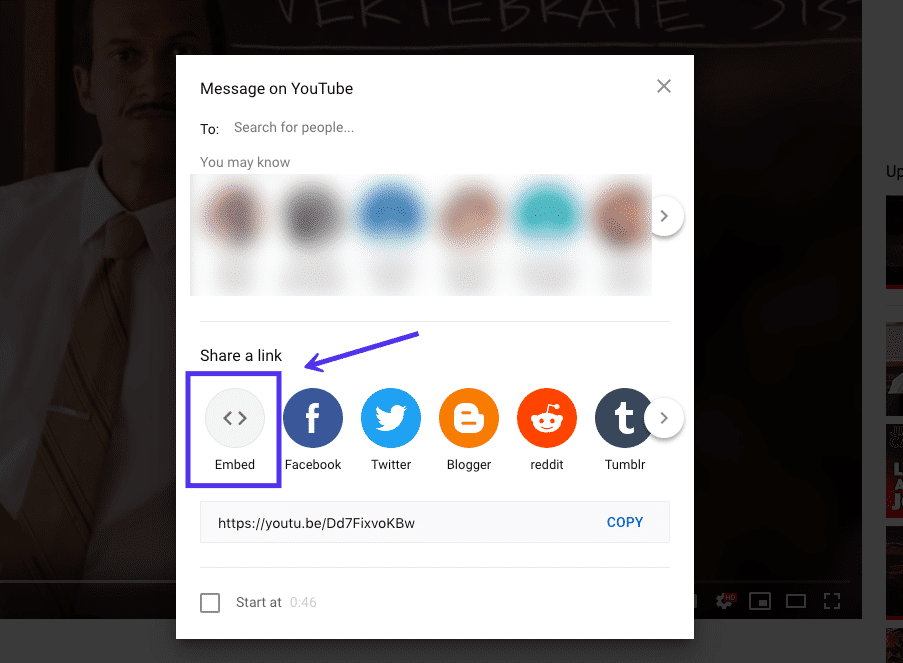
When you select the Embed option, YouTube will display an HTML snippet you can use to add the video to an iFrame. It includes certain iFrame parameters, which you can copy and use if you wish. Otherwise, you can also choose to simply copy the source URL instead:
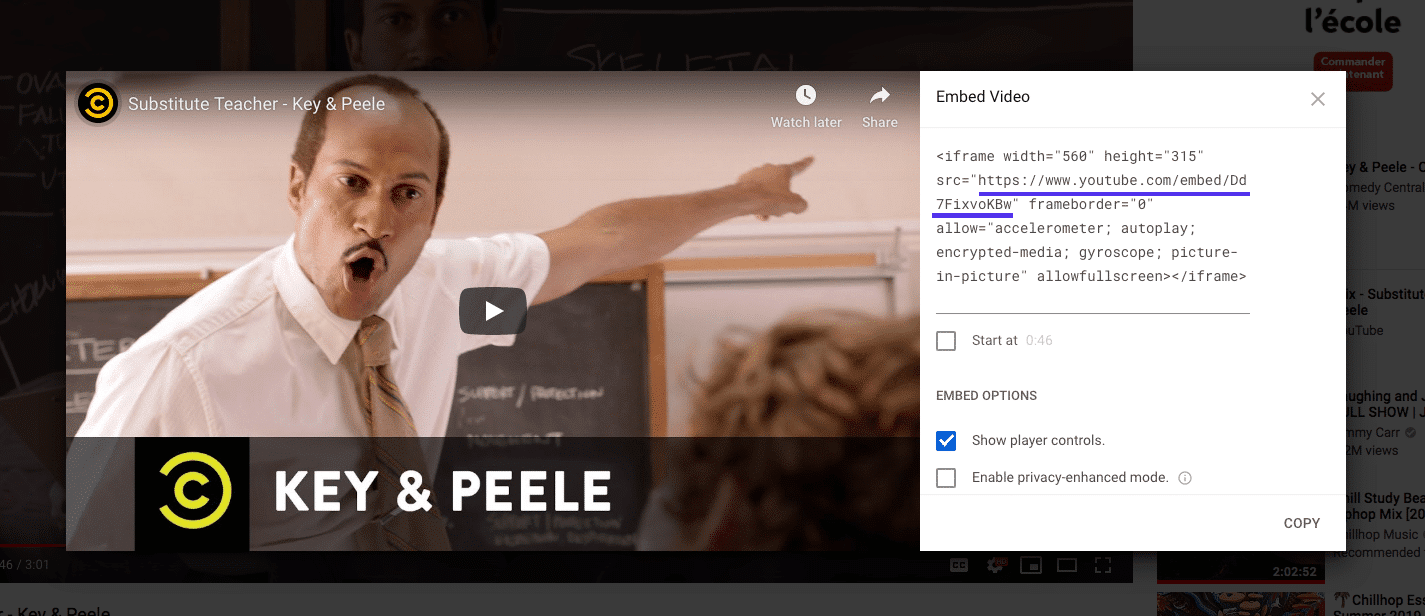
When you use the embed code, the video will display in your iFrame instead of the error you would see if you tried to use the standard URL.
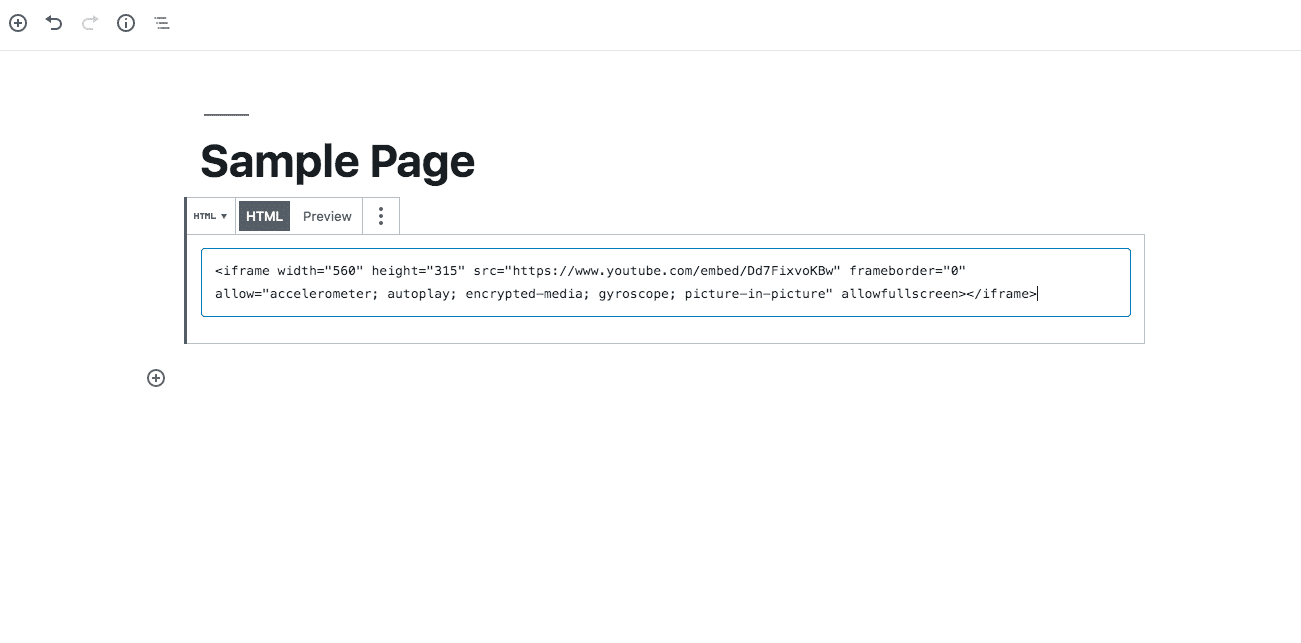
To add it to a page or post in the Block Editor, you can use a Custom HTML block:
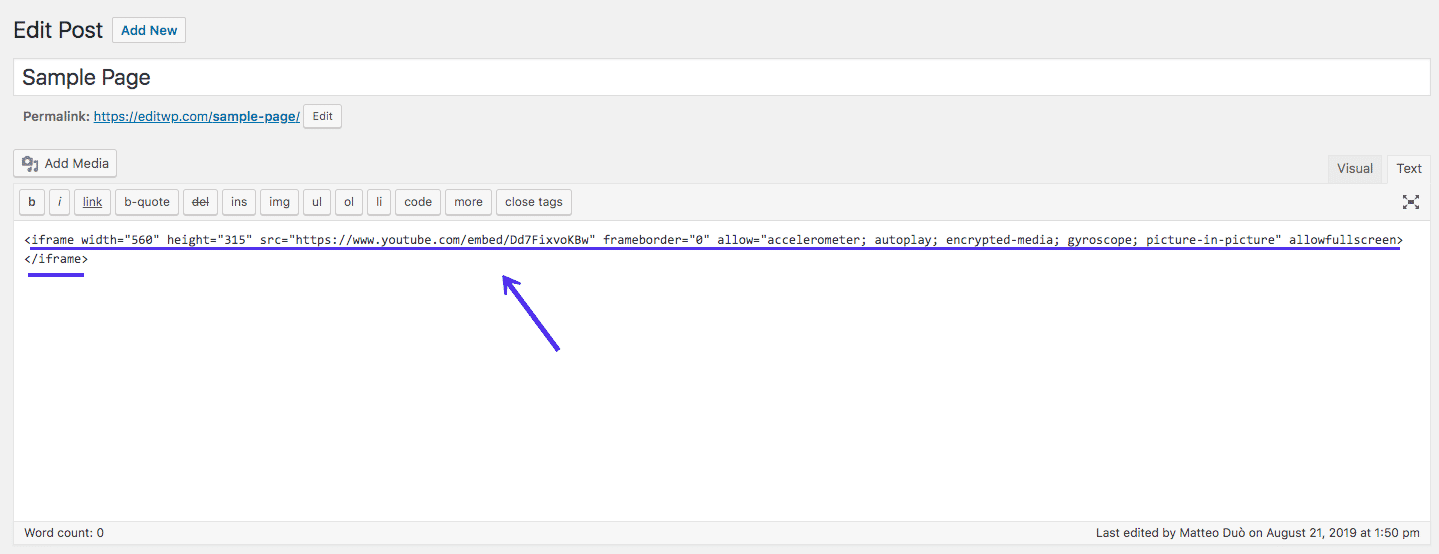
In the Classic Editor, you’ll need to switch to the text editor and add your code at the relevant point:
The result should be a functioning iFrame:

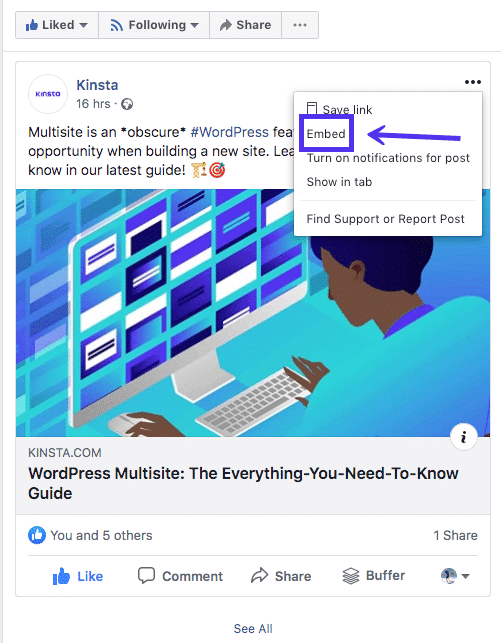
You can follow a similar process to embed a Facebook post on your site. Navigate to the post you want to share, and click on the three-dot icon in the top right-hand corner of the post:

Then, select the Embed option:
This will display an HTML snippet much like the one for the YouTube video we looked at earlier. Once again, the source URL is the most important part of this code, although you can use the predetermined parameters as well:
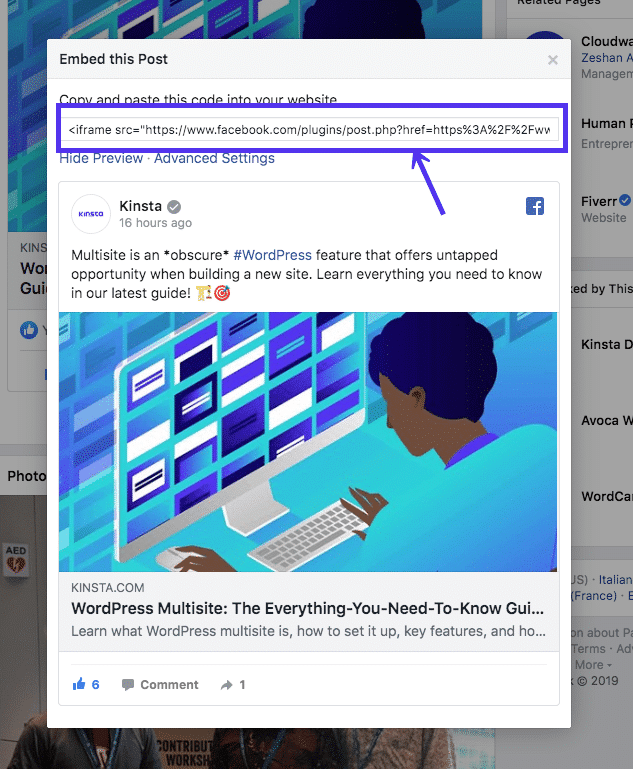
Add this code to your web page and the post should display without any issues:

Many popular social media sites, including LinkedIn, Instagram, and Twitter, also offer embed codes for their posts. You’ll typically find this option in each individual post’s settings.
(Suggested reading: How to Fix the Facebook oEmbed Issue in WordPress)
3. Add iFrames to WordPress Using a Plugin
Of course, WordPress developers are always working to simplify tasks such as embedding iFrames through the use of plugins. There are two options you might want to consider if embedding external content on your site is something you plan to do frequently. The most popular solution is the iFrame plugin:

This plugin enables you to add iFrames to your WordPress site using shortcodes. You can specify all the same parameters as you would when manually adding an iFrame via HTML. However, you don’t have to worry about dealing with your pages’ code directly.
Alternatively, you can also try the Advanced iFrame plugin:

Once again, this plugin allows you to add iFrames to your site using shortcodes. However, it also includes several additional features, such as security codes to prevent other users from embedding iFrames without your permission, custom styling options, and more.
For $20, you can upgrade to an Advanced iFrame Pro six-month license. This version produces responsive iFrames, and enables features such as zoom functionality and Lazy Loading. Depending on how often you plan to use iFrames on your site, these options could be worth the premium price tag.
Summary
Keeping your site performing well and on the right side of the law is vital. iFrames will not only help you share others’ content in an ethical manner but can also enable you to display video and audio files without having to host them on your site. In this post, we’ve looked at three methods for using iFrames with WordPress:
- Incorporate WordPress sites and iFrames manually.
- Use embed codes to create iFrames.
- Add iFrames using a WordPress plugin, such as iFrame or Advanced iFrame.
Do you have any questions about iFrames or how to use them on your WordPress site? Let us know in the comments section below!


