Shopify is a popular ecommerce platform. However, some drawbacks can make it less useful or appealing to site owners. If you’re considering switching to WooCommerce or another solution, you’ll need to know how to cancel Shopify.
The good news is that deleting a Shopify account is relatively simple. You can follow straightforward instructions to pause your subscription, deactivate your account, and delete your store altogether. You can even back up your store and migrate it to another site with as little downtime and interruption as possible.
In this post, we’ll discuss some reasons you may want to cancel Shopify. Then we’ll explain how you can pause your subscription and walk you through the steps for canceling and deleting your Shopify account. We’ll wrap up with some Frequently Asked Questions (FAQs). Let’s jump in!
Shopify Drawbacks (Why You Might Want to Cancel)
There are a handful of reasons you might consider canceling your Shopify subscription. One of the most significant drawbacks of using Shopify is that it lacks customization options. This can be frustrating for store owners who want more control over their site’s appearance and functionality.
While Shopify provides some templates and themes to design your store, these options are pretty limited. There aren’t many ways to modify them or create a completely custom look.
Another drawback of using Shopify is its high transaction fees. Merchants on Shopify are charged a small percentage of each transaction in addition to any payment processing fees.
In other words, if you sell a product for $100, only about $97 will actually make it into your pocket – not including any additional fees such as shipping or taxes.
Shopify also has fairly limited payment options compared to other ecommerce platforms. While it does support popular payment methods such as PayPal and credit cards, it doesn’t offer as many alternative options as WooCommerce does. These limitations can be problematic for store owners who want to provide their customers with a broader range of payment choices.
Furthermore, because Shopify is a hosted platform, it can be difficult to migrate your store to another platform. All of your store’s data is stored on Shopify’s servers, so you would need to export it and import it into your new platform – which we’ll cover in this post.
Overall, when you use WooCommerce and managed WordPress hosting, you’ll have more control over your site’s data (and design).
How To Pause Your Shopify Subscription
When you cancel Shopify, you delete your store from the platform entirely. However, another option is to pause your subscription.
Pause and Build mode is ideal for when you want to make changes to your store, such as adding new products. With this plan, your customers can access your store, but they won’t be able to purchase anything. You’ll be charged a reduced $9 subscription fee during this period.
To pause your Shopify account, log in to your store’s admin and select the Settings option in the bottom left corner of the screen, followed by Plan. Click on Pause or deactivate store, then choose the Pause and build option.
You’ll be prompted to agree to the terms. Select Switch to Pause and build to proceed. Finally, you can click on the Confirm changes button to complete the process.
How To Cancel Your Shopify Subscription (in 4 Steps)
Now that we’ve covered why you may want to cancel Shopify, let’s take a look at how to do it in four simple steps.
Keep in mind that when you cancel Shopify and close your store, you won’t be able to reopen it if you change your mind in the future. Therefore, we recommend pausing your subscription until you’re absolutely sure you’re done with the Shopify platform.
Step 1: Prepare Your Account
Before you cancel Shopify, there are a few housekeeping things to address. First, you’ll need to address any outstanding balances or charges you owe to your account. When you cancel your subscription during a billing cycle, Shopify will email you a final invoice to be cleared.
It’s also a good idea to back up and export your site data. Shopify keeps your data for two years after you cancel. However, if you want to access it after closing your store, you’ll need to purchase a new plan. Therefore, it’s important to export your store data before canceling Shopify.
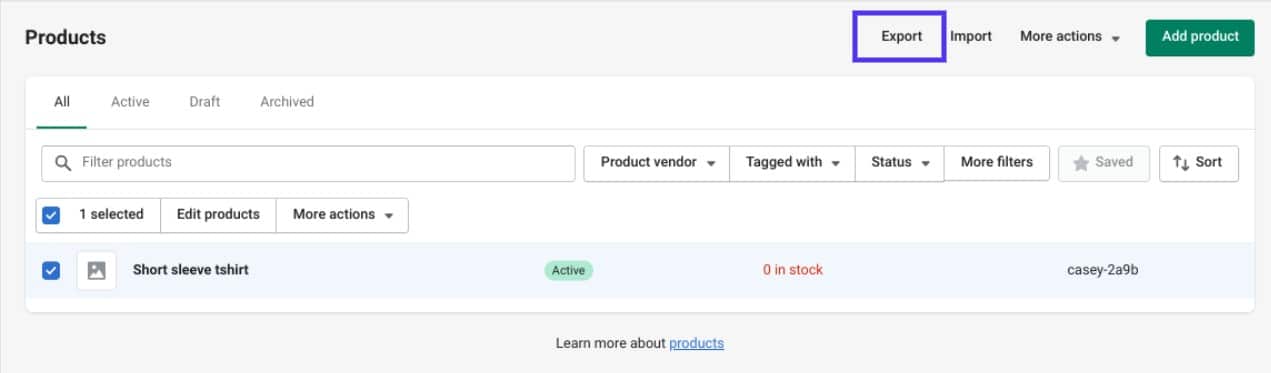
You can export your Shopify product data in CSV format. This file will include your titles, slugs, tags, etc. To do so, navigate to your Shopify account and select Products > All Products.
You can select all your products, followed by the Export button at the top of the screen:
Next, in the pop-up that appears, select All products and your preferred file format. When you’re done, choose Export products:
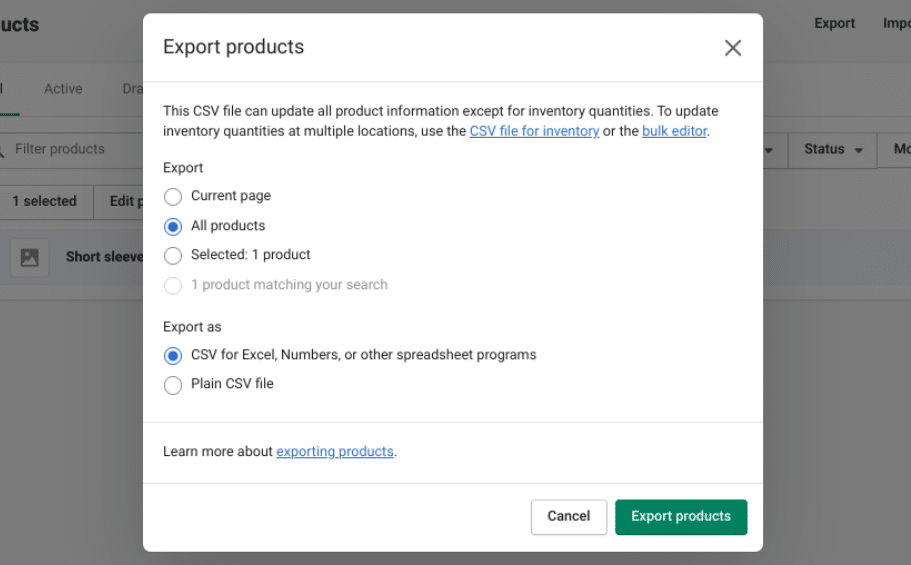
Your CSV file will then be sent to the email associated with your Shopify account.
Step 2: Uninstall Applications
Some apps may still charge you even after you close your store. Therefore, it’s essential to disconnect and uninstall any third-party services or apps from the Shopify App Store.
To do so, navigate to Apps from your Shopify account dashboard. Here, you can view all the apps currently installed on your site:
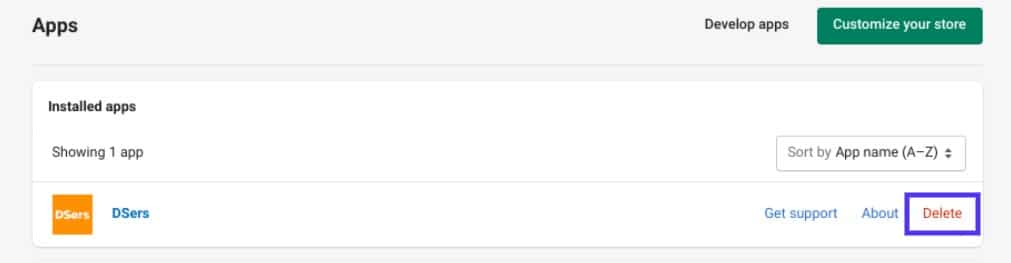
Go through each one and select Delete. Make sure to double-check for any apps that have recurring charges.
Step 3: Transfer Your Custom Domain
Shopify won’t automatically renew your domain name after you cancel your account. If you purchased a custom domain name, you’ll likely want to move it to another registrar. Otherwise, you risk losing it.
In your Shopify admin panel, you can access a handful of Domain Name System (DNS) settings, including your TXT, MX, and CNAME records. It’s important to note that you’re only eligible to transfer a domain from Shopify 60 days after purchasing it.
The process for transferring your domain will depend on how you obtained it. If you connected a third-party domain to Shopify, you can simply remove the domain from the Shopify domain list (Settings > Domains) by selecting Remove next to it:
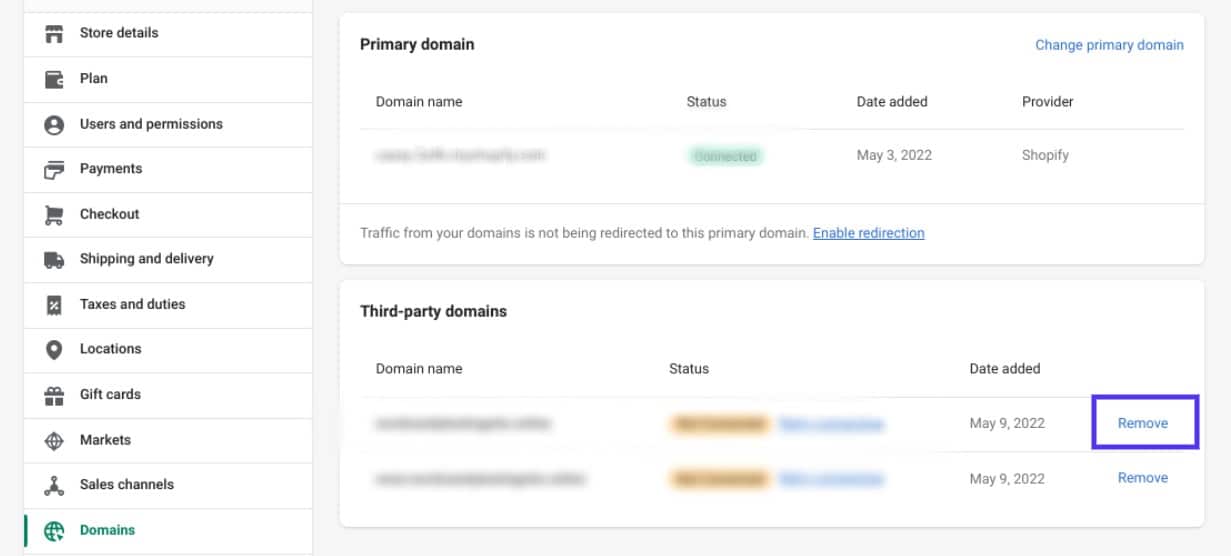
Then you can update the DNS settings with your new hosting provider. On the other hand, if you purchased your domain from Shopify, you’ll need to transfer its management to another hosting platform or registrar.
Step 4: Close Your Store via Shopify Settings
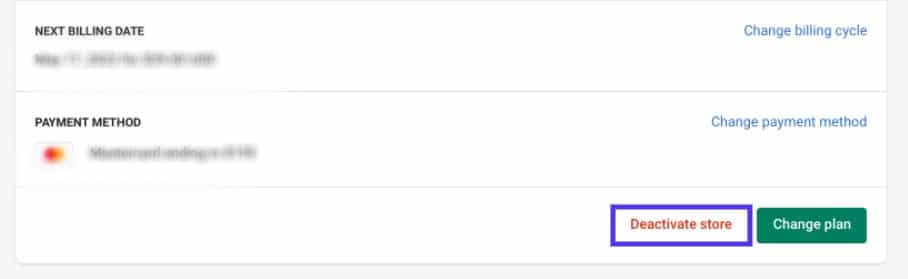
When you’re logged into your Shopify account, navigate to Settings > Plan. At the bottom of the screen, under your plan details, select the Deactivate store button:
Next, you’ll be asked to give a reason for deactivating your Shopify account. You may see subsequent questions depending on which reason you select.
After you choose a reason, click on the Continue button. You’ll then be asked to re-enter your password:
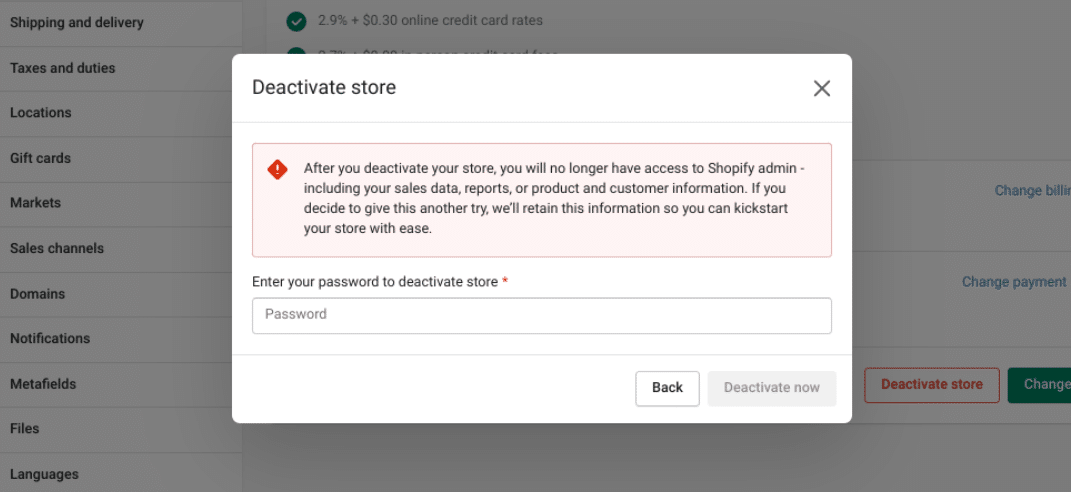
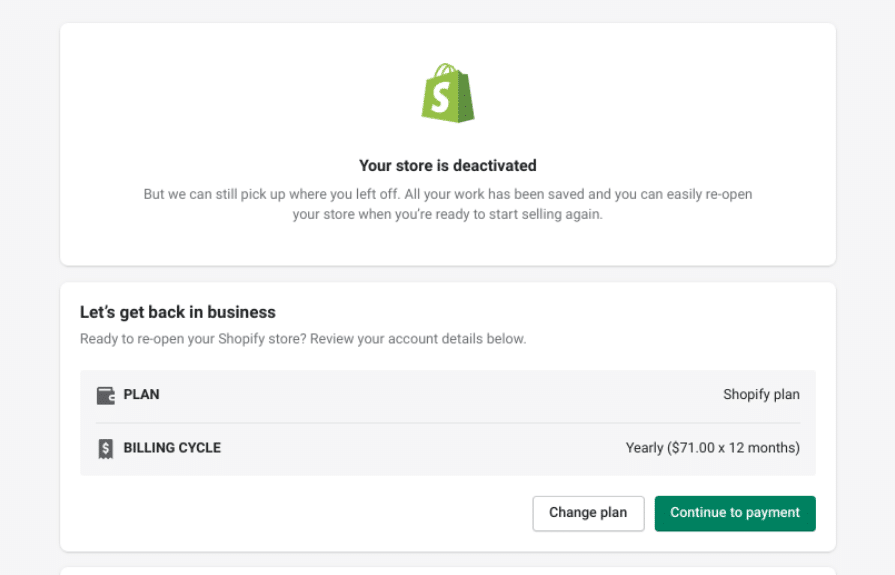
Once you enter your password, select Deactivate now. If successful, you should be brought to a page confirming that your store is now deactivated:
Under the View your past bills drop-down menu, you can find information about your past payments. You can also download these records.
Shopify Cancellation FAQs
At this point, you should have a solid understanding of how to cancel Shopify and the steps that are involved. However, let’s answer some FAQs to tie up any loose ends!
Can I Get a Refund for My Shopify Subscription?
Shopify offers a free 14-day trial that you can use without providing any credit card information. You can cancel this trial at any point. However, Shopify does not typically offer refunds to customers who close their stores.
However, there may be special cases where Shopify is willing to make exceptions to its no-refund policy. Your best bet is to reach out to the support team to discuss your options and argue your reasoning for a refund.
What Happens When You Cancel a Shopify Subscription?
When you cancel a Shopify subscription, you lose access to your admin area and store. To log back in and regain access, you will need to select a new plan and provide your credit card details. You also won’t be able to create a new Shopify store with the same domain name you used in the past.
Can I Migrate from Shopify to WooCommerce?
Fortunately, you can easily migrate from Shopify to WooCommerce. However, to do so, you’ll first need to purchase WordPress hosting. At Kinsta, we offer WordPress hosting plans that can help save you time and money.
You’ll also need to transfer your custom domain (or register a new one for your new WooCommerce site). Finally, you can export your Shopify product data and import it into your WooCommerce store.
How Can I Migrate from Shopify to WooCommerce?
There are several steps to migrate Shopify to WooCommerce. After you purchase your hosting plan, you’ll need to create your new WordPress installation.
Many providers, including Kinsta, offer one-click WordPress installation. You can then manage every aspect of your site from your MyKinsta dashboard.
You’ll also need to install the WooCommerce plugin. Note that you’ll need to back up your product data from Shopify before canceling your account.
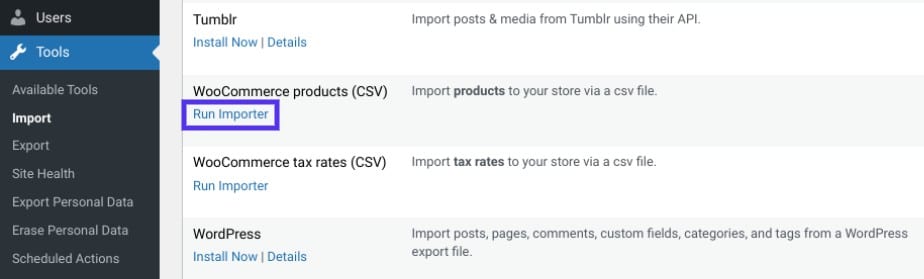
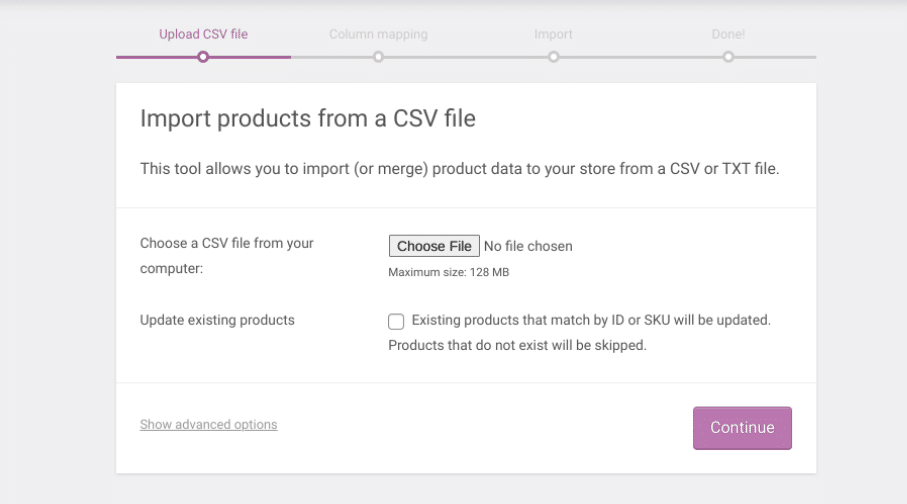
Now navigate to Tools > Import in your WordPress dashboard. Look for the WooCommerce Products (CSV) option, then select Run importer:
After uploading the CSV file you downloaded from Shopify, you can follow the WooCommerce importer prompts to set up your store:
There are also a handful of WordPress migration plugins to make this process easier, including tools for multisite networks.
We also recommend installing a tool such as UpdraftPlus to back up your site. Then you’ll be able to quickly restore your site files if you want to migrate again in the future. You can also access a previous version of your website if something goes wrong during the transfer and setup process.
What’s the Best Way to Migrate With Little to No Downtime?
If you plan to migrate to WordPress from Shopify, you’ll need to choose a reliable hosting provider to minimize downtime. At Kinsta, we offer free WordPress migration services to help ensure a smooth, seamless transition.
We also offer Kinsta APM, our custom-designed performance monitoring tool that can help you identify any performance-related issues.
Summary
Shopify is a popular and powerful ecommerce solution. However, it can feel limited with its customization and flexibility. If you discover Shopify no longer suits your needs or want to migrate to a Shopify alternative such as WooCommerce, you’ll need to cancel your account and delete your store.
In this post, we walked you through how to deactivate a Shopify store in four steps:
- Prepare your account by backing up your product and store data.
- Uninstall applications on your Shopify account.
- Transfer your custom domain (if applicable).
- Close your store via Shopify settings.
If you’re planning to move your online store to WordPress, you’ll need a hosting provider that can handle your traffic. At Kinsta, we offer managed WordPress hosting plans to suit e-commerce businesses of all sizes. Plus, we can even help migrate your data!