
Angular has quickly become one of the most popular frameworks for building web applications, thanks to its robust set of features and ease of use. But how do you use it?
Today, we’ll cover everything you need to know about Angular, from its background and importance in web development to a step-by-step guide on how to install it on various operating systems. There’s no time to waste, so let’s get started.
What Is Angular?
Angular is an open-source web application framework developed by Google in 2010. It is based on TypeScript, a statically-typed superset of JavaScript that adds optional types and other features for more robust and maintainable code.
Angular has a component-based architecture, which means that applications are built using reusable components that can be easily integrated into the larger application. This approach allows for better organization, maintainability, and scalability of your projects.
Some of the key features of Angular include:
- It’s component-based
- Focus on scalability and maintainability
- Strong support for two-way data binding and dependency injection
- A comprehensive set of built-in directives and services
Who Uses Angular?
Angular is a popular choice among various types of developers, including:
Many major companies use Angular in their projects as well due to its power and flexibility.
Some of these companies include:
- Google: It’s no surprise that Google, the creator of Angular, is also one of its biggest users. Google has used Angular in various products, such as Google AdWords, Google Cloud Platform, and the Google Analytics suite.
- Microsoft: Microsoft has adopted Angular for several of its products, including the popular code editor Visual Studio Code, which is built using Angular and other web technologies. Additionally, Microsoft has integrated Angular into its Azure platform for building and deploying cloud applications.
- IBM: Another major tech company that has embraced Angular for its projects is IBM, which has used Angular in its customer support platform.
- PayPal: The leading global online payment platform, has chosen Angular for its web development projects. The company’s PayPal Checkout product, which allows businesses to securely accept payments online, is built using Angular, demonstrating the framework’s ability to handle secure, large-scale applications.
- Upwork: The popular freelancing platform that connects businesses with professionals also leverages Angular for its web development needs. The company’s Upwork Talent Platform is built using Angular, showcasing the framework’s capabilities in creating a responsive and user-friendly interface for managing projects and hiring freelancers.
- Lyft: The ride-sharing platform uses Angular for its web application development. The company’s Lyft Business platform, which provides transportation solutions for businesses and organizations, is built using Angular, showcasing the framework’s ability to create scalable and robust applications for diverse industries.
With such a wide variety of companies embracing Angular, it’s clear that this powerful framework is an excellent choice for web development projects of all sizes and complexities.
Advantages of Using Angular
Before we dive into the installation process, let’s briefly discuss some of the key advantages of using Angular for your web development projects:
Component-Based Design Promotes Reusability
Angular’s component-based architecture encourages developers to create modular, reusable components that can be easily integrated into larger applications. This approach not only makes your code more organized but also promotes reusability, which can save time and effort in the long run.
Strong Support for TypeScript
TypeScript, the statically-typed superset of JavaScript, is a core part of Angular. TypeScript’s optional types and other features make it easier to write robust and maintainable code, which is especially important for large-scale projects.
Emphasis on Modular Architecture
Angular’s focus on modularity means your applications can be easily organized into smaller, more manageable pieces. This makes it simpler to scale your projects, as well as maintain and update them over time.
Built-In Support for Reactive Programming
Angular has built-in support for reactive programming through the RxJS library. Reactive programming is a powerful paradigm that allows you to work with asynchronous data streams, making it easier to handle complex data flows and user interactions in your applications.
Robust Ecosystem and Tools
Angular boasts a rich ecosystem of tools, libraries, and resources to help you get the most out of the framework. From the Angular CLI (Command Line Interface) to the extensive collection of third-party libraries, you’ll have everything you need to build, test, and deploy your applications with ease.
Angular Prerequisites
Before you start installing Angular, it’s essential to have some basic knowledge and tools in place. Here’s a list of prerequisites you should be familiar with:
- Basic knowledge of JavaScript: Angular is built on JavaScript, so having a solid understanding of the language is crucial. If you’re new to JavaScript, you may want to brush up on your skills first.
- Familiarity with command line/terminal: Throughout the installation process and when using Angular, you’ll need to work with the command line (on Windows) or the terminal (on macOS and Linux). Familiarity with basic commands and navigation is essential to getting started with Angular.
- Familiarity with TypeScript (optional): While not strictly necessary, having a basic understanding of TypeScript can be helpful when working with Angular, as the framework is built on TypeScript. You can learn more about TypeScript through the official documentation.
- Node.js and npm installed: Angular requires both Node.js and the Node Package Manager (npm) to be installed on your system. If you don’t already have them installed, you can follow the instructions in our guide on how to install Node.js.
System Requirements
Before installing Angular on your machine, it’s essential to ensure your system meets the following requirements:
- Operating System: Windows 10, macOS 10.10 (Yosemite) or later, or a recent distribution of Linux (such as Ubuntu 18.04 or later)
- Memory: At least 4 GB RAM
- Storage Space: At least 10 GB of free disk space
These requirements ensure that Angular runs smoothly on your system and that you can effectively develop and test your applications.
How To Install Angular
The process for installing Angular is very similar across Windows, macOS, and Linux operating systems. However, it’s still a good idea to follow the specific instructions for your system for the best results.
How To Install Angular on Windows
In this section, we’ll guide you through the process of installing Angular on a Windows machine. Follow the steps below to get Angular up and running on your system:
Step 1: Install Node.js and npm
Before you can install Angular, you’ll need to have Node.js and npm (Node Package Manager) installed on your machine. Again, if you haven’t already installed them, follow the instructions in our guide on how to install Node.js.
Step 2: Install Angular CLI Globally
Next, you’ll need to install the Angular CLI tool. To install the Angular CLI globally on your system, open the Command Prompt and run the following command:
npm install -g @angular/cliThis command installs the latest stable version of the Angular CLI tool and makes it available for use throughout your system.
Step 3: Run Angular CLI Commands
Once you have the Angular CLI installed, you can use its commands to manage your Angular projects. To verify that the installation was successful, run the following command in the Command Prompt:
ng --versionThis command displays the installed version of the Angular CLI, along with other relevant information about your environment.
Step 4: Create an Initial Workspace for the Application
To create a new Angular application, you’ll need to create a workspace. A workspace is a directory that contains the configuration files and source code for your Angular projects. To create a new workspace, run the following command in the Command Prompt, replacing my-app with the desired name for your application:
ng new my-appThis command creates a new directory with the specified name, sets up the necessary configuration files, and generates an initial Angular application within the workspace.
Step 5: Run the Angular Application in Your Browser
To test your new Angular application, navigate to the newly created directory using the cd command:
cd my-appThen, start the development server by running the following command:
ng serveThis command compiles your Angular application and starts a development server. By default, the server runs on port 4200.
Open your preferred web browser and navigate to http://localhost:4200/. You should see your new Angular application running in the browser.
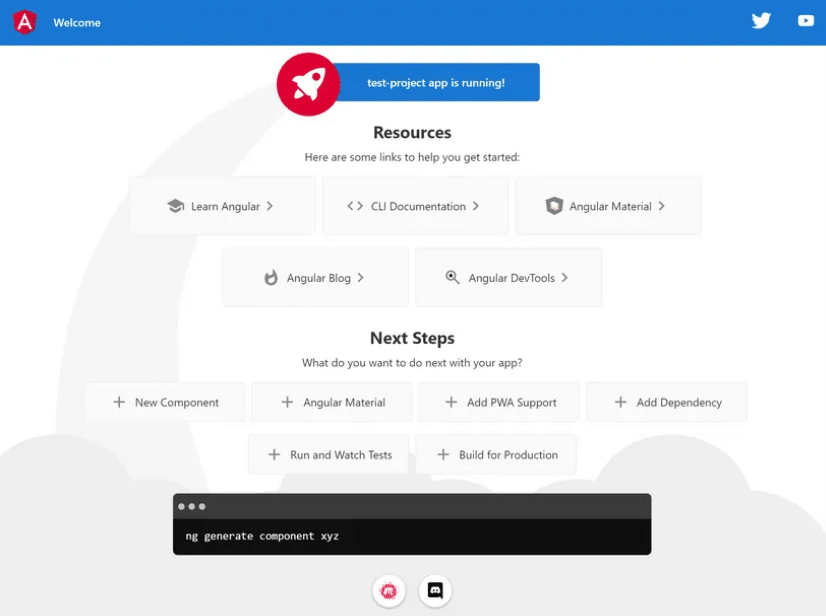
Congratulations! You’ve successfully installed Angular on your Windows computer and created your first Angular application. You can now start building your projects.
How To Install Angular on macOS
In this section, we’ll guide you through the process of installing Angular on a macOS machine. Follow these steps to get Angular up and running on your system:
Step 1: Install Node.js and npm (If Not Already Installed)
As mentioned previously, you need to have Node.js and npm installed on your computer before you can install Angular. If you have it already proceed to step 2. If not, follow along with our how-to guide first, then continue with this tutorial.
Step 2: Install Angular CLI Globally
Just as with the Windows instructions, you need to next install Angular CLI, which is what you need to create (and manage) Angular applications. To do this, open the Terminal and run the following command:
npm install -g @angular/cliBy running this command, you can install the most recent stable release of the Angular CLI tool and access it across your system.
Step 3: Test Angular Installed Correctly
After installing the Angular CLI, you can utilize its commands for managing Angular projects. To confirm a successful installation, run the subsequent command in the Terminal:
ng --versionYou should see the version of Angular CLI displayed.
Step 4: Create an Angular Application
To begin a new Angular application, you need to first create a workspace. This involves making a folder that will store the configuration files and source code for your Angular projects. To create the workspace, open the Terminal and enter the code below. But just like the instructions for Windows and macOS, remember to substitute “my-app” with the name you prefer for your application.
ng new my-appThis command performs three tasks: it creates a new directory with a specified name, sets up the configuration files required, and generates an initial Angular application within the workspace.
Step 5: Run the Application
To check your new Angular application, use the cd command to go to the directory where it was created.
cd my-appThen, start the development server by running the following command:
ng serveTo compile your Angular application and launch a development server, use this command. The server will run on port 4200 by default.
Please open your favorite web browser and go to http://localhost:4200/ to see your new Angular application.
And that’s all there is to it. You now have Angular installed on macOS and have created an Angular application successfully.
How To Install Angular on Linux
Lastly, we’ll guide you through the process of installing Angular on a computer running Linux.
Follow these steps to get Angular up and running quickly:
Step 1: Install Node.js and npm (If Not Already Installed)
Just like the Windows and Mac instructions, you need to have Node.js and npm installed prior to getting Angular on your Linux machine. Take a look at our detailed installation guide to learn how to do this or proceed to the next step if you’ve done it already.
Step 2: Install Angular CLI With npm Package Manager
Your next order of business is to install Angular CLI on your system. To do this, open a Terminal window and enter the command below:
npm install -g @angular/cliOr, you can use the following instead:
$ sudo npm install -g @angular/cliThis command installs the latest stable version of the Angular CLI tool and makes it available for use throughout your system.
Step 3: Create a New Angular Project
To create a new Angular application, you’ll need to create a workspace. A workspace is a directory that contains the configuration files and source code for your Angular projects. To create a new workspace, run the following command in the Terminal, replacing my-app with the desired name for your application:
ng new my-appThis command creates a new directory with the specified name and sets up the necessary configuration files for it. It also generates an initial Angular application.
Step 4: Test the New Application in a Web Browser
To test your new Angular application, navigate to the newly created directory using the cd command:
cd my-appThen input the following:
ng serveThe server runs on port 4200, so to access it, you’ll need to open a web browser and go to http://localhost:4200/.
If all went correctly, you should see your new Angular application in the browser.
And with that, you now have Angular installed on Linux. There’s no telling what you might do next!
Summary
If you’ve followed along, today we’ve guided you through the process of installing Angular on Windows, macOS, and Linux. And by following the steps outlined for each platform, you should now have a working Angular development environment and be ready to start building web applications using this powerful framework.
As you begin learning and using Angular, don’t forget to explore the extensive resources available to help you master the framework. From official Angular documentation to community-driven resources like Angular University, you’ll find plenty of material to support your learning journey.
You may also wish to consider joining Angular-focused communities, such as the r/Angular subreddit, where you can ask questions, share your experiences, and learn from fellow developers.
Once you’re ready to deploy your Angular applications, consider using Sevalla’s Application Hosting, Kinsta PaaS product.
With Angular installed and a wealth of resources at your fingertips, you’re well on your way to becoming a proficient Angular developer. Best of luck!


