If you haven’t set up WooCommerce logging yet, now is the time to do so. Error tracking can be very helpful if something breaks in your store, while general activity tracking can give you a good idea of the changes that are being made to WooCommerce settings by other users.
And if your store ever breaks or strange changes begin happening without a clear source, these logs can be crucial in fixing the problem.
Curious what’s going on in the WooCommerce back end? Let’s set up logging in WooCommerce so you always know exactly what’s happening in your back end at all times.
What Is WooCommerce Logging?
Logging and debugging are very important parts of running a website. When you use a tool such as WordPress or WooCommerce, it will keep track of a variety of activities happening on your site in the background.
These events are compiled into a log file for easy viewing. You usually don’t need to keep a close eye on activity logs, but when your site starts acting up or a setting seemingly changes on its own, it can be really helpful to have access to them.
But these logs can confuse, mislead, or needlessly concern beginners who don’t know how to debug, so many of these tools turn them off by default.
For example, WordPress has debugging built-in; you just need to turn on debug mode to begin logging.
WooCommerce works much the same. Without plugins, it offers the ability to track certain kinds of errors and log them in case you ever need to debug a broken storefront or strange site behavior. These can be found in your site’s files or through your dashboard.
WooCommerce Activity Logs
Activity logging is a feature that, though not built into WooCommerce by default, is very important nonetheless. These logs keep track of any settings changes and who’s responsible for them.
A WooCommerce activity log can track updates made to existing orders, product descriptions, stock quantity, prices, coupon codes, store settings, and basically any other feature provided by WooCommerce.
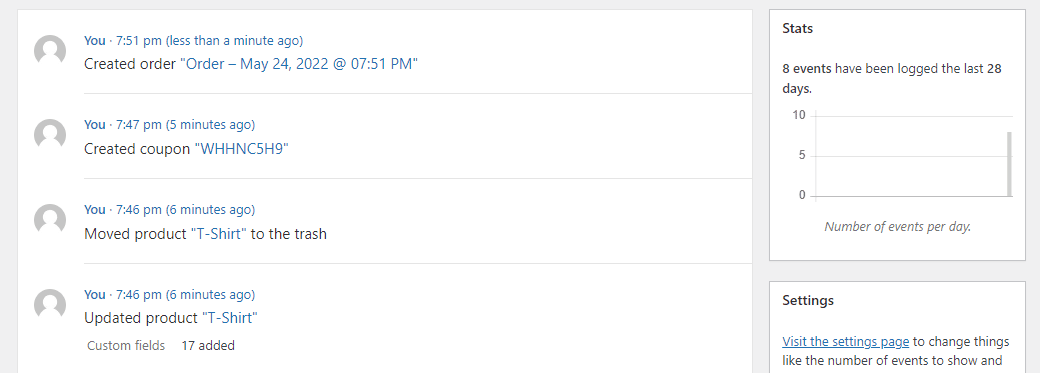
It will also tell you what user made this change and when. You could be alerted when specific sensitive changes are made as well.
This is crucial if your website has multiple store managers. If someone changes a setting they’re not supposed to, it can cause a lot of confusion. But with an activity log, you’ll know immediately who made the switch.
But even if you’re running a store on your own, it’s still an important feature. Sometimes you can change something without meaning to, and an activity log will allow you to find the issue and roll it back. Or if you get hacked, you’ll be able to quickly identify any suspicious behavior.
WooCommerce doesn’t include activity logging by default, so you’ll need to install a plugin to enable this feature.
WooCommerce Error Logs
Unlike activity logging, WooCommerce includes error logging built-in. It tracks two types of errors: Fatal errors and general PHP errors.
Fatal errors are a serious type of error caused by faulty code, which results in an action failing to complete. WooCommerce might call a function that doesn’t exist, get trapped in an infinite code loop, or try to do something your server doesn’t allow.
Sometimes a fatal error might have no noticeable effects, but other times it can break parts of your store or even cause your entire site to stop loading.
General PHP errors can be much less concerning. WordPress itself is built on PHP, as are plugins such as WooCommerce. Errors crop up constantly on websites, often due to incorrect coding syntax or minor conflicts. Sometimes they can cause noticeable issues, and other times you won’t notice them at all.
But it’s a good idea to keep an eye on errors on your site, especially fatal errors. They could indicate a problem that needs immediate fixing.
Why You Should Monitor Your WooCommerce Logs
Ignoring your logs can be a big mistake. Though it takes a bit of setup, it’s still worth taking the time to make sure your WooCommerce store is monitoring activity and errors.
While it may have no impact the majority of the time, the moment something on your website breaks or unexplained changes start happening, it will become a lifesaver. Logs let you know what happened, when, and where, so you can easily identify the problem and roll back changes.
And if you keep a close eye on your logs, checking them frequently or setting up automated notifications, they can allow you to catch an issue before it gets out of control.
Errors can crop up at any moment, rendering your store unusable. Or someone could – accidentally or maliciously – change a setting that messes with something important, such as product pricing or checkout page functionality. You may not notice the issue until you’ve lost weeks or months of revenue.
But if you monitor your logs, you’ll be aware before anything damaging can happen. You’ll always know right away when serious errors disable your website, settings are changed, and products or orders are updated.
And should your store ever be hacked and defaced, it will be immediately obvious with a logged string of prices being drastically changed, descriptions updated, and entire products deleted.
Finally, logging can help you remain GDPR-compliant in certain scenarios. Most activity log plugins should include a way to provide users with data collected on them, which is required by the GDPR. WooCommerce also offers GDPR features built-in.
How To Track WooCommerce Activity Logging
Activity logging doesn’t come with the plugin, so for this, you’ll need a WooCommerce extension. Each of these three has its own pros and cons, so here’s a quick look into how each one works.
You can install any plugin by going to Plugins > Add New and searching for its title, or by downloading these plugins through their link and uploading the file using the Upload Plugin button.
1. Activity Log
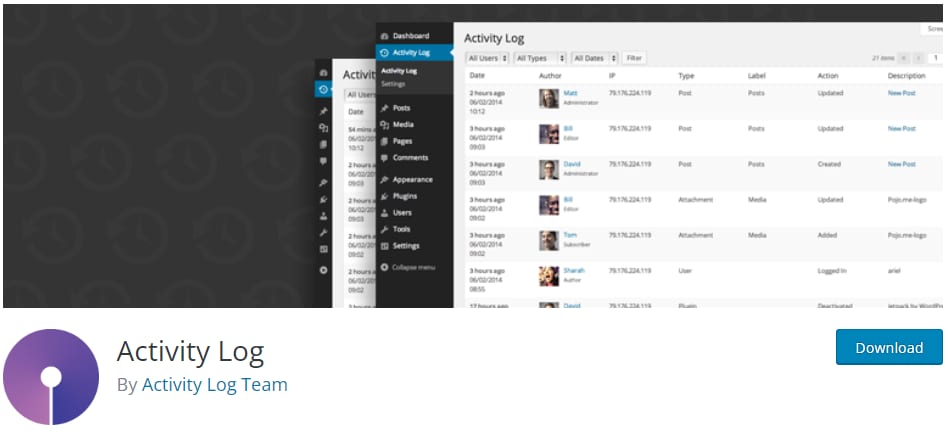
The aptly-named Activity Log plugin was designed to monitor core WordPress activities as well as multiple plugins including WooCommerce. It’s optimized well and uses its own database table, so you won’t notice any slowdowns.
You’ll find a new Activity Log menu near the top of your dashboard once you install it. You’ll be presented with a simple, to-the-point menu that lists out all the latest activities, what users (and IPs behind them) are responsible for, and any additional context.
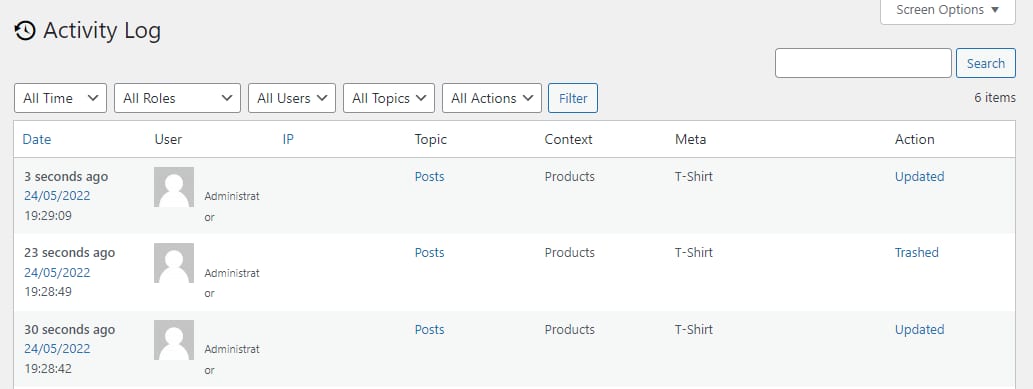
The only downside is that it doesn’t show you exactly what was changed in most instances, only that a change occurred.
You can also configure the settings to keep logs for a longer or shorter period or purge them from your database if they’re taking up too much space.
Overall, this is a good choice for a logging plugin if you just need a general overview of what’s happening in your store. There are no paywalled features; what you see is what you get.
2. WP Activity Log + WP Activity Log for WooCommerce

WP Activity Log is useful for monitoring the changes happening on your website in detail. It supports WooCommerce out of the box, providing exceptional activity coverage and even more insight. While some features (email notifications, reports, user session management, and others) are premium-only, free users get access to an array of options.
After installing, take a look at the new WP Activity Log menu on your dashboard. Use the Log Viewer to see any logged events, Settings for granular control over the plugin’s behavior, and the Enable/Disable Events option to choose which events you want to log. Select WooCommerce from the Choose a category drop-down menu to narrow the list down to store-only events should you wish.
The logs are very detailed, telling you exactly what changed along with the usual information like date, time, user, and IP, among other things.
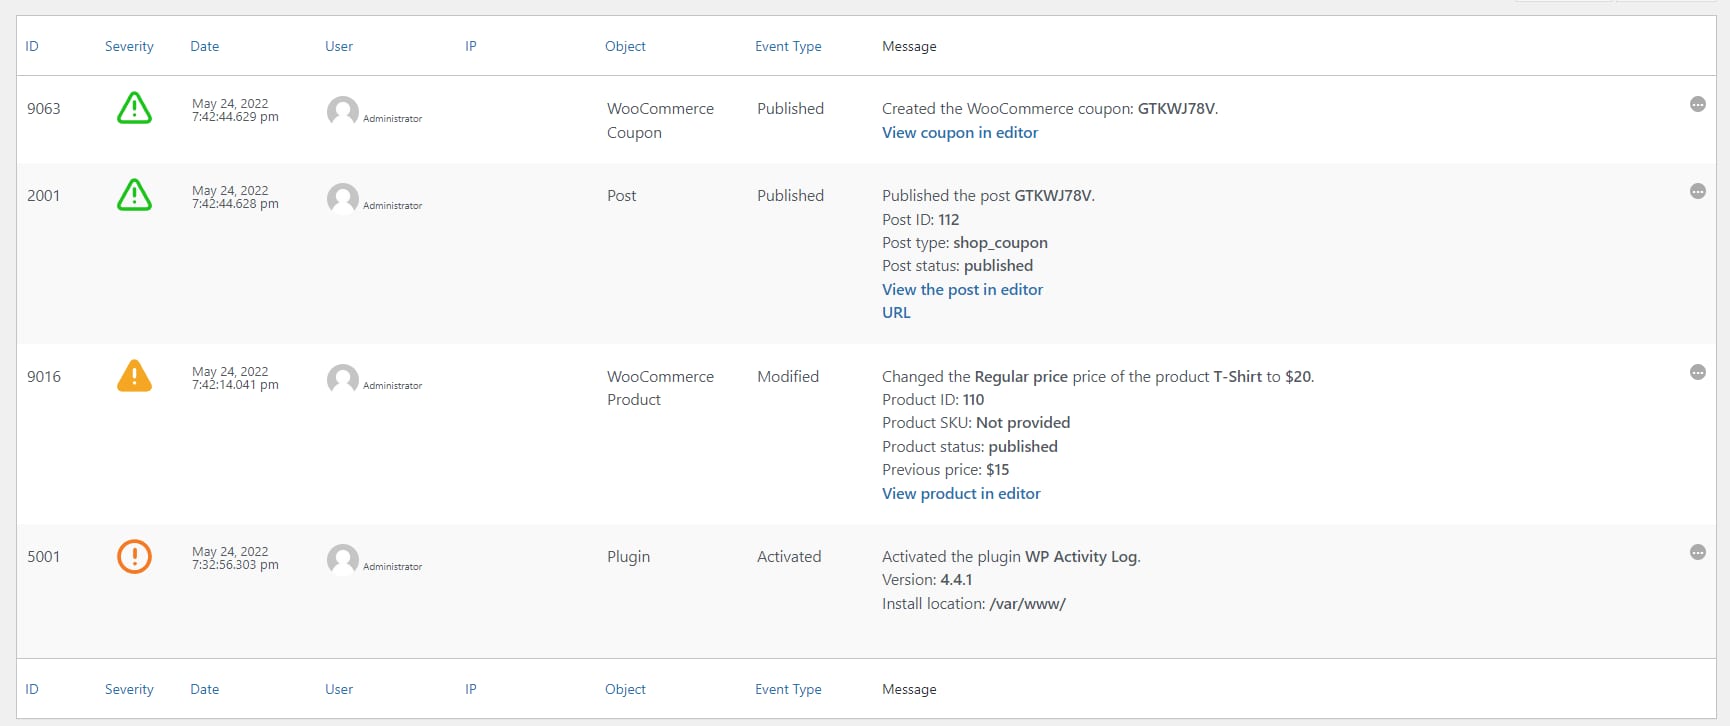
This is a very complex plugin with plenty of settings and features, so if you want even more control over your logs and full information on exactly what has changed, this is the one for you.
3. Simple History
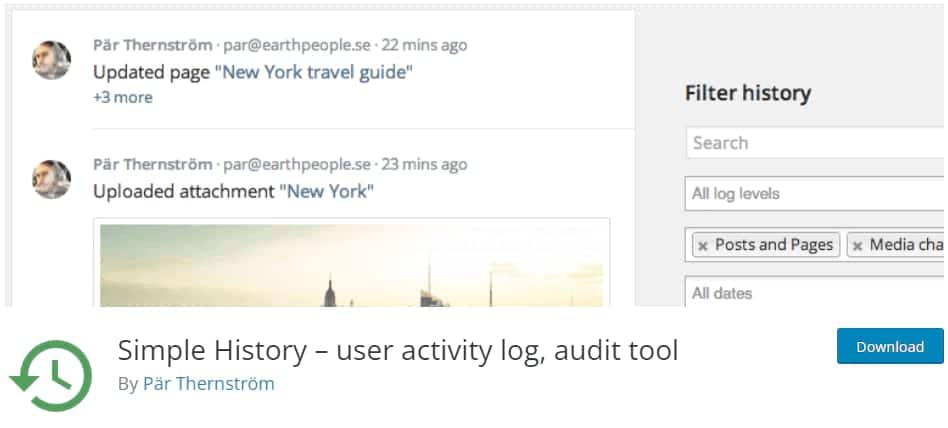
Sometimes simple is the best way to manage a website. If you need an activity logger without any hassle, Simple History is a good choice. It works with WooCommerce as well as the rest of your website to give a basic idea of any changes that are being made.
You can find your log page in Dashboard > Simple History, and your settings page in Settings > Simple History. Logs are kept for 60 days and you can search them for keywords.
The interface is pleasant and elegant, so if the clutter often present in logging plugins bothers you, you may enjoy Simple History.
How To Track WooCommerce Error Logging
Activity logging can be enabled with a simple plugin, but with error logging, you’re probably going to have to do some extra setup.
If you only want to see fatal errors, this is easy enough to access from your dashboard. But if you want to see general PHP errors or add custom log entries, it will require more work. You should only do this if you’re an advanced user and are familiar with PHP.
Before changing any sensitive files on your site or adding any code, you should always create a backup just in case something goes wrong. You can easily make a backup in the Kinsta dashboard. Also, check out how to backup your WooCommerce database.
Track WooCommerce Logging
Fatal errors are very easy to locate in WooCommerce. Your logs can be found in WooCommerce > Status. Then click the Logs tab at the top.
Click the dropdown menu to open it. If your site has generated a fatal error, you’ll find a log waiting for you here. Select it and click View to see what happened.
You’ll be able to tell at what time the error occurred and some of the code that might have caused it. If you’re familiar with PHP, this can point you in the right direction for fixing the issue.
If you don’t see any fatal error logs here, that means your site is working fine with no issues. Check back every once in a while to make sure everything is still running smoothly. And if your store ever starts acting up, this should be the first place you look.
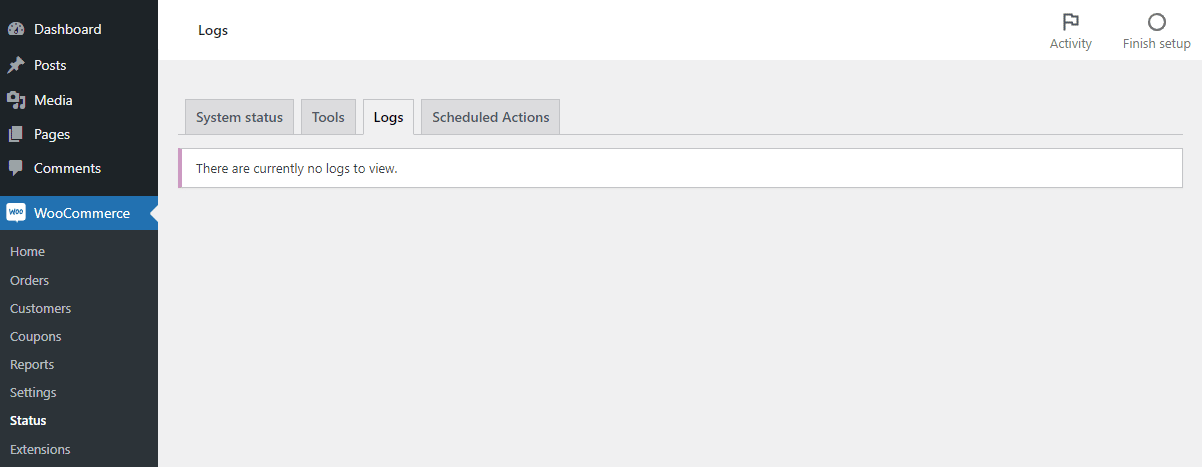
If you’d rather access the log files directly, you can find them in the /wp-content/uploads/wc-logs folder of your site. You can use FTP to connect to your site and view the logs, though it’s often more convenient to just use the dashboard.
You might also want to access the PHP error logs as a whole, as they provide a bit more information than just the fatal errors output to WooCommerce.
Install an FTP program such as FileZilla and obtain your FTP credentials from your host. Kinsta users can find these in MyKinsta under Sites > Info.
Connect to your site and find the error.log file, which can be in a variety of locations but is often in the root folder, public_html, or var/log folder.
If you’re using Kinsta, you can also access the error.log file in MyKinsta under Sites > Logs, no FTP necessary.
Enable WooCommerce Debugging
If you’re actively having an issue, you may want to try enabling debug mode. This will begin actively logging errors to a file you can find on your server.
Use an FTP program to access your server and find wp-config.php in the root folder of your website. Add the following code (or change the existing values if this code is already present):
define( 'WP_DEBUG', true );

define( 'WP_DEBUG_LOG', true );

define( 'WP_DEBUG_DISPLAY', false );
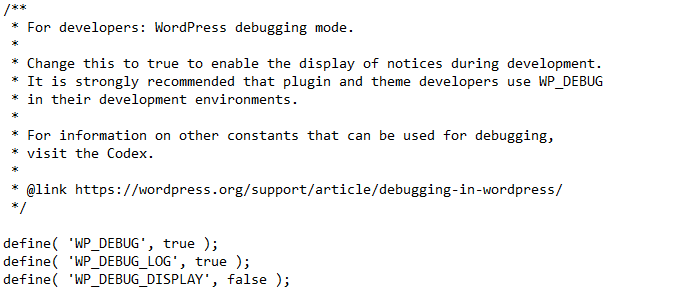
Now you’ll be able to find a new file in the wp-content folder: debug.log.
Try to trigger the issue again, and check the debug.log to see what’s been output. This can help lead you in the right direction towards solving your error.
Just make sure to turn off debugging again once you’re done, as it can present a security issue if left on for long periods of time.
Add Custom Log Entry
What if you want the WooCommerce logger to track a custom function and display it in your dashboard just like fatal errors? This is totally possible, but it requires some advanced knowledge of PHP and comfort in adding code to your website.
This is suitable if you want to track certain activity on your store without using an activity log plugin, or if you want to keep an eye on errors that WooCommerce normally doesn’t output.
WooCommerce uses the WC_Logger function to handle logs, which you can make use of yourself using wc_get_logger. You can even write these logs directly to your admin area with WC_Log_Handler_DB.
Once you’ve written your custom code, you can either insert it into functions.php using FTP or Appearance > Theme File Editor, or you can create a plugin if you’re using a lot of complex code.
If you want to see it in action, check out this example of custom WooCommerce logs.
Summary
It’s a good idea to set up an activity log and keep an eye on error reports, especially when you’re running something as sensitive as an online store.
One tiny issue can cause serious damage to your WooCommerce revenue. Proper logging can prevent an issue from spiraling out of control or even stop it in its tracks with enough diligence. The more people you have running your store, the more important logging becomes, though it can be a huge help even for solo projects.
WooCommerce doesn’t support activity logging by default, so you’ll need to install a plugin. Error logging is built-in, but if the system in place isn’t enough, you can always add your own logs with a little code.
WooCommerce was built to be extensible, so anything is possible, especially if you have WooCommerce hosting that makes modifying your site and accessing logs easy.


