
Running your WordPress installation, plugins, and theme on the latest available versions is a crucial best practice for using the platform. In fact, with Kinsta Automatic Updates, you can handle plugin and theme updates safely without lifting a finger. It’s also recommended to use the most recent version of PHP. However, there are some cases when this isn’t prudent or possible.
If you find yourself in such a situation, you may need to reverse an update and downgrade your WordPress site (or part of it). Fortunately, there are methods available for rolling back each element of your website.
This post will explain why you might need to downgrade WordPress, as well as how to do so safely. We’ll cover restoring previous versions of WordPress, as well as rolling back plugins, themes, and PHP.
Let’s get started!
Prefer to watch the video version?
Why You Might Want to Downgrade Your WordPress Version or Other Features
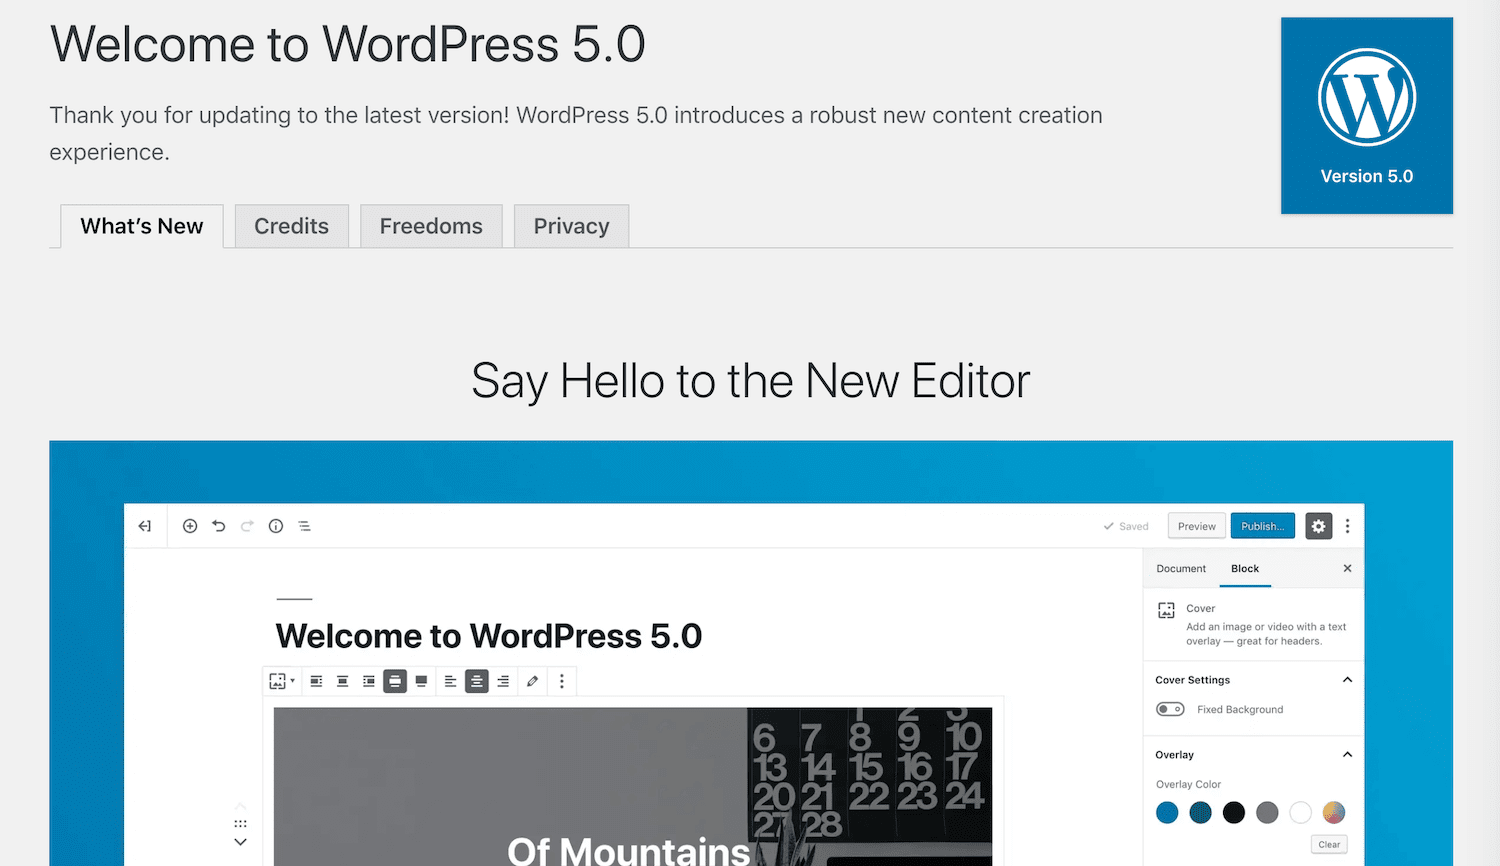
Running the latest version of WordPress core (in our case WordPress 5.5), plugins, and themes is one of the most important steps in maintaining your website. These updates often include security patches that are vital to preventing malicious attacks on your site and may enhance performance and functionality.
For this reason, we don’t recommend ever downgrading WordPress or any of its components permanently. However, there are some situations in which you may want to do so on a temporary basis.
The most common reason is due to a plugin or theme conflict. If one of your site’s elements is not compatible with the latest version of WordPress core, for example, downgrading your installation can enable visitors to access the feature while you work on a long-term solution.
(Suggested reading: How to Fix “The site is experiencing technical difficulties.” Error in WordPress).
In cases when the conflict is between two plugins, or between a plugin and your theme, downgrading WordPress itself won’t help. Instead, you’ll need to roll back the version of the plugin or theme that’s causing the problem, in order to get your site up and running again.
Additionally, some older plugins and themes may not be compatible with newer versions of PHP. If the plugin or theme in question is vital to the functionality of your site, you might want to downgrade PHP for a time while you find an alternative solution.
In short, downgrading WordPress should be a temporary troubleshooting procedure. You’ll want to plan on updating your website again once you’ve replaced the problematic plugin or theme, or otherwise addressed the issue causing a conflict on your site.
Suggested reading: here’s a curated list of the best WordPress themes.
How to Downgrade Your WordPress Site (6 Methods)
The process of downgrading your WordPress site will depend on what you’re trying to accomplish. You may find that you need to restore a previous version of your entire website, or that you only need to revert an individual plugin or theme rather than WordPress itself.
With that in mind, here are six different ways you might roll back your website. Each addresses a different need, so we suggest reading through all of them to see which is most applicable to your specific situation.
1. Downgrade Your WordPress Version Manually
If you’re experiencing a serious conflict that prevents you from accessing the back end of your website, downgrading WordPress manually may be your best or only option. Before you get started, you’ll want to back up your site just to be safe.
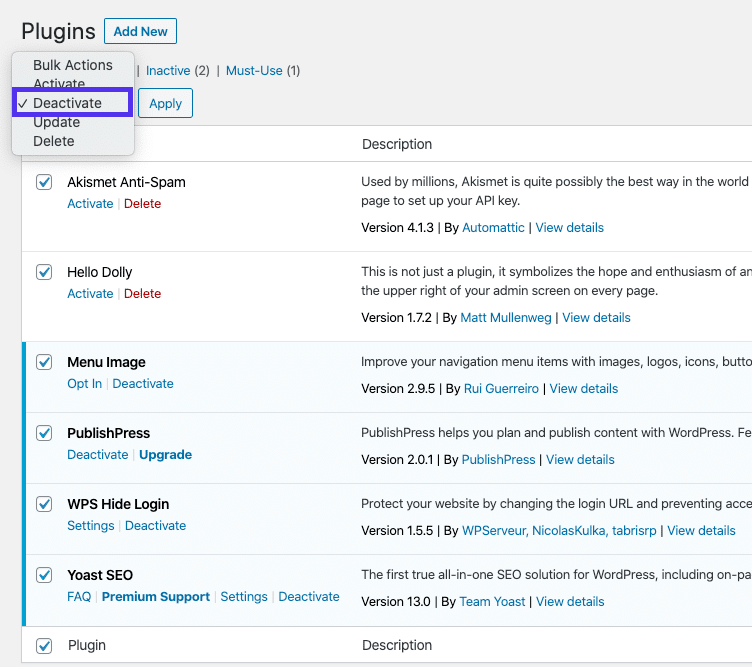
Next, you should deactivate all of your plugins. This is easy enough if you have access to the WordPress backend. Simply select the checkbox next to each plugin, and use the bulk Deactivate option:
If you don’t have access to your dashboard, you can deactivate plugins manually using Secure File Transfer Protocol (SFTP) and a client such as FileZilla. You’ll also need these tools for future steps, so if you aren’t familiar with them you may want to take a moment to learn how they work.
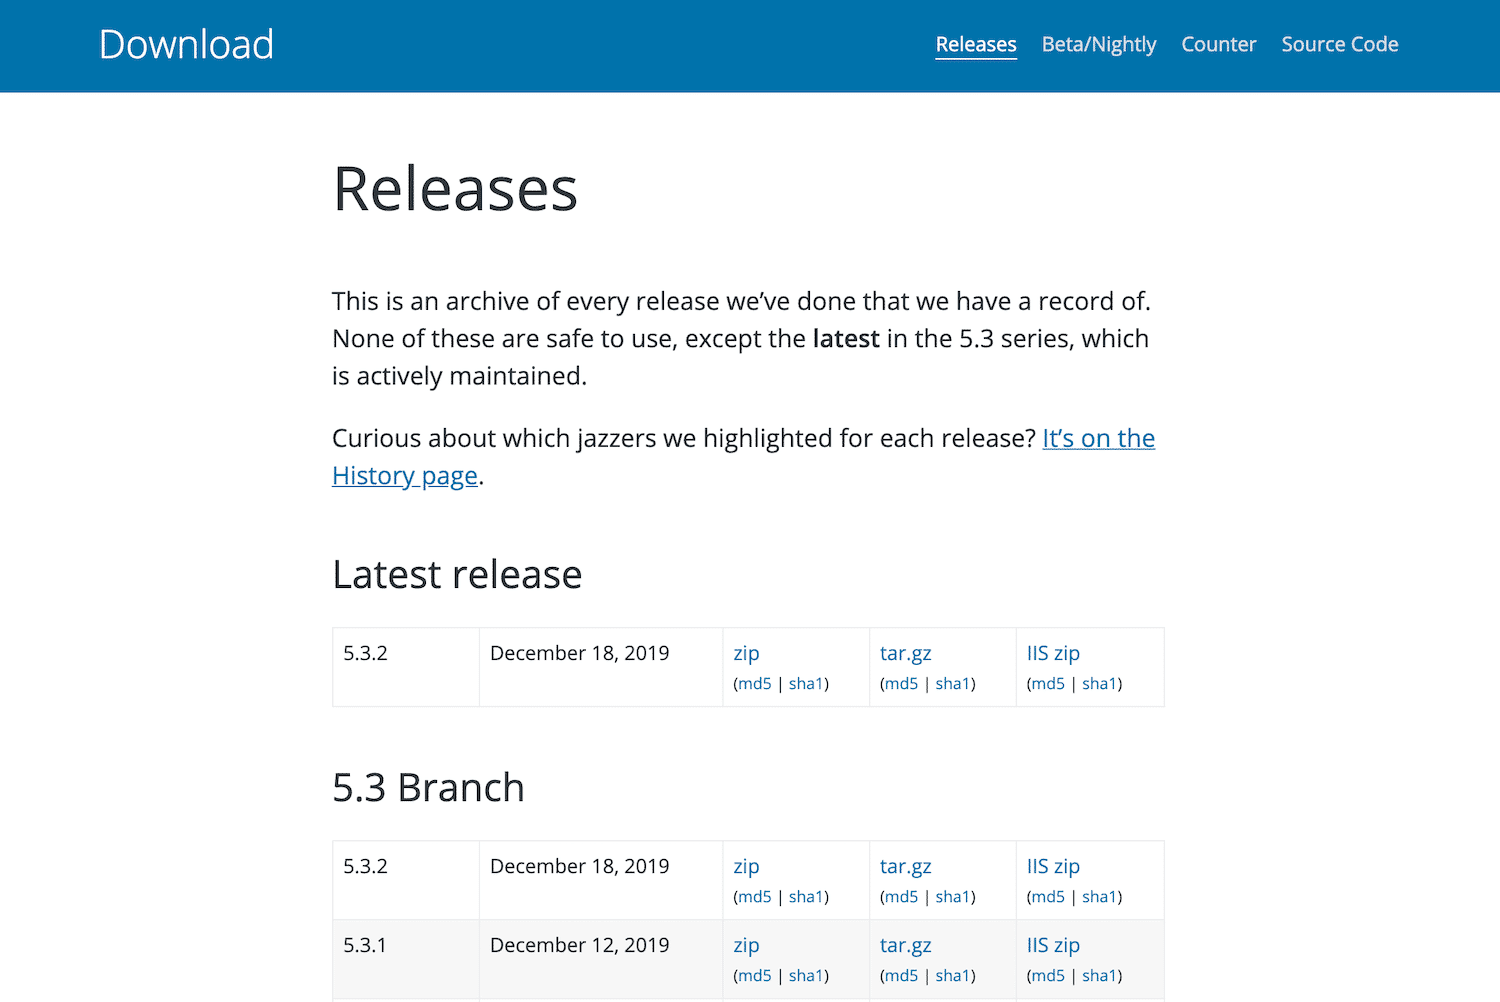
You’ll then need to download the relevant version of WordPress. We recommend using the newest release possible, which is usually the second-most recent version. You can access the files you’ll need in the WordPress Release Archive:
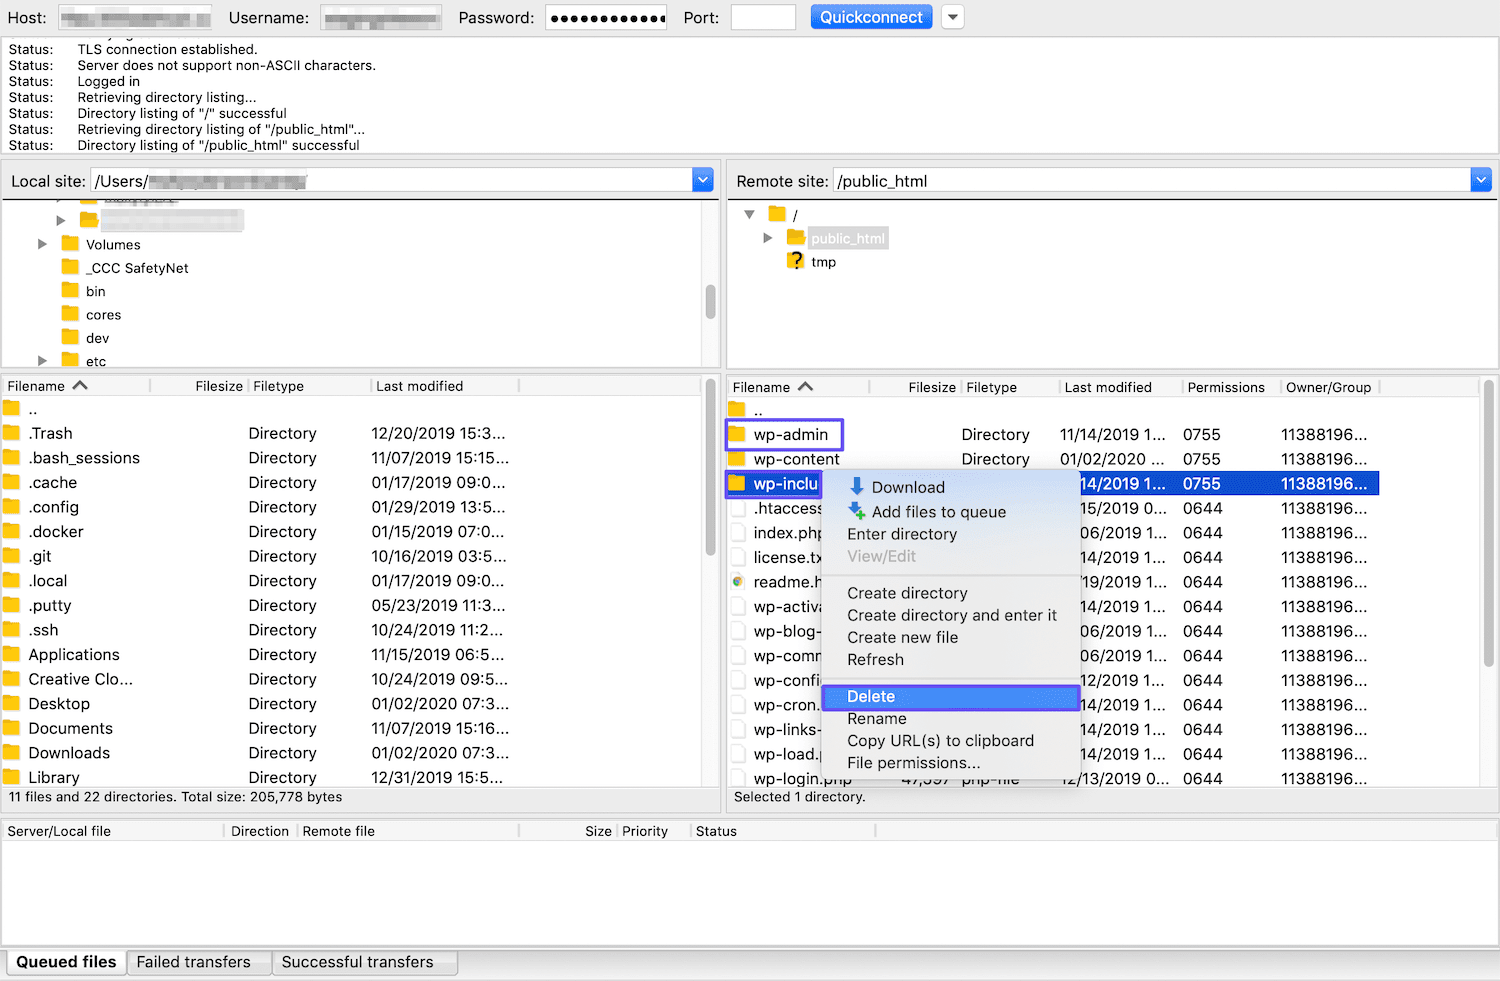
Then, using FTP and FileZilla (or another client), access your site’s files and delete your wp-admin and wp-includes directories:
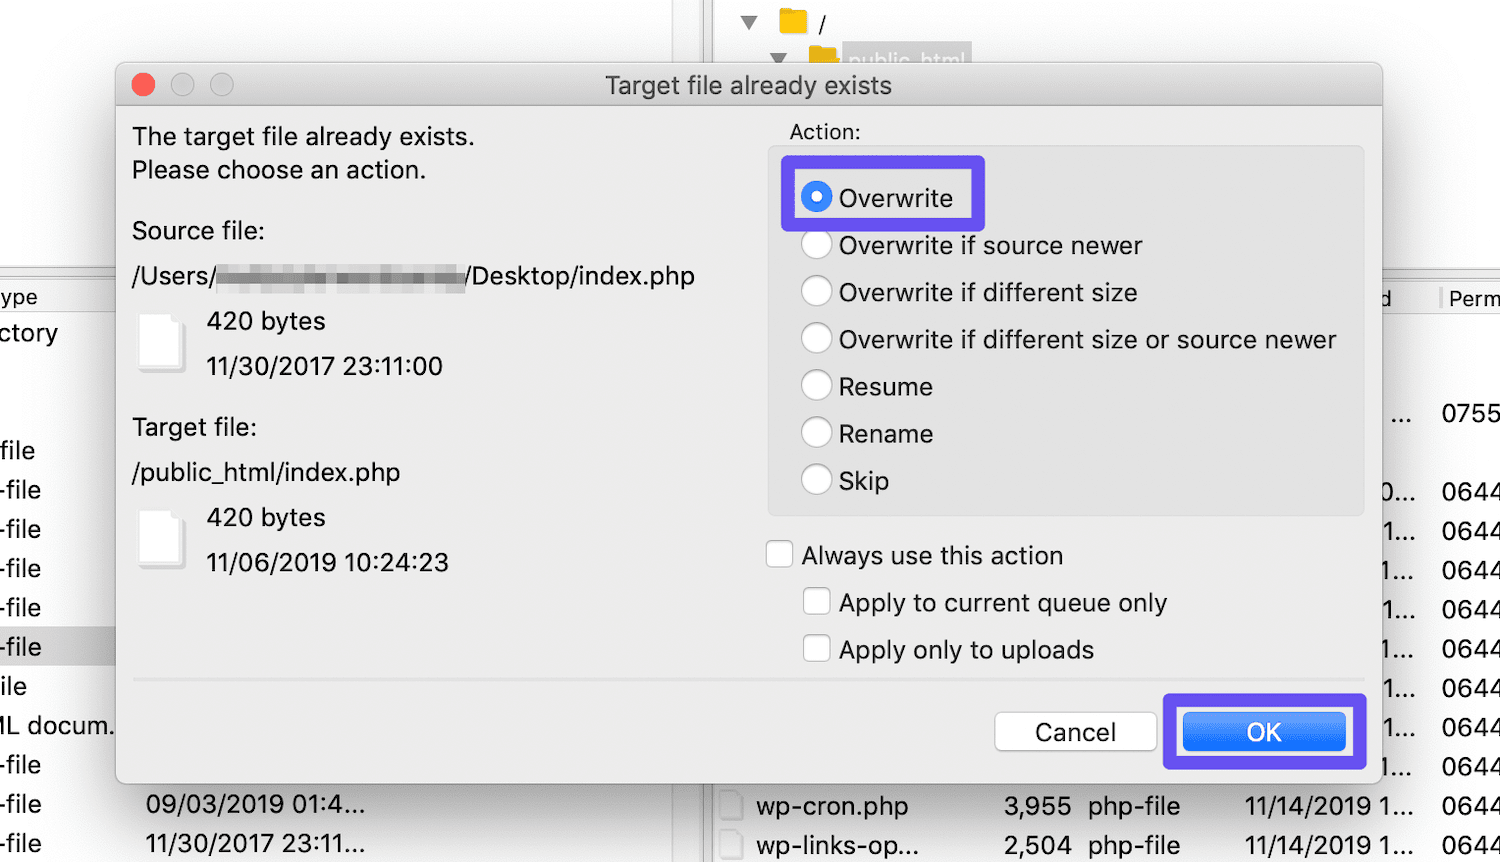
Once that’s done, upload all the files from the version of WordPress that you want to install, except for the wp-content directory. When asked if you want to overwrite files, select Overwrite > Ok:
Then, navigate to your site’s backend. You may see a message asking you to update your database. If so, click on the Update WordPress Database prompt. After that, log in to your site as usual.
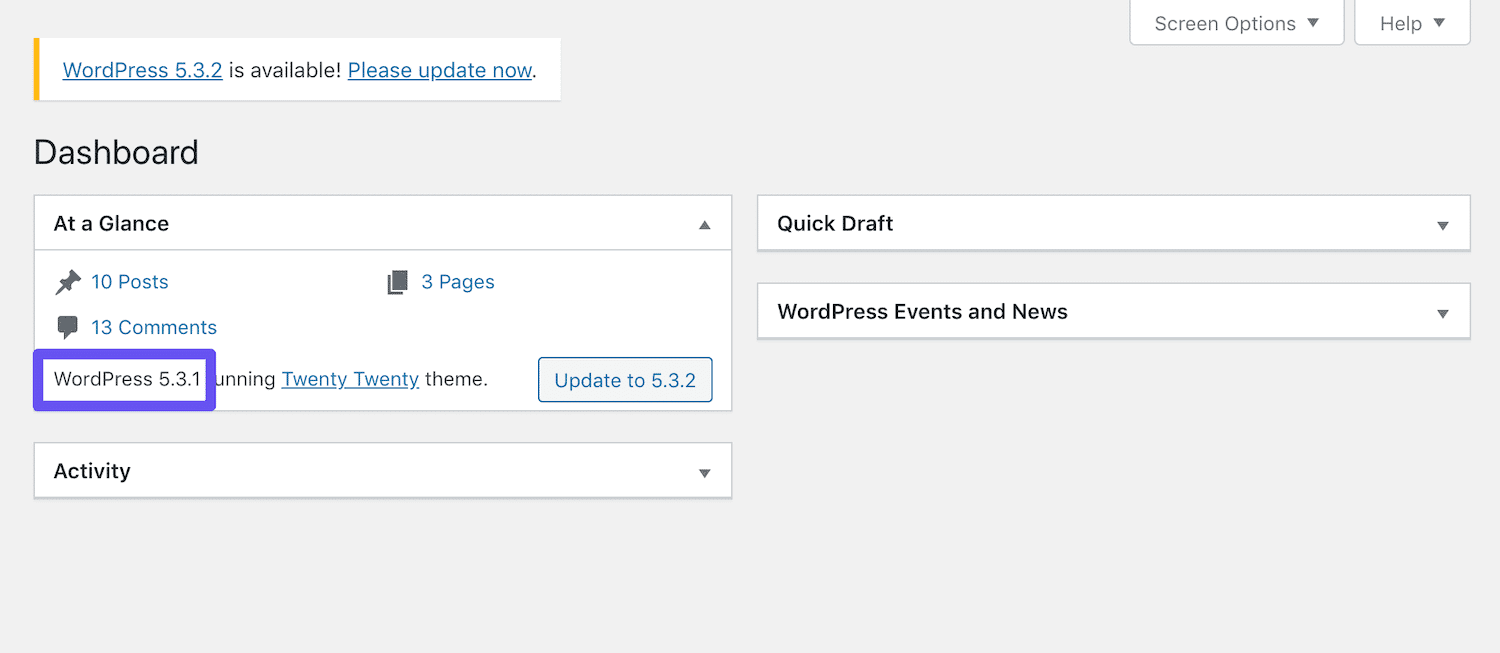
You should now have access, and be running the older version of WordPress:
At this point, you can re-activate your plugins and work on resolving the original conflict.
You may want to disable automatic updates as well, to prevent WordPress from installing another version in the meantime. When your issue is fixed, you can return to the latest version of WordPress from the Updates screen in your dashboard.
2. Use WP Downgrade to Run a Previous Version of WordPress
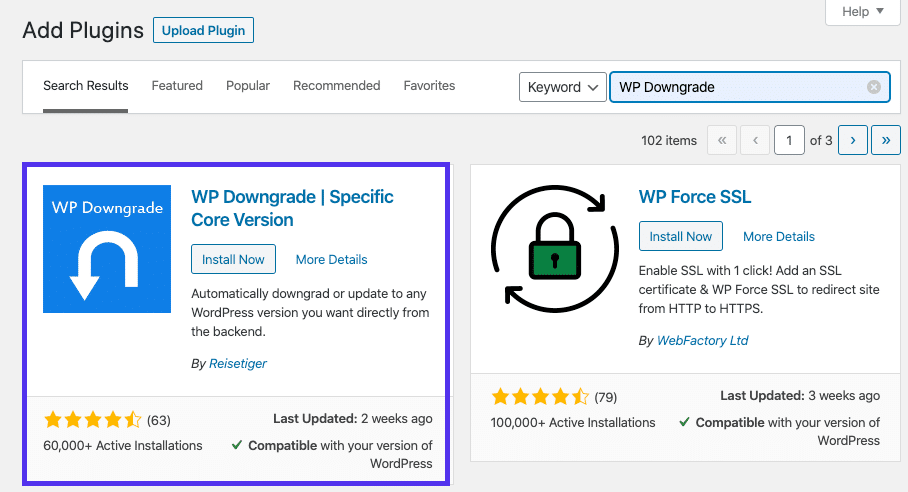
If you’re uncomfortable with FTP and the idea of deleting core files, there is a plugin available for downgrading WordPress. If you like this idea, go ahead and install WP Downgrade after backing up your site:
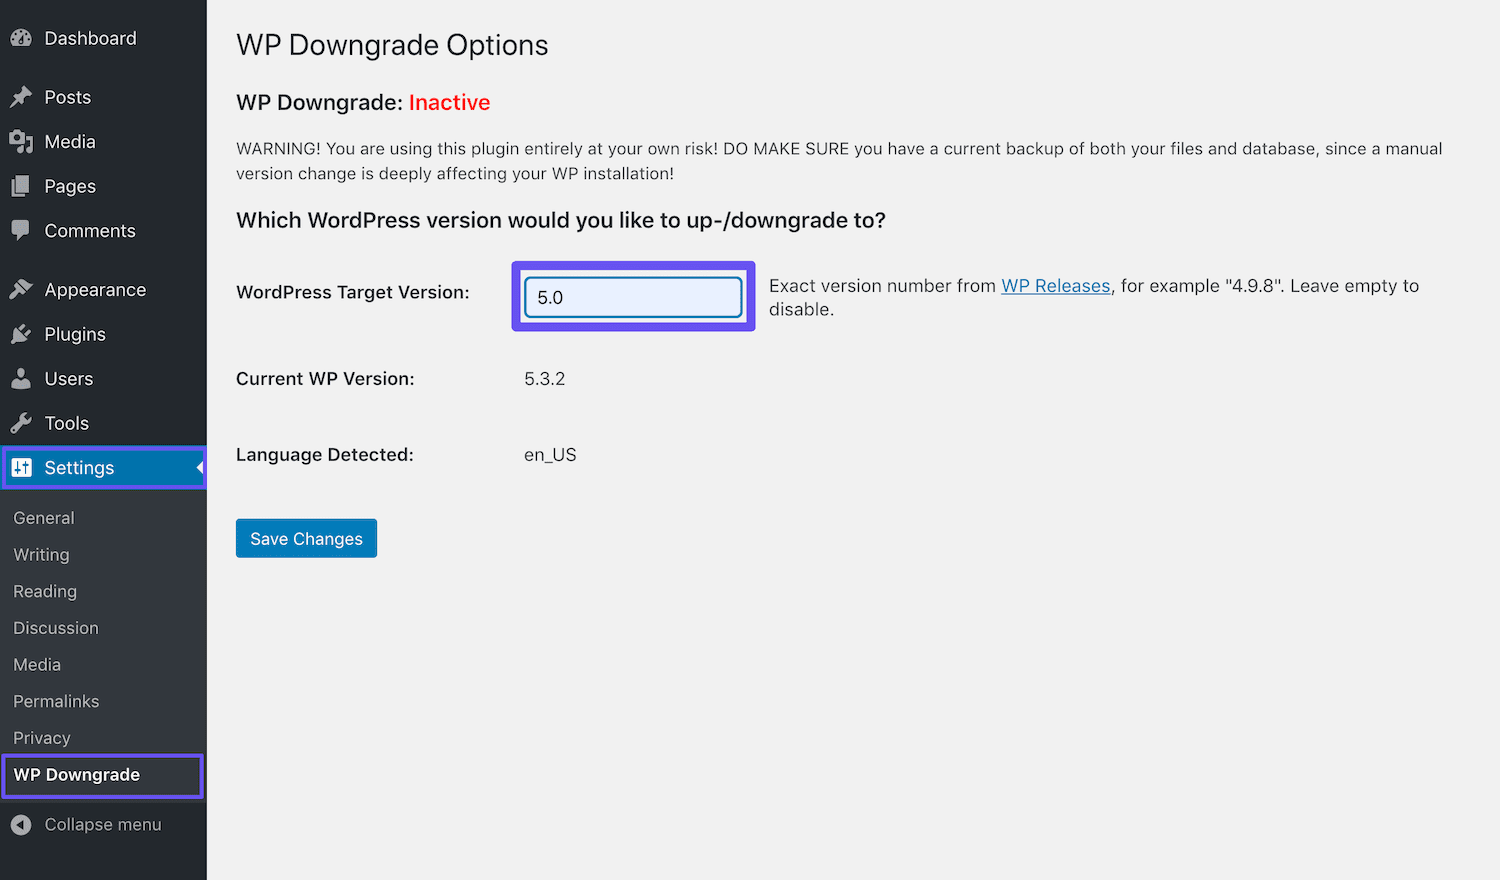
Then, navigate to Settings > WP Downgrade and enter your target version of WordPress into the relevant field:
Click on Save Changes, and then go to the Updates screen. You’ll see that your target version is now listed as the “latest version of WordPress”:
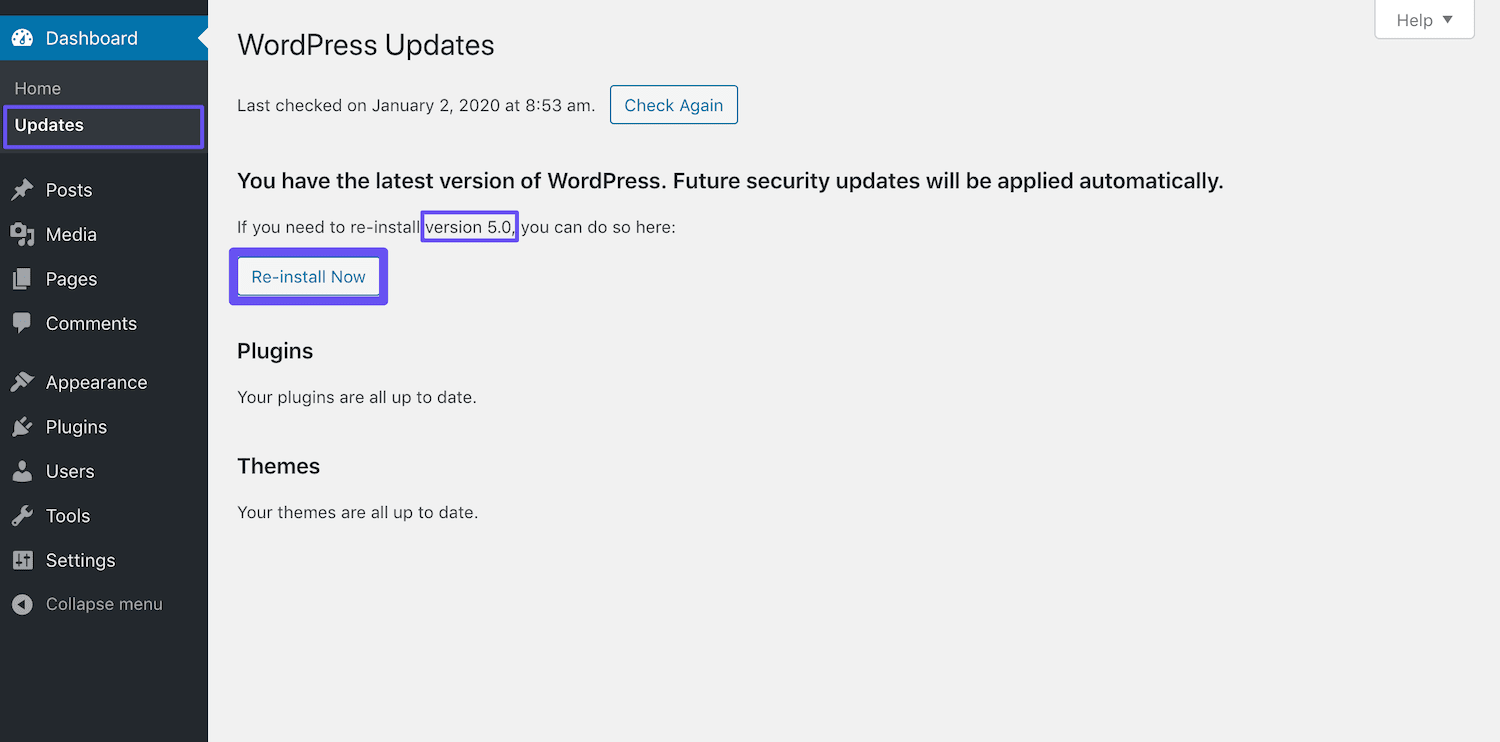
Click on the Re-install Now button to complete the downgrade. WordPress will appear to run a normal update, and then you should see the welcome message for your target version:
To re-install the most recent version of WordPress once you’re done troubleshooting, you’ll need to return to Settings > WP Downgrade. You can change your target version back to the latest update, and then repeat the process detailed above.
3. Restore a Previous Backup to Undo Changes to Your Site
Another way to downgrade your site is by restoring a backup from when your site was running an earlier version of WordPress. In order for this to work, of course, you’ll need to have a reliable backup system in place.
You’ll also need to make sure that the copy of your site being restored isn’t missing any key content that has been recently added. You don’t want to inadvertently lose your latest posts while trying to downgrade WordPress. If your site is highly dynamic, this may not be the best route to take.
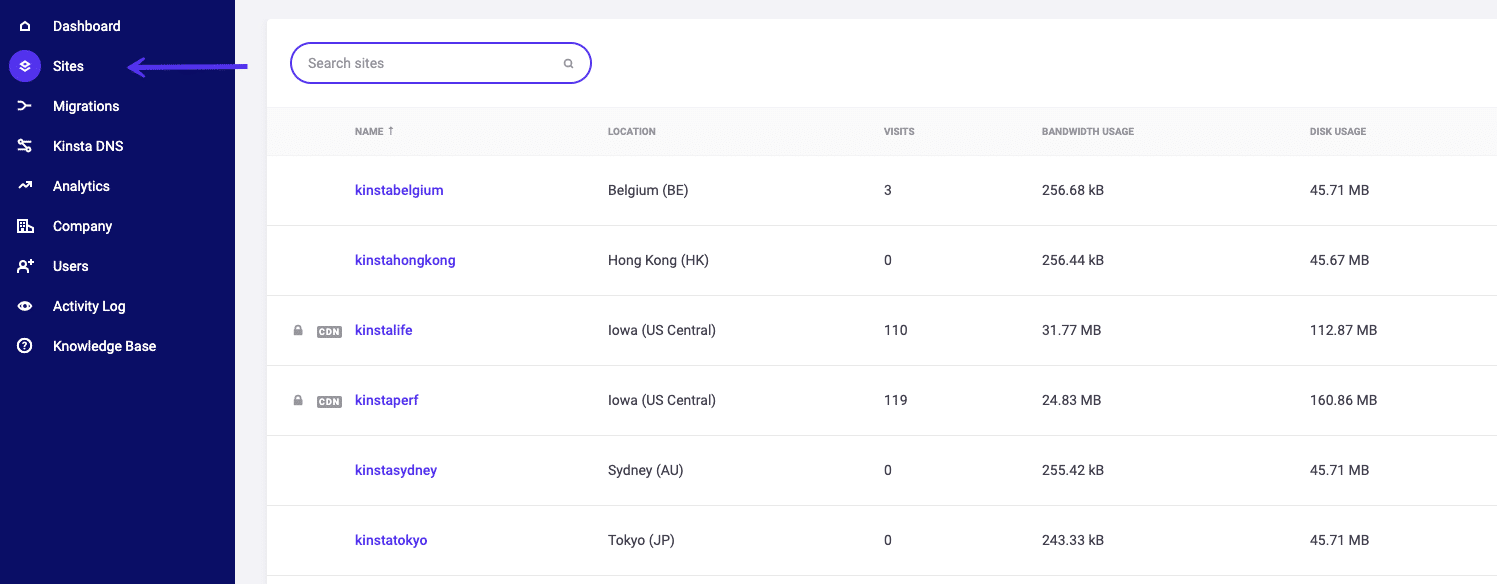
If you do choose to proceed, the process of restoring your backup will vary depending on the system you used to create and store your files. For example, Kinsta customers can take advantage of our one-click restoration process. Simply log in to your MyKinsta dashboard to get started, and click on Sites:
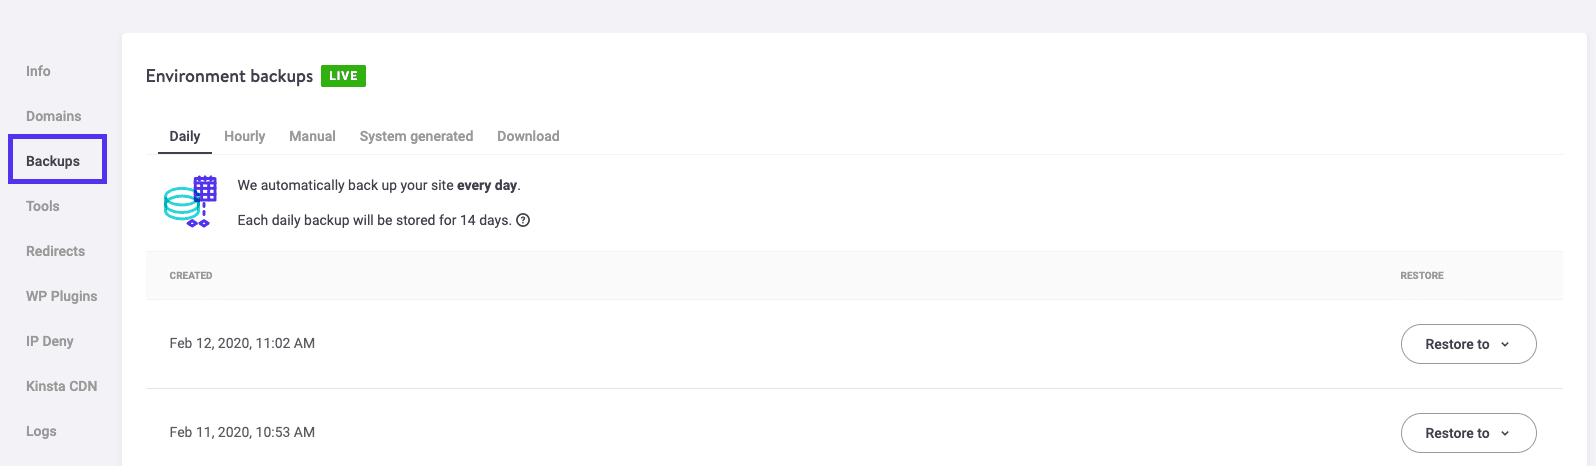
Select the WordPress site you wish to restore from the list. Then navigate to the Backups tab:
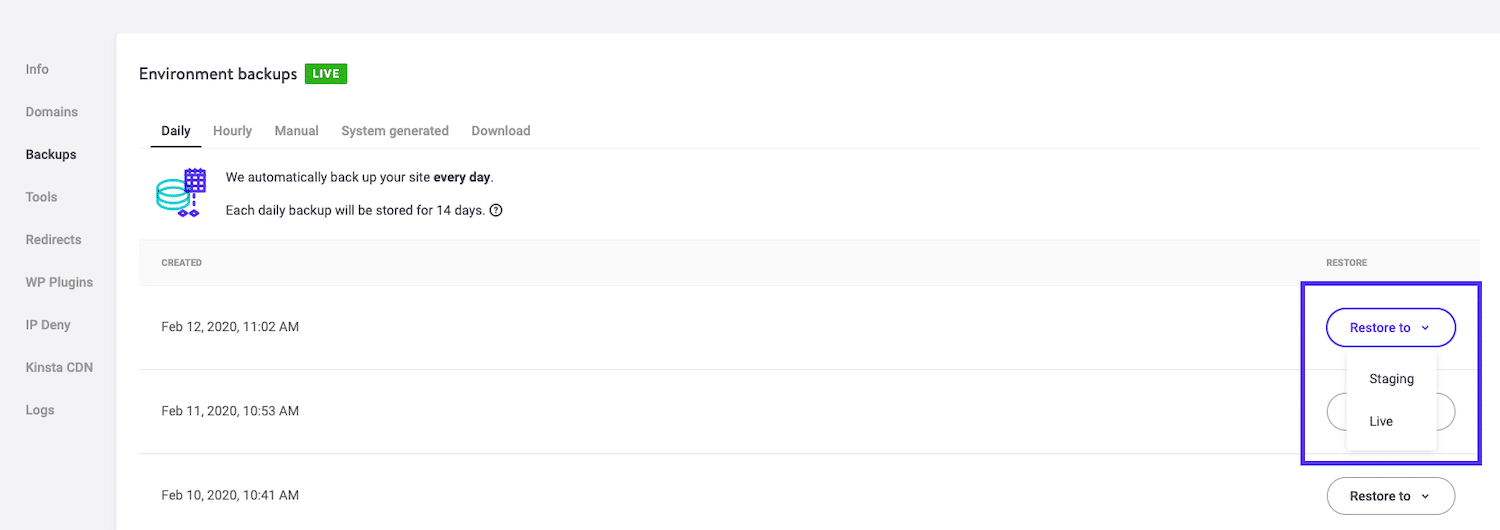
Click on the Restore to drop-down menu. If you wish to test the backup in a staging environment, you can do so here. To downgrade your live site to the version of WordPress in the backup file, select Live:
To prevent accidental restorations, we require one final step before reverting your live site. Enter your website’s name into the relevant field, then click on Restore Backup to confirm and start the process:

It may take a while for the restoration process to complete. Once it does, you’ll be able to regain access to your site’s back end. We’ll also create a backup of your site just before the restoration, in case you need to undo the process.
4. Manually Downgrade a Plugin or Theme
In the event that you need to downgrade a plugin or theme instead of WordPress core, you can do so manually using a process similar to that in Method #1. To get started, you’ll need to retrieve the files for the older version of the plugin or theme you wish to downgrade.
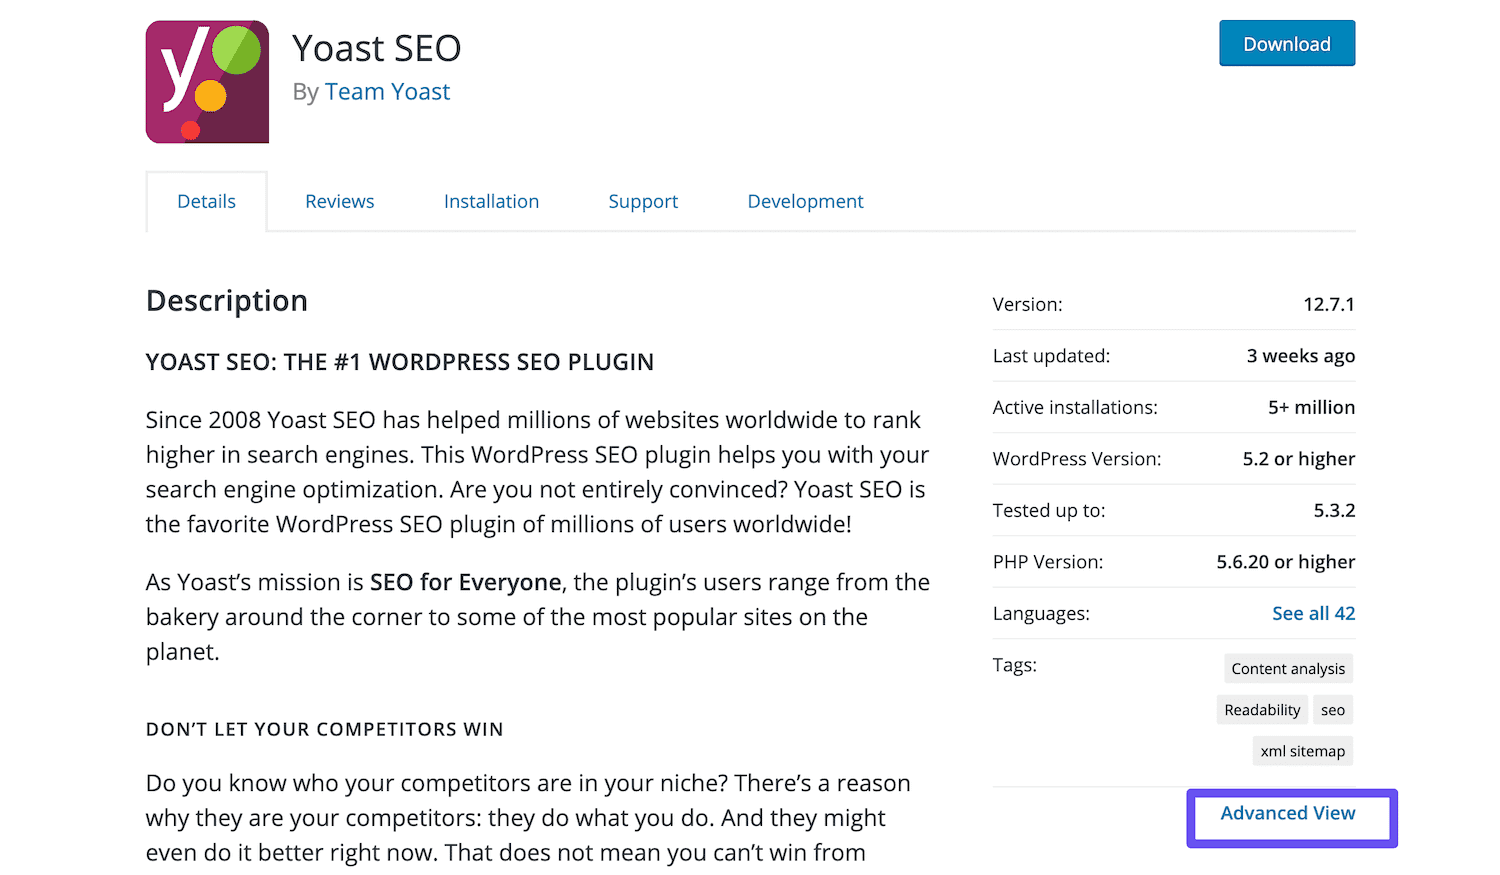
For plugins in the WordPress directory, you can find older versions by clicking on Advanced View on the feature page:
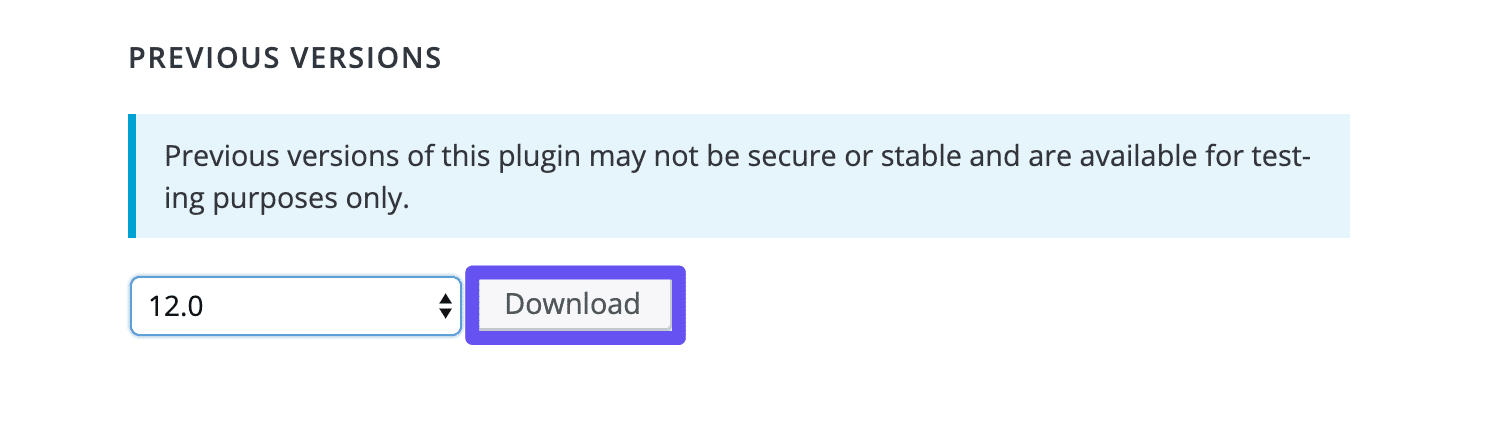
Scroll to the bottom of the page, then select the version you need from the drop-down menu and click on Download:
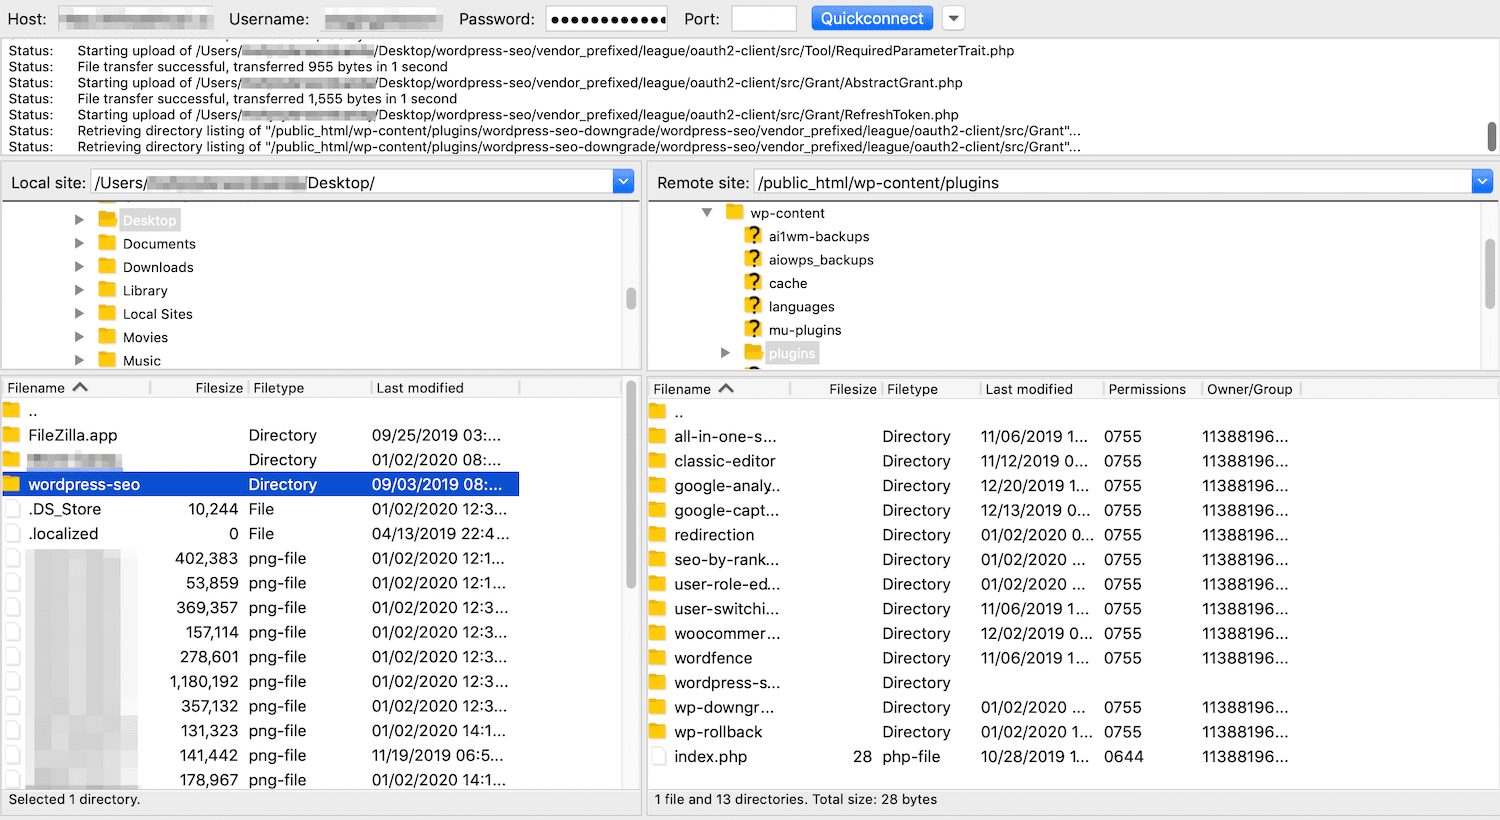
Unzip the file and save it to your computer. Then make a backup of your site just in case something goes wrong, and connect to your server using FTP and your preferred client. There, navigate to wp-content > plugins.
Next, you’ll need to rename the directory for the existing version of your plugin. Then upload the folder for the prior version you wish to downgrade to:
This should successfully restore the older version of the plugin you need. Plus, you’ll be keeping the latest version easily available, so you can switch back to it when you’re ready.
Unfortunately, this method gets tricker for themes and premium plugins. The process for rolling them back is more or less the same, but the WordPress Theme directory doesn’t have previous versions readily available for download.
As for premium plugins, previous versions may or may not be easily accessible. If you can’t find the version of the plugin or theme that you need, your best bet is to try contacting the developer for help.
5. Roll Back Plugin and Theme Updates With WP Rollback
Fortunately, there is a simpler method for downgrading plugins and themes. All you need to do is install and activate WP Rollback:
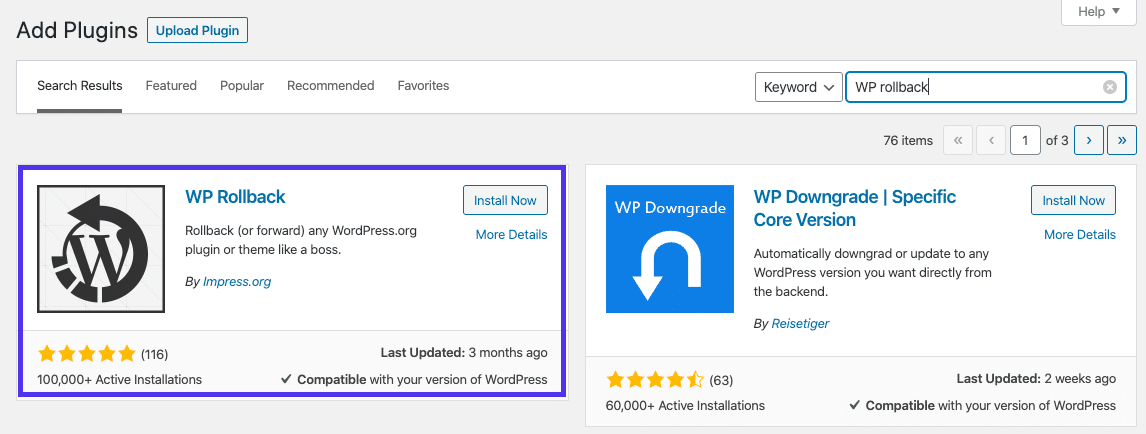
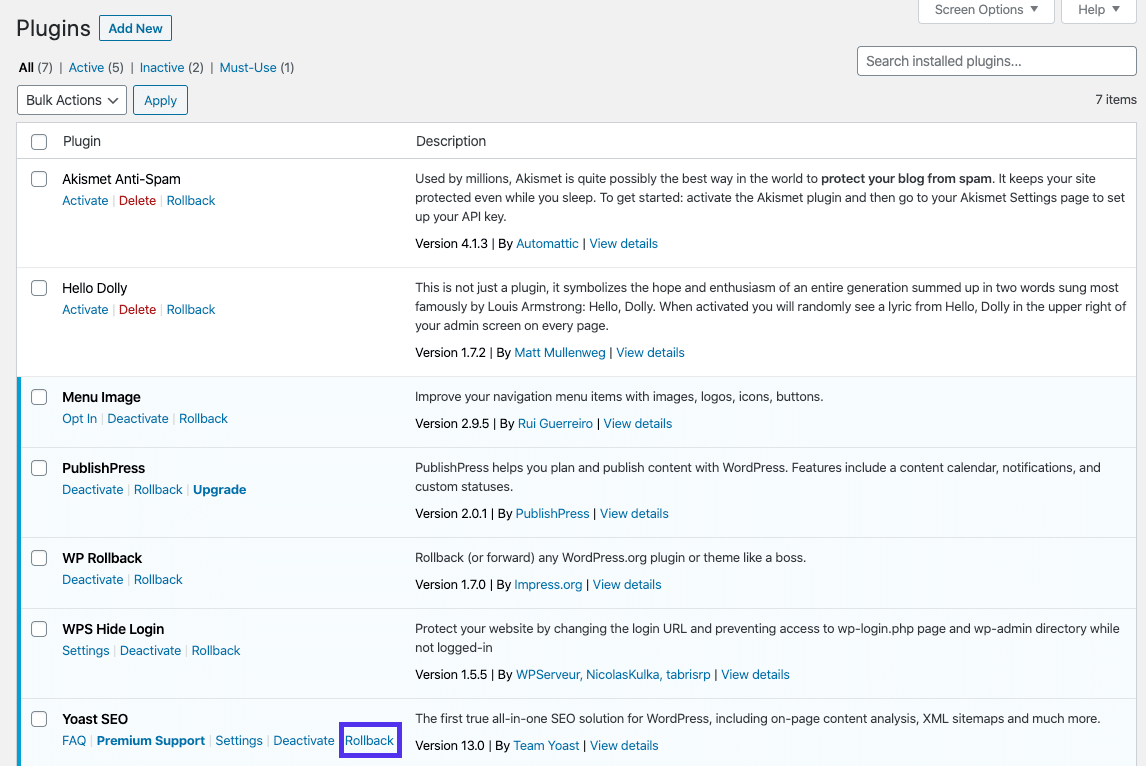
This plugin is routinely updated and has an impressive five-star rating in the WordPress Plugin directory. Once it’s up and running, navigate to your Plugins list.
You’ll now see a Rollback button under each plugin’s title, alongside the standard options:
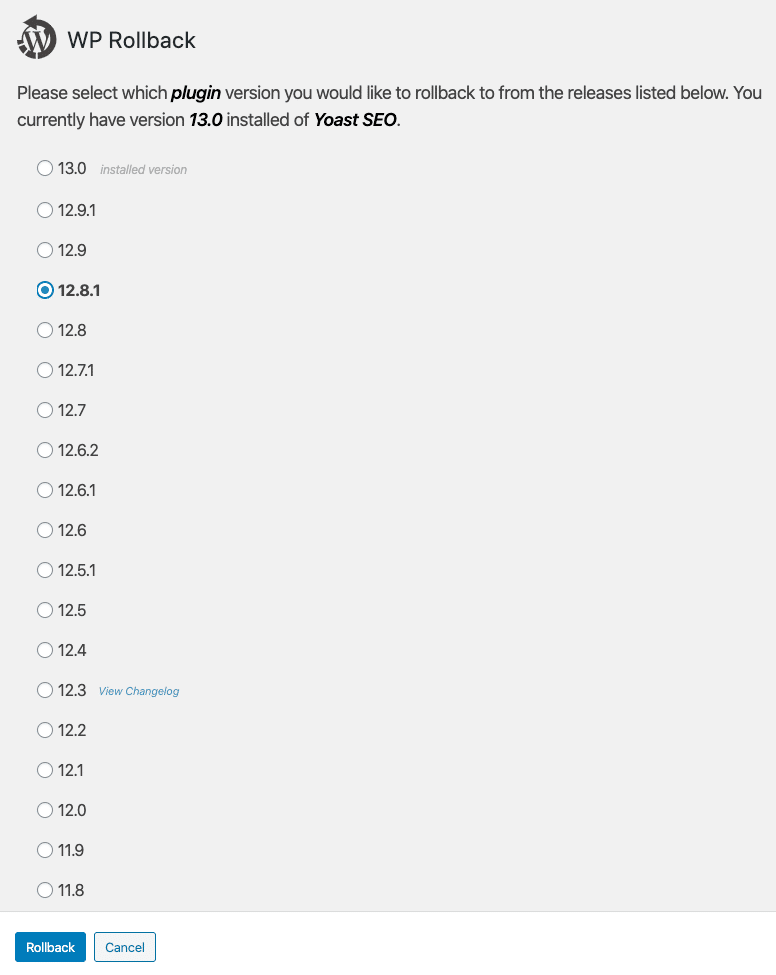
If you click on this new option, you’ll be redirected to a page where you can select your target version. Then select the Rollback button to start the downgrade process:
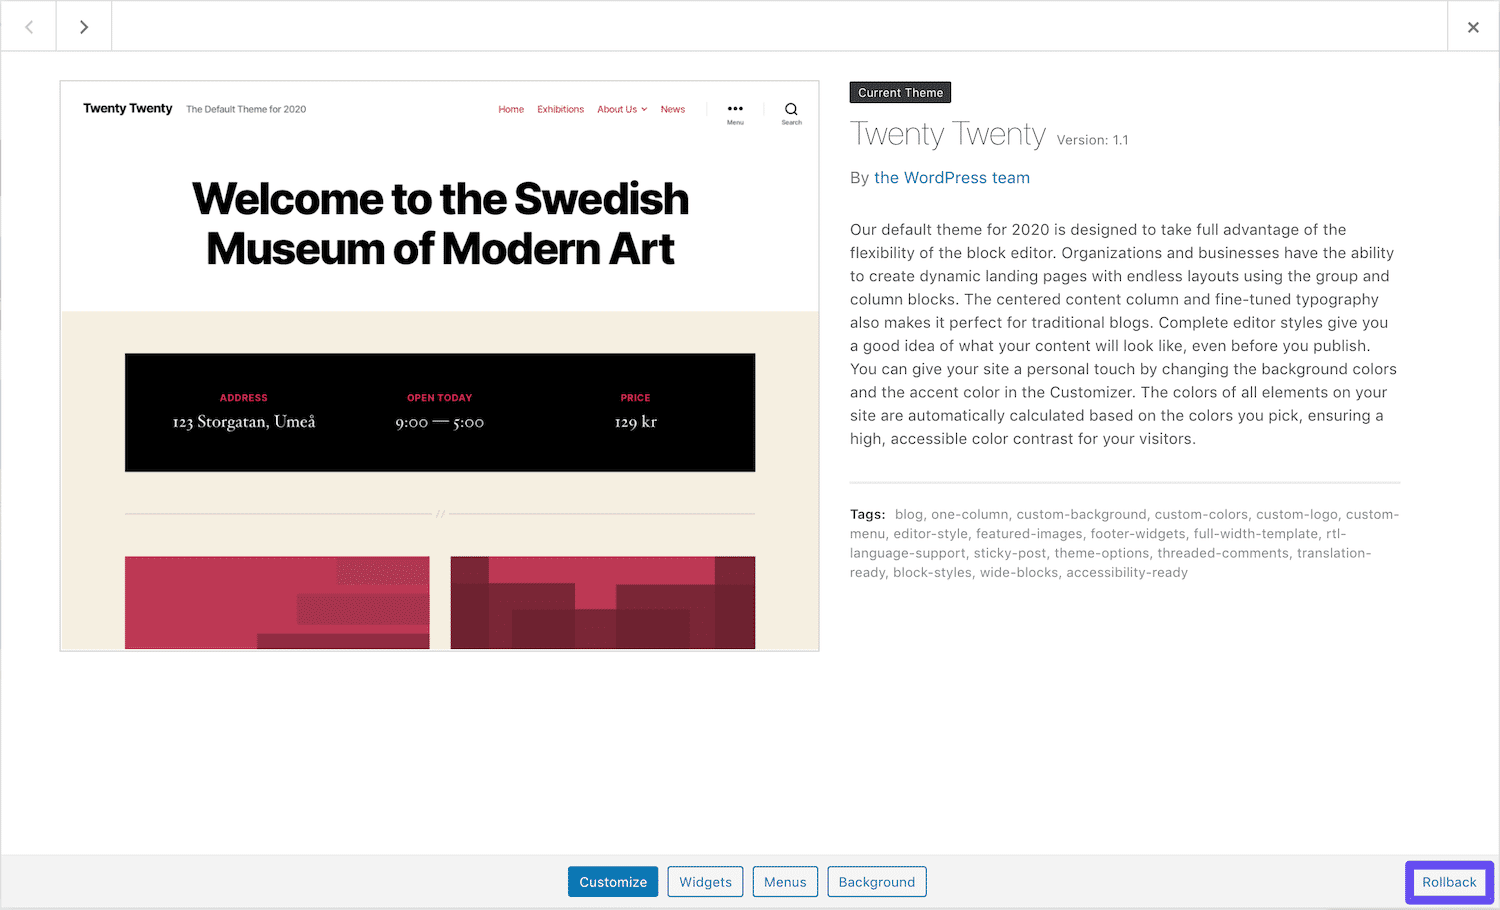
Rolling back themes is just as easy. Navigate to Appearance > Themes in your dashboard, and select the one you wish to downgrade. There will now be a Rollback button at the bottom of the window:
On the following screen, you can select your target version and initiate the downgrade process, just as you would for a plugin. When you need to restore the plugin or theme in question, you can do so from the relevant directory.
6. Revert to an Older Version of PHP
In 2019, WordPress made some changes to its PHP requirements. For this reason, as well as the many benefits of using the most recent version, upgrading your site’s PHP is always recommended.
However, some older plugins that haven’t been well maintained may not be compatible with newer versions of PHP. Ideally, you’ll always use tools that receive regular updates and support from their developers.
However, in the event that you have an outdated plugin that’s crucial to the functionality of your website, but doesn’t work with the latest version of PHP, you can perform a downgrade. Kinsta customers have the advantage of being able to easily switch PHP versions right from their MyKinsta dashboard.
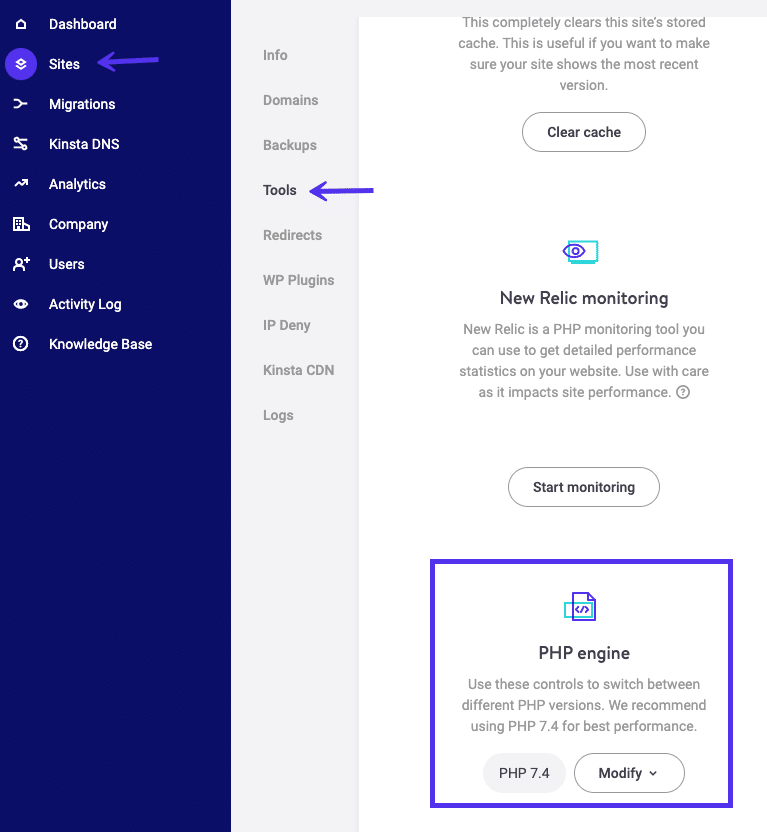
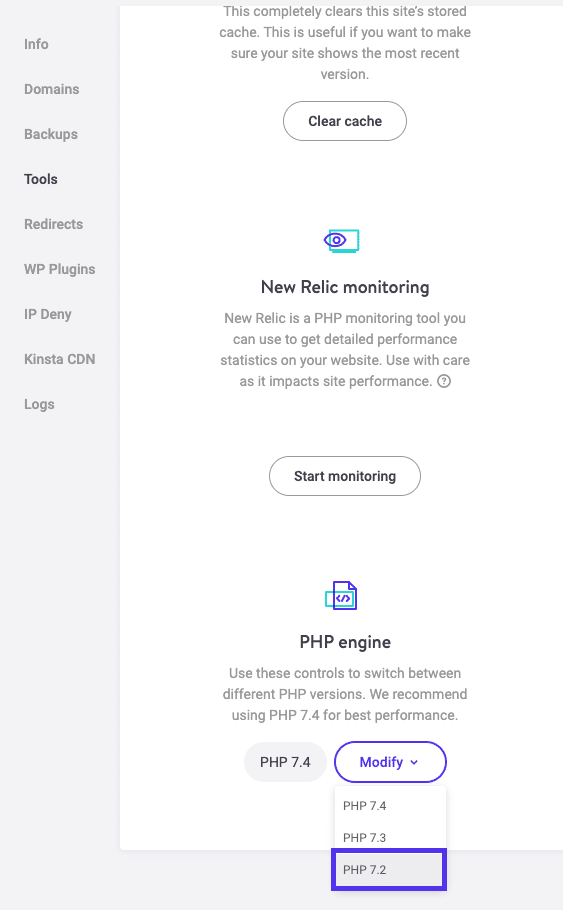
To do so, log in to your account. Navigate to Sites, select the one you wish to downgrade PHP for, then click on the Tools tab and scroll down to PHP Engine:
Use the Modify drop-down menu to select the version you need:
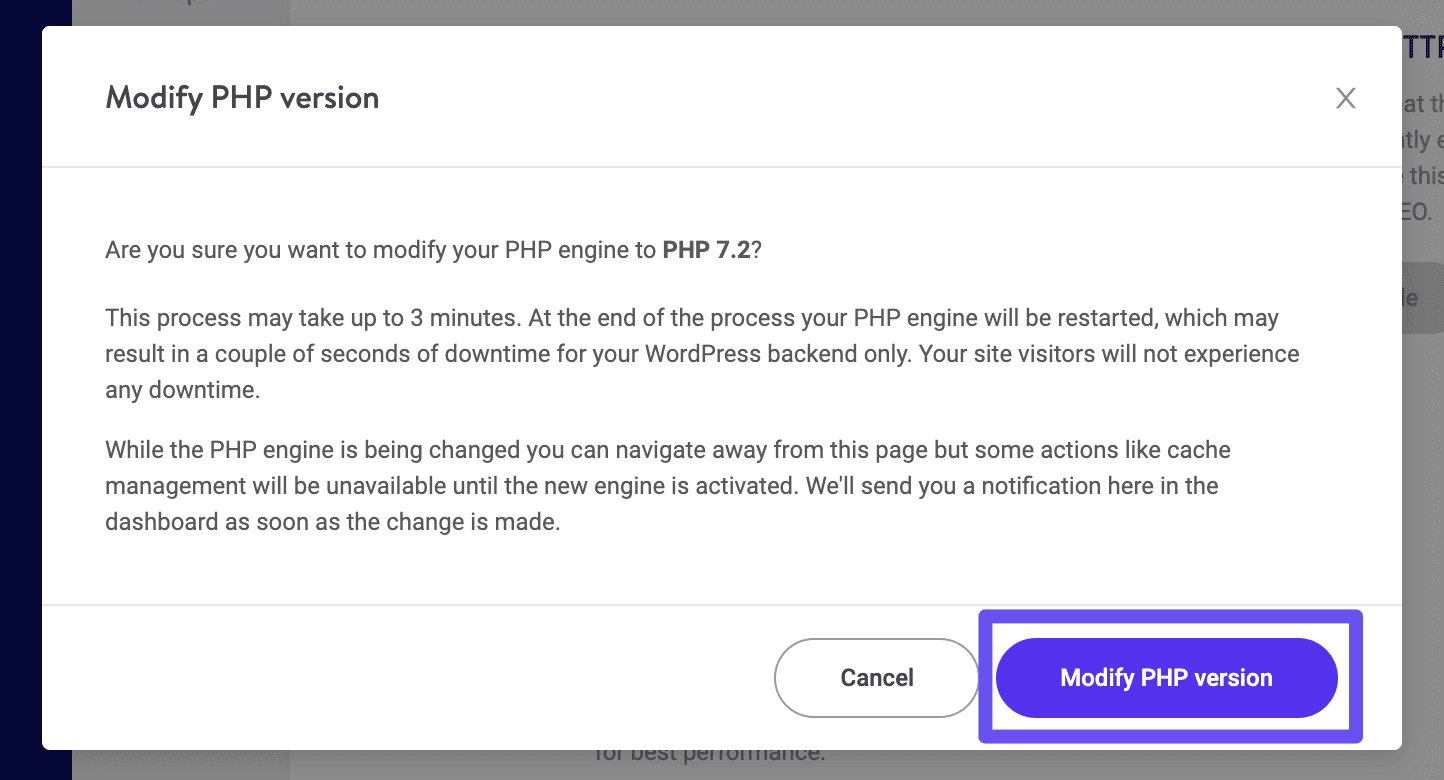
In the resulting window, click on Modify PHP Version to initiate the process:
If you’re not a Kinsta customer, or you need a need to install PHP with a version that’s even older than the ones available via the PHP Engine feature, you’ll need to downgrade PHP using the command line.
This process is more advanced and carries more risks. It may be better to consider replacing the problematic plugin or theme immediately in this case, instead of downgrading PHP and attempting to troubleshoot the conflict further.
Summary
Downgrading WordPress is sometimes necessary when troubleshooting your site or carrying out other key tasks. While there isn’t a native feature for accomplishing this goal, there are several methods for reverting to a previous version of your site.
This blog post covered six different ways to downgrade your WordPress site and its various elements:
- Downgrade your WordPress site manually.
- Use WP Downgrade to run a previous version of WordPress.
- Restore a previous backup to undo changes to your site.
- Manually downgrade a plugin or theme.
- Rollback plugin and theme updates with WP Rollback.
- Revert to an older version of PHP.
Do you have any questions about downgrading WordPress? Ask away in the comments section below!

Head of Content at Kinsta and Content Marketing Consultant for WordPress plugin developers. Connect with Matteo on Twitter.

