
Mailchimp is one of the best email marketing automation tools for your website. Its services can efficiently organize your subscribers and send them content they’re interested in. However, Mailchimp contact forms might not align with your website’s branding.
To solve this problem, you can integrate Elementor and Mailchimp. With Elementor, you can easily design a custom subscription form and embed it into your website. Then, you can manage registration information directly from Mailchimp.
In this post, we’ll discuss why you might want to integrate Elementor and Mailchimp. Then, we’ll show you how to do this in just five steps. We’ve also included a list of add-ons to access extra features and functionality. Let’s get started!
The Benefits of Integrating Elementor and Mailchimp
Whether you’re running an online business or blog, you’ll likely need a way to consistently contact your audience. With Mailchimp, you can do just that.
Mailchimp is an email marketing service that can build subscriber lists and design emails:
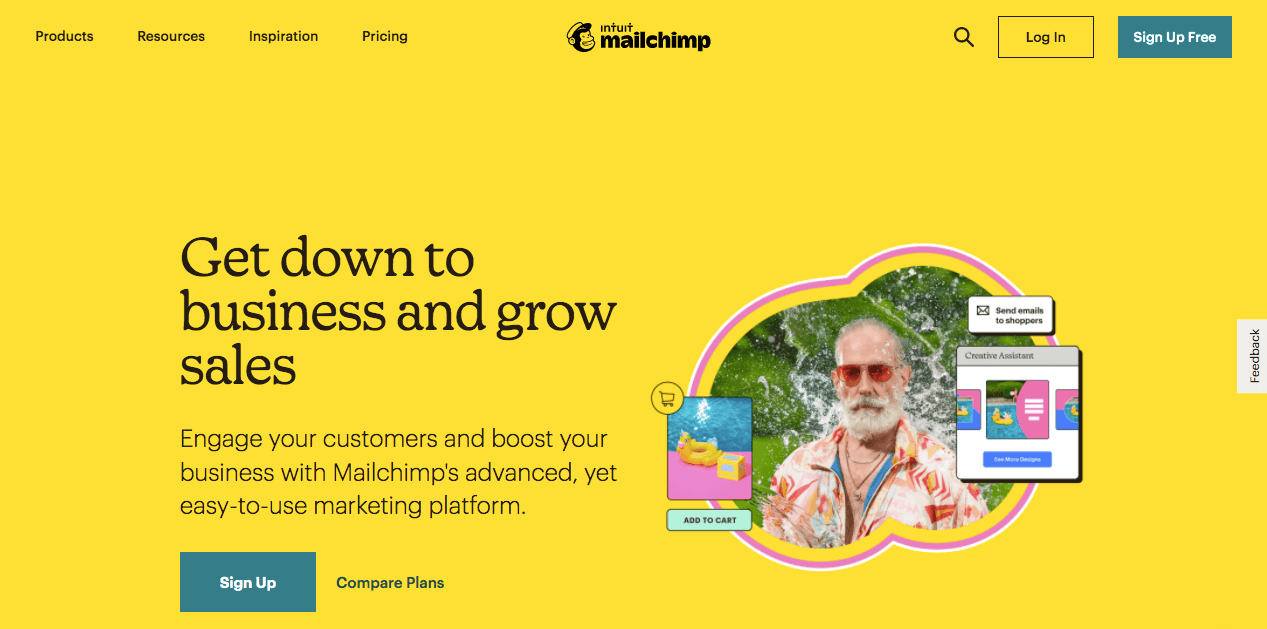
Using Mailchimp, you can create email lists with your subscribers’ contact information. Using pre-made email templates and the Content Optimizer, you can send engaging, informative updates to your audience members.
If you’re new to Mailchimp, you can create an account for free. You can access its easy-to-use features without paying as long as you have under 2,000 subscribers.
When you’re trying to grow your email list, it’s a good idea to embed some subscribe forms on your website. They can help you generate leads from your organic traffic. Although Mailchimp has this feature, its embed forms are often generic and likely won’t match your branding.
This is where Elementor comes in. Elementor is an easy-to-use WordPress page builder that you can use to design your website without coding. Its drag-and-drop editor makes it simple to create the features and functionality your site needs:
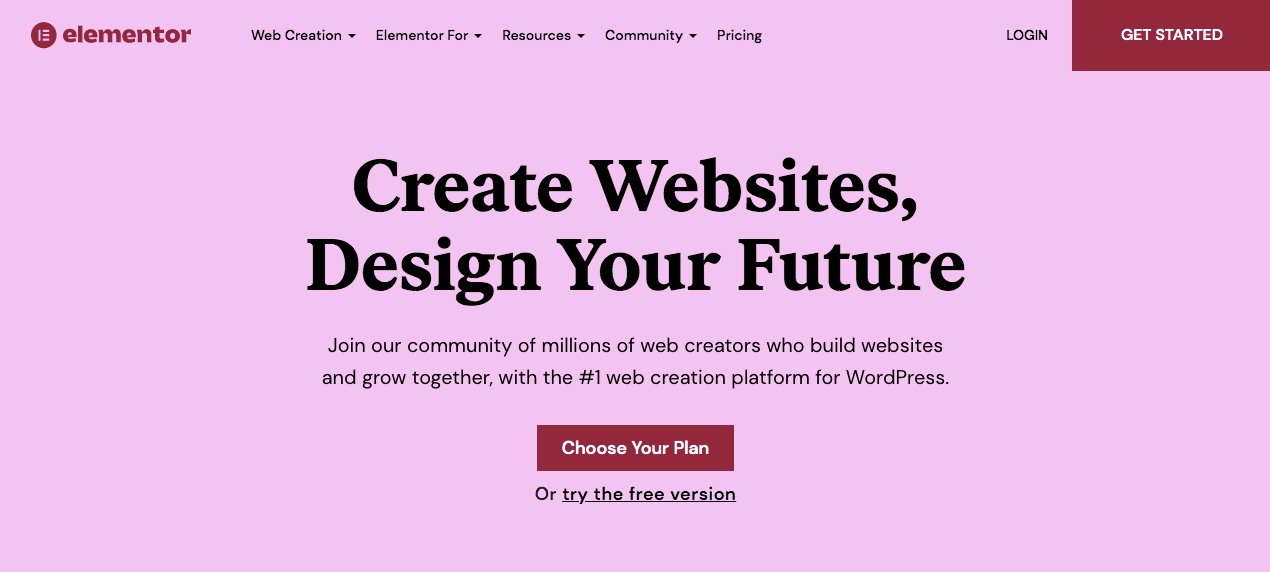
Furthermore, Elementor can easily integrate with Mailchimp. Compared with other page builders, Elementor is one of the best options for creating and managing opt-in forms.
With Elementor, you can add a contact form anywhere on your site and link Mailchimp in its settings. When your online visitors sign up, they will automatically be added to your Mailchimp list. Using both tools lets you have well-designed forms without losing out on subscriber analytics.
How To Integrate Elementor and Mailchimp (in 5 Steps)
Now that you know how Elementor and Mailchimp can benefit your website, let’s discuss how to start this integration process!
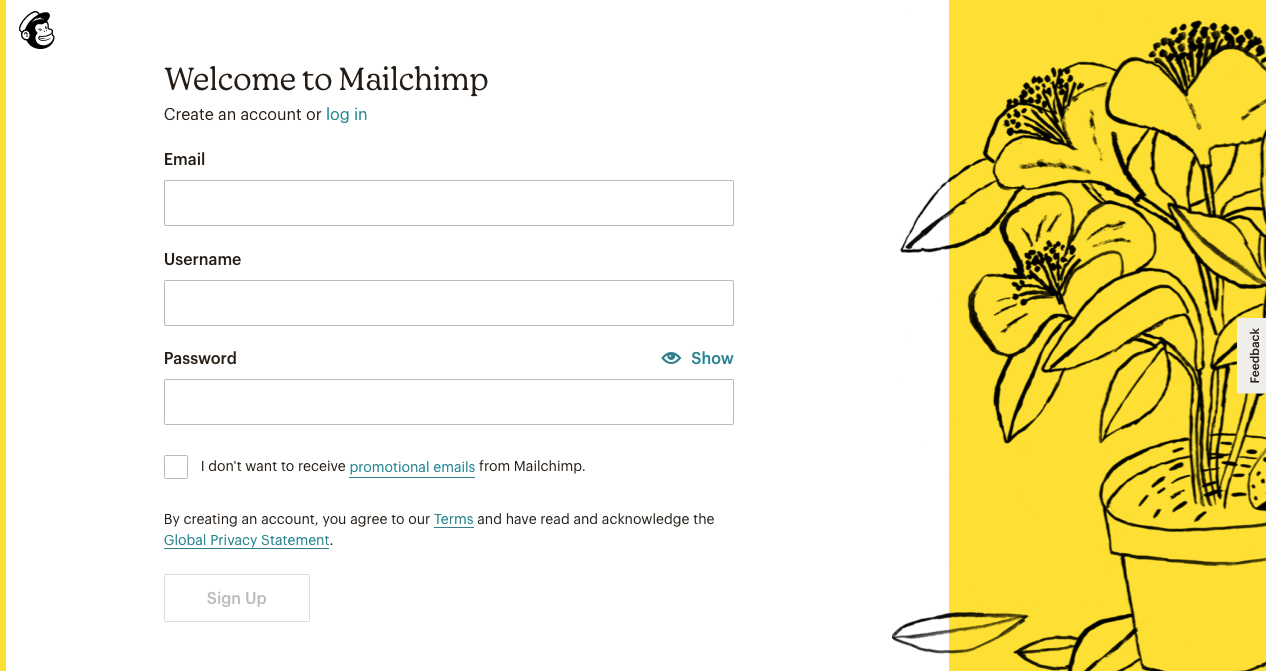
Step 1: Sign Up for a Mailchimp Account
First, you’ll need to go to the Mailchimp website and sign up for an account. You can do this for free by simply entering your email address, username, and password:
Then, Mailchimp will send you an email with an activation link. By clicking on this, you’ll see a page with different plan options:
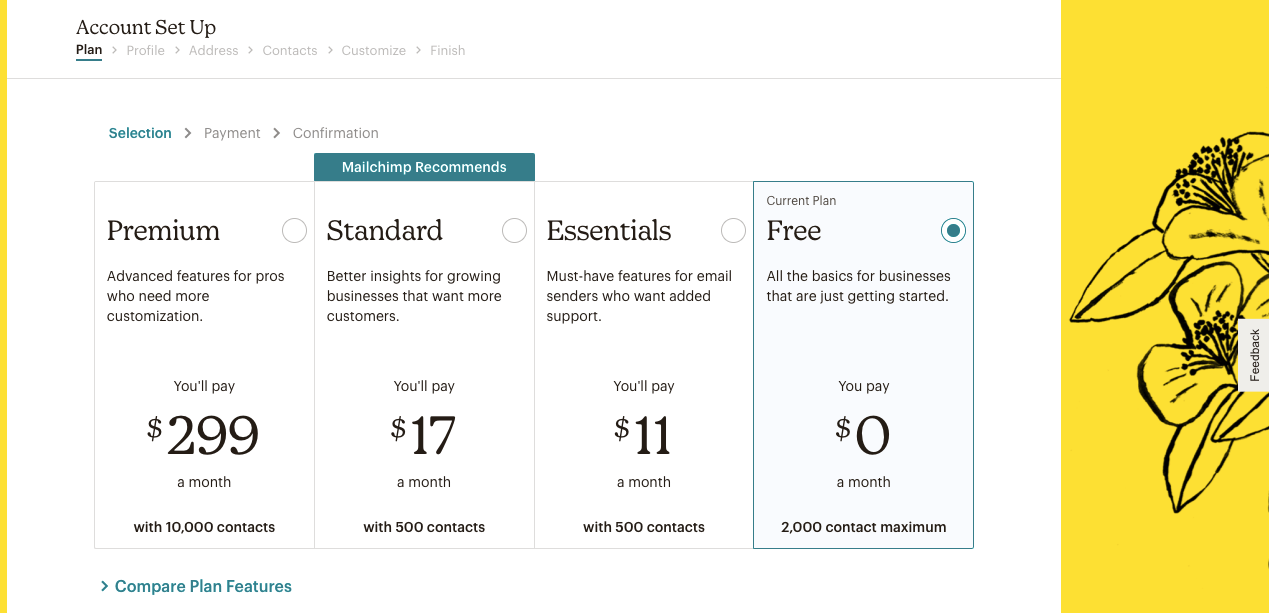
If you’re unsure which plan is right for you, select Compare Plan Features. Here, you can view everything that comes in each tier:
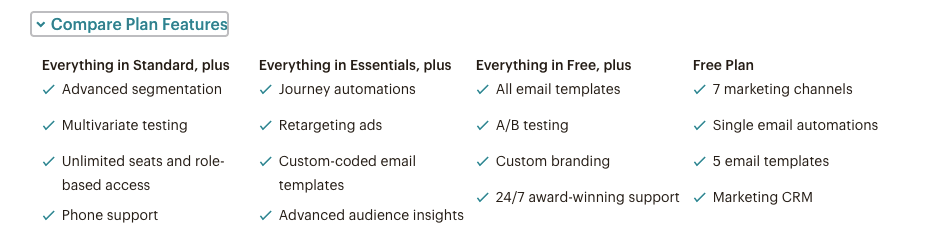
In this tutorial, we’re choosing the Free Plan, which can support 2,000 contacts and 10,000 email sends. It will be enough for a basic email marketing plan. However, you won’t be able to access retargeting ads, custom-coded email templates, or custom branding.
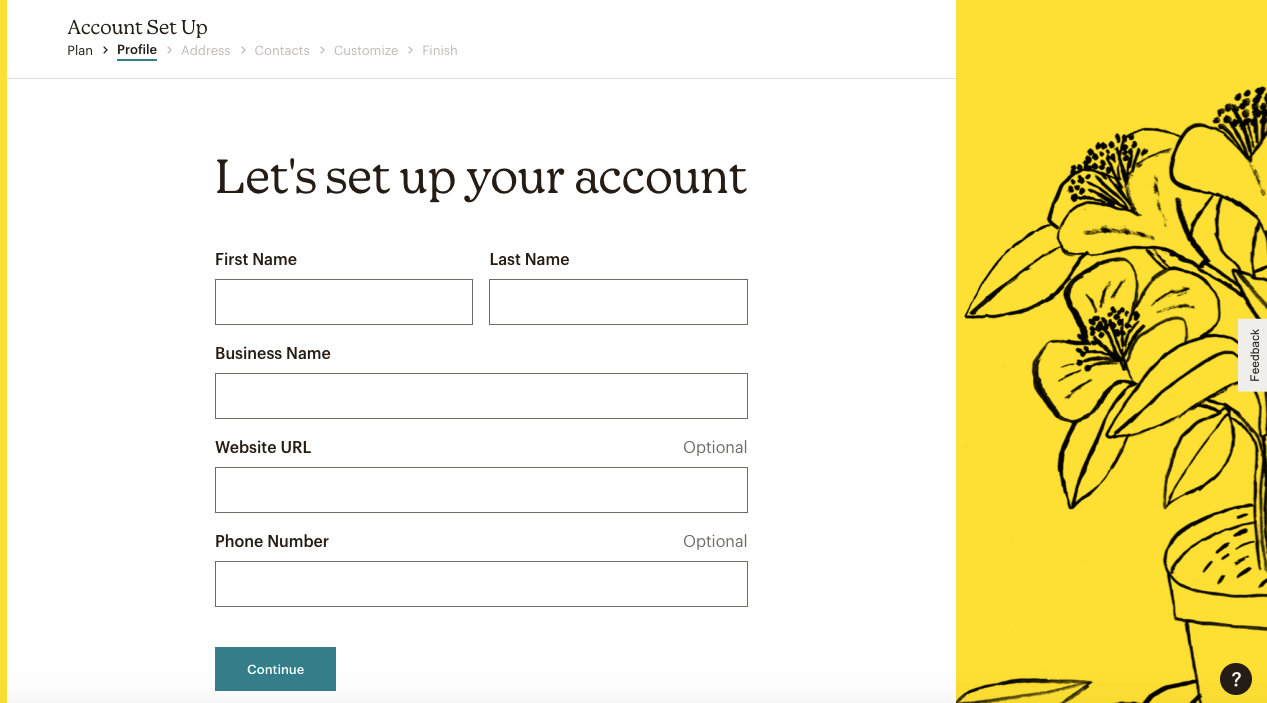
To start the sign-up process, fill out your name and business information. Although it’s optional, you can also enter your website’s URL and import your content:
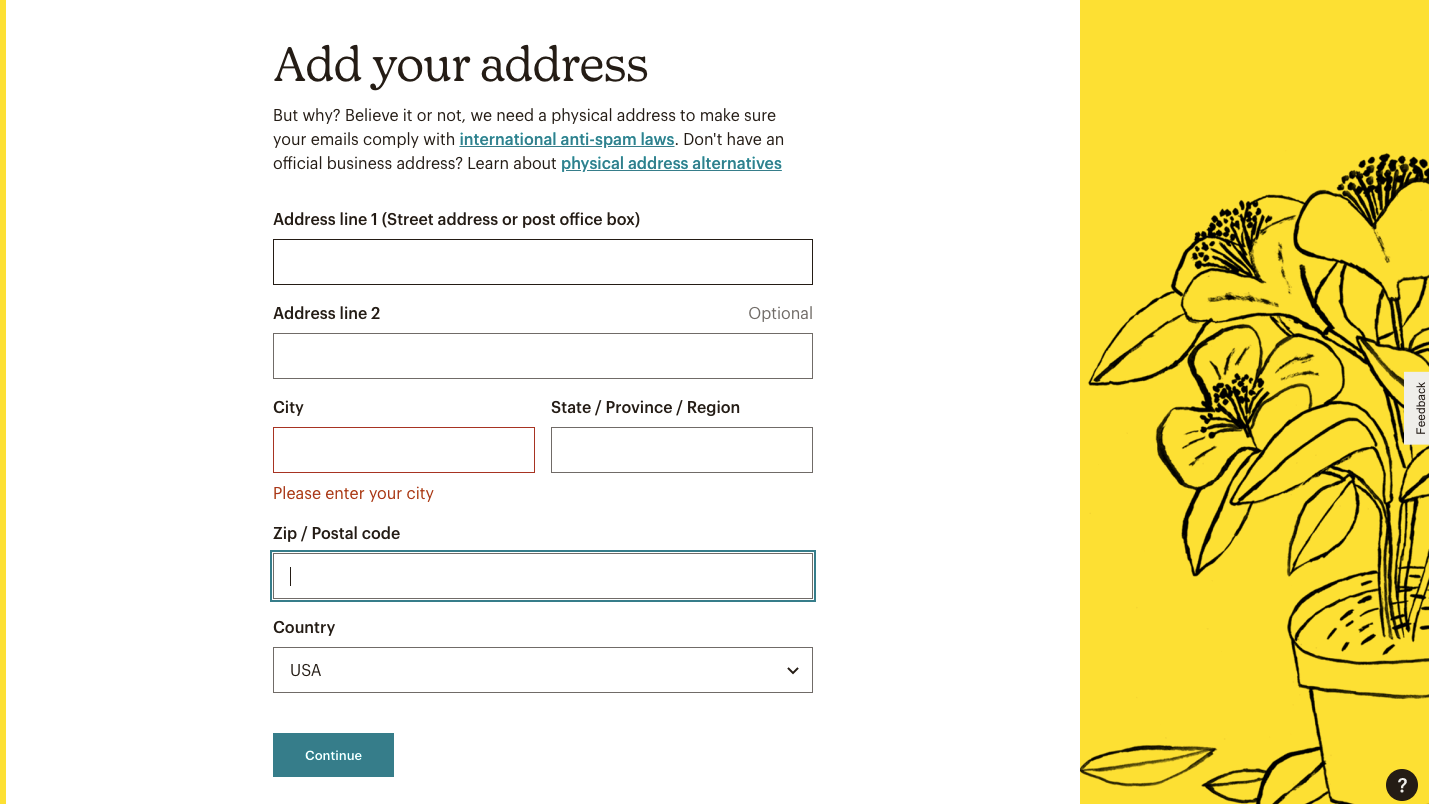
Next, fill out your address information. This step ensures that your emails aren’t contributing to spam:
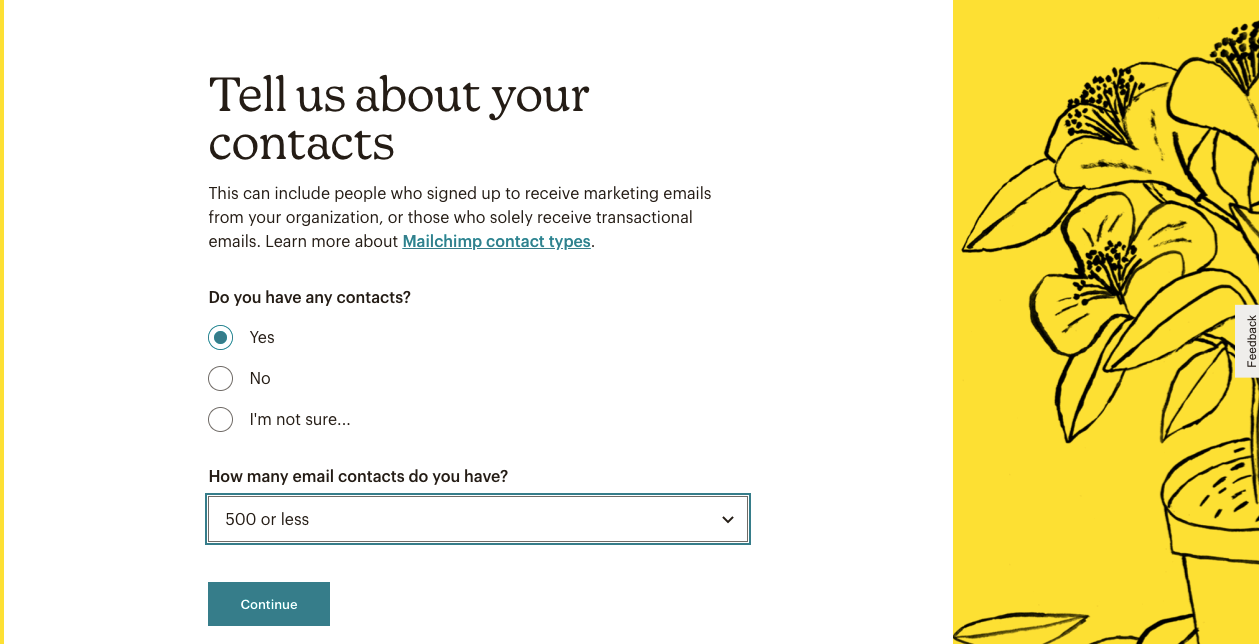
Mailchimp will then ask if you already have any subscribers. If so, select Yes and fill out how many you have:
To help Mailchimp understand your business, indicate whether you sell products or services. To bypass this question, you can click on Skip:

After you finish this sign-up process, you’ll be able to access your Mailchimp account!
Step 2: Create an Audience and API Key
To start organizing your subscribers in Mailchimp, you’ll need to create an audience. Keep in mind that a free account only supports one audience, but any advanced plan can include three or more.
Although you might feel tempted to create several audiences, Mailchimp recommends starting with one. This setup can help you understand your subscribers as a whole. It can also simplify your emailing process and maintain your contacts as your company grows.
Even with just one audience, you can create tags and segments to organize contacts into different subsets. However, making multiple audiences can have certain benefits.
For example, if you send emails to both vendors and buyers, you may need to send separate messages to these groups.
In your Mailchimp dashboard, go to Audience > Audience Dashboard. Then, click on Add Your Contacts:
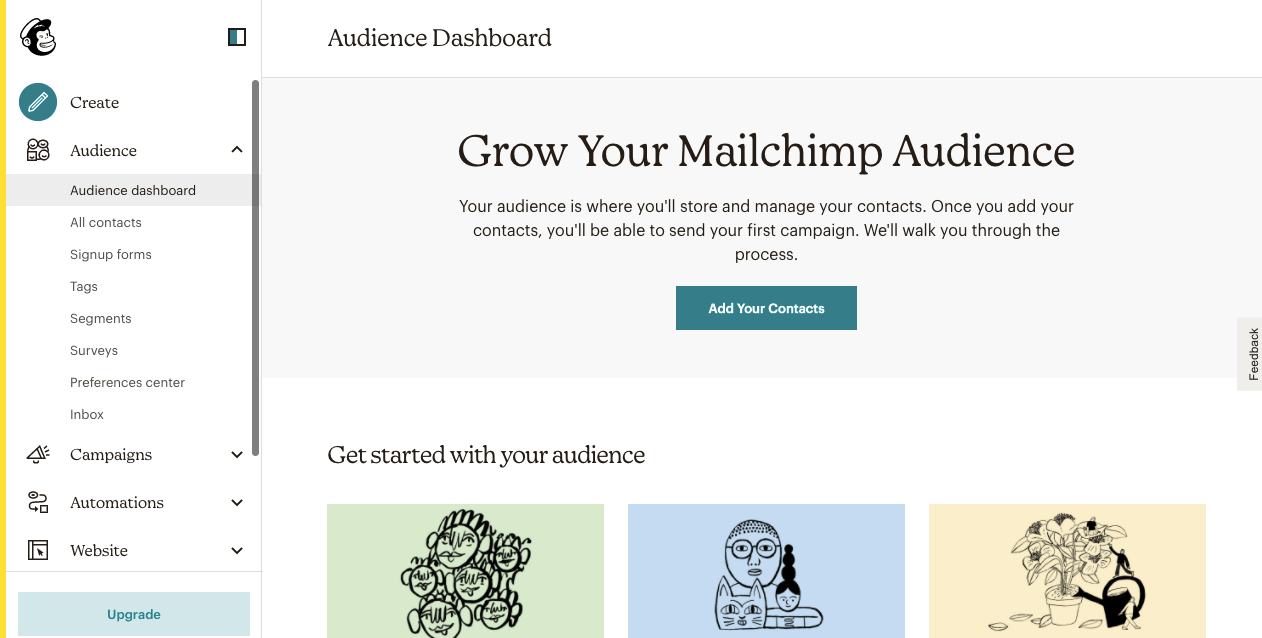
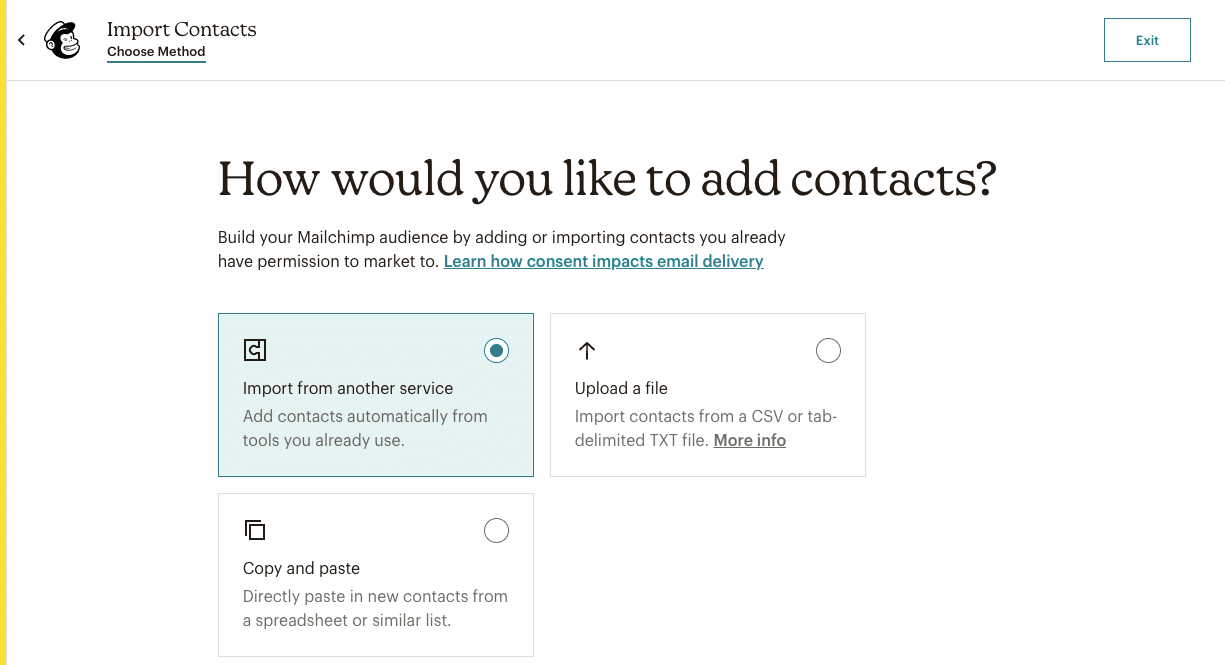
This will take you to a page to import your subscribers’ contact information. Simply copy and paste their names and email addresses into a text box. Alternatively, you can import data from a third-party service or upload a CSV or TXT file:
Once you’ve done this, go to your Audience Dashboard and find Manage Audience > Settings. Here, you can change the name and default settings:
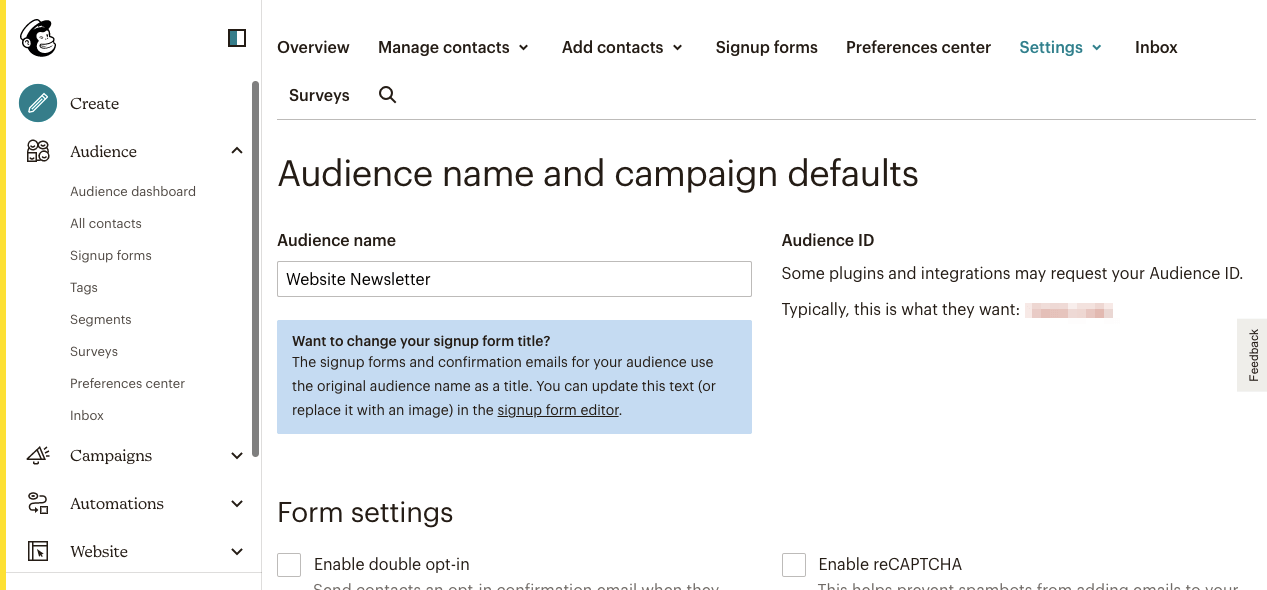
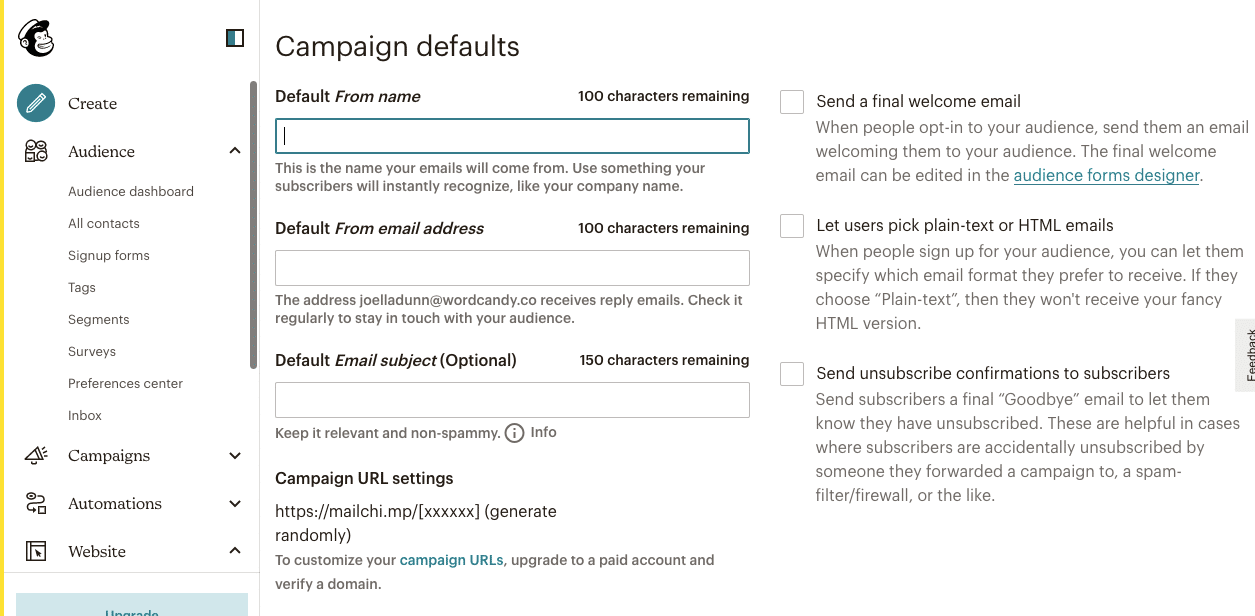
Be sure to set a From name and From email address. You can also enable a double opt-in to send subscribers a confirmation email after they sign up:
After you’re finished creating and setting up an account, go to your Profile. Then click on Extras > API keys:
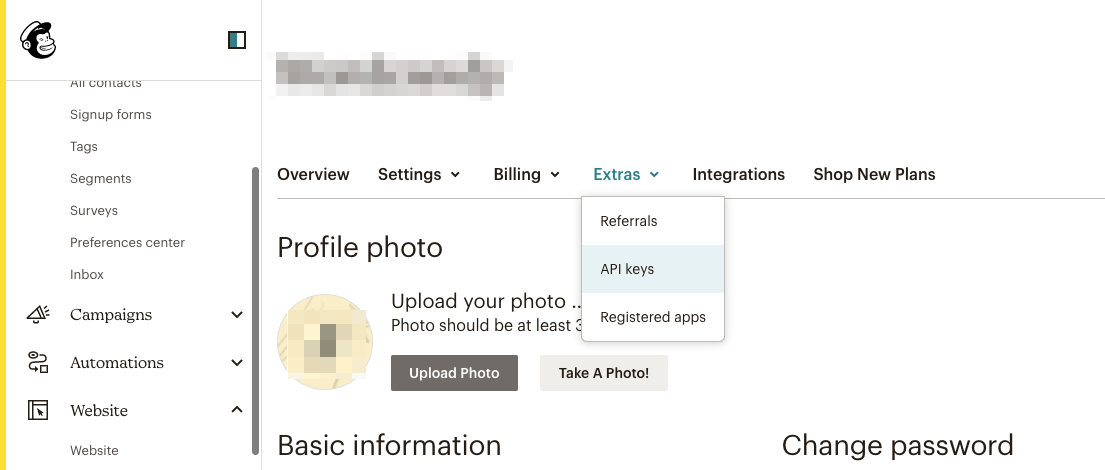
If you don’t have an API key, you’ll need to click on Create A Key. Mailchimp will automatically add one for you:
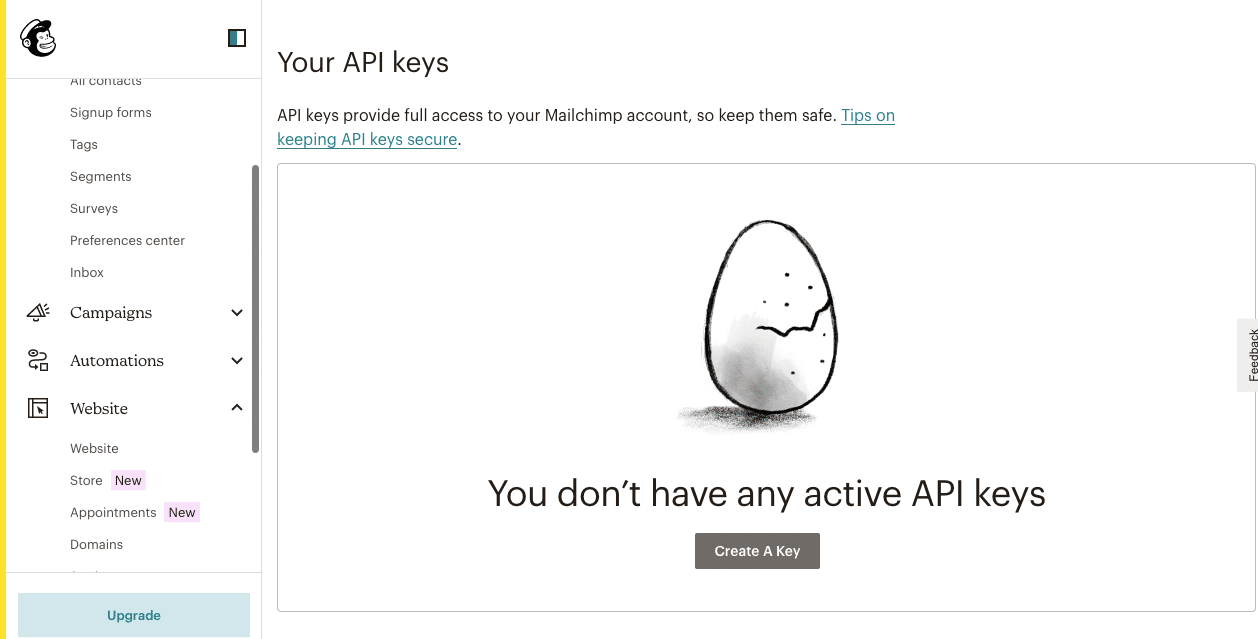
Once your API key is active, copy it. Since this information grants access to your Mailchimp account, never share this code publicly.
Step 3: Design a Mailchimp Signup Form With Elementor
Next, you’ll need to download and install Elementor Pro. It includes a WordPress Form Builder, which you can use to design custom forms and collect feedback from your audience.
After you activate Elementor Pro, go to Elementor > Settings > Integrations. Scroll down to the Mailchimp section and paste the API key:
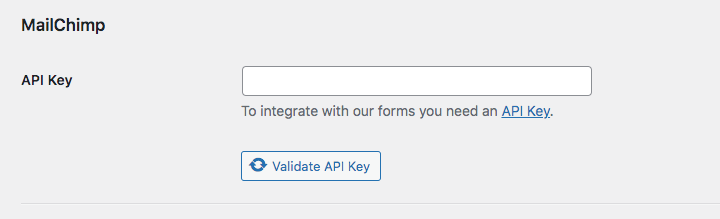
Click on Validate API Key. If the integration is successful, you’ll see a green checkmark next to this button. After this, save your changes.
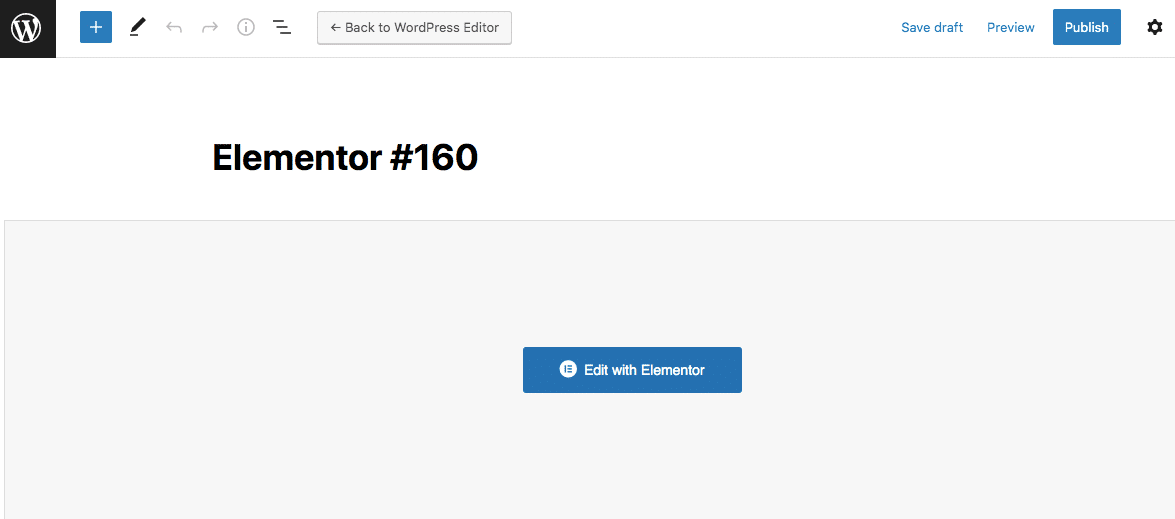
Now you can start designing your signup form. First, add a new post or page and select Edit with Elementor:
In the Elementor editor, scroll down to the Pro widgets. Here, you’ll see an option for Forms. Drag and drop this widget onto the page:
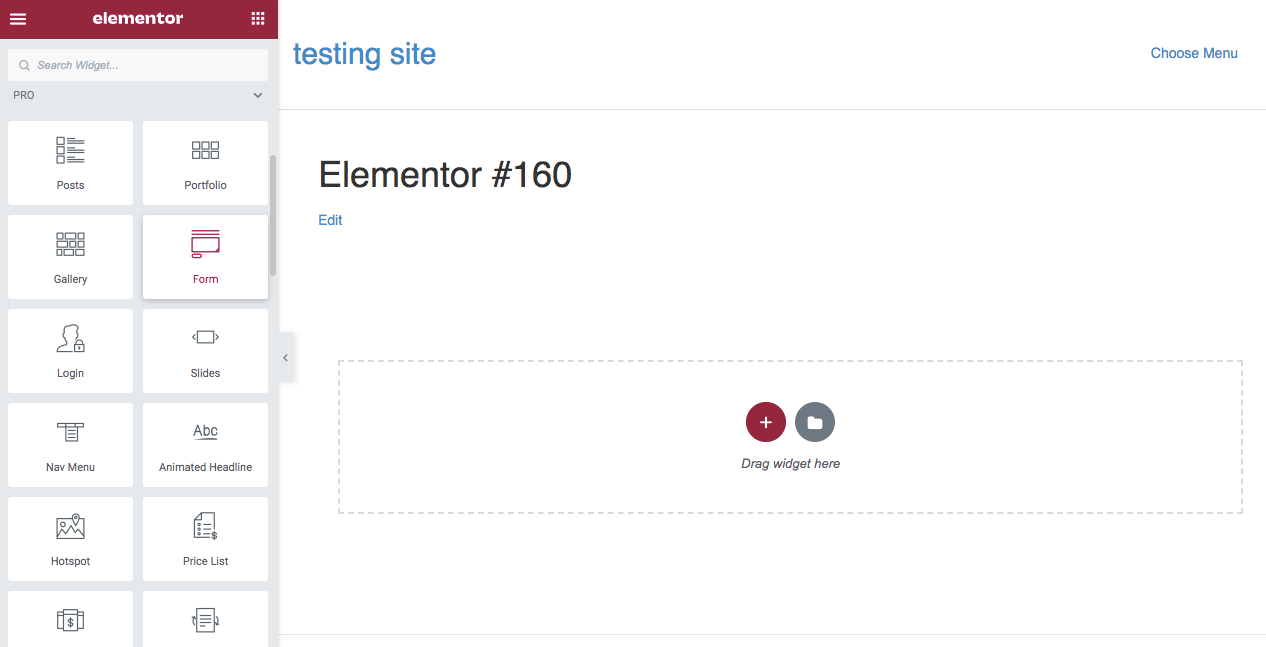
Elementor will automatically create a basic form that includes name, email address, and message fields. However, you can continue to customize the form until it meets your needs:
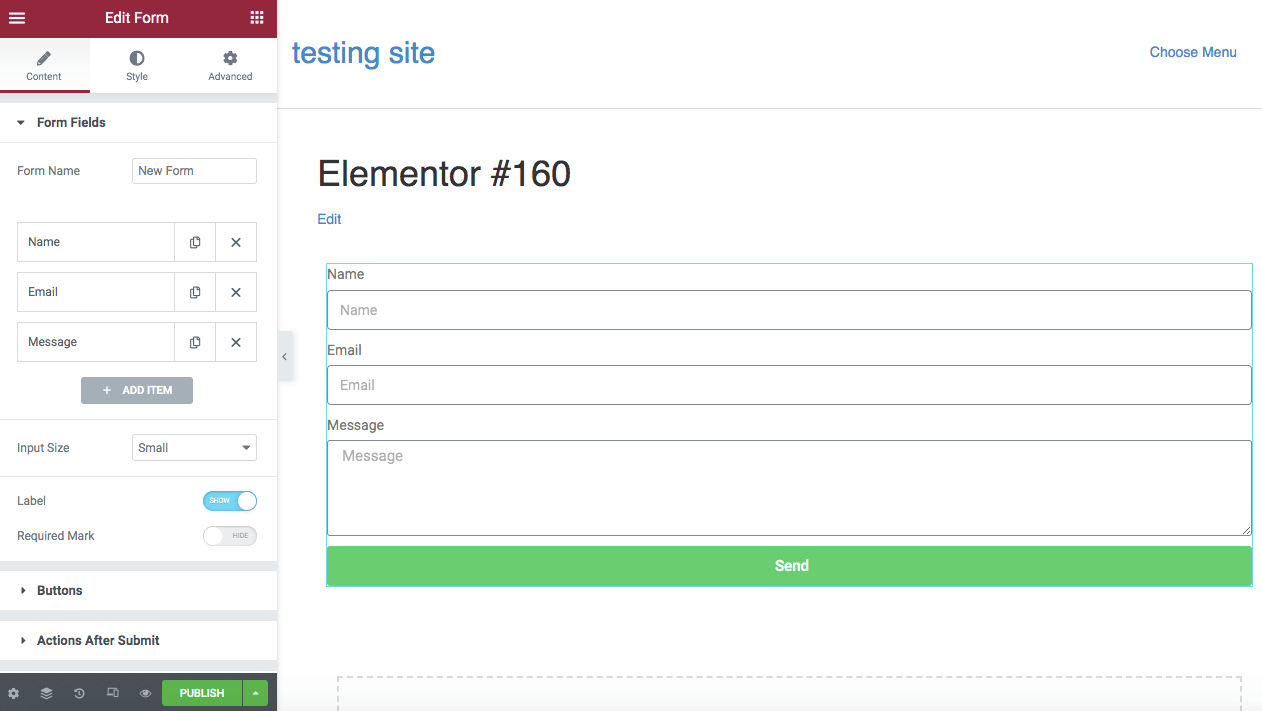
For example, if you want to add a subscribe form, it typically won’t need message fields. You can simply click on the X next to this item.
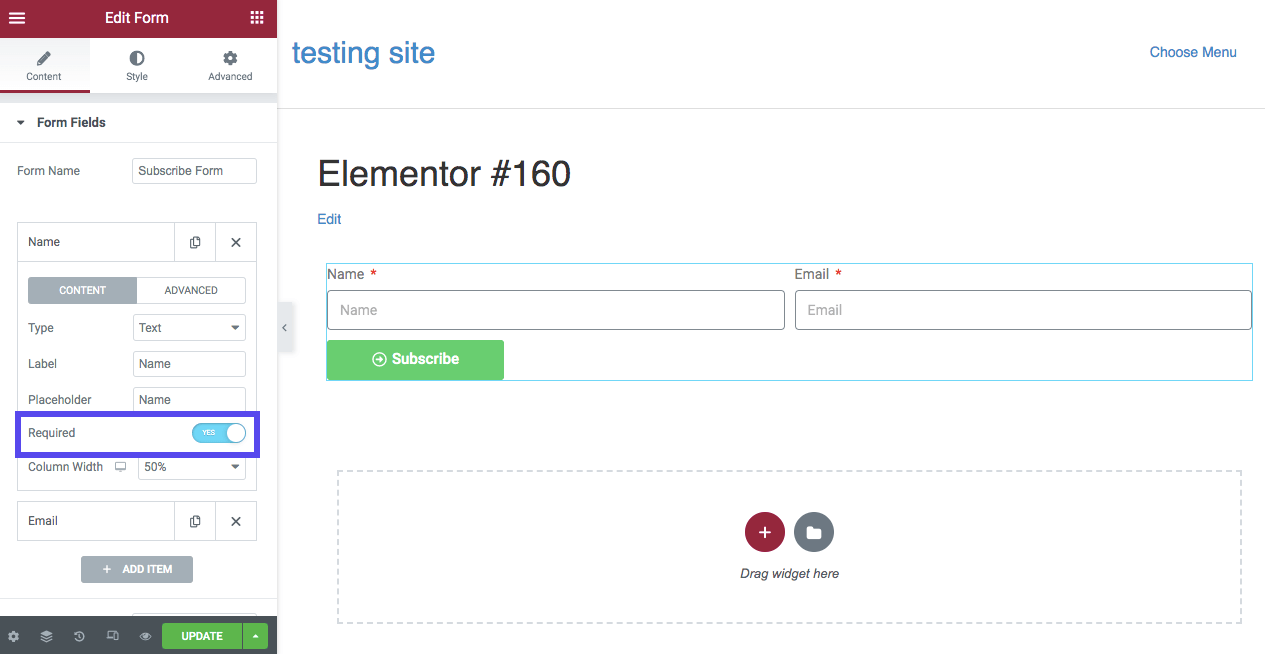
To generate leads, you’ll need to require visitors to fill out both their names and emails. You can do this by clicking on each field and selecting Yes next to Required:
Then, go to the Buttons section to edit the action button. Although the default text is “Send,” consider changing it to “Subscribe” or “Sign Up:”
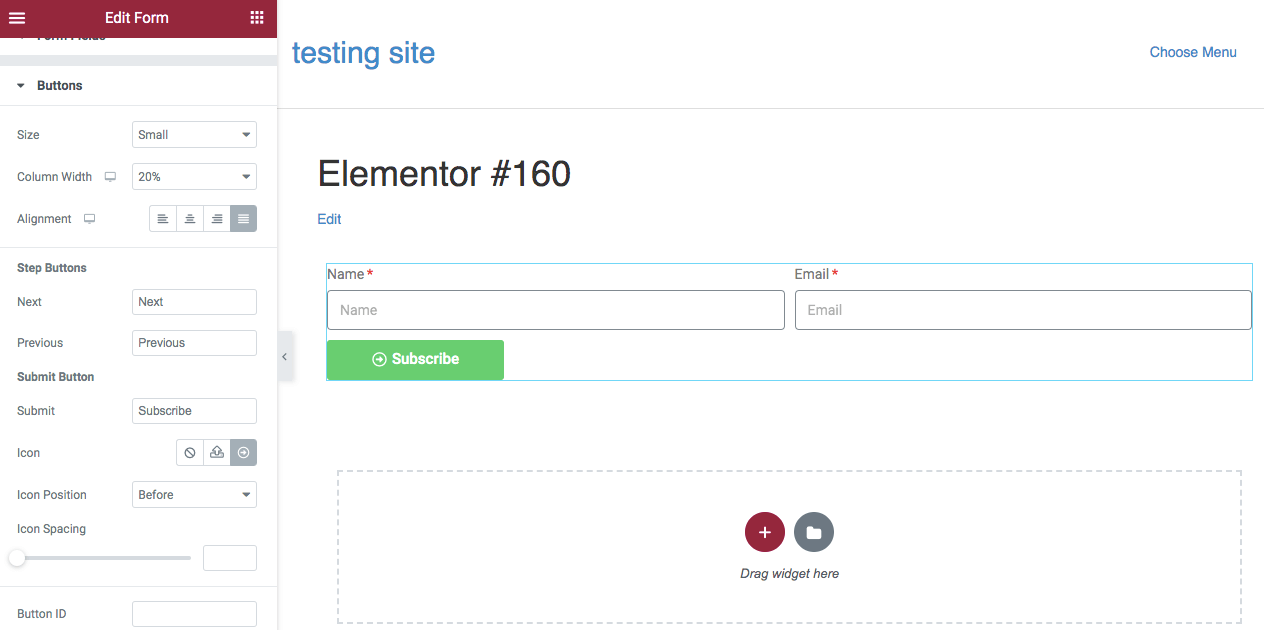
You can continue to change the button’s size and column width as needed. If you prefer, you can add an icon as well.
Step 4: Connect Mailchimp
After you customize your form to your liking, it’s time to connect your Mailchimp account. To do this, find the Actions After Submit section:
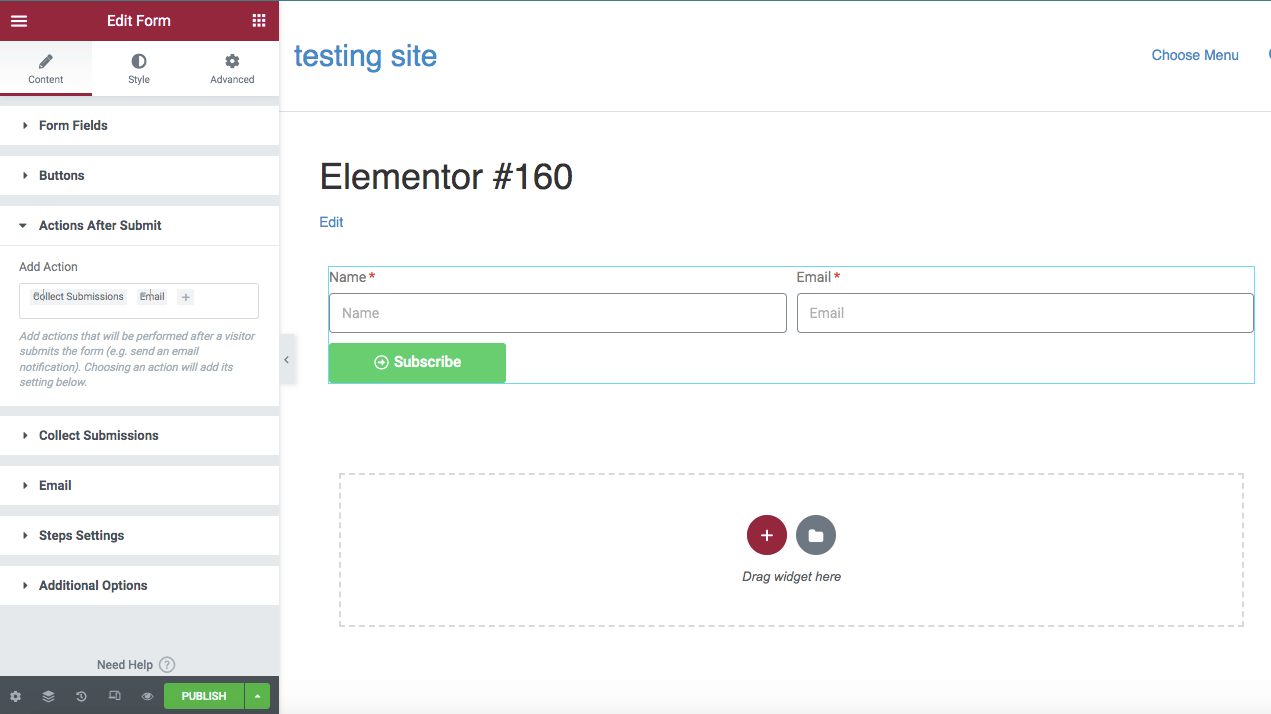
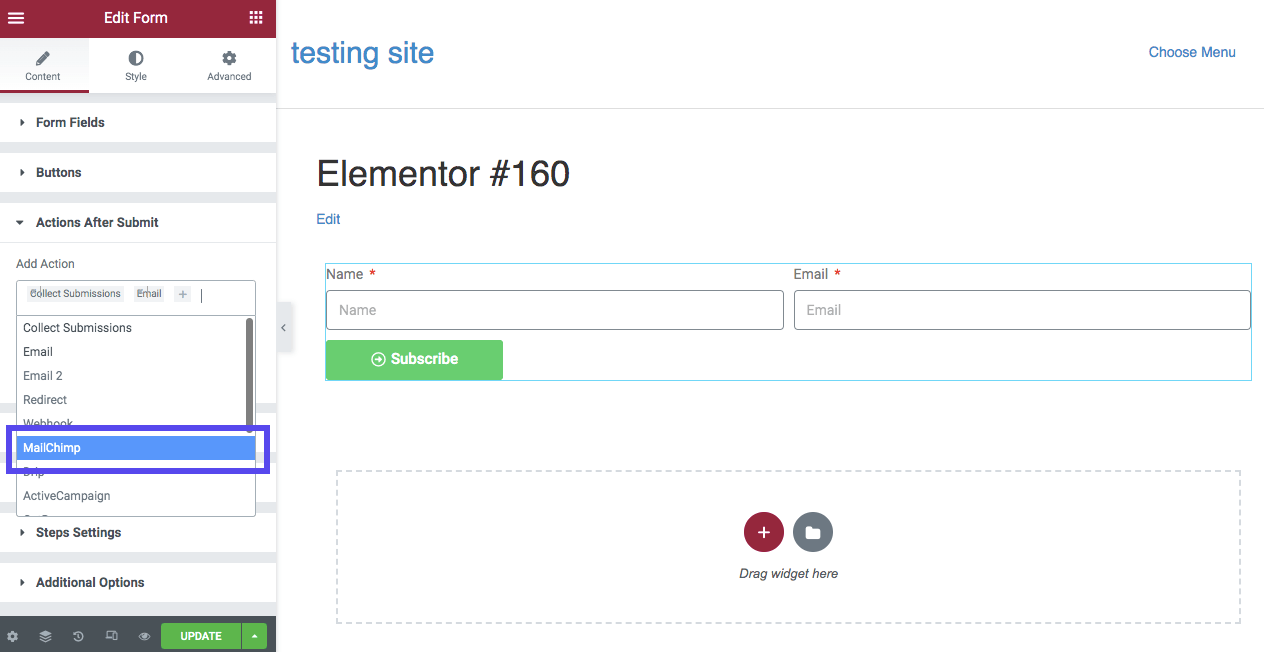
Then, click on the + icon and choose Mailchimp from the dropdown menu:
This will create a new section below titled Mailchimp. When you click on this, you’ll see options for setting an API key and audience:
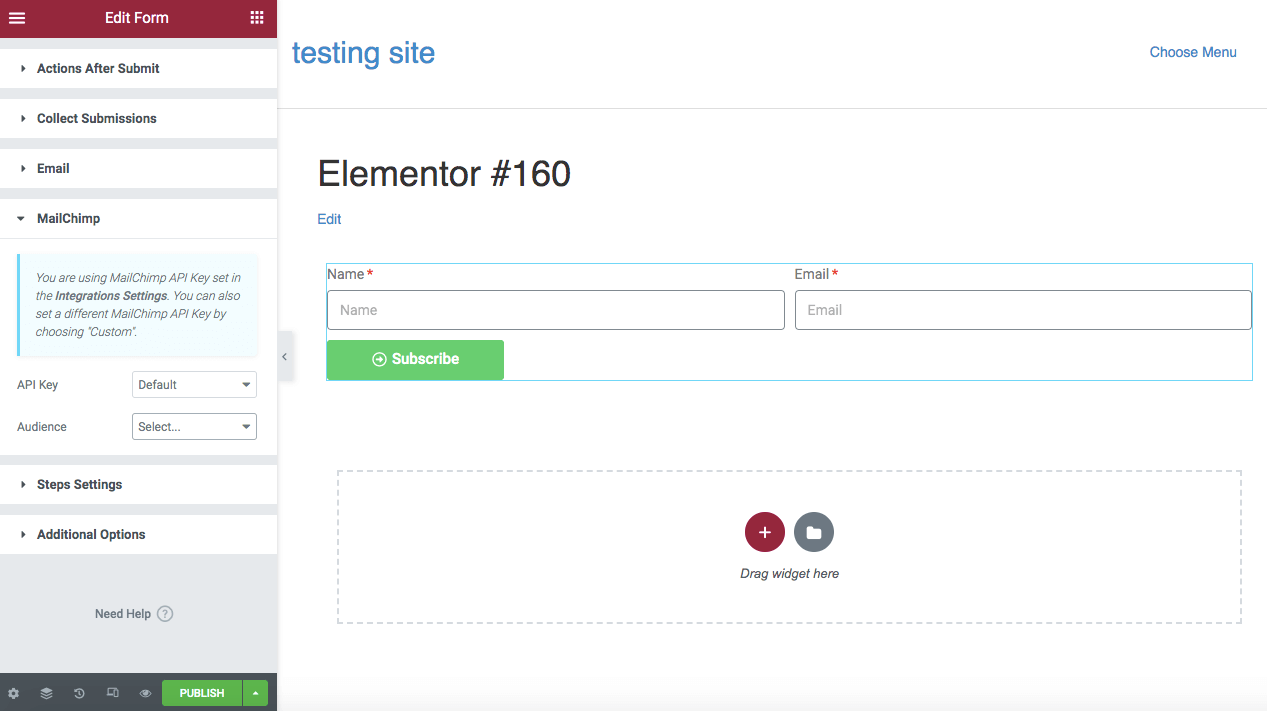
If you’ve entered your API key in the integration settings, you can leave the API Key section as Default. Then, select the Audience you want to link to this subscription form:
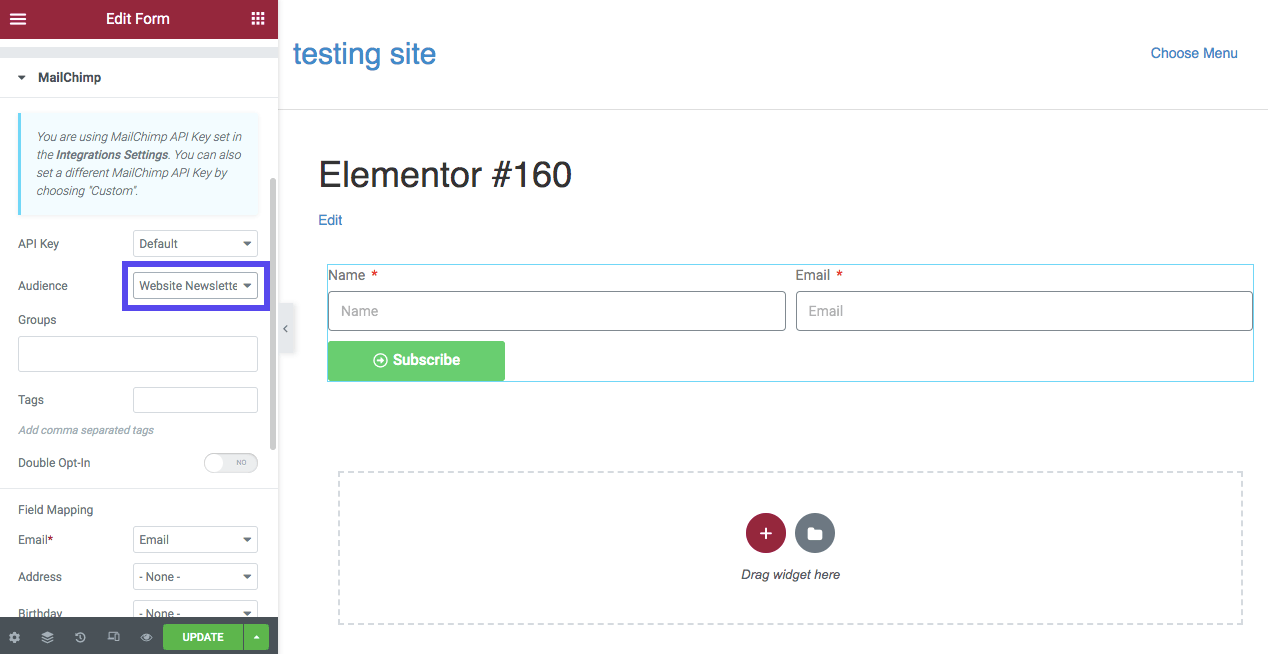
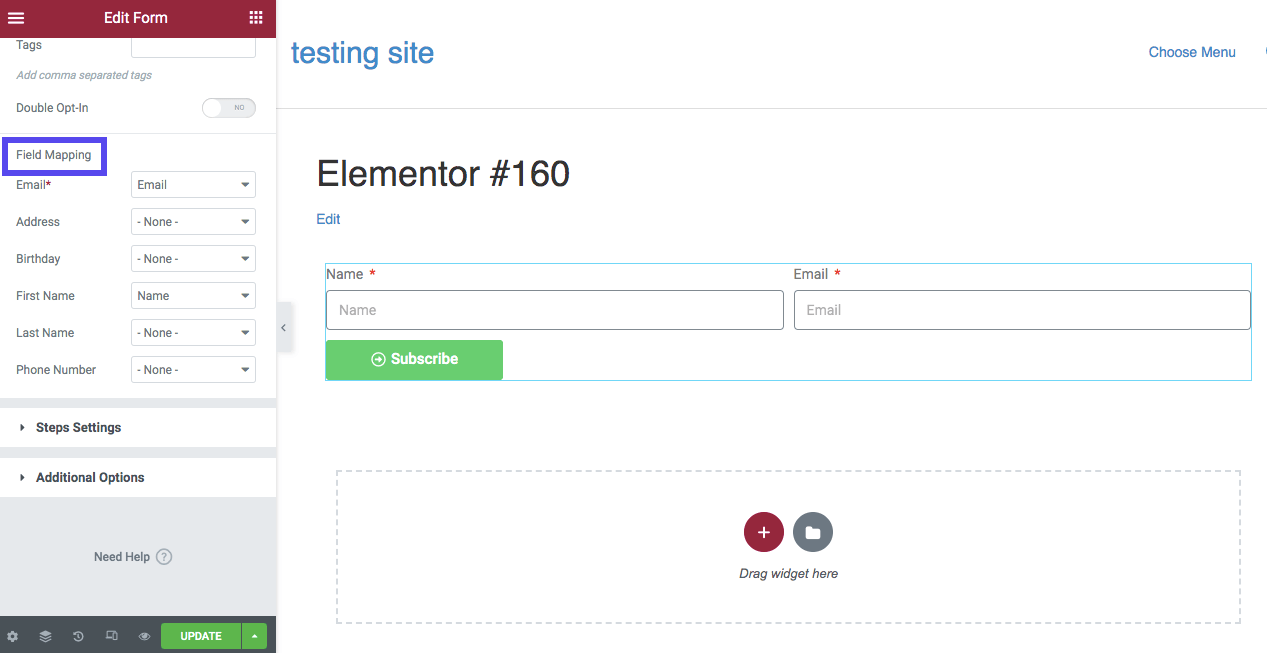
You can also choose any groups or tags that you created in Mailchimp. Finally, customize the Field Mapping settings based on the fields you provided in the form. This will tell Mailchimp which information to catalog in its system.
For this example, our subscribe form only contains a name and email field. This means that we’ll only include this information in the Field Mapping section:
Finally, navigate to Additional Options and find Custom Messages. Turn this on to provide a success message after someone completes the form:
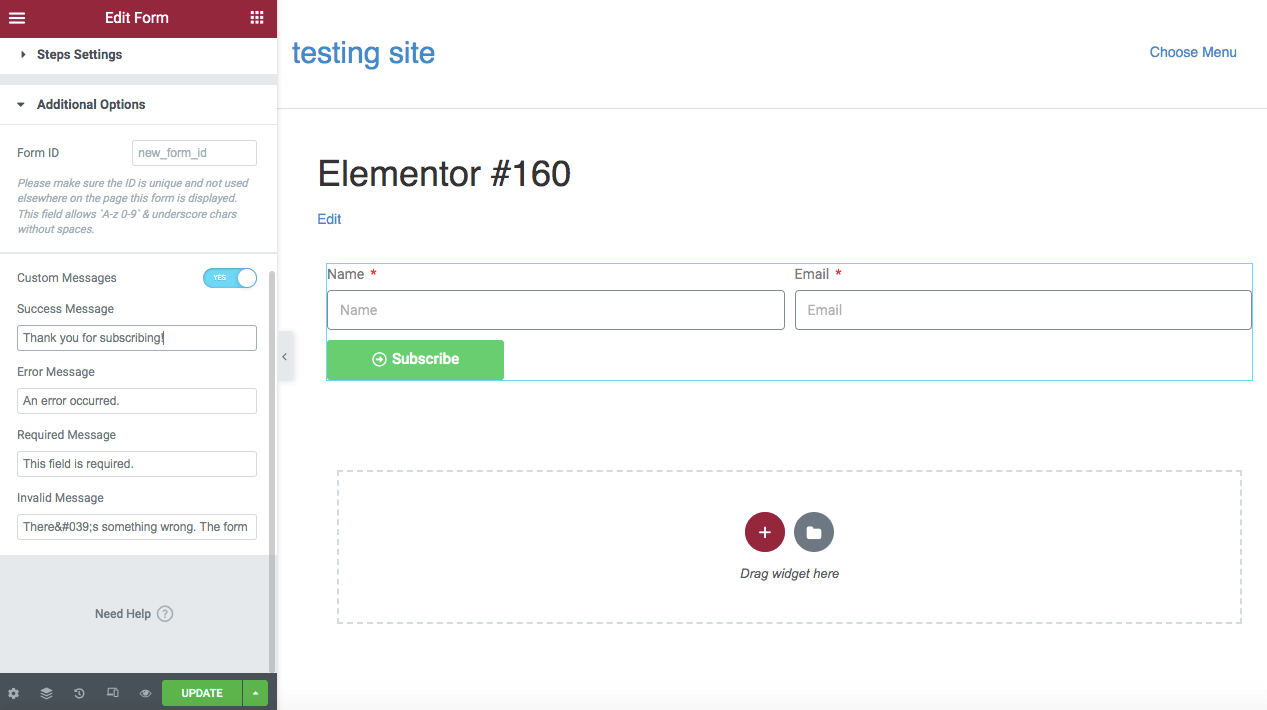
The default message will be “This form was sent successfully.” You might consider changing this to something like “Thank you for subscribing.” You can also add custom messages for errors and required fields.
Step 5: Add the Form to Your Site
After you’re finished customizing the form, select Publish. Consider using the signup form yourself to check that it is functioning correctly. Then, you can see whether the new email address is recorded in your Mailchimp account.
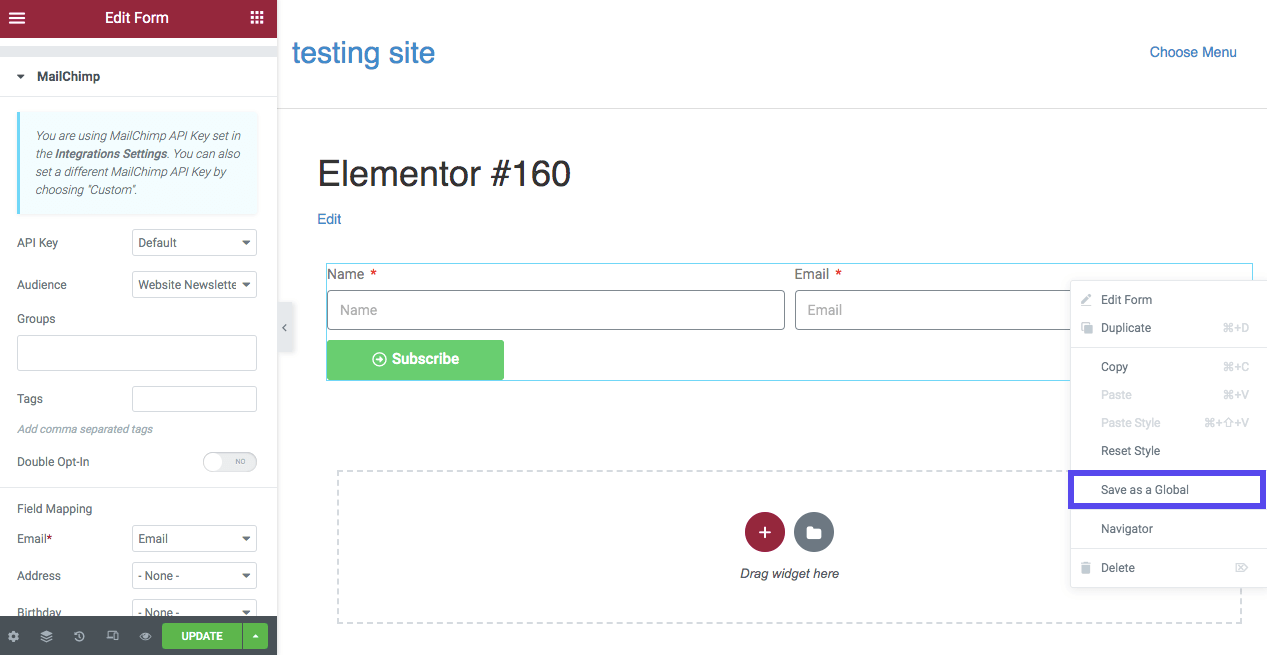
You might also want to add this new form to multiple areas of your website. You can save it as a Global Widget to make this process easier.
First, find the Edit Form icon on the right-hand side of the form. Right-click on it and select Save as a Global:
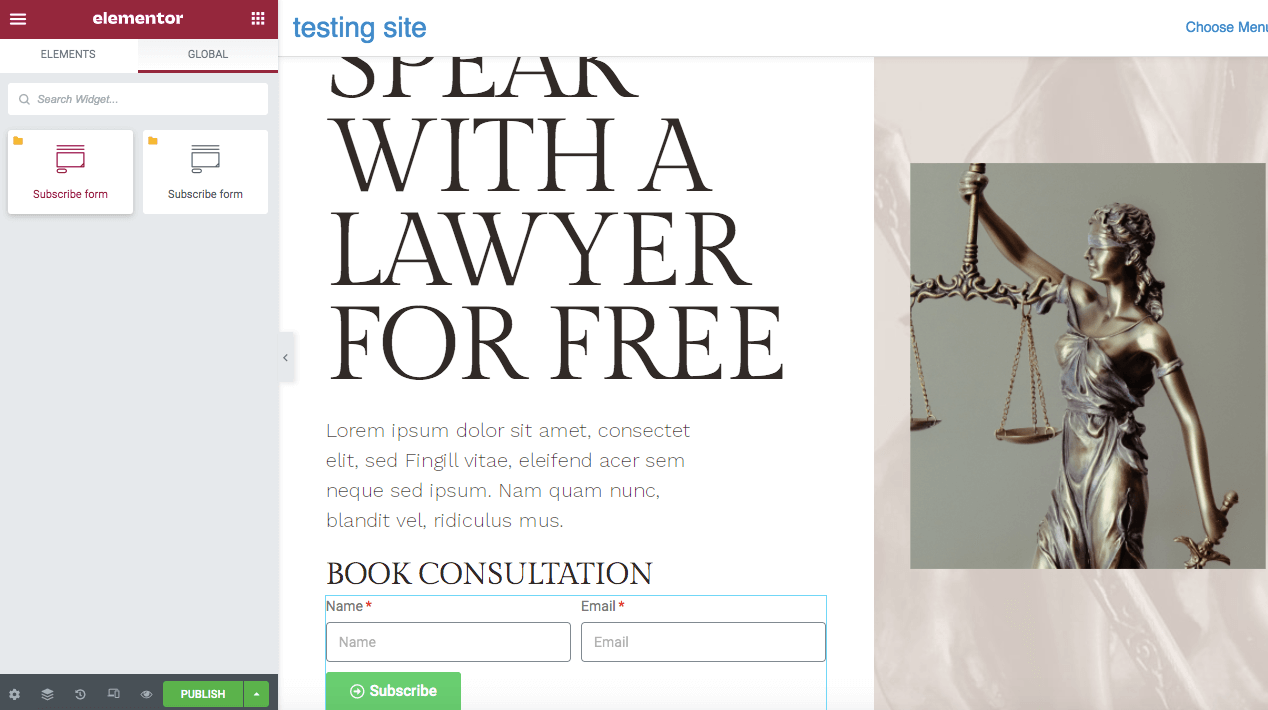
This will add the subscribe form to your Global Settings. When you add a new page or post, you can simply go to GLOBAL, find the pre-designed form, and drag and drop it anywhere you’d like:
When considering where to place your subscribe forms on your website, you might like to think about visibility. You can potentially collect more leads on a well-designed landing page, which visitors can see when they enter your site. However, users might not be interested in subscribing this early.
Sometimes, a better option is to include contact forms within your content or a sidebar. Although this has slightly less visibility than a landing page, this placement can enable visitors to subscribe as they’re interacting with your website.
Adding the form to a footer can also be a practical option. Users who scroll to the bottom of your website are often curious about your content, meaning they’re more likely to subscribe. However, this placement is not as visible as other options.
Top Add-Ons for Your Elementor/Mailchimp Integration
With the best WordPress plugins, you can create a tailored website for your audience. Elementor Pro gives you plenty of options for designing forms and integrating third-party services like Mailchimp.
Still, you might need more advanced features. With some add-ons, you can have more control over the appearance and functionality of your forms.
1. Essential Addons
Using Essential Addons is a great way to extend the core Elementor features. With this tool, you can access more creative elements. These include interactive features such as a Woo Product Grid, Countdown, and Filterable Gallery:

Features:
- Advanced content widgets to add event calendars, info boxes, testimonials, and more
- WooCommerce elements such as product galleries, grids, and carousels
- Integration with third-party platforms like Mailchimp and Ninja Forms
When you install Essential Addons on your WordPress site, you can integrate Mailchimp using its Form Styler Elements. Here, you can simply enter your Mailchimp API key, which will add an EA Mailchimp widget to the Elementor editor. Then, you can drag and drop the widget onto a page and continue customizing as needed.
Price: Subscription plans for Essential Addons start at $39.97 for one website. It includes over 70 widgets and seven extensions.
2. Happy Addons
With Happy Addons, you can choose from over 400 pre-designed blocks and widgets to import into the Elementor editor. To speed up the creation process, you can set design presets.
Happy Addons also makes it possible to copy elements from one website and paste them into a site with a different domain:

Features:
- Section nesting
- Cross-domain copy-paste
- 400+ pre-made design sets
After entering your Mailchimp API key under Credentials in the Happy Addons settings, you can use Elementor to drag and drop a Mailchimp Form Widget onto a page.
Then, you can edit the tool’s advanced settings to customize the form margins, colors, and typography. You can also redesign the fields and buttons to have a unique background, shadow, font size, and spacing.
Price: Happy Addons provides annual subscription plans starting at $39 for one site.
3. ElementsKit
Like the other options on this list, ElementsKit is an all-in-one plugin package with extra widgets and extensions for Elementor. It can offer more customization when editing functional features such as headers, footers, or menus.
Plus, ElementsKit includes a custom widget builder if you can’t find an option that works for you:
Features:
- Custom controls such as Multi Widgets, AjaxSELECT2, and Image-Picker
- 85+ widgets and extensions
- 500+ pre-designed web blocks
You can use ElementsKit to integrate Elementor and Mailchimp entirely through the Elementor editor. You’ll just need to drag and drop the Mailchimp widget onto a page and define the API key. Then, you can add custom fields and icons to your form.
Price: Yearly plans for ElementsKit start at $39 for one site.
4. The Plus Addons
The Plus Addons for Elementor advertises itself as an Elementor tool built for everyone. With ready-made templates and in-depth YouTube tutorials, even beginners can quickly learn how to design a functional website. Furthermore, It brings you the largest collection of high-quality Elementor addons in a convenient package, so you don’t need to purchase multiple plugins for different functionalities.

Features:
- 120+ Elementor widgets
- 300+ ready-to-use blocks
- 100K+ Active Users
- Performance Optimized
- Unused Elementor Widget Scanner
- 18+ ready-made templates for your website
And if that isn’t enough, This plugin comes with premium support from the developer.
Price: The Plus Addons for Elementor has a free version. However, its selection of plans contains more widgets and extensions. These packages start at $39 per year
Summary
Although combining Mailchimp and Elementor can seem daunting, anyone can integrate these two tools. By doing so, you can create custom subscription forms that meet your expectations for appearance and functionality.
To review, here are the five simple steps to integrate Elementor and Mailchimp on your website:
- Sign up for a Mailchimp account.
- Create an audience and an API key.
- Design a Mailchimp signup form with Elementor.
- Connect Mailchimp.
- Add your form to your website.
Email marketing and design are essential for your website’s success. You’ll also want to partner with a dedicated hosting provider.
At Kinsta, our managed WordPress hosting can take your site’s performance to the next level. Contact us to find out more!
Do you have any questions about integrating Elementor and Mailchimp? Ask us in the comments section below!


