
Apple echoes the tagline “there’s an app for that,” but you’ll also find plenty of native features built into macOS. After all, Apple’s ecosystem is known for how everything “just works.” It’s no surprise then that you don’t have to worry much about how to take a screenshot on your Mac.
Mac’s ability to take screenshots hasn’t seen significant updates, mainly because Apple arguably got it right the first time around. Overall, taking a screenshot—and editing it natively—is a breeze on Mac, regardless of the task.
In this article, you’ll learn how to take a screenshot on your Mac. Then we’ll explore many solutions that can complement the native macOS screenshotting functionality. You’ll also learn how to customize the screenshot tool. Let’s begin!
Check out the video version:
Shortcuts
Before detailing each method of taking a screenshot on your Mac, here’s a quick list of the most common shortcuts and a brief description of what they do:
| Shortcut | Action |
| Command + Shift + 3 | Takes a full-screen capture. |
| Command + Shift + 4 | Let’s define a capture area before taking a screenshot. |
| Spacebar | It lets you reposition the boundary when redefining an area. A single press enables you to select an open application window to capture. |
| Command + Shift + 5 | It opens the native Screenshot.app for more advanced screen captures. |
| Command + Shift + 6 | Takes a screenshot of the Touch Bar on relevant Macs. |
| Escape | Cancels the screenshot process in selected modes. |
| Control | Combines with any of the above screenshot shortcuts to copy your capture to the clipboard. |
How to Take a Screenshot on Your Mac (4 Simple Ways)
Now we’ve looked at some front-running solutions for taking a screenshot on your Mac. Let’s break down how to capture the screen.
Throughout the following few sections, we’ll offer four different methods for capturing the screen, and we’ll note when some apps do things differently from the standard approach.
1. Take a Full-Screen Capture
The most basic application of taking a screenshot is to capture the entire screen. Usually, this includes the toolbar, Dock if visible, and any files or folders on your desktop. It is a literal capture of the entire screen as you view it.
It’s initially a low-effort approach to creating a screenshot. You’ll simply press the required keyboard shortcut and save the capture. However, from there, you’ll likely need to do some editing to make the image suitable for your content. At a basic level, this will involve cropping. However, it could also need annotation and obfuscating too.
Full-screen captures are good where you need to show the entire context of the screen. Website showcases are one example, where the whole page is the focus. Of course, if you have a lot to capture, you’re going to take as many screenshots as possible.
However, full screenshots can be helpful where you have to balance specific dimensions and what the screenshot displays. For example, take the Kinsta home page:

If you can’t go wider than 1,400px for screenshots (for example), a good approach is to capture the entire screen and use the marquee or crop tools to “mark out” the correct dimensions.

You can then make sure the area you’re capturing will fit within your “frame” while ensuring the alignment is perfect.
To take a full-screen capture, you’ll select the option from your app’s menu. For example, in the native Screenshot.app, it’s a selection box:

However, in CleanShot X, it’s part of the toolbar’s dropdown menu:

While Snagit also lets you access full-screen capture from the toolbar, there are also other options to consider:

The native keyboard shortcut for taking a full-screen capture is Command + Shift + 3. You can set it up in whatever app you’re using as the default option. However, note that the Screenshot.app also lets you access the option by opening the app itself with Command + Shift + 5.
Copying a Screenshot to the Clipboard
Generally, each screenshot will save as a new image on your Desktop. However, by holding Control in addition to the regular keyboard shortcut, you’ll be able to copy the capture to the clipboard too. It means you can paste the image into another app, such as a graphic design program or similar.
However, some apps have different ways to copy to the clipboard. For example, Snagit has a toggle switch, while CleanShot X asks you to set the functionality within the Preferences screen:

Meanwhile, Skitch treats copying images to clipboard like text: through an option in the File menu.
2. Capture a Specific Portion of the Screen
Most of the time, you won’t want to capture the whole screen, but only a smaller portion of it. Fortunately, most apps let you drag rectangles around whatever elements you’d like to capture. When you take a screenshot on your Mac, this rectangle will disregard everything outside of the boundary you’ve set:

It has a wealth of uses—enough that area captures of various types will probably constitute the majority of your screenshots. It’s ideal to provide a clear focus on your image’s essential aspects, remove elements from the screenshot, and much more.
For this method, you’ll usually drag out the boundary using a built-in marquee tool, then refine it before taking the capture. Command + Shift + 4 is the default keyboard shortcut for activating the selection crosshairs, though the Screenshot.app also lets you define the screen area.
There will be lots of times you’ll want to capture specifics, such as a dropdown menu. Area capture is suitable for this, but you may find that the final image gets scaled up and looks unnatural. However, there is another part of the area capture process that could help you.
3. Capture a Specific Window on Your Screen
Capturing application windows on Mac is fantastic for showing “focused context” in your screenshots. This approach can offer focus by clearing out everything superfluous.
What’s more, macOS also captures the window shadowing by default, which gives your screenshots a professional sheen:

The most obvious use case here is to capture one window that fits your topic. Given that this is essentially an area capture with precise dimensions, the process to take these screenshots is almost the same.
To start, activate the area capture tool as usual in your chosen app. For the Screenshot.app, you’ll use the Command + Shift + 5 shortcut and select the Capture Selected Window option:

However, in other apps, there may be a specific option within the Preferences or toolbar:

However, in Snagit, you’ll need to select the Mission Control option to capture windows:

While taking a screenshot of a window is a handy solution, there’s a little more you can do to make the process even more focused and specific.
Capture a Specific Mac Menu or the Touch Bar
While you’ve been trying out window captures using your app of choice, you may have noticed that dropdown menus don’t form part of the screenshot for some windows. It is one area that is lacking with all screenshot apps.
However, you’re usually able to hover over a menu while selecting a specific window to capture it:

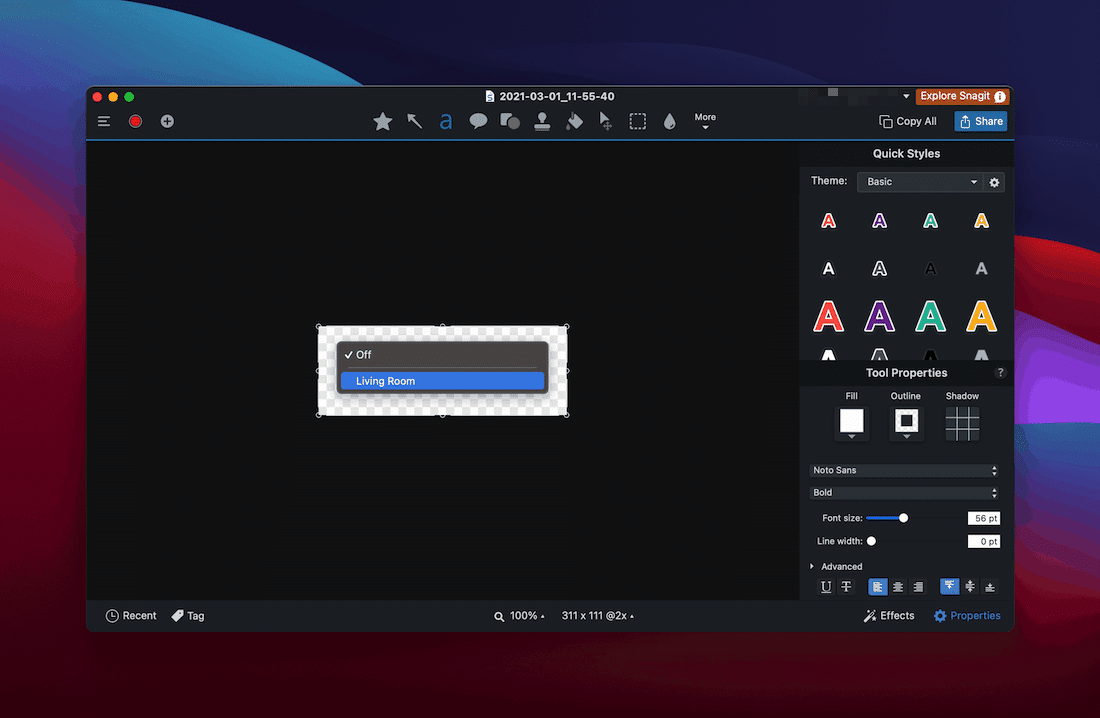
In Snagit, there’s a dedicated option for capturing menus:

The one drawback here is that you’re only able to capture the menu itself, rather than everything around it that might offer context:
Although it’s potentially phasing out, the shortcut Command + Shift + 6 can also capture screenshots through the Touch Bar.

However, new Macs based on Apple Silicon chips don’t appear to have the Touch Bar, so whether this shortcut will remain in future macOS versions remains to be seen.
Using the Spacebar
Finally, a quick tip if you want to capture specific windows and menus while using keyboard shortcuts: Command + Shift + 4 is usually the shortcut for setting Active Area. Once the mode is activated, you can press the Spacebar to enter window selection mode and click the mouse or Touchpad to capture the screenshot.
While this is the default for the Screenshot.app, other apps such as CleanShot X will often map the same key for screenshotting.
Finally, if you’d like to challenge your skill, you can also move the selected boundary around on the screen by holding Command + Shift + 4 + Spacebar. It lets you reposition the capture area to get the perfect screenshot. To take a capture, lift off the Spacebar.
4. Create a “Timed” Screenshot
So far, we’ve only discussed instant captures. We set the boundary for the screenshot and captured the screen immediately. In some cases, though, you may want to delay the capture for a few seconds.
It makes sense if you want to take a screenshot on your Mac of a specific event, such as a menu notification. You may also want to set a timer if you need to “set up” the capture’s specifics—for example, while opening a menu or when applying other shortcuts.
Screenshot.app gives you a choice of either five or ten seconds’ delay on a capture:

While CleanShot X gives you a 2–15 seconds timer, Snagit is the most flexible here—you’re able to set a custom time based on your exact needs:

Skitch is the least flexible; it only offers a five-second timer as part of a dedicated Timed Crosshair Snapshot option. Of course, we’ve already discussed how lean Skitch compares to others (and why this is), but it does mean that difficult time captures will require a more full-featured screenshot app.
4 Top-Notch Apps for Taking Screenshots on Your Mac
There are lots of apps on the market to take screenshots on your Mac. However, here we’re going to feature four. We think these offer a gamut of features, although the stock macOS screenshot app is a good tool. Let’s take a look at that one first.
1. Screenshot.app
We, of course, have to talk about the built-in macOS Screenshot.app before other tools. While you may think it’s been around forever, it’s only been a part of macOS since Mojave (10.14).
Before this, you’d use Grab for screenshots until it was sunsetted with 10.13. In reality, the new app’s functionality overlaps that of the old, and most users won’t notice the difference. It’s essentially a name change, with some organic enhancements for everyday desktop use.
You won’t even know you’re using an app if you work with the keyboard shortcuts in most circumstances. It’s the kind of seamless approach you get as standard with native Apple software. Even opening the Screenshot.app itself (more of which later) is a cinch.

If you do open the app without using the quick shortcuts, you’ll find screen recording functionality too. This ramps up the value of the app, and—along with other bundled apps such as iMovie—it gives you a solid base for taking your first steps into explainer videos. For a business that wants to document its products’ features and functionality, it’s nearly perfect.
On a day-to-day basis, most Mac users will take screenshots with the native app. Given that, it’s better to discuss why you would want an alternative to the Screenshot.app.
A few sentences ago, we said Screenshot.app was only “nearly perfect.” There’s no audio recording, for starters, and you’ll find scant options for working with the captures you take. As you’ll see, compared to other tools, there’s a disconnect between the screen capture technology and the annotation features.

Granted, Apple wants you to use Preview and Markup for annotating screenshots primarily. Although you’ll find a solid set of tools there, it lacks some sought-after features such as obfuscation. For more advanced markup and annotation tools, you’ll have to look elsewhere.
2. Skitch
Speaking of which, we’re going to make an educated guess with regards to Skitch. The app designed for use with Evernote has become a go-to screenshot solution for many Mac users. However, we’d bet that you’re only using Skitch for annotations rather than screen captures.

It isn’t because the capture functionality is terrible. It’s dependable and straightforward to use, and we’d use this as our default capture tool if we could. However, it doesn’t offer much more than the native Screenshot.app. It is understandable, given that Skitch is mainly for getting screen captures into Evernote.
With Skitch, what impresses us are the annotation tools, and they work well in combination with the macOS native tool. Before you get too excited, though, know that the tools on offer aren’t of the depth of a graphic design tool. That said, you get the fundamentals as part of the package, and they work well. There are text boxes, shapes, pen tools, cropping tools, and obfuscation.

We’d say that the obfuscation option alone makes it worth it to have Skitch installed. It’s sometimes tricky to create neat boxes that sit nicely with the original image, but the pixelated effect is pleasing, and it doesn’t feel obtrusive.

Because of this, the annotation features are going to be your primary reason for using Skitch on your Mac. That said, heavy Evernote users will find value in Skitch too. And for straightforward screenshot tasks, it’s a rugged solution to beat.
3. Snagit
Snagit is a premium screen capture tool with many features and functionality that rivals top graphic design tools. It’s a cross-platform software that works with images and videos, and outputs to several different formats. What’s more, you can create videos from images, or record using your webcam to produce full-featured explainer content.
Snagit will snuggle into the workflow of technical writers or those writing up documentation. We like how versatile the tools are and how you can edit the screenshots you make. For example, you can use the Grab Text tool to extract a copy from your screen capture and use it elsewhere:

You’re also able to replace the text in a screenshot due to Snagit’s recognition technology:

There’s plenty more in the Snagit toolbox that lets you manipulate screen captures, too, such as the ability to annotate stepped workflows on your captures and work with elements to move them around the image.
In our opinion, Snagit is a power user’s tool. Given that the price is about $60 as a one-time fee, it’s a steal and almost essential for specific writing projects.
4. CleanShot X
CleanShot X is a super tool for capturing the screen on a Mac, and it comes with lots of helpful functionality.

Its developers bill it as a replacement for the native Screenshot.app, and it’s easy to see why. It comes with the ability to take full-screen grabs (and partial ones too). It also lets you capture specific windows, both with and without the background.

It’s already better than Apple’s native tool, but it goes further. You can also perform scrolling captures, which means that grabbing the whole page on even lengthy websites is possible:

There’s one aspect of CleanShot X—one that’s in its name—that we particularly like: you’re able to hide whatever “clutter” is on your desktop, so that captures look neat and tidy. By clicking a button, CleanShot X can hide these for you temporarily:

As a replacement tool, CleanShot X hits the mark—especially for bloggers. For example, you can pin screenshots so that they’re always visible. It is helpful when you’re creating tutorials or blog posts illustrating steps.

You’re also able to configure the app’s comprehensive preferences to tailor your screenshots for specific use cases. For example, you could set a custom wallpaper for different projects and match the blog’s branding. What’s more, for some blogs that use smaller image sizes, you’re able to scale Retina images down to a standard resolution.
At $29 for a single “seat” and $49 for two, there’s no reason to skip over ClearShot X if you’re a blogger or online writer. It’s a native macOS app that can be a complete replacement for Apple’s solution, and we haven’t even mentioned the annotation or cloud-based features of the tool.
The Many Uses of Taking Screenshots On Your Mac
Back before the functionality was available, and smartphones were still in their infancy, the only way to take a screenshot was to use a dedicated lens extension for your film camera. The ability to take screengrabs has been around since the 60s.
With the advent of the internet and its continued growth, sharing screenshots has increased significantly. Here are a few uses for them:
- We can use them to show error messages. For instance, you can share them with tech support, who will look to replicate the error.
- They’re paramount for content marketing purposes, especially for tutorials and “how-to” posts.
- In some cases, they can be used as visible proof or for archiving purposes.
- Depending on the context, there can also be a social gaming aspect to creating screenshots. For example, the Nintendo Switch has a screen capture feature built into the console, and the Steam gaming platform has dedicated screenshot functionality for desktop users.
Regardless of the reason for your wanting to take a screenshot on your Mac, you’ll need an efficient and seamless way to do it. Later, we’ll show you some of the options. First, though, let’s discuss some of the limits when taking a screenshot.
Restrictions on Taking Screenshots on Your Mac
While the ability to take a screenshot is relatively simple, macOS (and the apps it hosts) has become more intelligent over time, faced with the myriad problems posed by the sharing and distribution of digital content. In other words, because we can view movies and other media on our computers, the OS can’t be held responsible for copyright infringement.
As such, when you go to take a screenshot of an app such as Apple TV or DVD Player, the OS will obfuscate the relevant window under the hood:
While there may be (illegal) workarounds for capturing copyrighted videos and other media on macOS, they obviously won’t focus on this article.
How to Record the Screen on Your Mac
In addition to capturing still images, many screenshot apps can also record your screen and save the result as a video file. While Skitch doesn’t offer this functionality, the rest of the tools in our list do, and they each provide a different way to access video recording.
The process of capturing a video is similar to defining an area of the screen: you’ll drag a marquee tool to define the boundaries, then begin recording. It’s even simpler than image capture, and it’s an excellent option for quick explainer videos sent through email or chat.
You’ll find the Screenshot.app’s recording functionality within the app itself (Command + Shift + 5). It’s pretty basic and comes with few options. However, both Snagit and CleanShot X have many options that let you create optimized screen recordings.

Both of these tools let you capture screen recordings down to a specific window, unlike the Screenshot.app. It keeps the file size down and retains viewer focus.
How to Increase Efficiency When Taking Screenshots and Recordings on Your Mac
By default, screenshots save to your Desktop. Typically, this is fine, and it’s arguably the perfect place for them. However, in most apps, you’re able to specify where screenshots save.
For example, CleanShot X and Snagit let you define a location within the Preferences screen. Screenshot.app, on the other hand, has a few preset locations, with the option to specify a custom location:

What’s more, each app has the option to show the cursor in your screenshots and recordings. It’s usually within the Preferences screen, and each app will have its way to let you toggle this on and off:
Once you’ve taken your screenshot, most of these apps will let you move it elsewhere too:

Finally, it may be that you want to choose a different default screenshot app. It’s understandable if something suits your needs better than the native tool. However, there isn’t a direct way to do this, unlike with apps such as Mail.

The solution is to map your keyboard shortcuts to the same ones used by Screenshot.app. That way, your chosen app will take precedence over the native one. CleanShot X will ask you whether you want to remap keys on the first launch, and Snagit also includes an option to open screenshots and videos in its own editor.
How to Change the File Format of Your Screenshots
There’s one more efficiency tip we want to share—one that’s usually found within the Preferences of third-party apps: changing your screenshot’s file type.
The default file format of screenshots is Portable Network Graphics (PNG) files. It makes sense because PNG files are more suitable for graphics images than photographs.
We noted earlier how third-party apps would offer you a few options for choosing the file format. However, if you’re using the Screenshot.app and want to change the file format, there are no such settings. Instead, you’ll have to open the Terminal and entering the following:
defaults write com.apple.screencapture type <file format>; killall SystemUIServerNote that you’ll need to replace the <file format> placeholder with one of the following:
- png
- gif
- tiff
Once you press Enter, your screenshot’s file format will change. Note that you won’t get a notification; taking a test screenshot will show you if the change has worked.
A Quick Primer On Annotating Your Screenshots
To wrap up this article on how to take a screenshot on your Mac, let’s discuss annotations. Even if your screenshotting skills are sharp, poor annotation can ruin your image and confuse the end-user.
To that end, here’s our advice on making the best annotations possible:
- The best annotation is none at all. In other words, try to take a screenshot that accurately shows the point you’re trying to make without words.
- Stick to simple boxes for the majority of your annotations. Arrows, text, and other elements can take focus away from what you’re trying to showcase, and they can make your screenshots look unprofessional.
- Steer clear of the default color schemes and sizes. It’s easy to tell if someone has used Skitch or Preview because they both use distinct colors for annotations.
- Use colors that contrast with your screenshots, but keep it consistent throughout all of the annotations you make. A yellow or orange color often works well, and you’ll notice that Kinsta uses our familiar purple for annotations on the blog.
You’ll sometimes grab sensitive information along with your screenshots, especially if you’re using an account-based app or are working with system files. In these cases, it’s a good idea to obfuscate the information using a suitable tool.

Skitch, Snagit, and CleanShot X all have this obfuscation option—a much better option than pen scribbles or ugly boxes.
Finally, you might even want to create a consistent framing for your images using a dedicated browser mockup tool. It makes it look as though your screenshots are in a browser or other app window.

There are a few free tools that can help with this, such as Screely and Shotmockr. However, if you have the time and the need, you can also create your mockups within your favorite graphics program using a dedicated template.
Want to find out about the Windows screenshot shortcut? Check out our guide: How to Take a Screenshot on Windows (7, 8, 10), and Save and Edit Them
Summary
For something that appears to be simple, taking a screenshot on your Mac can get complex quickly. It’s because visuals are so crucial for any documentation and tutorial blog posts. What’s more, a well-taken, well-annotated screenshot can offer as much instruction as several paragraphs of text.
In this post, we’ve explored many ways to take a screenshot on your Mac. While full-screen captures are the “brute force” approach to screenshots, defining an area or window of focus will result in greater efficiency, especially if you opt for a third-party app such as Snagit or CleanShot X.
Besides, taking some time to edit and annotate your screenshots will frequently boost their value and give focus to what you’re trying to convey.
Do you take screenshots on your Mac and, if so, will any of these apps help you? Let us know in the comments section below!

Head of Content at Kinsta and Content Marketing Consultant for WordPress plugin developers. Connect with Matteo on Twitter.

