
Having trouble with the preview of a page you want to share on LinkedIn? You could use the LinkedIn debugger tool known as the Post Inspector to sort out any problems before posting.
With millions of key decision-makers on the platforms, the last thing you want to do is make a bad impression.
Don’t rush into it and share a link that displays the wrong image or title. That could drastically lower your CTR and engagement, would be a waste of your post, and could end up hurting your brand.
Instead, follow along with our guide to quickly identify and fix any issues before taking your LinkedIn post live.
How Link Previews on LinkedIn Work
If you still haven’t solved your problems, let’s further examine the link preview functionality and how LinkedIn uses it.
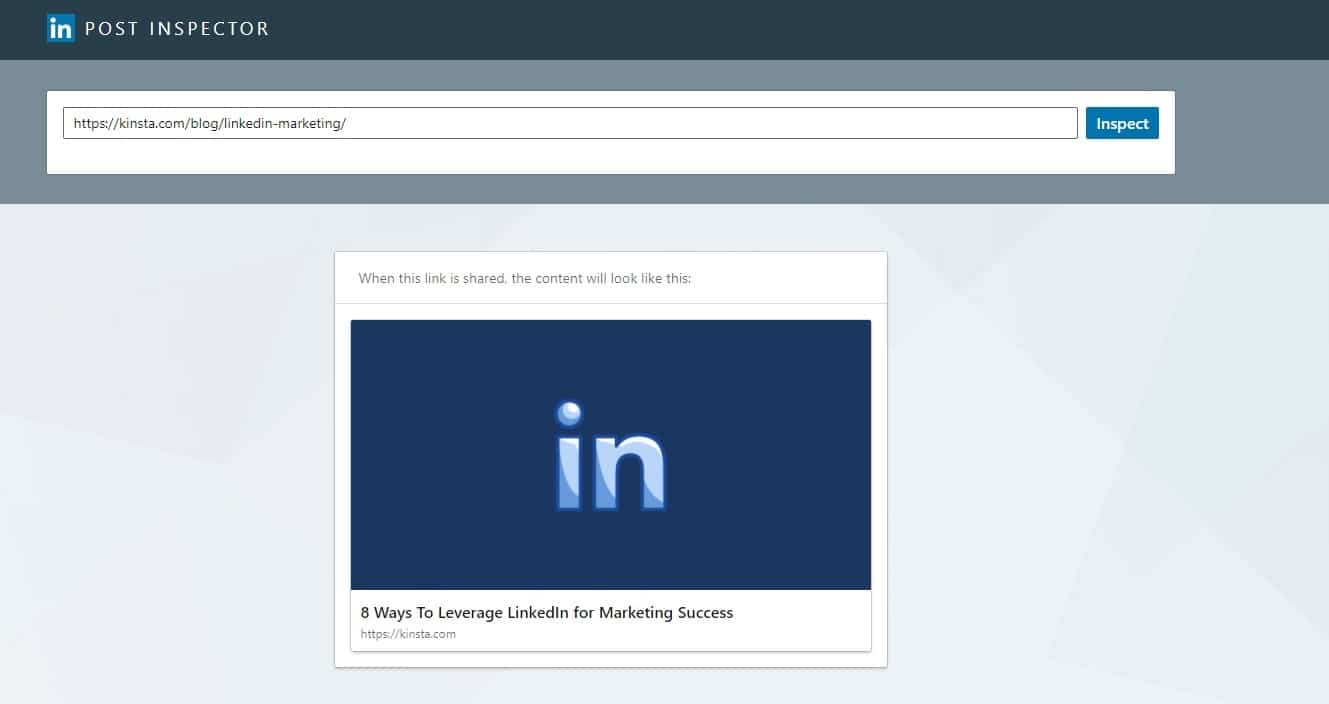
Whenever you create a new post on LinkedIn and include a link, the link preview creates a preview using data from the meta tags on the page in your URL.
For example, if you share a link from the Kinsta homepage, the preview looks like this:

LinkedIn uses something called Open Graph meta tags to get the data pertaining to the image, title, and description of your link. These are what you could debug using the free tool Post Inspector.
LinkedIn then creates the box you see above using the image and title provided in that metadata.
Link Preview Specifications
- Title: Up to 150 characters.
- Image: The image gets cropped into a 1.91:1 ratio and 1200 (width) x 627 (height) pixels. So you need an image with a compatible ratio and width of 1200px+.
- Optional comment of up to 1300 characters. (This is the LinkedIn post that you write outside of the link.)
These are the specifications for the automatic link preview that’s included in organic posts on LinkedIn.
If you’re wondering about the specs for sharing images on LinkedIn, or to include in your ads, read our guide on social image sizes.
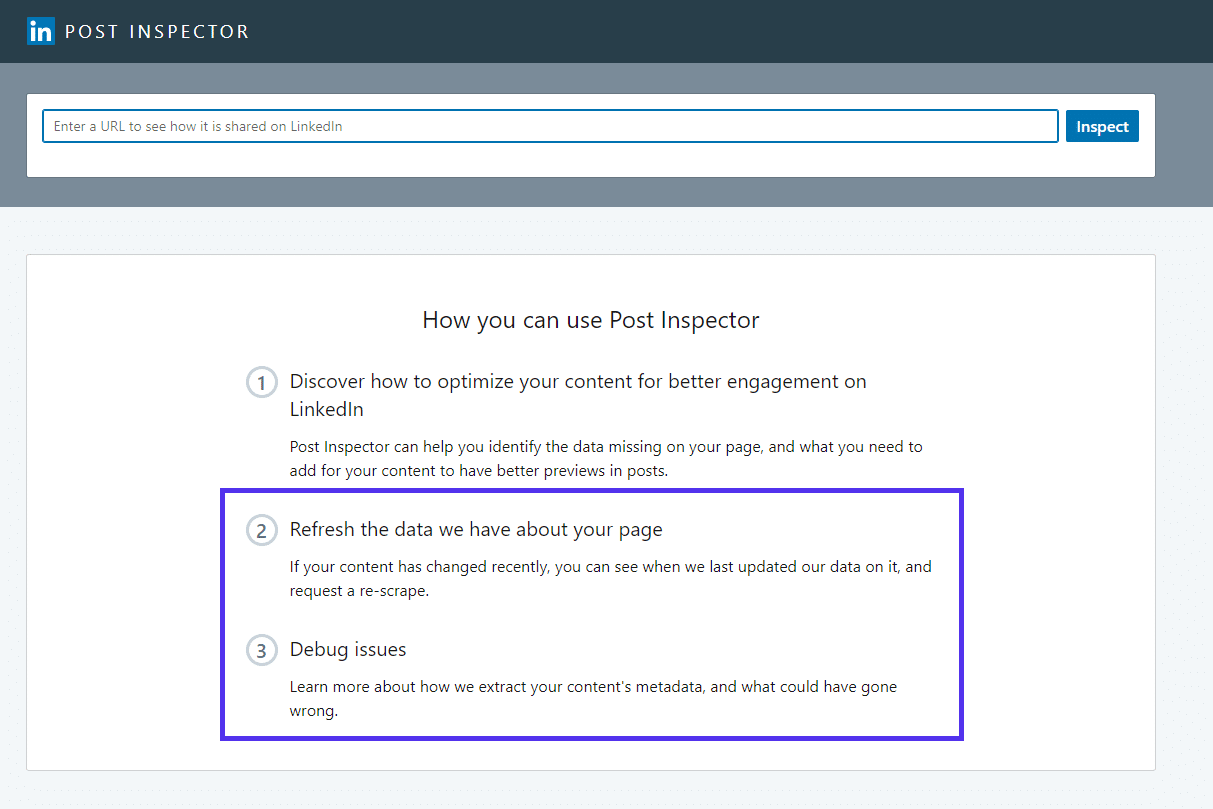
What’s the Post Inspector (LinkedIn Debugger Tool)?
While you may not have searched explicitly for the Post Inspector, it’s the only debugging tool available for LinkedIn posts. Sometimes referenced to as LinkedIn Debugger, this free tool solves the biggest problems marketers face when sharing links over LinkedIn: generating the correct previews.
- You can refresh the preview (title and image) if you’ve updated a post or page.
- You can also debug any issues with a link preview on LinkedIn, like the wrong image or title showing.
Other Terms That Refer to LinkedIn’s Post Inspector Tool
The following terms are essentially aliases for the same tool.
- LinkedIn Open Graph debugger: Open Graph meta tags are the tags that LinkedIn uses to create previews of links in shared posts. That’s exactly what the inspector gives you insight into and helps you debug.
- LinkedIn share URL validator: The inspector also helps you check that your links appear correctly before you choose to share them in a post.
- LinkedIn post link checker: it’s just yet another alias for the Post Inspector.
- LinkedIn preview validator: Another alias, you can easily preview and validate a link to any page with the inspector.
- LinkedIn checker or LinkedIn Debugger: other terms used for the Post Inspector.
If you searched for any of them, you were actually looking for the Post Inspector the whole time.
How to Refresh Your LinkedIn Cache and Troubleshoot Your Link Previews with the LinkedIn Post Inspector
LinkedIn launched the Post Inspector in 2018 to help make the LinkedIn marketing experience a bit better.
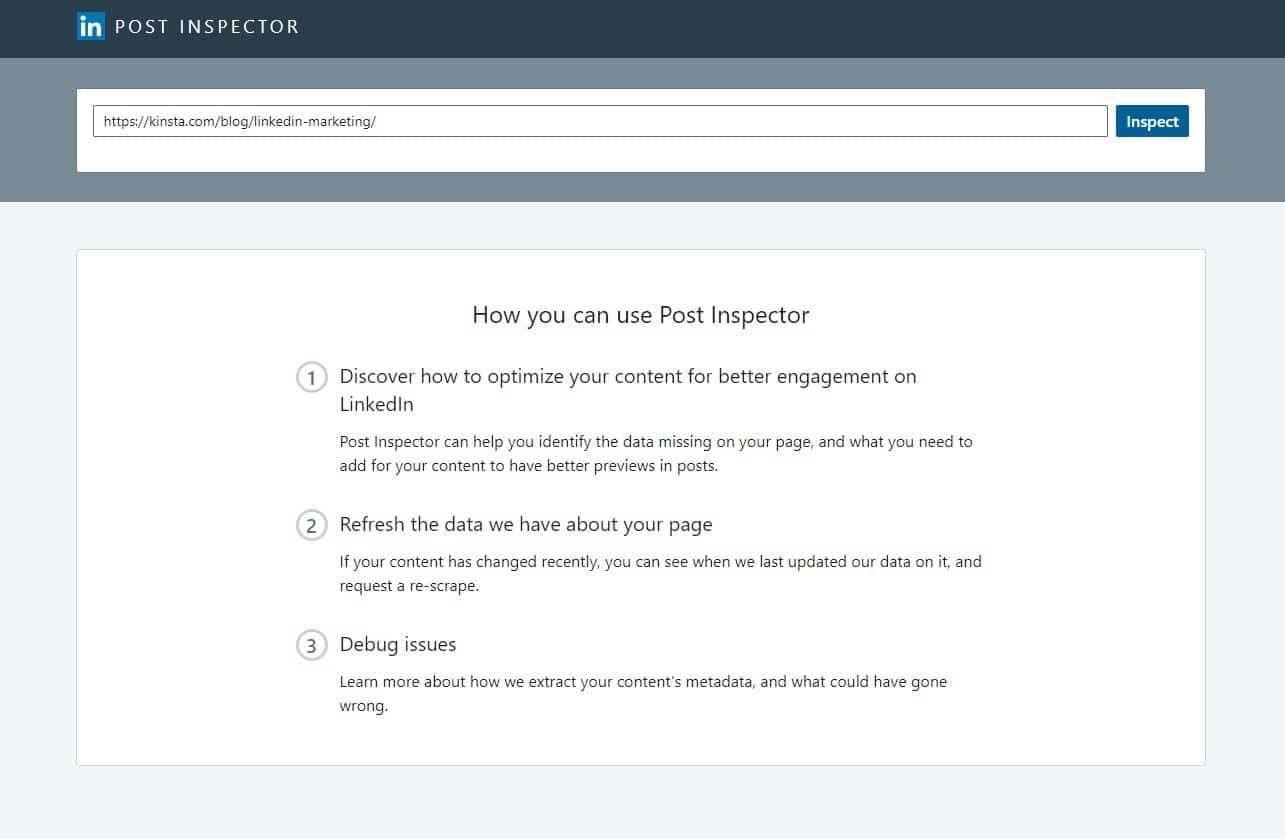
To instantly clear and refresh the LinkedIn cached version of your page, type in the URL and click the “inspect” button.
If all you wanted to do was refresh the cache, you’ve already completed your task. It’s that simple.
An old method involves sharing a page with a fake query string like ?a added at the end of your URL, but that won’t update the preview on posts that include your old URL. It will only refresh the preview for that particular shared link.
Sticking to the Post Inspector, it’s your best option and takes three seconds. If you want to debug the results and figure out what’s wrong, follow along with the next few steps.
Debugging Your Link Preview in LinkedIn
Debugging the preview of the page you want to share in LinkedIn is as easy as answering a few basic questions.
Is it showing the correct image? If not, you have to change the meta tags for your post or page.
It’s not enough to change the order of the photos in your post (more information on fixing this in the next section).
Is the full title readable? Check whether the title is cut-off or if you could include more information about your post.
LinkedIn allows up to 150 characters in the title, which means you can use a long, descriptive title if you want.

Are you getting any error messages? LinkedIn will let you know if, for example, you haven’t included all the OG meta tags that it scrapes and uses for previews.

You can find the error messages and warnings in the “Ingestion Feedback” section right below the preview.
You won’t see the section at all if your URL doesn’t include any errors. It’s hidden unless it finds them.
WordPress core doesn’t include OG metadata for your posts and pages. If you don’t have a plugin that supports Open Graph tags, you’re guaranteed to see error messages here.
That doesn’t mean anything is wrong with your installation or hosting environment. In most cases, it just means that you need to install the right plugin (more on this later).
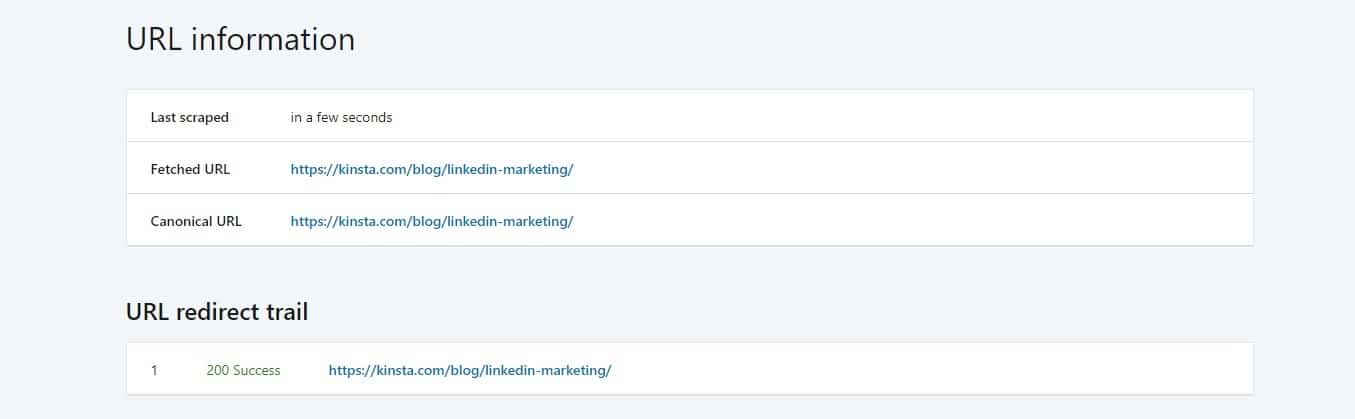
URL Information and Redirects
LinkedIn also shows basic information about the URL, its redirect status, and when LinkedIn last stored it.
If you’ve set up a URL redirect, this may interfere with how the link preview is displayed when you read it.
The Scraped Metadata
You can also check all the scraped metadata and make sure that it matches what’s on your website.

LinkedIn scrapes the following Open Graph meta tags:
- Title (og:title): The title of the page, blog post, or video.
- Type (og:type): The type of content, whether it’s an article, video, or rich media.
- Image (og:image): The preview thumbnail to show for the post in link previews.
- Description (og:description): The summary of the page, article, or video.
- Author (author): Regular meta tag for specifying the author of a post.
But it only displays the following metadata in the preview:
- Title
- Image
So technically, you could “get away” with only including the title and image tags to your posts and pages.
But with a CMS like WordPress, the right plugin will automatically generate the other tags either way.
How to Change The Link Preview Image and Title
When a link is first shared, this data is cached to use fewer resources when a URL is shared multiple times.
The second time a link is shared (or generated in a LinkedIn feed) LinkedIn pulls the cached version. It doesn’t change until you manually refresh it.
That’s why even after updating a post, you may still see an outdated title or image in the preview.
To change the preview images for your WordPress posts and pages, you need to install a plugin to include Open Graph meta tags.
The OG meta tags aren’t included in the WordPress core. But you may already have a plugin installed that activated them without your knowledge.
How to Get OG Meta Tags in WordPress
Do you already have a plugin installed that activates OG meta tags?
An easy way to check is to open the page source for any page (like your homepage) and search for “og:” in the source code.

If it shows 0 results, you need to install a plugin to get OG tags on your pages.
Any of the major SEO plugins will offer this capability, so they’re preferable to installing a separate plugin for just the OG tags.
Here are the steps to follow if you don’t have one of these plugins already:
- Search for and install Yoast SEO.
- After it’s installed, activate the plugin by clicking the same button (the text will change).
- Then head to the social settings under the new SEO item in the menu.
- Then, click the Facebook tab, and toggle the button to enable Open Graph metadata.
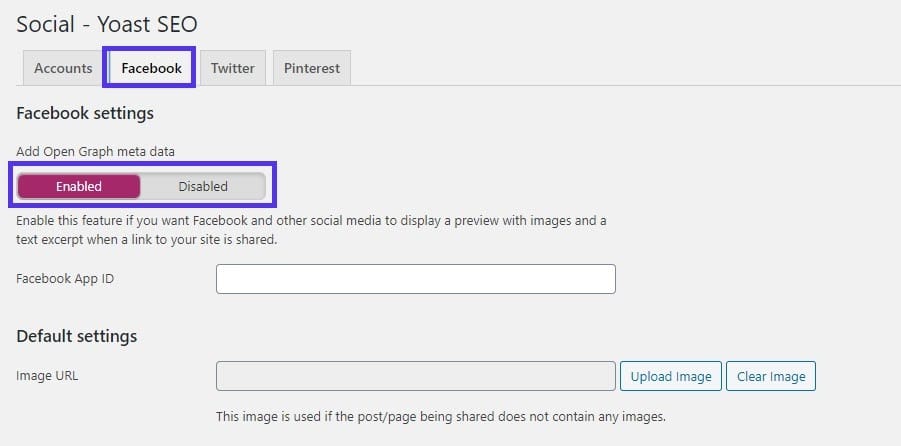
Don’t worry, though. The tab name might imply it, but these settings aren’t specific to Facebook. In 2026, all major social media sites use OG metadata for previews in social posts, including LinkedIn, Twitter, Pinterest, and more.
You can also set a default image to be used if there are no images in your posts or pages.
If your problem was that your LinkedIn post didn’t include Open Graph data, you can jump ahead and check your social preview at this point.
How to Get the Right Image and Text in the OG Tags
With Yoast SEO successfully installed, you can now set individual settings for each post.
By default, the plugin fills out the tags for all posts using WordPress data to generate them.
- The og:image tag is identical to your featured image, or if there’s none, the first image included in the post or page.
- The og:title tag is identical to the title of the post or page in WordPress.
- The author is equal to the post author.
To edit these tags, you have to edit the post or page in question. Then, toggle the Yoast menu with the button in the top right corner, and click the “Facebook preview” link.
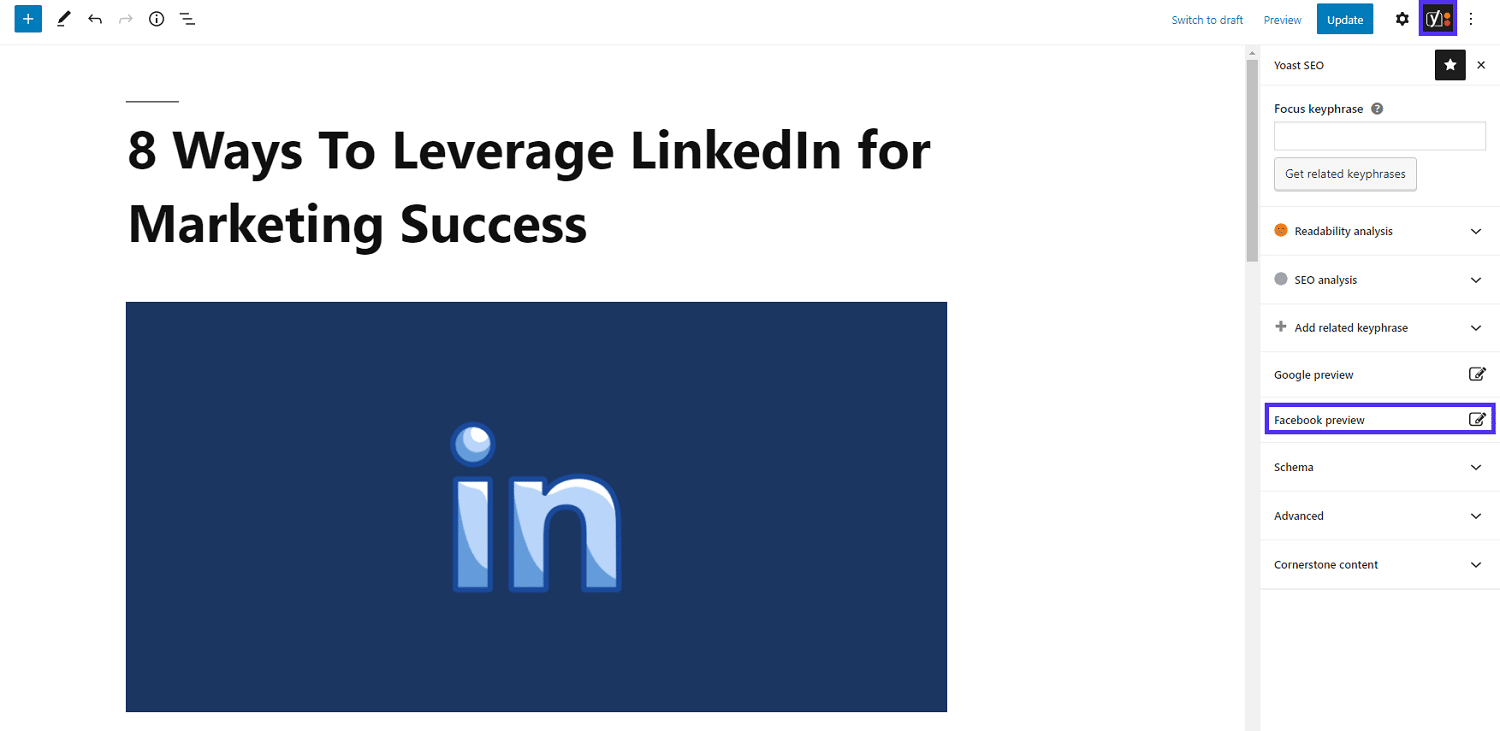
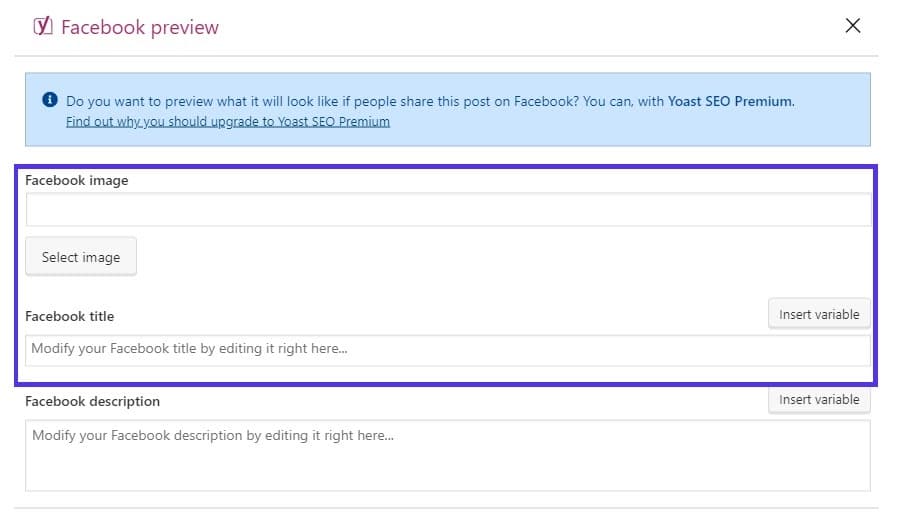
You can now start editing the “Facebook image” and “Facebook title” fields.
These will change the respective OG tags for the post and your LinkedIn link preview.
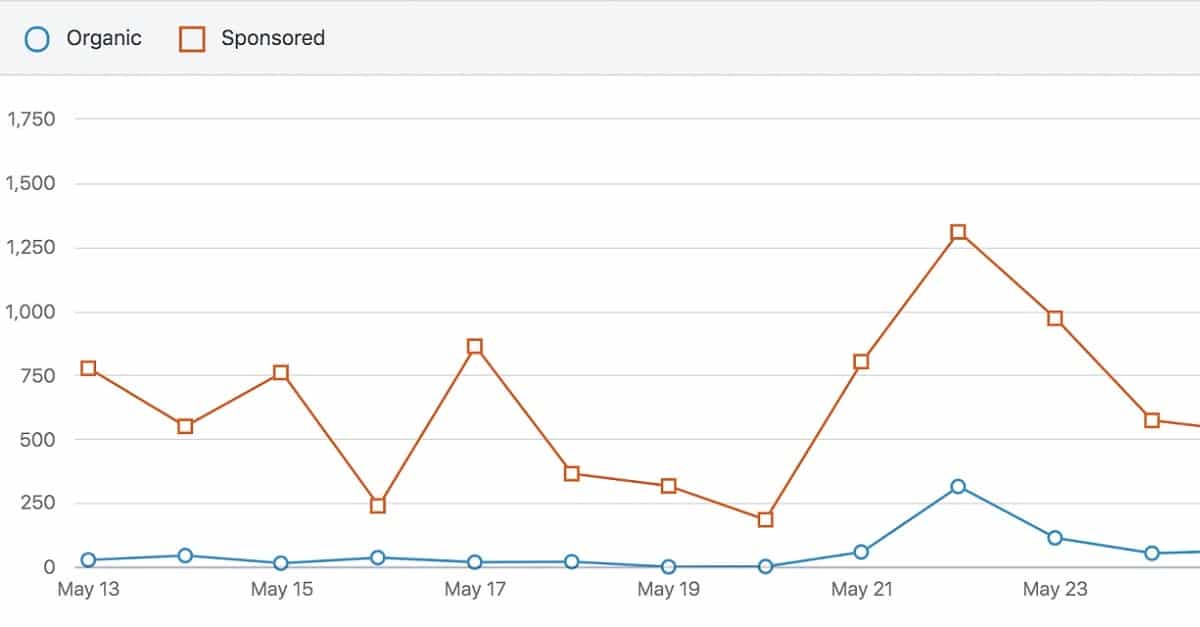
For example, we might want to include something like a graph instead of just the simple LinkedIn logo for sharing on social media.
In the post itself, we highlight this graphic comparing organic and sponsored traffic that shows the impacts of organic vs paid posts over time.
Click the “select image” button and choose the relevant image from your media library.
If it’s the title that you want to edit, you need to change the title at this stage as well. You can even use variables like post title and category to set it up.
You should also add a description. LinkedIn scrapes it but doesn’t include it in its previews (on desktop or the mobile app), but some social media apps do implement it.
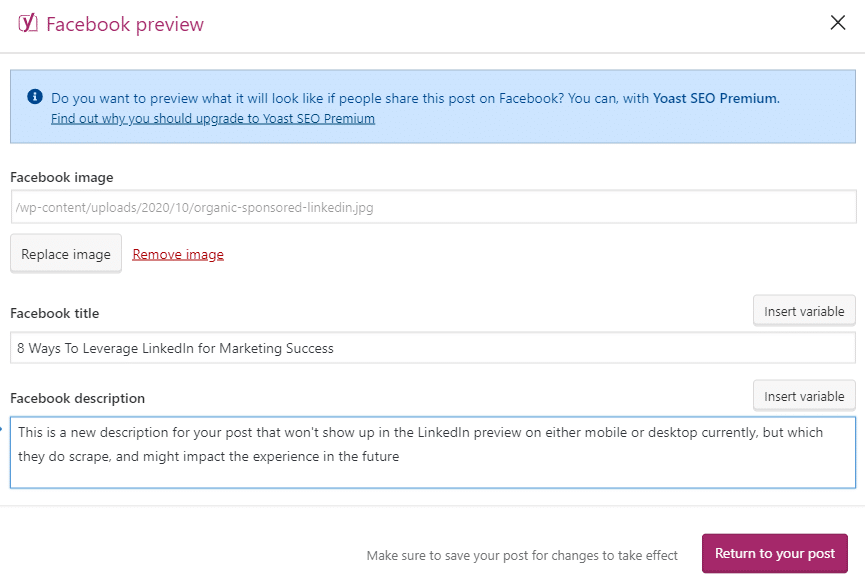
After filling out the fields appropriately, click the “Return to your post” button.
Finally, update the post to make the changes live.
Now you’re ready to move on to the next step.
Refresh Your Page (Or Site) Cache
Do you use a WordPress caching plugin? Or maybe you use a premium WordPress host like Kinsta that handles WordPress cache for you?
In either case, you need to clear and refresh the cached page (or your entire cache) for the changes to affect your live site.
Refresh Your LinkedIn Cache to Check the New Image Is Shown
With your cache cleared, it’s time to return to the Post Inspector to refresh LinkedIn’s cache of your post and see if your changes worked.
If you still have it open in a separate browser tab, just click on the refresh button. If not, go back to the inspector and copy and paste your page URL and run another inspection.
This time around you should see the new image and title.
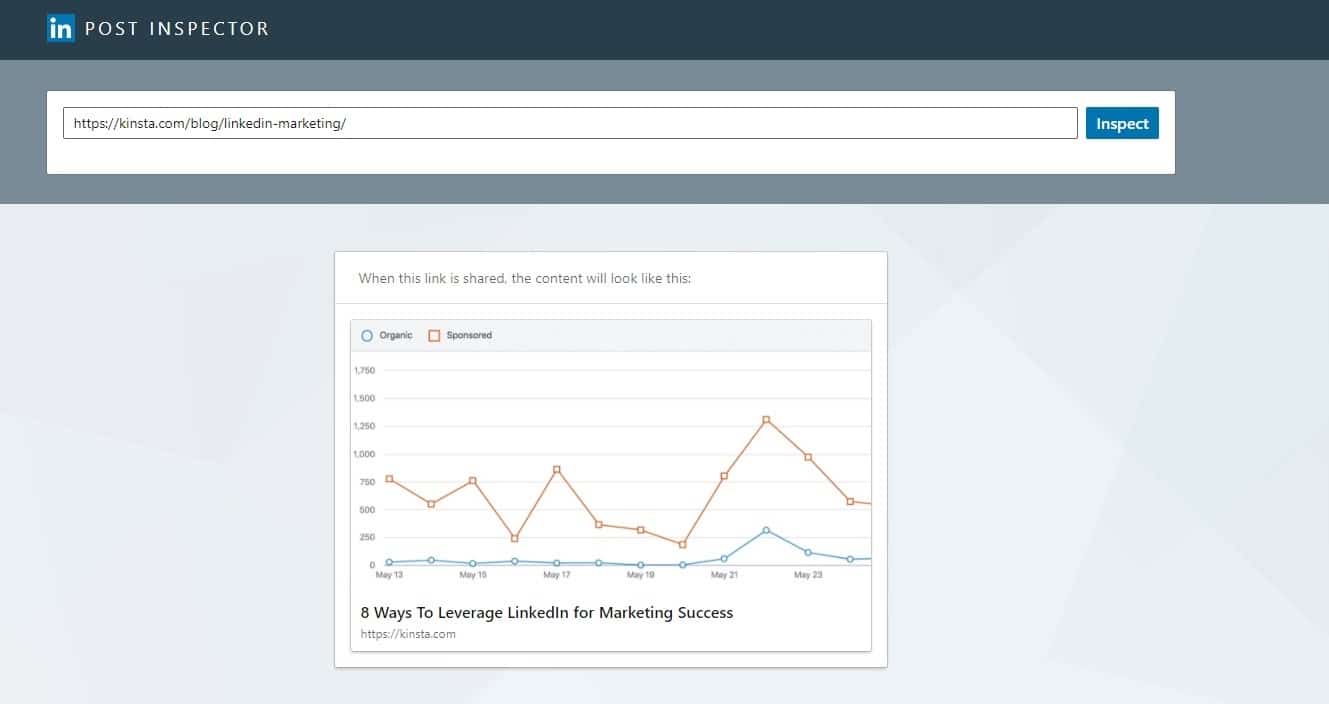
If it does show the new image and title, that means that any LinkedIn post to the same URL will look the same. You’ve successfully changed the link preview.
If this was your first time adding OG meta tags to a post, you should rinse and repeat for all of your essential posts and pages.
How to Change Open Graph Meta Tags for Images and Titles with HTML
Do you have a static HTML website or use a CMS that doesn’t offer OG tag support? Fixing the LinkedIn preview for a single page is easy.
Just add the following fields in between the head tags of the page you want to edit. So open up one of the best HTML editors and add this lines:
- <meta name=”title” property=”og:title” content=”[Social media content title here]”>
- <meta name=”image” property=”og:image” content=”[Social media image URL here]”>
- <meta name=”description” property=”og:description” content=”[Social media content description here]”>
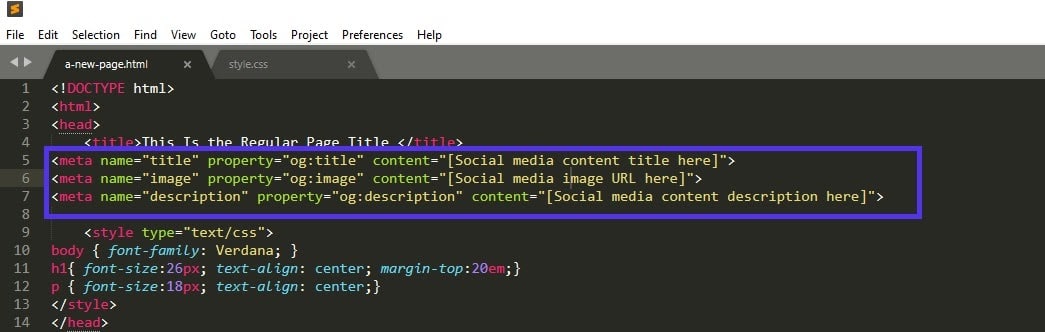
After that, make sure you save the document and upload the new version of the page to your server.
Summary
When you’re promoting an updated page to your LinkedIn following, the last thing you want is for post preview to counteract your message. The wrong picture can send the wrong message, reduce the CTR of your link, and reduce the effectiveness of your organic campaign.
Thanks to the LinkedIn Post Inspector tool, you’re able to identify any issues and fix them in time. And if you’re using WordPress with the right plugin, you’d only need to set it up once and then forget about it because it’ll work for every page (and link) you’ll create in the future.

Head of Content at Kinsta and Content Marketing Consultant for WordPress plugin developers. Connect with Matteo on Twitter.

