
When you change WordPress themes, your existing images may not be the right size.
The solution for WordPress? Regenerate thumbnails. This means resetting your image dimensions in WordPress core settings. It can also be done quickly by using a plugin.
In this post, we’ll dig deeper into the WordPress regenerate thumbnails solution as well as show you how to fix image issues with the Regenerate Thumbnails WordPress plugin and manually using WP-CLI.
Let’s start!
Prefer to watch the video version?
What Happens to Your Images
To figure out how to regenerate thumbnails WordPress-style, it’s essential to first understand how image and image sizes are handled.
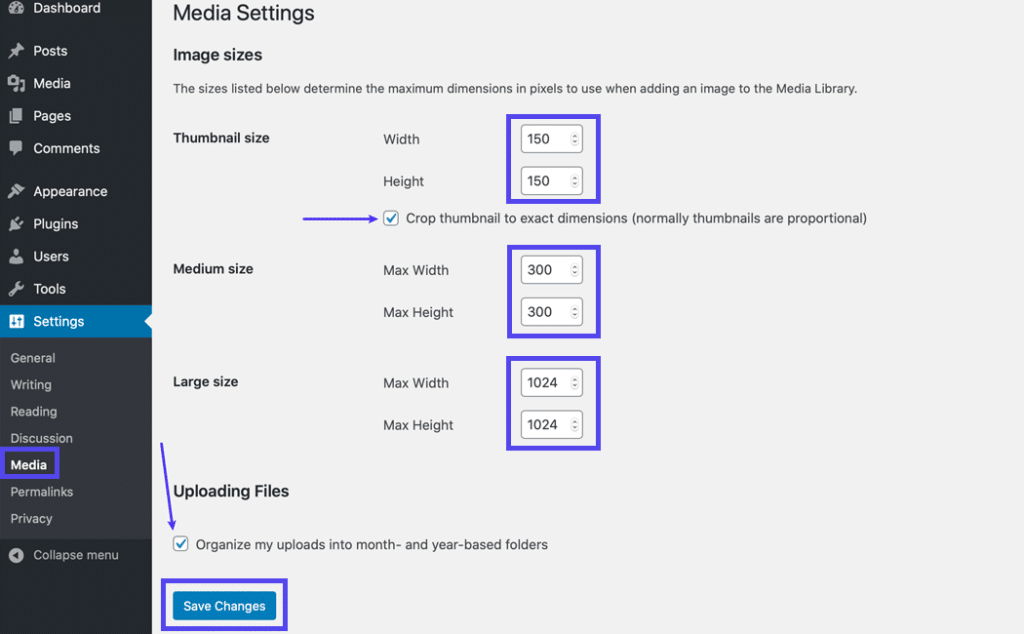
WordPress has settings to automatically crop images that you upload. The settings can be found in the admin dashboard under Settings > Media.
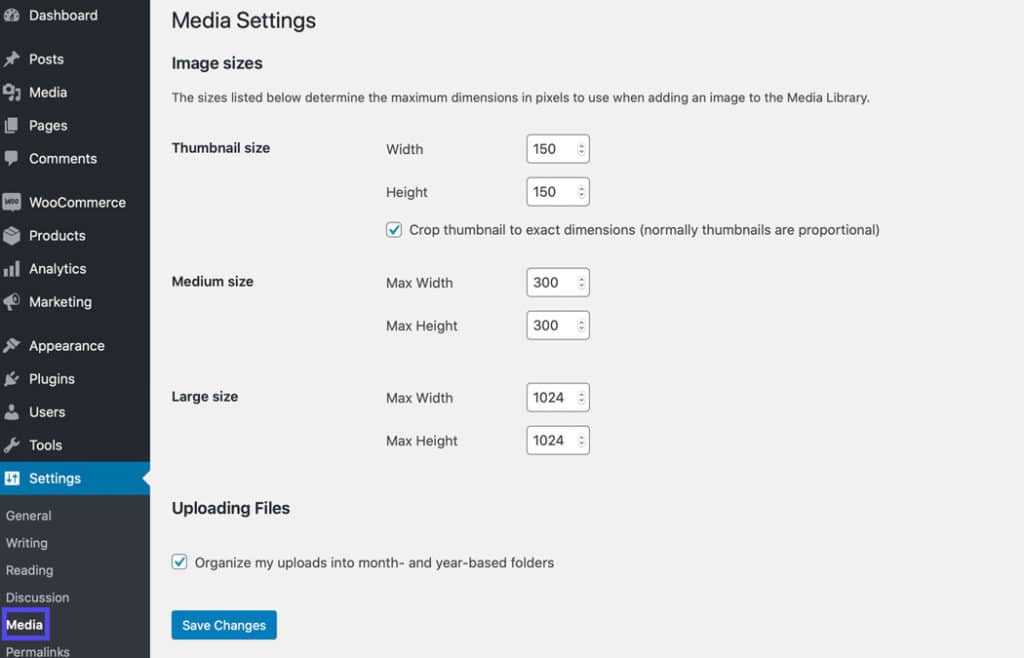
On the Media Settings page, there are sizes for “thumbnails”, “medium,” and “large.” You can update the pixel count for each of them, as needed.
But, don’t forget to click Save Changes toward the bottom of the page if you do update the sizes.
Here are the default sizing options:
- Thumbnails – 150 px x 150 px
- Medium – 600 px x 600 px
- Large – 1024 px x 1024 px
Keep in mind that the theme you’re using may have specific sizes for images that will override the options on the Media Settings page. If you switch to a new theme, the settings are updated to the sizes that the new theme has set.
But, older images you previously uploaded are unaffected.
This is where things get a little sticky. You need to be able to resize all the images you previously uploaded to conform to the new image sizes that were set. Unfortunately, there aren’t any settings to do that.
The solution is to do what’s referred to as “regenerate thumbnails.”
How Do I Resize Thumbnails in WordPress? (3 Methods)
Before exploring how to regenerate thumbnails in WordPress, it’s important to note the ways you can resize images in the WordPress dashboard.
What’s possibly even more essential to note is these solutions won’t necessarily resize your older images so you’ll still need to go into WordPress, regenerate thumbnails without the help of a plugin, or otherwise use a plugin.
If you want to resize a thumbnail or image, there are three main ways to do it:
1. Changing the Image Sizes in Your Theme
Since your WordPress theme can modify the default image sizes, you can choose to switch themes or you can check to see if there are settings available that are specific to adjusting the image sizes.
Each theme is different so be sure to check the corresponding documentation to see if there’s a way you can change your theme’s image sizes without installing a different theme altogether.
Alternatively, you could choose to create a child theme and change the image sizes with PHP code.
2. Cropping Images in the Media Library
Another option is to change the size of your images by cropping them in the Media Library.
Step 1
Go to Media > Library in the WordPress admin dashboard.
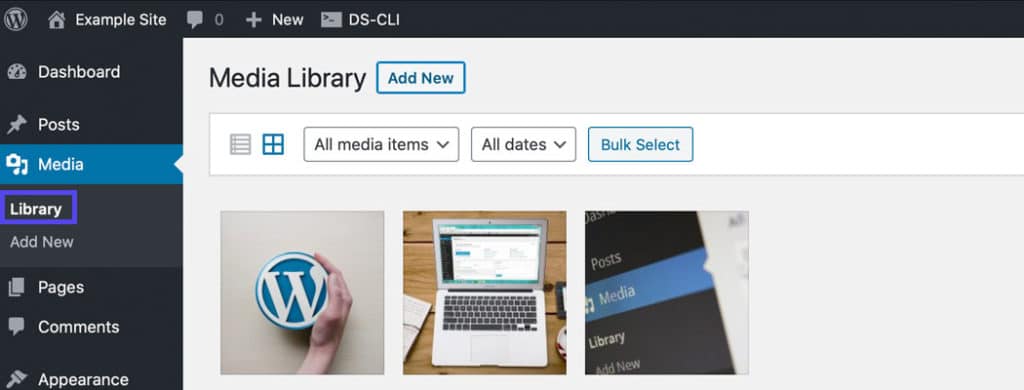
Then, click on a listed image that you want to resize.
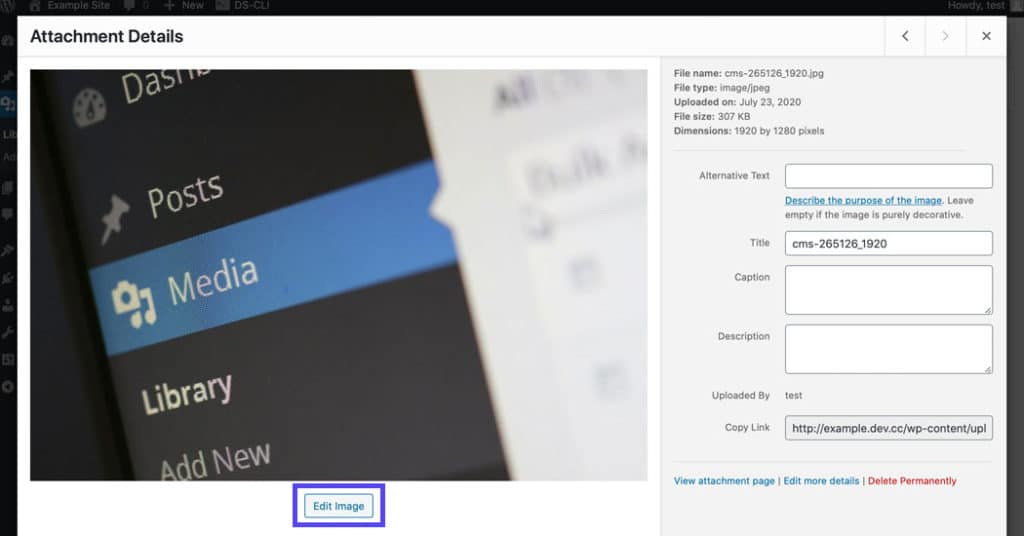
In the pop-over, click the Edit Image button.
Step 2
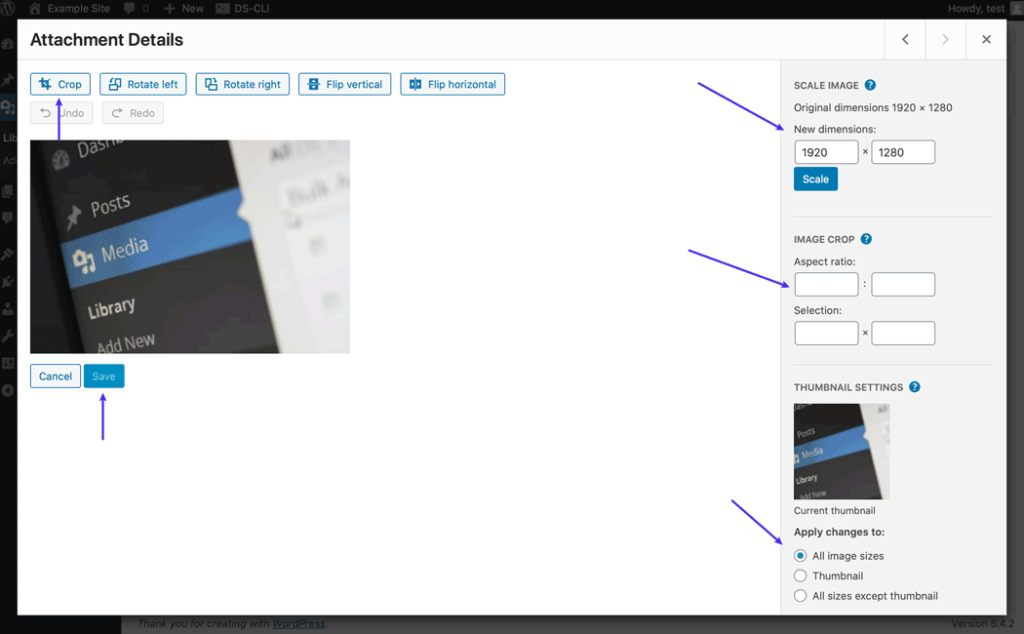
After that, you have several options to edit the image.
You can click on the image and drag your mouse over the image and let go when you have selected the area you want to keep. Then, you can click on Crop.
If you want to crop the image precisely, you can adjust the aspect ratio by entering the ratio you want.
For example, you can use 1:1 to create a square or you can use 4:3, 16:9, and any other ratio you want.
Then, hold down the shift key as you drag your mouse over the image. Let go when you have the part of the image selected that you want to keep. You can click on it and move the selection around so you can crop the exact part of the image you need.
You can also click and drag the corners of the selection if you didn’t get the size of the image that you wanted at first.
Or you can make a selection, then enter the exact size of the image you want in pixels in the Selection field under Image Crop on the right.
When you’re done, click Crop, then the Save button.
Step 3
If you’d rather resize the image instead of cropping it, you can scale the image in the settings on the right.
Enter the size of the image that you want, then click Scale.
Step 4
You can also choose which standard image sizes you want your changes to apply to under Thumbnail Settings.
You can choose to have your adjustments apply to:
- All image sizes
- Thumbnails
- All sizes except thumbnails
3. Resizing Images in the Media Settings
This is helpful if you only need to edit one or two images, but if you want to resize all your images, it’s best to do this through the settings page.
Step 1
In your admin dashboard, go to Settings > Media.
Step 2
Enter the new dimensions you want for all the thumbnails, medium, or large images. Enter your desired width and height for just one type of image, or all of them, as needed.
If you want to resize thumbnails to a size that isn’t proportional, check the Crop thumbnail to exact dimensions box under the Thumbnail size section.
Step 3
Then, you can check the Organize my uploads into month and year-based folders box if you don’t want all your new images unorganized in the uploads folder.
When you’re happy with your adjustments, click the Save Changes button toward the bottom on the page.
How to Regenerate Thumbnails in WordPress
After changing these settings or changing themes, you’ll have to regenerate your thumbnails if images aren’t updated on your public-facing site, as previously mentioned.
One of the easiest ways is using the free WordPress plugin Regenerate Thumbnails to quickly fix your previously uploaded images.
This plugin is also compatible with WooCommerce.
Step 1
To start, install and activate the Regenerate thumbnails plugin.
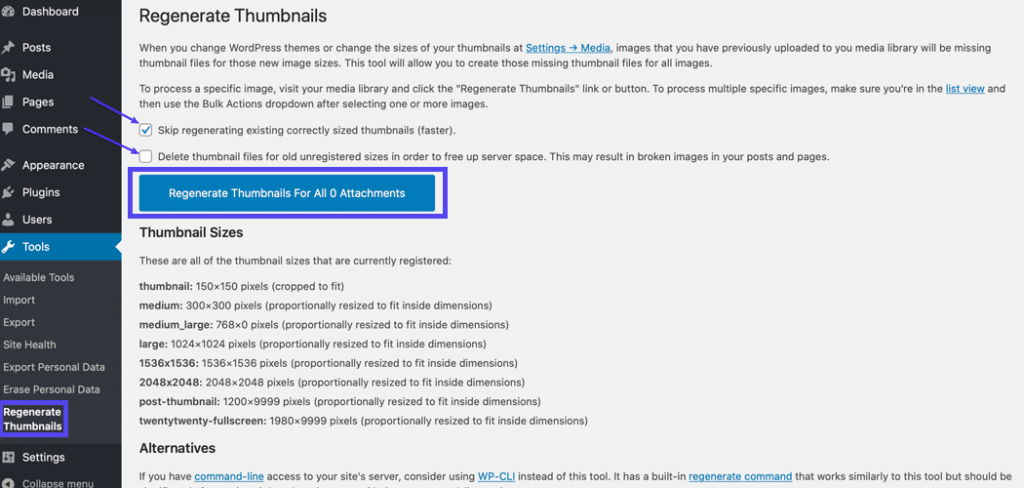
Then, go to Tools > Regenerate Thumbnails, WordPress image-related settings being found here.
Step 2
By default, the Skip regenerating existing correctly-sized thumbnails option is checked. Uncheck this box to use the Regenerate Thumbnails plugin to adjust all your images.
But, leave it checked if you want to save your server’s resources.
This is recommended if you already updated some of your image sizes such as through your theme. You can also choose to check the box underneath this option to Delete thumbnail files for old unregistered sizes. Selecting it frees up space on your server.
Make sure you don’t need these images before you choose this setting. If some of the images are in use on your site and you select this option, they’ll be deleted and will no longer be displayed on your site. Visitors will see a broken image.
You may also see the Update the content of posts to use the new sizes checkbox, which you can choose if you want the images that you’re currently using in your posts updated.
Step 3
After you chose the options you want, click the button to Regenerate Thumbnails, medium, large, and new file sizes included.
Then, wait for the process to complete. Depending on how many images you have on your site, this could take a while so grab a coffee or glass of water while you wait. It typically only takes a few minutes for larger websites on an high-performance server.
You’ll see the “All done!” message when the process is complete.
That’s it.
Your thumbnails and images should now be regenerated.
How to Force Regenerate Thumbnails
You can also use the Force Regenerate Thumbnails plugin as an alternative. As the name infers, it pushes the regeneration of thumbnails by deleting old image sizes so WordPress is forced to regenerate the images. This plugin is also compatible with WooCommerce online stores.
Keep in mind that at the time of publication, this plugin has not been updated for the last 3 major releases so use it with caution. Be sure to test it in a staging or local testing environment before you use it on your live website.
The reason why you would need to use this plugin over the Regenerate Thumbnails plugin is that the latter just resizes images, it doesn’t delete the old image sizes unless you check that option.
But, if you’re having trouble with it, you can give Force Regenerate Thumbnails a try.
Step 1
To force WordPress to regenerate thumbnails, install and activate the Force Regenerate Thumbnails plugin.
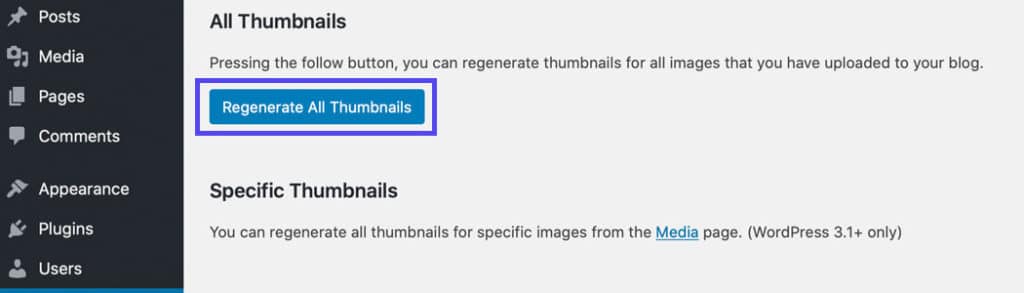
Then, go to Tools > Force Regenerate Thumbnails in the WordPress admin dashboard.
Step 2
To delete all images sized with the old settings and force WordPress to regenerate thumbnails, click the Regenerate All Thumbnails button.
Wait a while and your images will be resized. If you have a smaller site, this will take practically no time at all, but for larger sites with tons of images, this could take a few minutes.
Regenerating Specific Images
There could be use cases where you won’t need to regenerate all your thumbnails, but just some specific ones. With the Regenerate Thumbnails plugin still installed, you can do that as well. Here’s how.
Step 1
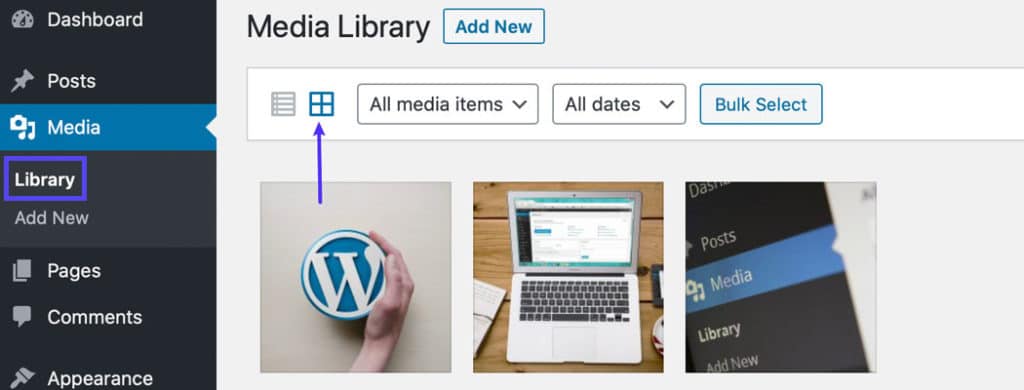
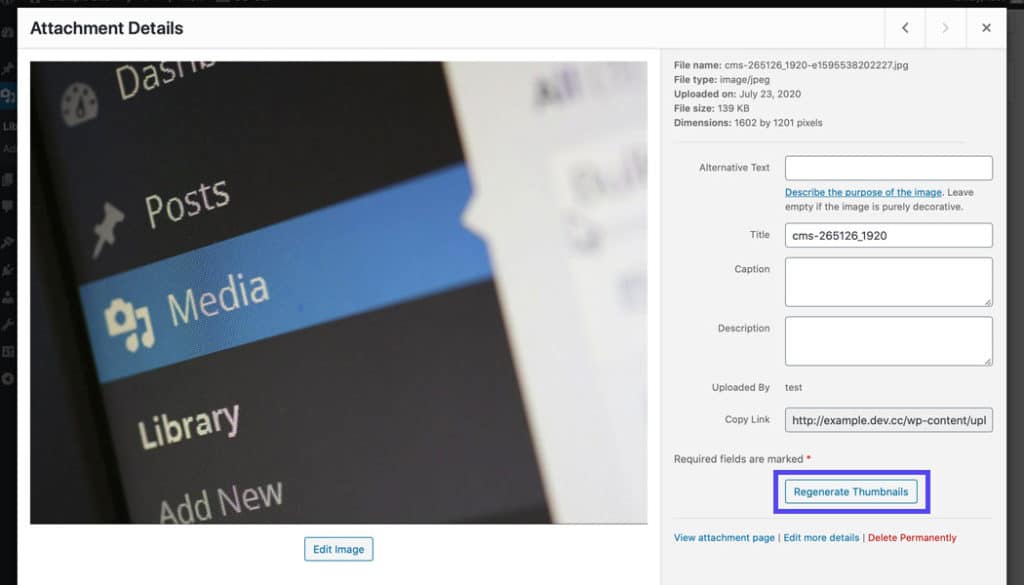
Go to Media > Library. In the grid view, click on a specific image.
Step 2
Then on the right, click the Regenerate Thumbnails button.
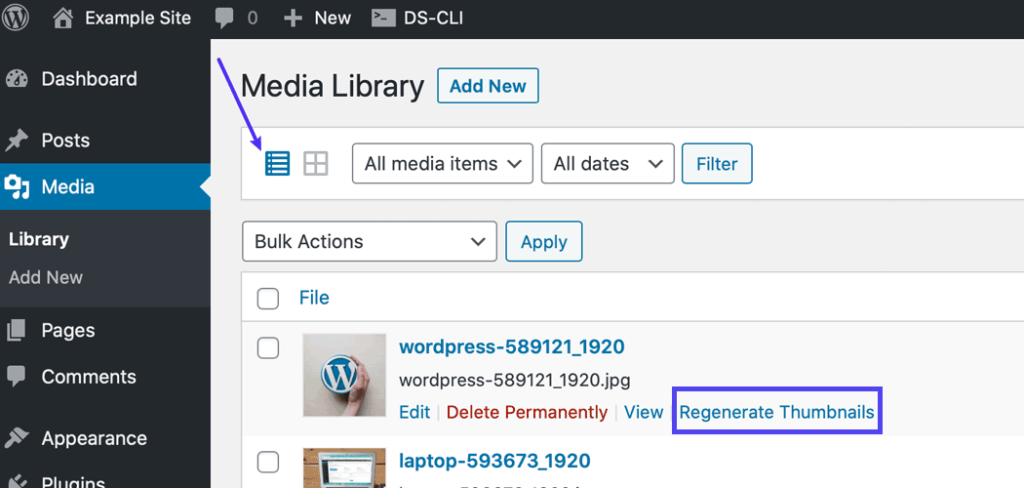
If you’re viewing the Media Library in the list view, click on the Regenerate Thumbnails link after hovering over the image that you want to regenerate.
Regenerate Thumbnails with WP-CLI
If you prefer not to use a plugin, there’s another solution for WordPress: Regenerate thumbnails without a plugin by doing so manually with WP-CLI.
Keep in mind that you need to have access to the command line on your server for this option.
Regenerating thumbnails using WP-CLI is a far superior option over using a WordPress plugin because it’s faster and isn’t subject to HTTP limitations and timeouts.
The basic command to regenerate thumbnails is below:
wp media regenerateAfter entering it, confirm you want to regenerate all thumbnails by pressing the letter “y” for “yes” on your keyboard.
Regenerate All Thumbnails with WP-CLI
Once you have fired up the command line, you can enter the following command for WordPress to regenerate thumbnails without a plugin in a matter of seconds:
wp media regenerate --yesWith this command, thumbnails will be regenerated without having to manually confirm it.
Regenerate Specific Thumbnails Using WP-CLI
You also have the option to regenerate specific thumbnails using WP-CLI and the IDs of the images you want to update.
Here’s the command to do that:
wp media regenerate 12 34 567Just be sure to replace the three example IDs – “12,” “34,” and “567” – with the actual IDs of the specific images you want to regenerate.
You can include as many IDs as you want. Just be sure to separate each of them with a space.
Summary
It can be frustrating to see that your images aren’t displayed properly when you switch themes.
Fortunately, there are two quick solutions for WordPress. It can be done in a few clicks with the help of the Regenerate Thumbnails plugin. Or, you could use WP-CLI to finish in less time than it takes to make a coffee.

Brian has been a WordPress user for over 10 years, and enjoys sharing his knowledge with the community. In his free time, Brian enjoys playing the piano and exploring Tokyo with his camera. Connect with Brian on his website at brianli.com.