
Static websites deliver content through a predefined collection of HTML, CSS, and JavaScript files, making them a straightforward and economical choice for many.
Despite their fixed nature, static sites can be enhanced with elements of dynamic content to foster user interaction. Integrating a comment section allows visitors to express their opinions, give feedback, or pose questions about your content or services.
This addition fosters community engagement and enables you to connect with your audience and refine your offerings based on their feedback. This tutorial demonstrates adding a comment section to a static site hosted on Kinsta’s static site hosting.
Set up a basic static site on Kinsta
This tutorial uses the Docusaurus template created on the Kinsta GitHub account. Docusaurus is a popular static site generator that uses React, one of the top JavaScript libraries, as its UI library for page creation.
Follow the steps below to set up this site on Kinsta:
- To use the Docusaurus template, click Use this template > Create a new repository.
- Clone the repository to your local machine by running the following command:
https://github.com/kinsta/hello-world-docusaurus.git - Log in or create an account to view your MyKinsta dashboard.
- Authorize Kinsta with your Git provider.
- Click Static Sites on the left sidebar, then click Add site.
- Select the repository and the branch you wish to deploy from.
- Assign a unique name to your site.
- Add the build settings in the following format:
- Build command:
npm run build - Node version: 18.16.20
- Publish directory: build
- Build command:
- Finally, click Create site.
After successfully deploying your site, you can visit the URL listed as the domain in your deployed site’s Overview tab.
Create a Disqus Account
Disqus offers tools to increase engagement through social integration, moderation tools, and analytics. It supports online discussions via comments. Follow these steps to use Disqus:
- Create a Disqus account.
- Fill in the required information for the signup process.
- After signing up, select I want to install Disqus on my site.
- Register your site with Disqus. During registration, pick a short name and a category for your site. An organization automatically generates a list containing your new site and any additional sites you create in the future.
- Select a Disqus plan for your organization. Disqus offers various subscription plans, including Plus, Pro, and Business. For this demo, you can select the Basic plan, which includes core features such as the comments plug-in, advanced spam filtering, moderation tools, and basic analytics.
Integrate Disqus with your static site on Kinsta
The next step is integrating the Disqus code snippet into your static site generator.
-
- After registering your site, click I don’t see my platform listed, install manually with Universal Code.

Embedding the Disqus code manually with Universal Code. The displayed page contains a JavaScript code snippet in the section labeled Place the following code where you’d like Disqus to load. Since the static site is a React application, you must modify this code snippet to work with React.
- Create a folder called Disqus inside the src/components folder.
- Use the following code inside your index.js file. Make sure to replace
https://your_shortname_placeholder.disqus.com/embed.jswith the URL you received in the Universal Code:import React, { useEffect } from 'react'; const DisqusComments = () => { useEffect(() => { const disqus_config = function () { this.page.url = PAGE_URL; // Replace PAGE_URL with your page's canonical URL variable this.page.identifier = PAGE_IDENTIFIER; // Replace PAGE_IDENTIFIER with your page's unique identifier variable }; // Load Disqus script dynamically (function () { const d = document; const s = d.createElement('script'); s.src = 'https://your_shortname_placeholder.disqus.com/embed.js'; s.setAttribute('data-timestamp', +new Date()); (d.head || d.body).appendChild(s); })(); // Cleanup Disqus on component unmount return () => { const disqusThread = document.getElementById('disqus_thread'); if (disqusThread) { disqusThread.innerHTML = ''; // Clear the Disqus thread to avoid interference with other components } }; }, []); // Run this effect only once on component mount return ( <div> <div> id="disqus_thread"></div> <noscript>Please enable JavaScript to view the <a> href="https://disqus.com/?ref_noscript">comments powered by Disqus.</a></noscript> </div> ); }; export default DisqusComments;The
disqus_configfunction defines two variables:this.page.url— This variable is set toPAGE_URL, which you should replace with the page’s canonical URL. Disqus uses this URL to identify the specific page where the comments belong.this.page.identifier— This variable is set toPAGE_IDENTIFIER, which you should replace with a unique identifier for the page. This identifier allows Disqus to differentiate between pages with the same URL and associate comments with the correct page.
- You can import this component to the page where you want to display the Disqus comments section.
import DisqusComments from '@site/src/components/Disqus'; - Then, add the Disqus comments section to the landing page, include the following import statement in index.js within the src/pages directory, and use
DisqusCommentsaccordingly:export default function Home() { const {siteConfig} = useDocusaurusContext(); return ( <Layout title={`Hello from ${siteConfig.title}`} description="Description will go into a meta tag in <head />"> <HomepageHeader /> <main> <HomepageFeatures /> <DisqusComments/> </main> </Layout> ); }
<l
- After registering your site, click I don’t see my platform listed, install manually with Universal Code.
i>Commit these changes to your repository to reflect on your Kinsta-hosted static site:
">git add .
git commit -m "Adding Disqus Comments"
git push -u origin master
</l
If you clicked <strong>Automatic deployment on commit enabled when deploying your static site, committing new changes will automatically initiate a deployment on MyKinsta. Otherwise, deploy the changes manually.</stron
Congratulations — you’ve created a static site using Kinsta Static Site Hosting and integrated a comments section using Disqus!
You may want to modify the DisqusComments> component to ensure the comment section loads as intended.
How to customize the comments section
You can customize the comments section on your static site by modifying its appearance, implementing reactions, performing comment moderation, and more. Some customization options available on Disqus include the following.
Customize the theme
To customize the theme of your Disqus comments, navigate to the Disqus dashboard, click <strong>Generalg> from the Settings tab, and select suitable options from the <strong>Color Schemeg> and Typeface dropdowns.</stron</stron
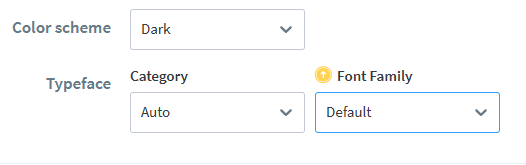
Customize the theme of your Disqus comments.Enable reactions on your site
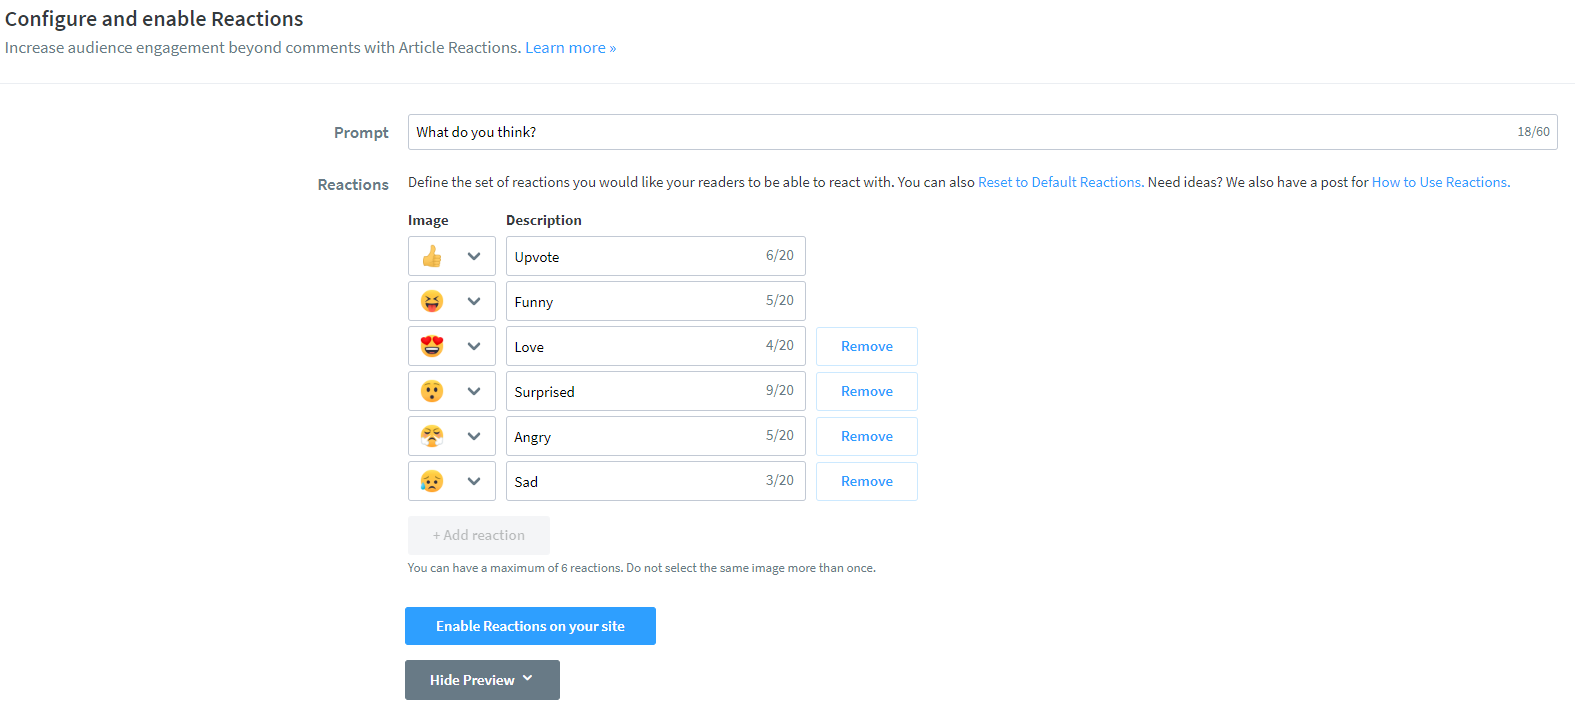
You can increase your audience engagement by enabling Reactions on your site. Customize these Reactions according to your preferences.
To enable this feature, navigate to the Settings tab on the Disqus dashboard. Select Reactions. Then, click Enable Reactions on your site.
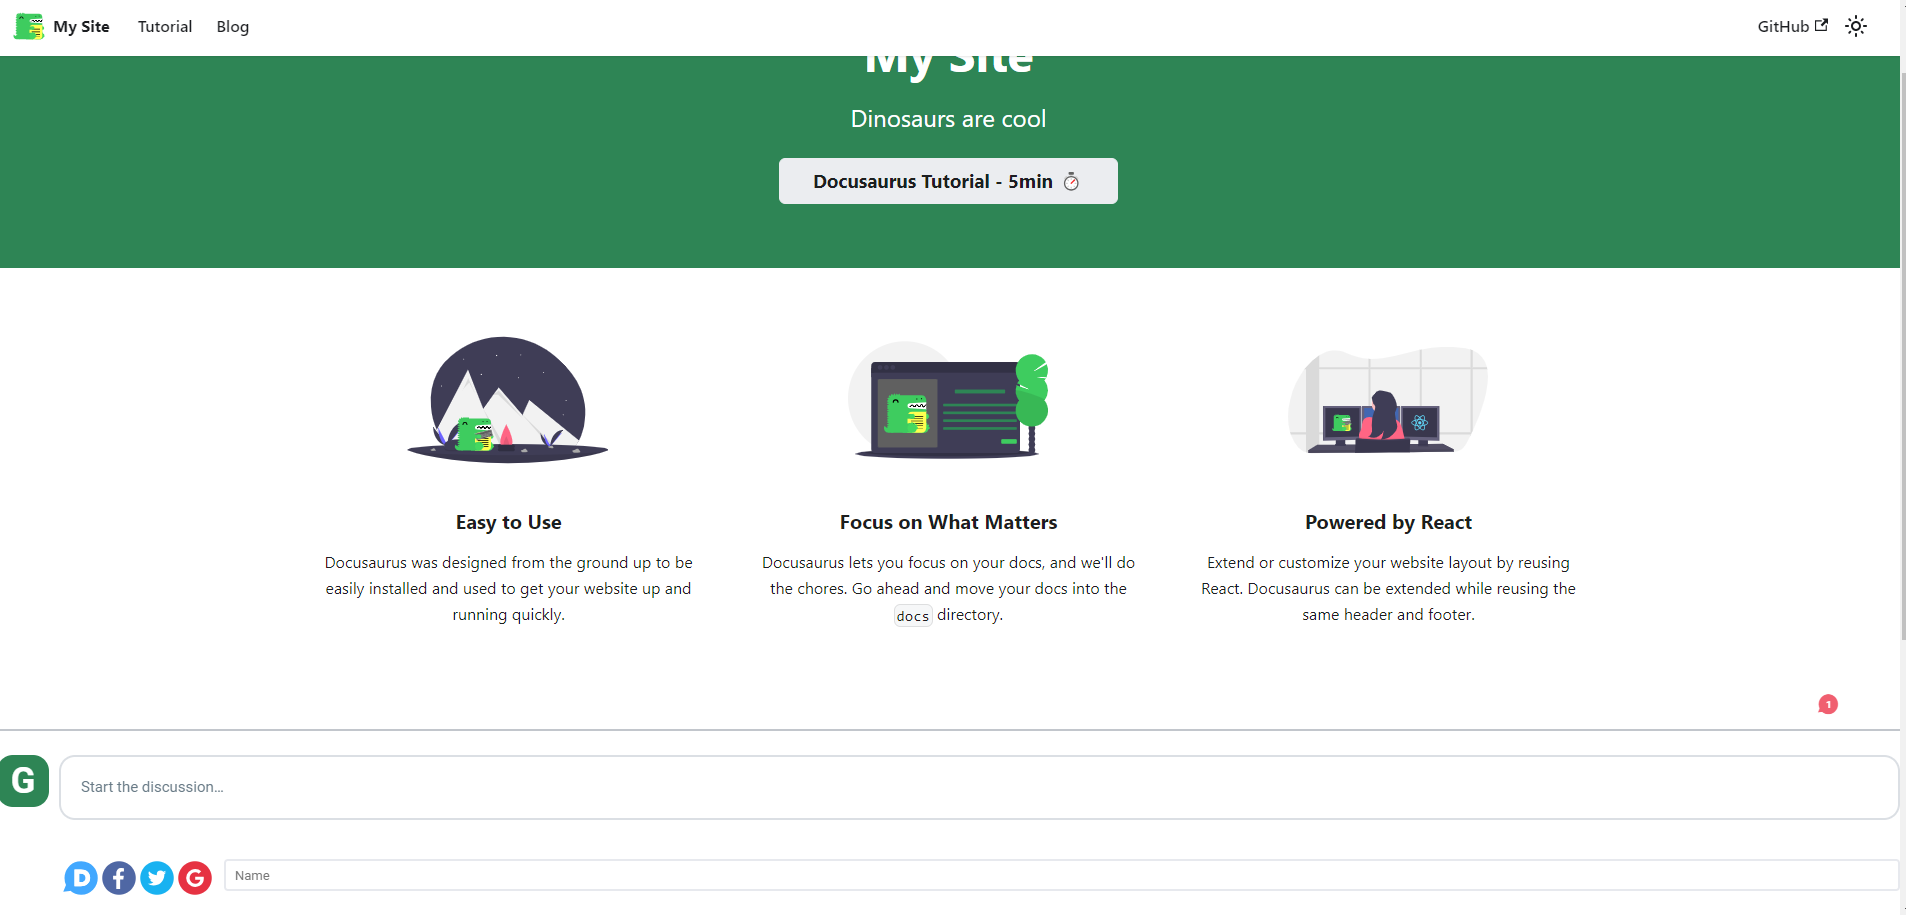
Configuring and enabling Reactions through the Disqus dashboard.Refresh your site. The option for reactions appears.
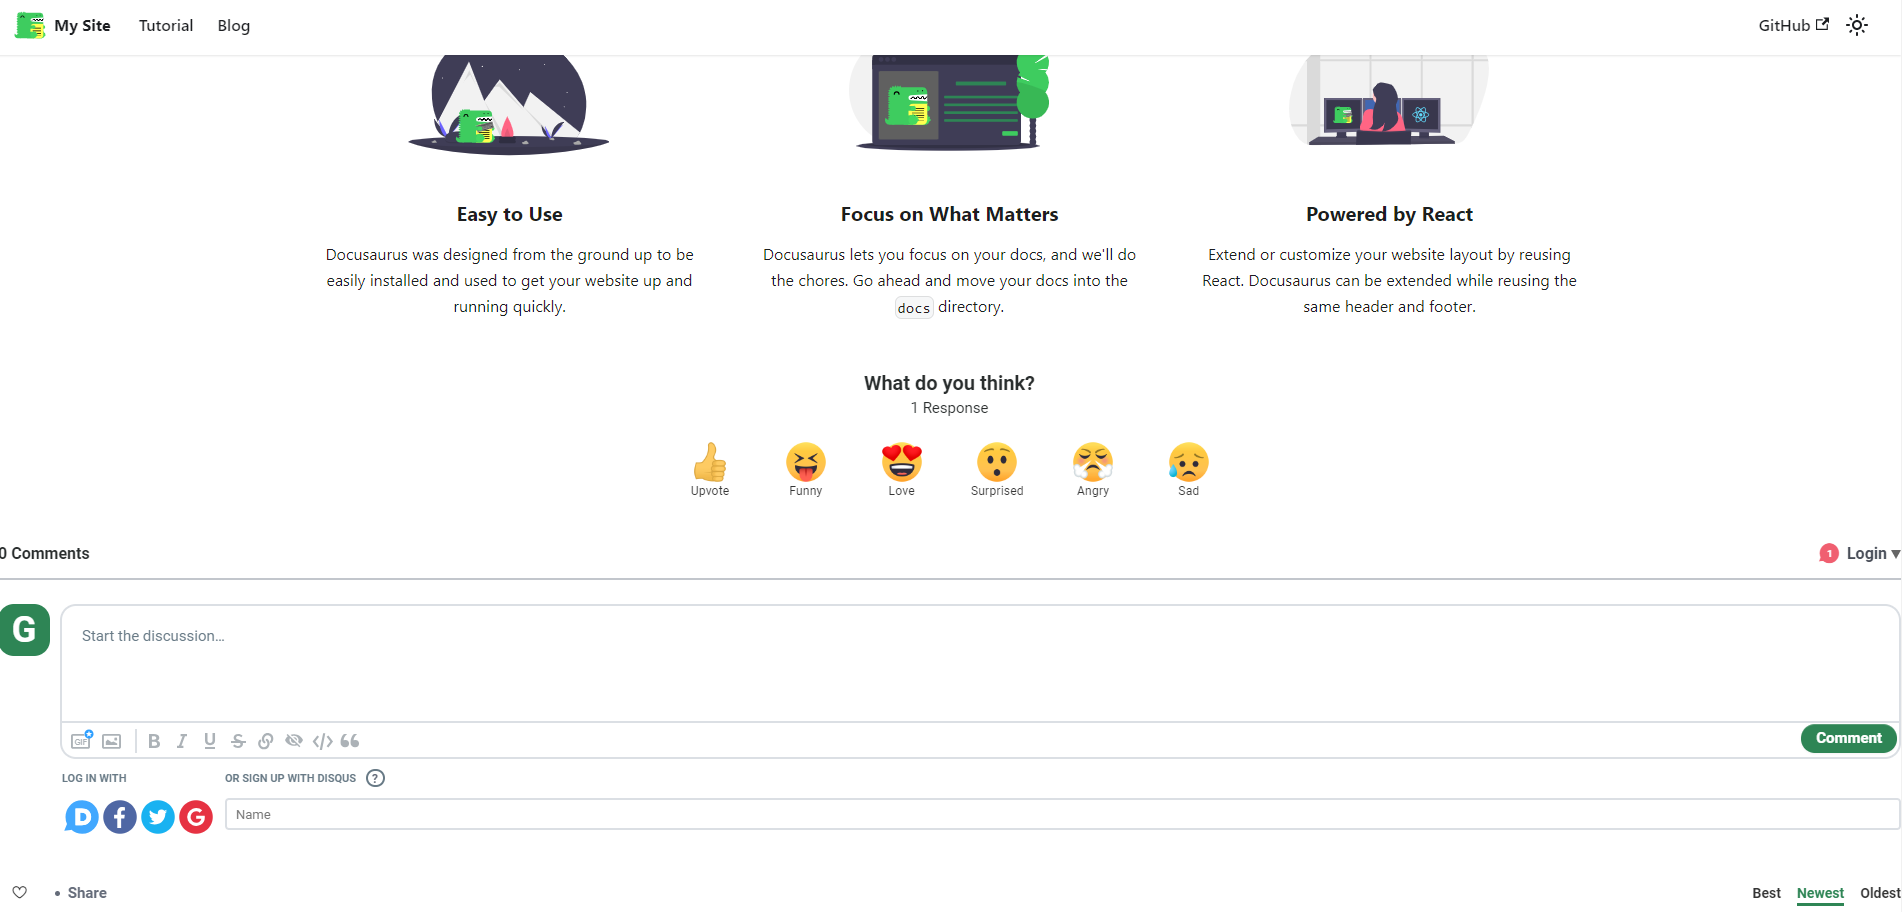
The static site displays the reactions integration.Comment avatars
You can upload a default commenter avatar for users, making them feel like a part of the community.
To enable this feature, navigate to the Disqus dashboard, click <strong>Generalg> from the Settings tab, and upload an image from <strong>Default Commenter Avatar.</stron</stron
The Default Commenter Avatar feature.Sort comments
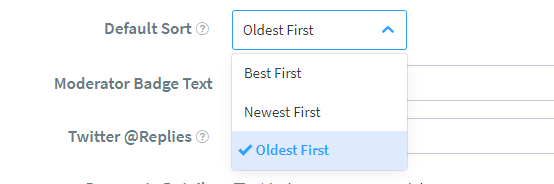
Add customization to let users sort comments based on Oldest First, Newest First, or Best First. Click <strong>Communityg> in the Settings tab from the Disqus dashboard and select the order from the <strong>Default Sortg> dropdown.</stron</stron
Sorting comments based on the provided order.How to moderate comments
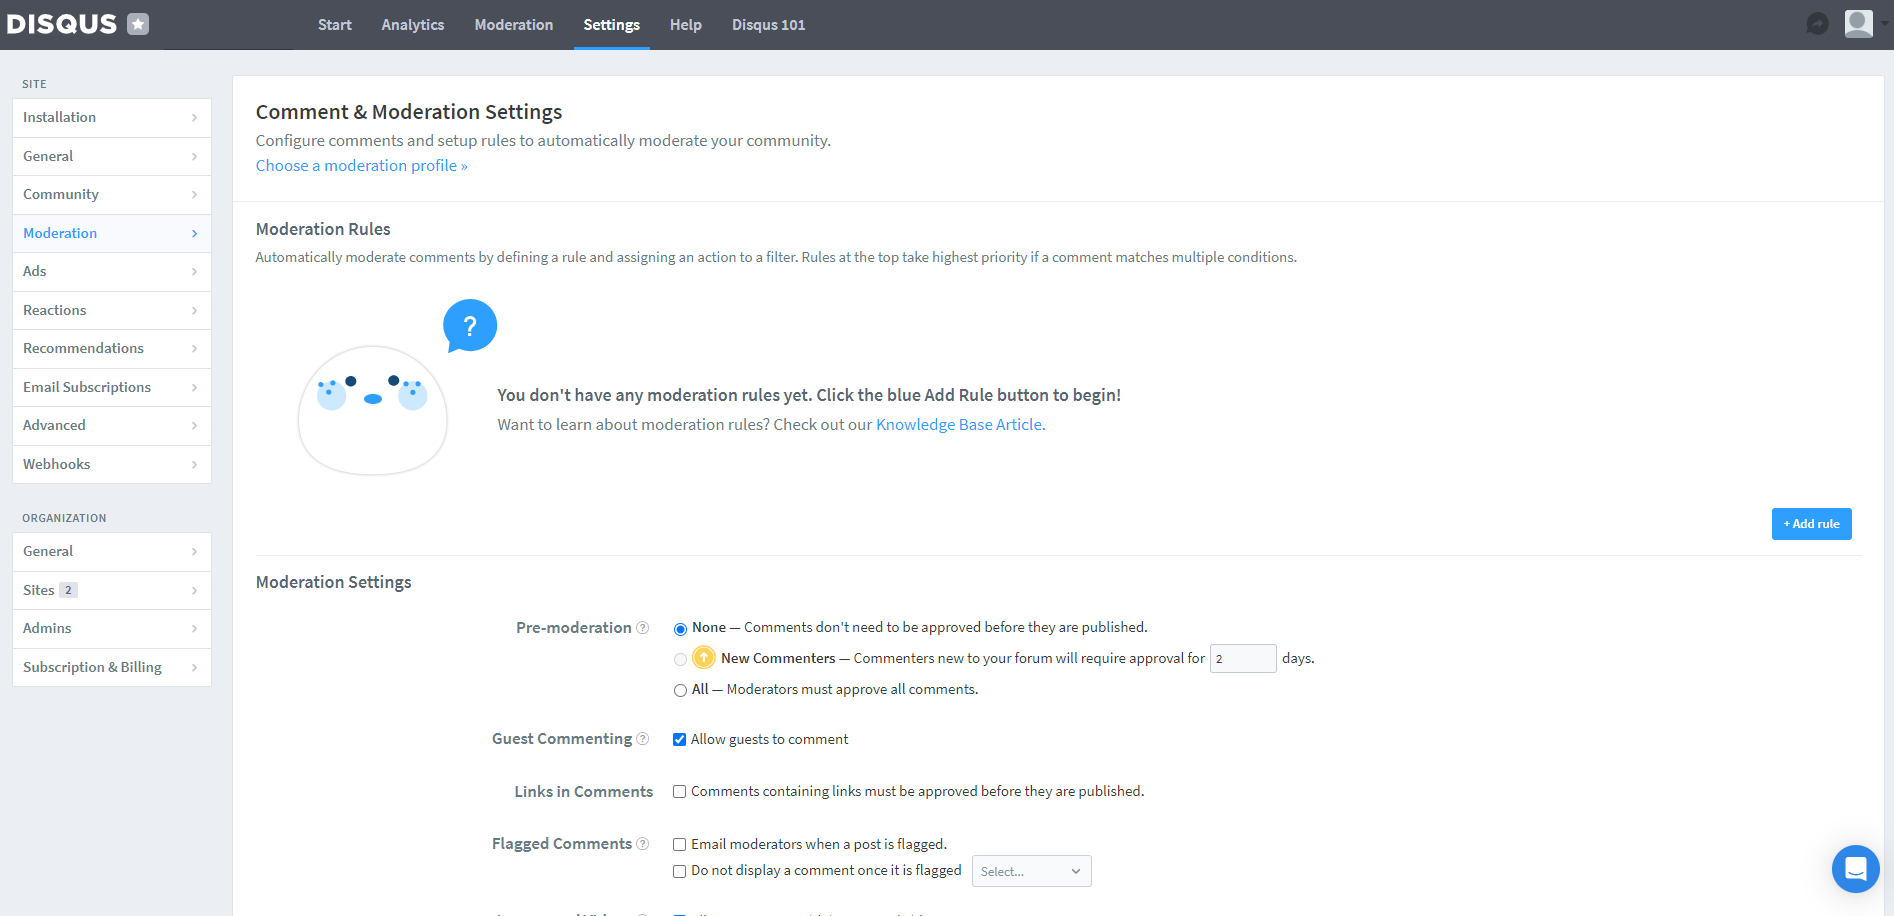
To moderate comments on Disqus, use the Disqus moderation panel on the top navigation bar in your Disqus dashboard. This tool provides a quick view of your forum’s comments and their status (approved, pending, and so on).
You can also configure moderation rules from the Moderation menu, which is available on the left navigation pane under the Settings tab of the Disqus dashboard.
Accessing the moderation panel from the Disqus dashboard.<p>Next, check out their documentation for key steps and features to help you manage and moderate comments on Disqus.
Allow visitors to comment
To allow guest users to comment on your site, check the <strong>Guest Commenting checkbox, then click <strong>Save. These comments remain pending until a moderator approves them from the Disqus moderation dashboard.</stron</stron

Approve, delete, and mark comments as spam
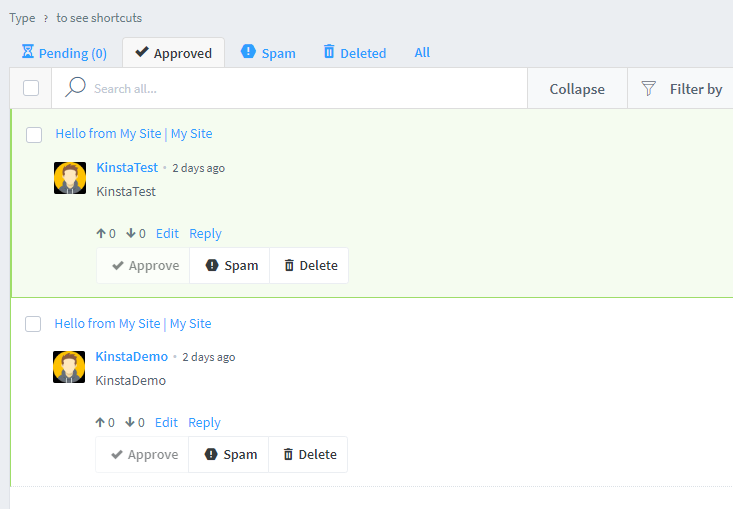
The moderation panel lets you perform bulk actions (approve, delete, and mark comments as spam) by checking multiple comments. Alternatively, you can moderate them individually in the expanded comment view.
Once you enable this setting, a moderator must approve comments before they’re displayed.
Summary
This tutorial taught you how to add a comment section to your static site. Aside from Docusaurus, you can implement Disqus into any other SSG like VuePress, Gatsby, and more.
Kinsta’s Static Site Hosting lets you deploy your pre-built non-dynamic files easily. To explore the benefits of hosting your static site on Kinsta and integrating features like a comment section, check out Kinsta’s Static Site Hosting.
Have you ever implemented Disqus or any other commenting service on your static site? Share your experiences in the comments section below.


