Searching for Yahoo SMTP settings and how to connect to the Yahoo SMTP server?
Knowing this opens up a lot of possibilities. You can configure your desktop or mobile email client to send and receive emails using your Yahoo Mail account. If you have a WordPress website, you can also configure your site to send its emails using Yahoo Mail’s SMTP server, which is a great free way to improve your site’s email deliverability.
In this post, we’ll quickly go over Yahoo SMTP server details, along with its POP3 and IMAP settings. Then we’ll show you how to connect your email client to the Yahoo SMTP server.
Later, we’ll cover how you can configure your WordPress site to send emails via the free Yahoo Mail SMTP server.
Excited? Let’s roll out!
Check Out Our Video Guide to Configuring Yahoo SMTP Settings To Connect Your Email Client or WordPress Site
What Are the Yahoo SMTP Settings?
To kick things off, let’s go straight to the Yahoo SMTP settings. We’ll provide greater context for this information later if you need extra help.
Here are all the essential details you’ll need:
- SMTP Server: smtp.mail.yahoo.com
- Port: 465 or 587 (learn more about SMTP ports)
- Requires SSL: Yes
- Requires TLS: Yes (if available)
- Authentication: Yes (choose Login if multiple options available)
- Username: Your full Yahoo Mail email address (e.g. [email protected])
- Password: Your Yahoo Mail app password (it’s not the password you use to log in to Yahoo Mail — we’ll show you how to generate this below)
Using the Yahoo SMTP settings listed above, the Yahoo Mail SMTP server lets you send up to 500 emails per day.
How to Create an App Password for Yahoo Mail
To use the Yahoo Mail SMTP server, you first need to create a dedicated app password. Earlier, you could use your Yahoo Mail password, but Yahoo updated this requirement to improve security. Now, you need to generate a unique app password.
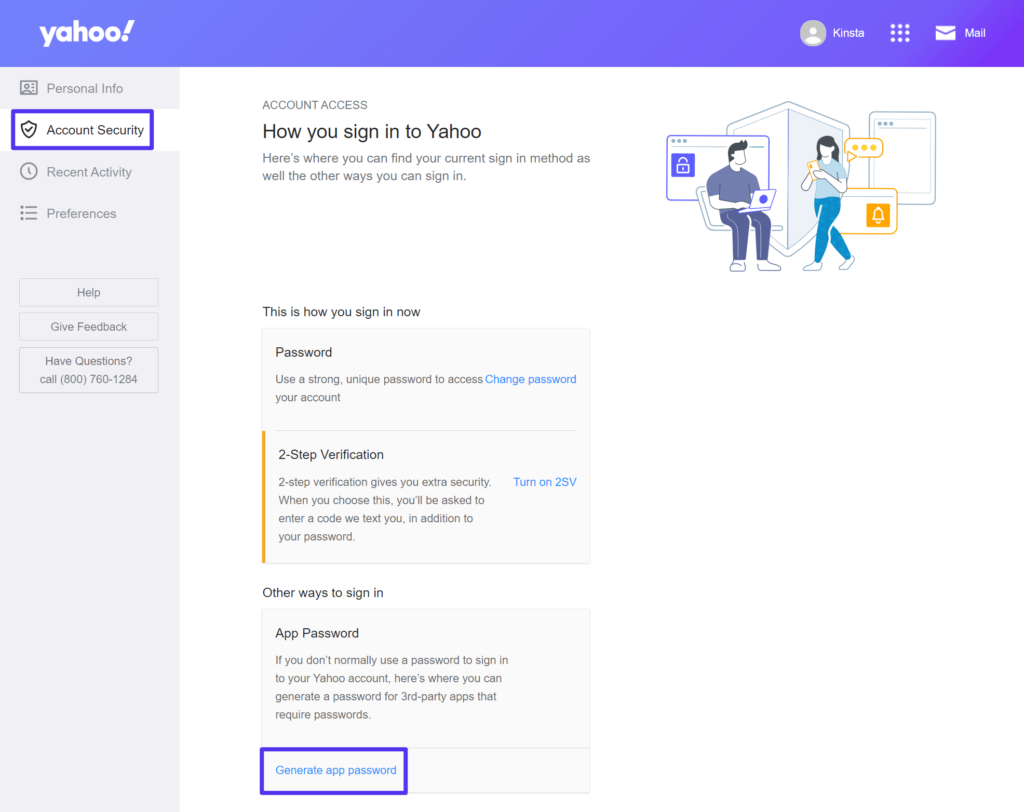
Thankfully, generating a Yahoo Mail app password is pretty straightforward. To get started, go to your account settings area and then click on the Account Security tab.
You can access your account settings area by clicking on your username/icon in the top-right corner. Or, you can click this link to go straight to the account security area (as long as you’re logged in to Yahoo Mail already).
Then, click the Generate app password link under the Other ways to sign in section.
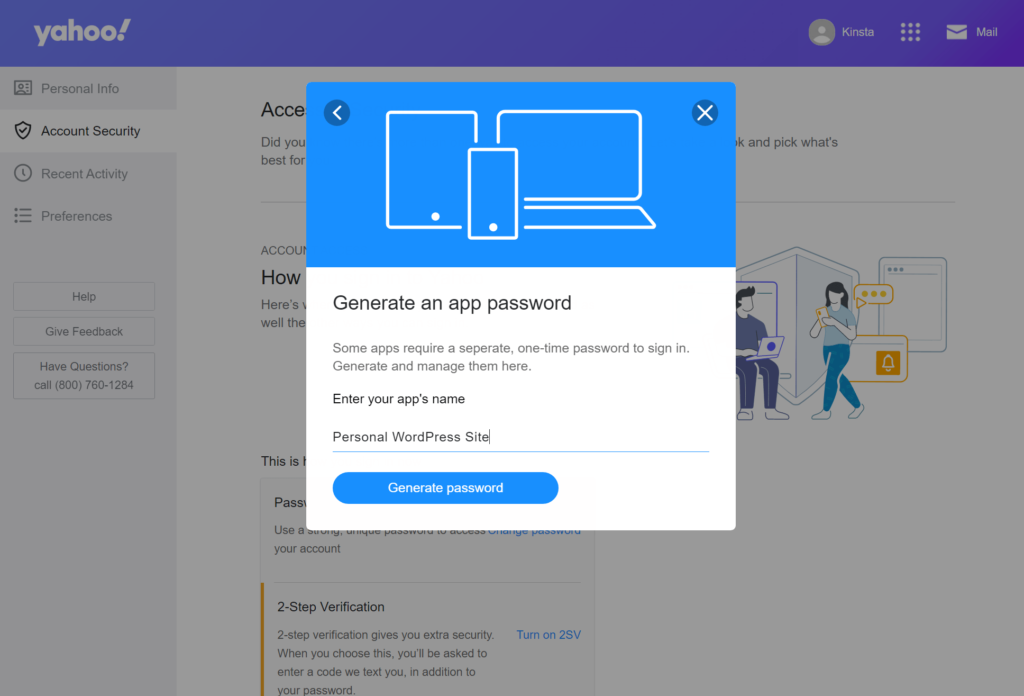
You should now see a popup. Go ahead and click the blue Get started button in the popup to advance.
Enter your app name, which is just an internal name to help you remember it — for example, “WordPress” or “Thunderbird.” Label this correctly, as it’ll help you remember the service the password connects. Next, click the Generate password button.
You should then see the app password — keep this handy because you’ll need it when you configure the Yahoo Mail SMTP settings in whatever app you’re using.
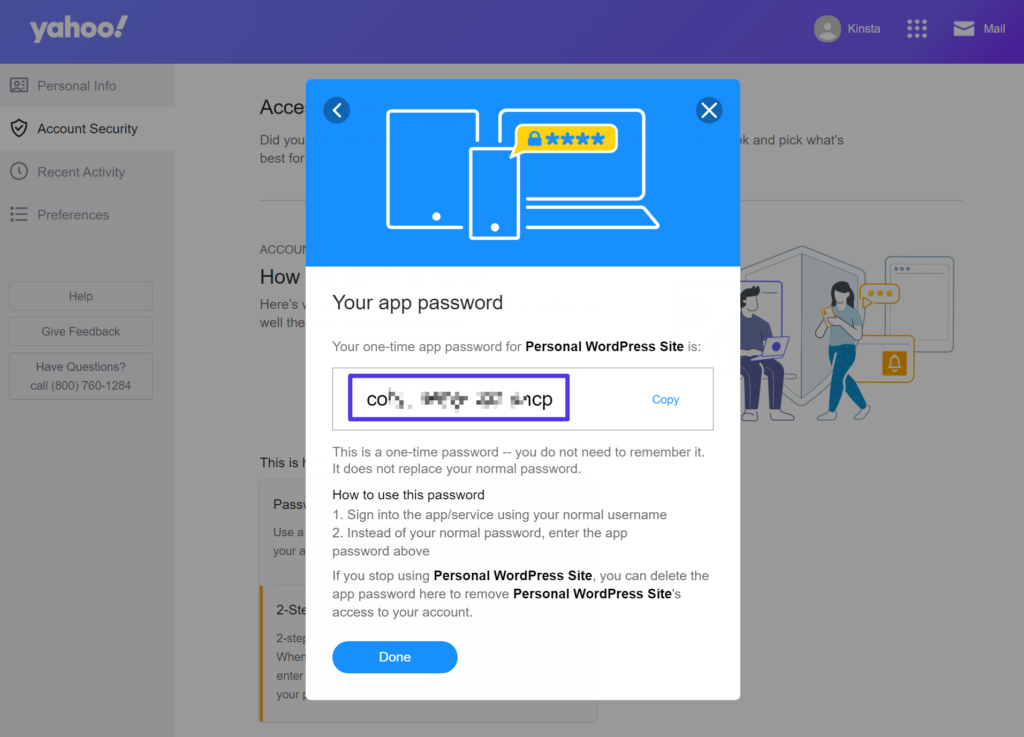
We’ll show you how to use this app password when configuring WordPress to use the Yahoo SMTP server a bit later on.
What Are the Yahoo POP3 Settings?
The Yahoo SMTP settings let you configure your email client or website to send email via Yahoo Mail. But if you want to import emails to your email client, you’ll also need to set up POP3 (or IMAP) for incoming mail.
The Yahoo POP3 settings are as follows:
- Server: pop.mail.yahoo.com
- Port: 995
- Requires SSL: Yes
- Username: Your full Yahoo Mail email address (e.g. [email protected])
- Password: Your Yahoo Mail app password (it’s not the password you use to log in to Yahoo Mail — you can follow the instructions from the SMTP section above to generate an app password)
What Are the Yahoo IMAP Settings?
IMAP gives you another way to import emails to your email client. IMAP works better than POP3 if you’re planning to access your emails from multiple devices because it allows for two-way syncing, while POP3 works better if you’ll only be using a single device to access Yahoo Mail.
The Yahoo IMAP settings are as follows:
- Server: imap.mail.yahoo.com
- Port: 993
- Requires SSL: Yes
- Username: Your full Yahoo Mail email address (e.g. [email protected])
- Password: Your Yahoo Mail app password (it’s not the password you use to log in to Yahoo Mail — you can follow the instructions from the SMTP section above)
How to Configure Yahoo SMTP for WordPress Sites
It is possible to configure your WordPress site to use the Yahoo Mail SMTP server to send its transactional emails. It lets you take advantage of Yahoo Mail’s generous sending limit of 500 emails per day and improve your WordPress site’s email deliverability.
However, Yahoo Mail doesn’t always play nice with WordPress sites/hosting, and you might experience connection issues when setting it up. That mainly has to do with Yahoo Mail having reasonably strict firewall rules to prevent spam.
For that reason, we recommend using another free SMTP server if you hit any issues, such as the free Gmail SMTP server or the SendGrid API. These SMTP servers are easier to get working and are just as free as Yahoo Mail (the Gmail SMTP server also supports 500 emails per day for free).
If you do want to go ahead with using the Yahoo Mail SMTP server for WordPress, here’s how to do it…
1. Create an App Password
To get started, make sure you’ve created a Yahoo Mail app password per the instructions above. Once you have your app password, store it in a safe place because you’ll need it in the next step.
2. Install and Configure the Free Post SMTP Plugin
To configure WordPress to send emails via SMTP, you need a WordPress SMTP plugin. There are many great free SMTP plugins, but we recommend the free Post SMTP plugin because it includes all the features you need and makes it easy to debug issues.
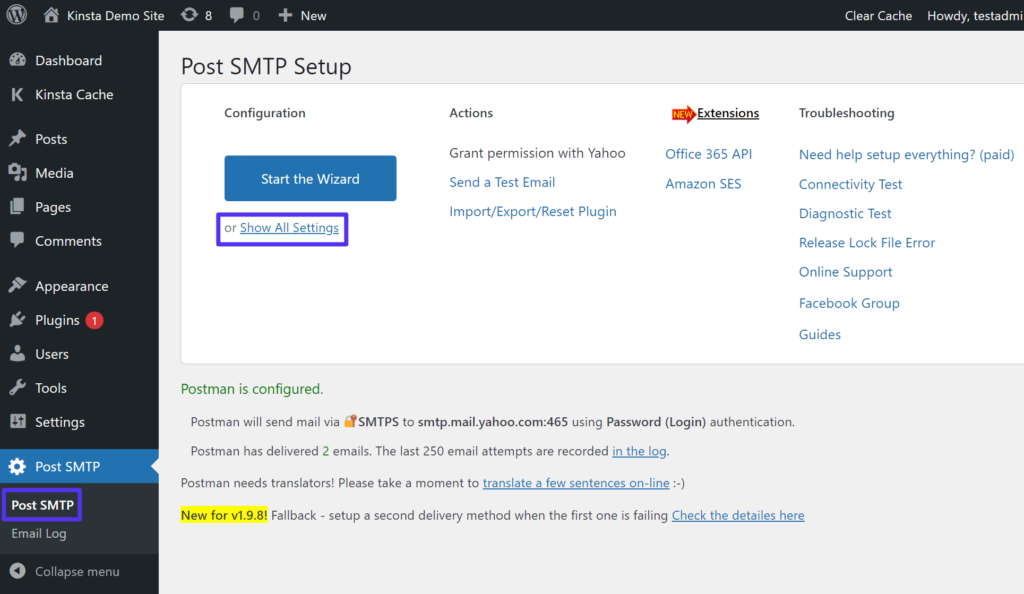
To get started, install and activate the free Post SMTP plugin from WordPress.org. Then, go to the new Post SMTP area in your WordPress dashboard and click the Show All Settings link.
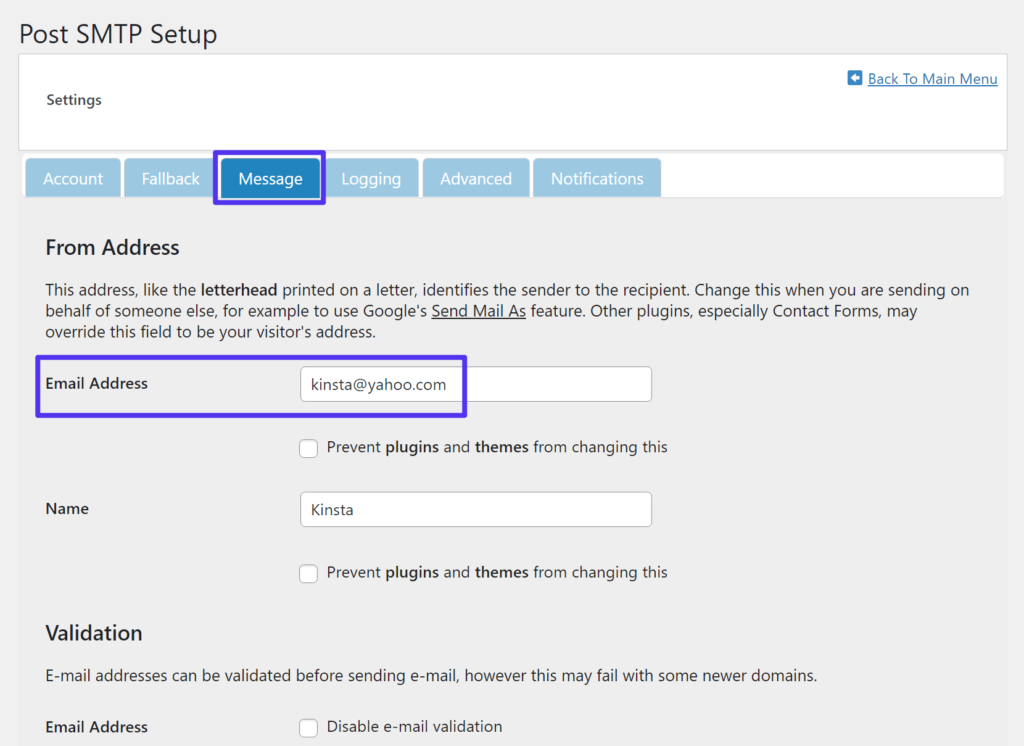
In the settings area, go to the Message tab and enter your “From” email address and name.
Your “From” email address needs to be your Yahoo Mail address.
If you try to use a different email address, Yahoo Mail will block the connection, and you’ll see an error message in your email logs (likely a “550 Request failed; Mailbox unavailable” error).
Click Save Changes at the bottom. Then, go back to the settings area (you might need to click Show All Settings again).
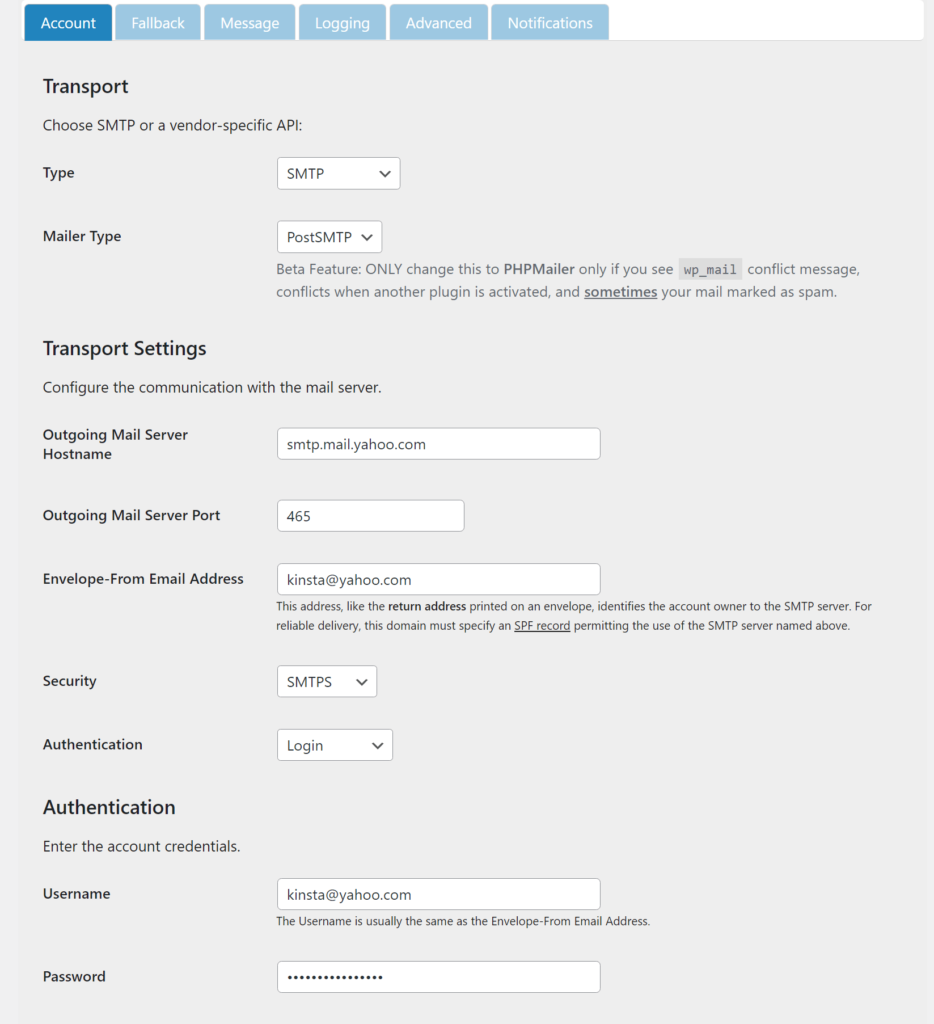
In the Account tab of the settings area, choose SMTP as the transport Type and set the Mailer Type equal to PostSMTP. You should see a new list of settings at the bottom of the screen.
Here’s how to configure them:
- Outgoing Mail Server Hostname: smtp.mail.yahoo.com
- Outgoing Mail Server Port: 465 (you can also try port 587 if you experience issues)
- Envelope-From Email Address: your Yahoo Mail email address. Again, if you use a different email address, you’ll likely experience errors.
- Security: SMTPS
- Authentication: Login
- Username: your Yahoo Mail email address.
- Password: the Yahoo Mail app password you generated in the first step (this is not the password you use to log in to Yahoo Mail).
Then, click Save Changes at the bottom to save your settings.
3. Send a Test Message
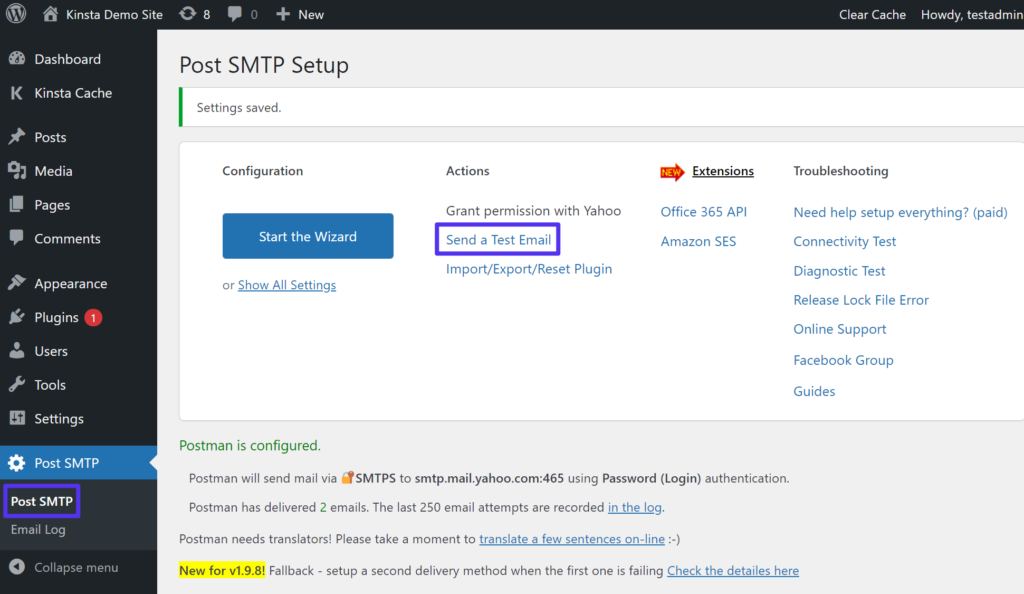
At this point, you’ve completed the configuration. To make sure everything is working correctly, you can send a test email via Post SMTP.
Go to Post SMTP and then click the Send a Test Email link in the Actions column:
Enter the email address to which you want to send a test email and click Next:

If you’ve set everything up correctly, you should see a success message in the Post SMTP Setup interface. And you should also receive an email at the email address that you entered.

If the message fails to send, you can view a log of the issue from Post SMTP → Email Log.
Hover over the failed message and click the View Session Transcript link. Here, you can see the log for a message that was unable to deliver because the Envelope-From email address didn’t match the Yahoo Mail email address.
You can see that it triggered a 550 Request failed error:

If you’re still experiencing issues after making sure that your “From” email address matches your Yahoo Mail email address, you can consider using another free SMTP server, such as the free Gmail SMTP server.
Summary
If you have a Yahoo Mail account, the Yahoo SMTP server lets you configure your email clients and websites to send emails using your Yahoo Mail account. For configuring an email client, you can also use POP3 or IMAP to import your Yahoo Mail emails to your email client to send and receive emails from the client.
Because Yahoo Mail allows sending up to 500 emails per day, it can be an excellent free solution for WordPress transactional emails. However, you might encounter problems setting it up due to Yahoo’s strict firewall and anti-spam rules. Hence, you might be better off using another free SMTP server if you encounter recurring issues setting up Yahoo Mail with WordPress.
Do you still have any questions about the Yahoo SMTP settings or how to use them with WordPress? Let us know in the comments!