Errors on your WordPress site can slow down your work and create serious inconveniences for both you and your users. For instance, the “Installation failed: could not create directory” message can prevent you from providing a key feature or functionality.
Luckily, resolving this error is fairly simple. By tweaking just a few settings, you can easily get your WordPress plugin or WordPress theme up and running in no time.
In this post, we’ll discuss what causes this error and other issues related to it. Then we’ll walk you through three methods for resolving the “Installation failed: could not create directory” message so that you can complete your installation or update.
Let’s get started!
What Causes the “Installation Failed: Could Not Create Directory.” Error in WordPress
There are three primary situations in which you might encounter the “Installation Failed: Could Not Create Directory.” error in WordPress:
- When installing a theme or plugin via your WordPress dashboard
- During a standard theme or plugin update
- While attempting to upload files to the wp-content directory on your server
The root cause of the problem is the same in each scenario. However, let’s take a look at each of these situations in turn.
Installing a New Theme or Plugin on Your Site
Your WordPress site is made up of two components: a database and various files that are stored on a server in ‘directories.’ When you use WordPress admin to add a theme or plugin to your site, it has to create a new directory in which to save its files.
However, if the plugin or theme you’re attempting to install does not have permission to write in your website’s root directory, it won’t be able to complete this task. That’s when you’ll see an error such as “Installation failed: could not create directory.”
This error is your server’s way of saying that you’re not allowed to make changes to your site’s files by adding the plugin or theme in question. In general, this is a problem that usually occurs on new WordPress sites.
It’s important to note that there is a similar, less common cause for this error. If your server is running out of disk space to store your site’s files, it may show this same message because it has no room for the new plugin or theme. Read this guide to check disk usage in WordPress.
This may be due to old backup files not being deleted, or it may happen because your hosting plan is too small for your site. In the latter case, you’ll want to look into upgrading to another hosting package that provides more storage.
Updating an Existing Theme or Plugin
Sometimes, when attempting to upgrade a WordPress theme or plugin that’s already installed on your site, you may see an error very similar to the one we’ve described above. This one will typically read, “Update failed: could not create directory.”
This problem occurs for the same reasons as the “Installation failed could not create directory.” error. When you update a WordPress plugin or theme, WordPress needs to rewrite its files on your website’s server. If your permissions settings are incorrect or there is not enough free space, the process will not be able to access the right files or upload new ones.
Since the cause of these two issues is the same, the solutions are identical as well. Any methods for resolving the “Installation failed: could not create directory” error listed below should also work for a stalled update.
Uploading Files to the wp-content Directory
Server file permissions are a security feature that hosting providers put to prevent unauthorized parties from making changes to your site or stealing sensitive information.
However, they can sometimes lock you out of your own files if they aren’t set correctly.
This is why, if you try to get around the “Installation failed: could not create directory.” error in your WordPress dashboard by uploading the plugin’s or theme’s files directly to the wp-content directory on your server, you’ll likely still encounter the same problem. The error occurs because of a problem with your server, not your WordPress installation.
This issue may also extend to your wp-content/uploads subdirectory, where all your media files are stored. Adding images, videos, or similar content to your site by saving them to your server follows the same process as installing a new plugin or theme.
If you don’t have permission to write in your root directory, uploading content to wp-content/uploads will still produce the error we’ve been discussing. To fix it, you’ll need to adjust your server’s settings, as we’ll describe shortly.
Diagnosing the “Installation Failed: Could Not Create Directory.” Error in WordPress (2 Methods)
The good news about this error is that it’s relatively easy to fix. Most of the time, correcting your permissions will clear everything right up. However, before you start work on that solution, you may want to make sure that it can solve your problem.
Below, we’ve outlined two methods for determining whether your site is experiencing a permissions-related error.
1. Use the WordPress Site Health Tool
WordPress 5.2 introduced the Site Health tool. It contains a wealth of valuable information regarding your WordPress site, such as performance test results, security checks, and WordPress configuration data.
You can access it by navigating to Tools > Site Health in your WordPress dashboard. To check your file permissions settings, you’ll want to click on the Info tab:
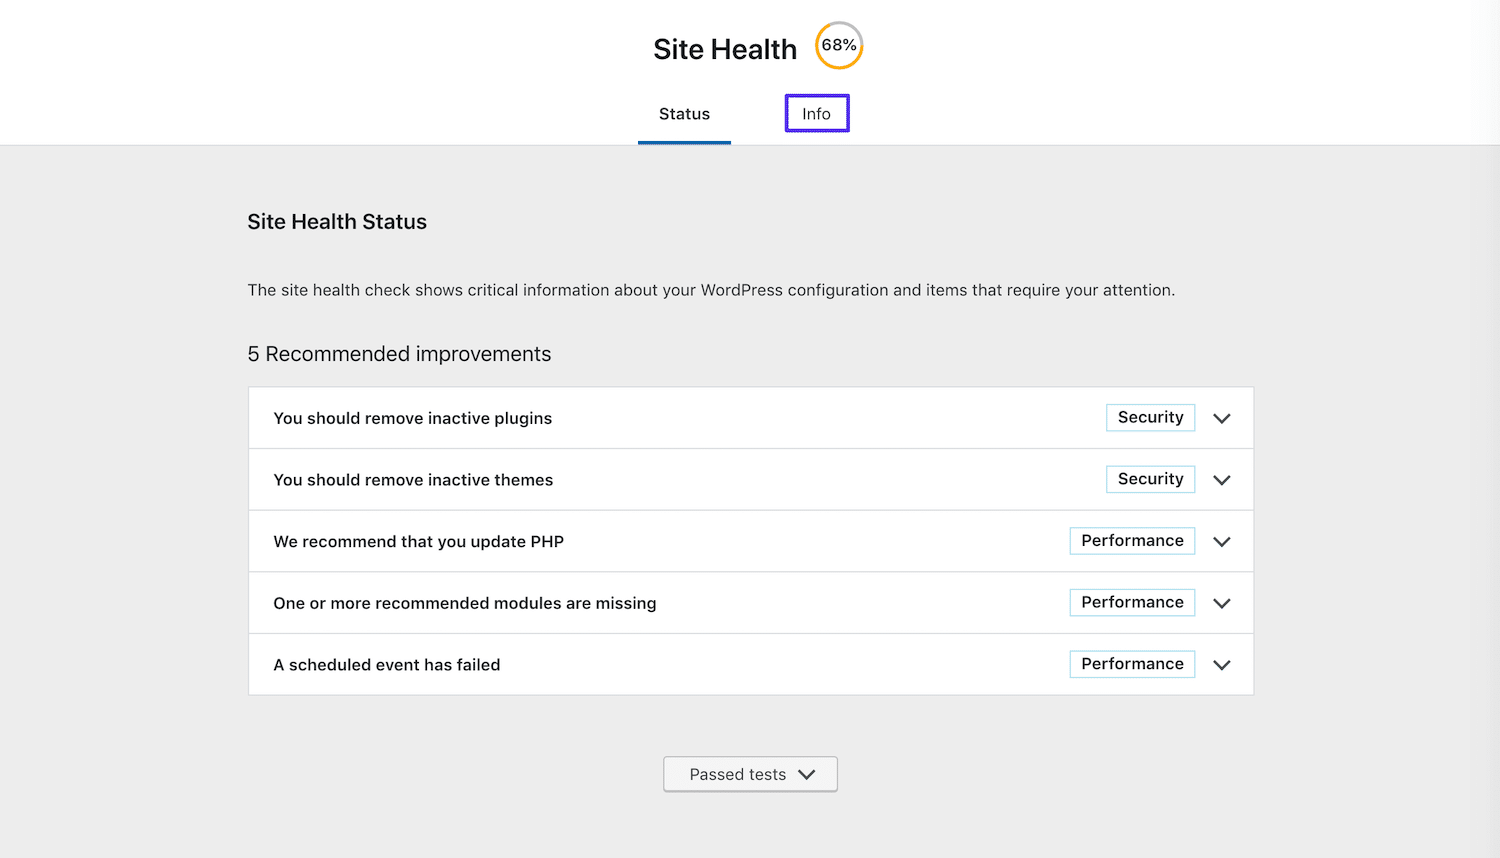
Then, scroll down to the last section, which should be labeled Filesystem Permissions:
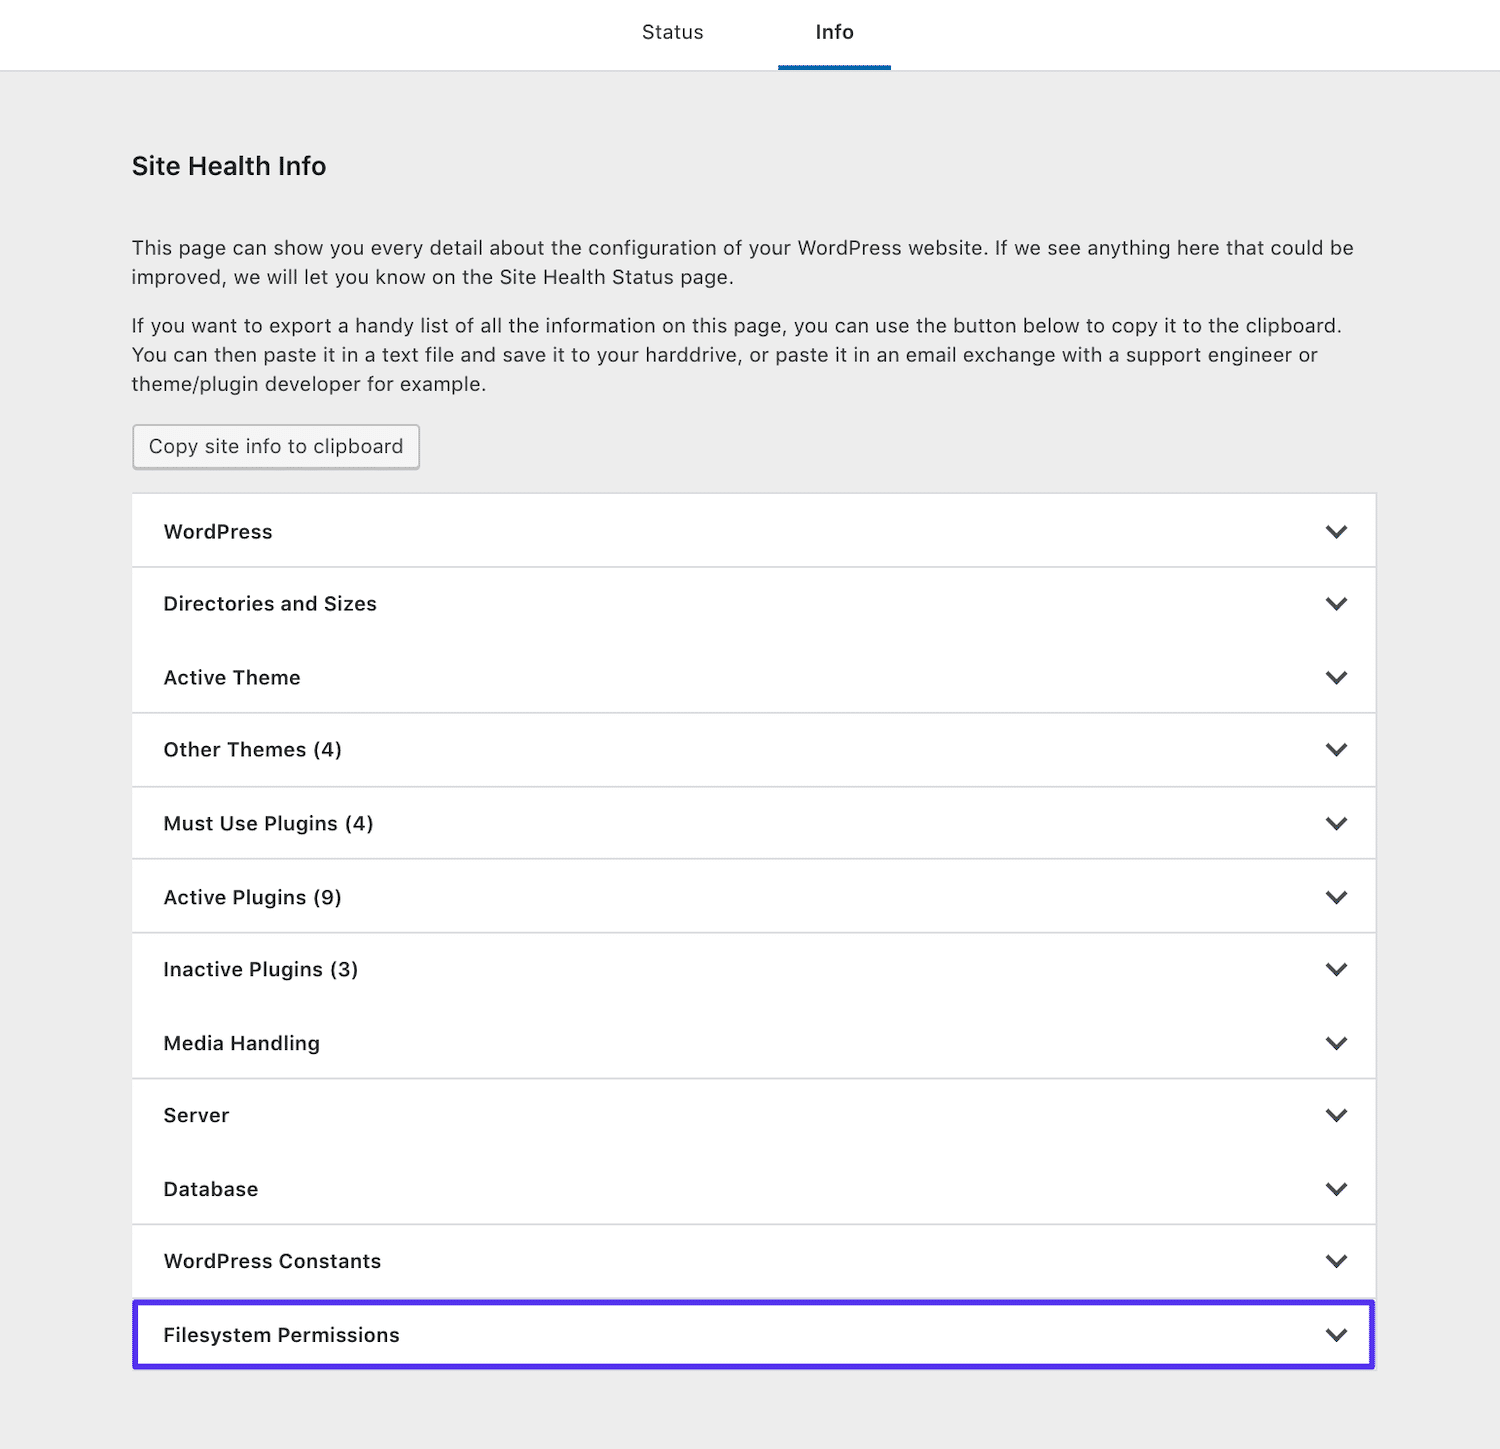
Here you’ll see a list of crucial WordPress files, including the plugin and theme directories. Ideally, they will all be listed as “Writable”:
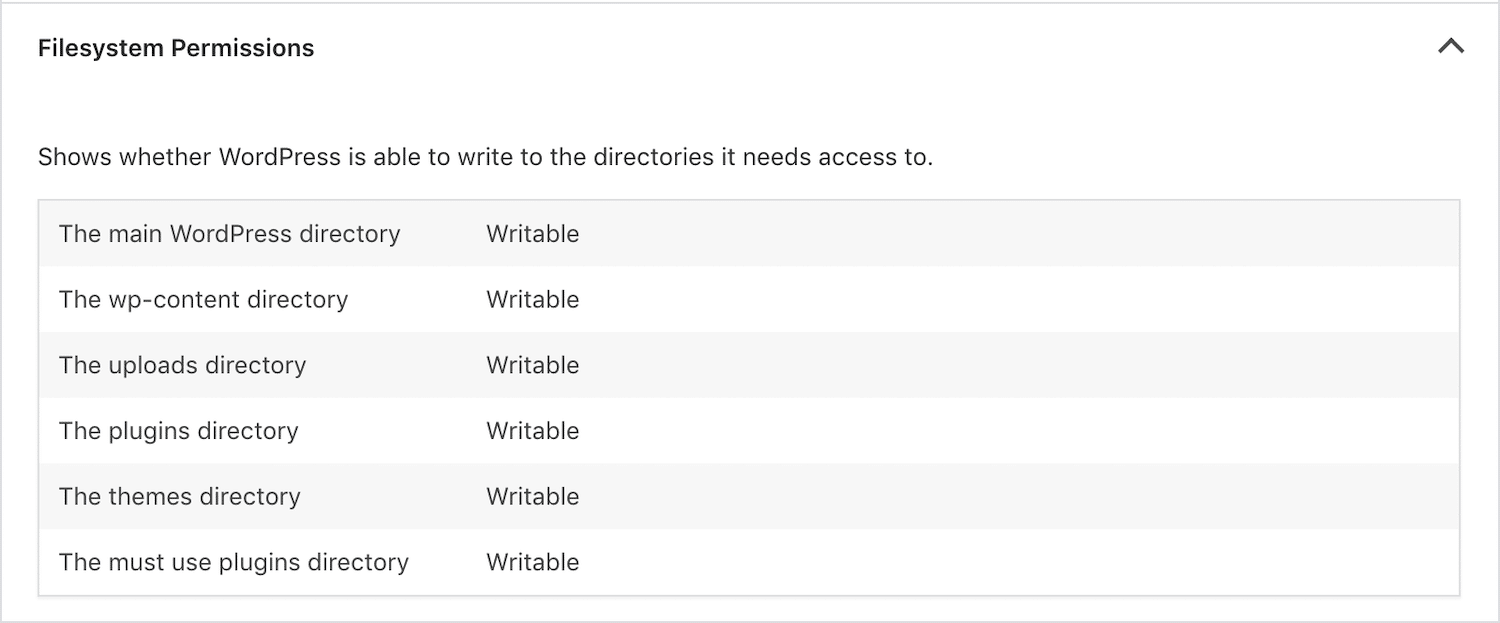
If your permissions are not configured correctly, you’ll see “Not writable” listed next to the problematic folders. If this is the case, you’ll know that you need to correct your file permissions.
2. Check Your Server’s Error Log
Another option is to check your server’s error log. This may be a more efficient method, as it will display any errors that have occurred, not just incorrect file permissions. You should be able to access your logs via your hosting account.
If you’re a Kinsta customer, you can log into your MyKinsta dashboard and click on Sites in the sidebar:
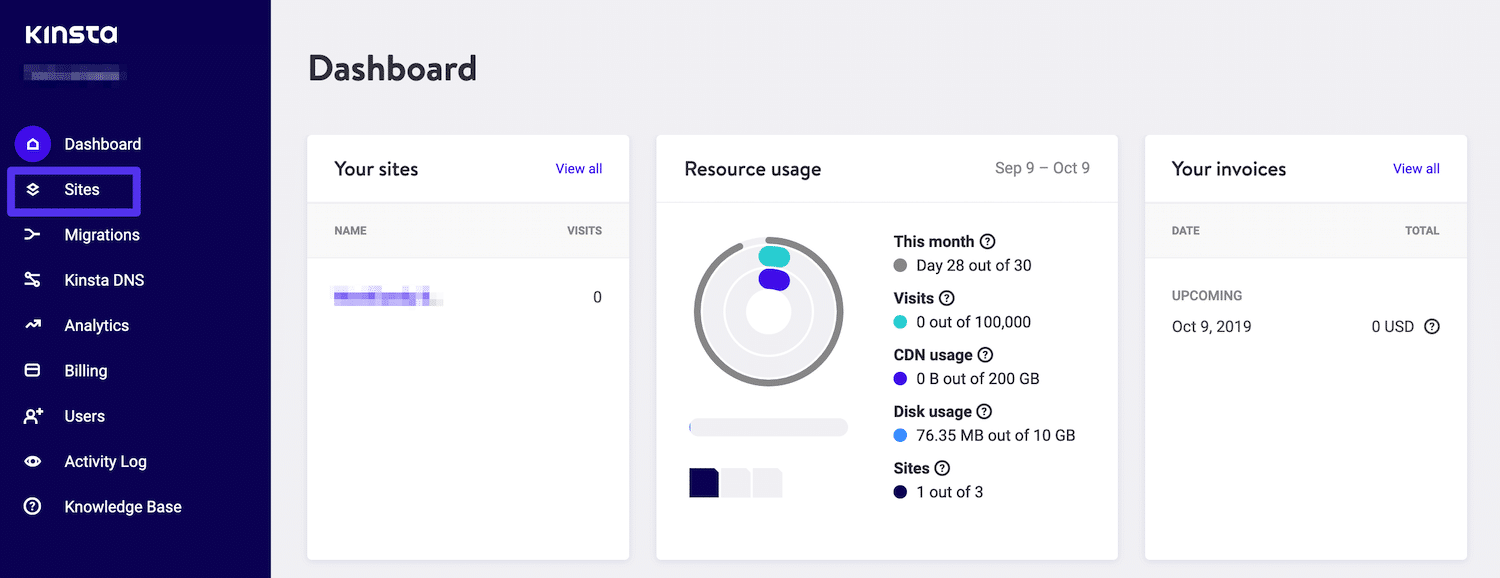
Select the site’s name that is experiencing the “Installation failed: could not create directory” error. Then, choose the Logs tab:

From the drop-down menu, make sure that error.log is selected. Here, you should be able to see any recent errors that have occurred on your server, including incorrect file permissions or insufficient storage, either of which may be causing the installation error.
If you see a relevant error listed, you can either correct your file permissions or consider upgrading your hosting plan as needed.
How to Fix the “Installation Failed: Could Not Create Directory.” Error in WordPress
If your site’s permissions settings are causing the “Installation failed: could not create directory error,” you can resolve it by resetting them. To do so, you’ll need to connect to your server via File Transfer Protocol (FTP), using an FTP client.
Any time you make changes to your site’s files, it’s wise to create a backup first, just in case something goes wrong and you need to restore your site. Then, collect your FTP credentials from your hosting account.
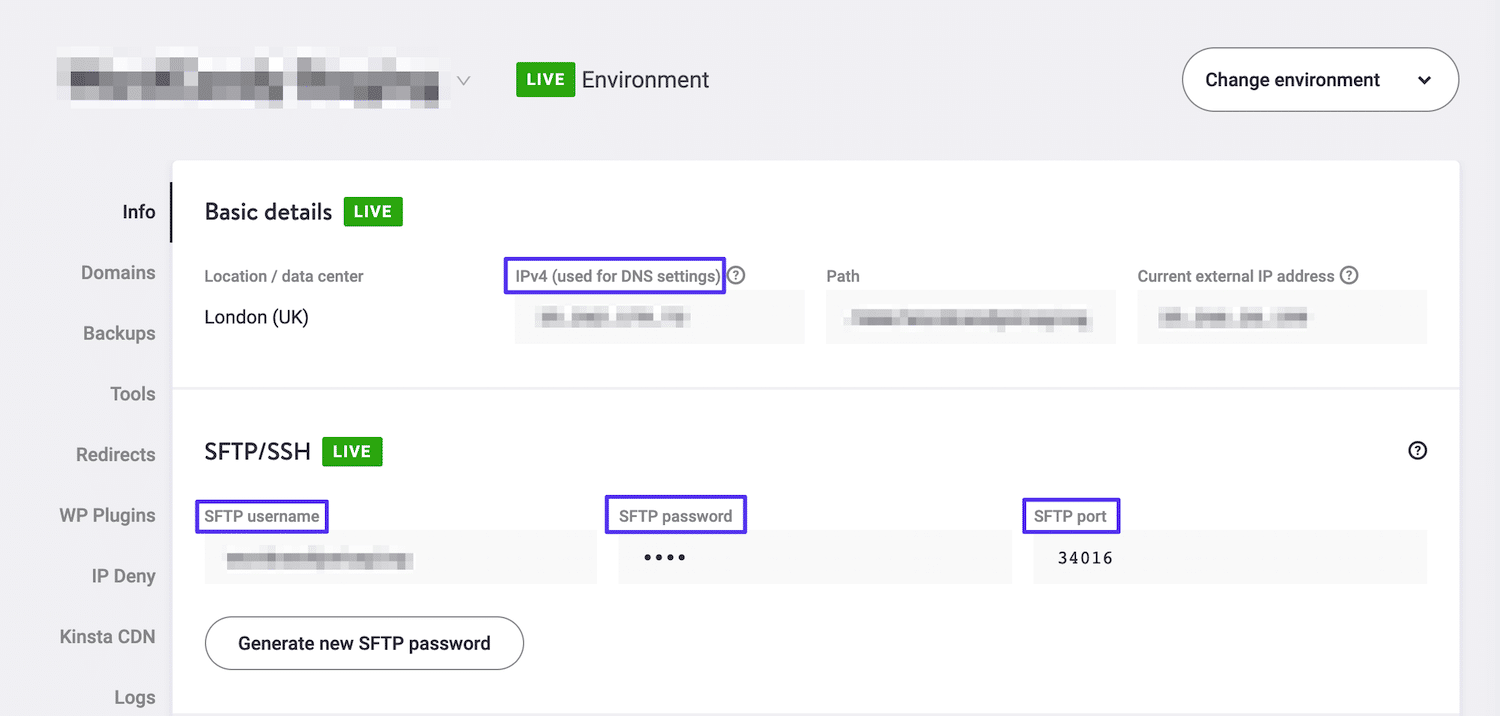
As a Kinsta customer, you can do this by accessing the Info tab for your site in the MyKinsta dashboard:
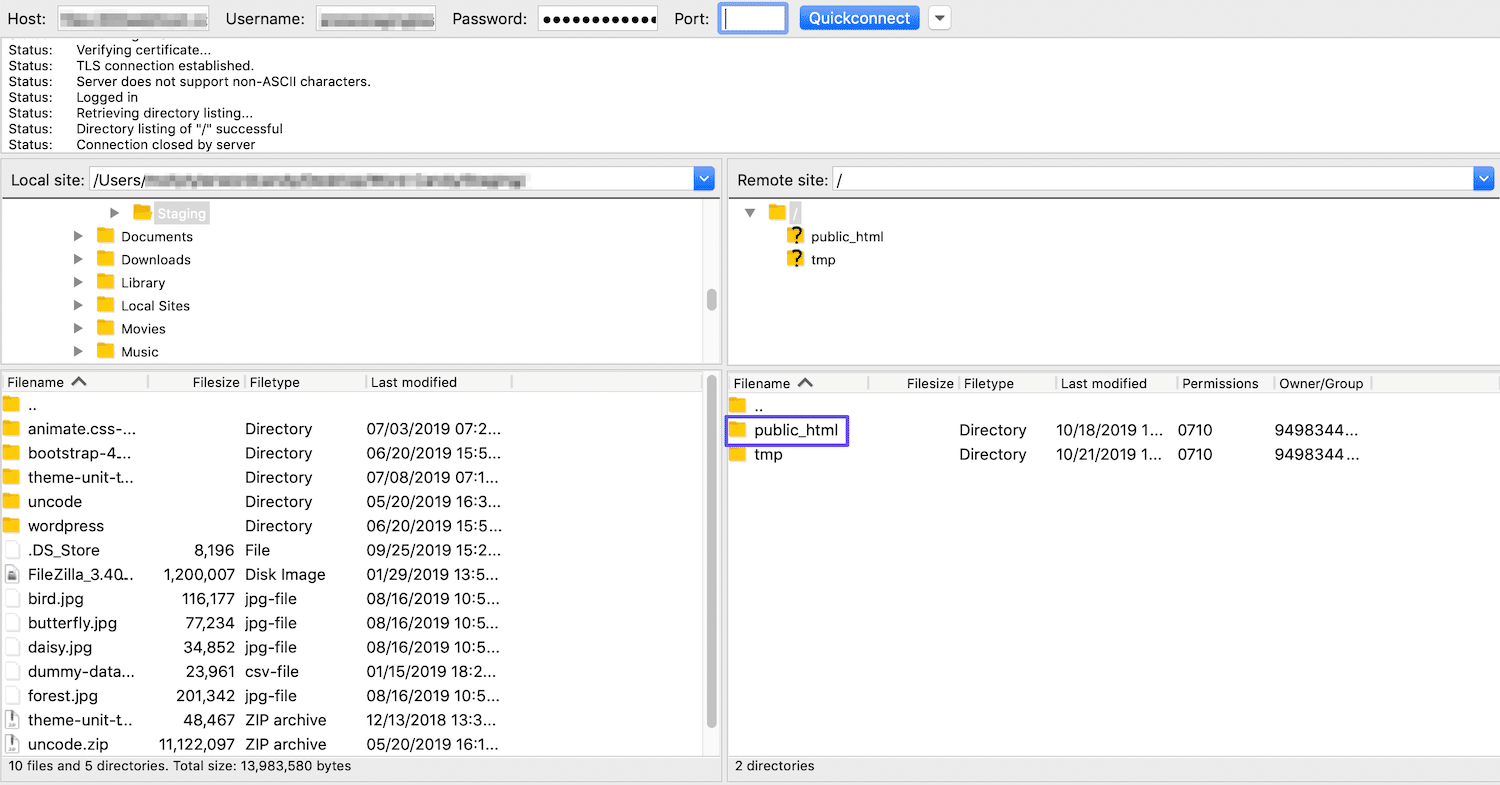
Then, open up FileZilla (or another client) and enter your information. You’ll be connected to your server, where you should see a folder called public_html. Double-click on it to view your WordPress files:
If you don’t see all the files, here is a guide on how to show hidden files in Filezilla. After that, select the folders labeled wp_content, wp_includes, and wp_admin. Right-click on them and choose File Permissions:
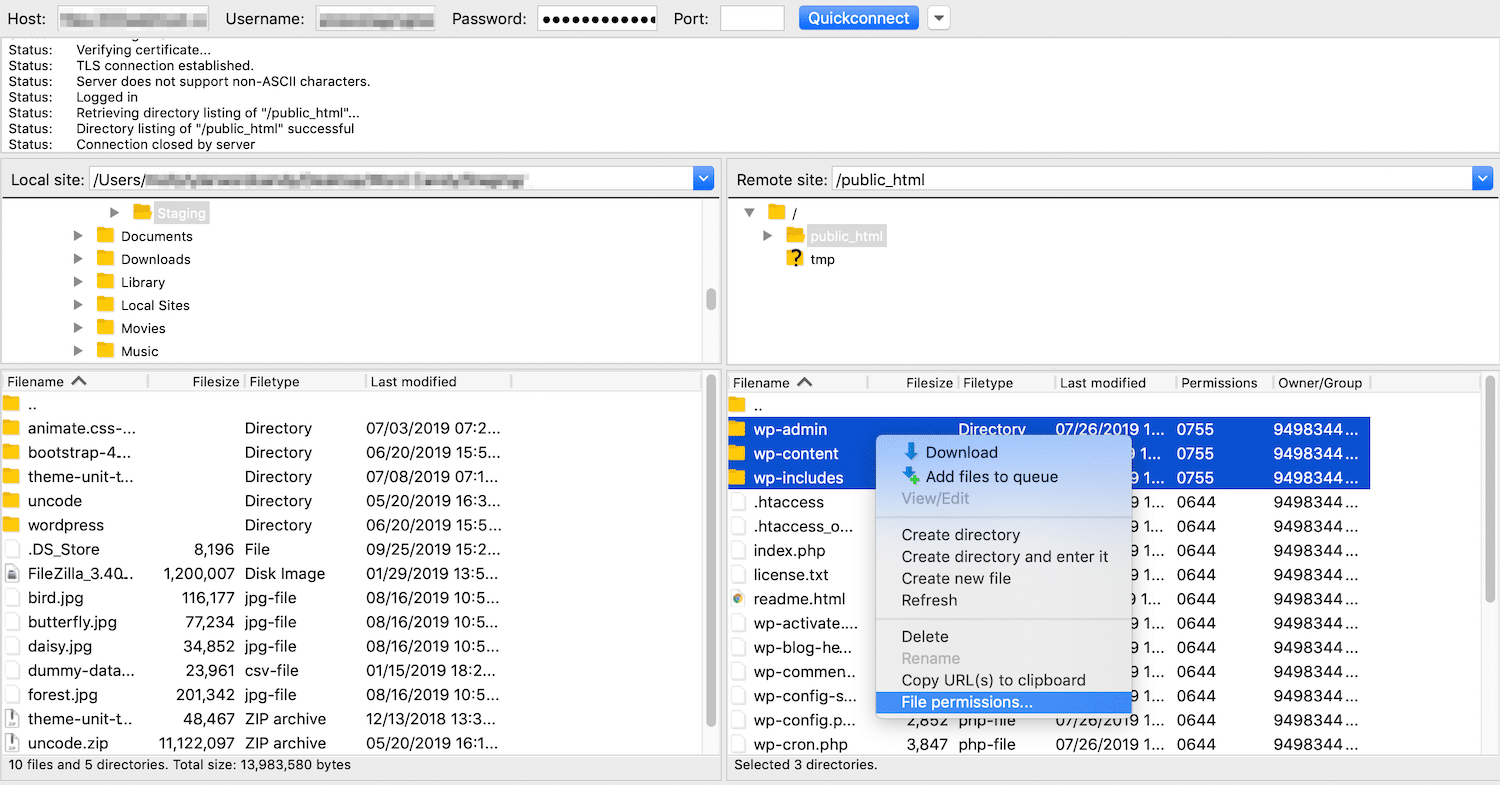
You should see a window that contains a handful of settings:
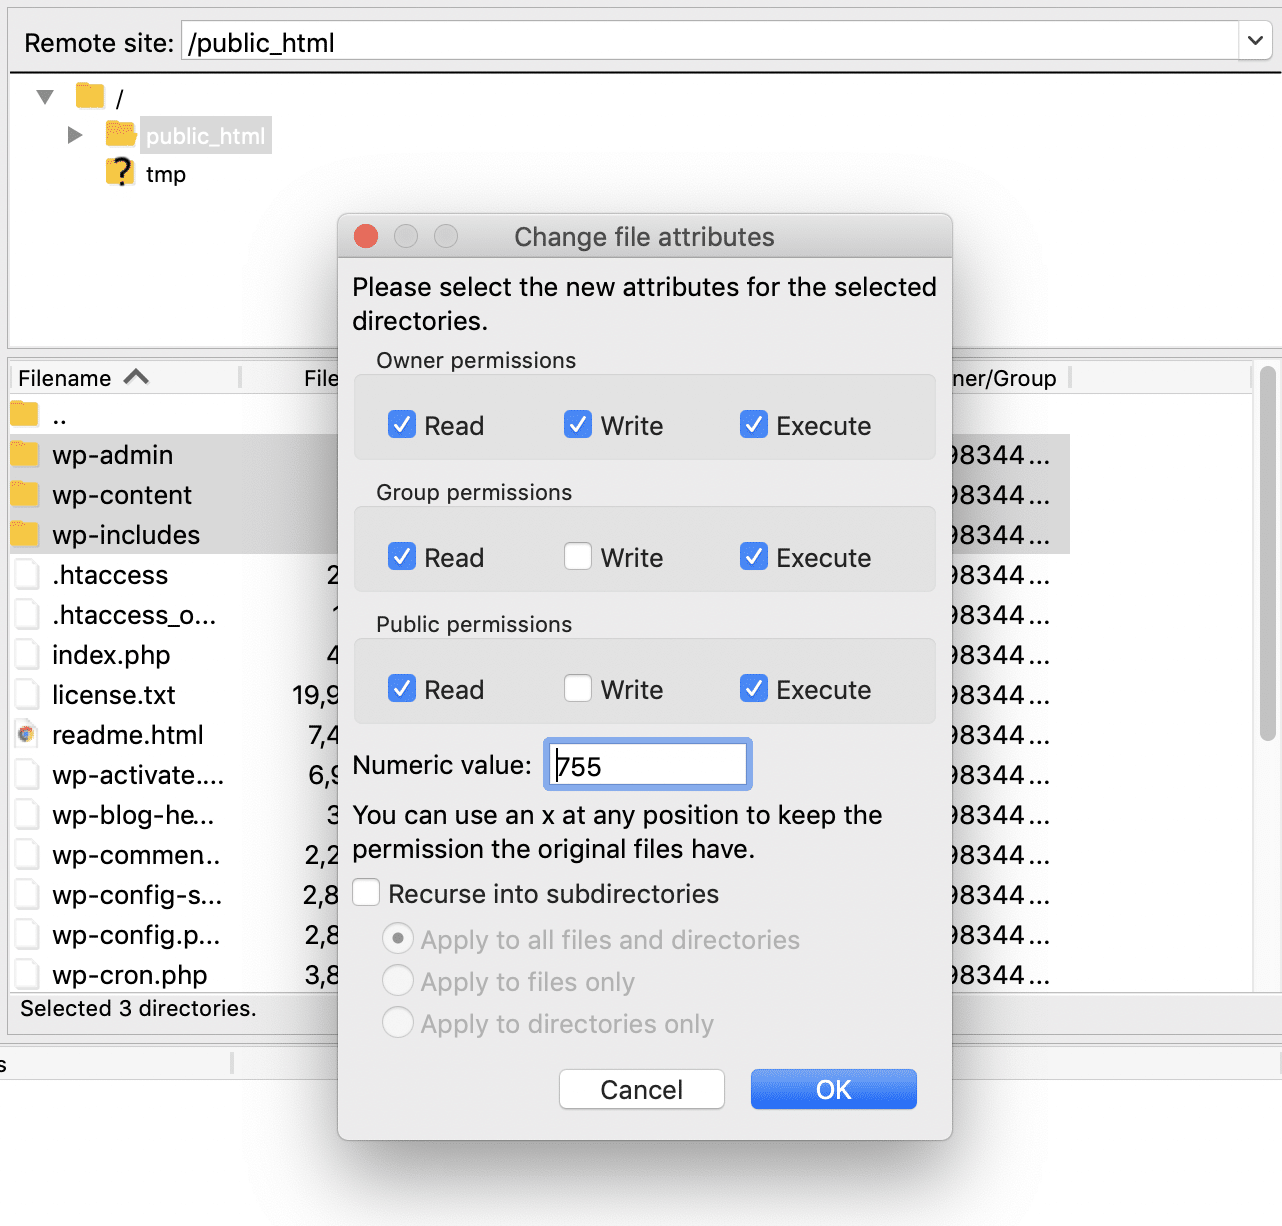
Check that the options here are set to the following values:
- Owner Permissions: Read, Write, Execute.
- Group Permissions: Read, Execute.
- Public Permissions: Read, Execute.
- Numeric value: 755.
- Recurse into subdirectories.
- Apply to directories only.
Click on the OK button to close the window. Now return to your site and attempt to install or update the plugin/theme again.
It’s worth noting that some hosting providers, including those that use cPanel, have their own tools you can use without bothering with FTP/SFTP. You can often find this tool by logging in to your hosting account, navigating to the site experiencing the error, and looking for a File Manager.
Summary
Your WordPress site’s plugins and themes provide important functionality for you and your users. Encountering an error when installing or updating one can throw a wrench in your plans and slow down your progress.
To determine if a file permissions issue is causing a plugin or theme installation error on your site, you can use the Site Health tool or check out your server’s error log. After that, resetting your permissions using FTP/SFTP should only take a few minutes.

Head of Content at Kinsta and Content Marketing Consultant for WordPress plugin developers. Connect with Matteo on Twitter.