The “error establishing a database connection” is probably one of the most common errors WordPress users can encounter. It’s closely tied to the white screen of death (WSOD). This error means your website is no longer communicating or has access to your WordPress database; thus, your entire website goes down.
You should resolve this error immediately, as this can directly affect your sales, traffic, and analytics. But don’t worry, today we’ll discuss some common scenarios that cause this error and some easy ways to get your site back up and running in no time.
What Is The “Error Establishing a Database Connection”?
The “error establishing a database connection” happens when a website is unable to make a connection to the WordPress database, which prevents the page from loading. The most common causes for this issue are incorrect login credentials and database corruption.
This is how it works: all the information on your WordPress site, such as post data, page data, meta information, plugin settings, login information, etc. is stored in your MySQL database. The only data not stored there is media content such as images and your theme/plugin/core files such as index.php, wp-login.php, etc.
When someone visits your website, PHP executes the code on the page, queries the information from the database, and then displays it to the visitor in their browser.
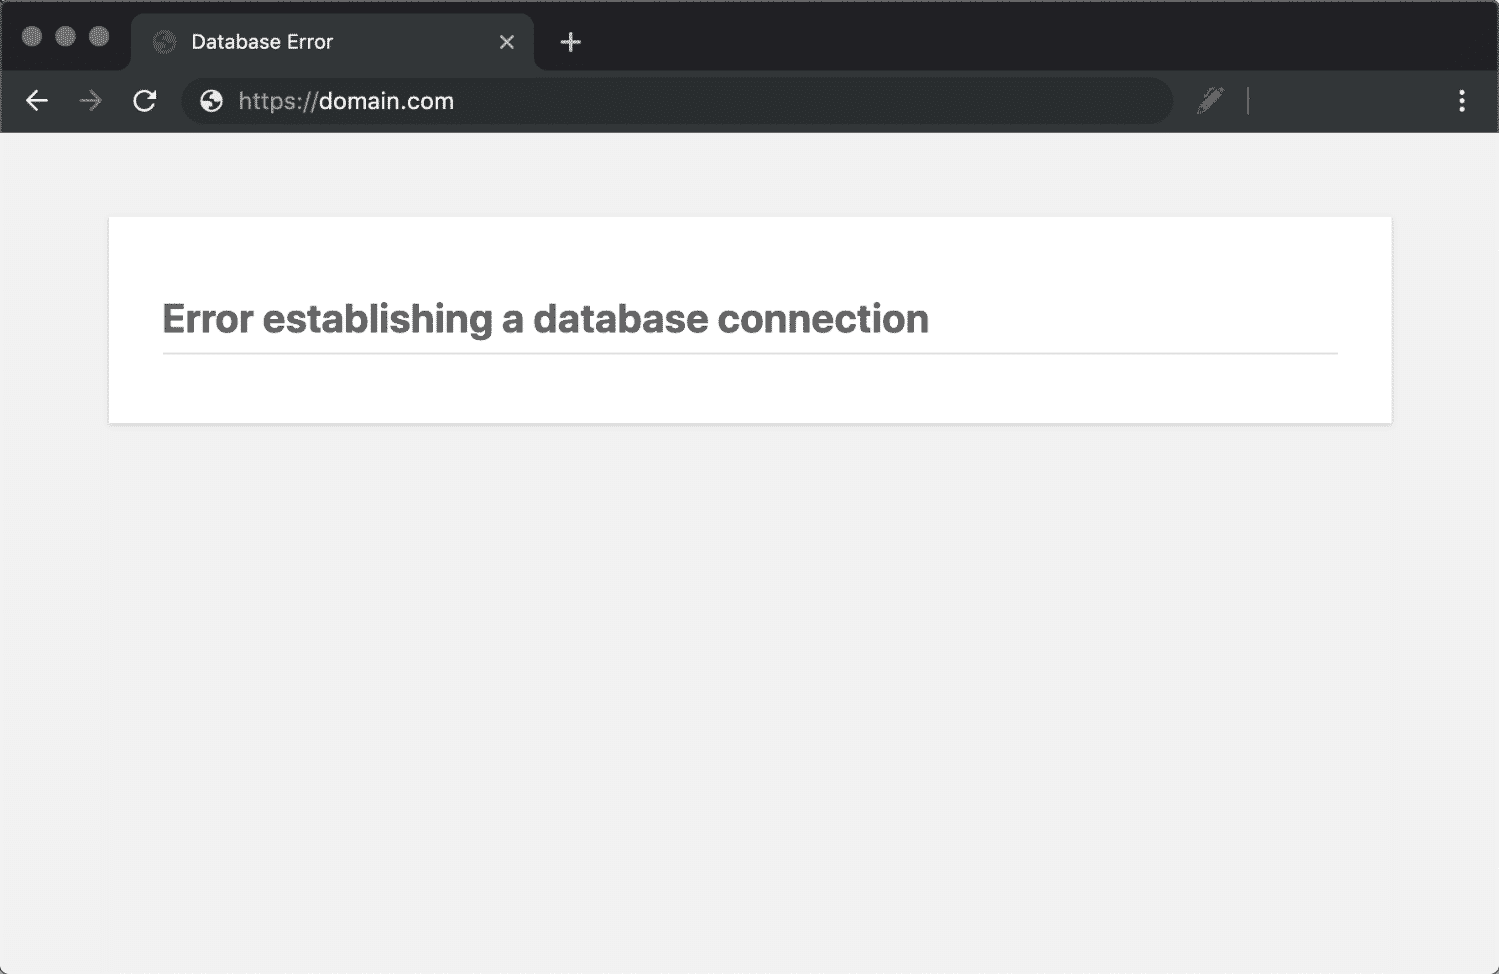
If this isn’t working correctly, you are left with the “error establishing a database connection” message, as seen below. The entire page is blank because no data can be retrieved to render the page, as the connection is not working properly. Not only does this break the frontend of your site, but it will also prevent you from accessing your WordPress dashboard.
However, visitors might not see this error on the frontend right away. That is because your site is most likely still serving from cache until it expires. For example, at Kinsta, all WordPress sites are cached for one hour by default. Therefore, if a site is still serving from the cache, it might appear acceptable to a visitor.
At Kinsta, our support team can increase the duration of your cache to, say, an hour or even a week if you want. If you have a site that doesn’t change very often, this can increase your site’s performance as it does not have to grab new files as often after the cache expires. And in cases like the above, the frontend of the site in most cases (unless you have a script or part of your site breaking the cache) would stay up a lot longer.
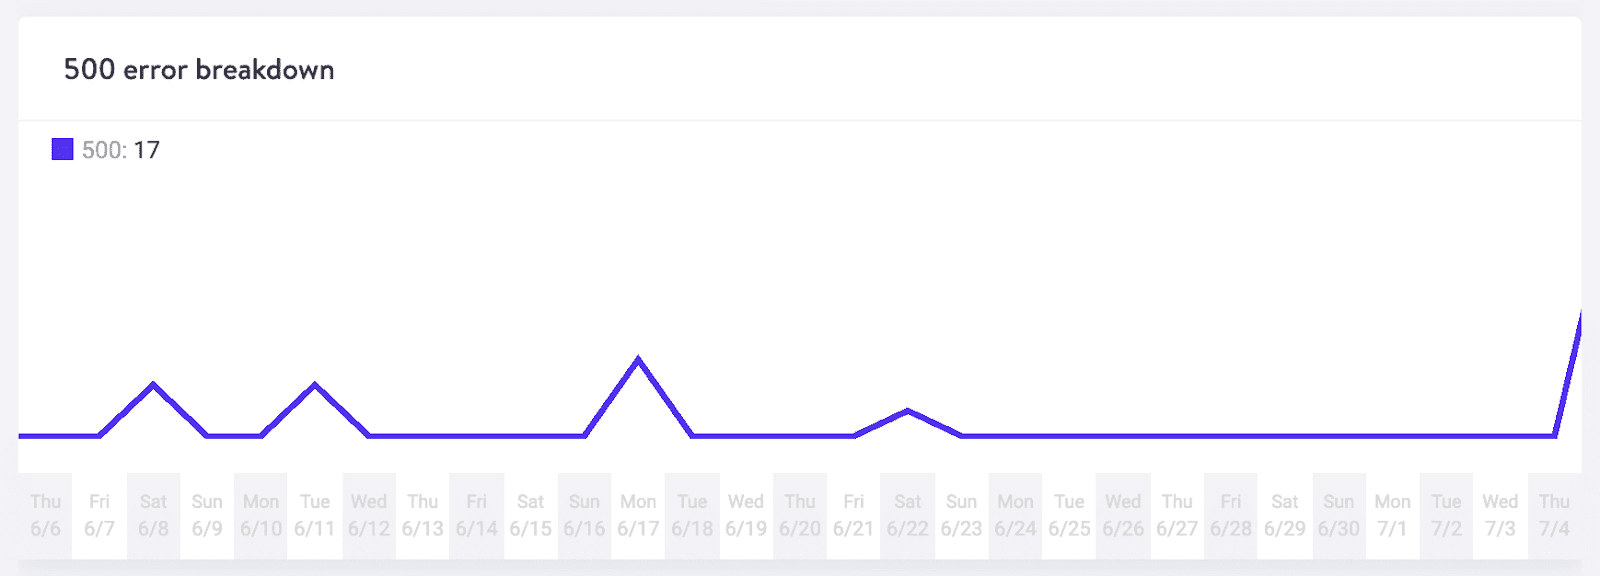
When visitors try to access your site while this error is happening, it will generate a 500 HTTP status code in your logs. This same status code appears with an “internal server error.” It means that something went wrong on the server, and the requested resource was not delivered. When everything is working properly, your site will generate a 200 HTTP status code, which means everything is fine.
Kinsta customers can review their site’s logs within the MyKinsta dashboard:

If you’re a Kinsta client, you could also look at the 500 error breakdown report in MyKinsta analytics to see if it’s something that has been a reoccurring problem.
What Causes The “Error Establishing a Database Connection”?
So why exactly does this happen? Well, here are a few common reasons below. And don’t worry, we will go into each of these more in-depth so you can know how to fix them. Typically you can resolve this error in under 15 minutes.
Incorrect Database Login Credentials
Your WordPress site uses separate login information to connect to its MySQL database.
Corrupted Database
With so many moving parts with themes, plugins, and users constantly deleting and installing them, sometimes databases get corrupted. This can be due to a missing or individually corrupted table, or perhaps some information was deleted by accident.
Corrupt Files in Your WordPress Installation
This can even happen sometimes due to hackers.
Issues With Your Database Server
Several things could be wrong on the web host’s end, such as overloading the database from a traffic spike or being unresponsive from too many concurrent connections. This is common with shared hosts as they utilize the same resources for many users on the same servers.
Spike in Traffic
Depending on the web host you use, your server might be unable to handle many concurrent database connections. An increase in traffic can lead to temporary problems with the database.
How To Fix The “Error Establishing a Database Connection”?
Before troubleshooting the error, we recommend taking a WordPress site backup. Many of the recommendations below involve manipulating information in your database, so you don’t want to make things worse. You should always backup before trying to fix things on your WordPress site, no matter how tech-savvy you think you are.
You can use a popular WordPress backup plugin such as VaultPress or WP Time Capsule to backup your files and database.
If you are a Kinsta user, you can take advantage of our built-in backup feature. Click into your WordPress site in MyKinsta and select Backups. Next, click on the Manual tab and click the Back up now button to create a backup manually.

You then also have the option to restore a backup to production or staging. Or you can manually backup your MySQL database using phpMyAdmin. Once you have a successful backup, it is time to troubleshoot your database connection issues.
1. Check Your Database Login Credentials
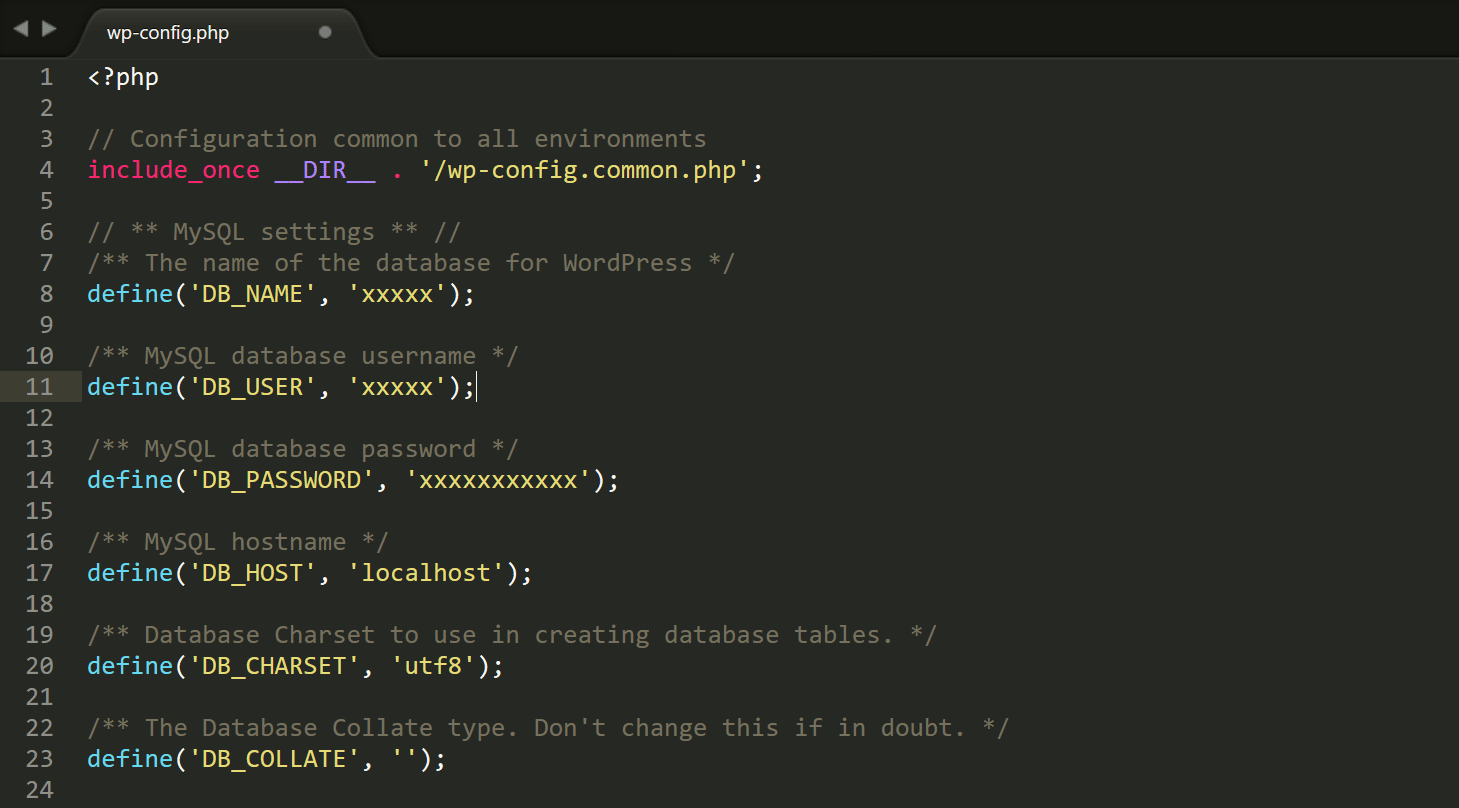
The first thing to do is check to ensure your database login credentials are correct. This is by far the most common reason why the “error establishing a database connection” message occurs. Especially right after people migrate to a new hosting provider. The connection details for your WordPress site are stored in the wp-config.php file, which is generally located at the root of your WordPress site.
It contains four important pieces of information that must be correct for the connection to occur successfully.
Database Name
// MySQL settings

// The name of the database for WordPress
define('DB_NAME', 'xxxxxx');
MySQL database username
// MySQL database username
define('DB_USER', 'xxxxxx');
MySQL database password
// MySQL database password
define('DB_PASSWORD', 'xxxxxxxxx');
MySQL hostname (server)
// MySQL hostname
define('DB_HOST', 'localhost');
To access your wp-config.php file, you can connect to your site via SFTP and browse to the root of your site. Or, if you are using cPanel, you can click on “File Manager,” browse to the root of your site, and right-click to edit the file.

Here is an example below of what the file looks like when opened.
You need to now check your current values against those on your server to ensure they are correct. Follow the directions below for cPanel and Kinsta users.
Check Database Credentials in cPanel
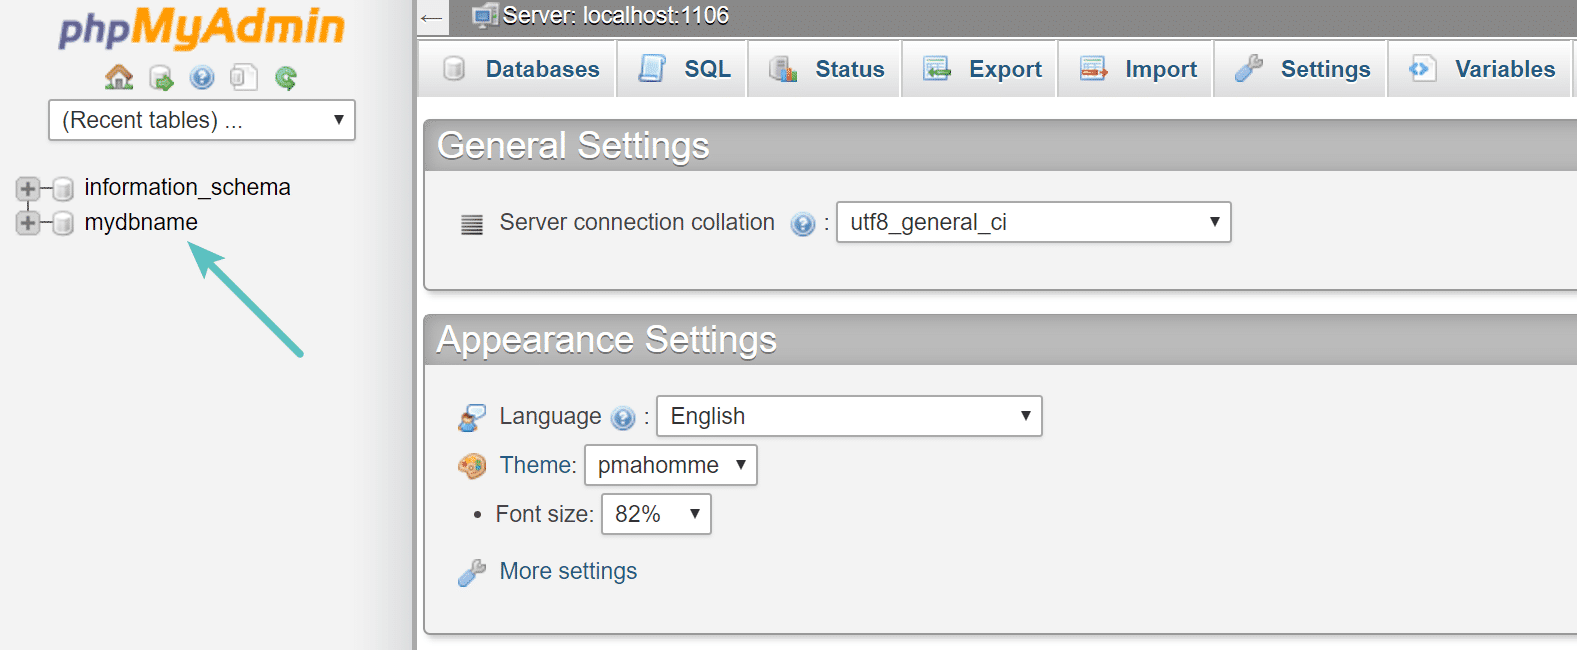
The first thing to check is the database name. To do this, you must log in to phpMyAdmin in cPanel under the Databases section.

You should see your database name at the bottom on the left. You can ignore the “information_schema” database as this is something used by the host. You will then want to compare that name against the DB_NAME value in your wp-config.php file. If they match, then this isn’t the problem. If they don’t match, you need to update your wp-config.php file.
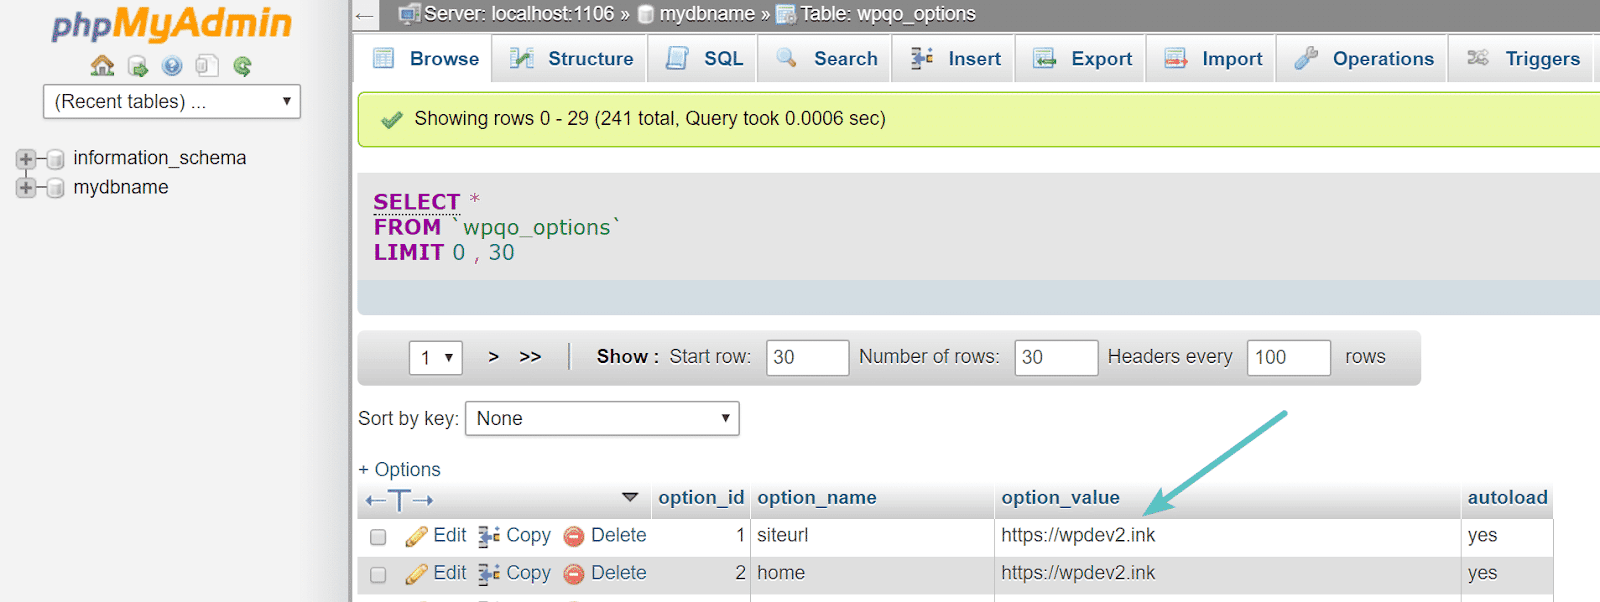
You can also verify this is the correct database by ensuring it contains your WordPress site’s URL. To do this, click on the database and then click into the wp_options table (this might be slightly different for security purposes, such as wpxx_options). At the top of the table, you will see values for your site’s URL and name. If these match your current site, you can rest assured you are in the right place.
If your database name was already correct and you still get the “error establishing a database connection” message, you will also want to check your username and password. To do this, you will need to create a new PHP file in the root directory of your WordPress site and input the following code. You can name it whatever you want, such as checkdb.php. Change the values of db_user and db_password with those in your wp-config.php file.
<?php

$test = mysqli_connect('localhost', 'db_user', 'db_password');
if (!$test) {
    die('MySQL Error: ' . mysqli_error());
}
echo 'Database connection is working properly!';
mysqli_close($testConnection);
Then browse the file on your WordPress site: https://yourdomain.com/checkdb.php. If you get a “MySQL Error: Access denied,” then you know your username or password is wrong, and you will need to continue to the next step to reset your credentials.

Below is the message you want to see, “Database connection is working properly.” But of course, if it were, then you wouldn’t be here. Be sure to delete/remove this file after you are done testing.

So next, you need to reset your username and password. In cPanel, click on MySQL Databases under the Databases section.

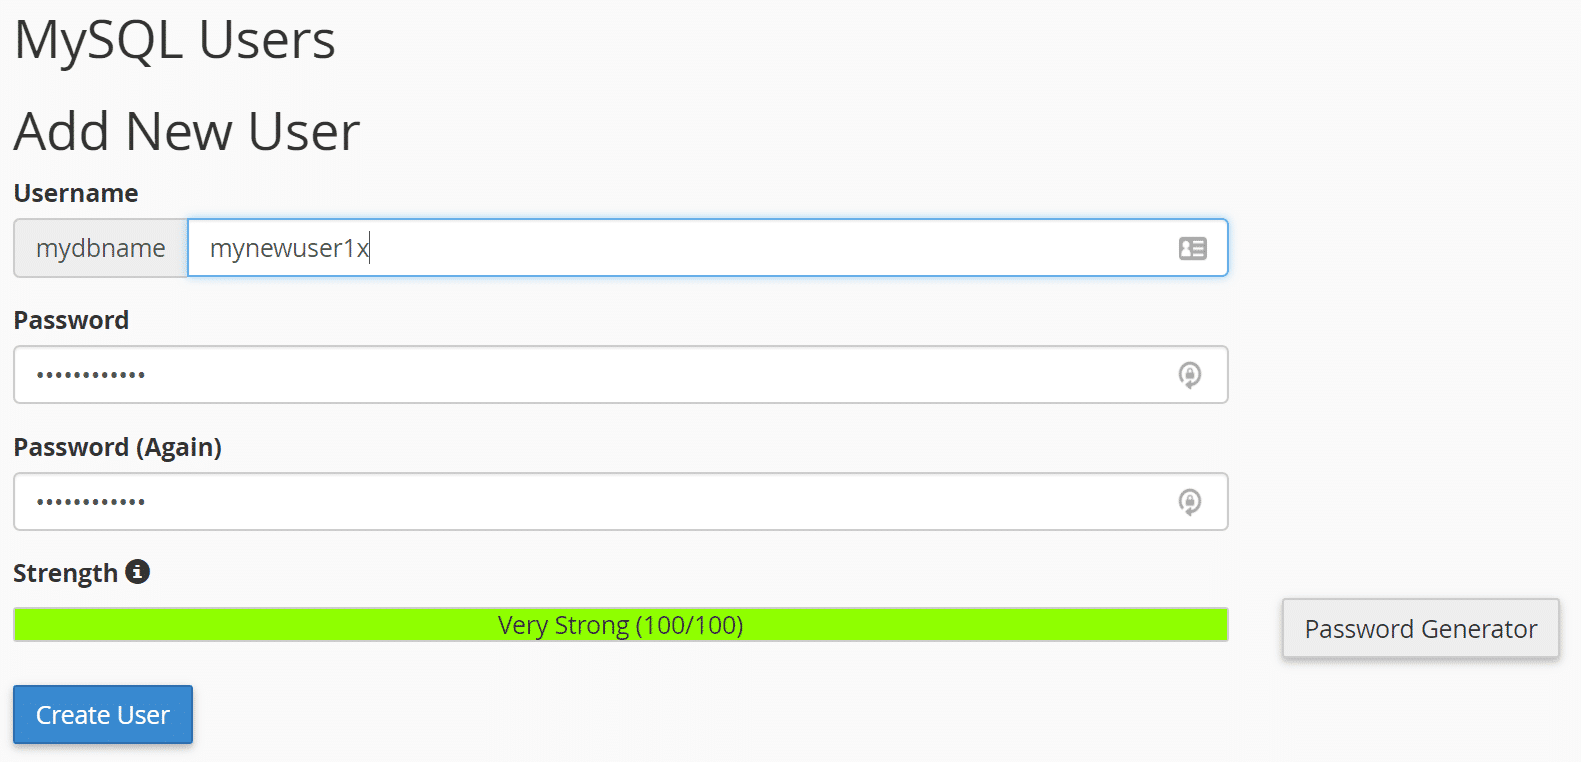
Scroll down and create a new MySQL user. Try and pick a unique username and password so they can’t easily be guessed. The password generator tool they provide works excellent. Then click on “Create User.” Alternatively, you could change the password on this screen for the current database user.
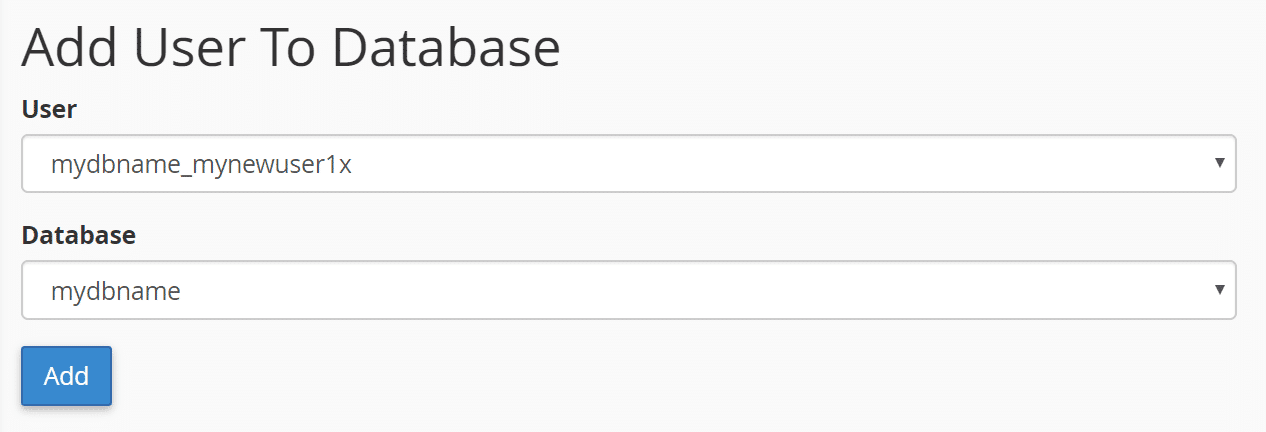
Then scroll down and add your new user to your database. The next screen will ask which privileges you want to assign. Select “All Privileges.”
Then take those new credentials and update your wp-config.php file. You will want to update the DB_USER and DB_PASSWORD values. You could also rerun the test file from earlier. This should then resolve your credentials issue. If not, you could still have the wrong hostname (DB_HOST). Some hosts use different values.
See a list of some common DB host values. Typically this will be localhost. But you can always reach out to your hosting provider or check their documentation if you aren’t sure. Some might also use 127.0.0.1 instead of localhost.
If you have followed everything above and are still receiving the “error establishing a database connection” message, proceed to the following troubleshooting steps below.
Check Database Credentials With Kinsta
If you are a Kinsta user, checking your credentials against your wp-config.php file and the server is much easier! All you need to do is click on the Info section of your site within the MyKinsta dashboard, and towards the bottom, you will see the database name, username, and password. By default, Kinsta uses localhost for the DB_HOST.

Then take those new credentials and update your wp-config.php file. You will want to update the DB_USER and DB_PASSWORD values. This should then resolve your credentials issue. If you need to reset these credentials, contact our support team. If you have followed everything above and are still receiving the “error establishing a database connection” message, proceed to the following troubleshooting steps below.
2. Repair Corrupt WordPress Database
In some cases, it could be that your database has become corrupt. This can occasionally happen (although not very often) as, over time, hundreds of tables are constantly added/removed by new plugins and themes. If you try to login to your WordPress site’s dashboard and are receiving the following error, it means your database is corrupt: “One or more database tables are unavailable. The database may need to be repaired.” It is important to note that you might only see this error on the back-end, whereas you see the “error establishing a database connection” message on the frontend.
WordPress has a database repair mode that you can initiate. Add the following to the bottom of your wp-config.php file.
define('WP_ALLOW_REPAIR', true);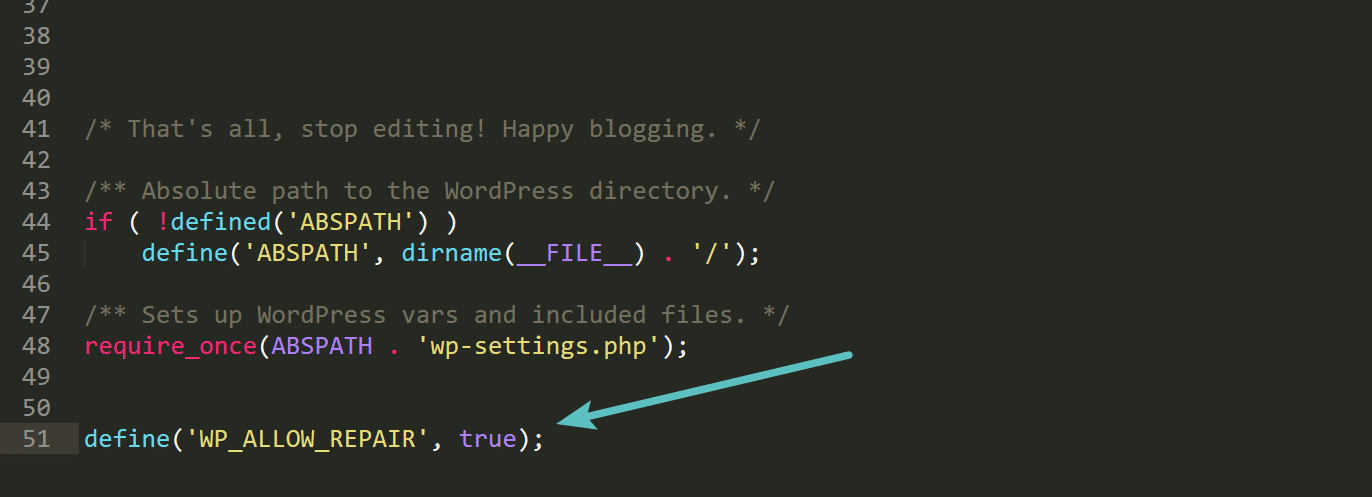
Then browse to the following location on your WordPress site: https://yourdomain.com/wp-admin/maint/repair.php. You will then have the option to repair the database or repair and optimize the database. Since you are probably troubleshooting an outage on your site now, we recommend using the repair database option as it is quicker.
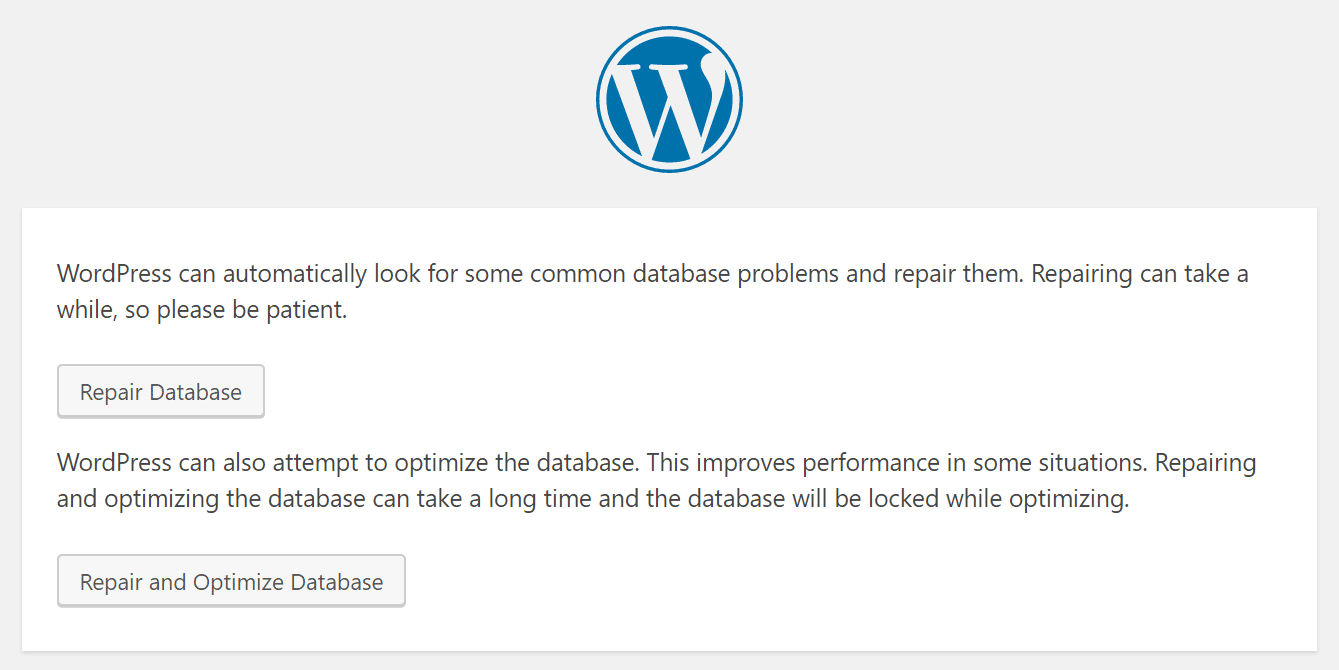
After running the repair of the database above, ensure that you remove the line of code you added to your wp-config.php file. Otherwise, anyone will be able to access the repair.php page. If you are running cPanel, you can also run a repair from within the MySQL databases screen.

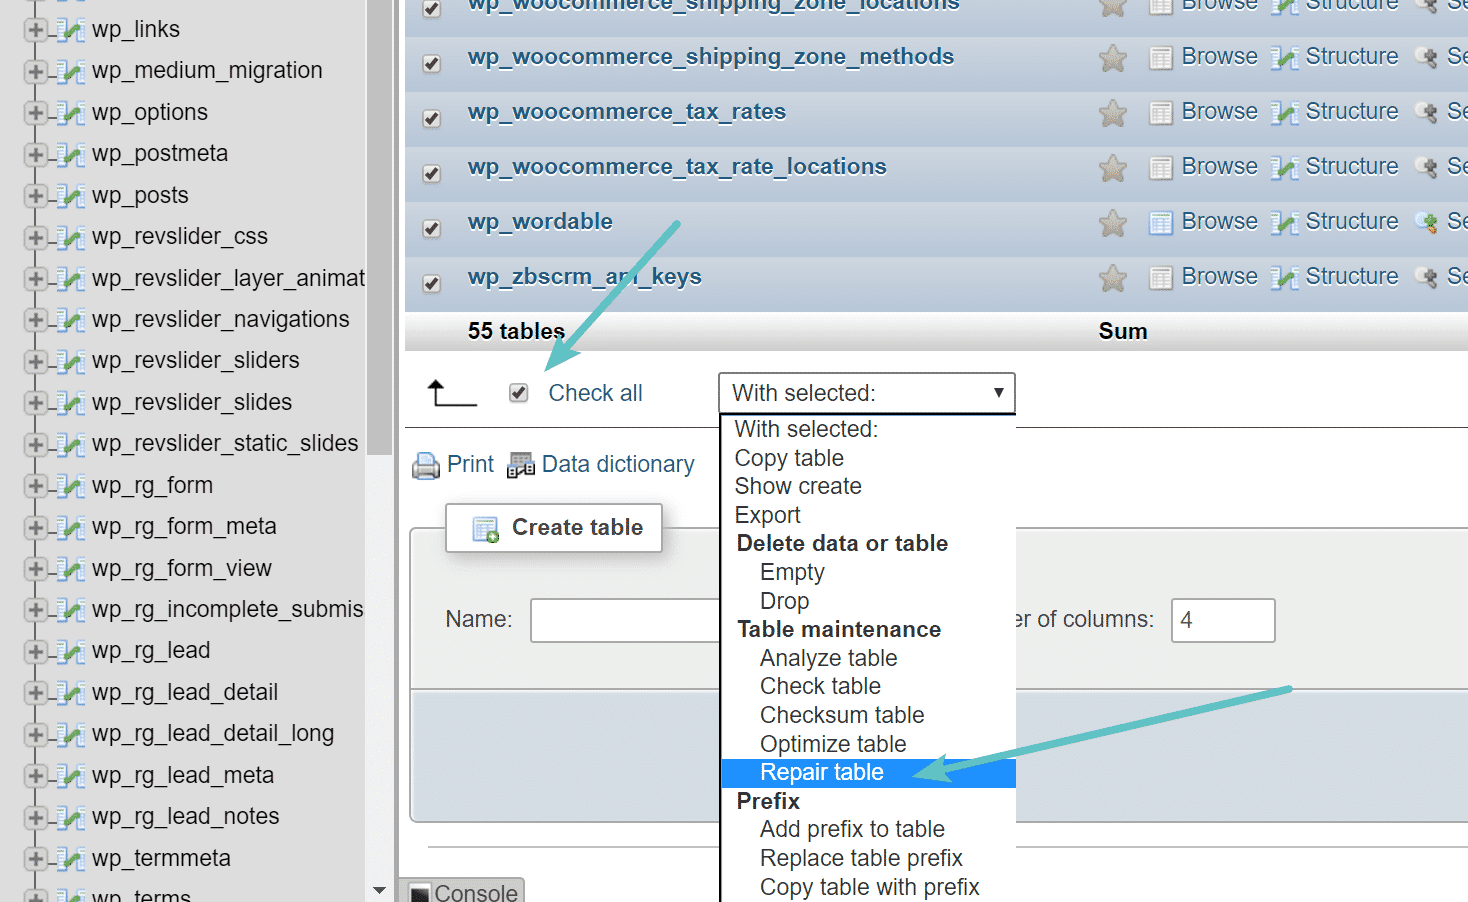
Or you could run a repair from within phpMyAdmin. Simply log in to phpMyAdmin, click on your database, and select all the tables. Then from the dropdown, click on “Repair table.” This is essentially just running the REPAIR TABLE command.
And finally, your other option would be to run the repair using WP-CLI with the following command:
wp db repairSee more documentation on usage in the WordPress developer resources.
If you want to optimize your database, we have some great tutorials on how to optimize WordPress revisions for performance, along with how to convert your MyISAM tables to InnoDB. If you still have issues on your site, proceed to the next troubleshooting step.
Suggested reading: How to Fix the “MySQL Server Has Gone Away” Error in WordPress.
3. Fix Corrupt WordPress Files
The following possible reason you might see the “error establishing a database connection” message is that your WordPress core files have become corrupt. Whether this originated from an issue with transferring files via FTP, a hacker gaining access to your site, or a problem with your host, you can quickly fix this. However, we recommend taking a backup of your site before trying this.
You are going to replace the core version of WordPress on your site. You aren’t touching your plugins, themes, or media, just the WordPress installation itself.
However, you may lose any changes or custom code you’ve added to files such as .htaccess or wp-config.php. If you backed up your website before troubleshooting, you’d have copies of those files that you can restore later.
To get started, you must download a fresh WordPress copy from WordPress.org.
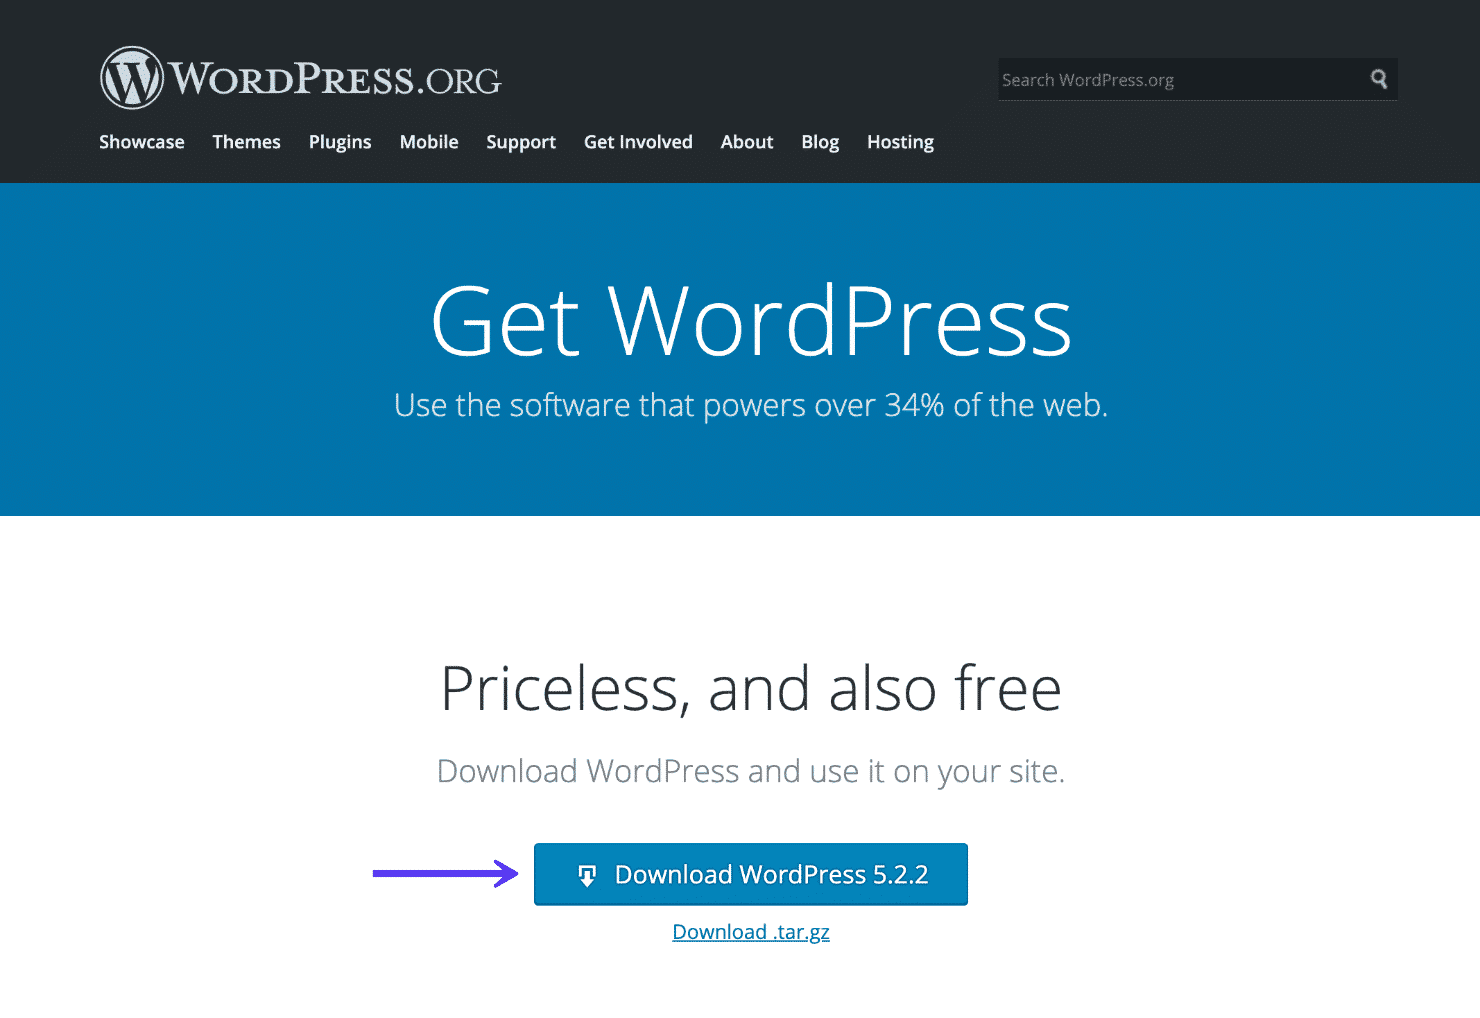
Unzip this file on your computer. Inside, you will want to delete the wp-content folder and the wp-config-sample.php file.
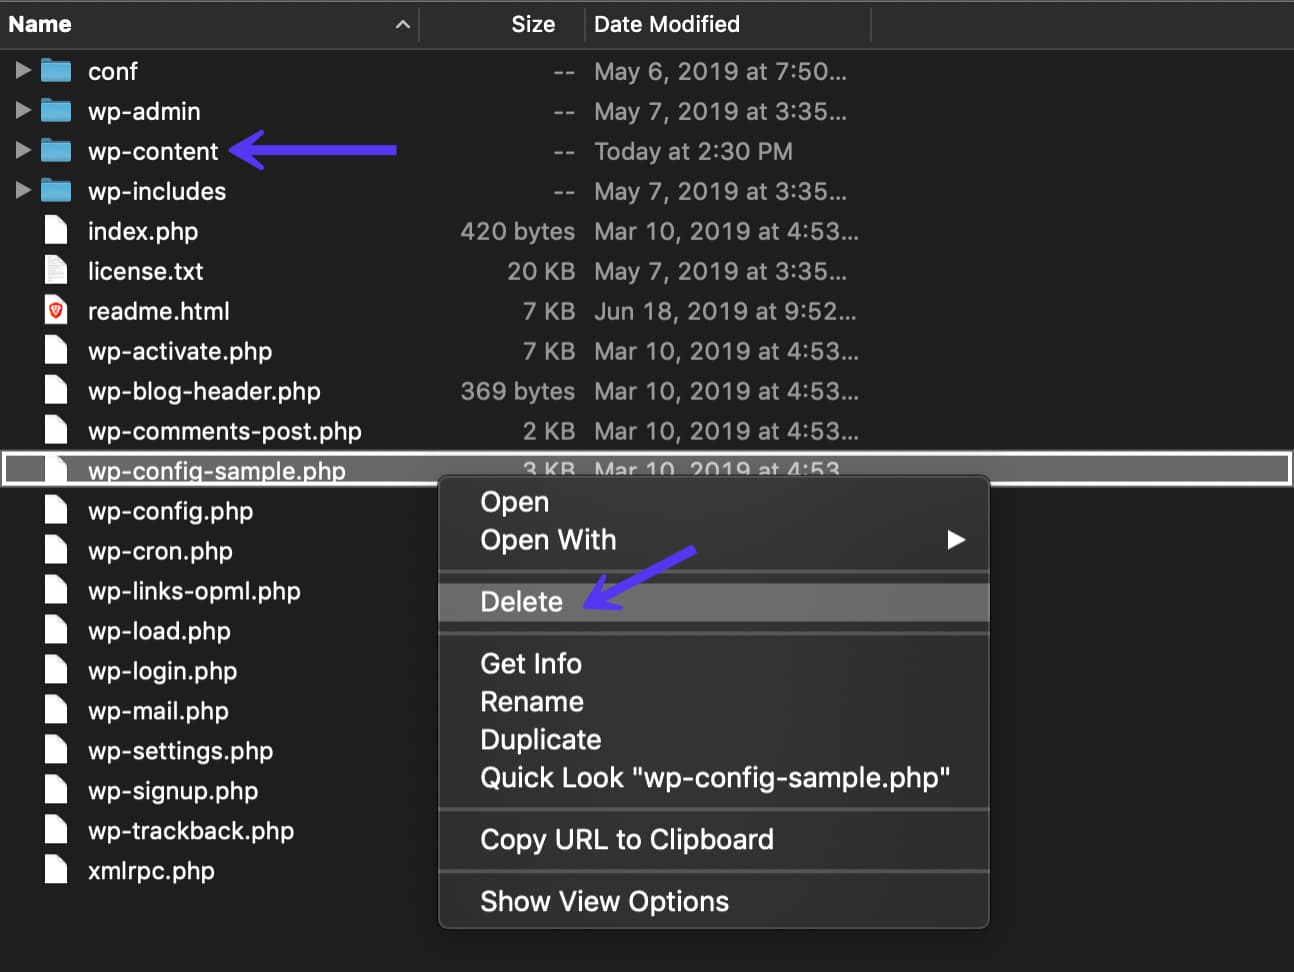
Then upload the remaining files via SFTP to your site, overwriting your existing files. This will replace all the problematic files and ensure you have fresh ones that are clean and not corrupted. It is recommended to clear your browser cache after doing this. Then check your WordPress site to see if the error still exists.
4. Check for Issues With Your Database Server
If nothing above has helped resolve your issue, we highly recommend checking with your hosting provider as it could be an issue with your database server. For example, if there are too many concurrent connections to your database at once, it could generate an error. This is because many hosts limit their servers on how many connections are allowed at once. Utilizing a caching plugin can help minimize the database interactions on your site. If you are a Kinsta client, you don’t need caching plugins, as we have fast server-level caching.
This problem can happen a lot on shared hosts, as someone else could theoretically be affecting your site. This is because shared hosts utilize all the same resources on servers. This is another reason we recommend using a high-performance managed WordPress host, so things aren’t overcrowded. It also means the environment is typically fine-tuned to handle large amounts of traffic, specifically to WordPress sites.
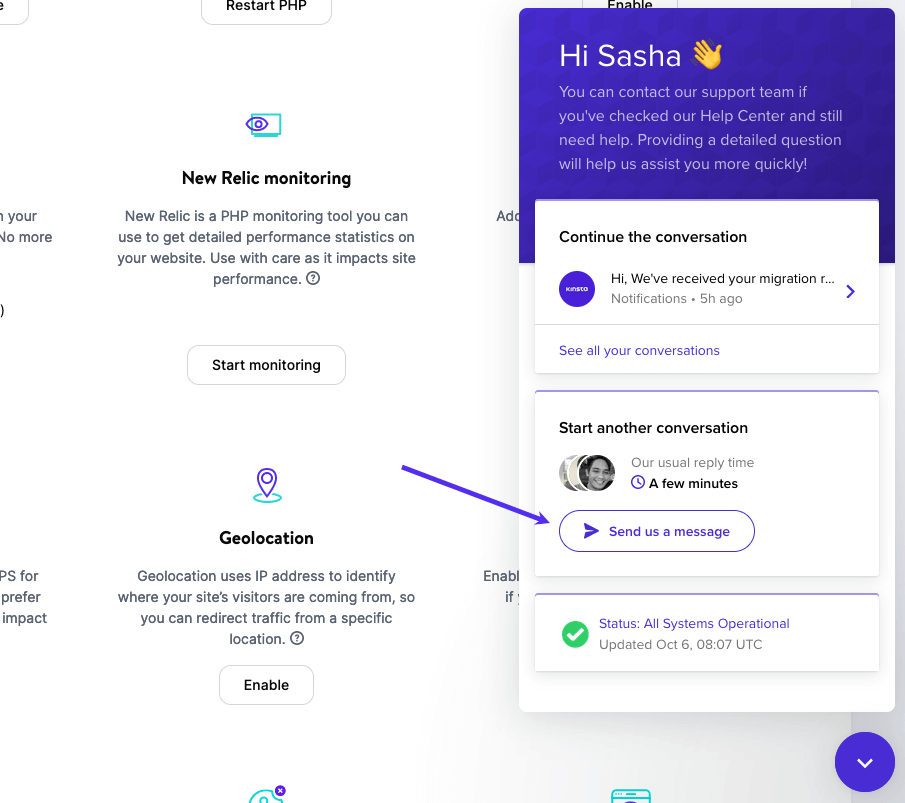
The knowledgeable Kinsta support team is always a click away on the bottom right side of the dashboard and available 24/7/365 if you need help. And don’t forget we have representatives to assist you in multiple languages, including English, Portuguese, Spanish, Italian, French, German, Japanese, Danish, Dutch, and Swedish.
5. Restore Latest Backup
And last but not least, you can always resort to a backup if needed. In some cases, this might be a faster way to resolve the issue if you aren’t worried about losing any data between when your last backup was taken. Many hosts have their own backup restore process. Remember that you might need to restore both your database and your files.
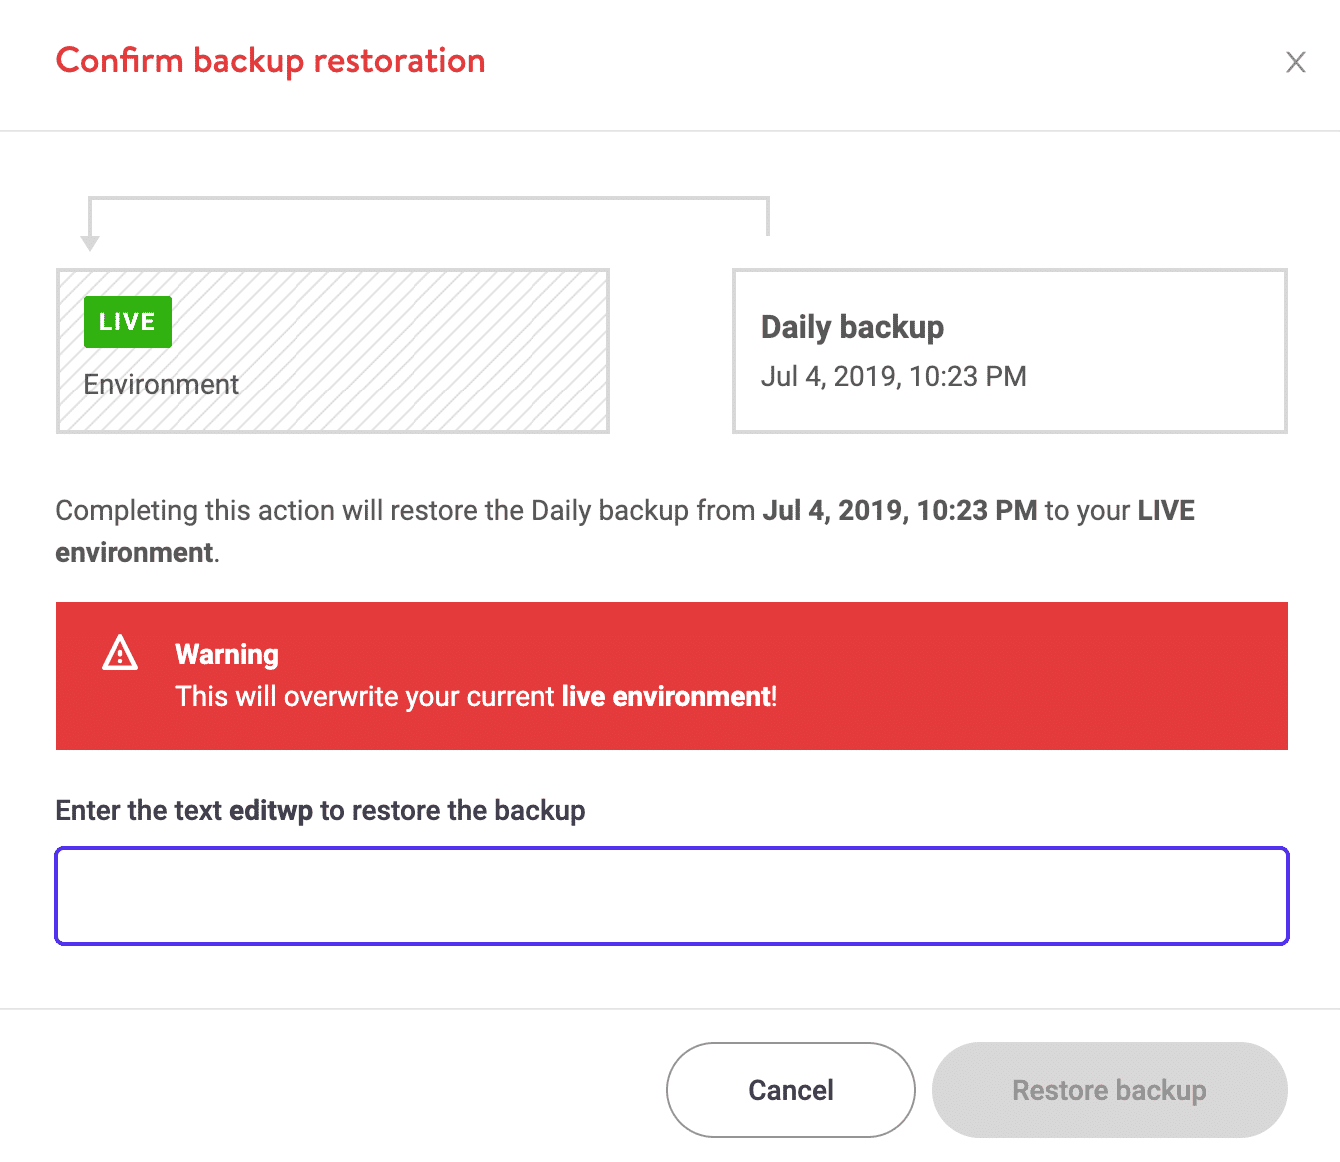
If you are a Kinsta user, you can quickly restore a backup of your site within the Backups section of your site. Choose the time you want to revert and click on Restore to. You can then select whether you want to restore to Staging or your Live site.

You will then be prompted to confirm the restoration. Enter your site name and click on “OK.” It also creates a backup at the restoration time so you can undo the restoration if needed.
Check Out Our Video Guide to Fixing The “Error Establishing a Database Connection”
Summary
As you can see, there are quite a few ways to fix the “error establishing a database connection” in WordPress. The most common being invalid credentials in the wp-config.php file. Checking to ensure those are correct is the best place to start. The last thing you want for a website is to experience downtime.
Hopefully, one of the steps above helped you get your site back up and running. Remember, you can always restore your site from a backup if needed.
Have you experienced the “error establishing a database connection” message on your site? If so, were you able to resolve it? Let us know below in the comments.


