Learning how to display code in WordPress is crucial for bloggers and content creators who consistently publish code online for their readers to use. Computer code, by design, renders something new on the frontend of a website rather than the tags, slashes, and brackets you find within the actual code snippets.
This, however, poses a problem for those writing about development and design, since you need a way to properly display the code without it doing its real job, like creating a button or adding styling to a paragraph block.
Simply put, if you write a blog post and put a code snippet example in there, you’ll want to prevent the code from actually working! This way, readers can see the code in its raw form, view the code in a nicely formatted block, and even copy its contents to use in their development work.
In this guide, we’ll show you exactly how to display code in WordPress (regardless of your WordPress theme) using several different methods, and we’ll help you decide which method works best for your workflow.
Check Out Our Video Guide On How To Display Code in WordPress:
What Happens When You Add Regular Code in WordPress?
You may wonder what would happen if you wrote some code into the WordPress visual editor. After all, you’re not messing with the text or code editors, so shouldn’t your code snippet work just fine?
Probably not.
Here are some of the unusual results that may occur:
- The code partially appears, with bits of coding showing on the frontend of the post and others disappearing. This looks unprofessional to visitors; it means your code is not accurate.
- Nothing at all shows up, with the code completely vanishing from sight on the backend and not showing anything on the frontend of your post.
- You see odd formatting — often something that’s not user-friendly or publishable for an audience.
- The code may only partially render
To illustrate a couple of these results, we’re going to use the following HTML code snippet:
<!DOCTYPE html>
<html>
<head>
<style>
.cities {
background-color: green;
color: white;
border: 4px solid black;
margin: 10px;
padding: 10px;
}
</style>
</head>
<body>
<div class="cities">
<h2>Chicago</h2>
<p>A nickname for Chicago is The City of Broad Shoulders.</p>
</div>
<div class="cities">
<h2>Los Angeles</h2>
<p>A nickname for Los Angeles is The City of Angels.</p>
</div>
<div class="cities">
<h2>New York</h2>
<p>A nickname for New York is The Big Apple.</p>
</div>
</body>
</html>
This particular code snippet uses HTML styling elements to produce three green content blocks with headers and paragraphs.
However, we’d like to display the raw code in a blog post, not have it actually render into those blocks.
Here are the results if we paste the code directly into the WordPress Gutenberg Block Editor:
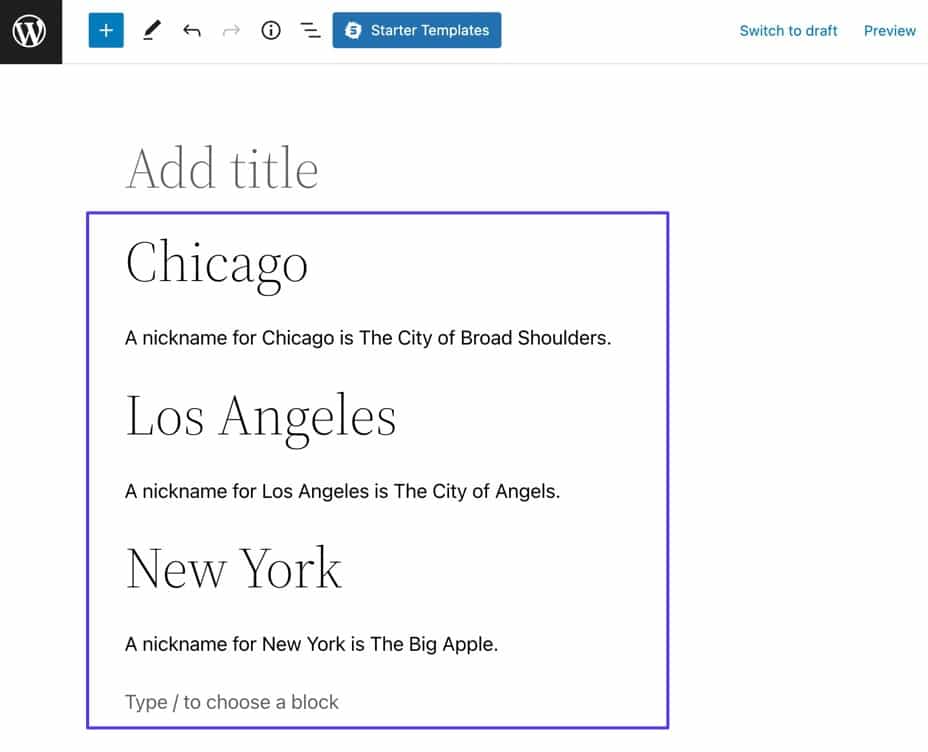
As you can see, WordPress tries to use the code for its main purpose: to generate content — yet it strips the code of its styling, so it doesn’t provide the result we wanted to show to the readers.
To avoid situations like this, we encourage you to instead use one of the methods listed below to display code.
How To Display Code on Your WordPress Site (6 Methods)
These methods are listed from easiest to most difficult, and we have some special methods for those who enjoy writing code and content in markdown editors (as opposed to WordPress).
Method 1: Using the Gutenberg Block Editor (Default)
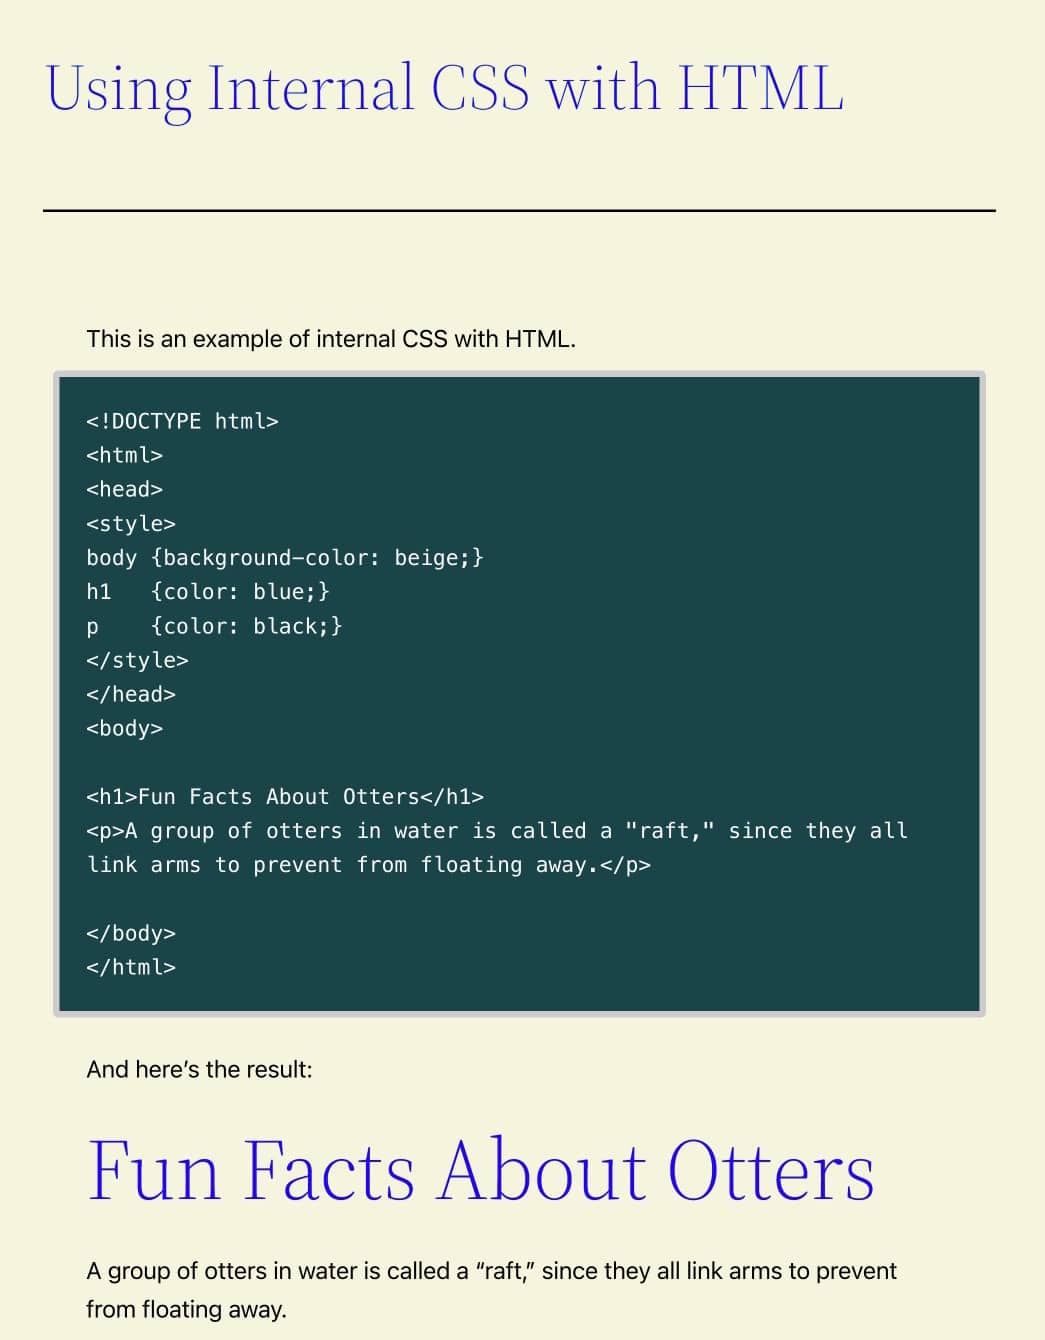
To practice displaying code in WordPress, you can use the following code snippet, which uses HTML and internal CSS to produce a simple result with one blue header and one black paragraph:
<!DOCTYPE html>
<html>
<head>
<style>
body {background-color: beige;}
h1 {color: blue;}
p {color: black;}
</style>
</head>
<body>
<h1>Fun Facts About Otters</h1>
<p>A group of otters in water is called a "raft," since they all link arms to prevent from floating away.</p>
</body>
</html>
When put into action, the code shows this on the frontend:

But by following this tutorial, you’ll learn how to display the raw code itself, not what the code is supposed to show on the frontend.
Step 1: Add a Code Block in WordPress
The WordPress Gutenberg editor already has a built-in Code block, which allows you to display snippets of code without losing any of its formatting or actually activating the code.
To begin, open a post or page in WordPress, then click one of the Add Block buttons.
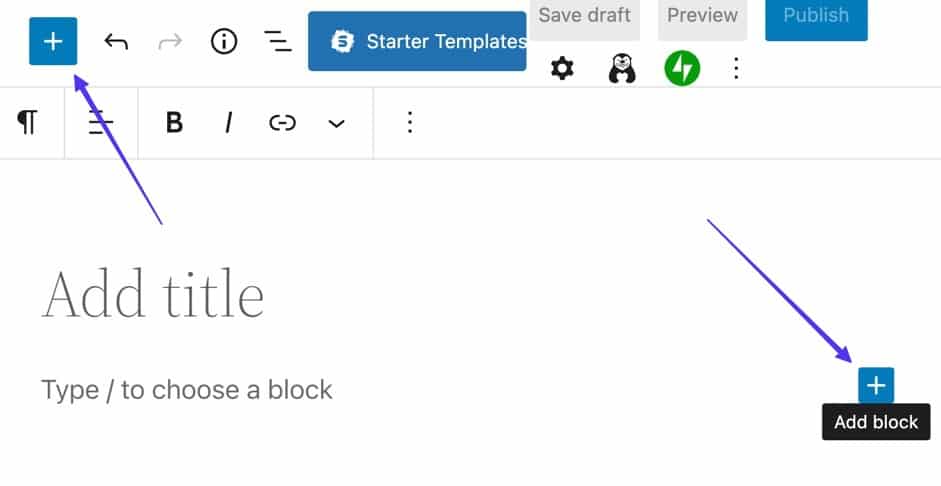
Click one of the Add Block buttons
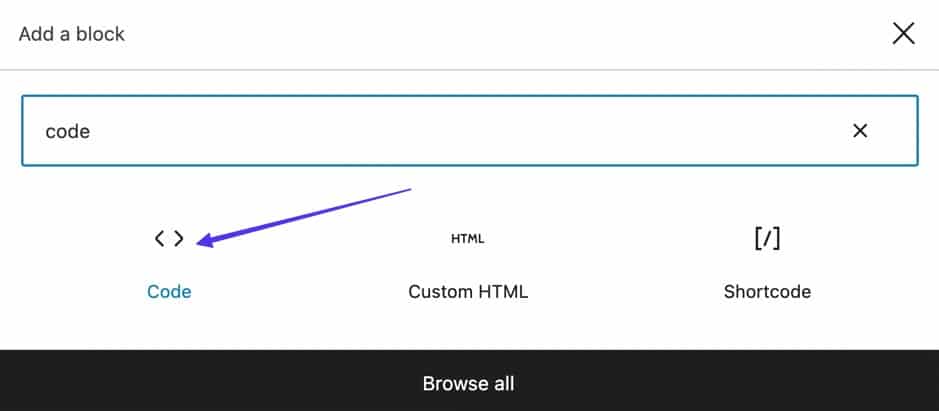
This reveals the collection of blocks available. You can search for the Code block or type a keyword like “code” into the search bar.
Once you see the Code block (with brackets icons), click on that to insert a chunk of code into the post.
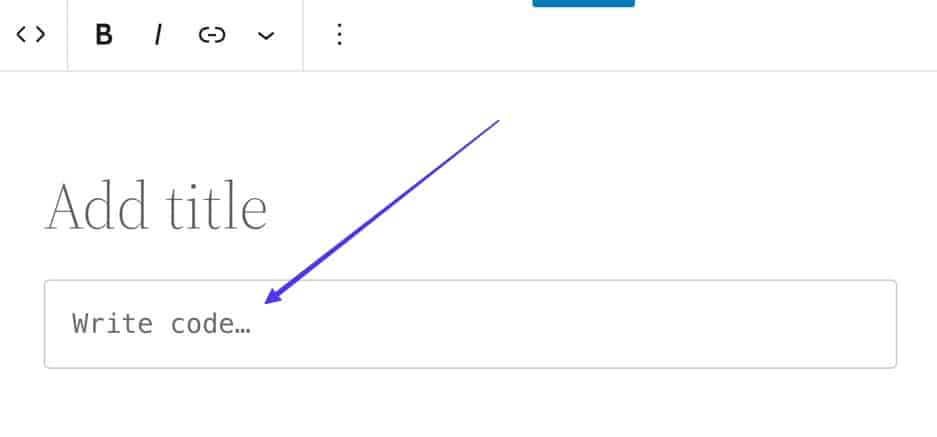
You should now see a field with the prompt “Write code…”.

The WordPress Gutenberg editor supports markdown, so you can also find and insert the Code block by typing a forward slash (/) into the editor, then start writing “C” or “Code”. WordPress will then show all relevant blocks, giving you a faster way to insert them.
It’s easy to confuse the Code block and the Custom HTML block. However, the Custom HTML block is for adding custom HTML to render on the frontend, not for adding raw code for display.
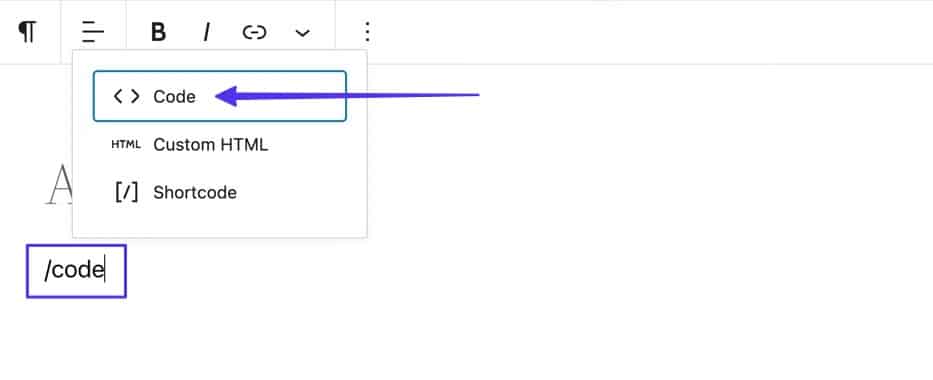
Step 2: Paste Display Code Into Code Block Field
Now it’s time to copy the code you’d like to display and paste it into the box that says, “Write Code…”.
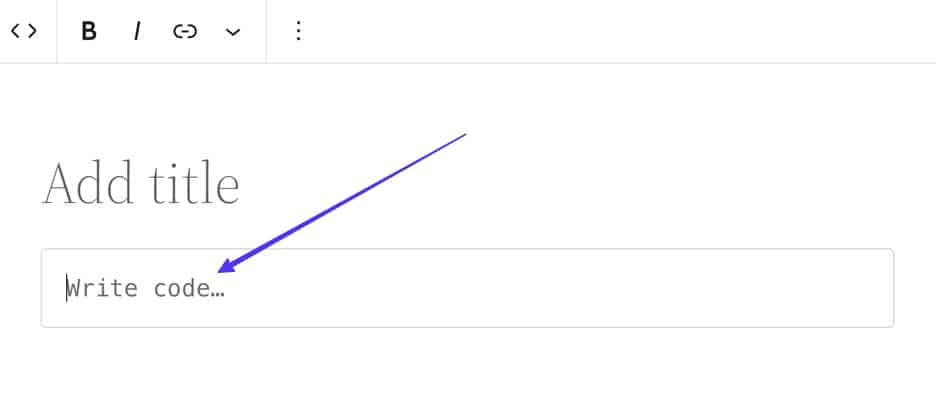
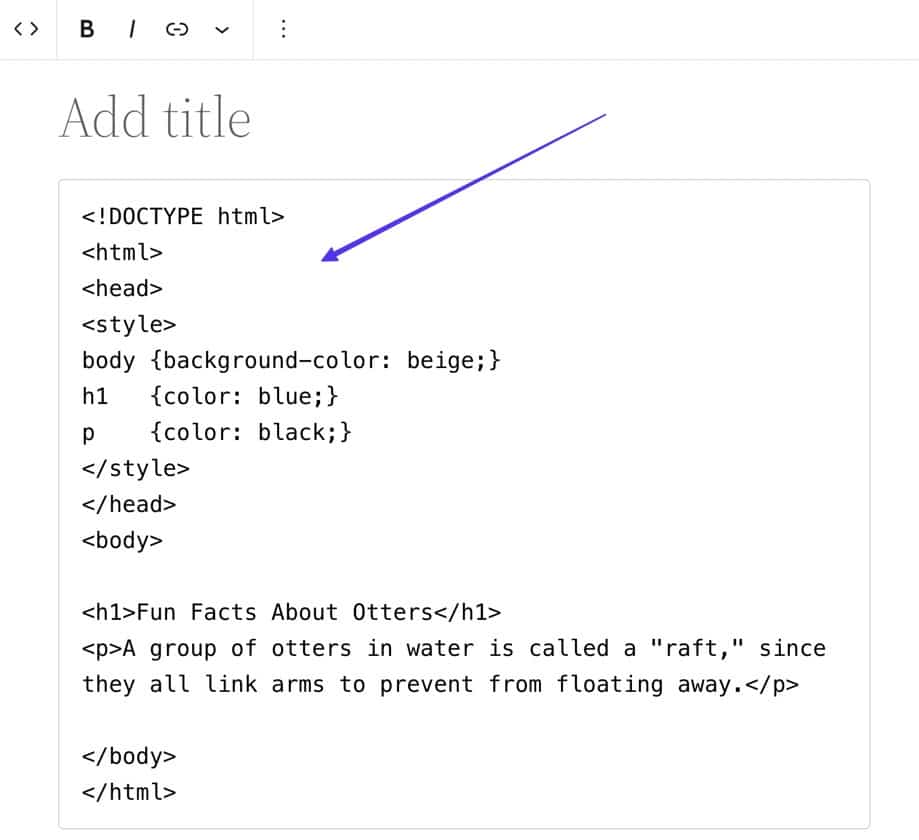
Your code now appears inside the box.
What’s great about the Code block is that it respects all spaces and tabs you already had within the code snippet. As a result, it shouldn’t look any different from the source you copied it from.
Step 3: Publish and View Results
To display your code on your WordPress post or page, finish the process by clicking on the Publish button.
You can also get an idea of what it looks like before publishing by selecting Preview.
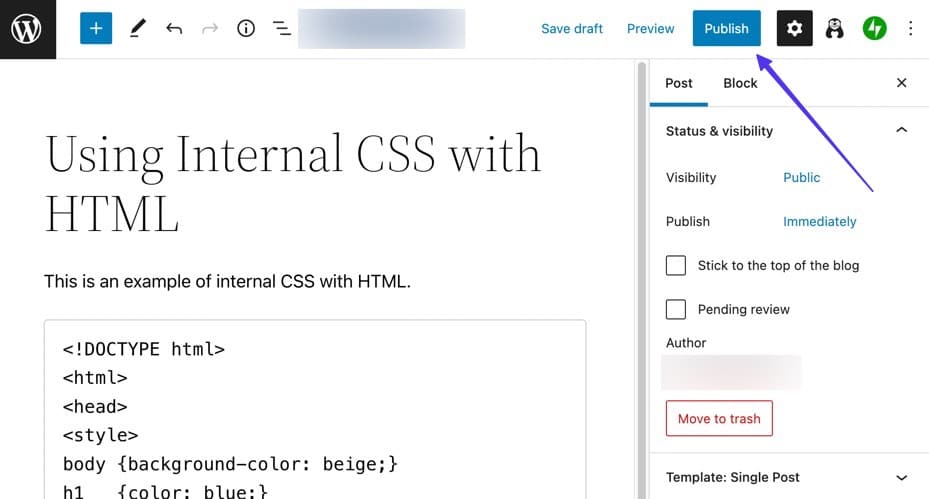
Once you’ve hit the Publish button, visit the live version of that post to confirm your code chunk is displaying as raw code.
As you can see, the Code block is fairly simple, but it provides necessary functionality for maintaining formatting when publishing code on blog posts.
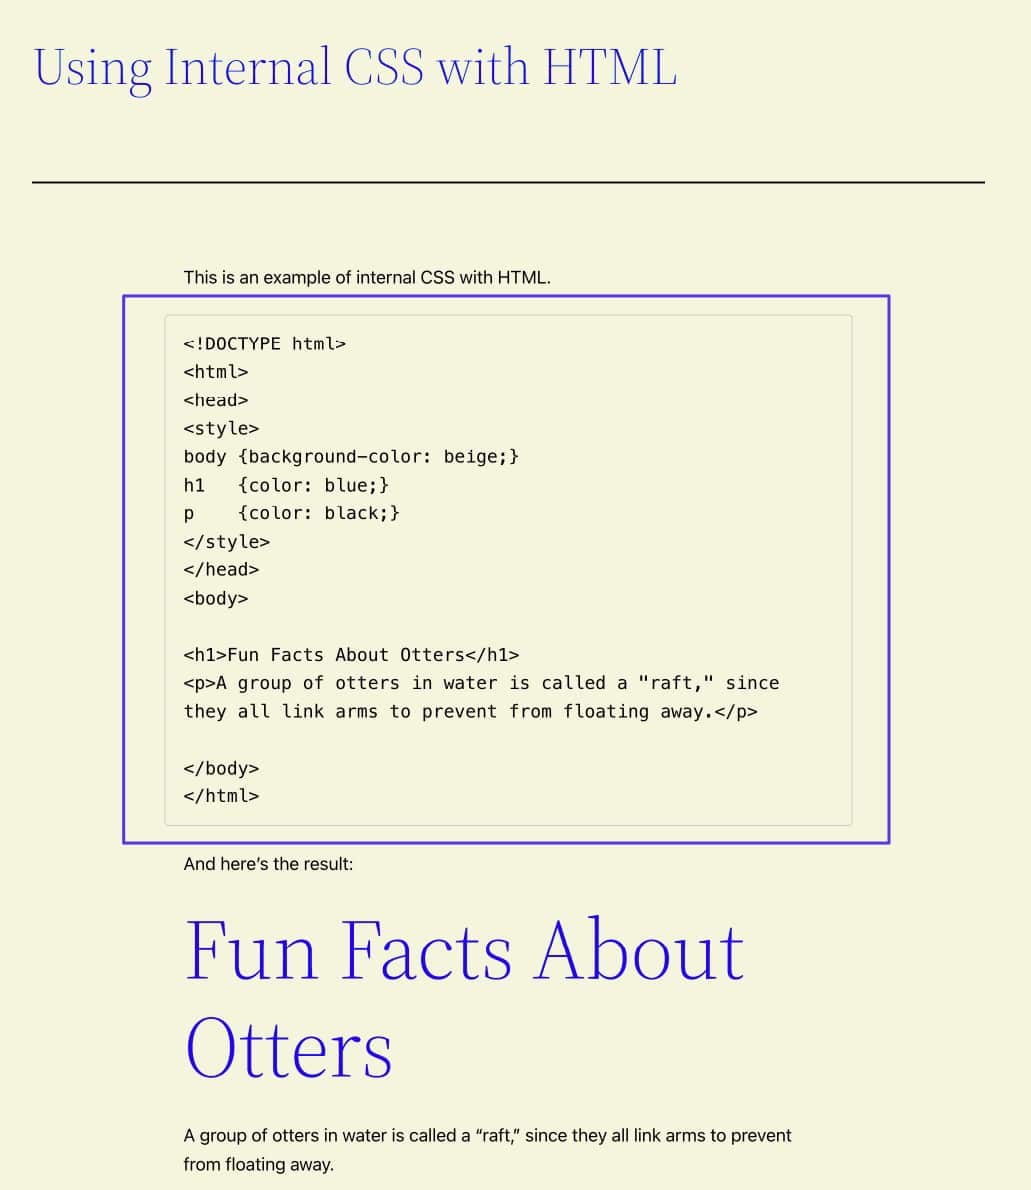
Take a look at the below screenshot. In our example here, nothing has changed from the original code snippet; it has simply been presented on the frontend in a grey box.
Step 4: Consider Formatting the Code Block
To make the Code block stand out a bit, think about changing its appearance from the default.
To reveal styling options for the block, select the Code block, then choose the Settings (gear icon) button. This opens the Block tab, which only shows the Block settings for your selected block — in this case, the Code block.
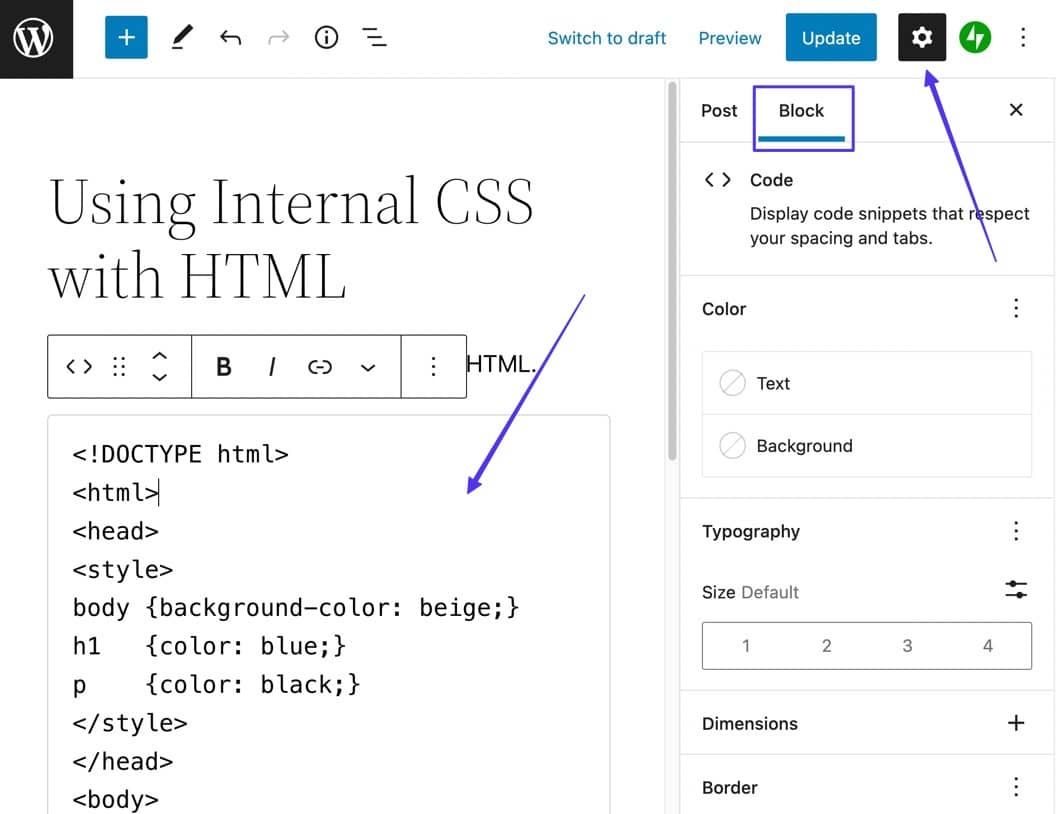
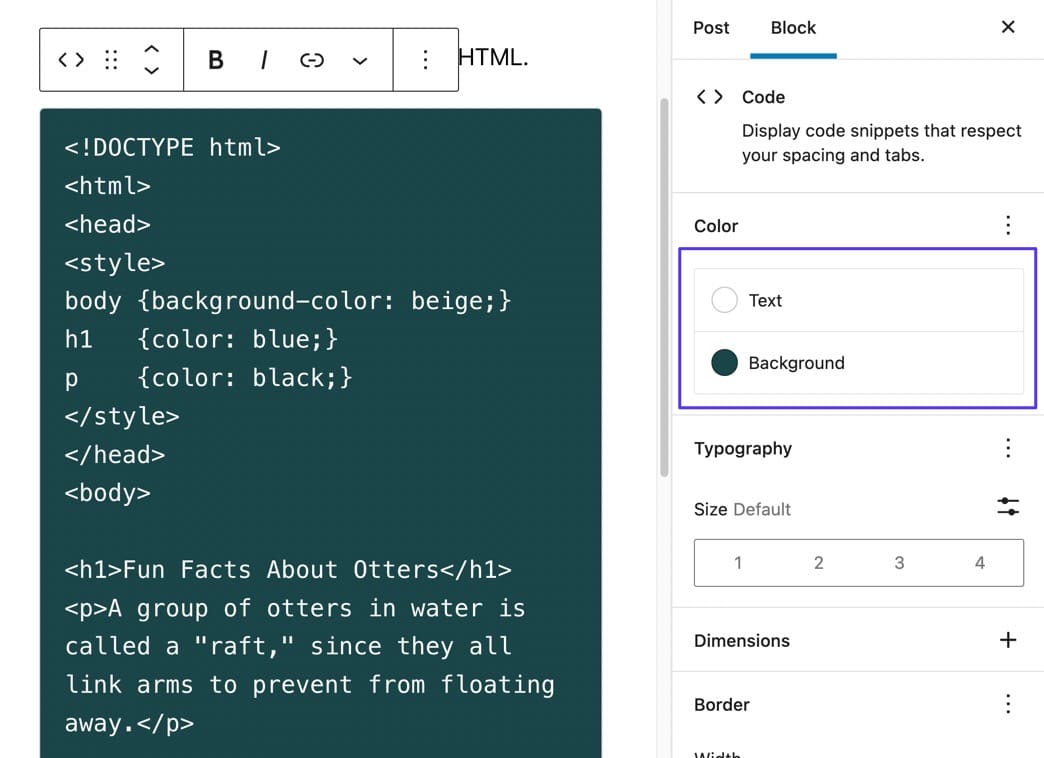
You can stylize the Code block however you want, with options to change things like text and background colors.
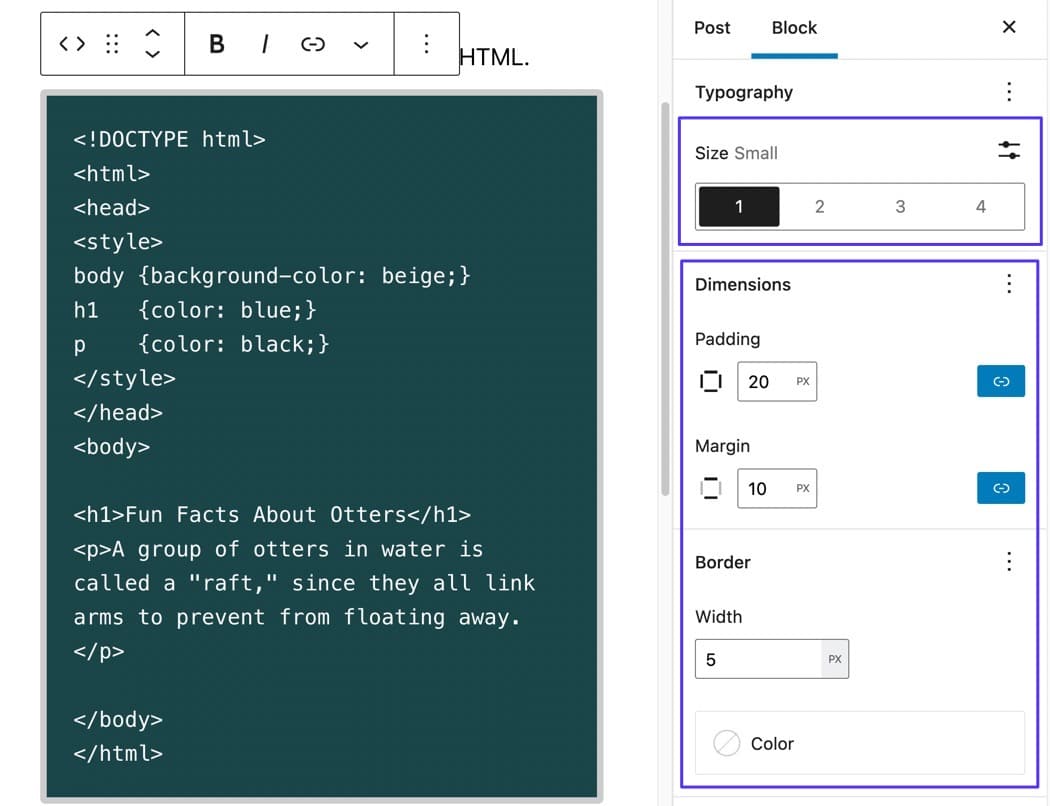
You can also:
- Change the size of the text
- Add padding and margins to the code box
- Include a border with a custom width and color
As always, click on the Publish button when you’re done editing the block, then view the results on the frontend of your WordPress post.
Method 2: Using a Plugin
Another way to display code on WordPress is by installing a plugin.
This method may seem a bit redundant considering that WordPress already has a built-in Code block, but some plugins offer additional features and formatting tools to make working with a plugin worthwhile. In short, you can make your code blocks prettier than what you’d get with the standard Gutenberg Code block.
In addition, some Classic WordPress Editor users may find partering with a plugin easier, since it’s a little trickier to display code in the Classic Editor.
To begin, you must choose a “syntax highlighter” plugin, which is a fancy way of saying that the plugin will highlight your source code and keep its formatting intact.
Here are some reputable plugins for displaying code on WordPress:
We’ll use the Enlighter plugin in this tutorial since it offers options to tag which types of code you display in your code boxes, along with many other styling features. However, you’re more than welcome to try out the others, as they all mostly do the same thing.
Step 1: Install a Syntax Highlighter Plugin
Install the Enlighter – Customizable Syntax Highlighter plugin on your WordPress site using your preferred plugin installation method.
After activation, the plugin is ready to insert code into any post/page with a Gutenberg block or Classic Editor Insert button.

Step 2: Insert the Enlighter Sourcecode Block Into a Post
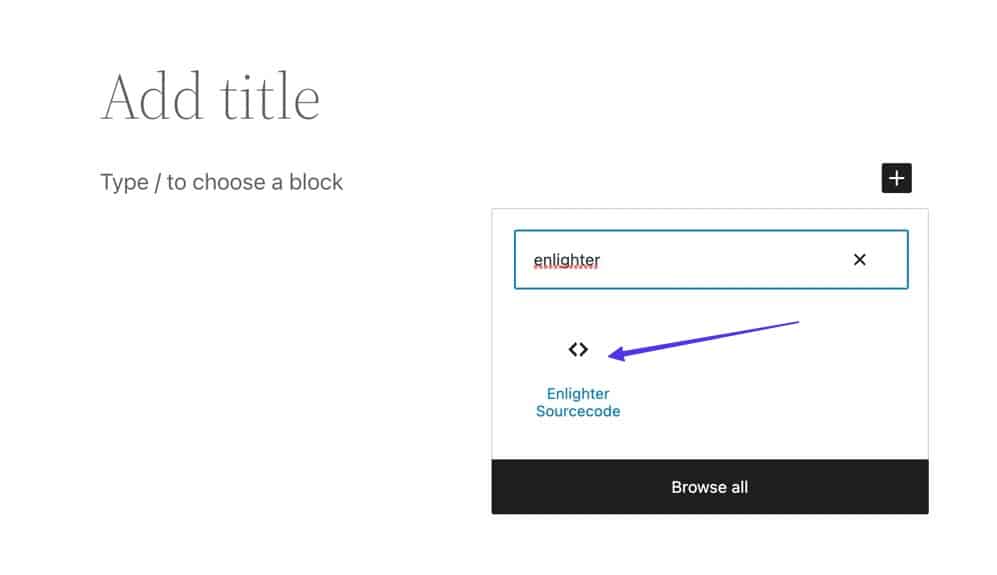
If you’re using the WordPress Gutenberg Block Editor, open a post in which you’d like to display code. Click one of the Add Block (+ icon) buttons to reveal the collection of blocks available.
Browse or type in a keyword for the Enlighten Sourcecode block. Click on that block to insert it into the post.
Step 3: Paste Code into the Syntax Highlighter Block
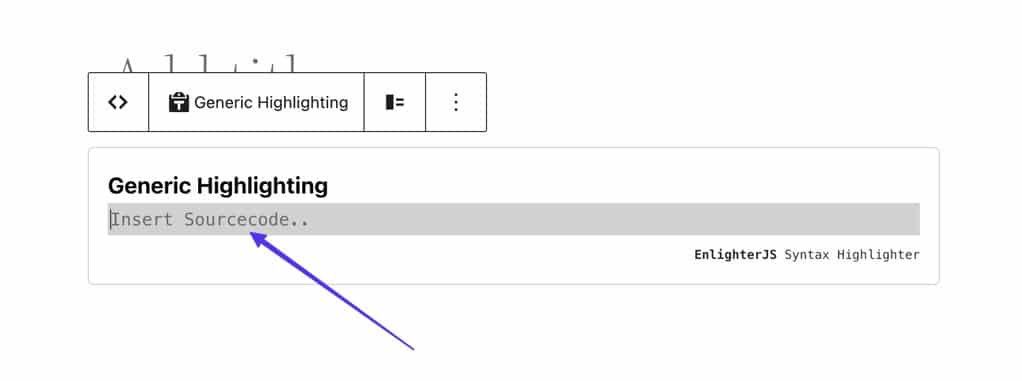
The Enlighter Highlighter block then shows up in the Block Editor, with a title for “Generic Highlighting” and a field to “Insert Sourcecode…”
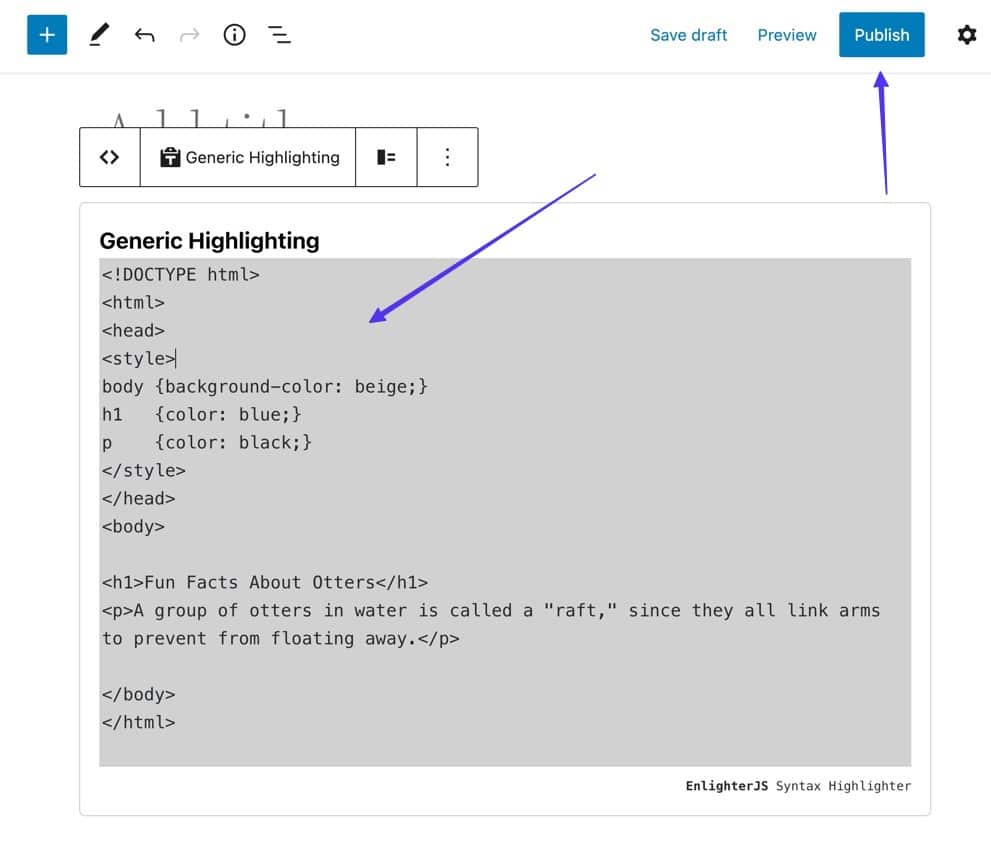
Take whatever code you’d like to display on WordPress and paste/type it into the “Insert Sourcecode…” field.
As a syntax highlighter, the plugin preserves all formatting choices and tabs. Once you’re happy with the result, click on the Publish button.
Step 4: Preview Code on the Frontend
With that, you can view the frontend of your post to see what site visitors see.
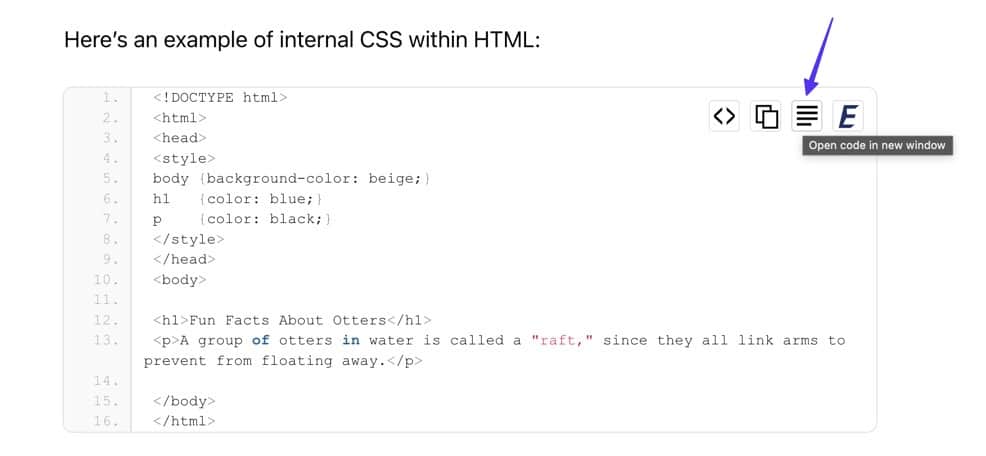
The Enlighter plugin offers a minimalist default theme for code display, with line numbers to help with organization and referencing.
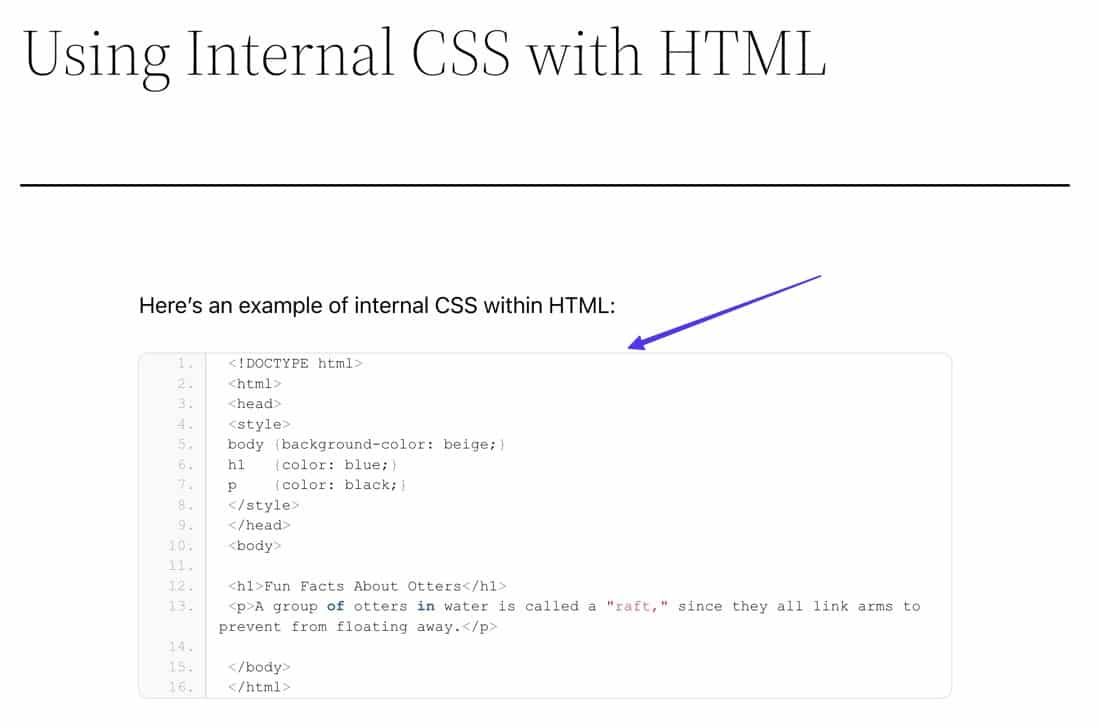
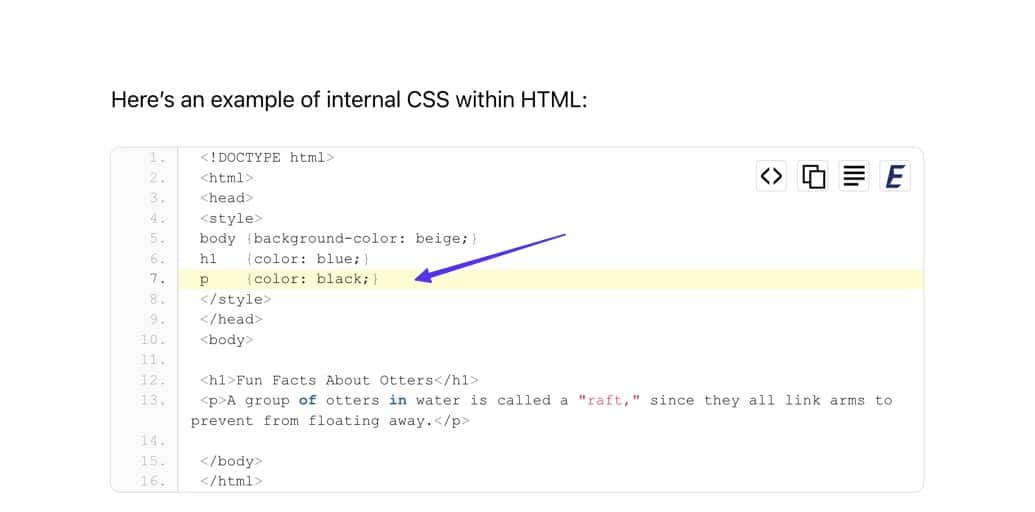
As we mentioned, using a plugin to display code on WordPress does have its advantages over the other methods. For instance, the frontend version of the Enlighter syntax plugin highlights lines as the user scrolls over your code.
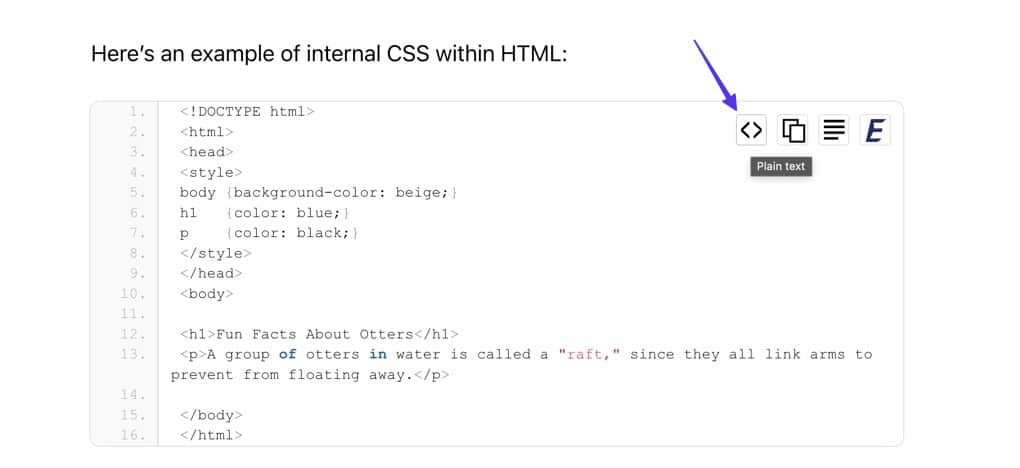
There are also several buttons in the upper-right corner of the code box, including one that presents the code in plain text, without the line numbers.
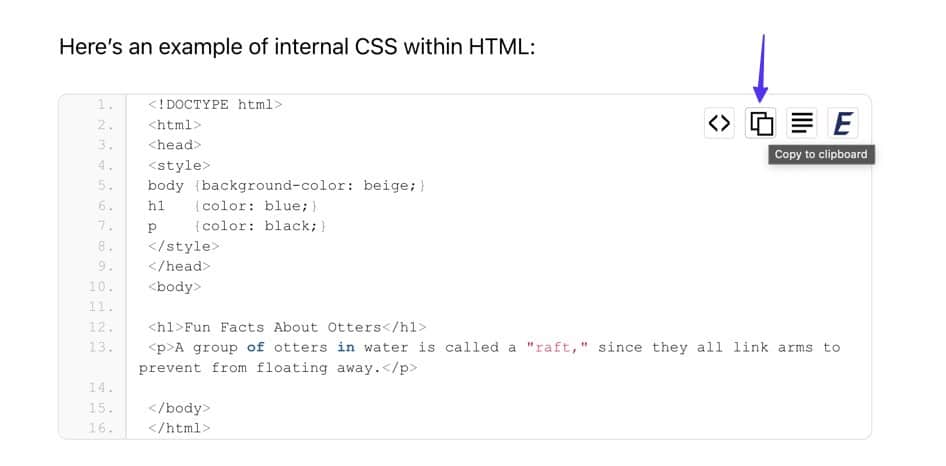
The second button is called Copy To Clipboard, which instantly copies everything within the code box to the user’s clipboard, which they can take and paste into any program they’d like.
Finally, the third button opens the code in a new window, presenting it in a plain text version of your browser window.
Step 5: Set Language and Line Settings for Code Box
The Enlighter plugin comes with various themes and powerful customization tools to make the code box look however you want. If you’d rather not use the default theme, go back to your post inside WordPress and click on the currently open Enlighter Sourcecode block.
This reveals the Block sidebar in WordPress. If it doesn’t appear, be sure to click the Settings (gear icon) button in the top-right corner of the WordPress window.
The first setting to customize is the Language field — this tells the plugin which code language is displayed so it can offer the proper formatting and highlighting.
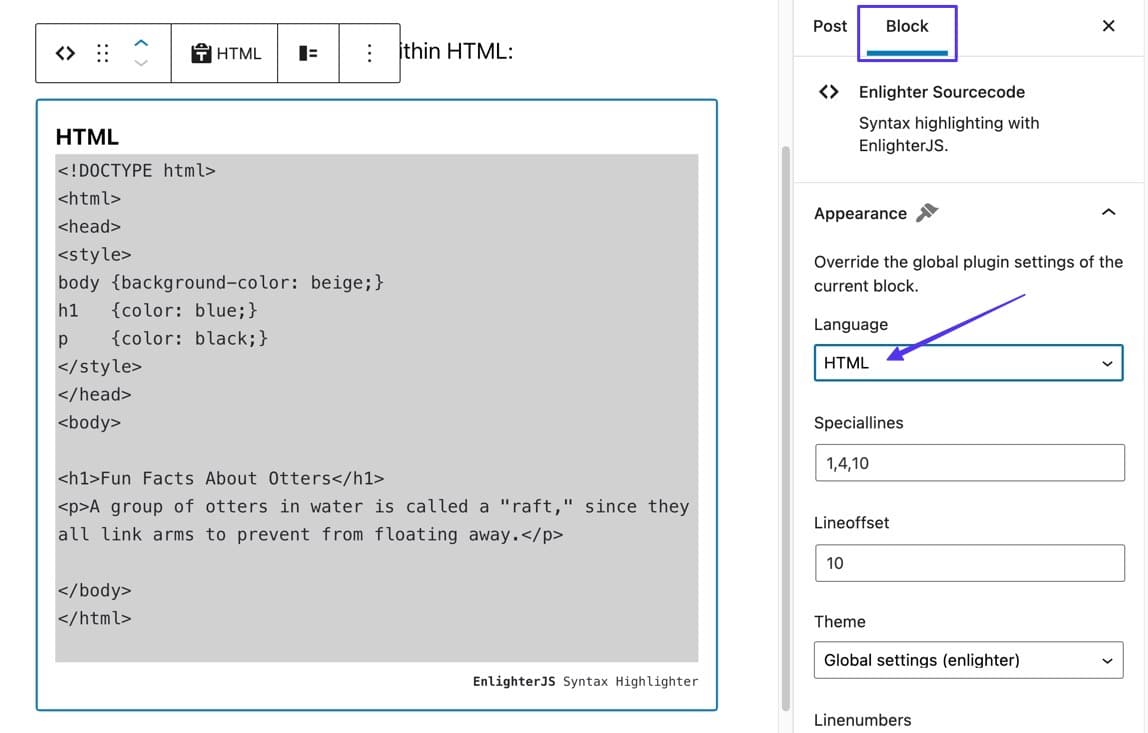
There are quite a few coding languages to choose from, so scroll through the list and pick the one that’s most appropriate.
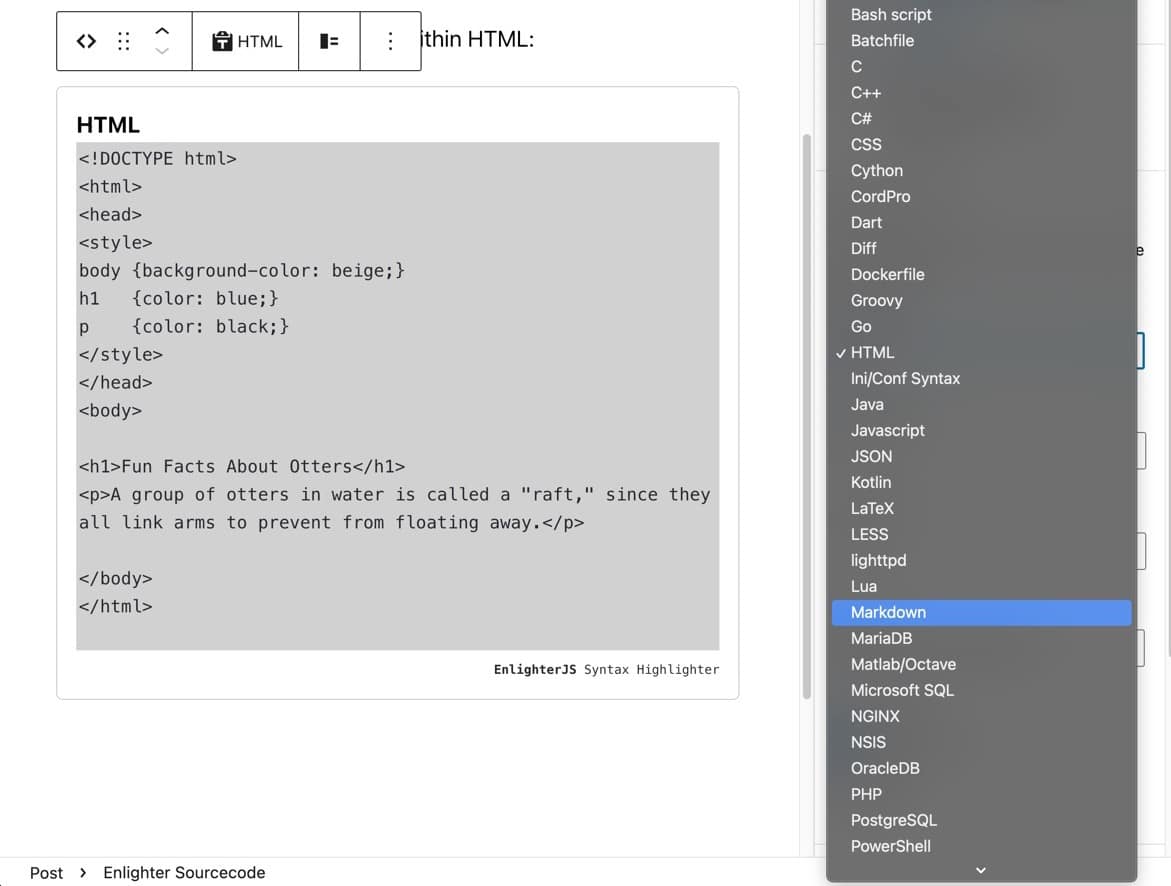
The Speciallines field highlights any lines you specify. To make this happen, type in line numbers separated by commas.
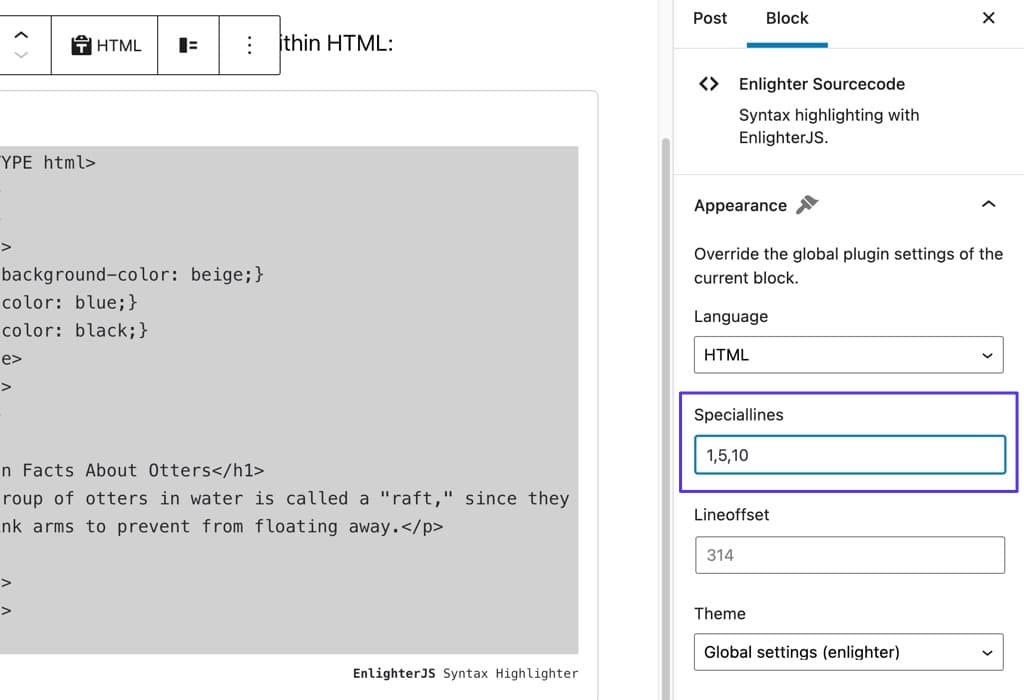
As a result, site visitors see highlighted lines for all the ones you specified.
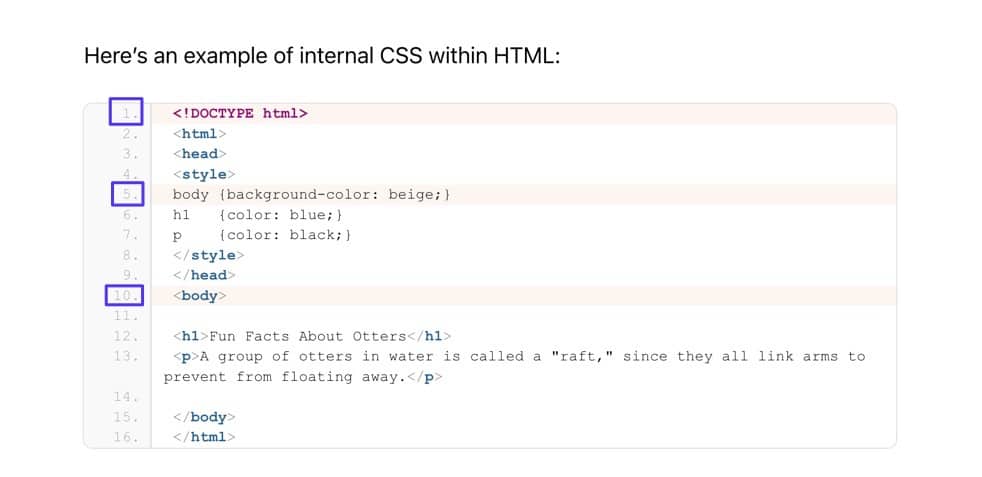
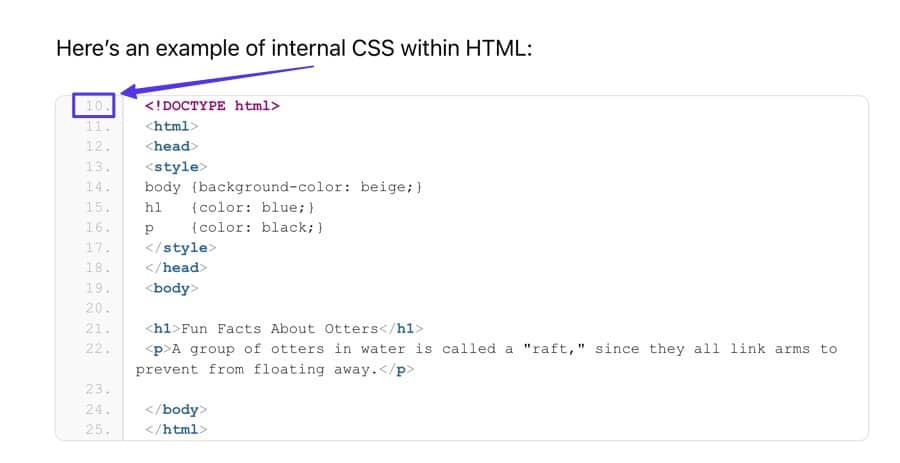
The Lineoffset field is a way to start your coding snippet at a specific numbered line, which is beneficial if you’re only displaying a subset of code that’s part of a larger collection of lines.
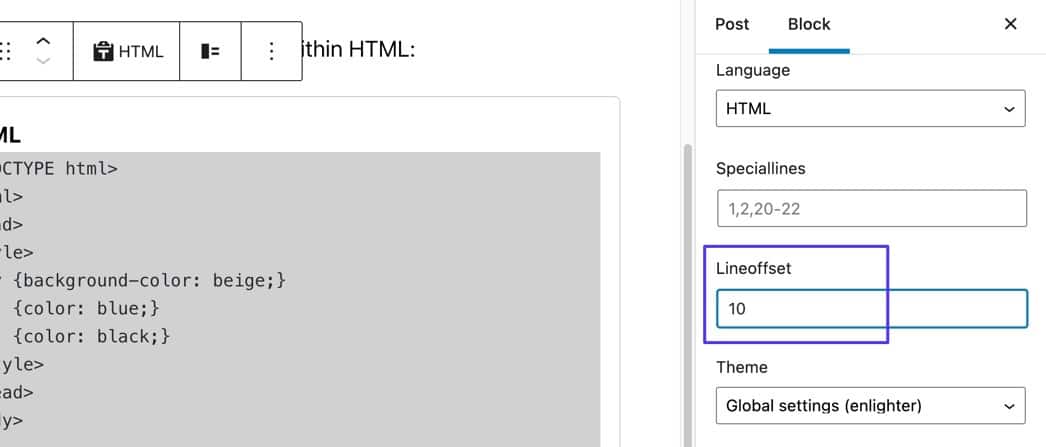
As you can see, typing 10 into the Lineoffset field starts the entire code box at the number 10.
Step 6: Choose a Theme
The Enlighter theme is the default theme from this plugin. However, the Theme field (still underneath the Block settings panel) presents a wide range of built-in themes to pick.
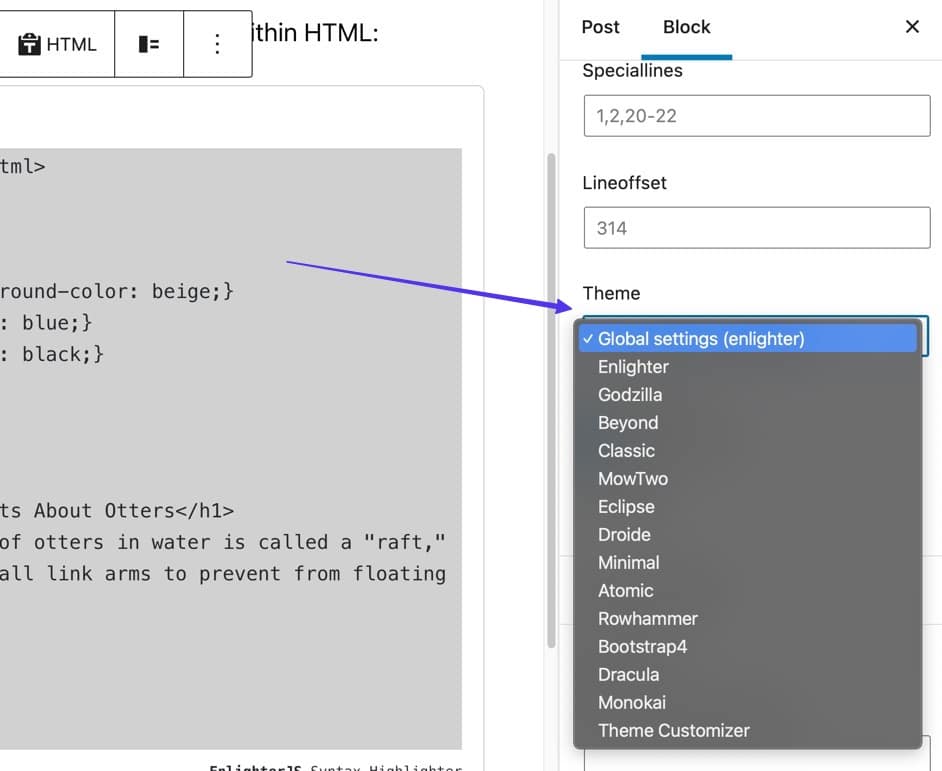
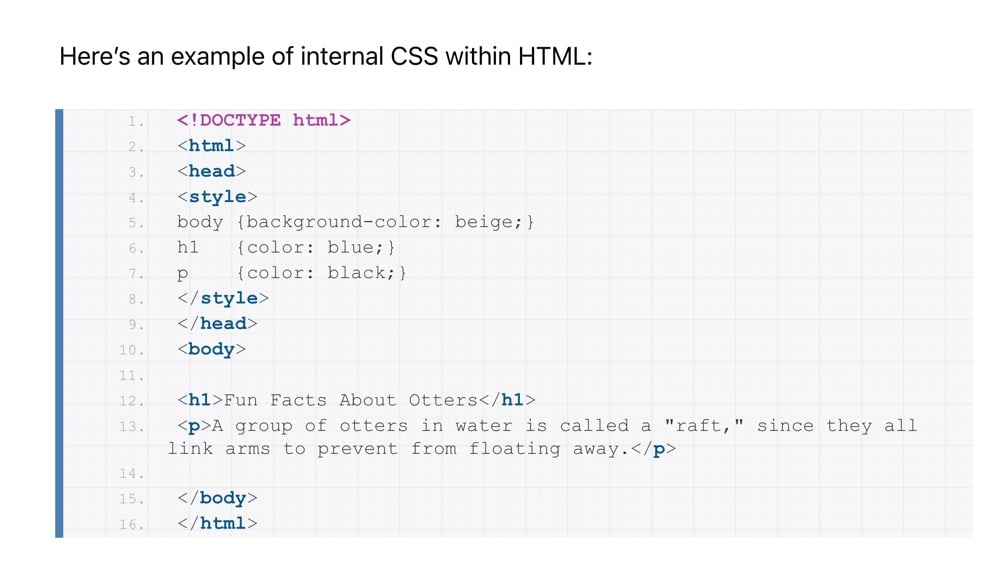
For instance, the Godzilla theme displays code as if it were on top of graph or drafting paper.
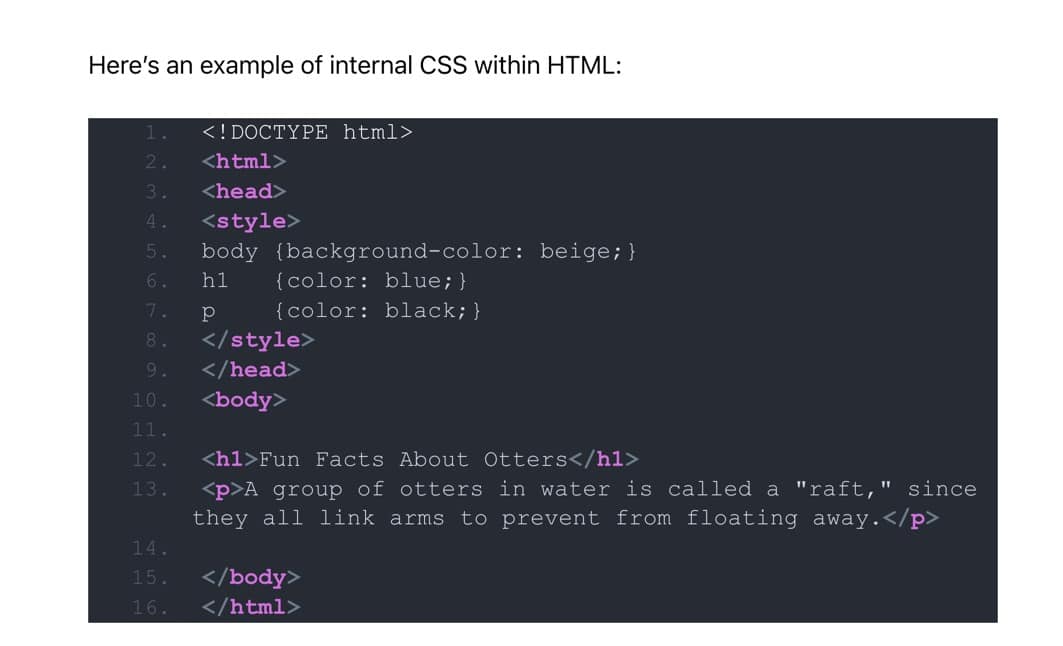
And the Atomic theme switches the background to a dark theme while offering mainly white text and pink coloring for code tags.
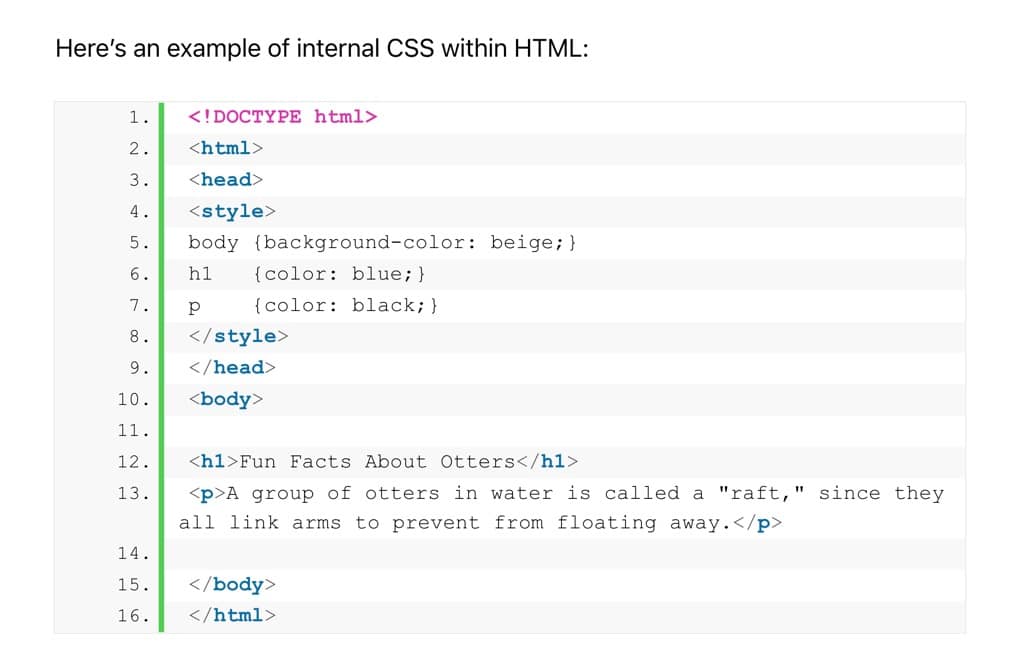
Another example is the Classic theme, which is a less minimalistic version of the Enlighter theme with brighter colors and more defined lines.
Step 7: Consider Building a Custom Theme
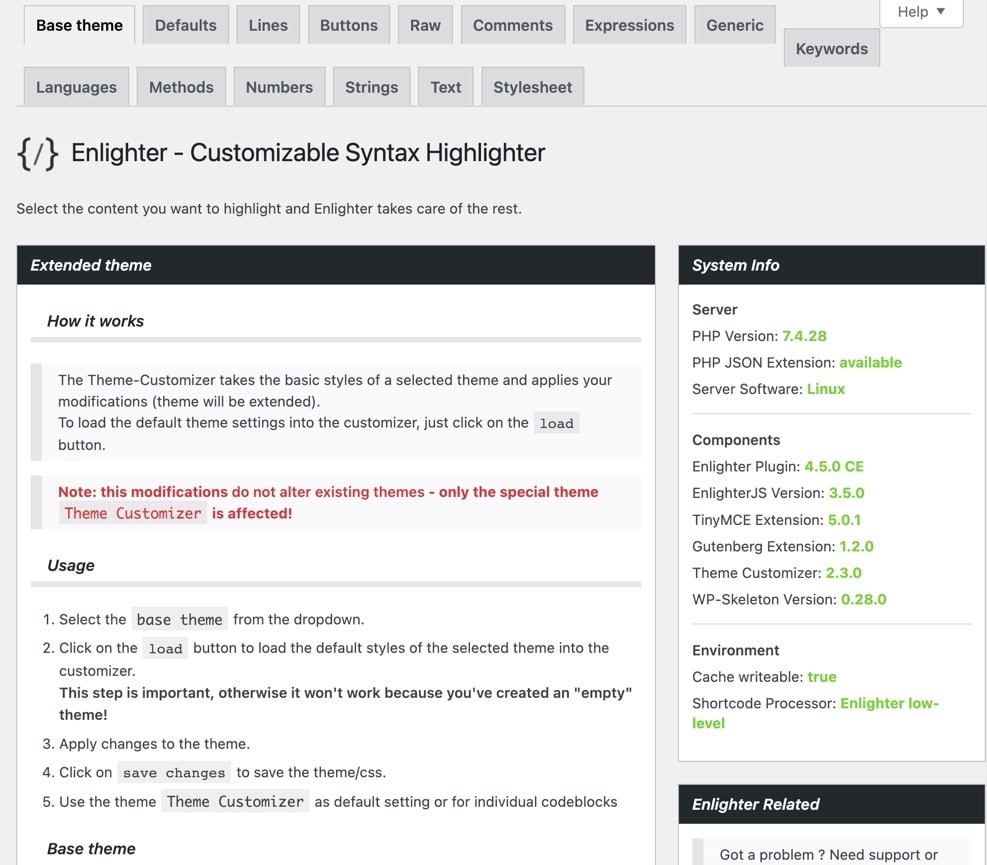
The Enlighter plugin provides a tab inside the WordPress dashboard for customizing every aspect of the plugin and its highlighting features.
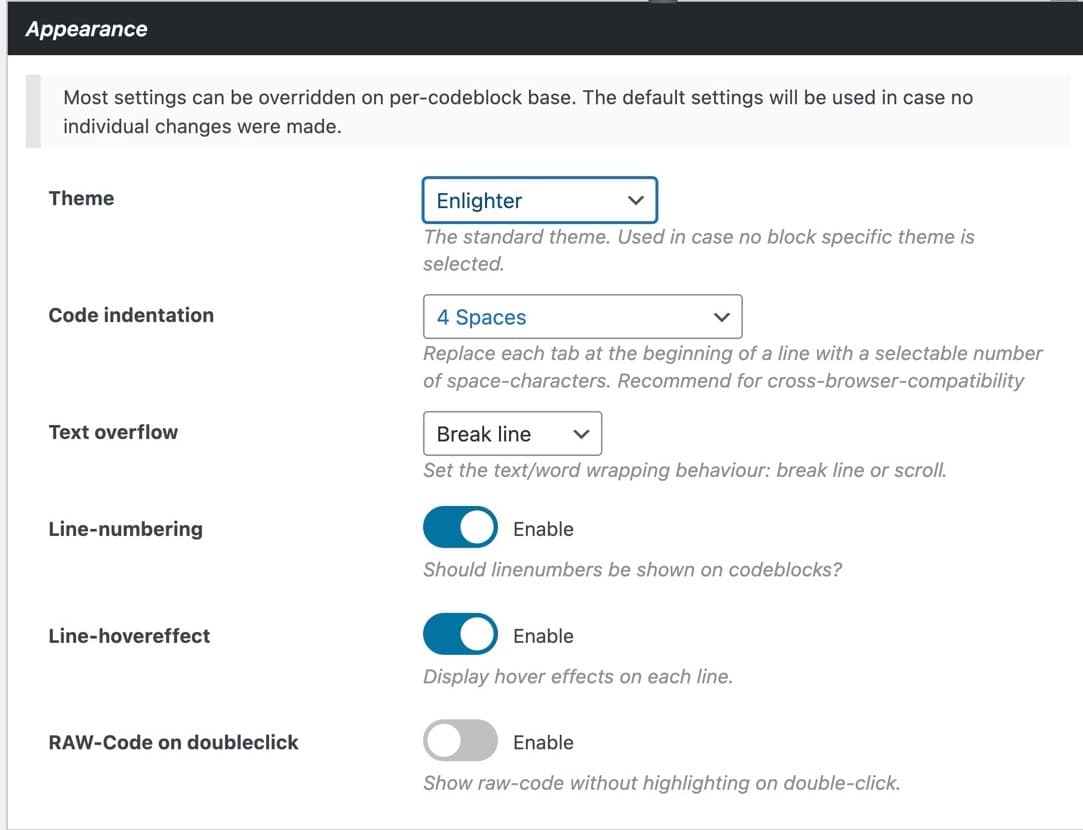
To gain full control over the design and display of your code boxes, go to the Enlighter tab (<> icon), then choose Appearance or Theme Customizer.
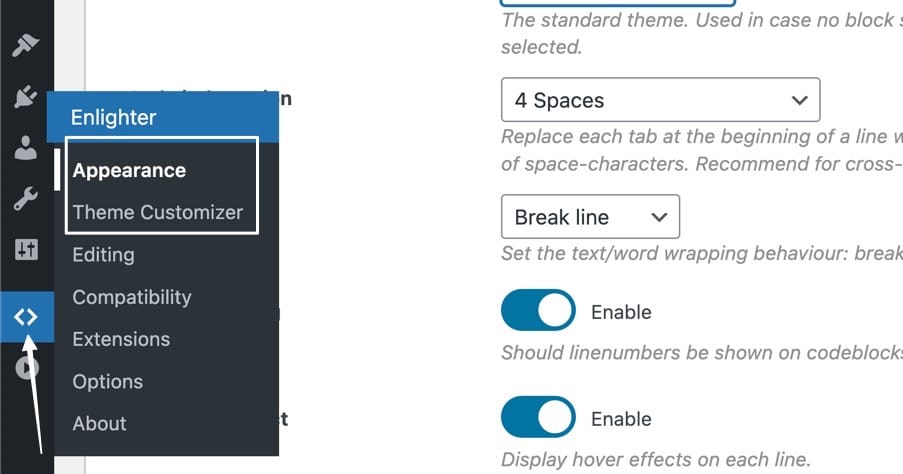
The Appearance tab lets you pick a standard theme while also giving you access to adjust elements like:
- Code indentation
- Text overflow
- Linenumbering
- Line-hover effect
- RAW-Code on doubleclick
The Theme Customizer section includes a long list of tabs for building a code highlighter theme from scratch, with options to adjust buttons, expressions, languages, and more.
Bonus: Using Enlighter With the Classic Editor
The Enlighter plugin works slightly different for those still using the Classic WordPress Editor.
Once you’ve installed the Enlighter plugin, go to any post or page and find the Enlighter Code Insert button in the control panel of the editor.
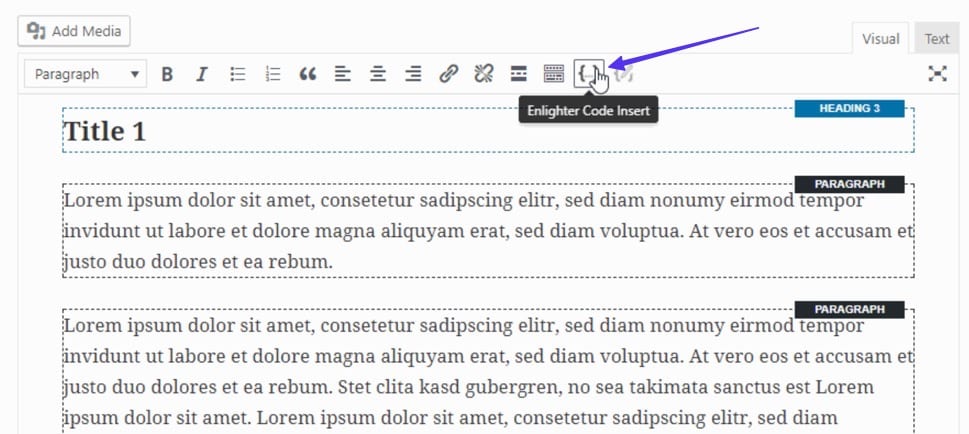
This brings up a new window called Enlighter Code Insert.
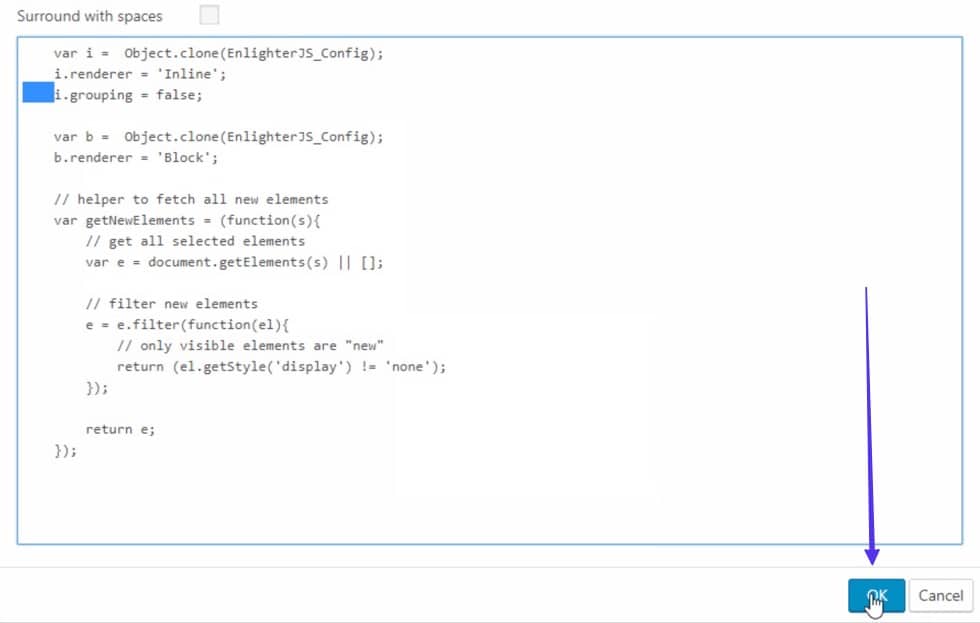
Paste the code you’d like to display in the large (unlabeled) field at the bottom.
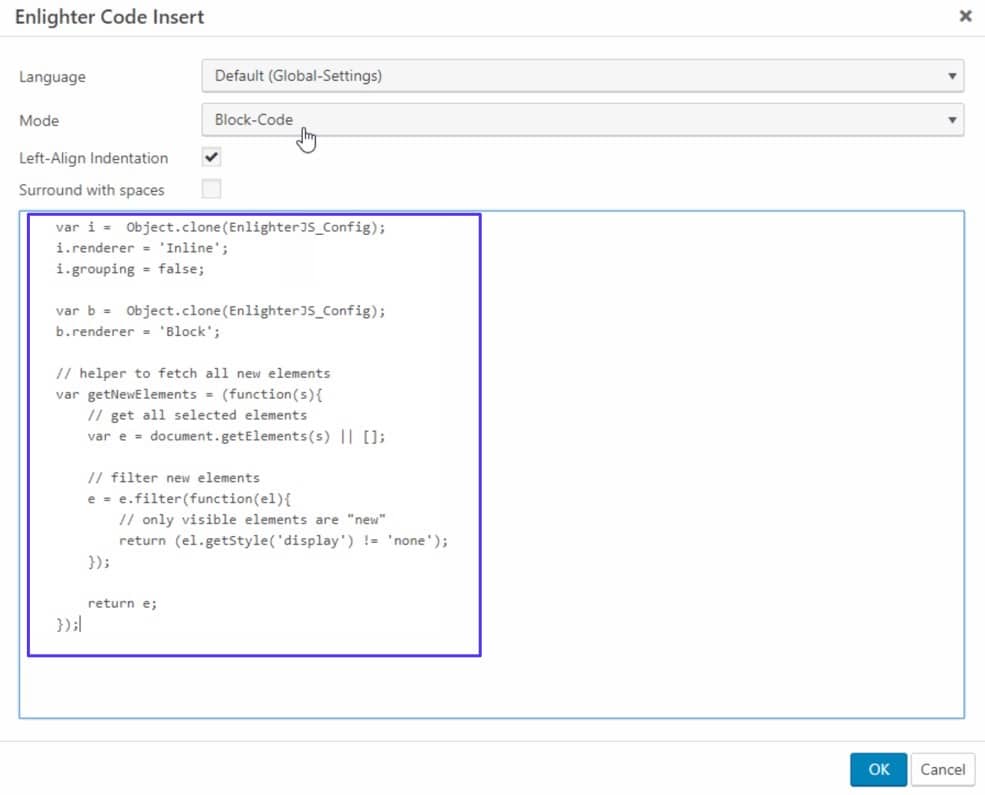
Click the dropdown menu from the Language field to select the right coding language.
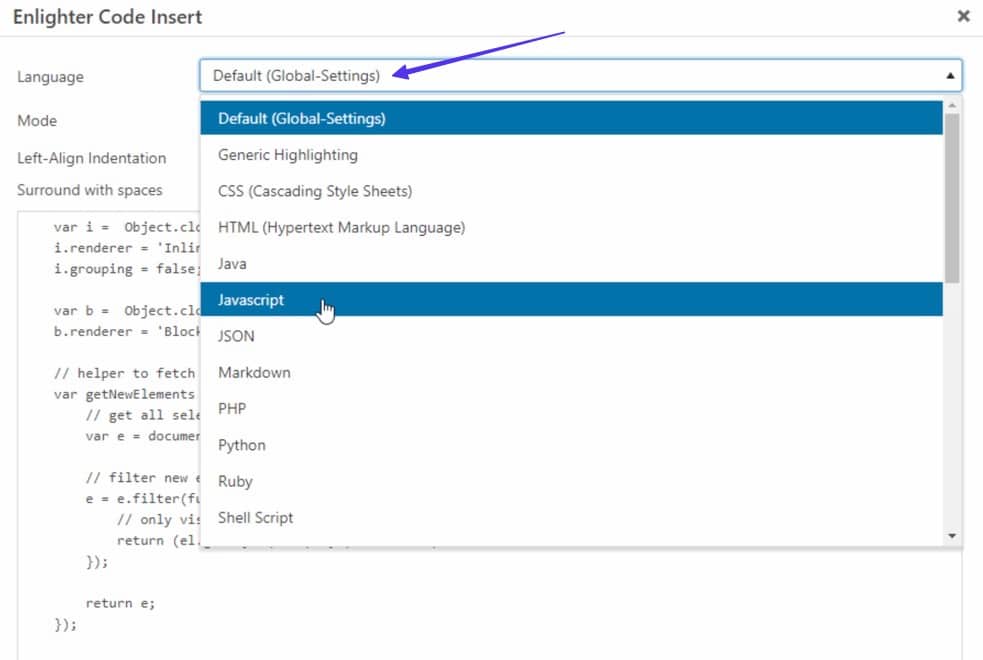
Once you’re done, click on the OK button. You can also make adjustments to the other features in that window, like adding line indentation.
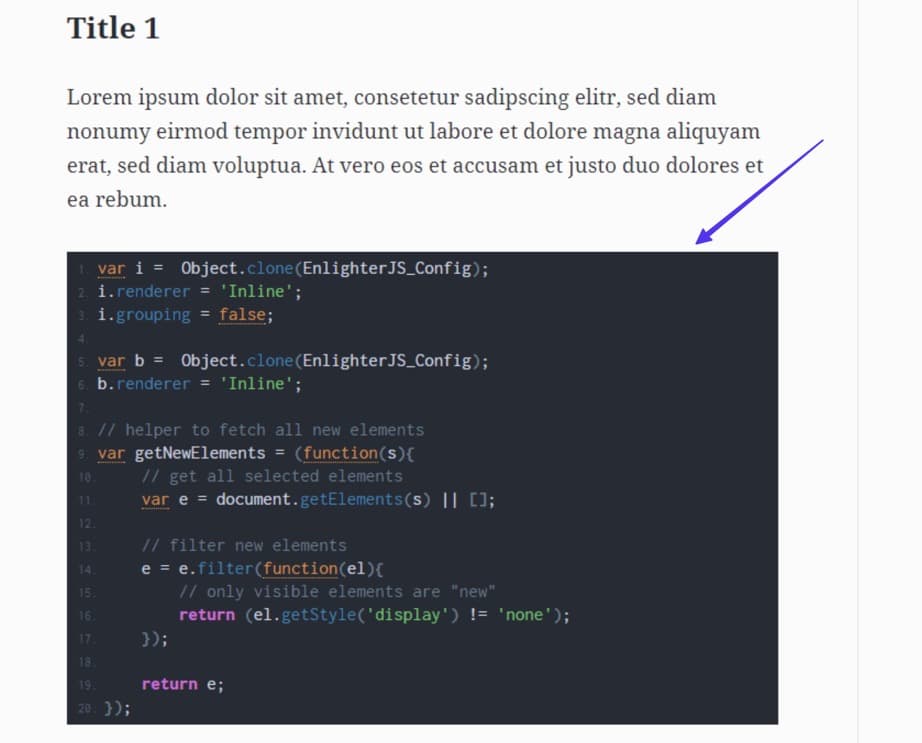
Click the Publish button for the post, then view the results on the frontend. The default code box for the Classic Editor is a dark theme, but you can change the appearance of your code box and even build your own themes.
Method 3: Using an Encoder Tool
Encoder tools serve as alternative options when trying to display code in WordPress, especially if you don’t intend to do it that often (and would rather not mess with a plugin).
HTML encoders preserve the integrity of code formats, particularly those with special characters and tabs. Encoders can handle all types of code, but they then translate the inserted code into HTML-ready code that’s easy to paste into WordPress.
There aren’t any reliable encoder tools as plugins, but many are offered as free third-party web apps. Note also that Encoder tools don’t offer any styling tools, so you’ll only receive the code as it’s supposed to be displayed (no fancy boxes or line customization features).
Some reliable encoder tools include:
Based on our testing, the most effective encoder tool is the W3Docs HTML Encoder, so we’ll use it for this tutorial.
Step 1: Open the Encoder and Choose Settings
Go to the W3Docs HTML Encoder website.
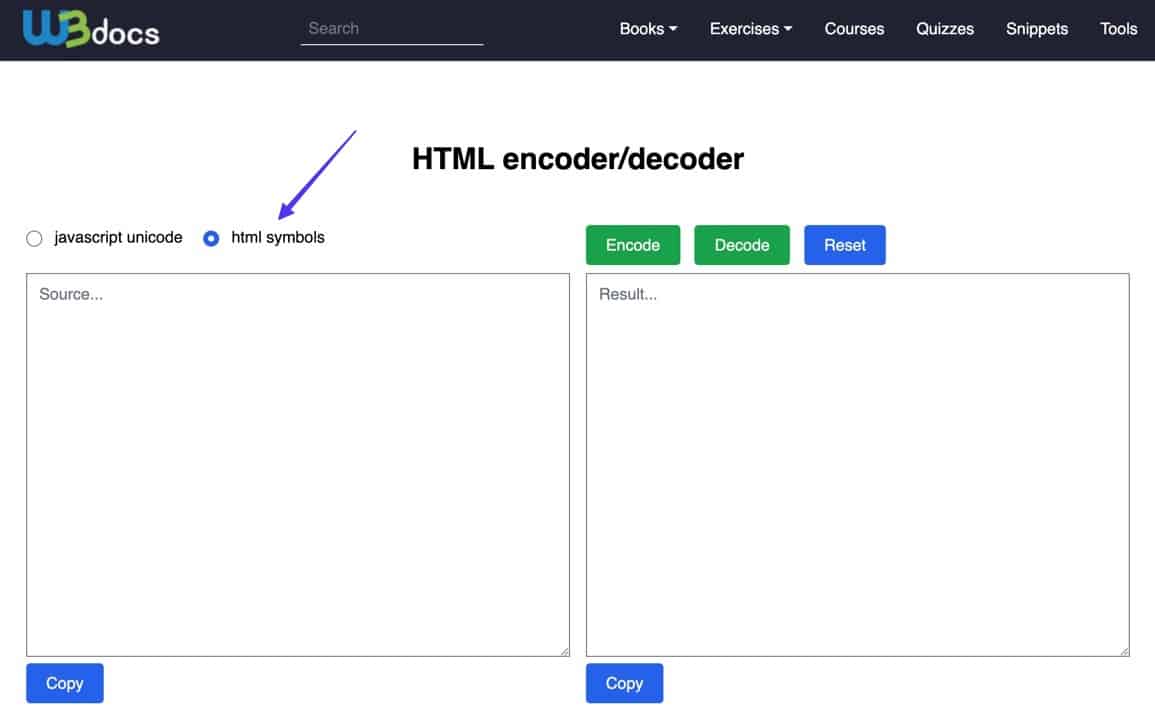
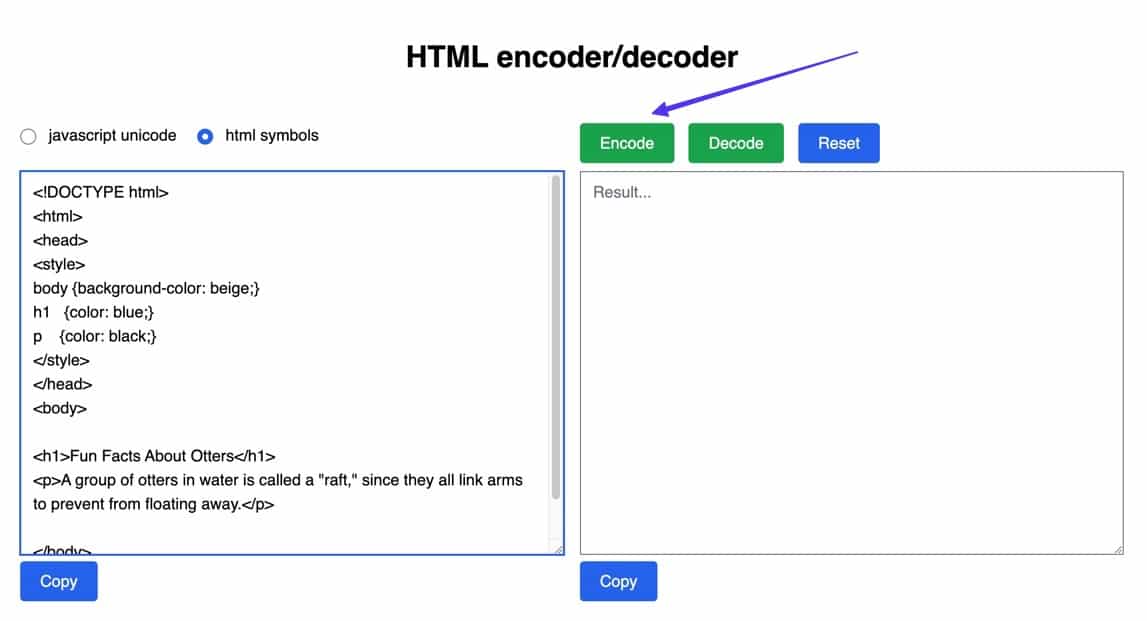
The page shows two side-by-side box fields. The one on the left is where to paste your code. The one on the right displays the encoded version to copy and paste into WordPress.
However, you must first set which type of code you’d like to preserve:
- Pick JavaScript unicode if pasting in code with JavaScript elements.
- Go with HTML symbols when using HTML.
Step 2: Paste and Click to Encode
Paste whatever code you’d like to display in WordPress into the left field. Then find and click on the Encode button above on the right.
Step 3: Copy the Decoded Result
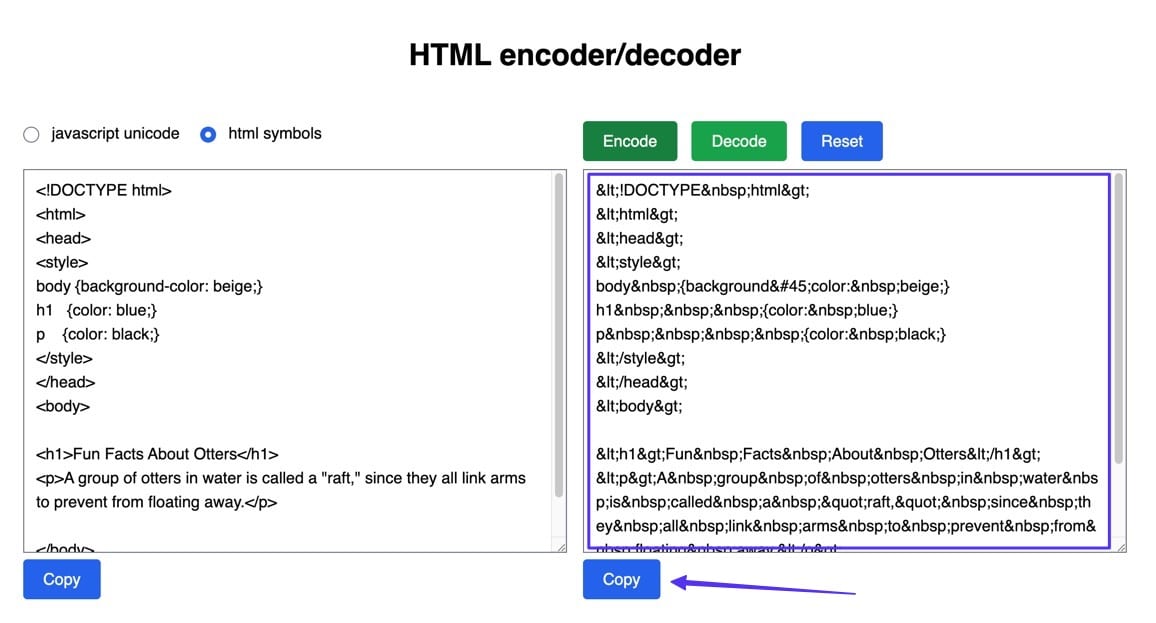
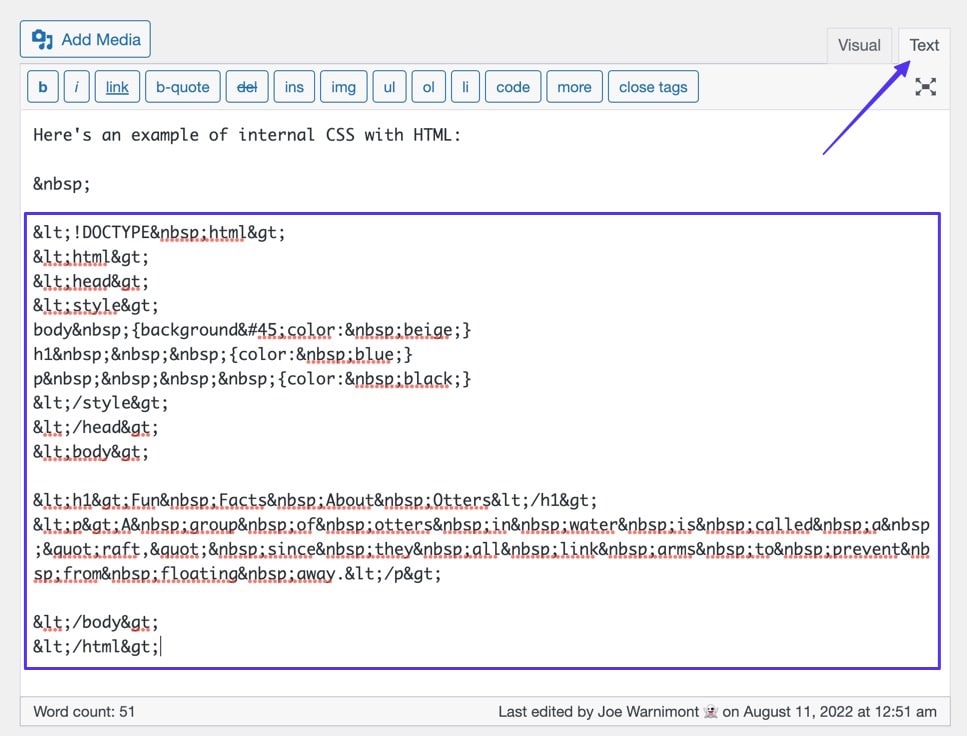
The finished product may look confusing, but it’s actually a combination of HTML elements to preserve every aspect of the code you inserted, all without causing the code to activate and show something else on the frontend.
Click the Copy button.
Step 4: Paste Encoded HTML Into the WordPress Code or Text Editor
Go back to WordPress, and open the desired post or page.
Select the Options (three vertical dots) menu item in the upper-right corner. Click on the Code Editor option.
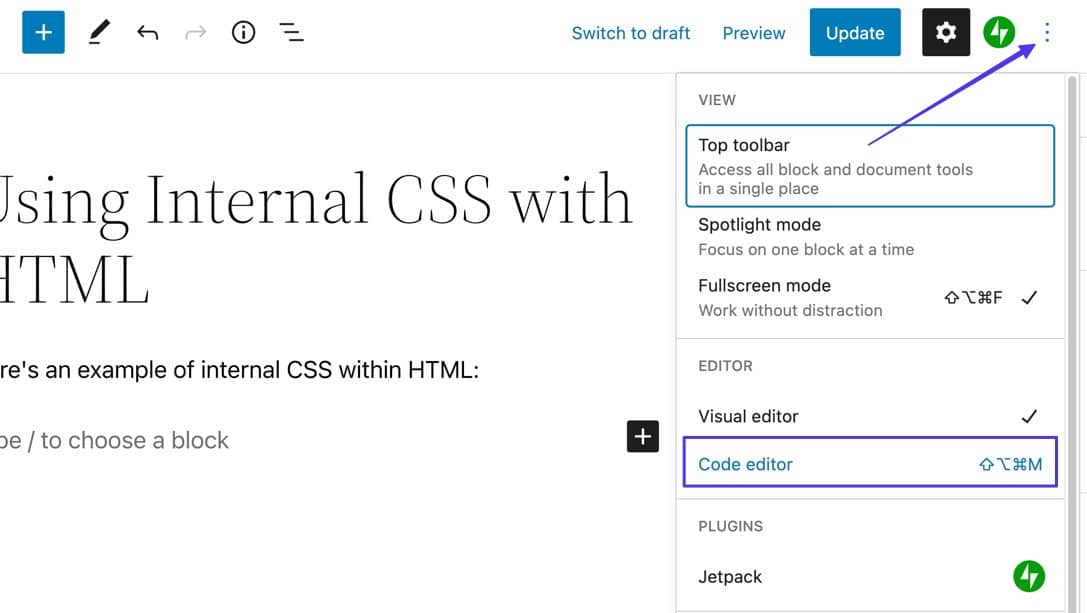
You’ll now see the Code Editor rather than the visual Block Editor. Find the area you’d like to display the code and paste your encoded HTML into the editor.
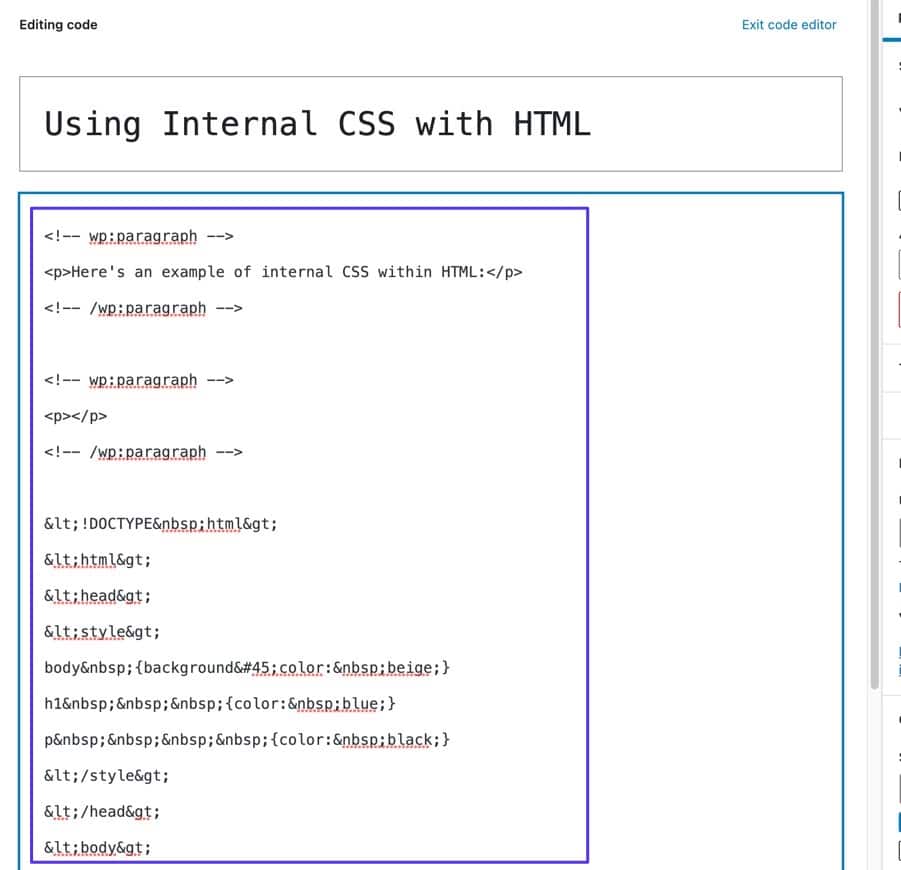
If you are using the Classic WordPress editor, you must go to the Text tab, which is the same as the Code Editor from the Gutenberg Block Editor.
Step 5: Publish and View the Code
Click Update or Publish for the post, then navigate to the frontend of that post to view how it looks.
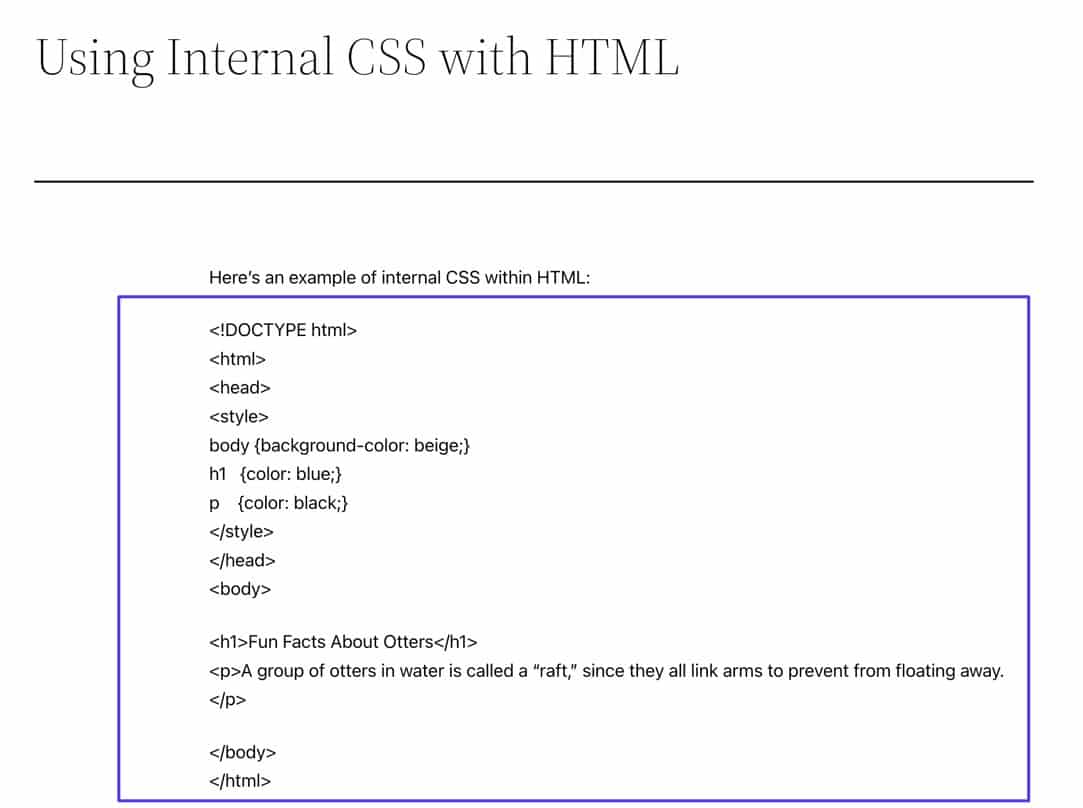
You should see the original code that was pasted into the encoder, before the tool added HTML encoding elements. As mentioned, there aren’t any styling features with the encoders, so this is a wonderful method for a clean, minimalistic appearance.
Method 4: Using a Custom Shortcode
Creating a custom shortcode does the job of inserting chunks of reusable code without you having to copy and paste. That’s why custom shortcodes offer a solid opportunity for displaying code on WordPress.
Here are the benefits of using custom shortcodes to display code:
- Custom shortcodes let you save complicated code once, then reuse it, eliminating the need to type longer code snippets every time.
- You can write your own styling CSS for the code highlighters and boxes.
- Shortcodes can be used by anyone, so other contributors can take advantage of your code highlighters and blocks with the click of a button.
Creating a custom shortcode requires experience editing WordPress theme files, working with PHP code, and potentially creating WordPress plugins. Due to those requirements, making a custom shortcode for WordPress can be difficult for those new to PHP.
However, the finished product results in a significantly easier way to display code on WordPress.
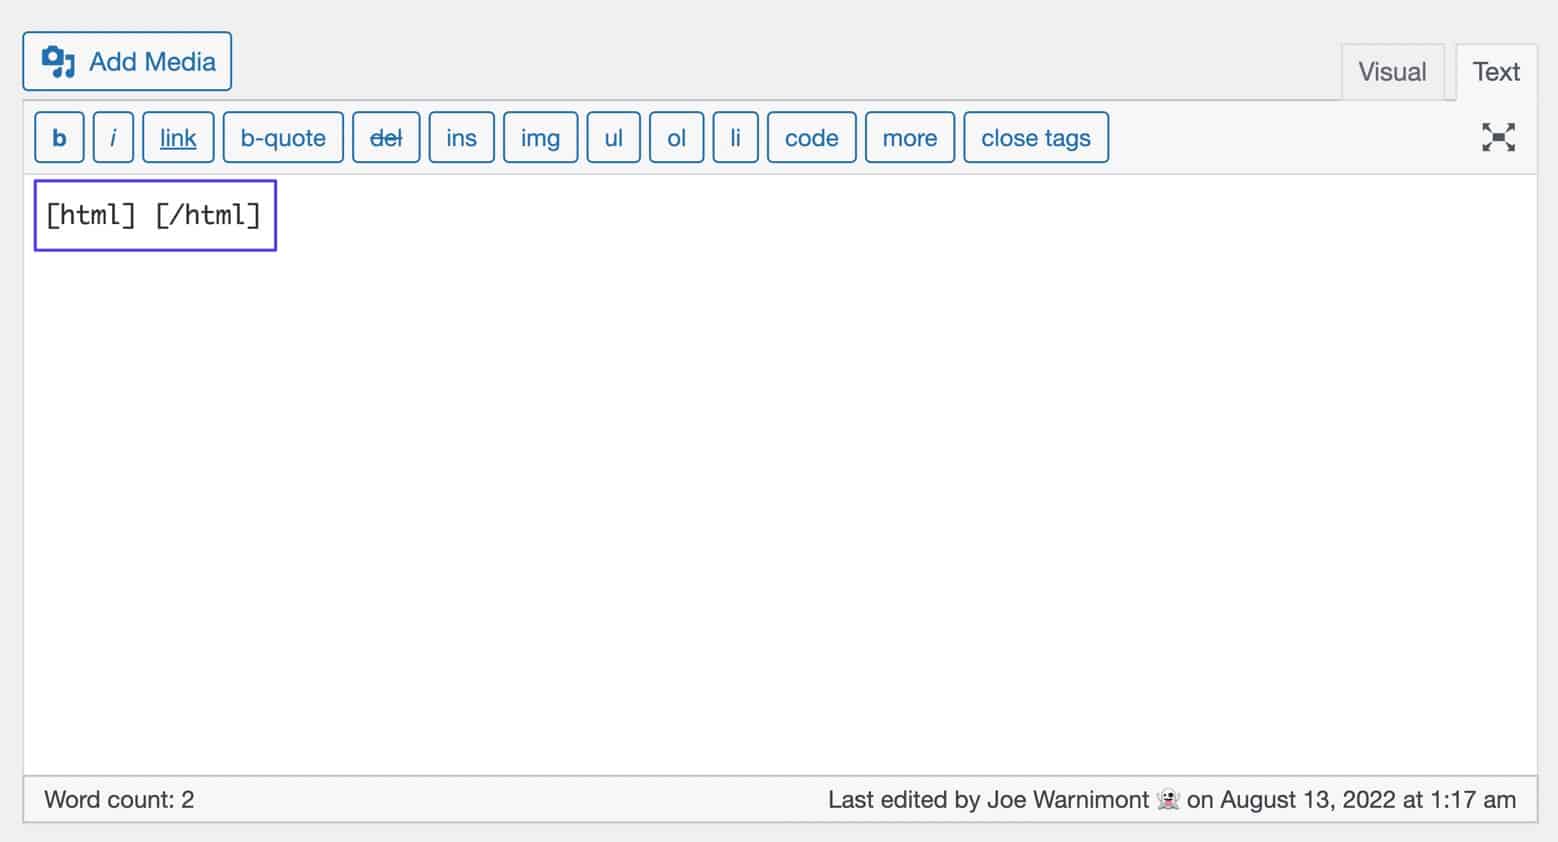
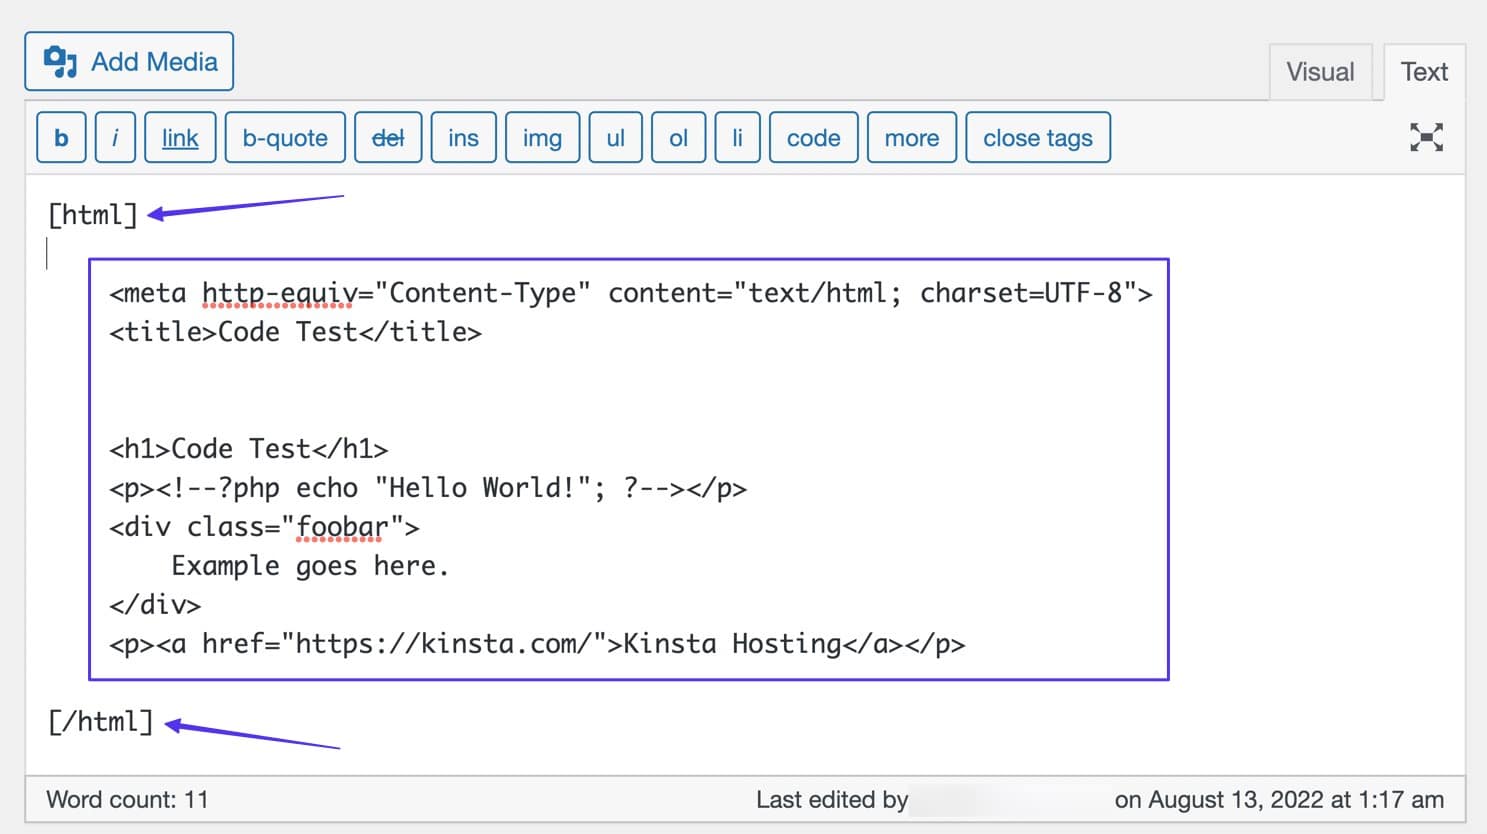
You can name the custom shortcode whatever you want and create multiple options, like [html] [/html] and [css] [/css], for different coding languages.
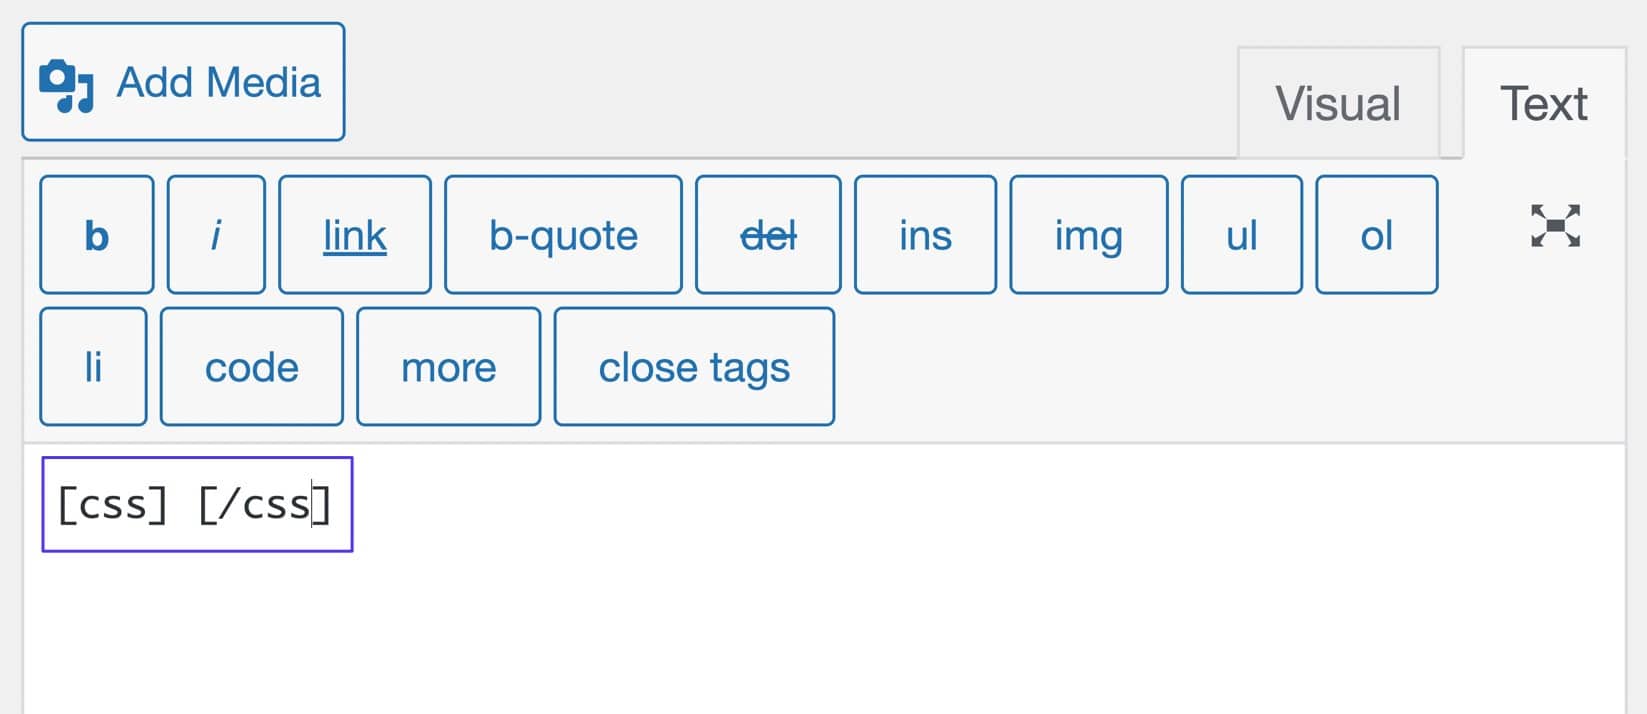
Keep in mind that custom shortcodes work best for syntax highlighting when using the Text Editor (in WordPress Classic) or the Custom HTML box when working with the WordPress Gutenberg Block Editor.
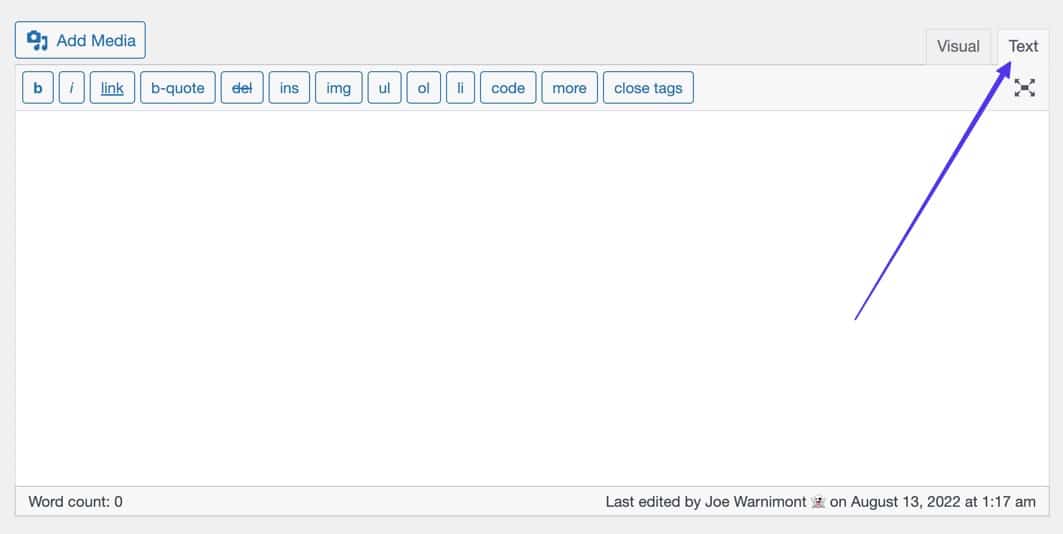
The goal is to build a custom shortcode where you can type or paste code between the opening and closing tags of the shortcode.
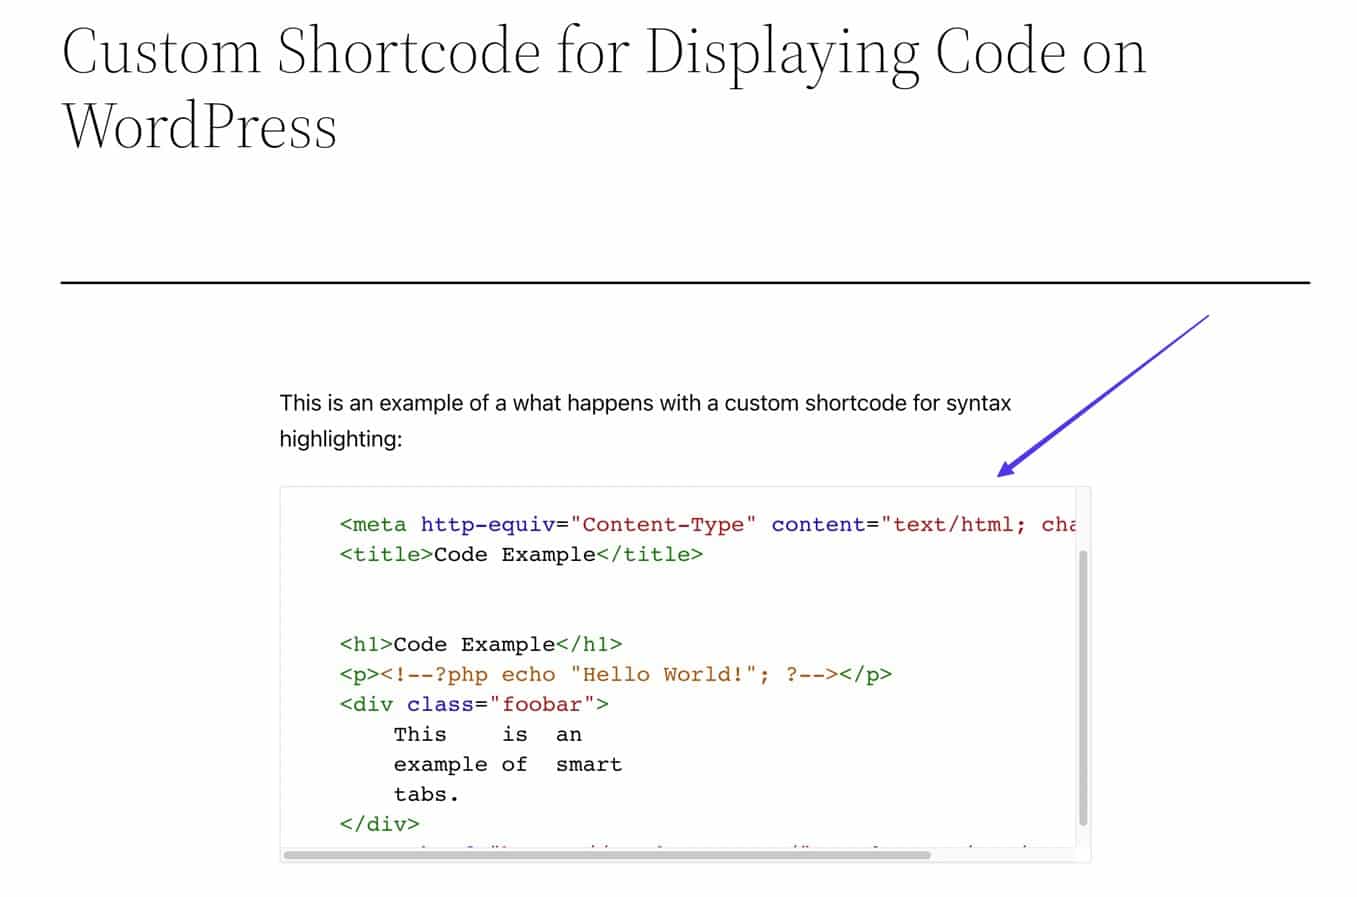
Once published, your custom shortcode styling and highlighting settings get shown on the frontend. And the code you added displays nicely within the syntax highlighter.
Method 5: Using
Perhaps the oldest — yet still incredibly reliable — way to display code on WordPress is by simply adding specific HTML tags around the code snippet. This method is best for when working with the classic WordPress editor, or in any HTML editor.
There are two options:
<code>tags: Best for displaying a short line of code; often used within paragraphs<pre>tags: Ideal for longer blocks of code, or when you’d like more formatting options
Option 1: Use <code> Tags for Inline Code Snippets
Content creators who write about coding don’t always want to use large code blocks. Sometimes it makes more sense to include a quick bit of code inside a paragraph.
However, you still need to highlight and preserve that code’s formatting. And some code may cause problems with the surrounding content if not preserved properly.
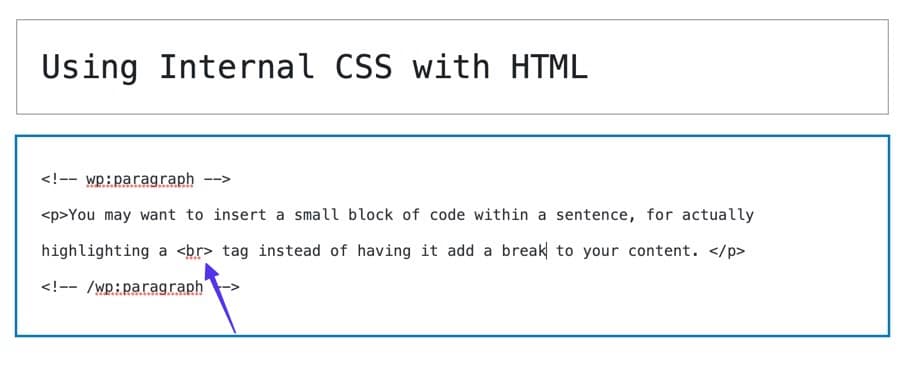
Let’s take the <br> tag, for example — without <code> tags, it would simply add a break to your paragraph.
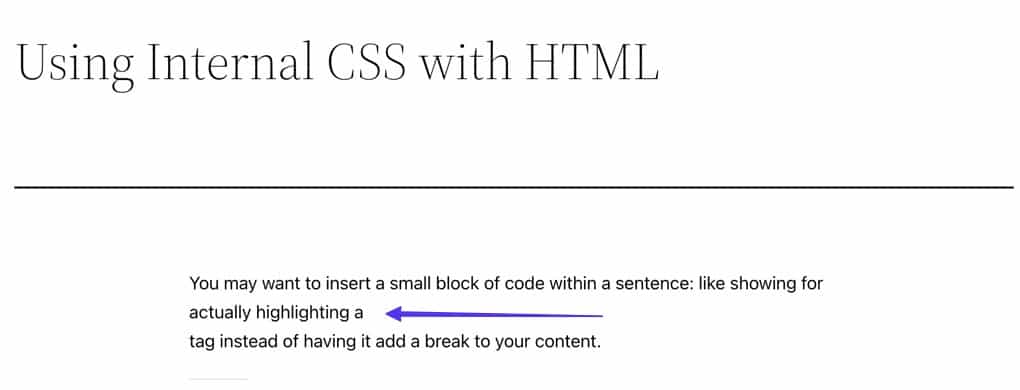
Placing the coding inside these tags makes a much cleaner result:
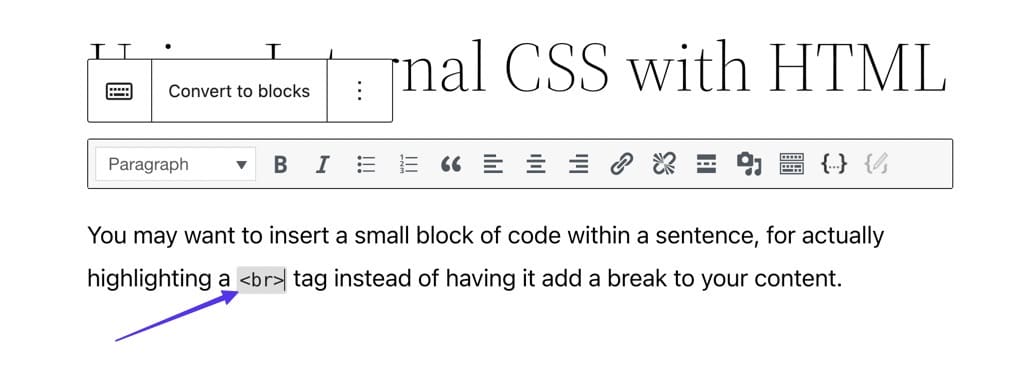
<code> </code>To do so, open a WordPress post, and either turn on the Code Editor (for the Gutenberg Block Editor) or the Text Editor (when using WordPress Classic).
Paste or type these tags somewhere in the editor; don’t insert the code you want to display just yet. Instead, add a space between the tags.
<code> </code>

Switch to the Visual Editor (regardless of whether you’re in Gutenberg or Classic WordPress).
You’ll see a small grey space inside the visual content. Click to place your cursor within that grey space. This is where you can paste or type in the code for display.

As you type, the grey space expands to accommodate the code snippet. Click the Publish or Update button for that post.
On the frontend of the post, you’ll now see the code preserved as it should be, and without any odd activity (like adding a break to your content).
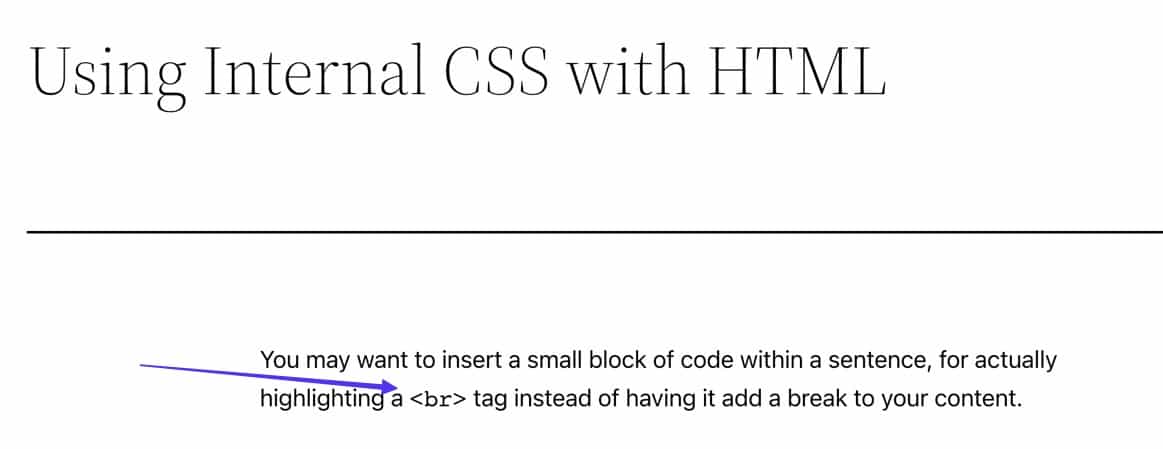
The formatting of these <code> tags is usually barebones, but it often depends on your theme styling. For instance, our example only changes the font but doesn’t include a grey background.
Option 2: Use <pre> Tags for Longer Code Blocks
Lengthier code snippets deserve their own blocks, separated from whatever content you’re writing into paragraphs. For those, we recommend sticking with <pre> tags.
The process of adding a <pre> tag is just like with the <code> tags, but you have more space to work with when it comes to inserting your code.
Go to a post and open the Code (Gutenberg) or Text (Classic WordPress) editor. Paste or type in the code you’d like to display. Then, surround the code with these tags:
<pre> </pre>
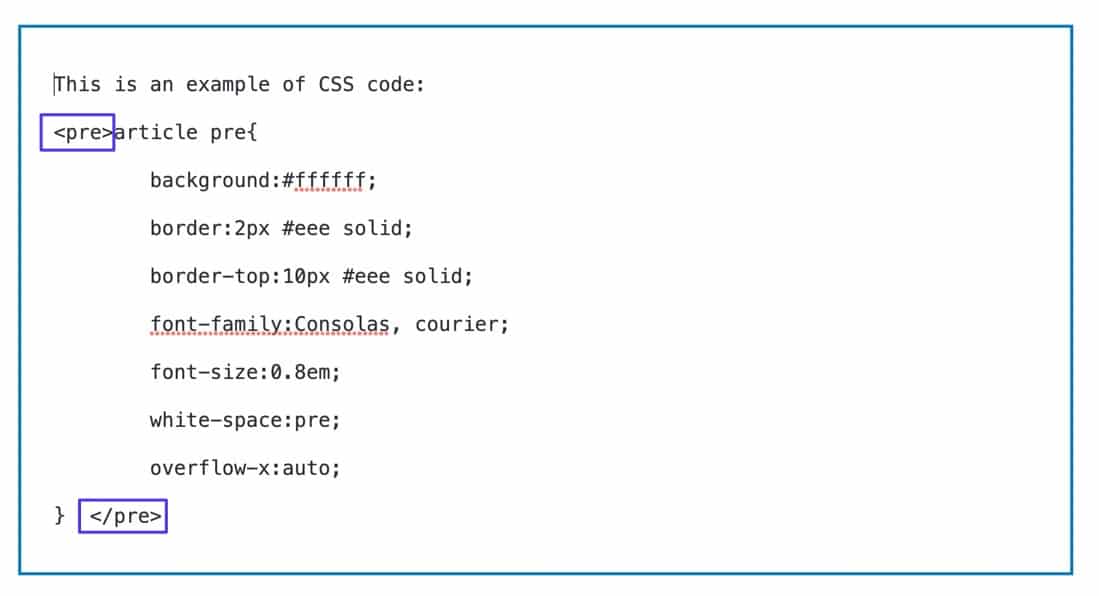
Switch to the Visual editor to view what it looks like. You’ll notice that the section of text will have a “Preformatted” label, which is precisely what the <pre> tag is meant to do.
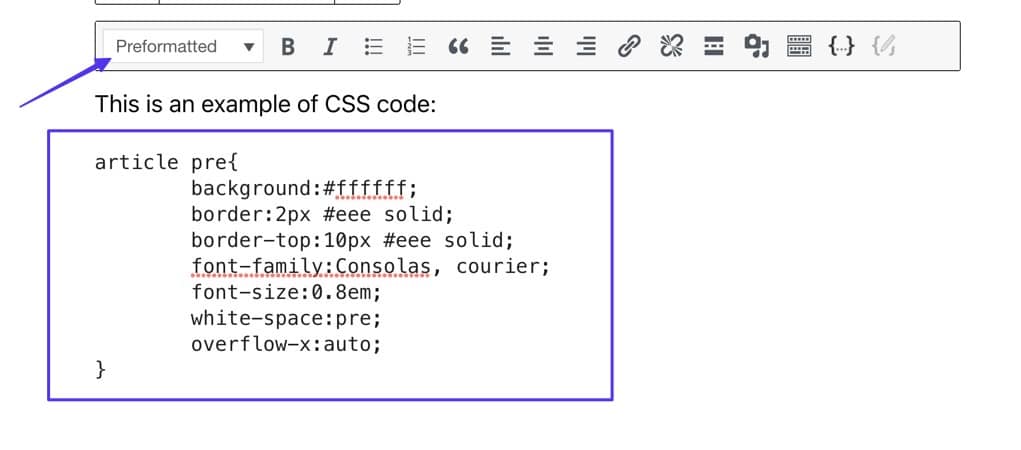
Click Publish or Update, then switch to the frontend to see your code in its original form. Similar to <code> tags, <pre> tags are lousy with formatting, so you’re left with the simplest possible look. However, there are ways to stylize these yourself.
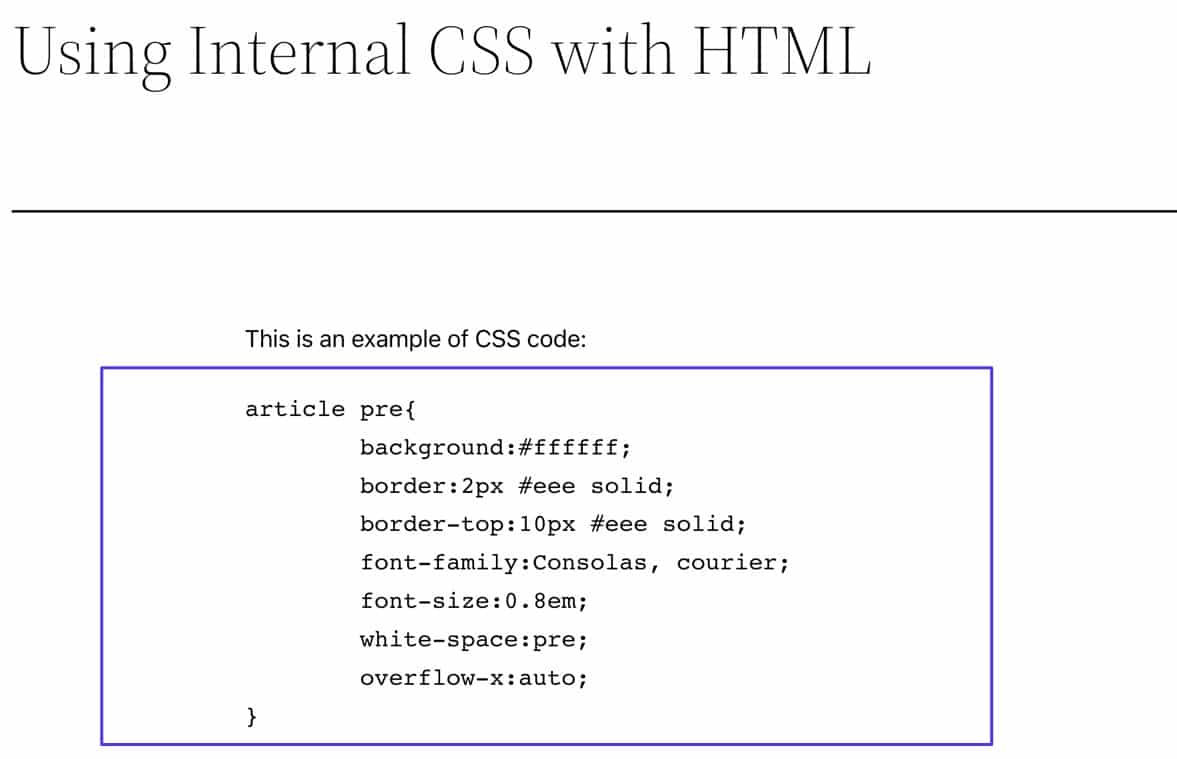
Tips for Styling <pre> Tags
The <pre> tags are less stable than <code> tags, so you may encounter difficulty depending on the type of code you’re trying to show.
Use these tips to improve how it looks:
- Try your best to remove, or completely avoid, line breaks, since the
<pre>tag often doesn’t recognize these. In general, it responds poorly to too many line breaks. - Consider adding an
overflow-x:auto;property in your CSS to add scrolling functionality to the<pre>tag code. This helps with overflowing content, since the<pre>tag by itself lets your code run off the page. - Stick to monospaced fonts.
You can also stylize the text formatting and box behind the code. Here’s a starter template that you can add to your CSS file:
article pre{
background:#ffffff;
border:3px #eee solid;
border-top:30px #eee solid;
font-family:Consolas, courier;
font-size:0.8em;
white-space:pre;
overflow-x:auto;
}
Method 6: Using a Markdown Editor that Connects to WordPress
Markdown editors offer the ability to not only type and format faster, but many of them connect directly to WordPress for instant publishing right from the editor.
Many writers turn to markdown editors due to this rapid content creation process. And luckily, some of those editors offer markdown for code blocks, meaning you can display code within the markdown editor, then send it right off to WordPress for publishing.
Keep in mind that normal text editors (like Sublime Text) don’t preserve the integrity of code when transferred for publishing on WordPress. And HTML editors, while excellent for writing and storing code, won’t provide the highlighting features required to preserve code for WordPress publishing, either.
There are plenty of markdown editors to pick from, but the ideal solutions share two features:
- Direct exporting to WordPress
- Markdown for code highlighting
You can, however, opt for a markdown editor with HTML exporting, if you’re not fond of direct WordPress exports.
The best markdown editors with both features are:
Ulysses and ByWord are premium apps, while Obsidian has both free and premium versions.
For the following tutorial, we’ll use Ulysses.
Step 1: Add a Longform Code Block in Ulysses
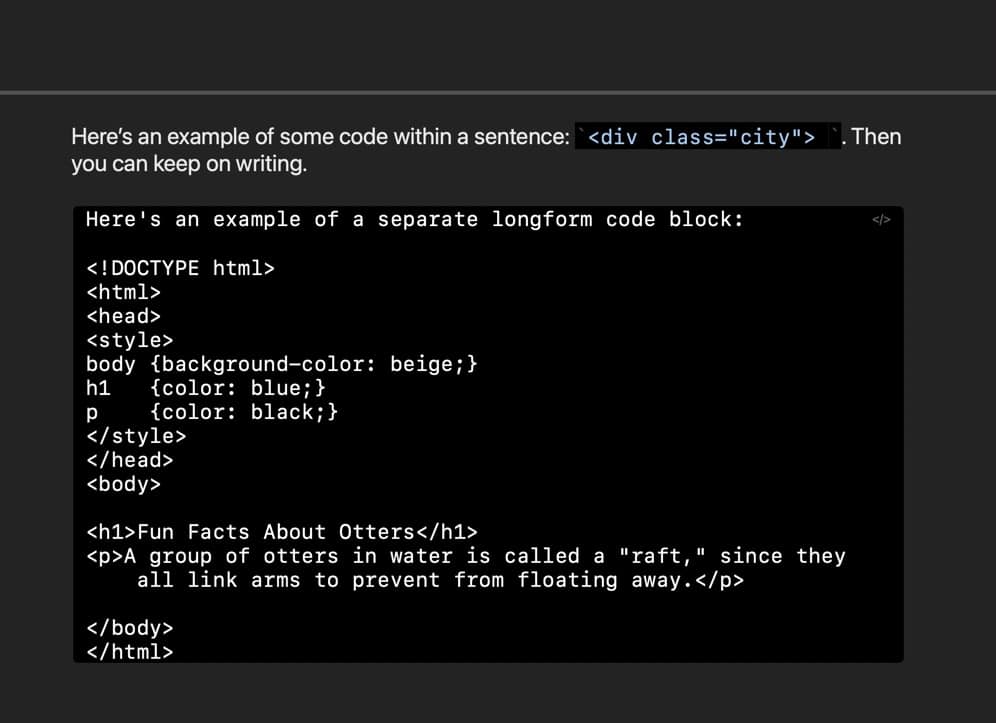
While drafting a document in Ulysses, type " markdown — that’s two apostrophes — whenever you want to immediately add a code highlighter block inside a document.
This markdown method is for longer blocks of code. It’s not usable in the middle of a paragraph, so you must create a new line in order for the markdown to activate.

Once the code highlighter appears, you can type or paste anything you want into it.
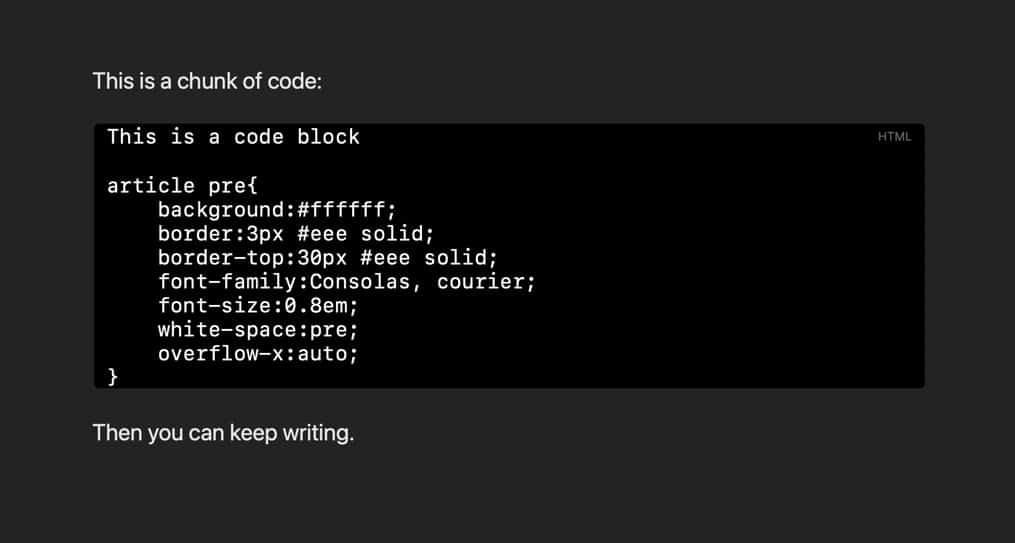
Another way to turn on the code block is by clicking on the Markdown (three horizontal dots) menu item, then selecting the Code option.
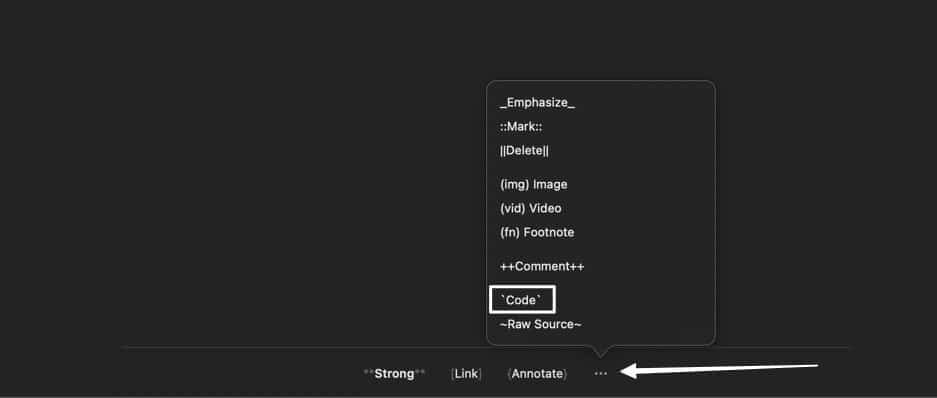
After clicking that menu item, the code highlighter field appears wherever the cursor was last.

To place code snippets within paragraphs, you’d turn to the `` markdown (which looks almost the same, but it’s actually two acute/grave accents instead of apostrophes).
Step 3: Export to WordPress
Once you have your document ready, it’s time to export everything to WordPress.
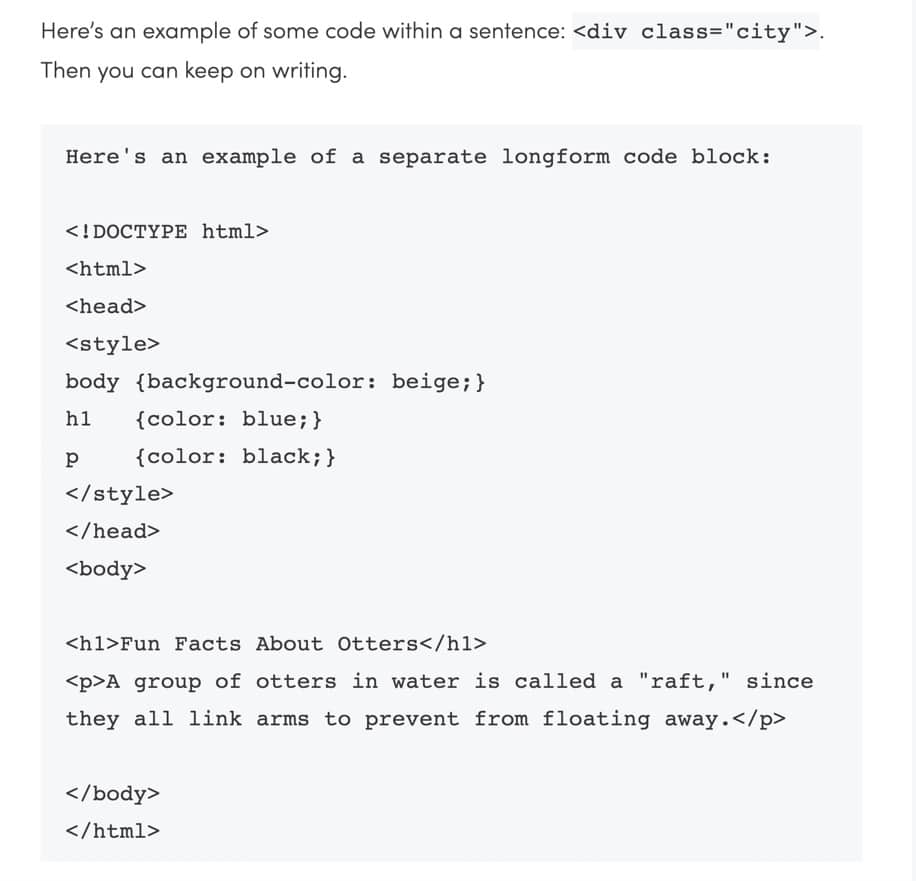
The wonderful part about markdown editors that connect with WordPress is that they maintain the code blocks throughout the transfer. So, you’ll see nicely formatted code highlighters ready to publish in WordPress.
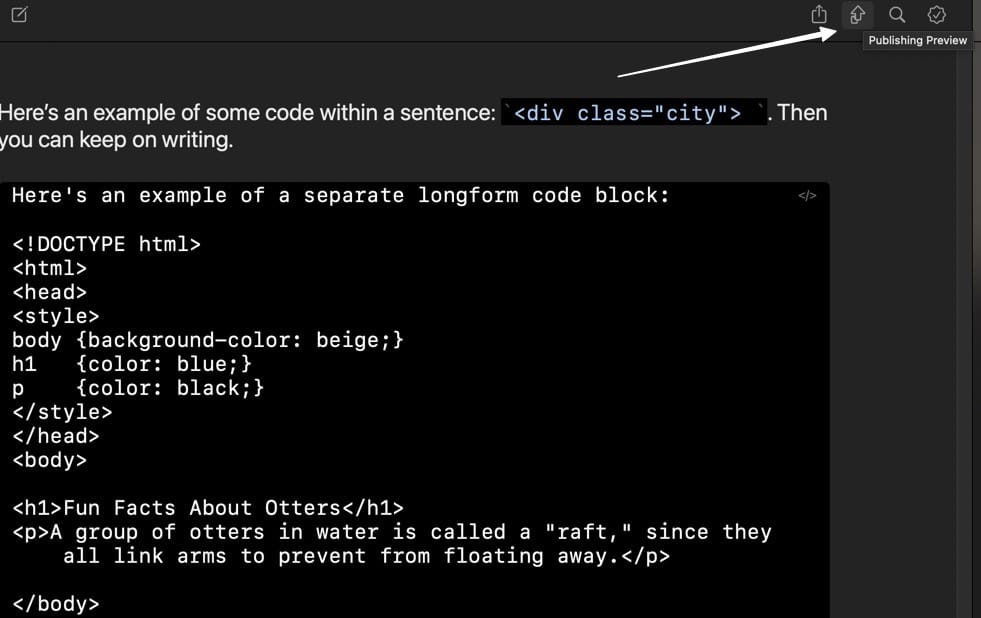
In Ulysses, go to the top of the document to find the toolbar. Click the Publishing Preview button.
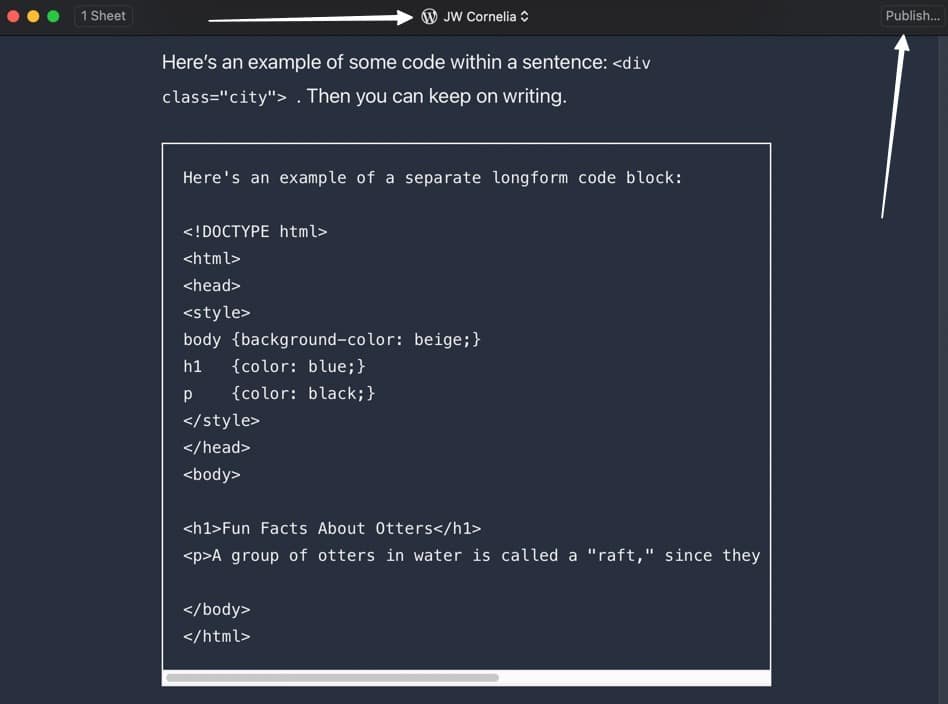
This brings up a dropdown menu to select a platform and website to publish on. You can also use the Manage Accounts option in that menu to log into a WordPress website before exporting.
Once you have the right website, click the Publish button.
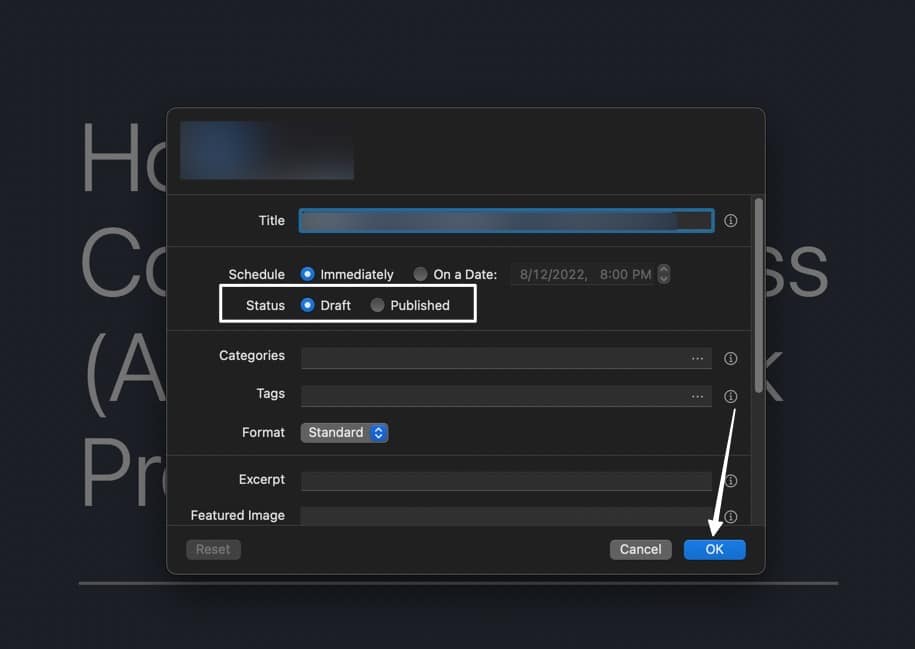
Fill in the post title, schedule, and any other information you’d like, such as categories, tags, and featured images.
The most important part, however, is to set the Status to Draft so as not to publish the post without reviewing it on WordPress first.
Click OK to proceed.
Within a few seconds, Ulysses places the entire document into a new WordPress post (you may have to log into your WordPress admin when it pops up).
You’ll see the code blocks already configured and ready to publish. Click the Publish button to make it live.
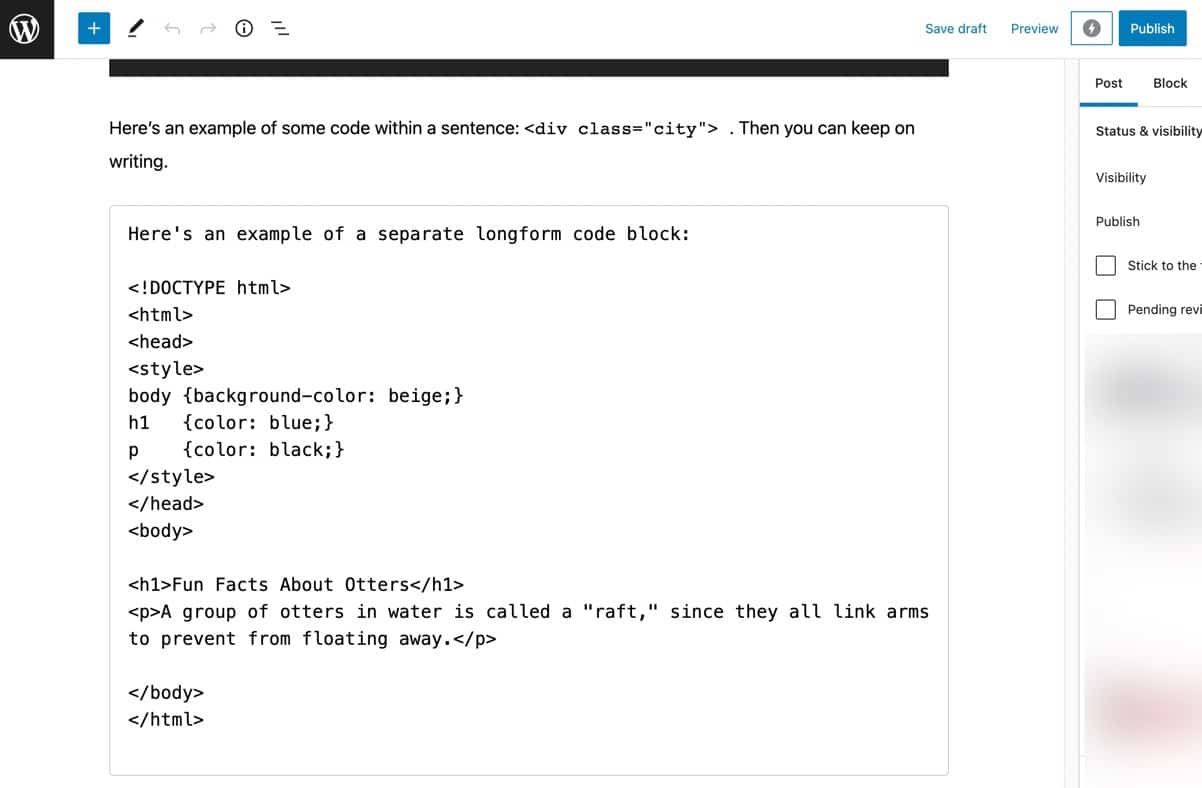
On the frontend, you’ll see that the inline code snippets and larger code blocks are nicely highlighted, and the formatting from that code has been preserved.
Summary
There are several methods to properly display code on WordPress, and it often depends on the WordPress editor being used, the code language you’d like to display, and how you’d like to display and format that code. For example, opting for a plugin will definitely provide a more creative formatting experience than the standard Code block in the WordPress Gutenberg editor.
In this article, we covered many different methods illustrating how to display code in WordPress.
We typically recommend starting with method 1 and working your way through. Method 2 serves you well if looking for more styling options, and methods 3–5 are only useful in particular situations. Method 6 is somewhat of a bonus solution, meant for those who prefer markdown editors over writing directly into WordPress.
Regardless of which method you choose, a reliable hosting provider can help you polish your site even further. Kinsta’s WordPress Hosting solutions offer plans for sites of all shapes and sizes, and the easy-to-use platform — MyKinsta, a proprietary admin dashboard — makes editing any portion of your site and its files a cinch. Plus, you’ll get the added benefits of Kinsta’s world-class speed, security, and support.
Have you tried to display code in WordPress in the past? If so, which method worked best for you? Let us know in the comments section below.


