WooCommerce is one of the most popular WordPress plugins for building ecommerce applications. In addition to using WooCommerce in a traditional WordPress application, you can use it as a headless solution.
This article teaches you how to build a headless WordPress application with React deployed on Kinsta.
Introduction to headless WooCommerce
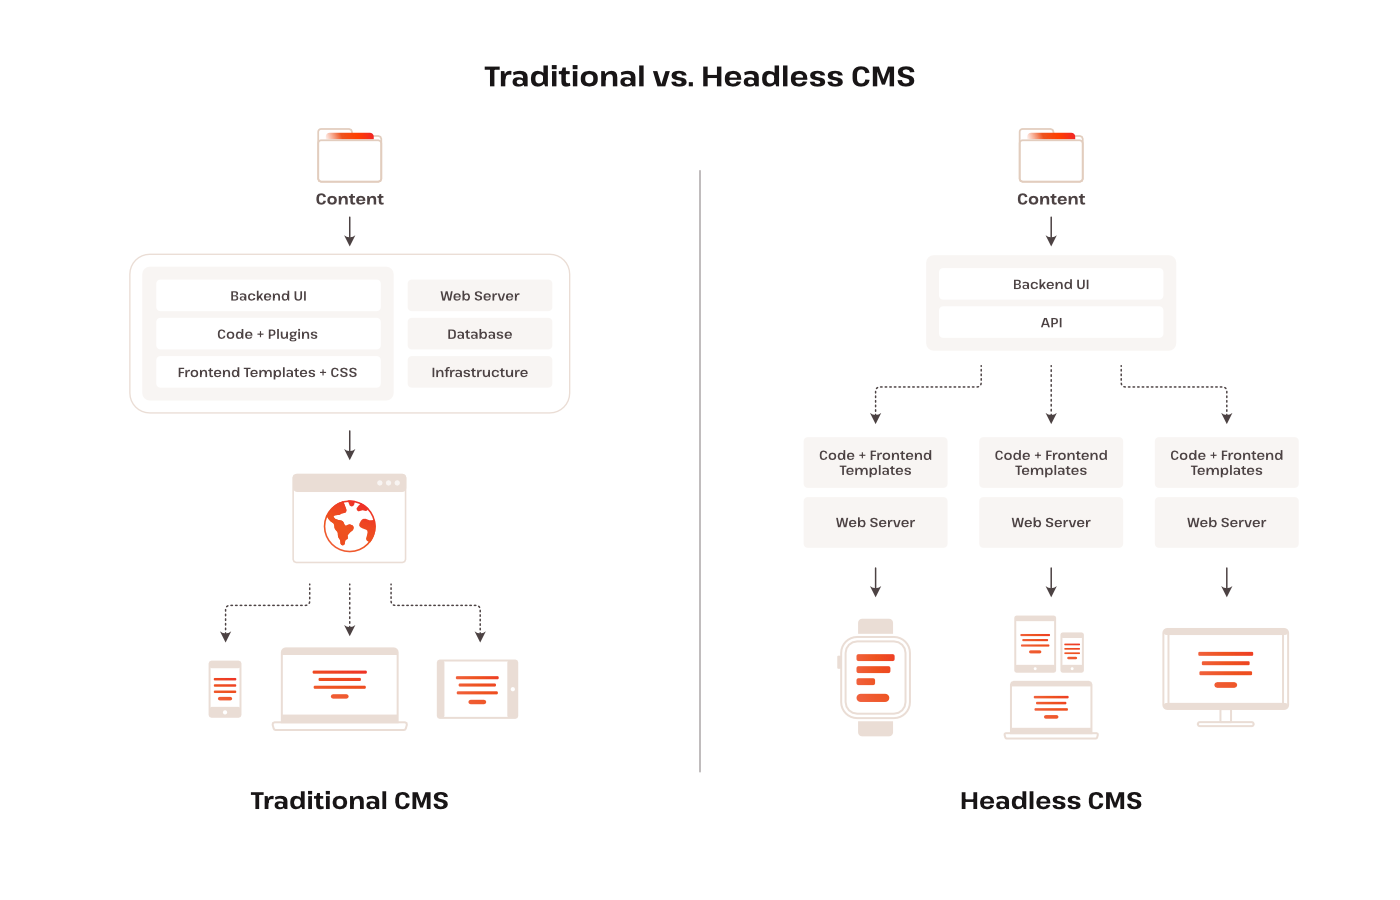
The term “headless ecommerce” means the separation of the backend (head) from the frontend (body) of an ecommerce application. Headless architecture passes requests between the presentation layers (frontend) and the application layers (backend) of an ecommerce solution through APIs.
The APIs define interactions between intermediaries, allowing businesses to change the presentation layers without disturbing the functionality of application layers and update, edit, or add products to multiple application layers.
In a headless WooCommerce application, the WooCommerce API is an intermediary, providing communication between the frontend and backend. In addition to the benefits mentioned above, this supports flexible and scalable frontend development, empowering you to focus on crafting engaging and dynamic user interfaces with modern technology stacks like React or Vue.
Moreover, using headless WooCommerce future-proofs ecommerce infrastructure by helping you adapt to evolving customer needs and technological advancements. You can effortlessly update frontend components while ensuring the stability and reliability of the backend WooCommerce platform.
This modern approach offers numerous benefits compared to traditional WordPress ecommerce setups.
Now that you understand what a headless WooCommerce application is and its benefits, it’s time to build one for yourself. Using WordPress, React, and the WooCommerce plugin, you’ll create an ecommerce app and deploy it on Kinsta.
Prerequisites
Before beginning, ensure you have the following:
- An understanding of React and WordPress
- A Node.js installation
- An operational WordPress website
- An active Kinsta account
Benefits of headless WooCommerce
When you choose the headless route for your WooCommerce applications, you unlock a range of benefits—especially the flexibility of having one backend support various frontends for your application.
Here are some other benefits of headless WooCommerce:
- Enhanced customization — You can build your WooCommerce application how you want using any web framework.
- Improved site performance — You can leverage fast web frameworks like React and Vue to significantly boost your site’s performance.
- SEO benefits — You have more control and flexibility over SEO strategies to achieve your business’s goals.
- Better scalability — Your site can scale more efficiently, ensuring smooth performance even during periods of high traffic.
- Ability to create unique customer experiences — You are free from the constraints of traditional templates. You can craft innovative and personalized experiences for your customers.
Setting up a headless WooCommerce site
Here’s a step-by-step guide to setting up a WooCommerce site:
- Log in to your MyKinsta dashboard
- Navigate to Add Service > WordPress site.
- Select the Install WordPress option.
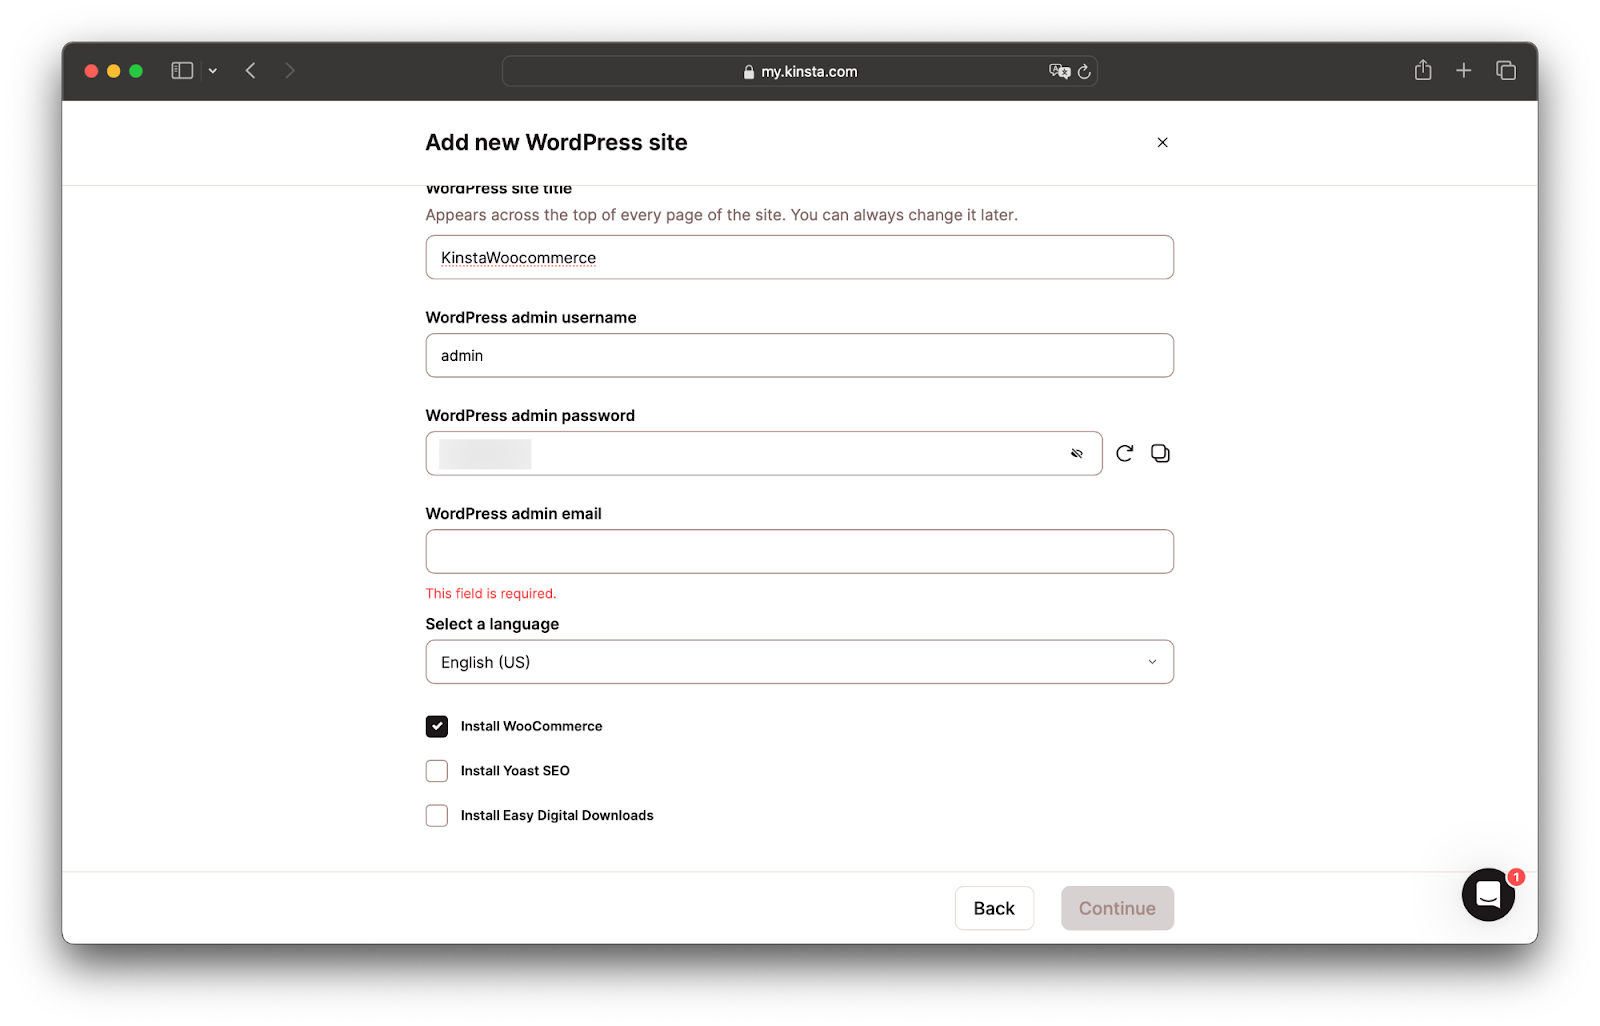
- On the Add new WordPress site page, complete the fields required to install WordPress.
- Check the Install WooCommerce box before you click Continue.
Activate the WooCommerce plugin
- On your MyKinsta dashboard, click Domains on the sidebar.
- On the Domains page, click Open WordPress Admin.
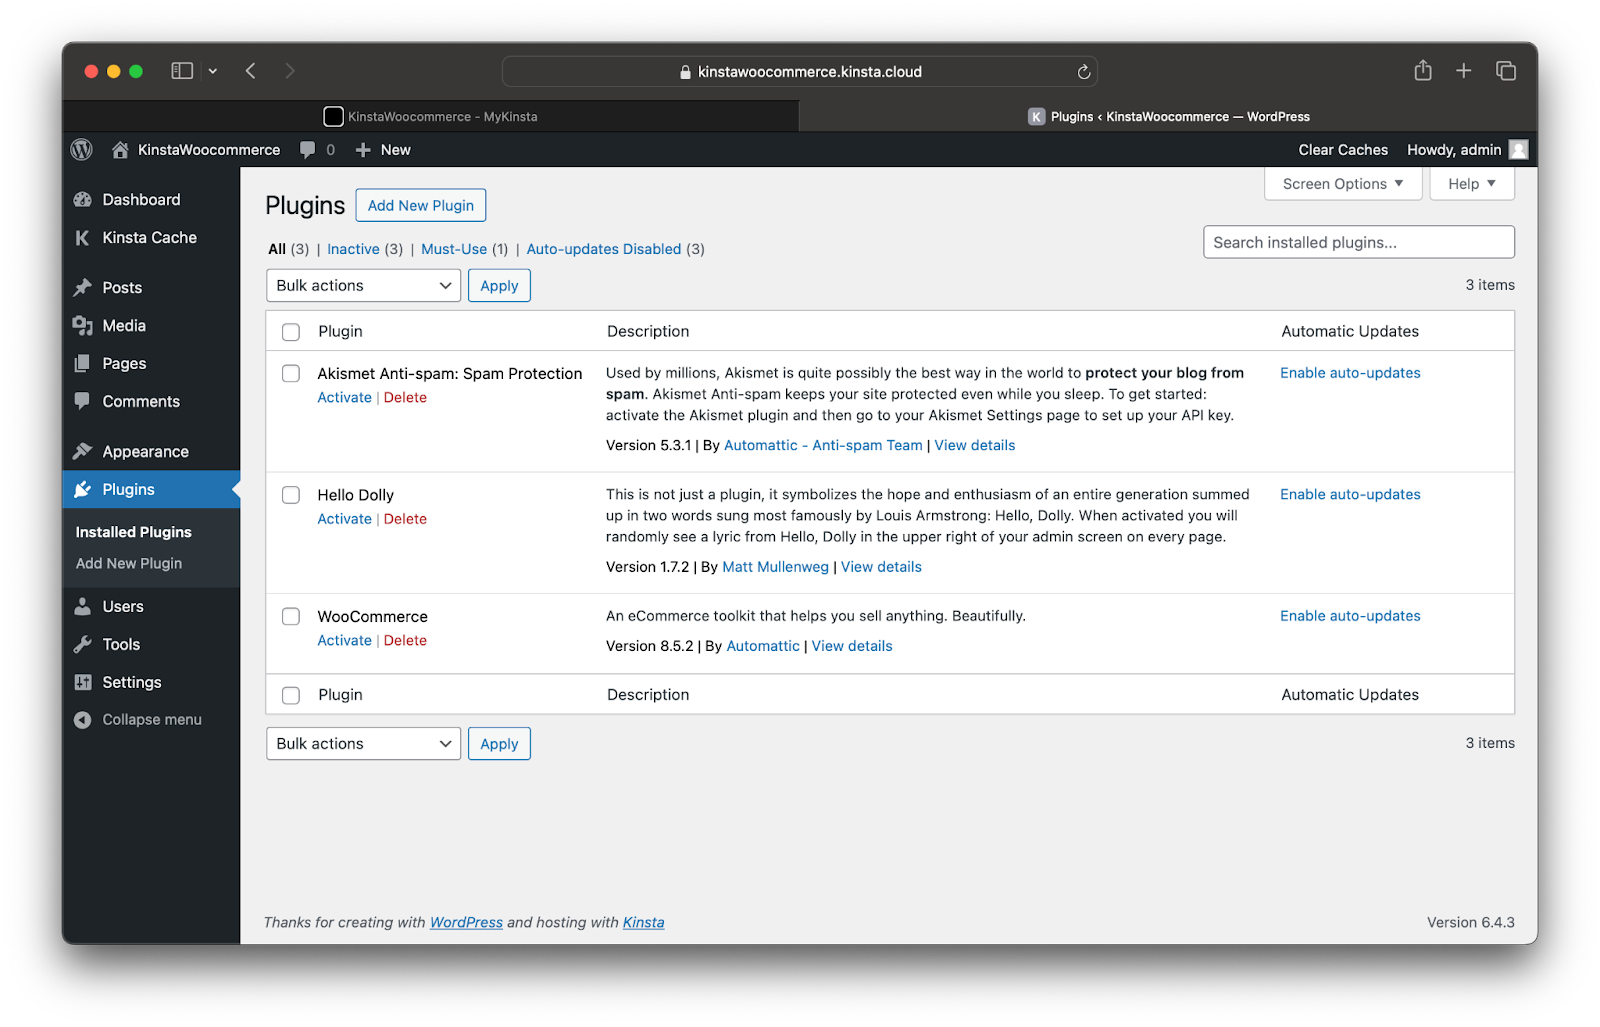
- Log in to your WordPress Admin dashboard, navigate to plugins, select the WooCommerce plugin, and activate it.
Configure WooCommerce for headless operation
To configure WooCommerce for headless operations:
- Log in to your WordPress Admin dashboard. On the sidebar, click WooCommerce > Settings.
- On the Settings page, click the Advanced tab. Then, click Rest API.
- Now click Add key.
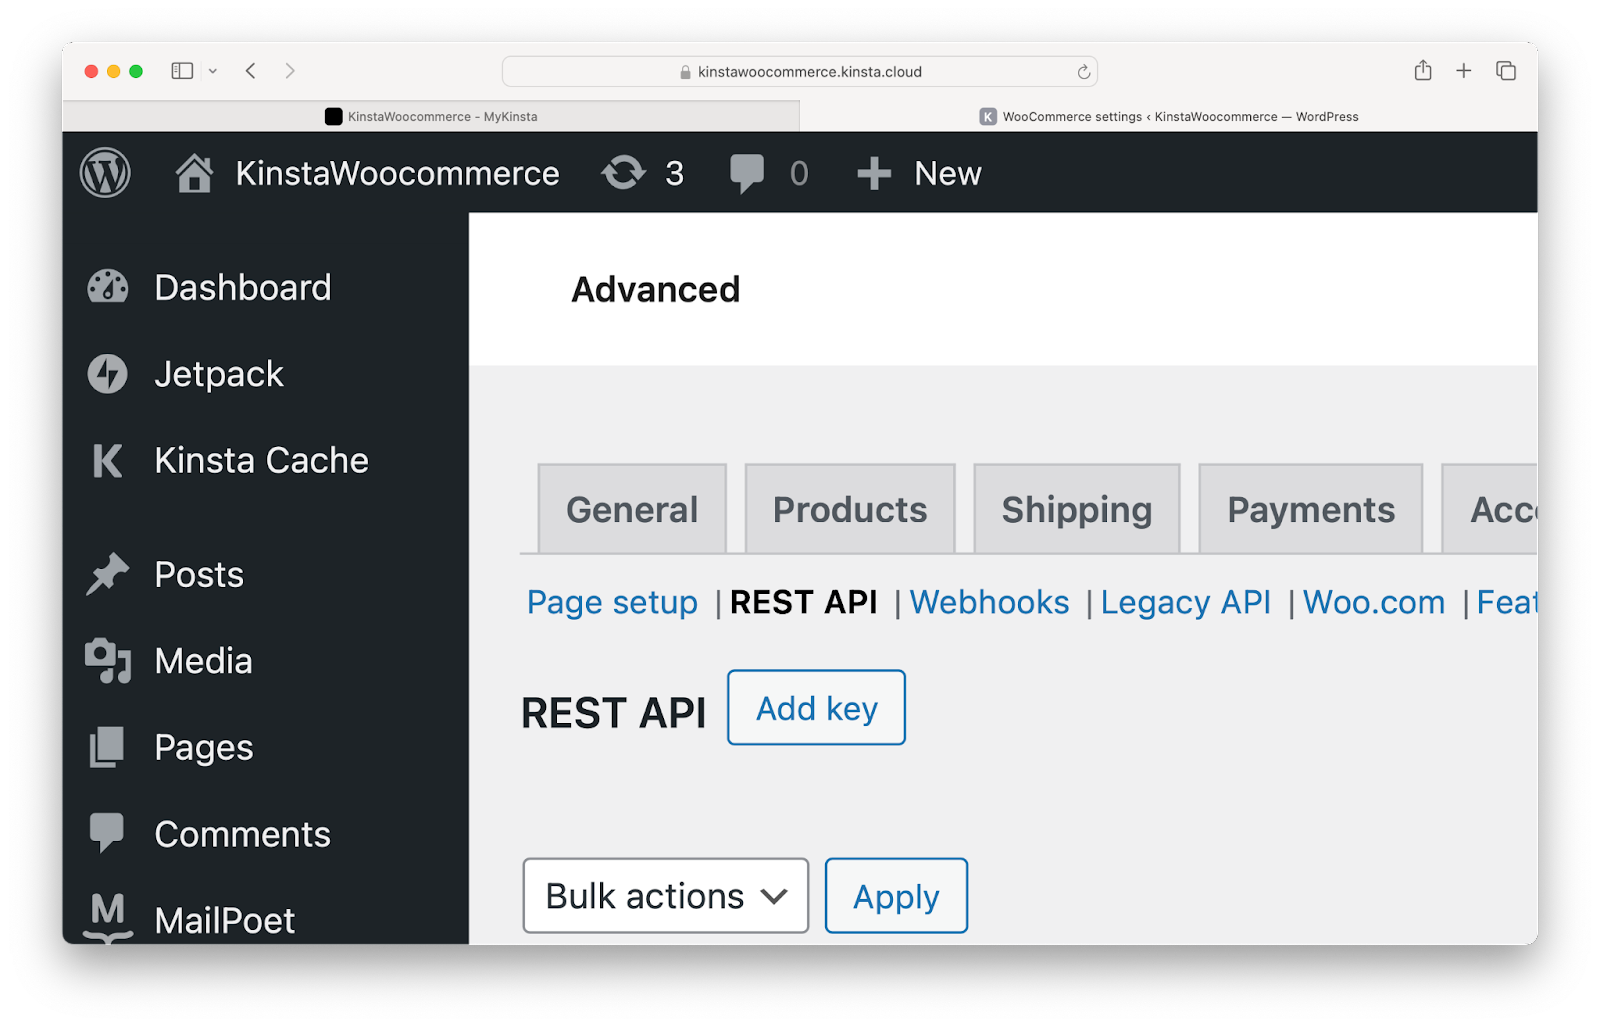
Adding the key for the REST API. - Click Create an API key. Give your new REST API a description, set the Permissions field to Read/Write, and click Generate API key.
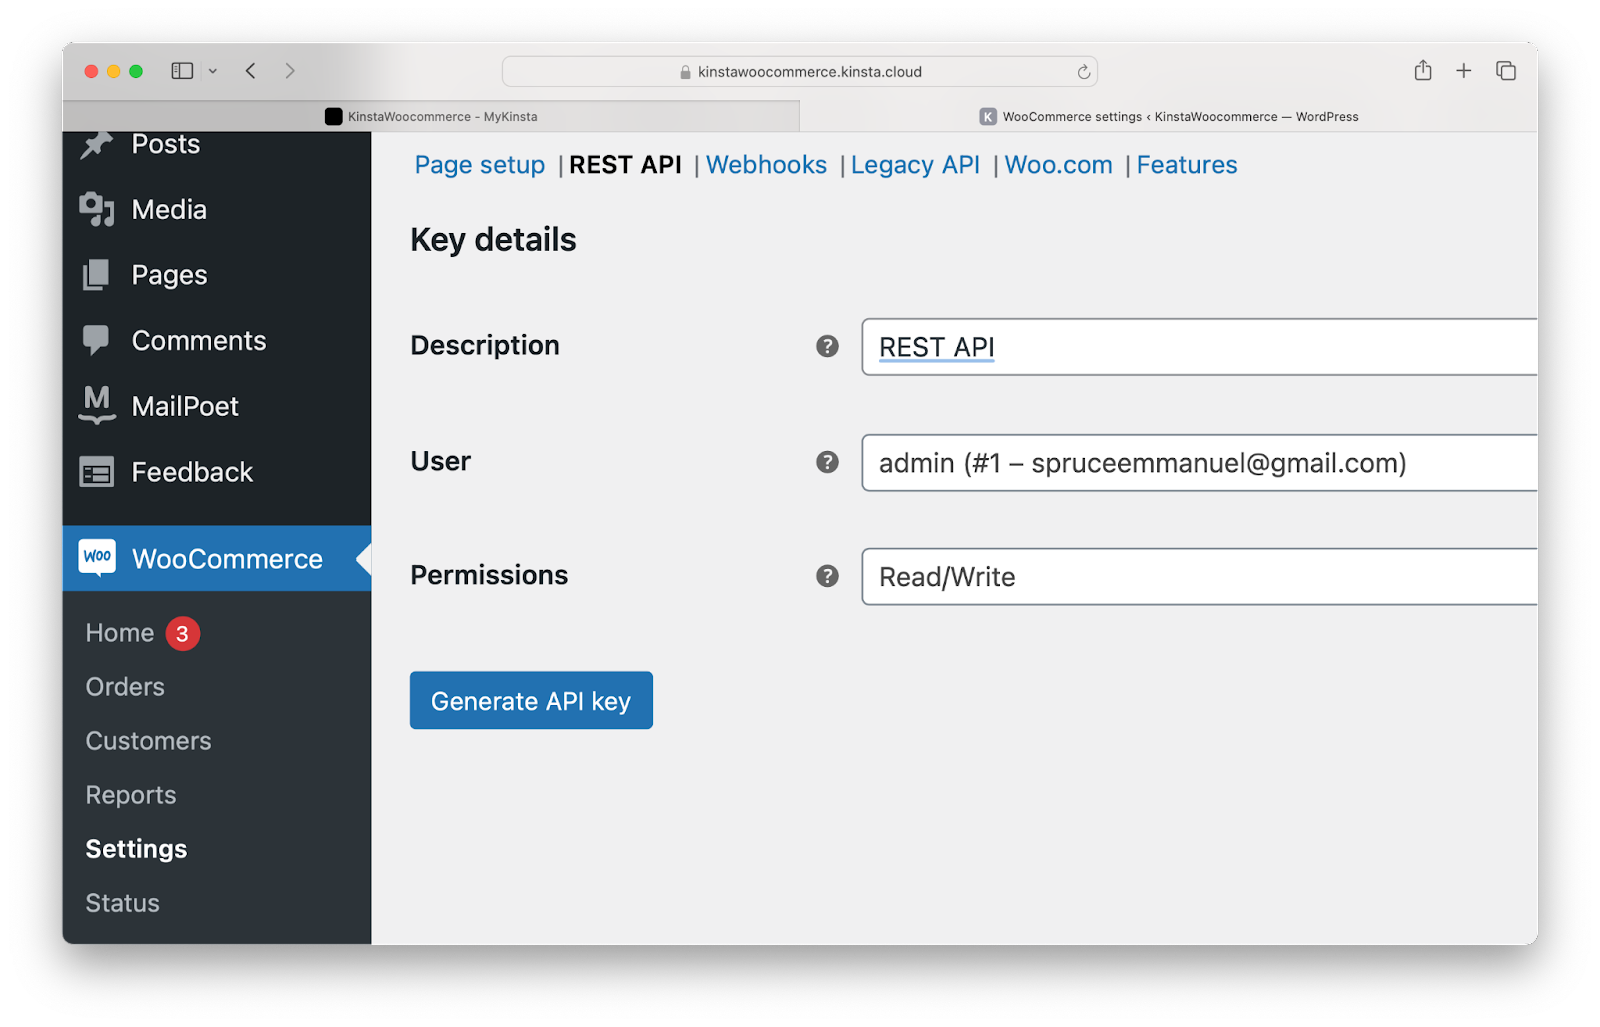
Generating the WooCommerce API key. - Copy the consumer key and secret and store them safely for use in the React application.
- Finally, adjust the Permalink structure to ensure JSON data is returned when requesting the API. On the WordPress Admin dashboard, click Settings > Permalinks, and select Post name.
Before proceeding, add some products to your WooCommerce store. Navigate to the WooCommerce section in your WordPress dashboard, click on Products, and follow the prompts to add products. You can also import these sample products for your store.
With WordPress and WooCommerce set up, you’re ready to focus on the frontend of your headless ecommerce application.
Set up a React project
Here’s how to set up a React project:
- In your preferred directory, use the following commands to create a React project:
# Remember to replace <app-name> with your preferred name # With npx npx create-react-app <app-name> && cd <app-name> # With yarn yarn create react-app <app-name> && cd <app-name> - Once your project is created, create a .env file in the root of your project and add the following:
REACT_APP_CONSUMER_KEY=your_Woocommerce_consumer_key
REACT_APP_CONSUMER_SECRET=your_Woocommerce_consumer_secret
Replace this with your WooCommerce consumer key and secret generated earlier.
- Next, use the command below to install a package for managing routes:
## With npm npm i react-router-dom ## With yarn yarn add react-router-dom - Finally, launch the React project using the following command:
## With npm
npm start

## With yarn
yarn start
Develop the frontend for your headless WooCommerce site
A successful ecommerce store showcases products and facilitates purchases. Begin by displaying the products available in the WooCommerce store on the frontend. This involves making requests to the WooCommerce API.
The endpoint to list all products is wp-json/wc/v3/products. This endpoint must be appended to the host URL. Add this variable to your .env file for your base URL, which is the host URL appended with the products endpoint. Update http://example.com with your WooCommerce site domain.
REACT_APP_BASE_URL=http://example.com/wp-json/wc/v3/productsWhen making API requests, you must include your consumer key and secret in the URL. When combined, the URL looks like this:
https://kinstawoocommerce.kinsta.cloud/wp-json/wc/v3/products?consumer_key=your_consumer_key&consumer_secret=your_consumer_secretLet’s make API requests in the React application using the Fetch API to fetch the WooCommerce products.
- In your React application, open the App.js file in the src directory and replace its contents with the code below:
import {Link} from 'react-router-dom';
import {useEffect, useState} from 'react';

function App() {
    const BASE_URL = process.env.REACT_APP_BASE_URL;
    const CONSUMER_KEY = process.env.REACT_APP_CONSUMER_KEY;
    const CONSUMER_SECRET = process.env.REACT_APP_CONSUMER_SECRET;

    const [products, setProducts] = useState([]);
    const [loading, setLoading] = useState(true);

    useEffect(() => {
        const fetchProducts = async () => {
            const response = await fetch(`${BASE_URL}?consumer_key=${CONSUMER_KEY}&consumer_secret=${CONSUMER_SECRET}`);
            const data = await response.json();
            setProducts(data);
            setLoading(false);
        };

        fetchProducts();
    }, [BASE_URL, CONSUMER_KEY, CONSUMER_SECRET]);

    return loading ? (
        <div className="loaderText">
            <h2>Just a moment. Fetching products...</h2>{' '}
        </div>
    ) : (
        <ul>
            {products ? (
                products.map((product) => (
                    <li key={product.id}>
                        <Link to={`/product/${product.id}`}>
                            <img src={product.images[0].src} alt="Product banner"/>
                            <h2>{product.name}</h2>
                            <p>Sale price: {product.sale_price}</p>
                            <strong>
                                {product.stock_status === 'instock'
                                    ? 'In stock'
                                    : 'Out of stock'}
                            </strong>
                            <button>Add to Cart</button>
                        </Link>
                    </li>
                ))
            ) : (
                <li>No products found</li>
            )}
        </ul>
    );
}

export default App;
This code fetches a list of products from the WooCommerce API endpoint using the Fetch API when the component mounts (
useEffecthook). The endpoint URL is constructed using environment variables set earlierOnce the data is fetched, it updates the component state (
products) usingsetProducts(response)and setsloadingtofalseusingsetLoading(false).While the data is being fetched, it displays a loading message. Once the data is fetched and
loadingis set tofalse, it maps through theproductsarray and renders a list of product items using JavaScript XML (JSX). Each product item is wrapped in aLinkcomponent fromreact-router-dom, which generates a link to the individual product’s details page based on its ID.The product’s name, price, description (rendered using
dangerouslySetInnerHTMLto inject HTML content), stock status, and a button are displayed for each product. - In the src directory, open the index.js file and replace the code with the snippet below:
import React from "react";
import ReactDOM from "react-dom";
import { BrowserRouter, Route, Routes } from "react-router-dom";
import "./index.css";
import App from "./App";


ReactDOM.render(
    <React.StrictMode>
        <div className="container">
            <header>
                <h1>Kinsta Store</h1>
            </header>
                <BrowserRouter>
                    <Routes>
                        <Route exact path="/" element={<App />} />
                    </Routes>
                </BrowserRouter>

        </div>
    </React.StrictMode>,
    document.getElementById("root")
);
It renders the
Appcomponent when the/route is called in the browser. - Run your app to view the changes.
## With npm
npm start

## With yarn
yarn start
The React application now displays a list of products from the WooCommerce store.
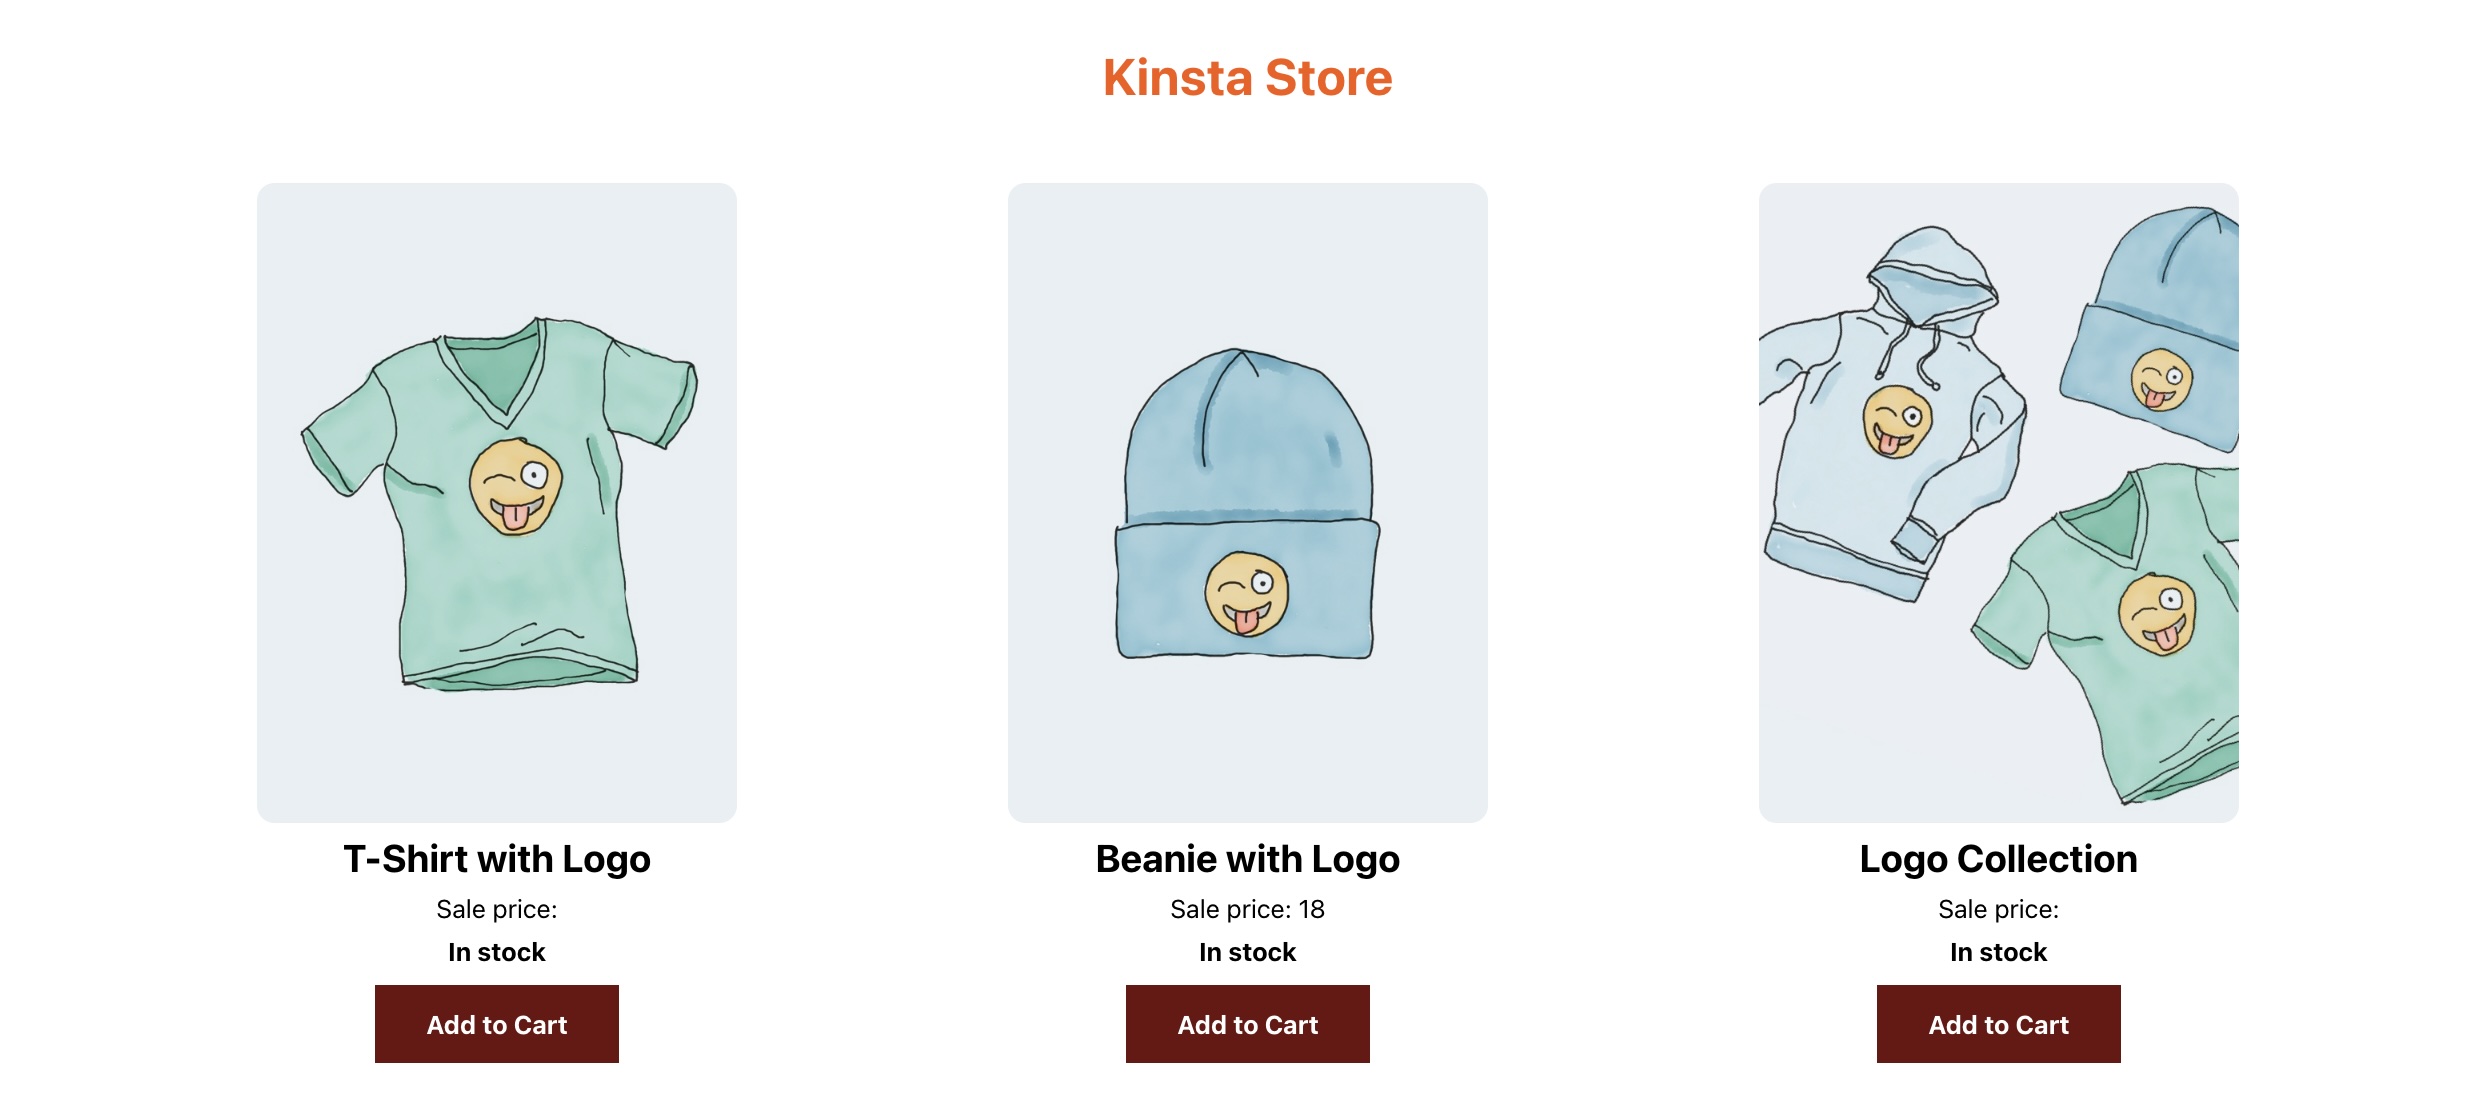
WooCommerce store product list.
Create dynamic product pages
Now, to enhance the user experience, create dynamic product pages using the WooCommerce API. This API provides an endpoint to fetch data about a single product: wp-json/wc/v3/products/<id>. To use this endpoint to fetch and display data about a single product in the store, follow these steps:
- Create a component ProductDetail.js inside the src directory that fetches and displays data about a single product. This component fetches and displays detailed information about a single product.It operates in a similar manner to the code in the App.js file, except it retrieves details for a single product.
import {useState, useEffect} from 'react'; import {useParams} from 'react-router-dom'; function ProductDetail() { const BASE_URL = process.env.REACT_APP_BASE_URL; const CONSUMER_KEY = process.env.REACT_APP_CONSUMER_KEY; const CONSUMER_SECRET = process.env.REACT_APP_CONSUMER_SECRET; const {id} = useParams(); const [product, setProduct] = useState(null); useEffect(() => { const fetchSingleProductDetails = async () => { const response = await fetch( `${BASE_URL}/${id}?consumer_key=${CONSUMER_KEY}&consumer_secret=${CONSUMER_SECRET}` ); const data = await response.json(); setProduct(data); }; fetchSingleProductDetails(); }, [BASE_URL, CONSUMER_KEY, CONSUMER_SECRET, id]); if (!product) { return ( <div className="loaderText"> <h2>Fetching product details...</h2> </div> ); } return ( <div className="product-detail"> <h2>{product.name}</h2> <h4>Original Price: {product.regular_price}</h4> <h4>Sale price: {product.sale_price}</h4> <img src={product.images[0].src} alt="Product banner"/> <strong> {product.stock_status === 'instock' ? 'In stock' : 'Out of stock'} </strong> </div> ); } export default ProductDetail; - Create a new route in index.js and assign the
ProductDetailcomponent to it. This code snippet creates a new route in index.js and assigns theProductDetailcomponent. This ensures that when users click a product link, they are directed to the respective product page.// index.js … import ProductDetail from "./ProductDetail"; ReactDOM.render( <React.StrictMode> … <Router> <Routes> <Route exact path="/" element={<App />} /> {/* the new route */} <Route path="/product/:id" element={<ProductDetail />} /> </Routes> </Router> </div> </React.StrictMode>, document.getElementById("root") );With these modifications, clicking any product in the application redirects users to a page displaying detailed information about that specific product.
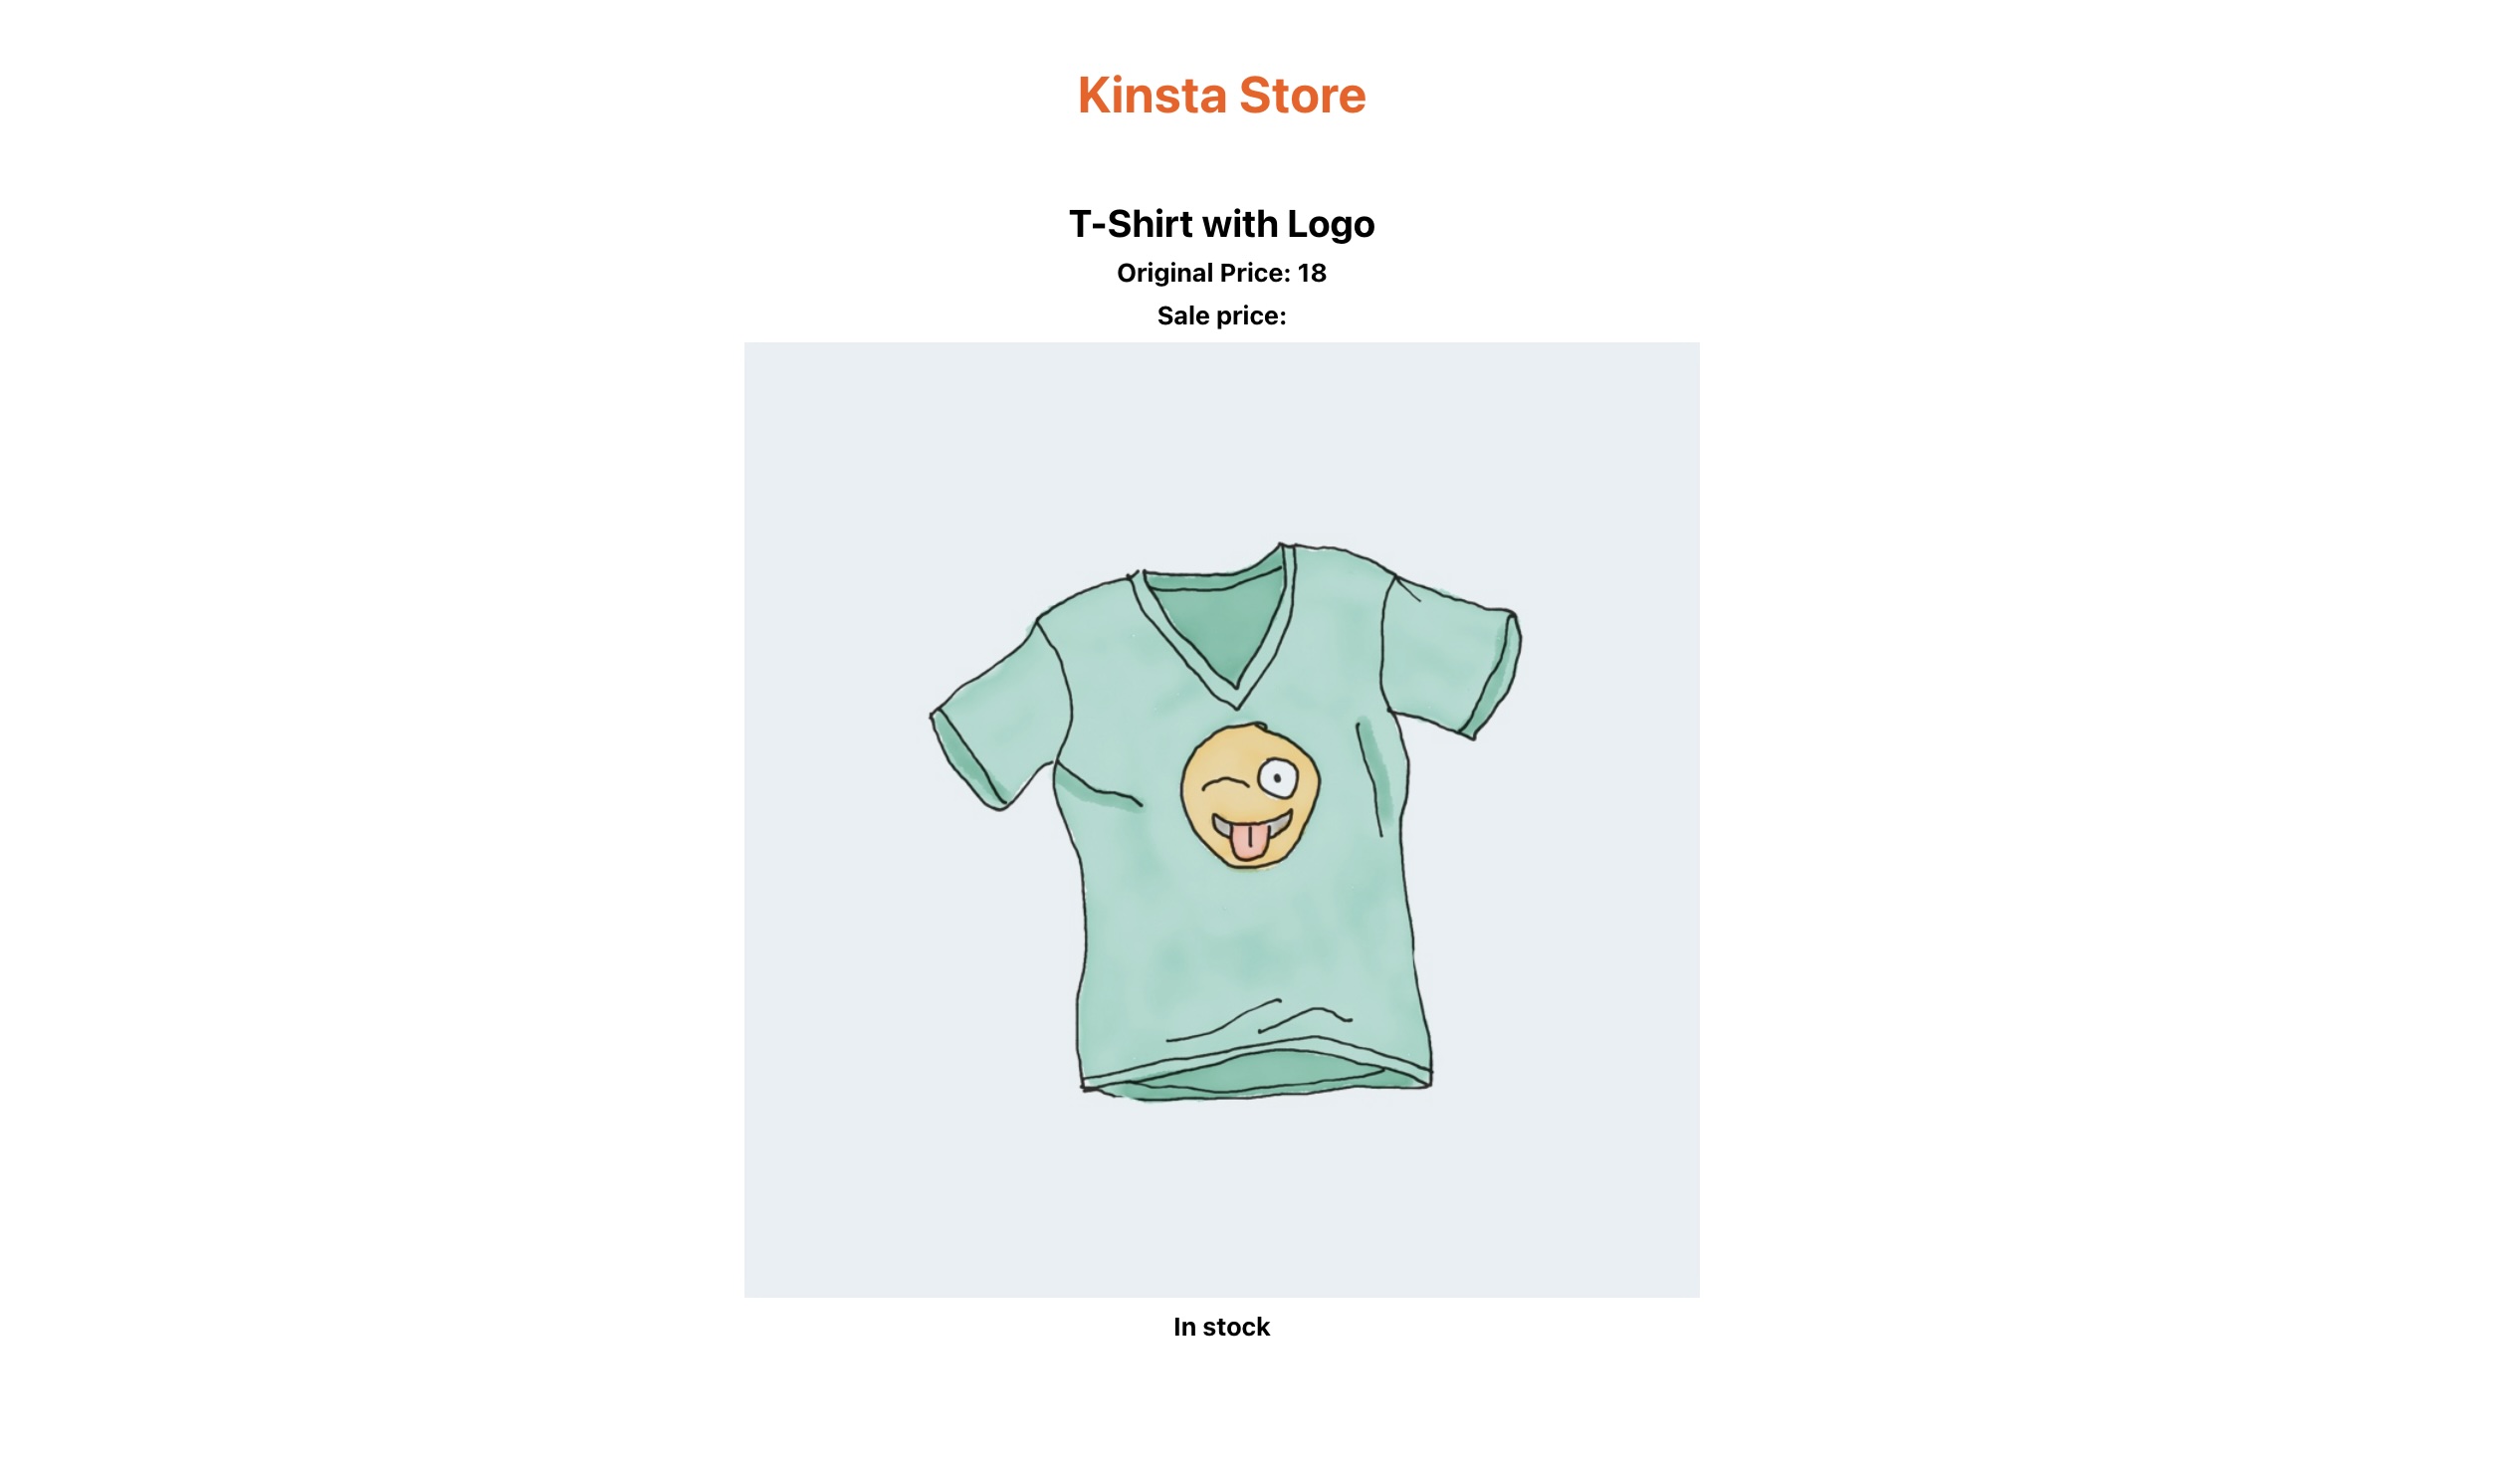
Detailed information about a clothing product.
You can access the complete code in this GitHub repository.
Integrate key WooCommerce features in a headless setup
You can build on the foundation of listing products in a headless WooCommerce application by integrating essential features like the following:
- Shopping carts — Manage cart data on the client side or use local storage to allow users to add, remove, and update items seamlessly.
- Checkout processes — Design a streamlined checkout with React components, collect necessary information, validate user input, and ensure a smooth checkout experience.
- User authentication — Implement secure authentication using JSON Web Token (JWT) or Open Authorization 2.0 (OAuth2) to enhance the user experience with registration, login, and password reset features.
- Payment processing — Use secure payment gateway APIs, like Stripe or PayPal, for transactions and refunds.
- Order management — Manage orders and statuses efficiently with the WooCommerce API. Provide user-friendly features for order history, tracking, returns, and refunds, and automate processes using webhooks or event-driven architecture.
Deploy your headless WooCommerce site on Kinsta
Once you’ve developed your headless WooCommerce site, deploying it on Kinsta’s WordPress Hosting platform is straightforward.
Kinsta offers a range of benefits, including high performance, robust security, and scalability, making it an ideal choice for hosting your headless ecommerce site. If you already have a WordPress site that isn’t on Kinsta, you can easily migrate it to Kinsta.
Additionally, you can deploy your React application to Sevalla’s Static Site Hosting service, Kinsta’s PaaS product, for free, all you have to push your code to your preferred Git provider (Bitbucket, GitHub, or GitLab).
Summary
This article explained the numerous advantages and new possibilities for creating dynamic and high-performing online stores by setting up headless WooCommerce sites.
By decoupling the frontend from the backend, you can customize your site to deliver more engaging and personalized shopping experiences to customers that benefit from high performance, robust security, and scalability.
Whether you’re a seasoned developer or just starting, Kinsta provides the support, tools, and other resources you need to build and manage innovative and successful e-commerce solutions. Host with Kinsta today to explore the possibilities of headless e-commerce!
Are you excited about the endless possibilities of headless WooCommerce for your online store? Share your insights or questions in the comments below.