
As with any platform, there are always those annoying errors or problems you have to learn how to work through. Trust us, we’ve pretty much seen them all! From the white screen of death to database connection errors, WordPress definitely has its quirks. 😉 But we still love it! Today we’re going to dive into one of the more common ones, the HTTP error. Users typically encounter this when trying to upload images or videos to the WordPress media library.
While the HTTP error is usually easy to fix it can be rather frustrating as it usually interrupts your workflow. Nothing is worse than spending 20 minutes trying to find that perfect image for your blog post, you go to upload it, and bam, you’re suddenly met with a very vague error.
Below we’ll explore why this error happens and what you can do to quickly resolve it so you can get back to uploading your media.
What is the WordPress HTTP Error?
The WordPress HTTP error occurs when something goes wrong while attempting to upload images or videos using the built-in media library tool. Unfortunately, unlike browser errors where we can usually reference an HTTP status code, WordPress errors are sometimes a little harder to troubleshoot (especially if you don’t know how to enable WordPress debugging mode).
The very vague “HTTP error” definitely doesn’t help you determine what might be wrong or even where to start looking. But that is because there could be a few causes for the failure and WordPress simply doesn’t know why, so it spits out a generic error message (as seen below).

How to Fix the WordPress HTTP Error
From our experience, the WordPress HTTP error typically originates from two things: the first is a client-side or user error (your login session, bad characters in the file name, etc.), and the second is a problem or setting on your WordPress host (server issue, memory list, third-party plugin, shared hosting throttling resources, etc.). So we’ll dive into a little of both.
Here are some recommendations and things to check to fix the error (sorted in order by most common reasons we see):
- Refresh the Page
- Shrink or Resize the File
- Rename the Image File
- Temporarily Deactivate Plugins and Theme
- Ask Your WordPress Host
- Increase PHP Memory Limit
- Check Uploads Folder Permissions
- Move to the Latest Version of PHP
- Fix Performance Issues with Imagick and Shared Hosts
- Remove Custom Media Library Path
- Disable mod_security
- Install the Add To Server Plugin
1. Refresh the Page
The very first thing you should do when encountering the WordPress HTTP error is to simply refresh the page in your browser. Sounds too easy right? 😉 Well, actually this is the most common fix we’ve seen for it. Here’s why:
First, for whatever reason, your browser might have lost connection temporarily with WordPress and the process simply failed to complete. This could be due to your ISP, a temporary hiccup with your WordPress host, etc. If you refresh the page and try uploading again it the error sometimes will resolve itself.
Second, we’ve also seen that sometimes after refreshing the page, or coming back to the WordPress editor from another tab, that it suddenly kicks you out. This is most likely an indicator that your WordPress login session has expired. You should see the following message:
Your session has expired. Please log in to continue where you left off.

So naturally, you log back in and try to upload your media again. However, the HTTP error occurs. This is kind of a quirk with WordPress. Once you log back in, you need to actually manually refresh the page you’re on. Then uploading media will work again.
2. Shrink or Resize the File
You might need to edit your image file, which could entail reducing the file size (KB or MB) or decreasing the width/height (pixels). We recommend checking out our in-depth post on how to optimize images for the web. There are a lot of third-party image optimization plugins you can use to automatically do this for you (both reducing and resizing) when your image is uploaded to the media library.
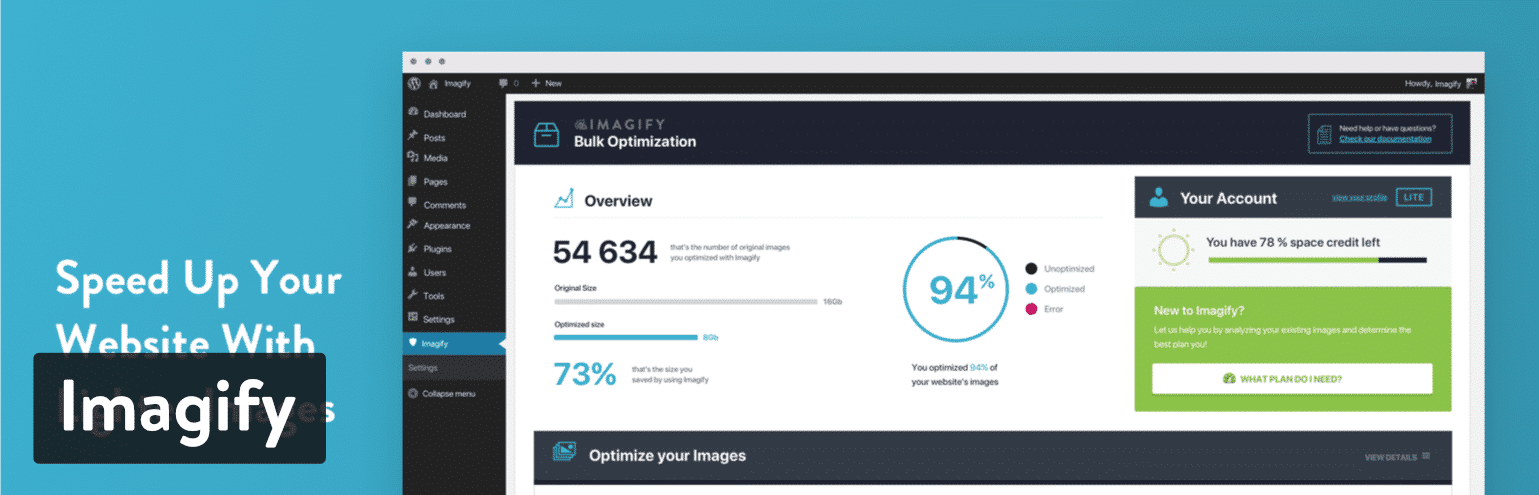
We have used Imagify on our Kinsta site for years without a single issue. But there are a lot of other great ones out there as well. Just make sure whichever plugin you use, that they are optimizing images on their own servers, not locally. If you’re bulk optimizing images locally this can drastically harm your site’s performance.
It’s OK to upload high-resolution images as WordPress supports responsive images out of the box. In fact, you will probably want to so that the image looks crisp on retina displays. But unless your a photographer or business that needs high-resolution images a good rule of thumb though is to keep your final image size under 100 KB and no more than double the size of your website’s content div width.
Also, you might have to play with the PNG and JPG file types. Sometimes one can be much larger than the other depending on what type of image it is.
Depending on the configuration of your WordPress host, you might also want to look into increasing the WordPress maximum upload file size.
3. Rename the Image File
It can never hurt to try and rename the image file. WordPress should automatically append a number on the end if you try to upload a duplicate file name, but in case that doesn’t work, try renaming your file. Unfortunately, WordPress doesn’t let you rename the file of an already uploaded image file, so you will need to rename it locally and re-upload it.
When we are uploading images that already exist we typically add a -1 or -2 on the end (example: image-file-1.png, image-file-2.png). Make sure to add the dash otherwise Google will read it as one word and it could hurt your SEO.
Also, to be safe, stay clear of uploading an image with file names that contain special characters. This includes international language symbols and characters such as apostrophes. Dashes are OK. You can see in this example below on the Kinsta Japanese site, we are using English for the file names, not the special characters. While WordPress can technically support these, there are a lot of other issues that can pop up.

4. Temporarily Deactivate Plugins and Themes
It’s always a good idea if you’re having HTTP errors to try deactivating your plugins and even switch your WordPress theme to the default to see if this resolves the problem. A few plugins that are are typical culprits include image optimization plugins (they tie directly into the media library) and security plugins such as WordFence (these plugins are sometimes too restrictive). Or you can simply delete your WordPress theme.
If you don’t want to affect your live site, simply clone your live site to a staging environment. If the WordPress HTTP error is also happening on staging, then you can quickly deactivate all your plugins to start narrowing it down.
Remember, you won’t lose any data if you simply deactivate a plugin. If you can still access your admin, a quick way to do this is to browse to “Plugins” and select “Deactivate” from the bulk actions menu. This will disable all of your plugins.

If this fixes the issue you’ll need to find the culprit. Start activating them one by one, and try uploading an image again in the media library. When you see the HTTP error return, you’ve found the misbehaving plugin. You can then reach out to the plugin developer for help or post a support ticket in the WordPress repository.
If you can’t access WordPress admin you can FTP into your server and rename your plugins folder to something like plugins_old. Then check your site again. If it works, then you will need to test each plugin one by one. Rename your plugin folder back to plugins and then rename each plugin folder inside of if it, one by one, until you find it. You could also try to replicate this on a staging site first.

The same goes for your WordPress theme. Typically themes don’t tie into the media library, but we’ve seen some weird setups. It never hurts to try switching your theme over to the default Twenty Seventeen theme to see if it fixes it. Just like with plugins, you don’t have to worry about losing your current theme settings. All of that is stored in the WordPress database.
5. Ask Your WordPress Host
If you’ve tried the steps above already and are still getting the WordPress HTTP error, we recommend reaching out to your WordPress host for assistance before proceeding. Many of the additional troubleshooting steps are a little more advanced and a lot of times you can ask your host to do or check on this for you.
Kinsta’s support team is available 24×7 from the bottom right-hand side of the MyKinsta dashboard.

6. Increase PHP Memory Limit
Another cause for the WordPress HTTP error is that your server lacks the available memory for the background upload process to complete successfully. This is a very common problem with shared WordPress hosting. To fix it you need to increase the amount of memory PHP can use. 256 MB is recommended.
The default memory limit for Kinsta clients is already set to 256 MB. If you host your WordPress site at Kinsta you shouldn’t have any issues with a lack of memory. 👍
Increase PHP Memory Limit with wp-config.php
You can increase the PHP memory limit by adding the following code to your wp-config.php file. Note: this may be overwritten by a server-level rule in place by your WordPress host.
define( 'WP_MEMORY_LIMIT', '256M' );Increase PHP Memory Limit in cPanel
If your host is using cPanel, you can increase the PHP memory limit in two different areas.
The first is under the software section. Click on “Select PHP Version.” Click on “Switch to PHP Options.” You can then click on “memory_limit” to change its value.
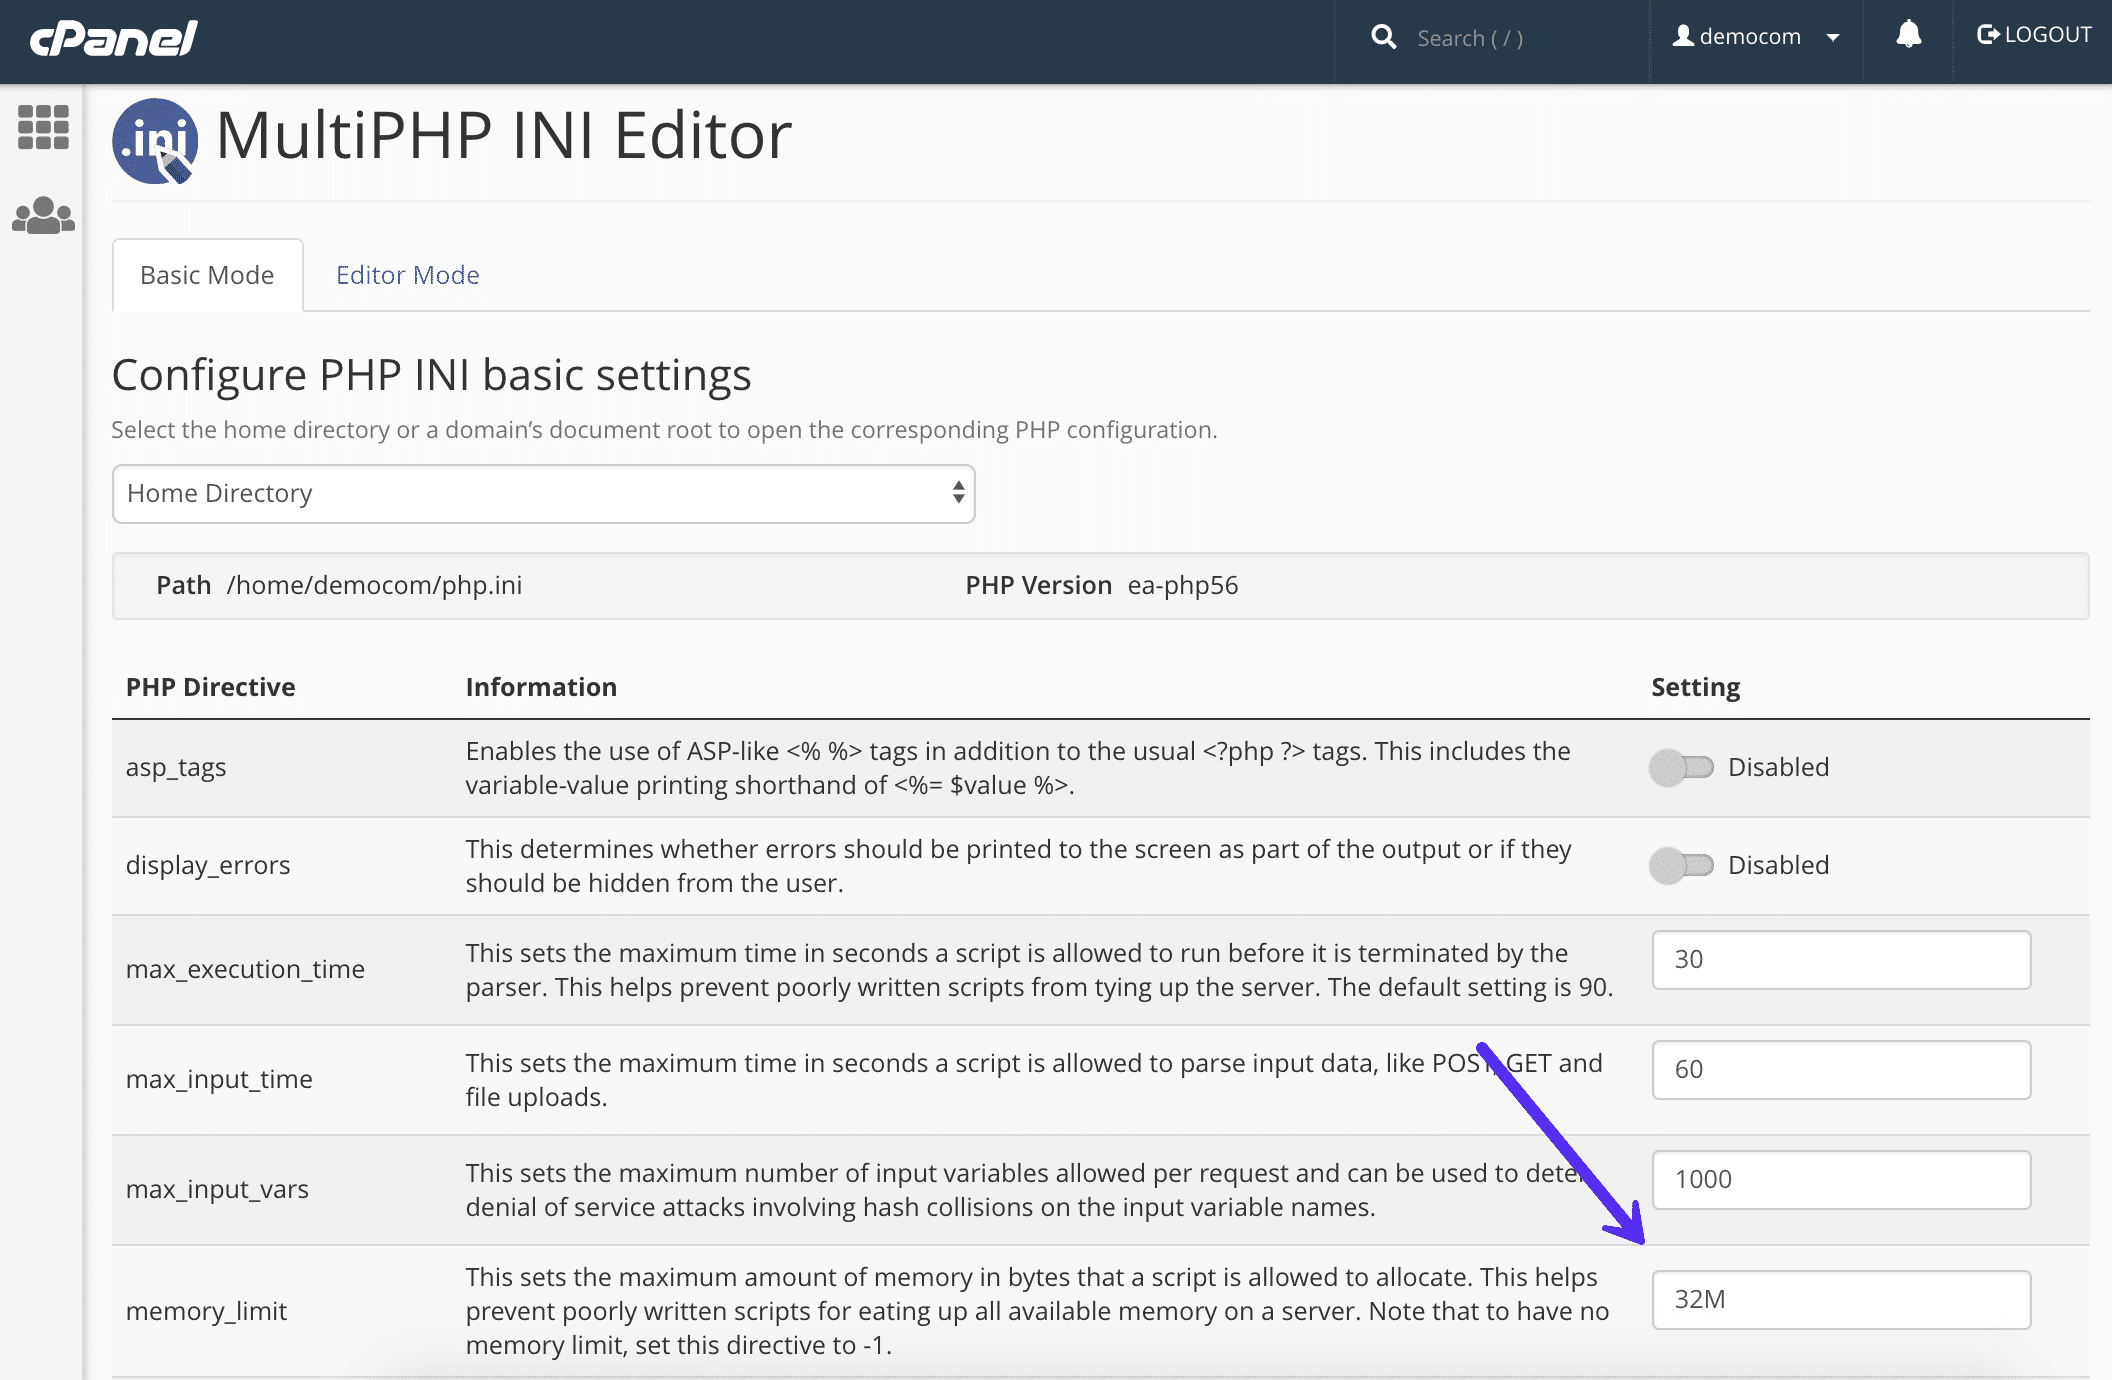
The second area is also under the software section. Click on the “MultiPHP INI Editor” tool. This allows you to modify the php.ini file. Simply scroll down to where it says “memory_limit” and input a higher value.
Increase PHP Memory Limit with php.ini
If you aren’t using cPanel, you can also edit the php.ini file directly if you have access. To do this, login to your site via FTP or SSH, go to your site’s root directory and open or create a php.ini file.
Can’t connect via SSH? Learn how to fix the SSH “Connection Refused” error.
If the file was already there, search for the “memory_limit” setting and modify it as necessary.
Some shared hosts might also require that you add the suPHP directive in your .htaccess file for the above php.ini file settings to work. To do this, edit your .htaccess file, also located at the root of your site, and add the following code towards the top of the file:
<IfModule mod_suphp.c>
suPHP_ConfigPath /home/yourusername/public_html
</IfModule>
Increase PHP Memory Limit with .htaccess
The .htaccess file is a special hidden file that contains various settings you can use to modify the server behavior, right down to a directory specific level. If you don’t have access to php.ini, we suggest you try this next. First, login to your site via FTP or SSH, take a look at your root directory and see if there is a .htaccess file there.
If there is you can edit that file to and modify the “php_value memory_limit” value.
7. Check Uploads Folder Permissions
Typically when there is a folder permissions error you should get a message in WordPress about it not being able to write to the directory. However, this might not always be the case. If a WordPress site has been hacked or infected with malware, there could be a lot of issues going on with the permissions.
Tip: Kinsta offers free hack fixes for all clients. 😄
The main folder you’re concerned with is your /wp-content/uploads folder, as this is where files are stored when uploaded via the media library.
According to the WordPress Codex, all directories should be 755 (drwxr-xr-x) or 750.
You can easily see your folder permissions with an FTP client (as seen below). You could also reach out to your WordPress host support team and ask them to quickly GREP file permissions on your folders and files to ensure they’re set up properly.
Make sure that if you manually update the permissions on this folder that you check both the “Recurse into subdirectories” option as well as the “Apply to directories only.”

8. Move to the Latest Version of PHP
WordPress officially recommends PHP 7.3 or higher. If you’re not running on that, you’re below the minimum requirements set by the developers of the CMS. 😮
We always recommend running the latest and supported versions of PHP due to the fact it offers better security and performance, including bug fixes and functions that need to be deprecated.
We have seen older versions of PHP contribute to all sorts of errors, including the infamous WordPress HTTP error. At Kinsta you can easily change to PHP 8.1 with a single click in the MyKinsta dashboard.
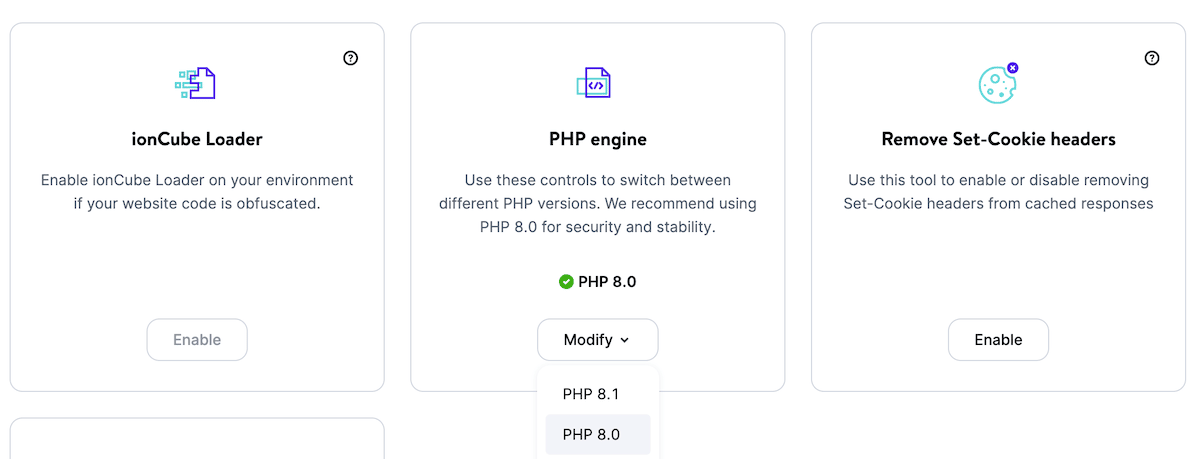
If your host uses cPanel they might already have an option available to you to change your version of PHP. Simply log in to cPanel and under the “Software” category click on “Select PHP Version.”

You can then select the PHP versions available to you that your host supports.

9. Fix Performance Issues with Imagick and Shared Hosts
There are two different PHP modules WordPress uses for image processing: GD Library and Imagick (ImageMagick). Depending on what is installed on your server, WordPress may use either one.
The problem is that shared WordPress hosts have a lot of hidden resource throttling behind the scenes. That is the only way they can cram so many users on the same machine. A common issue people run into is that there are too few resources allocated to Imagick (ImageMagick). Hosts will limit the ability to use multiple threads, hence resulting in the WordPress HTTP error.
You can add the following code to the top of your .htaccess file, changing the thread limit value to something higher.
MAGICK_THREAD_LIMIT 1
Another option you have is to tell WordPress to use the GD library instead of Imagick. You can do this by simply adding the following code to your theme’s functions.php file.
function wpb_image_editor_default_to_gd( $editors ) {
$gd_editor = ‘WP_Image_Editor_GD’;
$editors = array_diff( $editors, array( $gd_editor ) );
array_unshift( $editors, $gd_editor );
return $editors;
}
add_filter( ‘wp_image_editors’, ‘wpb_image_editor_default_to_gd’ );
We’ll be blunt. If you’re having to tweak things like this it’s time to move to a new WordPress host. Kinsta doesn’t have crazy limits like this in place and for the most part, you’re only limited by PHP threads. You shouldn’t have to worry about these types of things as a website owner.
Every WordPress site hosted on Kinsta is housed in its own isolated container, which has all of the software resources required to run it (Linux, Nginx, PHP, MySQL). The resources are 100% private and are not shared between anyone else or even your own sites.
Read more about how Kinsta is different than any other host you’ve tried.
10. Remove Custom Media Library Path
It very well could be that your media library path isn’t setup correctly. We typically see this when users migrate their local development site over to production. If you look in “Media” under “Settings” in your WordPress dashboard and see a file path value listed, go ahead and delete it and click “Save Changes.” You want your media to be stored in the default /wp-content/uploads folder.
Below is what it typically looks like. If you don’t see a library path, then you’re all good here.

11. Disable mod_security
Mod_security is an open source firewall that sometimes might cause the WordPress HTTP error to occur. You can disable mod_security by adding the following code to the top of your .htaccess file.
<IfModule mod_security.c>
SecFilterEngine Off
SecFilterScanPOST Off
</IfModule>
If you’re using cPanel, you can also disable it by clicking into “ModSecurity” in the “Security” section.

Then toggle the status from “On” to “Off” next to the domain you want to disable it on.

We always recommend using an enterprise-grade and yet affordable WAF like Sucuri or Cloudflare instead. You can read our recommendation for the best WAF settings here.
12. Install the Add From Server Plugin
Last but not least, if you’re really in a bind and nothing else seems to be working, you can install the free Add From Server plugin. Perhaps you’re waiting for a response from your WordPress host or a developer on how to get the WordPress HTTP error resolved.

The Add to Server plugin will usually get you around the error and could be a good temporarily fix, especially if you’re right in the middle of something important. It was originally developed to allow you to add very large files via SFTP. Important: this plugin is no longer maintained or supported. Use at your own risk.
Summary
As you can see there are quite a few different ways to fix the WordPress HTTP error. Hopefully one of the solutions above worked for you and you’re already back on track and uploading your media. If you continue to receive this error time and time again, it might be time to consider upgrading to a better WordPress host. Many of the solutions above are things you don’t have to worry about at Kinsta.
If you found a solution that isn’t in our list, please leave a comment a below and we’ll get it added.

Brian has a huge passion for WordPress, has been using it for over a decade, and even develops a couple of premium plugins. Brian enjoys blogging, movies, and hiking. Connect with Brian on Twitter.

