
When you’re redesigning a website or updating old content, changes to your URL structures are likely. And if you don’t follow WordPress redirect best practices, you risk negatively impacting the User Experience (UX) and your Search Engine Optimization (SEO).
The WordPress redirect functionality built into the core platform is designed to catch incorrect URLs. That’s to say: when a wrong URL is requested, WordPress tries to locate the correct URL and will redirect the visitor if it does.
In this post, we’ll explain the importance of WordPress redirects and how they influence page speed and, of course, SEO. We’ll also discuss how you can minimize redirects in WordPress and guide you through the various solutions you can use to set them up.
Let’s get started!
Prefer to watch the video version?
An Introduction to WordPress Redirects
WordPress core comes with redirect functionality that is intended to help catch and correct incorrect URLs. If someone requests an incorrect URL, WordPress attempts to locate the correct one and then redirects the visitor if it was successful.
Let’s say you have a page that resides at “http://www.example.com/parent/page”. If you type “http://example.com/page” into your browser, typically, WordPress is smart enough to automatically locate the correct page to redirect you to.
Unfortunately, it’s not always that simple. If you set up your website to resolve using HTTPS (so as to force all traffic to be redirected from the HTTP to HTTPS prefixed URL), the redirection process becomes more complex.
For example, imagine that a visitor attempts to access the web page “https://www.example.com/parent/page” by typing “http://example.com/page” into the address bar. The process would unfold as follows:
- First, the visitor is redirected from HTTP to HTTPS.
- Second, the visitor is redirected when “www” is added to the URL.
- Third, the visitor is redirected to the URL formulation that includes the parent page in the path.
- Finally, the server begins to send the website’s files and resources to the visitor’s browser.
You might be thinking: “That’s great! I can butcher a link and the visitor will still end up where they’re supposed to be.” In a sense, you’d be right to think that. WordPress is very good at figuring out where URLs are supposed to resolve, and this means that mistyped URLs will often resolve properly.
However, all of this auto-redirection also has a downside.
How WordPress Redirects Impact Page Loading Speed
Once you realize how resilient WordPress is, it’s easy to get tricked into neglecting URL formulation. This is particularly dangerous if you manually type out the URLs in inline links and custom menus.
It’s no big deal, right? Visitors still end up at the correct URL! While that’s true in theory, what you’re overlooking is the impact redirects have on page loading speed.
Let’s take a look at a Pingdom page speed result for a WordPress website. This test is based on accessing a page using a properly-formulated URL, in order to avoid any redirects:
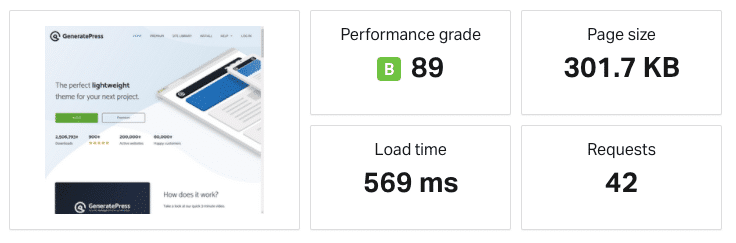
That’s not bad at all. If we look at the file requests, we see that there are no redirects happening when the site is requested:

So what happens if we mess up that URL and run the test again?
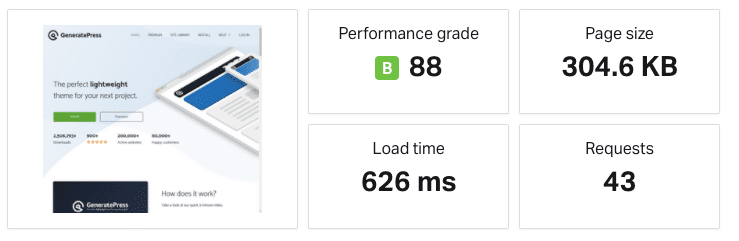
That adds almost 100 milliseconds to the page loading time. Although it may seem like not of a big deal as this site is fast enough already, let’s take a look at the file requests to see what happened:

Now there is a redirect added to the front of the URL. Following the redirects, the page loads as normal. So we can attribute the slower page speed to the redirect happening when the incorrect URL is fed into the test.
The bottom line is that redirects hurt web page loading speed. The difference can be significant and measurable.
How WordPress Redirects Affect Your Site’s SEO
If you have a basic understanding of SEO, you probably know the important role links play in it. If a URL links to a page that no longer exists, or was transferred to another link that was moved, your visitors may encounter a 404 page error:
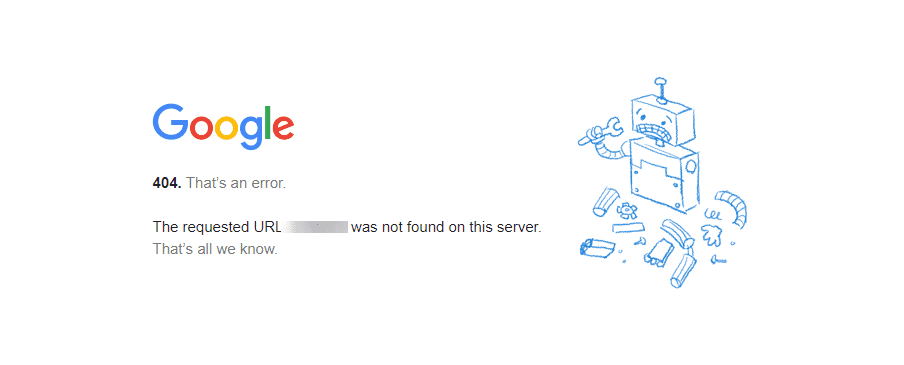
In addition to poor user experience, a 404 ‘page not found’ error can also hurt you from an SEO standpoint. These 404 errors are the result of broken links, which affect search engines’ ability to crawl your website and locate its pages.
This signals to search engines that users not only are able to find what they’re looking for but that you have a poor and outdated site architecture as well.
Therefore, it’s essential to set up redirects for pages with changed URLs. If you’re moving your site to a new domain, configuring WordPress redirects can make it so that search engine crawlers are still able to index the new site URLs, while simultaneously ridding the old ones from the index.
Redirects can also help ensure that link juice will be passed from your old domain to your new one and within your own pages. However, it’s important to note that only certain HTTP redirect codes will pass on your ranking in search engines.
The Various Types of URL Redirects
As a WordPress user, the most common type of redirect you’ll be dealing with (and the best for SEO purposes) is a 301 redirect. This is used for content that has been permanently moved.
301 redirects tell search engines the page you want to send visitors to has changed or moved and pass between 90-99% of link juice. In most cases, this type of redirect will result in search engines passing on the majority of the link juice (or page authority) to the new or updated page.
Additional types of server-side redirects include:
- 302. This temporary redirect informs search engines that the page is moving, but not permanently. It does not pass on link juice as a 301 redirect does.
- 303. This type of temporary redirect is used to prevent pages that are storing data from being refreshed or bookmarked (payment forms, landing pages, etc.). This way, users can’t re-submit forms after hitting the ‘back’ button in their browsers. These redirects don’t influence SEO.
- 307. A 307 redirect is similar to a 303 redirect, in that it should only be used for a temporarily moved page. However, a 302 redirect is usually the preferred method.
- 308. A 308 redirect is a permanent redirect, so it will pass on link juice and page authority. Like the previous redirect, however, its effects on SEO aren’t well known. In most cases, it’s best to use a 301.
As we said, all of the above are considered server-side redirects.
There are also client-side redirects and those are triggered when a user’s browser handles the forwarding or redirection. However, these are not reliable and should be avoided.
Server-side redirects are the best way to ensure that search engines can quickly understand the redirects and transfer your SEO juice appropriately.
To Redirect or Not to Redirect?
Redirects exist for a reason. They allow you to send visitors from outdated content and nonexistent URLs to updated content. We already covered the nonexistent URLs angle to a degree. WordPress does some of that all on its own.
However, WordPress won’t catch everything, and there are times when manual redirect rules are needed.
For example, let’s say you wrote an article titled “What’s Brand New in WordPress” back when WordPress 3.0 was released. It was a great post back in 2010, but searchers looking for “what’s new in WordPress” today in 2026 want newer information. You want to keep those readers happy, so you write a new post about the features included in an upcoming version of WordPress.
In this scenario, a redirect from the old post to the new post is perfectly acceptable and appropriate. Additionally, in this case, a redirect is good SEO practice. The link juice attributed to the old post would be passed to your new post instead, giving it instant weight in search engines.
There are several scenarios where redirects are appropriate, including:
- You’ve posted updated content and want to steer visitors away from the older version.
- You’ve overhauled a website’s permalink structure and need to redirect old URLs to their new structure.
- You’re updating a published page or post and want to temporarily redirect traffic to a different post or page while you work on the update.
When Not to Redirect
In all of the scenarios above, redirects are necessary to send visitors from outdated content and broken URLs to updated content. They’re also handy as a temporary measure while a specific bit of content is updated.
So, when is it not appropriate to use a WordPress redirect? For example, if you’ve built a custom menu using URLs that don’t include “www”, but your site URL does resolve with the “www” subdomain at the front of the URL, you’re making a mistake.
Using redirects in that scenario is not appropriate and hurts the speed and SEO of your site.
How to Minimize Redirects in WordPress
If you’re sold on the idea of minimizing redirects in WordPress, there are two important things you need to do.
1. Never Create Unnecessary Redirects
The first thing to remember is to never intentionally create unnecessary redirects. For example, you shouldn’t create redirects when building internal links and menus.
If you’ve gotten into the habit of typing URLs lazily, it’s best to rethink the way you’re working. Instead, when you create a URL make sure that you:
- Use the proper protocol prefix (HTTP or HTTPS).
- Include or exclude the “www” subdomain as appropriate.
- Don’t use post and page IDs in links.
- Include the entire path to the page or post.
The redirection power built into WordPress is supposed to be a fallback, in case you accidentally create a bad URL. It’s not a very reliable fix for lazy URL writing in general.
2. Make Sure Your Top-Level Domain (TLD) Resolves With No More Than One Redirection
The second thing you can do to minimize the occurrence of WordPress redirects is to make sure your Top-Level Domain (TLD) resolves with no more than one redirection. Your goal is to make sure that the correct URL is reached through one redirection or less, no matter what combination of protocol prefix and subdomain a visitor throws in front of the TLD.
Let’s look at an example. All of the following URLs should resolve to the TLD with no more than one redirection and one of these should resolve with no redirects:
- http://example.com
- http://www.example.com
- https://example.com
- https://www.example.com
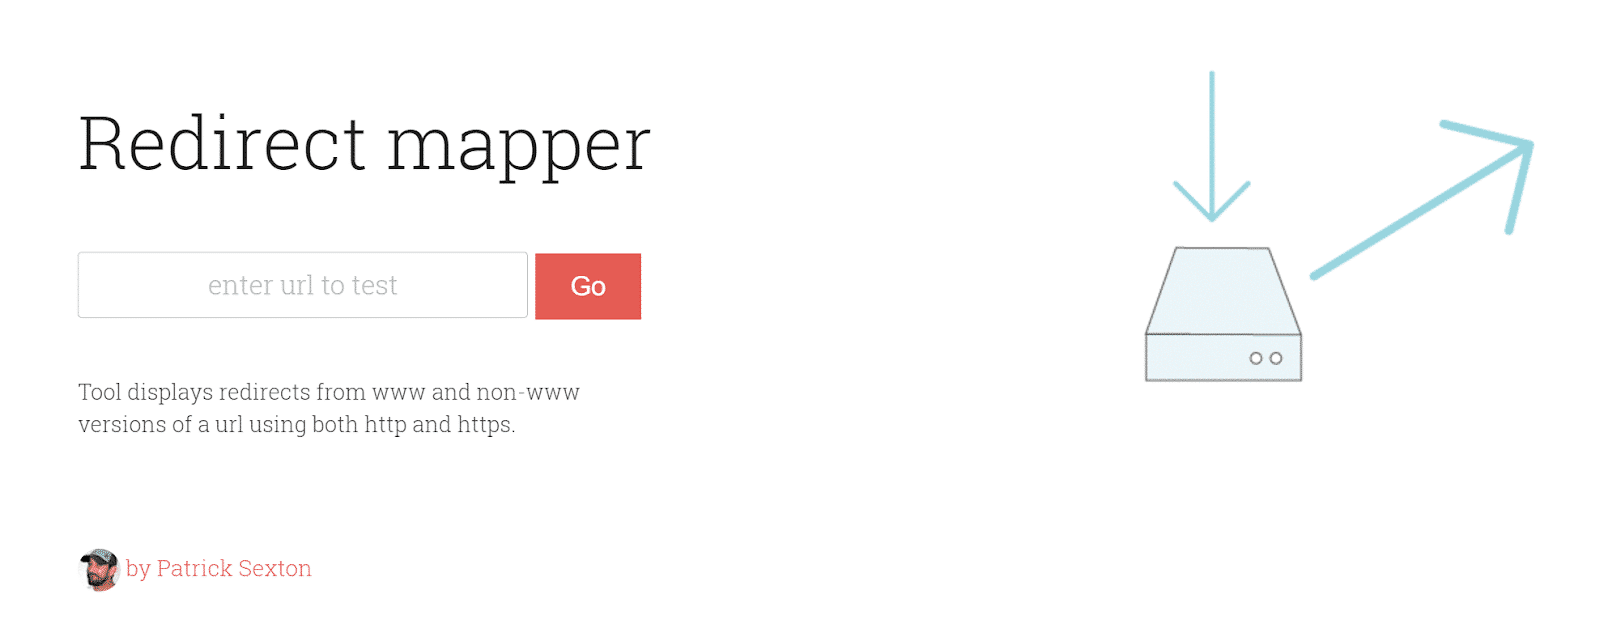
If you aren’t sure how many redirections are required to resolve your site’s URL using those different combinations of protocol prefixes and subdomains, you can check using Patrick Sexton’s Redirect mapper:
Below is an example of how redirects that are not set up correctly are easily spottable using this redirect mapper:
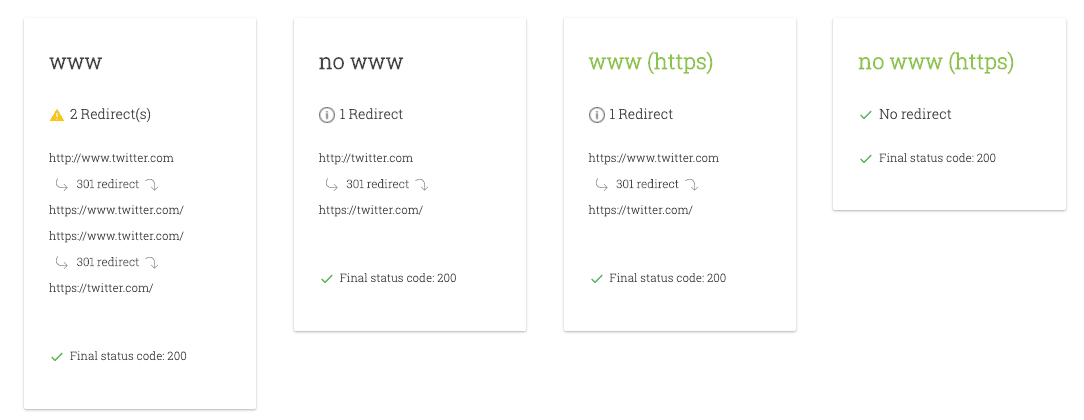
You can see that there are duplicate redirects happening in the “www” version of the domain. Conversely, here is an example of redirects set up correctly:
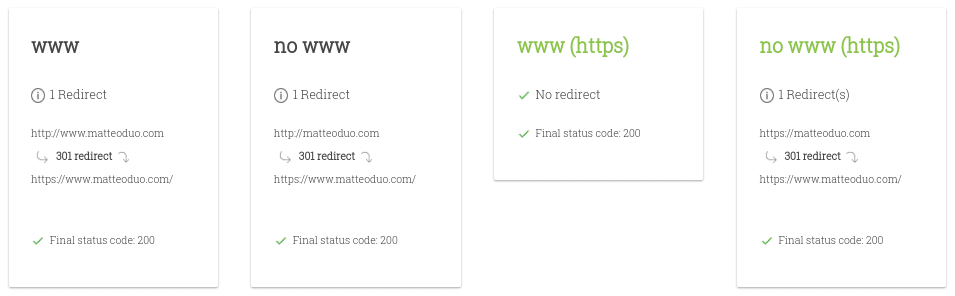
As you can see, there is only one redirect happening for both the “www” and “no www”.
If you do find that some of those combinations either fail to resolve (return a 404 server status code) or require more than one redirection to resolve, it’s time to get to work.
Setting Up Redirects on the Server-Level
One method you can take for setting up a WordPress redirect is to add one or more redirection rules to your server. This will ensure that visitors land at the proper formulation of your site’s URL as quickly as possible.
The basic goal you’re trying to accomplish is to create redirect rules that target any URL formulations requiring more than one redirection. You want to force those URLs to resolve directly to the properly-formulated URL.
For example, if the URL “http://example.com” requires two redirects to get to “https://www.example.com”, you can create a manual redirection that makes that happen in one step (rather than two).
Redirect Rules in Apache
If your site is hosted on a standard LAMP stack, you will need to add URL rewriting rules to your site’s .htaccess file. Setting up a WordPress redirect through a web server configuration file is a technical process and can be complicated.
Therefore, only use this method if you’re comfortable with editing your .htaccess file. Even if you are, it’s still a good idea to create a backup of the file first.
Then, the first step is to connect to your WordPress installation using an FTP client, or through your hosting cPanel’s File Manager. You can locate the .htaccess file in the root directory of your WordPress site.
To set up a 301 redirect, you’ll need to specify the old and new URL locations with a syntax structure that looks like this:
Redirect 301 "old-page" "new-page"
If you want to redirect all of your site’s traffic from HTTP to HTTPS, you can use the following:
<IfModule mod_rewrite.c>

RewriteEngine On
RewriteCond !{HTTPS} off
RewriteRule ^(.*)$ https://www.%{HTTP_HOST}%{REQUEST_URI} [L,R=301]
RewriteCond %{HTTP_HOST} !^www\.
RewriteRule ^(.*)$ https://www.%{HTTP_HOST}%{REQUEST_URI} [L,R=301]

</IfModule>
Keep in mind that before doing this, it’s important to make sure you have your SSL certificate properly configured on the new WordPress site.
Redirect Rules in Nginx
If you’re using a more advanced hosting configuration, there’s a good chance it’s powered by Nginx rather than Apache. In that case, things aren’t quite as simple.
If you’re a Kinsta user, feel free to skip to the next section.
Redirection configuration will vary from one host to the next and you’ll want to get in touch with your host’s support to fix the redirection issue.
However, if you feel confident in your abilities, you can create a redirect in Nginx by creating a server block for the content you want to redirect, using the following code:
server {
	listen 80;
	server_name domain1.com;
	return 301 $scheme://domain2.com$request_uri;
}
In the above directive, “return” is used for a URL substitution. It returns the status code specified in the redirection URL. The “$scheme” variable uses the scheme from the original http/https request and returns the 301 redirect code with the new URL.
Another option is to use:
rewrite ^/$ http://www.domain2.com permanent;
rewrite ^/(.*)$ http://www.domain2.com/$1 permanent;
This can be used to create a permanent redirect. For more detailed information, you can check out F5 Network’s guidance on creating Nginx rewrite rules.
Redirect Rules in MyKinsta
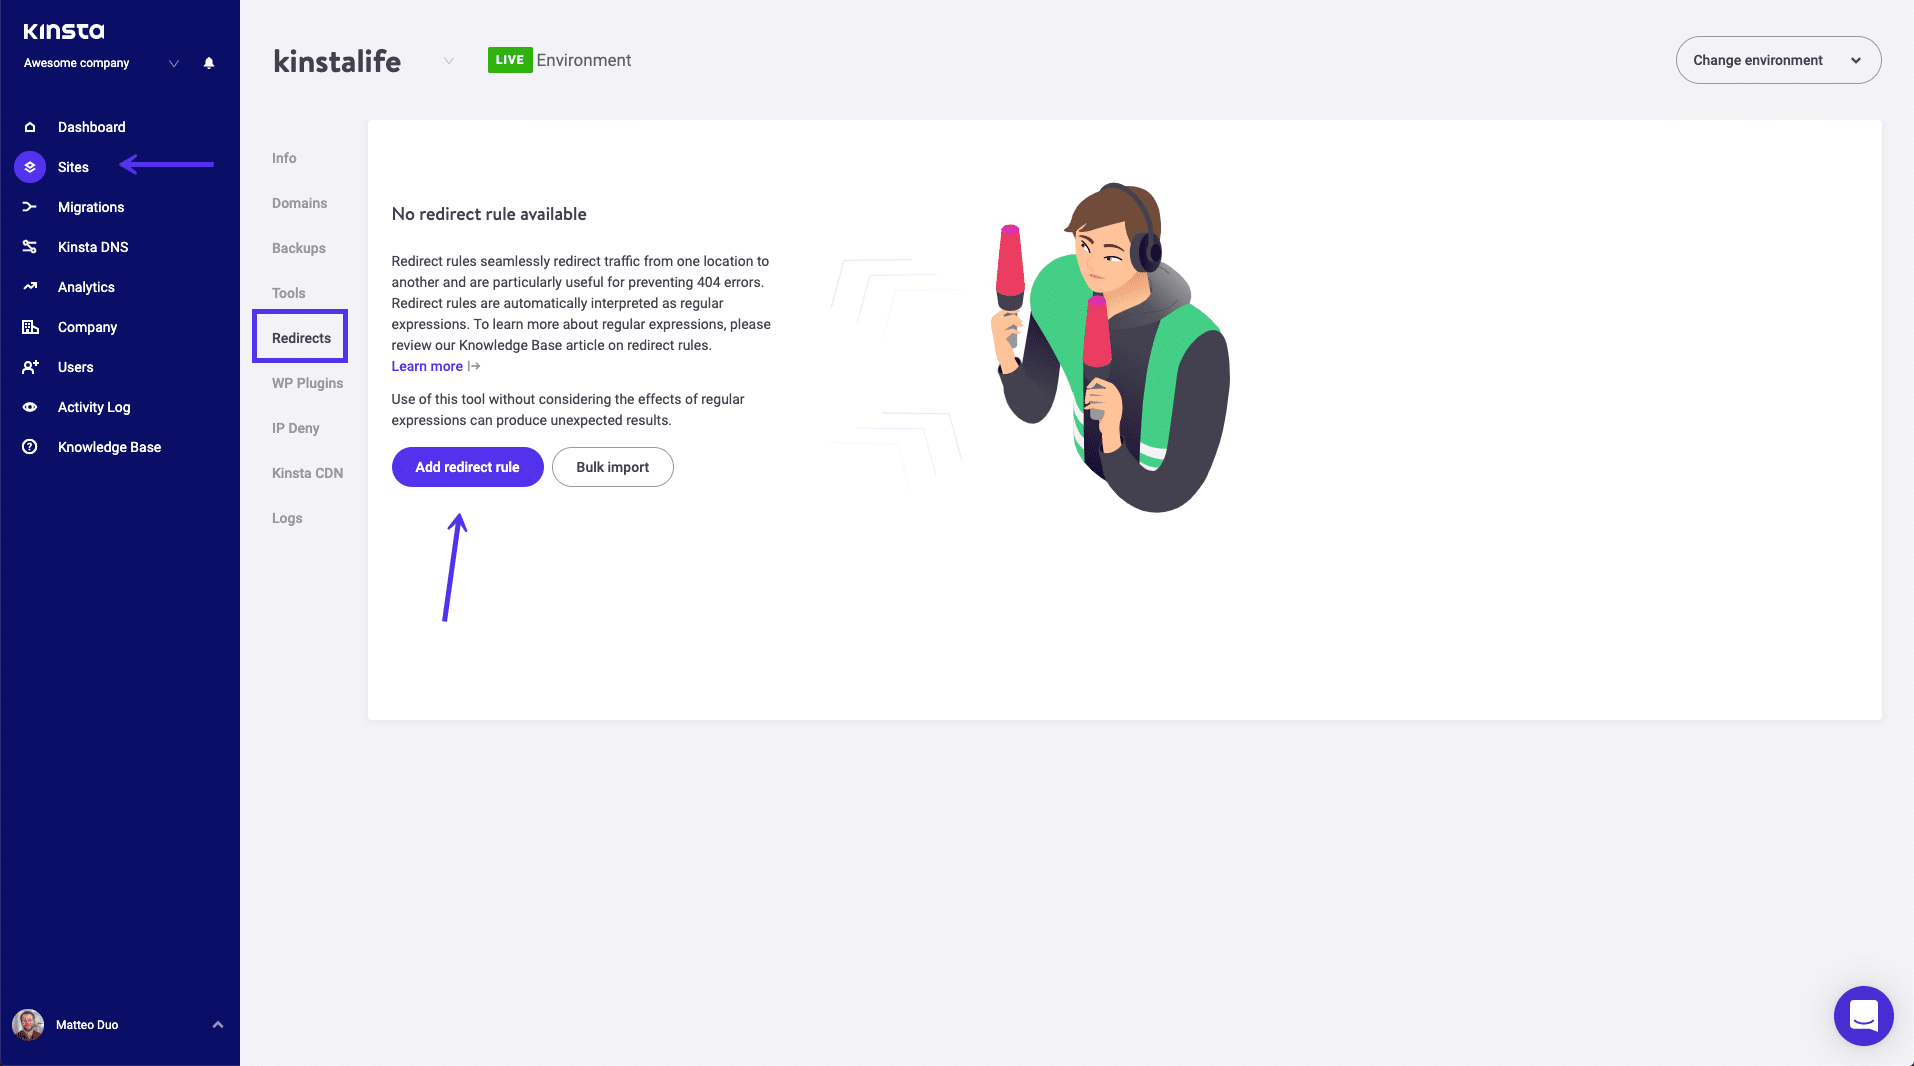
If your site is hosted by Kinsta, setting up redirects is easy. You can use our redirect rules tool in MyKinsta to create 301 and 302 redirects.
After you log into your MyKinsta, click on your site and go to Redirects, followed by Add Redirect Rule:
Next, on the Add redirect rule screen, you can choose which domain prefix to add the redirect for. Typically, you’ll want to redirect both www and non-www traffic, in which case you’d choose All Domains:
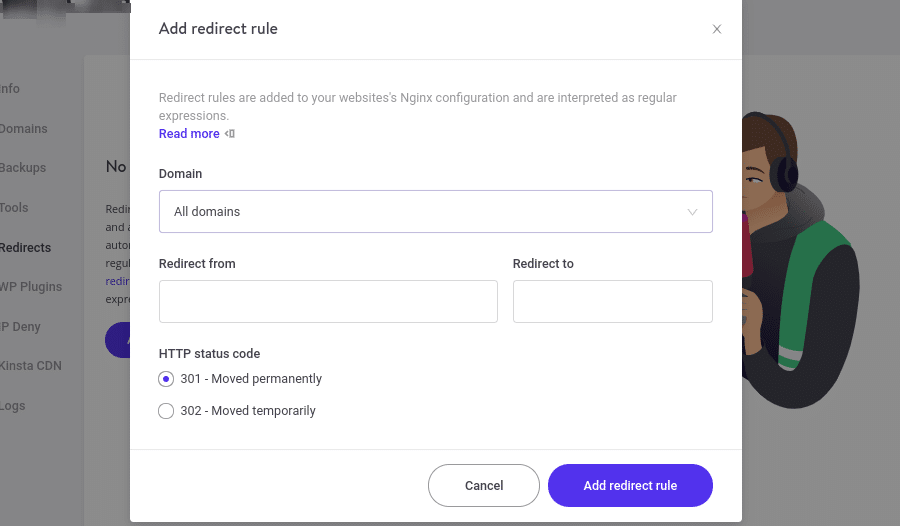
Once that’s clear, you’ll need then to fill out the Redirect from and Redirect to fields.
Under HTTP status code, you can easily choose which type of redirect rule you want to use: 301 or 302. When happy with your choice, click on Add redirect rule.
Keep in mind that because our redirect tool uses regex automatically, you should add “^” before every “from” path. This will keep it from creating a redirect loop with other URLs. While this tool is pretty straightforward, you can always get in touch with support if you have any questions or need help.
Adding redirects in MyKinsta means the rules are implemented at the server level, which is the optimal way. However, there also WordPress plugins through which you can implement redirects for WordPress sites.
Before taking a closer look at redirect plugins, it’s important to note that using them can sometimes cause performance issues. Most of them utilize the wp_redirect function, which requires additional code execution and resources.
Creating a WordPress Redirect With a Plugin
If your host doesn’t have a redirect rules feature, you might have to use a WordPress plugin. There are many redirection plugins available and Redirection is one of the most popular ones you can use:

This plugin is very easy to use and can be set up to create redirects using WordPress code, .htaccess on Apache servers, or Nginx server redirects. Plus, it’s free.
Here’s how to get started with the Redirection plugin.
After you download it from the Plugin Directory, you can locate it by going to Tools > Redirection:
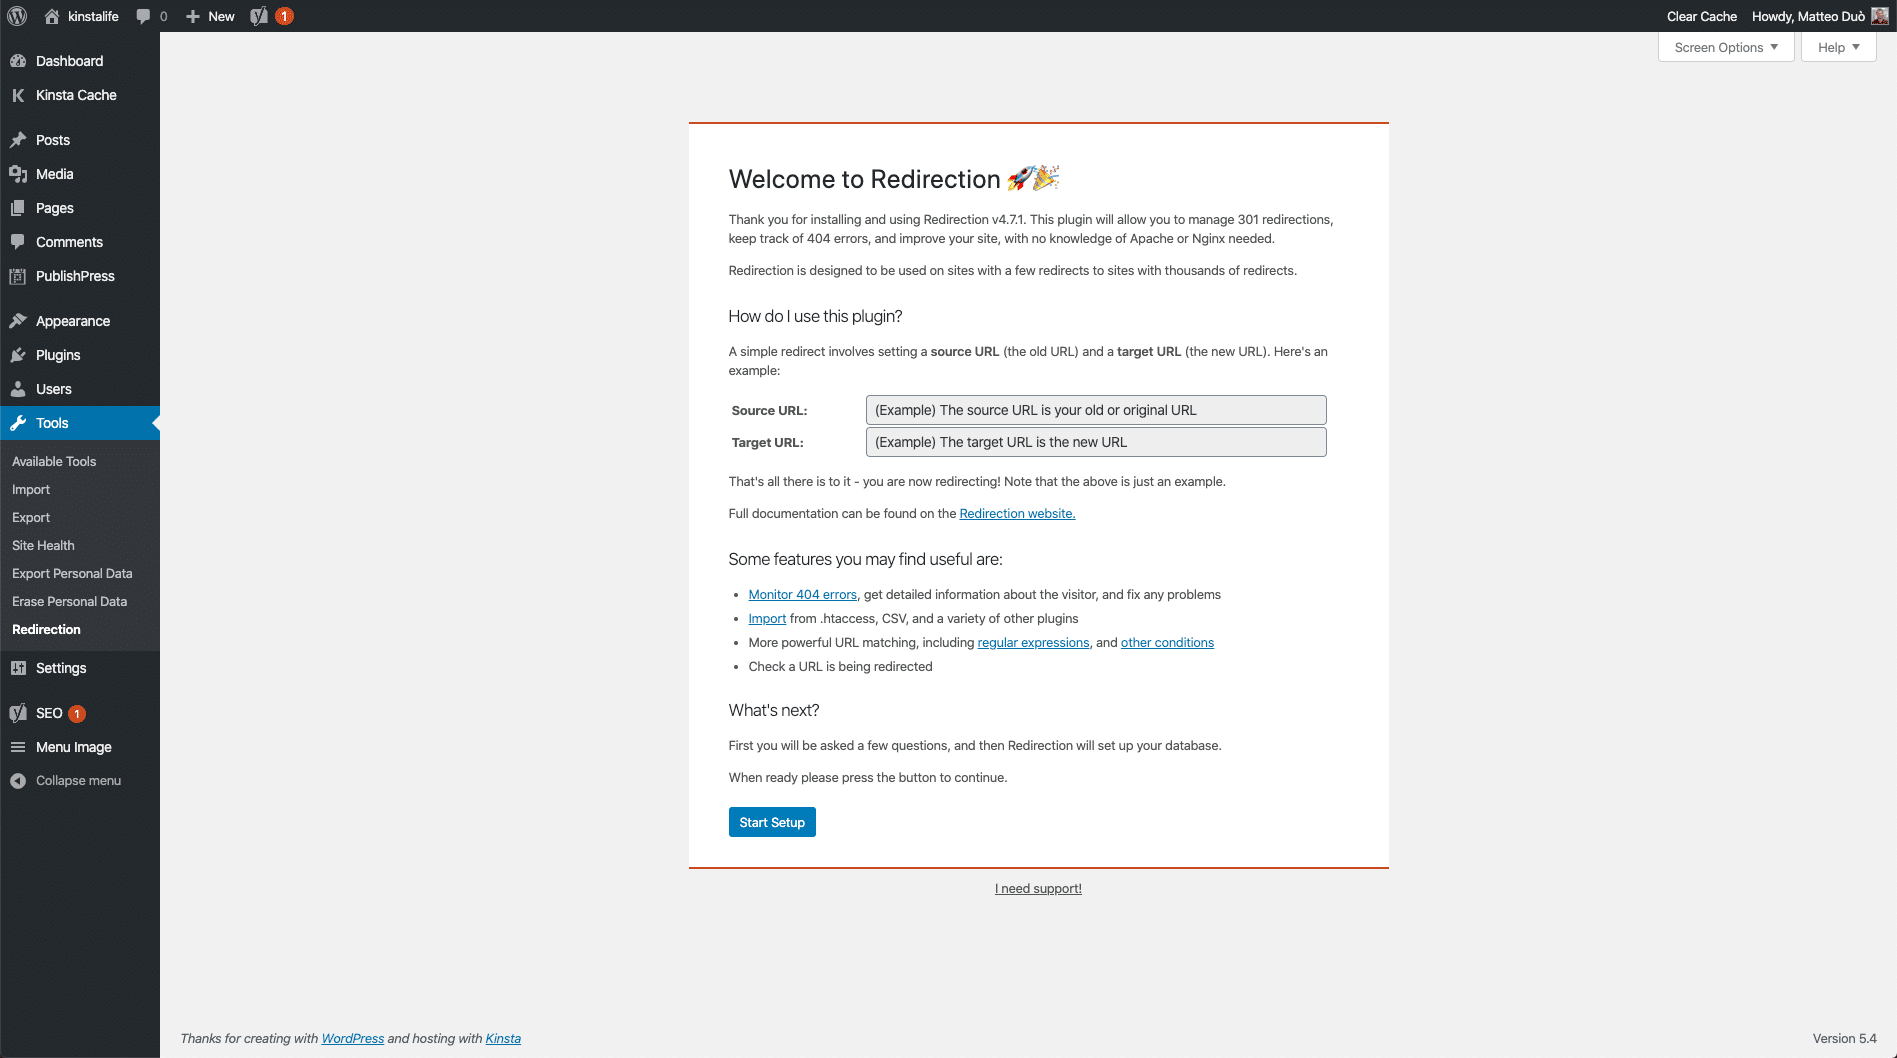
This will bring you to a welcome page. Click on the Start Setup button, then follow the series of prompts. Once it’s done, you can begin using it.
How to Manually Add a New Redirection
You can manually add a new redirection by clicking on the Add new button, then inputting the source and target URLs into the respective form fields and clicking on the Add Redirect button:

This approach is only recommended if you have just a few URLs to redirect. If you’re dealing with an entire site’s worth, you’re encouraged to save time by using the plugin’s URL import feature.
Import/Export Redirects
Another helpful way you can use this plugin is to import and export redirects. For example, you can export old URLs from your website, then use the plugin on a new site to import the list.
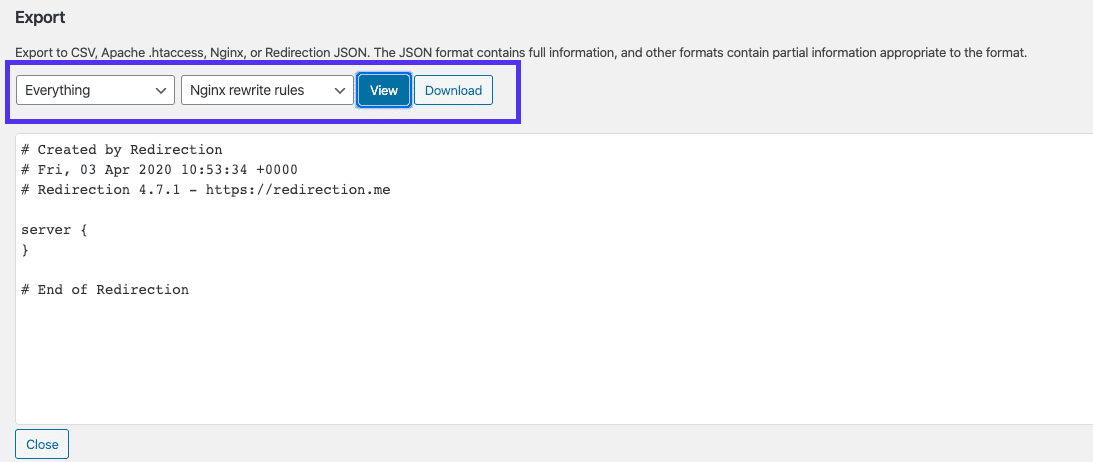
To do this, install and activate the Redirection plugin on your old website. Next, from your WordPress admin dashboard and go to Tools > Redirection > Import/Export.
At the bottom of the screen, under Export, you can export everything to a CSV, Apache .htaccess, Nginx rewrite rules, or Redirection JSON file:
Then, with the plugin installed on your new site, you can go to the same screen to import the file:
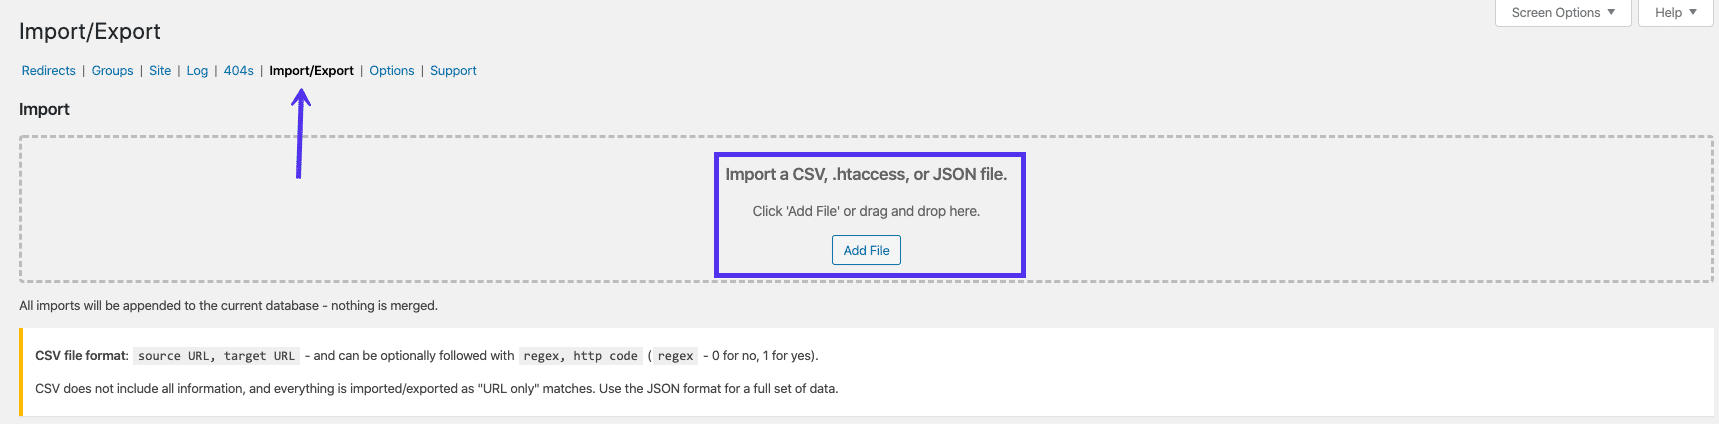
Click on the Add File button and select the file. Once it’s uploaded, you can find the new URLs listed under the Redirects tab.
Other WordPress Redirect Plugins and Tools
You can use our very own HTTP Status and Redirect Checker tool to check the status of any URL instantly. You will be able to review all response headers, client errors, and other server-related errors.
This is not the only WordPress redirect plugin you can use. 301 Redirects is another popular plugin that will be preferred by users looking for a shopping list of configuration options. With over 80,000 active installs, it’s certainly been well tested. It is easy to learn, has a well-designed interface, and can be used to manually create 301 and 302 redirects.
One particularly nice feature is a dropdown menu for selecting pages, posts, media pages, and archive pages as the redirection target. This ensures that manually-created redirection rules resolve without any issues. You can also retain query strings across redirects.
Summary
Plain and simple: if implemented poorly, WordPress redirects can slow down your site. That’s why it’s worth taking the time to minimize the number of redirects.
You can do this by avoiding creating unnecessary redirects and making sure your TLD resolves with no more than one redirection.
However, there are times when it’s appropriate to intentionally create and use redirection. When this is the case, there are two ways to go about it:
- You can set up redirects at the server-level. Some hosting providers offer features that can help, such as the redirection rules tool here at Kinsta.
- Use a WordPress plugin such as Redirection to manually add a few redirects or import a list of URL redirects.
By limiting the use of redirection to necessary instances and using WordPress redirect best practices, you help ensure that your visitors have the fastest experience possible and your conversion rates won’t decline.
Plus, you won’t have to worry about hurting your SEO and losing your rankings!
What are your thoughts: have you experienced performance issues due to too many redirects? Let us know in the comments section below!

Jon is the Chief Operating Officer at Kinsta and is involved with Kinsta's sales, customer service, and technical support teams on a daily basis. Jon's a family man. So when he isn't feverishly tapping the keys of his laptop he's usually helping one of his kids fix a bike or setting up Netflix for an impatient preschooler.

