
Running into WordPress errors can be one of the most stressful parts of being a website owner. This is especially true if the problem is accompanied by a message you don’t understand, such as the “509 bandwidth limit exceeded” error.
The good news is that there are simple steps you can take to resolve this issue. Once you troubleshoot and locate the problem, you can make the necessary adjustments to prevent it from happening again in the future.
In this post, we’ll explain what the “509 bandwidth limit exceeded” error is, some common causes, and how to troubleshoot it. Then we’ll walk you through five potential solutions you can use to resolve the problem. Let’s jump in!
[Check Out Our Video Guide to Fixing The 509 Error]
What the 509 Bandwidth Limit Exceeded Error Is
If you run into the “509 bandwidth limit exceeded” error, you’ll see a message similar to the following:

If you are getting this error, your website is using more bandwidth than your hosting plan allows. Bandwidth refers to the amount of data your site can transfer to its visitors within a set period. It’s typically measured in gigabytes (GB).
The wording of this message may also vary. For example, you may also see “storage limit exceeded” on your screen. A handful of factors can cause this scenario, which we’ll cover in the next section.
Common Causes of 509 Bandwidth Limit Exceeded
There are a few common causes of the “509 bandwidth limit exceeded” error. One of the common causes is high traffic. If your website gets a lot of traffic, it can use more resources than your hosting plan allows. This can happen if you have a popular website or referrals.
Another common cause is large files. If you have heavy files on your website, such as videos or images, they can use more bandwidth than your hosting plan allows. To fix this, you can try to optimize your website by compressing files or using smaller file sizes.
Finally, if you are on a shared hosting plan, someone else on the same server is likely using too many resources. This scenario can cause your website to use more resources than allotted by your hosting provider. If this is the case, you may need to upgrade your hosting plan.
How To Troubleshoot the 509 Bandwidth Limit Exceeded Error
To troubleshoot this error, you might need to contact your host and ask them to increase your bandwidth limit. If you’re a Kinsta user, you can use MyKinsta Analytics to troubleshoot this problem and any other issues on your site.
We also recommend calculating your bandwidth. To calculate your bandwidth, you will need to know the average size of your website’s pages and the number of visitors you get each day.
You can find out the size of your pages by using a tool such as Sitechecker’s Web Page Size Checker tool. Simply enter your URL, and you’ll receive an HTML size value:
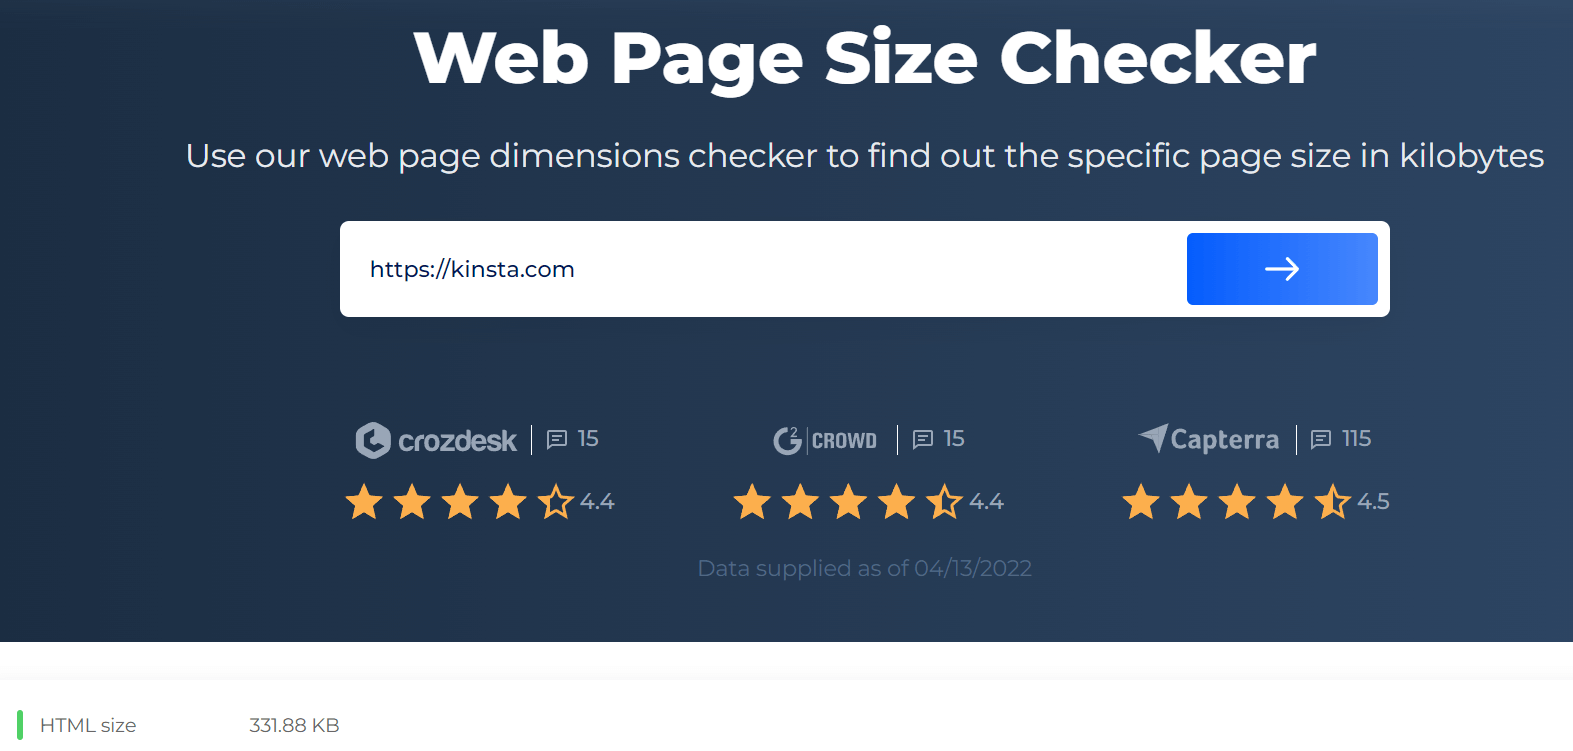
Then, you’ll need to source information on how many visitors your website receives in a day. You can get this data from an analytics platform like Google Analytics.
If you’re a Kinsta customer, you can see this data by visiting Analytics in your MyKinsta dashboard:

As you can see, Kinsta automatically calculates your bandwidth for you. Otherwise, you’ll need to multiply the number of visitors by your web page size to get your daily bandwidth usage. To calculate your monthly bandwidth usage, you can multiply your daily usage by 30.
For example, if your website is 50 MB and you get 1,000 visitors per day, your monthly bandwidth usage would be 150 GB (50 MB x 1,000 visitors x 30 days).
How To Fix the 509 Bandwidth Limit Exceeded Error (5 Solutions)
There are a few ways to fix the “509 bandwidth limit exceeded” error. Below are five potential solutions you can use!
1. Enable CDN Caching
Using Content Delivery Network (CDN) caching can be a great way to improve the performance of your website. It can help reduce the load time of your pages by storing static files on a CDN server and delivering them to visitors from there.
This setup can be beneficial if you have a lot of traffic. CDN caching is also handy if your website is located in a different part of the world from most of your visitors.
Some hosts include WordPress CDN services in their plans. For example, we offer Kinsta CDN, which is powered by Cloudflare.
To enable the feature, log in to your MyKinsta account. Next, navigate to Sites > sitename > Caching > CDN, then click the Enable CDN button:
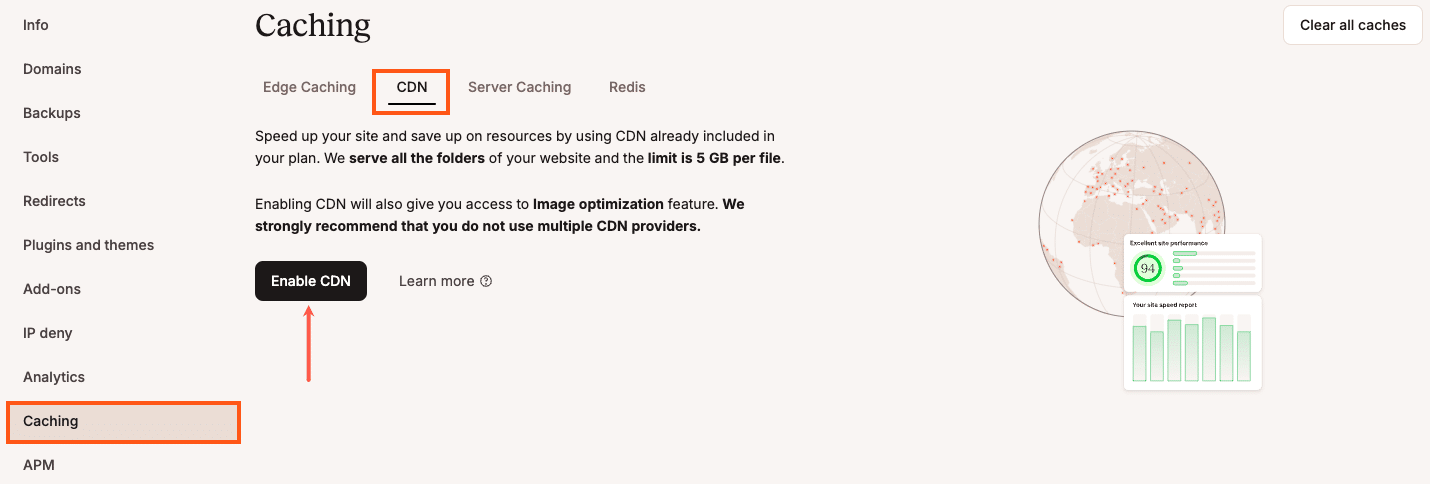
To manually enable CDN caching with other web hosts, you may need to add a few lines of code to your website’s .htaccess file. Once you have done this, you will need to configure your CDN provider and specify which files you want to cache. After that, visitors to your website will be served static files from the CDN instead of from your server.
There are a few things to keep in mind when using CDN caching. Firstly, it is essential to only cache static files. If you cache dynamic files, such as those generated by a Content Management System (CMS), they may not be updated when you make changes to your website.
Secondly, you will need to ensure that your CDN provider has enough capacity to handle the traffic to your website. If it doesn’t, your site may experience delays or downtime.
2. Avoid Hotlinking
Hotlinking is when someone includes a URL on their site that points to an image or other file on your website. This setup can cause your server to be overloaded with requests for the file, which can slow down your website or even cause it to crash. It can also result in you being charged for bandwidth that you did not use.
To prevent hotlinking on an Apache server, you can edit your .htaccess file and enable hotlink prevention. It will prevent people from hotlinking to files on your website.
Simply add the following code to the file:
RewriteEngine on

RewriteCond %{HTTP_REFERER} !^$

RewriteCond %{HTTP_REFERER} !^http(s)?://(www.)?yourdomain.com [NC]

RewriteCond %{HTTP_REFERER} !^http(s)?://(www.)?google.com [NC]

RewriteCond %{HTTP_REFERER} !^http(s)?://(www.)?bing.com [NC]

RewriteCond %{HTTP_REFERER} !^http(s)?://(www.)?yahoo.com [NC]

RewriteRule .(jpg|jpeg|png|gif|svg)$ http://dropbox.com/hotlink-placeholder.jpg [NC,R,L]

If your website runs on Nginx, you’ll want to add this code to your config file:

location ~ .(gif|png|jpeg|jpg|svg)$ {

valid_referers none blocked ~.google. ~.bing. ~.yahoo. yourdomain.com *.yourdomain.com;

if ($invalid_referer) {

return 403;

}

}
You can also contact your host and ask them to disable hotlinking for your domain. With Kinsta, you can request this service directly from your MyKinsta dashboard.
Alternatively, you can use a plugin such as All In One WP Security & Firewall:

This tool is a complete security plugin for WordPress. It helps you automatically detect and block hotlinks.
3. Optimize Your Database and File Storage
Your database and file storage can take up a lot of space on your server. If they are not optimized, they can hurt your site’s speed. Therefore, optimization should be an integral part of your WordPress website maintenance.
To optimize your database and file storage, you can compress files, use smaller file sizes, and limit the number of stored items. You can also move files to a different server or delete them altogether.
There are also plenty of database optimization plugins to choose from. A popular option is WP-Optimize:

The free tool lets you easily clean and optimize your database. It also enables you to compress your images and leverage page caching.
4. Delete Unused Files
Unused files can take up space on your server and slow down your website. To delete unused files, you can use a file manager or File Transfer Protocol (FTP) client to connect to your server and delete the files that you do not need. You should also remove any unused plugins or themes.
You can also ask your host to delete the files for you. Alternatively, you can use a plugin to detect and delete unused files automatically. An example of this type of tool is Media Cleaner:

This free plugin lets you automatically clean your Media Library by deleting any files it detects as unused.
5. Upgrade Your Hosting Plan
If you are still having trouble with your bandwidth limits, it’s best to contact your host and see if they can help you troubleshoot the issue. For example, the hosting provider may offer add-ons to increase storage space and bandwidth limits.
In most cases, your host will be able to identify the problem and help you fix it. You may need to upgrade your hosting plan to a higher bandwidth allocation. Furthermore, once you have solved the issue, be sure to monitor your website closely to ensure that the error does not return.
Summary
Encountering an error message such as “509 bandwidth limit exceeded” can be stressful. Fortunately, this is a common issue and, typically, one with a simple resolution process.
As we discussed in this post, there are five potential fixes for the “509 bandwidth limit exceeded” error:
- Enable CDN caching.
- Avoid hotlinking.
- Optimize your database and file storage.
- Delete unused files.
- Upgrade your hosting plan.
When choosing a hosting provider, you’ll need a plan with plenty of bandwidth and storage to meet your site’s needs.