
With the work that takes place on a development project, Git is a godsend. However, if you have a lot of movers on the dancefloor, one or two will tread on each other’s toes. For your project, this means two developers may work on the same suite of code and both may commit. For these situations, you need to pull out some Git merge strategies to resolve the conflict.
While a Git merge can be straightforward, there are often many other times when you need an advanced approach. This will see you use strategies such as recursive merging, three-way merges, and many more. You may even need to undo a Git merge at some point.
This tutorial will discuss some complex Git merge techniques to add to your tool belt. In fact, we can dive right into the good stuff first!
An Introduction to Git Merge Strategies
The core concept of a merge is straightforward: you join two branches together in order to turn multiple commits into one. However, there are a number of techniques you can employ to make sure you commit and merge the right code.
We’re going to look at a few important strategies you need to understand. They aren’t in any order, and at some point in your development career, you may need them all. What’s more, you will also want a solid understanding of basic Git concepts, such as pointers, branches, and commits.
The Difference Between Two-Way and Three-Way Merges
It’s helpful to understand the difference between a two-way merge and its three-way companion. Most of the merge strategies we cover next deal with three-way situations. In fact, it’s more straightforward to talk about what a three-way merge is. Consider the following example:
- You have a main branch with several commits and a feature branch that also has commits.
- However, if main now carries out further commits, both branches will diverge.
- In layperson’s terms, both main and the feature branch have commits the other doesn’t. If you merge these using a two-way approach, you lose a commit (likely on main.)
- Instead, Git will create a new merge commit from both the current main and feature branches.
In a nutshell, Git will look at three different snapshots to merge changes: the head of main, the head of the feature branch, and the common ancestor. This will be the final commit common to both main and the feature branch.
In practice, you won’t need to worry about whether a certain merge strategy is two-way or three-way. Lots of times, you have to use a strategy regardless. In any case, it’s helpful to know how Git ‘thinks’ when it comes to merging branches and repos.
Fast-Forward Merging
The first strategy might not need you to carry out any action to perform. A fast-forward merge shifts the pointer to the latest commit on main without creating an extra commit (which can be confusing.) It’s a clean approach that many developers will use as standard.
The technique starts with a main branch that may or may not have commits. In this case, you open a new branch, work on the code, and make commits. At this point, you also need to merge those changes back to main. A fast-forward merge has one requirement to pull off:
- You need to ensure that no other commits take place on main while you work on your new branch.
This won’t always be possible, especially if you work in a large team. Even so, if you choose to merge your commits with a main branch that is current and without its own commits, this will carry out a fast-forward merge. You can do this in a couple of different ways:
git merge <branch>

git merge --ff-only
Lots of times, you won’t need to specify that you want to run a fast-forward merge. This type of merge happens on solo projects, or those with small teams. In a fast-paced environment, this is a rare merge. As such, others will be more common.
Recursive Merging
A recursive merge is often the default, as it will crop up during more common situations than other types of merge. A recursive merge is where you make commits on a branch, but further commits happen on main too.
When it’s time to merge, Git will recurse over the branch in order to make its definitive commit. This means a merge commit will have two parents once you complete it.
As with a fast-forward merge, you won’t normally need to specify a recursive merge. However, you can make sure Git doesn’t choose something like a fast-forward merge using the following commands and flags:
git merge --no-ff

git merge -s recursive <branch1> <branch2>
The second line uses the -s strategy option and explicit naming to carry out a merge. Unlike a fast-forward merge, a recursive merge does create a dedicated merge commit. For two-way merges, a recursive strategy is solid and works well.
Ours and Theirs
A common situation during development is one where you create a new feature within your project that ultimately won’t get the green light. In many cases, you will have a lot of code to merge that’s also co-dependent. An ‘ours’ merge is the best way to resolve these conflicts.
This type of merge can handle as many branches as you need and works to ignore all of the changes on those other branches. It’s great if you want to clear the decks when it comes to old features or unwanted development. Here’s the command you need:
git merge -s ours <branch1> <branch2>An ours merge essentially means that the current branch contains the code de jure. This ties in with ‘theirs’ merges, which treats the other branch as correct. However, you need to pass another strategy option here:
git merge -X theirs <branch2>
Using ours and theirs merges can be confusing, but it’s generally safe to stick to the typical use cases (that of keeping everything in the current branch and discarding the rest).
Octopus
Handling multiple heads – i.e. merging more than one branch into another – can be a tricky scenario for a git merge. You could say you need more than two hands to resolve the conflicts. This is perfect for an octopus merge.
Octopus merges are like the polar opposite of ours and theirs merges. The typical use case is where you want to include multiple commits for similar features and merge them into one. Here’s how you pass it:
git merge -s octopus <branch1> <branch2>
However, Git will refuse an octopus merge if you have to make a manual resolution down the line. For automatic resolutions, an octopus merge will be a default if you need to merge multiple branches into one.
Resolve
One of the safest ways to merge commits, a resolve merge is great if you have a situation that involves criss-cross merges. It’s also a quick resolution method to implement. You may also want to use this one for more complex merge histories – but only those with two heads.
git merge -s resolve <branch1> <branch2>
Because a resolve merge uses a three-way algorithm to work with both your current branch and that you’re pulling from, it might not be as flexible as other merge methods. However, for the job you need it to do, a resolve merge is near-perfect.
Subtree
This companion to a recursive merge could confuse you. We’ll try to explain this using a clear example:
- First, consider two different trees – X and Y. This will often be two repos.
- You want to merge both trees into one.
- If tree Y corresponds with one of the subtrees in X, tree Y is changed to match the structure of X.
This means a subtree merge is fantastic if you want to combine multiple repos into one definitive article. It will also make the necessary changes to the common ‘ancestor’ tree of both branches.
git merge -s subtree <branch1> <branch2>
In short, a subtree merge is what you want if you need to combine two repositories. In fact, you might struggle to understand which merge strategy is right for you. Later, we discuss some tools that could help.
Before this, there are some advanced merge conflicts that you have to know how to resolve.
How To Deal With More Complex Git Merge Conflicts
Merging branches in Git is more like managing conflicts and resolving them. The greater the size of your team and project, the greater the chance of conflicts. Some of these can be complex and difficult to resolve.
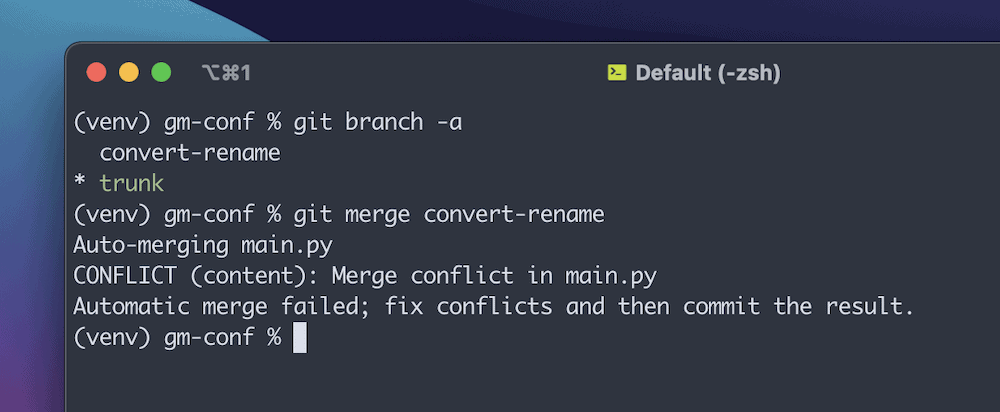
Given how conflicts can eat away at time, money, and resources, you need to figure out how to nip them in the bud fast. In most cases, two developers will work on the same suite of code, and both will decide to commit.
This might mean you might not be able to start the merge at all due to pending changes or have a failure during a merge that requires manual intervention. Once your working directory is ‘clean’ you can begin. Lots of times, Git will notify you of a conflict once you begin a merge:
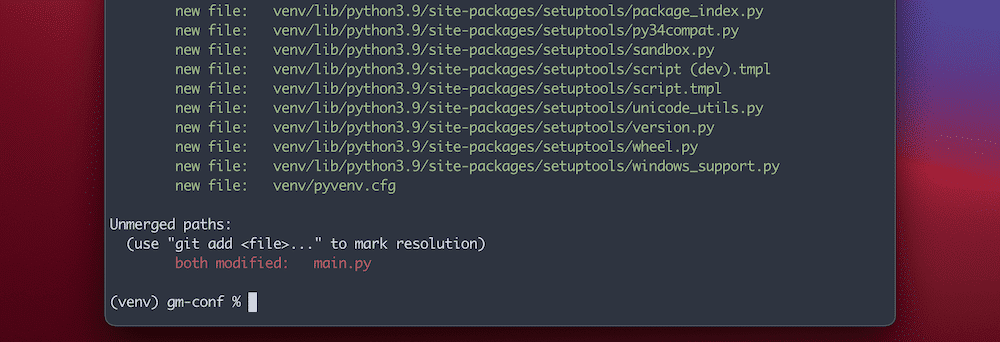
However, for more information, you can run a git status and see the details:
From here, you can begin to work on the various files causing the conflict. Some of the tools and techniques we discuss next will help.
Aborting and Resetting Merges
Sometimes, you need to stop the merge altogether and start from a somewhat clean slate. In fact, both of the commands we mention suit situations where you won’t yet know what to do with a conflict.
You can choose to abort or reset a merge that’s in progress with the following commands:
git merge --abort

git reset
The two commands are similar, but you use them in different circumstances. For example, aborting a merge will simply revert the branch back to its state pre-merge. In some cases, this won’t work. For instance, if your working directory contains uncommitted and unstashed changes, you won’t be able to run an abort.
However, resetting a merge means you revert the files back to a known ‘good’ state. The latter is something to consider if Git fails to start the merge. Note that this command will delete any changes you don’t commit, which means this one is more of a deliberate act that requires care.
Checking Out Conflicts
The majority of merge conflicts will be straightforward to ascertain and resolve. However, in some cases, you might need to dig deeper in order to figure out both why a conflict happens and how to begin to fix it.
You can get more context after a git merge using a checkout:
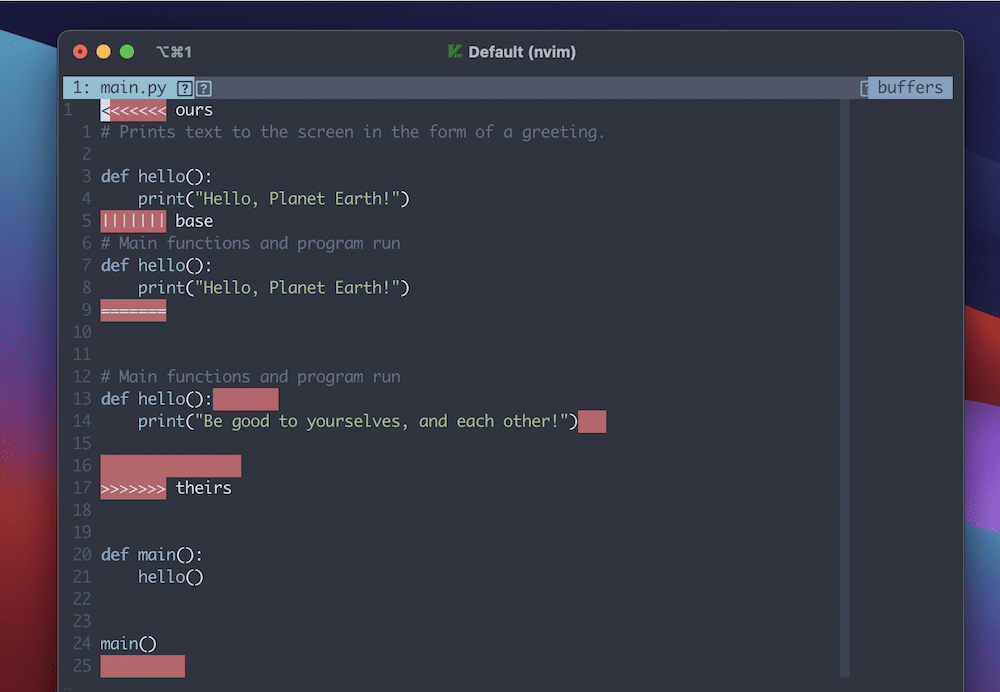
git checkout --conflict=diff3 <filename>
This takes the typical navigation that a checkout provides and creates a comparison between the two files that shows the merge conflict:
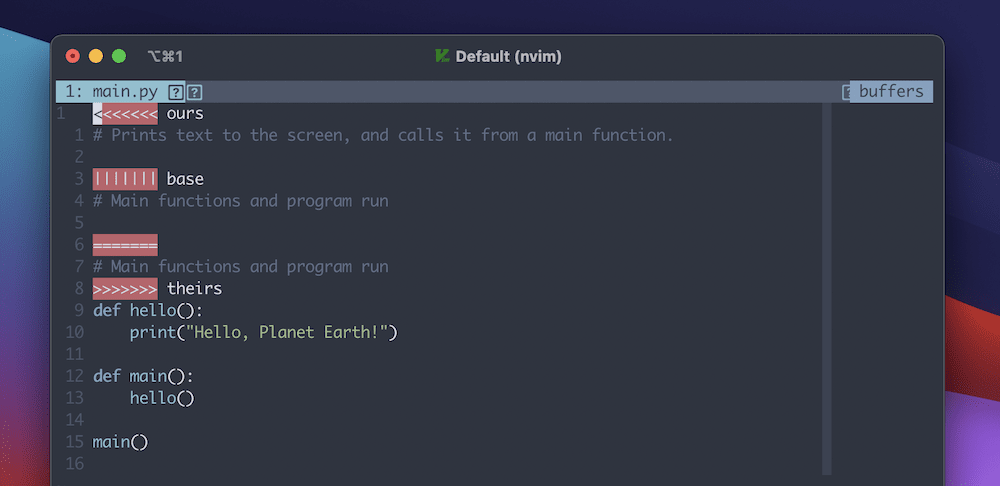
In a technical sense, this will check the file out again and replace the conflict markers. You might do this a few times throughout a resolution. Here, if you pass the diff3 argument, it will give you the base version and alternatives in ‘ours’ and ‘theirs’ versions.
Note that the default argument option is merge, which you don’t have to specify unless you change the merge conflict style away from the default.
Ignoring Negative Space
Negative space and its usage is a common discussion point. Some programming languages will use different types of spacing, and even individual developers will use different formatting.
Spaces versus tabs is a battleground we won’t join. However, if you have situations where formatting changes from one to the other depending on the file and coding practice, you could run into this Git merge issue.
You’ll know this is why the merge fails because there will be lines removed and added when you look at the conflict:
This is because Git looks at those lines and deems the negative space to be a change.
However, you can add specific arguments to the git merge command that will overlook negative space in the relevant files:
git merge -Xignore-all-space

git merge -Xignore-space-change
While these two arguments seem similar, they have a unique difference. If you choose to ignore all negative space, Git will do so. It’s a broad brush approach, but in contrast, -Xignore-space-change will only count sequences of one or more negative spaced characters as equivalent. As such, it will ignore single spaces at the end of lines.
For extra safety, you could also review the merge using the --no-commit command, in order to check that you ignore and count negative space in the right way.
Merge Logs
Logging is crucial for almost every piece of software that passes data. For Git, you can use the log to ascertain more detail on a merge conflict. You can access this information using git log:
It’s essentially a text file dumping station for every action within a repo. However, you can add further arguments to refine the view and only see the commits you wish:
git log --oneline --left-right <branch1>...<branch2>
This uses a ’Triple Dot’ to provide a list of commits involved in two branches during a merge. It will filter all of the commits both branches share, which will leave a selection of commits to investigate further.
You could also use git log --oneline --left-right --merge to only show commits either side of a merge that ‘touch’ a conflicting file. The -p option will show you the exact changes for a specific ‘diff,’ although note that this is only for non-merge commits. There’s a workaround to this, which we cover next.
Using the Combined Diff Format to Investigate a Git Merge Conflict
You can take the view you get with git log further to look into merge conflicts. In typical circumstances, Git will merge code and stage everything that succeeds. This will leave you with only conflicting lines, and you can see them using the git diff command:
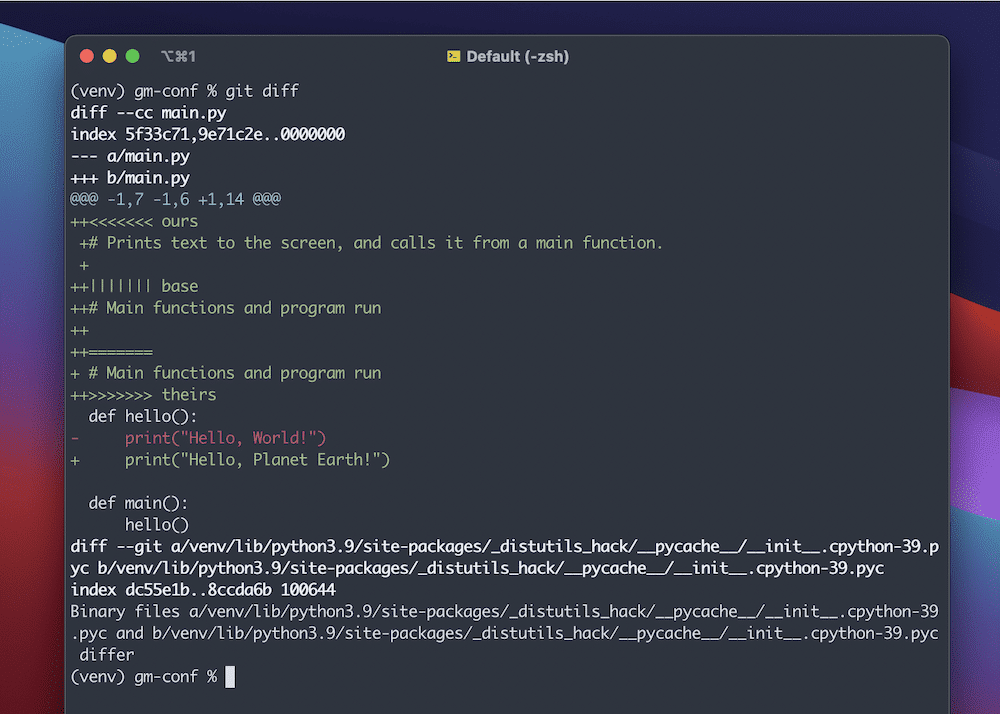
This ‘combined diff’ format adds two extra columns of information. The first tells you if a line is different between your (‘ours’) branch and the working copy; the second gives you the same information for the ‘theirs’ branch.
For the signs, a plus sign denotes whether a line is an addition to the working copy but not in that specific side of the merge, and a minus sign denotes whether the line is removed.
Note that you can also see this combined diff format within Git’s log using a couple of commands:
git show

git log --cc -p
The first is a command you use on a merge commit to see its history. The second command uses the functionality of -p to show changes to a non-merge commit alongside the combined diff format.
How To Undo a Git Merge
Mistakes can happen, and you can carry out merges that you need to walk back on. In some cases, you can simply amend the most recent commit using git commit --amend. This will open the editor to let you modify the last commit message.
While you can reverse more complex merge conflicts and the resultant changes, it can be tough because commits are often permanent.
As such, there are a lot of steps you need to follow:
- First, you need to review commits and find references to the merges you need.
- Next, checkout branches to review commit histories.
- Once you have knowledge of the branches and commits you need, there are specific Git commands based on your desired action.
Let’s look at these in more detail and start with the review process. From there, we can show you a quick way to undo a Git merge, then look at specific commands for more advanced use cases.
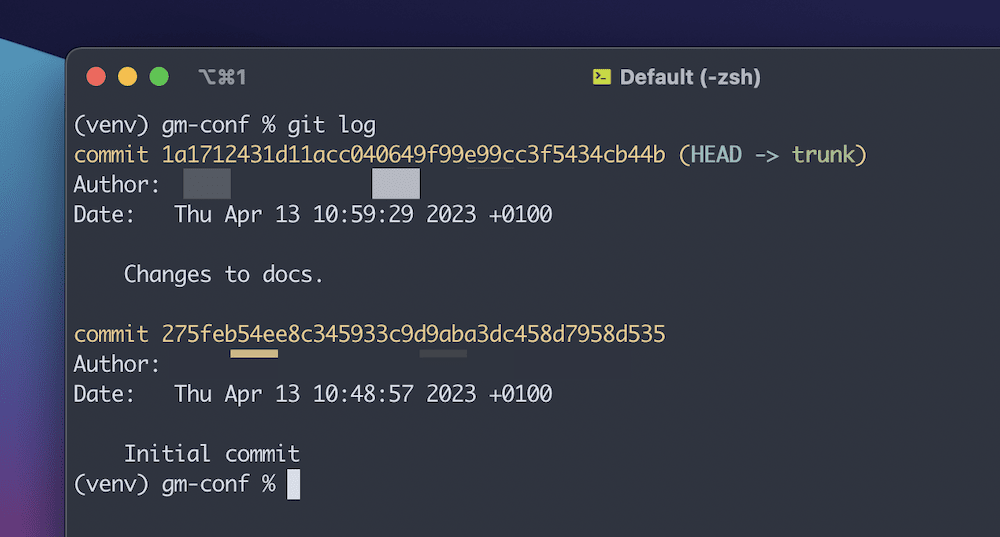
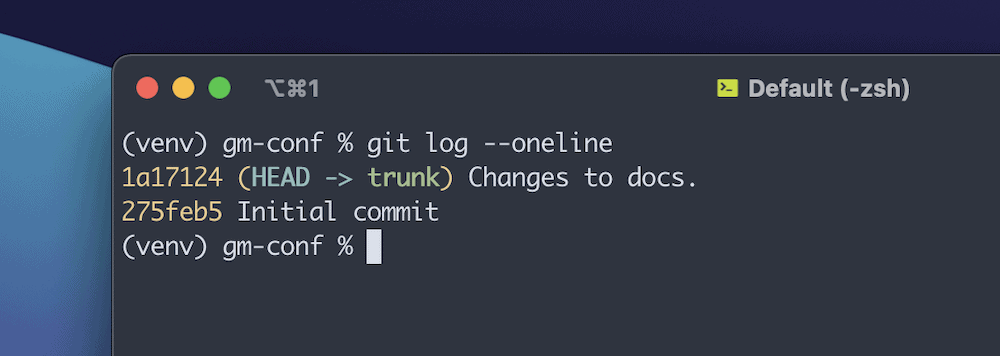
Review Commits
The git log --oneline command is great if you want to see the revision IDs and commit message relating to the current branch:
The git log --branches=* command will show you the same information but for all branches. Regardless, you can use the reference IDs alongside a git checkout to create a ‘detached HEAD’ state. This means you won’t work on any branch from a technical point of view, and once you switch back to an established branch, you ‘orphan’ the changes.
As such, you can use the checkout almost as a risk-free sandbox. However, if you want to preserve the changes, you can checkout the branch and give it a new name using git checkout -b <branch-name>. This is a solid way to undo a Git merge, but there are more nuanced ways to do this for advanced use cases.
Using git reset
Many of your merge conflicts could happen on a local repo. In these cases, git reset is the command you need. However, this command has more parameters and arguments to dive into. Here’s how you use the command in practice:
git reset --hard <reference>
The first part of this – git reset --hard – goes through three steps:
- It moves the reference branch to its location before the merge commit.
- The hard reset makes the ‘index’ (i.e. the next proposed commit snapshot) look like the reference branch.
- It makes the working directory look like the index.
Once you invoke this command, the commit history removes later commits and resets the history to the referenced ID. It’s a clean way to undo a Git merge but isn’t suitable for all cases.
For instance, you will cause an error if you try to push a local reset commit to a remote repo containing that commit. In this scenario, there’s another command you can use.
Using git revert
While both git reset and git revert seem similar, there are some important differences. In the examples so far, the undo process involves moving the reference pointers and HEAD to a specific commit. It’s akin to shuffling around playing cards to create a new order.
In contrast, git revert creates a new commit based on backtracking changes, then updates the reference pointers and makes the branch the new ‘tip.’ It’s also why you should use this command for remote repo merge conflicts.
You could use git revert <reference> to undo a Git merge. Note that you always need to specify a commit reference, or the command won’t run. You can also pass HEAD to the command to revert to the latest commit.
However, you can give Git greater clarity on what you want to do:
git revert -m 1 <reference>
When you invoke the merge, the new commit will have two ‘parents.’ One relates to the reference you specify, and the other is the tip of the branch you want to merge. In this case, -m 1 tells Git to keep the first parent – i.e. the specified reference – as the ‘mainline.’
The default option for git revert is -e or --edit. This will open the editor in order to amend the commit message before you revert. However, you can also pass --no-edit, which won’t open the editor.
You can also pass -n or --no-commit. This tells git revert to not create a new commit, but ‘inverse’ the changes and add them to the staging index and working directory.
The Difference Between Merging vs Rebasing in Git
Instead of using the git merge command, you can also use git rebase. This is also a way to integrate changes into one directory, but with a difference:
- A three-way merge is the default when you use
git merge. It combines snapshots from two current branches and merges it with a common ancestor of both to create a new commit. - Rebasing involves taking a patched change from a divergent branch and applying it to another, without the need for the ancestor. This means there won’t be a new commit.
To use this command, checkout to a branch you’d like to rebase to. From there, you can use the following command:
git rebase -i <reference>
In lots of situations, your reference will be your main branch. The -i option starts ‘interactive rebasing.’ This gives you the opportunity to alter the commits as they move across. You can use this to clean up the commit history, which is one of the big benefits of using git rebase.
Running the command will display a list of potential commits to be moved in the editor. This gives you complete scope to change how the commit history looks. You can also merge commits if you change the pick command to fixup. Once you save your changes, Git will perform the rebase.
On the whole, you use Git merge for many conflicts. However, rebasing has lots of benefits too. For example, while merging is simple to use and lets you preserve the context surrounding your merge history, rebasing can be cleaner as you can simplify your commit history into one.
Despite this, you have to take more care with rebasing, as the potential for errors is huge. What’s more, you shouldn’t use this technique on public branches, as rebasing will only affect your repo. To fix the resultant issues, you’d need to make even more merges and will see multiple commits.
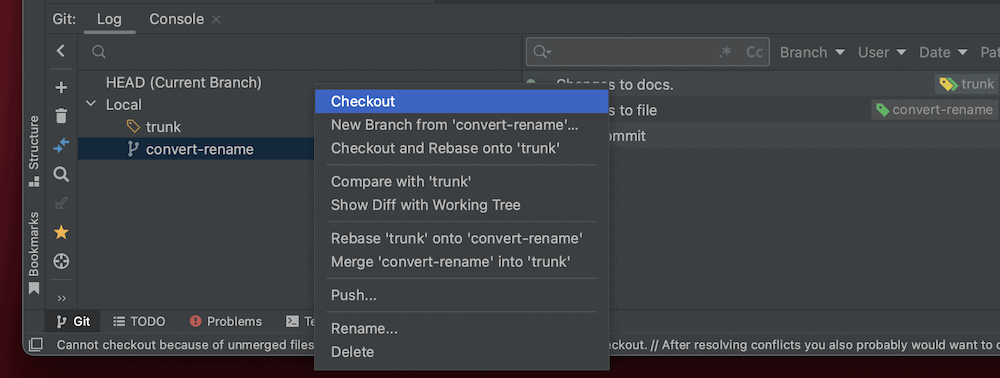
Tools That Help You Manage a Git Merge Better
Given the complexities surrounding Git merge conflicts, you might want a helping hand. There are plenty of tools available to help you carry out a successful merge, and if you use Intellij IDEA, you have a built-in method using the Branches menu:
VSCode also includes similar functionality within its user interface (UI.) Older Atom users will find that Microsoft has carried on its fantastic Git integration here, complete with the ability to connect to GitHub without further extensions or add-ons.
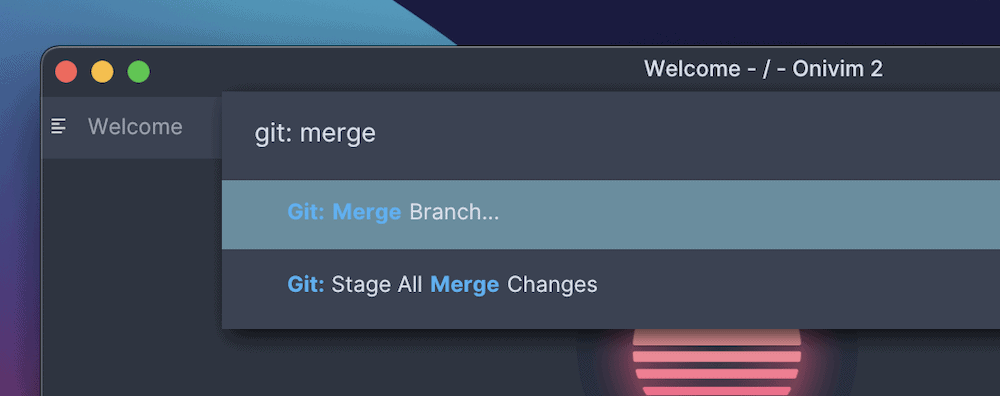
You also get further options using the Command Palette. This is even the case in editors that build on top of VSCode’s open-source framework:
The benefit here, as is the case with all of the tools on this list, is that you don’t need the command line to carry out merges. You usually need to select a source and target branch from a drop-down menu, then let the editor carry out the merge. Even so, you don’t have to take a hands-off approach. You’re able to review the changes after, then make the commit you need.
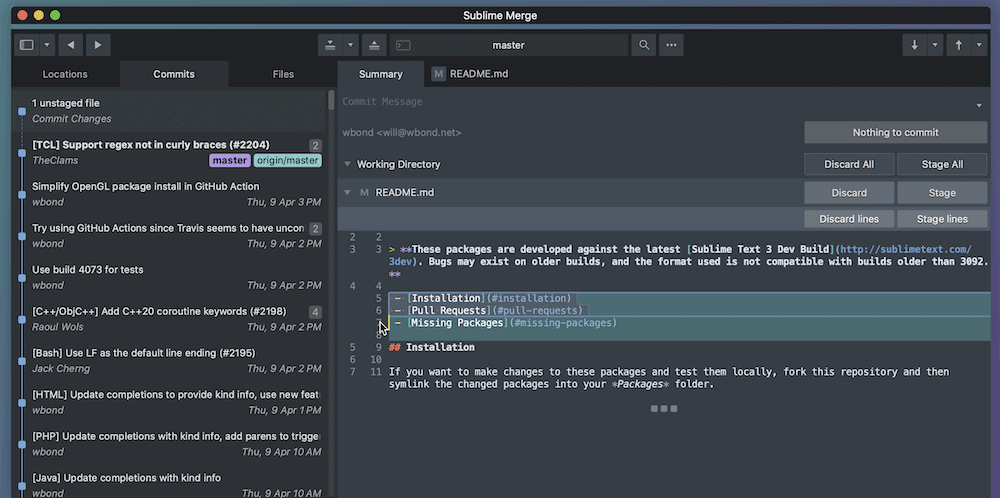
One editor that offers a separate graphical user interface (GUI) for working with Git is Sublime Text. If you use this editor, Sublime Merge could be an ideal addition to your workflow:
Regardless of your choice of code editor, it often will include the ability to work with Git without using the command line. It’s even the case with Vim and Neovim, using Tim Pope’s Git Fugitive plugin, which is fantastic and simple to use.
However, there are a few dedicated third-party merge tools that focus solely on the task.
Dedicated Git Merge Apps
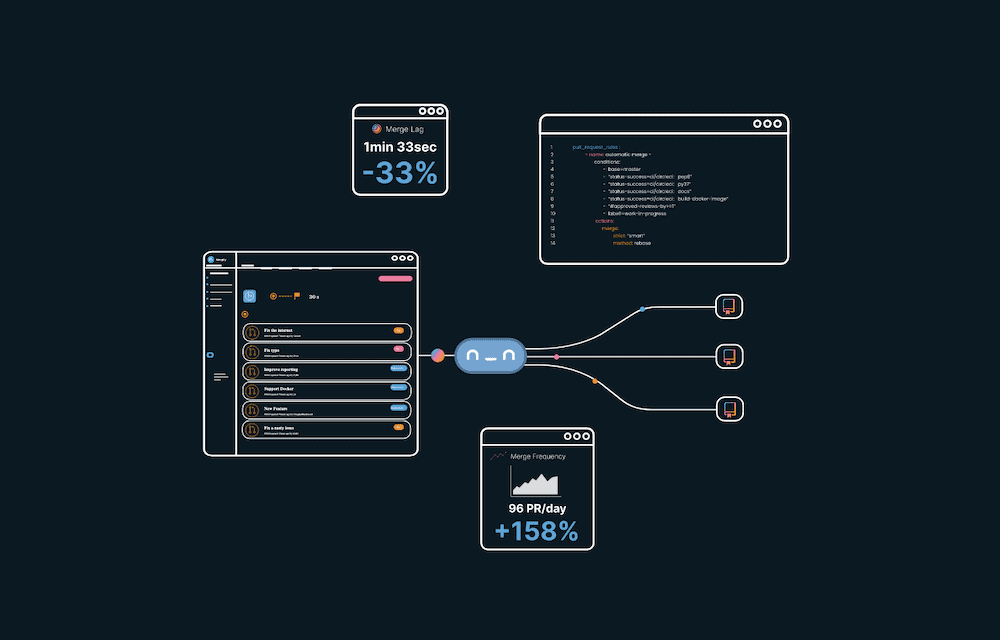
For instance, Mergify is an enterprise-level way to merge code that integrates into your continuous integration/continuous delivery (CI/CD) pipeline and workflow:
Some of the features here help you to automate the update of your pull requests before the merge, reorder them based on priority, and batch them too. For an open source solution, Meld might be valuable:
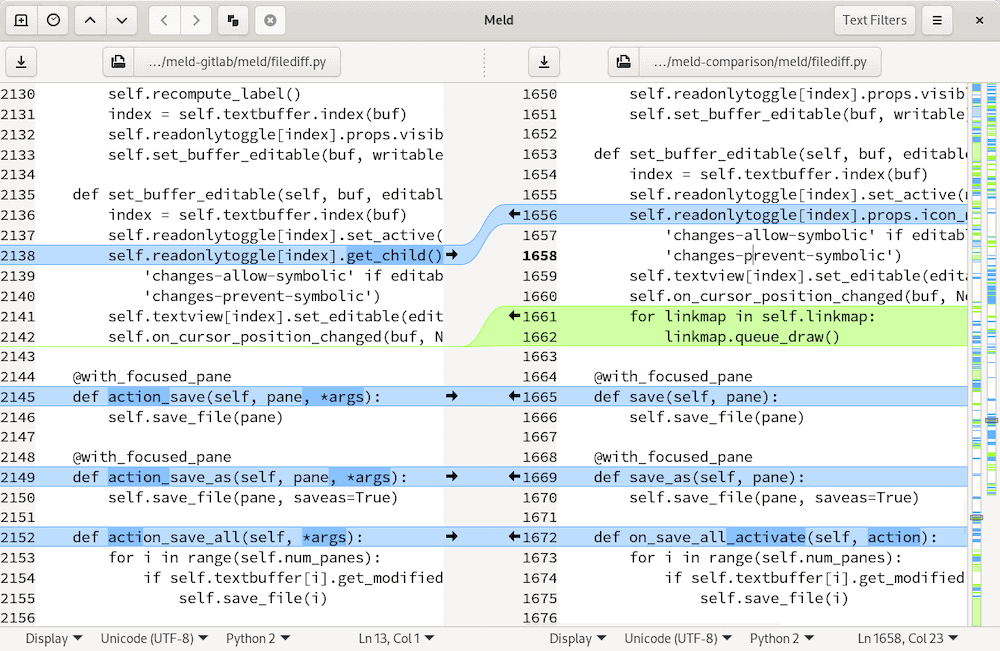
Its stable release supports Windows and Linux and runs under the GPL license. This gives you basic functionality in order to compare branches, edit your merges, and more. You even get two- or three-way comparisons and support for other version control systems such as Subversion.
Summary
Git is an essential tool to collaborate and manage code changes efficiently. However, if multiple developers work on the same code, conflicts may arise. Git merge strategies will help you resolve these conflicts, and there are lots of ways to do the job. For more complex Git merge strategies, you need to turn to advanced tactics.
This can even be as straightforward as ignoring negative space or trawling through the search logs. However, you don’t always have to use the command line, either. There are plenty of apps to help you, and your code editor will often use a built-in interface too.
If you’d like to secure high-quality application hosting, we’ve got you covered. Our cloud-based app hosting services ensure your full-stack app is ready for prime time in no time.
Which of these Git merge strategies will get you out of a tight spot? Let us know in the comments section below!


