Squarespace is an intuitive platform that makes it easy to create simple websites and online stores. However, its features are limited. So, you may be looking for a more flexible solution, like WordPress.
Migrating from Squarespace to WordPress can help take your website to the next level. With WordPress, you can customize your content in dozens of ways, using page builder plugins and the Block Editor. On top of that, you don’t need to pay to use the Content Management System (CMS) or to unlock additional features.
In this article, we’ll tell you what you need to know before you embark on a Squarespace to WordPress migration. Then, we’ll guide you through that process step by step.
Let’s get to it!
Check Out Our Video Guide to Migrating From Squarespace to WordPress
Why Move From Squarespace to WordPress
Squarespace can be a fantastic option if you’re working on your first website and you’re not sure how hosting works or what it takes to put everything together. With Squarespace, you get hosting, page-building features, and marketing tools bundled into a single platform.
The problem with this is that you’re locked into using Squarespace. If you want access to better features, you’ll need to pay for a more expensive plan.
The most expensive Squarespace plan costs $40 per month, and you get access to features such as selling subscriptions, offering discounts, and advanced shipping functionality. For that same price, you can pay for a top-notch managed WordPress hosting plan and use free plugins to get access to all of those same features. You may even have money left over by the time you’re done.
Things to Consider Before Migrating From Squarespace to WordPress
Moving a website can be time-consuming, even if you’re using migration plugins. The migration process itself often doesn’t take a long time. However, there are some preparations to be made before that process begins. Let’s take a look at the main ones.
Finding a WordPress Web Host
One of the best things about using WordPress is that you’re free to choose any web host you want. The CMS works with any hosting plan and provider that you can find. However, you’ll have a much easier time if you focus your search on WordPress-friendly web hosts.
As far as we’re concerned, managed WordPress hosting is the way to go for most websites. With managed hosting, you get to focus on growing your website and publishing content while your web host takes care of optimization, securing your site, and backup tasks.
Kinsta offers a broad range of managed WordPress hosting plans to fit different budgets. With every plan, you get access to the same high-performance servers, as well as a host of features that will enable you to focus on running your site, including:
- Around-the-clock support and malware removal services
- Automatic backups
- Free SSL certificates and setup
- Automatic Content Delivery Network (CDN) integration
- Staging functionality
- Integration with DevKinsta, our free local WordPress development tool
There are a lot of excellent WordPress web hosts that you can choose from. We recommend that you don’t settle for the cheapest hosting plan that you can find. Instead, take the time to look at reviews and see what some of the best web hosts have to offer before you sign up for a plan.
If you sign up for a Kinsta plan, you can benefit from our migration services. We offer help with the migration process and, depending on which platform you’re coming from, our WordPress experts can take care of the entire move for you.
Backing Up Your Squarespace Data
It’s important to note that your Squarespace website won’t suffer any changes or disappear during the migration process to WordPress. This means that you don’t need to back up the website before you begin “moving” it.
In any case, Squarespace doesn’t offer regular backup functionality. The platform doesn’t enable you to create complete copies of your site that you can restore with a few clicks in case something goes wrong.
Squarespace enables you to export your website’s data, which serves as a type of backup. We’ll use that exported data during the migration process to WordPress, so let’s jump right into it.
How to Migrate From Squarespace to WordPress (7 Steps)
Migrating from Squarespace to WordPress involves exporting all of the content from the former and importing it into the latter. The process is easier than you might think, but before we get to it, you’ll need to install WordPress.
Step 1: Install WordPress
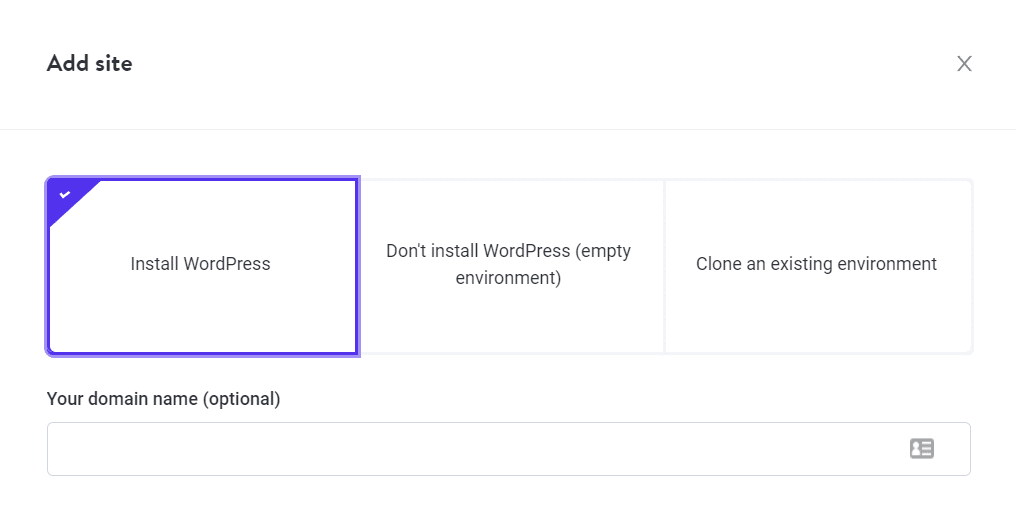
Now that you have a web host and a plan, it’s time to set up a WordPress installation. Some managed WordPress hosts will offer you the option of installing the CMS automatically when you create a new website:
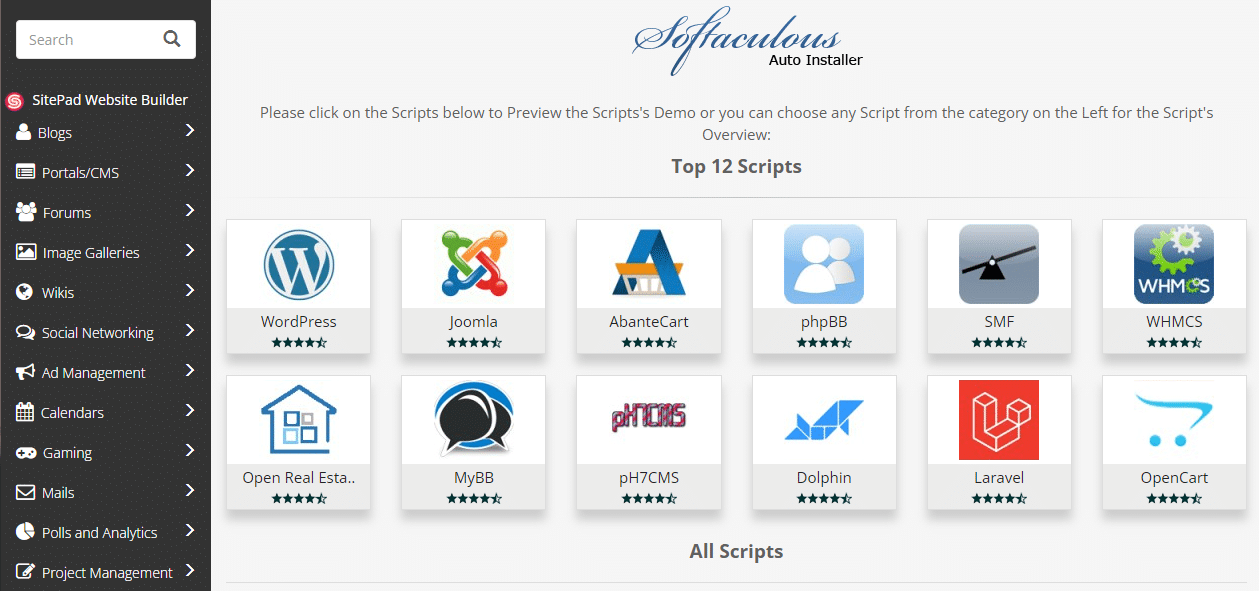
If your web host doesn’t offer that feature, there are other options. Some hosting control panels, such as cPanel, include built-in software installers that come with dozens of options.
Softaculous, for example, enables you to set up a WordPress website in a matter of minutes:
You also can install WordPress manually, which is much easier than it sounds. The entire CMS is available for download at WordPress.org. You can upload the WordPress files to your server and run the “five-minute” WordPress installer, which will walk you through the entire process.
Step 2: Export Your Website’s Content From Squarespace
Squarespace enables you to export most, but not all of your site’s content in an XML file. Here’s what the platform allows for you to carry over to your new host:
- Pages and posts (as well as the site’s main blog page)
- Gallery pages
- Text and embed blocks
Overall, Squarespace enables you to export the bulk of your site’s content. However, if you’re using Squarespace to run an online store, you might be out of luck. That’s because the platform’s export files don’t include product pages, images, audio or video files, or any custom CSS on your site.
To move that type of content over to WordPress, you’ll need to copy/paste it manually or start from scratch. On that same note, importing Squarespace images to WordPress can be a chore, and it requires you to use a plugin.
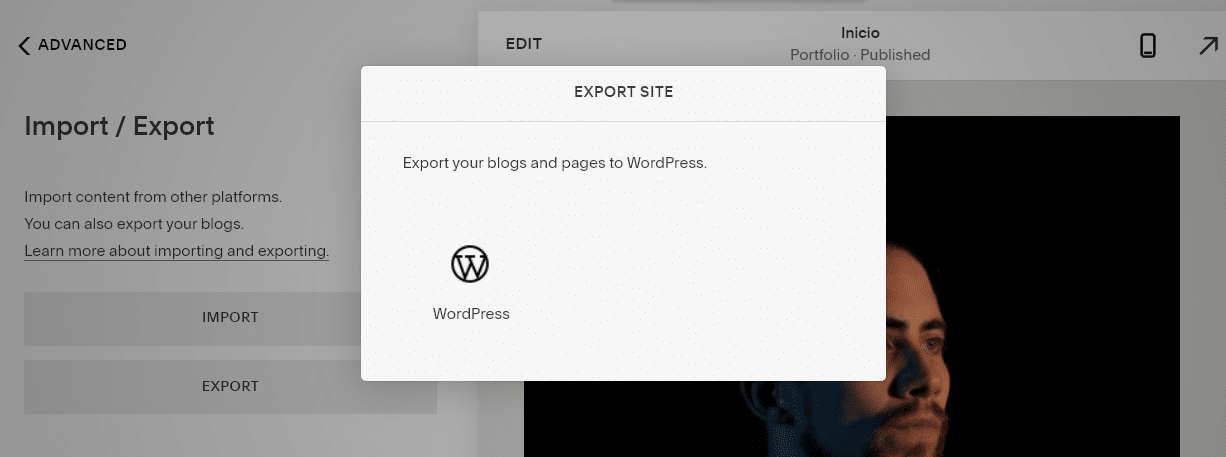
For now, let’s go ahead and export the content that Squarespace allows you to download. To do so, access your website’s dashboard and go to Settings > Advanced > Import/Export. You’ll see a preview of your site to the right, and a menu to the left, which includes an option that says EXPORT:

Click on EXPORT, and Squarespace will display an option to export your posts and pages to WordPress. Go ahead and select the WordPress icon:
Squarespace will take a minute to prepare your site for exporting. When the XML file is ready, the option to download it will appear on the menu to the left:

Save that file to your computer and note where you stored it. This file is what makes migrating from Squarespace to WordPress possible, and you’ll need it for the next step.
Step 3: Import Your Squarespace Content Into WordPress
WordPress comes with a broad range of tools that enable you to import different types of content into the platform. Although there’s no dedicated Squarespace import tool in WordPress, the CMS can import content that’s in XML format.
Go to your WordPress dashboard and jump to Tools > Import to access that feature. Look for the WordPress option at the bottom of the page and click on Install Now:
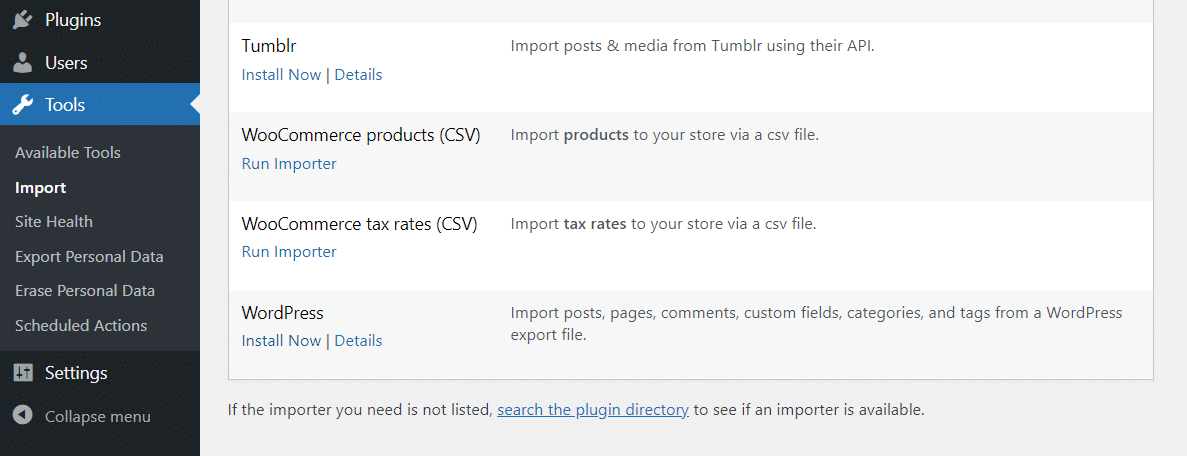
If the WordPress import tool is already set up, you’ll see the Run importer option instead. Click on it, and WordPress will ask you to select an XML file to upload:
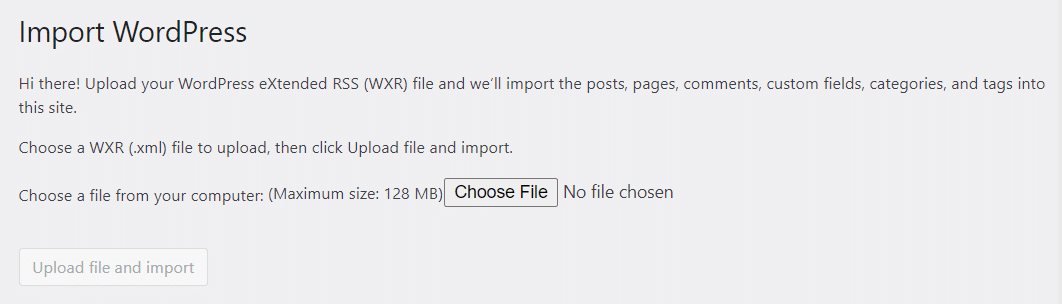
Select the file you downloaded during the last step and click on Upload file and import. Now you get to assign the posts and pages that you want to import from Squarespace to a new or an existing author in WordPress:
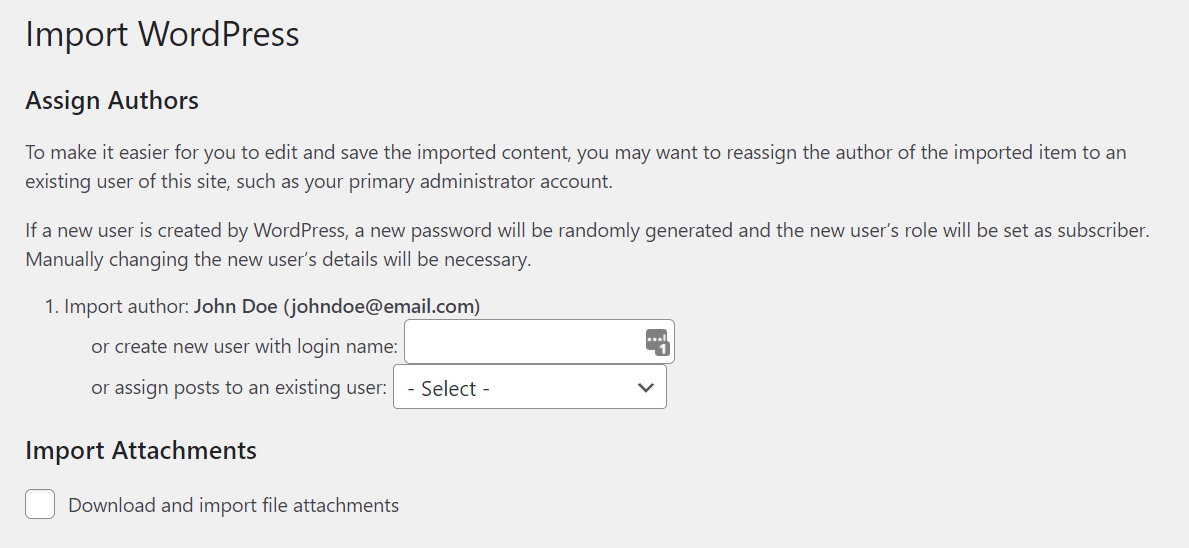
You’ll also see an option to import attachments from Squarespace to WordPress. Enable that option and click on Submit. Depending on how much data you’re importing, the process might take a while. Once it’s done, you’ll see a success message.
You can now check all of the imported content by navigating to the Posts or Pages tabs. As we mentioned before, the Squarespace export file doesn’t enable you to import images into WordPress. For that, we’ll need to use a plugin.
Step 4: Import Images From Squarespace
A website is not without images unless you’re still living in the 90s. One way to get your Squarespace images into WordPress is to download all of them, upload each file to your new site, and place them within your content one by one. However, no one has time to do all of that unless you’re only importing a couple of pages.
Naturally, some plugins can automate importing Squarespace images into WordPress. Our favorite pick for the job is called Auto Upload Images:

This plugin looks for image URLs in your posts and pages. Then, it automatically takes those URLs, downloads the images, and uploads them to WordPress, replacing the original URLs.
When you import Squarespace data into WordPress, the CMS doesn’t upload images automatically. However, it does import the original Squarespace image URLs, which means this plugin is perfect for your needs.
To get started, install and activate the plugin, then go to Posts > All Posts in the dashboard. Select the Screen Options menu near the top of the screen and update the Number of items per page option to a number that will display all of your WordPress posts on one single page. Then, click on Apply:

This way, you can update all of your WordPress posts at once, which will enable the plugin to import all the images in one fell swoop.
Now, select all of the posts on your site, open the Bulk actions menu, and click on Edit:
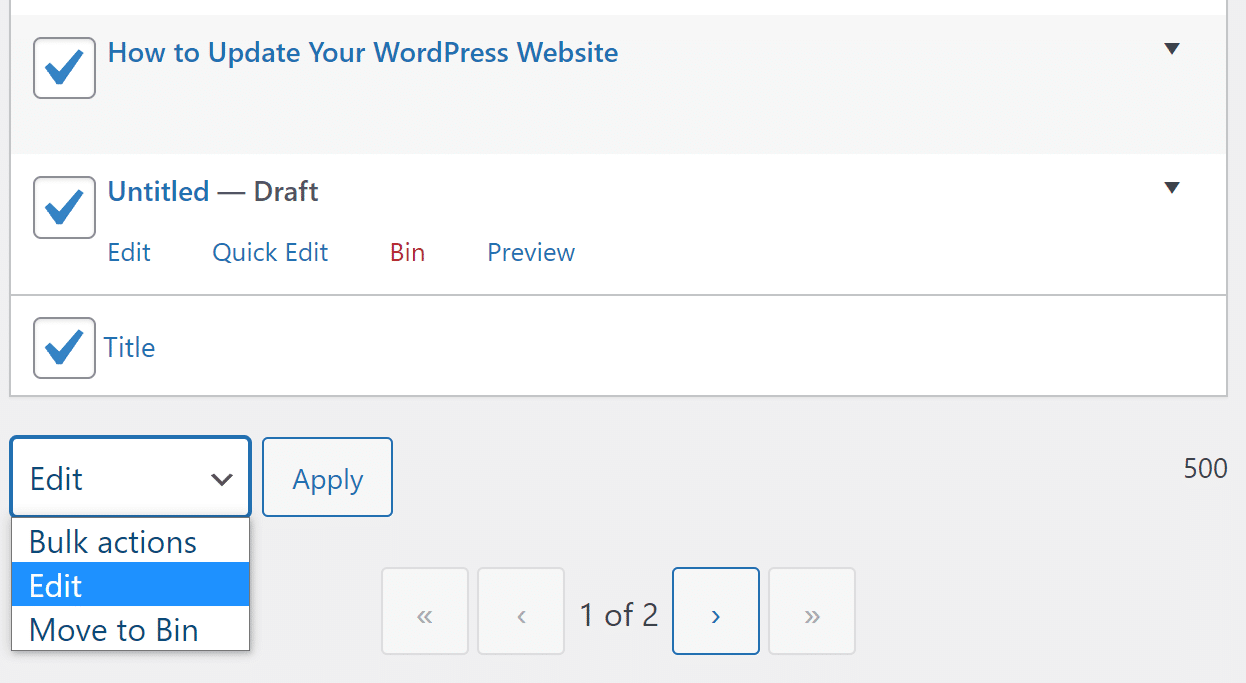
A menu will appear, showing bulk edit options for your existing posts. Click on Update without selecting any option and wait for the page to reload.
One issue you might encounter once you click on Update is that the page takes a long time to reload or update. That’s because WordPress imports Squarespace images your website is missing and updates each post. If you’re using a slow web host, this process can cause WordPress to time out:

If that happens, you’ll need to update posts in small batches instead of uploading images for all of them at once. The number of posts you can work on at a time will largely depend on your hosting service.
Remember that you’ll also need to repeat the whole process for your WordPress pages. Afterward, all of your Squarespace content should appear in WordPress without a single missing image.
Step 5: Point Your Domain Towards WordPress
Currently, the domain you use for your website is still pointing towards Squarespace’s nameservers. Instead of registering a new domain for your WordPress website, you can update your existing one. This way, when visitors type in the domain, they’ll end up on your new website.
The process for updating a domain’s settings varies, depending on where you registered that domain. For example, if you used a domain registrar, you’ll need to log into your account to manage its DNS settings (the information that tells a domain where it points to):
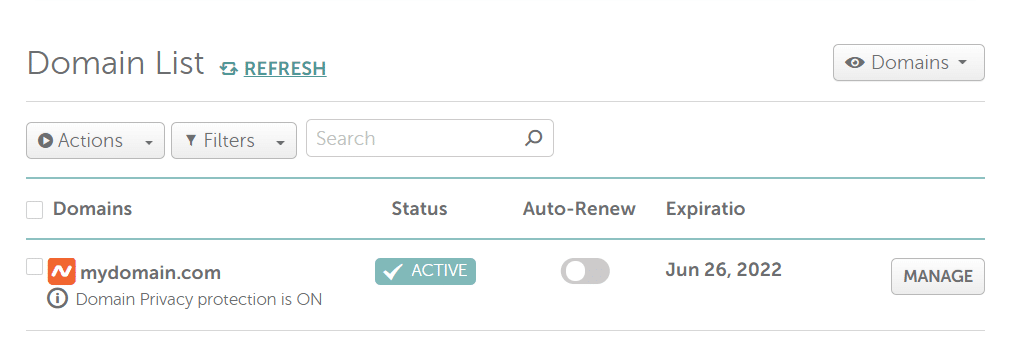
Some web hosts enable you to register and manage domains through their control panels. In that case, you’ll need to access the panel to update the DNS records and point the domain towards your new WordPress website.
If you’re using Kinsta, you can use MyKinsta to point domains towards your website. The process works for websites that use the Kinsta Cloudflare CDN and those that don’t.
Step 6: Update Your WordPress Permalink Structure
If you open any of your WordPress posts or pages right now, you’ll notice that their URL probably looks like this:
yourwebsite.com/?p=123That’s the default URL or permalink structure that WordPress uses. Each post or page gets a unique ID, and its URL includes that number. It’s recommended that you change that permalink structure early on in your website’s life. Otherwise, it can impact your site’s Search Engine Optimization (SEO) and cause significant technical errors.
To change your site’s permalink structure, go to Settings > Permalinks in your dashboard and select the type of URL that you want to use:
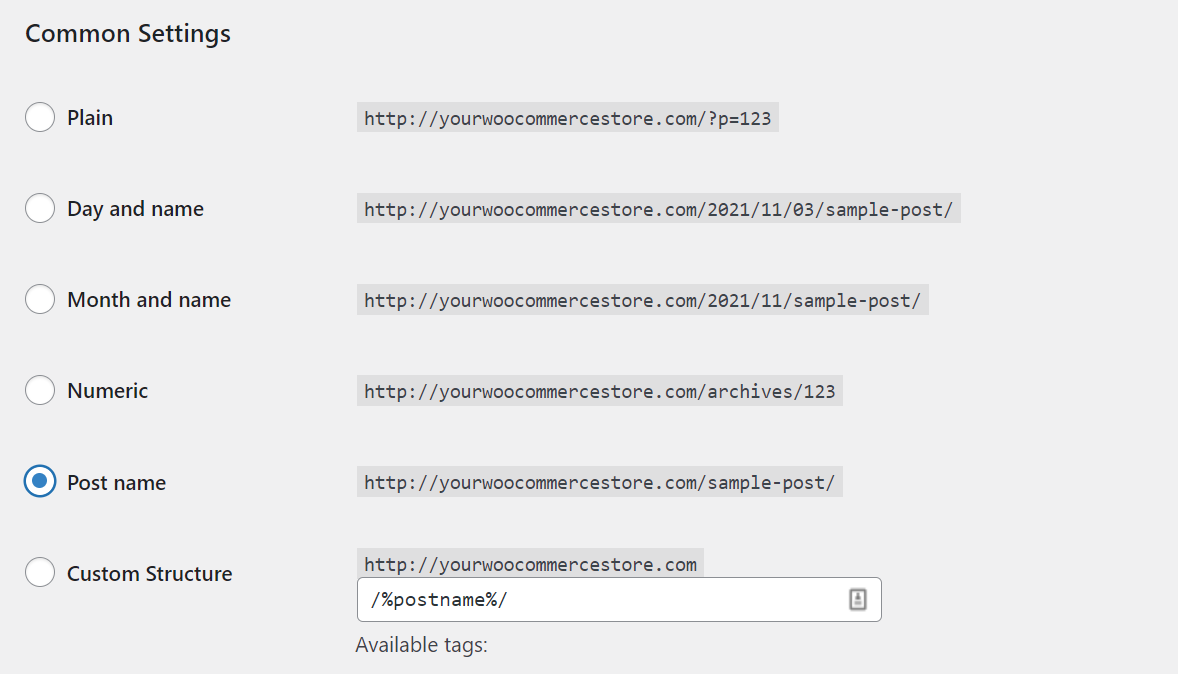
The best permalink structure, in our opinion, is Post name. As long as you set a unique slug for each post and page on your site, the Post name structure results in the shortest and cleanest URLs that you’ll see.
You’re free to choose whichever permalink structure you prefer, but we advise against using the Plain option. When you’re ready, save your changes and move on to the final step.
Step 7: Choose a Theme for Your WordPress Website
Squarespace websites have a very polished look. When you import Squarespace content into WordPress, you might think it doesn’t look as sleek as your former website. However, with the right theme, your WordPress website can look much better than its Squarespace counterpart ever did.
WordPress gives you a massive range of options when it comes to themes. The free WordPress.org theme repository is a great place to start looking for a style that resembles your old Squarespace website:
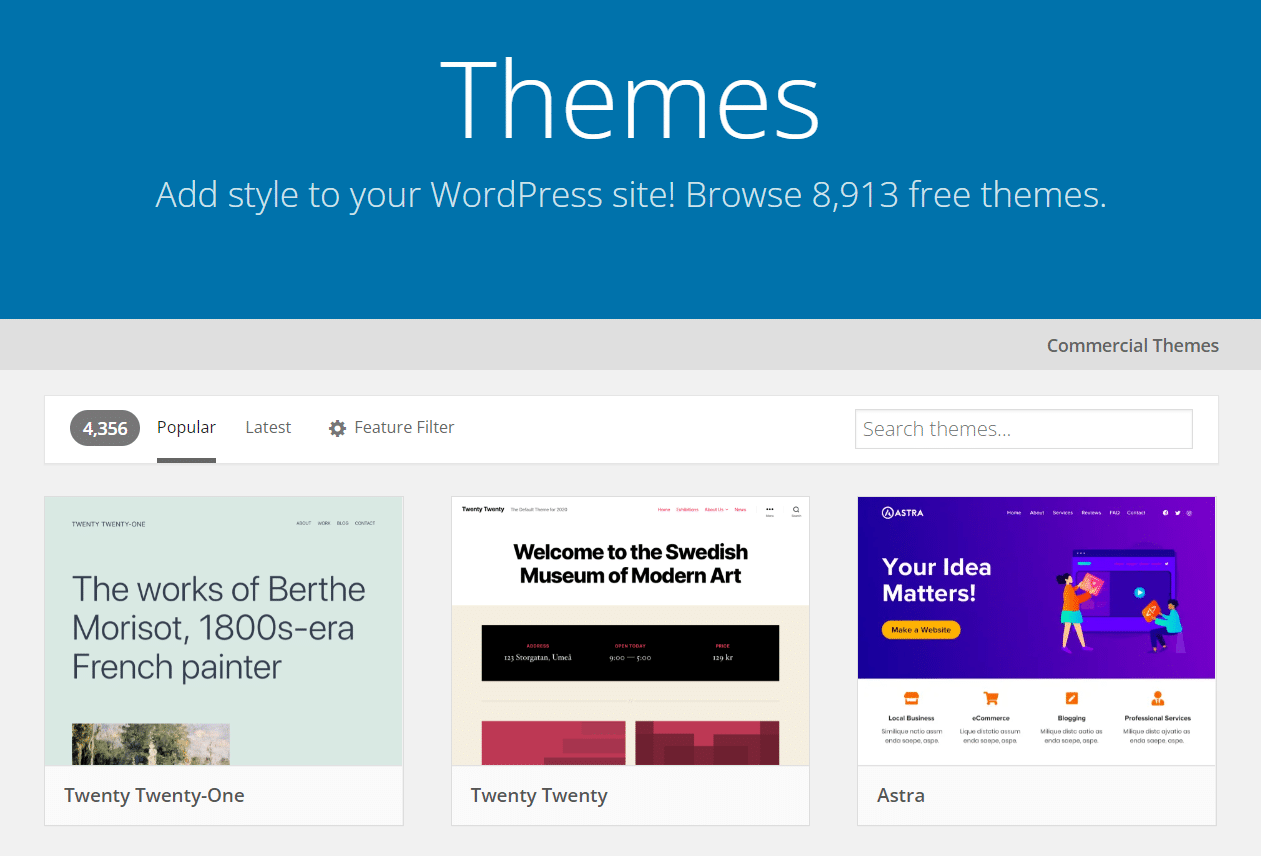
If you want to try out a new look, now is the perfect time to do it. You can choose any theme you wish to, and WordPress will adapt your content to it. Many premium WordPress themes come with advanced features such as powerful page-builders and fully responsive designs.
WordPress also gives you access to the intuitive Block Editor, enabling you to edit any page or post’s layout and style using a visual interface. Whether you choose to replicate your old website’s design or start anew, WordPress can offer you a much better experience than Squarespace.
If you’re unsure where to start, we have a hand-picked list of the best WordPress themes you can use in 2021. This list includes options for almost any type of website that you can imagine, so go ahead and check it out.
What to Do After You Migrate From Squarespace to WordPress
WordPress opens up a massive world of possibilities if you’re coming over from Squarespace. The most exciting change is that you now get access to plugins.
Squarespace offers an extensive extensions library to its users. However, that feature pales in comparison to the sheer number of options that become available once you install WordPress. To give you an idea, the WordPress.org plugin repository features almost 60,000 plugins (all of them free):

If you can imagine a feature, chances are there’s a plugin for it (as was the case with Auto Upload Images).
Summary
Squarespace is a suitable option if you’re getting to work on your first website. However, there’s a reason why WordPress is the most popular CMS in the world (40 percent of all websites use it), and that is due to its flexibility.
WordPress is all about enabling you to create any website you want, in any style that you can imagine, with any feature you need. Migrating from Squarespace to WordPress only takes a few hours, but you’ll be reaping the rewards for years to come.
Do you have any questions about how to migrate from Squarespace to WordPress? Let’s talk about them in the comments section below!