
Ecommerce is nothing without a way to make payments. It’s obviously a crucial element, which means you’ll also want to consider which payment gateway you use. There are a number of perennial contenders to consider, but WooCommerce Payments is worth your time, especially if you use the plugin.
The plugin will integrate WooCommerce Payments with your site in the most optimal way and still give you the functionality you need to take payments. While it’s simple to set up and use, not everything is as it seems — and we’ll discuss this in the article.
For the rest of the post, we’re going to talk about WooCommerce Payments and how to use it. We’ll also compare it to some other popular gateways. First, though, let’s talk about what requirements a gateway should have.
Check Out Our Video Guide to WooCommerce Payments
What Makes for a Good Ecommerce Payment Gateway?
With ecommerce, the bulk of the attention will go towards the client-business relationship. This is all well and good, but there’s another key part of the chain that needs your focus: the payment gateway you choose.
This is software that connects the frontend button on your site to initiate a purchase, and (ultimately) your bank account. When you get to the point of the checkout process where you need to enter your billing information, this is the payment gateway in action.

Because the gateway will handle the important task of processing payments, it needs to have a few key elements in place:
- Availability: There are two points to this. You’ll need to know that the gateway is available not only in your country of business, but in that of your target audience. If you run a worldwide business, the gateway will need to be available in all of those countries.
- Overhead-friendly transaction charges: If a gateway ticks most of the boxes, but charges a packet to process transactions, it will sting you hard. You’ll want the most cost-effective set of charges you can muster from your gateway.
- Intuitive and simple interface: It goes without saying that a nice user interface (UI) that offers a logical layout is a boon for any app. For a gateway, it will be the difference between an abandoned cart and a full sale.
- Integration with your ecommerce solution: As a WooCommerce user, the payment gateway you choose must have compatibility. Without it, you won’t be able to process payments at all.
While we’ll talk about a number of payment gateways that tick all of these boxes, there’s one we want to focus on throughout this article. We’ll take a look at it next.
Introducing WooCommerce Payments

If you use WooCommerce as your ecommerce platform, and take advantage of WooCommerce hosting, it makes sense to integrate WooCommerce Payments into your site. It’s the “official” payment gateway for the platform, and comes with a number of impressive features:
- It uses a pay-as-you-go (PAYG) model for transactions (more on this shortly).
- The extension offers full integration with WooCommerce.
- You’ll track everything about your payments from the WordPress dashboard.
- WooCommerce Payments offers multi-currency support — 135+ choices at your disposal.
As you might expect, WooCommerce Payments is an Automattic product. This means you get the highest level of integration with WooCommerce and WordPress, which is tantalizing for a store on those platforms.
In fact, this is the only payment gateway that can offer this level of integration. However, this doesn’t stop with WooCommerce. You can also integrate with other extensions in ways you wouldn’t normally be able to. For example, take WooCommerce Subscriptions:

If you use this and WooCommerce Payments, you can handle those subscriptions within WordPress in a way no other solution can.
As for technical requirements, you’ll need a WordPress installation and server setup to cope, which often means at least PHP 7.0, WordPress 5.7, and WooCommerce 4.8.
However, you’ll also need a Secure Sockets Layer (SSL) certificate to use the gateway in “live mode,” and a business based in one of 18 supported countries. A WordPress.com account is necessary too. The Jetpack plugin helps carry out transactions and link services and is an easy way to connect to WordPress.com. That said, you do not have to have JetPack installed, as you are able to connect to WordPress.com with or without the plugin.
As for transaction charges, these depend on your country, although you’ll notice that they are similar to another popular payment gateway in Stripe. This is because WooCommerce Payments is a “white-label” version of Stripe. We’ll talk more about this a little later.
Why Use WooCommerce Payments Over Other Gateways?
With the plethora of gateways available to WooCommerce users, there needs to be something special about WooCommerce Payments to attract users.
There are a few reasons we can note for why you’d want to opt for the solution:
- You get the greatest level of integration with WordPress and WooCommerce. In fact, it’s near-perfect and no other gateway will be able to match it.
- Because of the way WooCommerce works, you can also handle every aspect of your payments from the WordPress dashboard, without the need to log into a third-party app.
- Because the gateway is built on top of Stripe, it’s robust, rock solid, and popular.
- By extension, how you can integrate your Stripe gateway with third-party services should be similar for WooCommerce Payments.
On the whole, the primary reason you’ll want to use WooCommerce Payments is for the tight integration from Automattic. Even so, it’s worth exploring how WooCommerce Payments compares to the competition. Let’s take a look at a few of these in the next section.
4 Other Leading Payment Gateways for WooCommerce
While there are myriad payment gateways to choose from, we have four here to contrast with WooCommerce Payments.
However, the first will feel familiar for one good reason that we’ll explain. Let’s start with the Stripe gateway, as it’s at the core of what WooCommerce Payments does.
1. Stripe
First up, Stripe. This will be a familiar gateway to many, due to Stripe’s market share, popularity, feature set, and low transaction rates.
WooCommerce Payments gets its genealogy from Stripe, as it’s a white-label version of the gateway. This means the Stripe branding is removed and replaced with that of WooCommerce. From there, Automattic makes further changes to integrate it into WordPress and WooCommerce.
This means while Stripe and WooCommerce Payments share the same core and architecture, both solutions can feel different. In fact, Stripe is already in WooCommerce as a default payment gateway. As such, it offers a few differences:
- You can use Stripe in more countries, as it’s a more mature solution.
- There won’t be as much integration between WordPress and your gateway. However, this is still going to be suitable, given that it’s a default option within WooCommerce.
We’d suggest that the first point here is going to be the reason users opt for Stripe. When it comes to Stripe vs WooCommerce Payments, you’ll decide between country availability and integration with WordPress. Whichever you favor more will help inform your decision.
2. PayPal
For those old enough to remember, PayPal was a revelation when it first appeared. It was the number one way to process transactions and move money around online for a long time. While there’s a lot more competition nowadays, it can still throw hands with the largest solutions in the space.
It’s a mature and functional payment gateway that offers a number of interesting features:
- It has the infrastructure and reliability you’d expect from a top-tier gateway.
- There’s lots of flexibility within the payment processing functionality. For example, you could implement PayPal’s Pay in 3: a way to split a large payment over three different installments.
- While you’ll need to use a third-party dashboard to manage your transactions, it’s intuitive, feature-rich, and clean-looking.
PayPal’s flexibility is why this would win over WooCommerce Payments. Pay in 3 is welcome for end users, and the checkout process is familiar and easy to use.
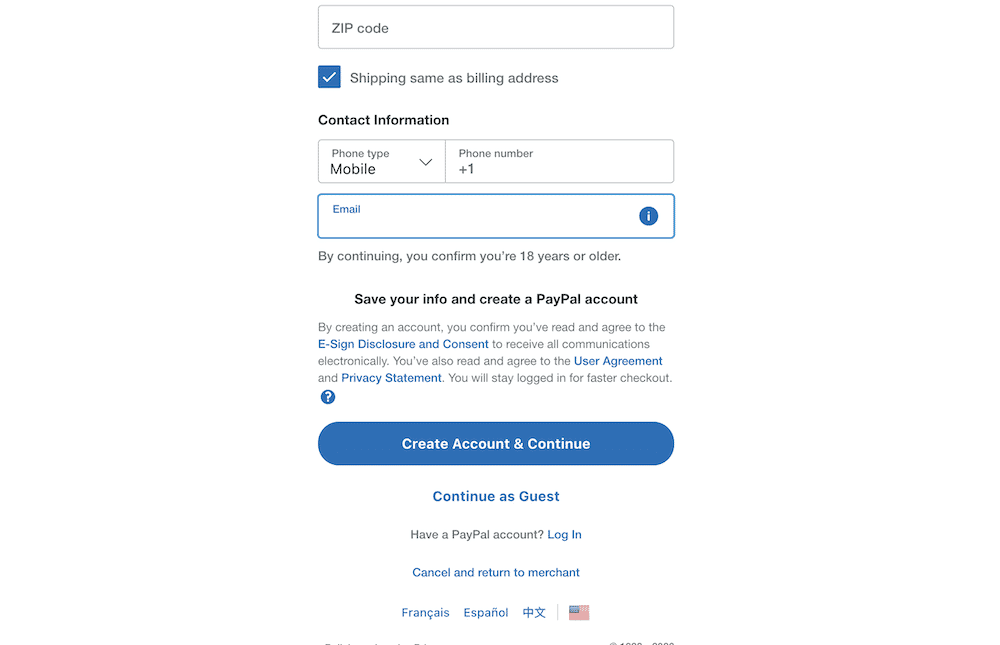
What’s more, you can set up recurring payments and subscriptions without the need for an extension. Speaking of which, lots of the web is already set up to deal with PayPal. Many users will have PayPal accounts already in place, ready to go.
However, PayPal’s transaction and merchant fees are notorious for being confusing at times. There’s a whole microsite dedicated to listing and explaining them. This is part of the reason for the switch from PayPal in the first place.
In addition to this, customer support is lackluster at points — especially for dispute resolutions. While this won’t stop you from using PayPal, it should make you consider whether it’s worth the hassle.
Read our Stripe vs PayPal in-depth comparison, if you’d like to know more.
3. Square
WordPress users will know Square almost as a competitor of sorts — it owns the Weebly website builder solution. Of course, Square is a fantastic payment gateway in its own right.
There are a few reasons why users will turn to Square over other solutions:
- For starters, it takes minutes to set up, and day-to-day usability is high.
- The Square Checking service lets you access your money fast. This is important for comfort and trust.
- The transaction fees are uncomplicated and low (we’ll talk about this in a minute).
Combined, this makes Square one of the leading payment gateways available. However, we’d suggest that Square is best for in-person, point of sale (PoS) transactions. Lots of businesses will use Square’s software and hardware to power their payments, and we’d tend to agree.
Still, it’s a solid payment gateway that also has integration with WooCommerce, but to a lesser degree than WooCommerce Payments.
As for transaction charges, it’s super simple. Taking a US user into account, you’ll pay 2.9% plus a $0.30 charge on every transaction. There are other rates depending on how you use Square, but for the most part, you’ll know exactly what you’ll pay on every sale.
Read our Stripe vs Square in-depth comparison.
4. Authorize.net
Although Visa runs Authorize.net, it’s an outlier when it comes to payment gateways. However, it’s not poor in features or functionality.
In fact, there are lots of positives in using Authorize.net as your payment gateway:
- It’s flexible with regard to where you can take payments. For WooCommerce stores, this isn’t going to matter too much, but this means Authorize.net is scalable with your needs.
- You can offer lots of payment types, not just Visa. For example, you can accept most credit cards, along with Apple Pay, Visa Pay, and more. Even PayPal is an option.
- You get security tools to help protect you and your customers. Advanced fraud protection is built into the gateway, and by extension, your checkout.
The only sticking point with Authorize.net is the price. While the transaction charges are standard at 2.9% plus a $0.30 handling charge, you’ll also need to pay a $25 per month fee to access Authorize.net.
If you already have a merchant account you still need to pay $25 per month, but the transaction charges drop to $0.10 per transaction. This might be beneficial if you have the infrastructure in place. However, despite the positives, you could be better off with another payment gateway that offers more for less outlay.
How To Install WooCommerce Payments
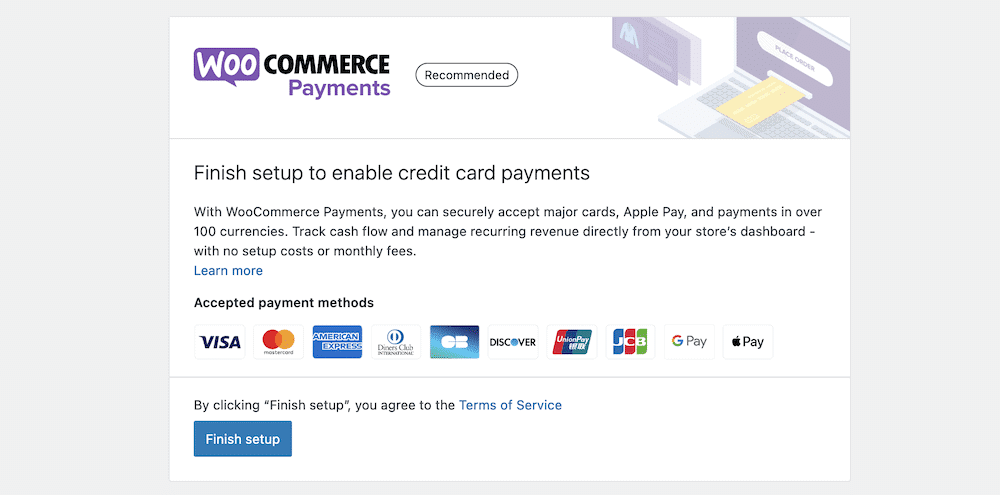
In general, the installation process for WooCommerce Payments is much like any other WordPress plugin. However, the extension asks you to complete a few other steps before you continue:
- You’ll need to have a WordPress.com account to provide Automattic-focused security.
- You will have to verify your business and payment details before you can continue to use the extension.
- For live use, your site will also need an SSL certificate that’s active.
Because of the requirement for WordPress.com (and by extension, Jetpack), you won’t be able to use WooCommerce Payments on a local server. This is a pain, and it’s likely a sticking point for many — unless you’re a WordPress developer who can edit files to bypass the live mode settings on a temporary basis.
If you do want to use WooCommerce Payments, you’ll need to understand this crucial concept. However, the process for each of these is straightforward. Connecting to WordPress.com takes a simple click via the Approve button:
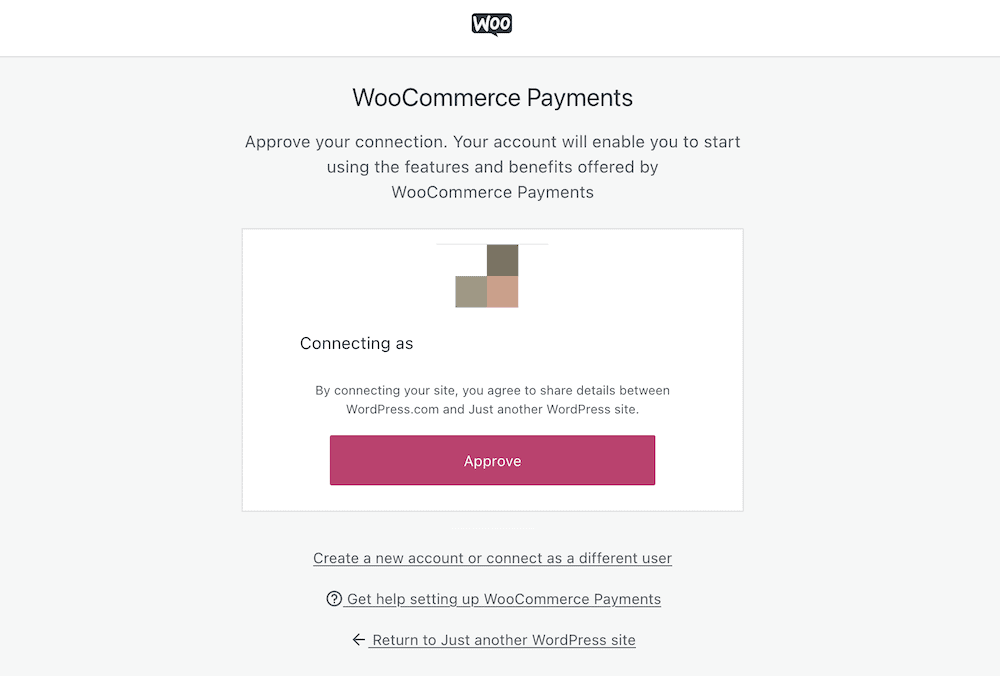
…then entering a telephone number and email address:
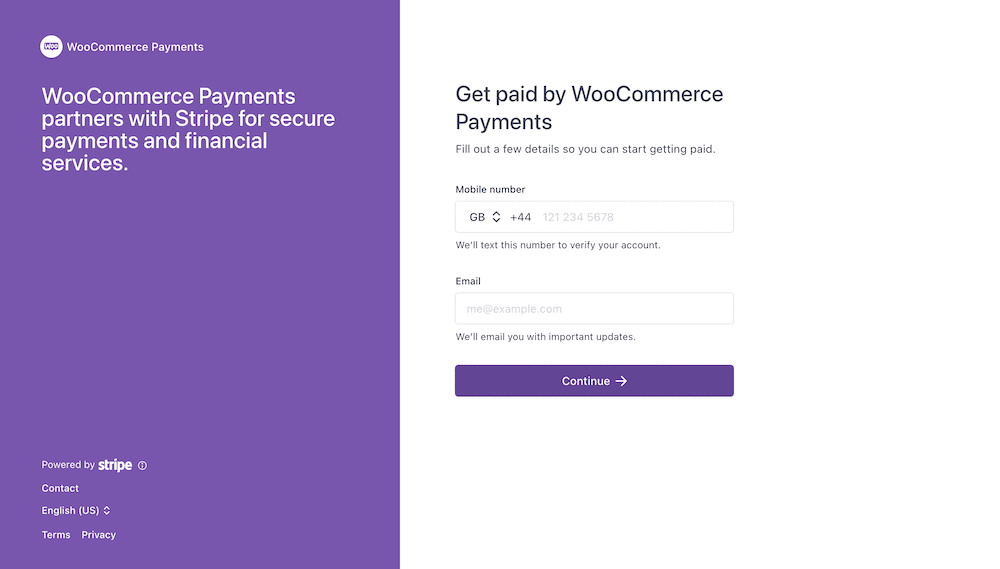
The Stripe portion of the process asks you for some personal details about your business, along with an active bank account for your business:
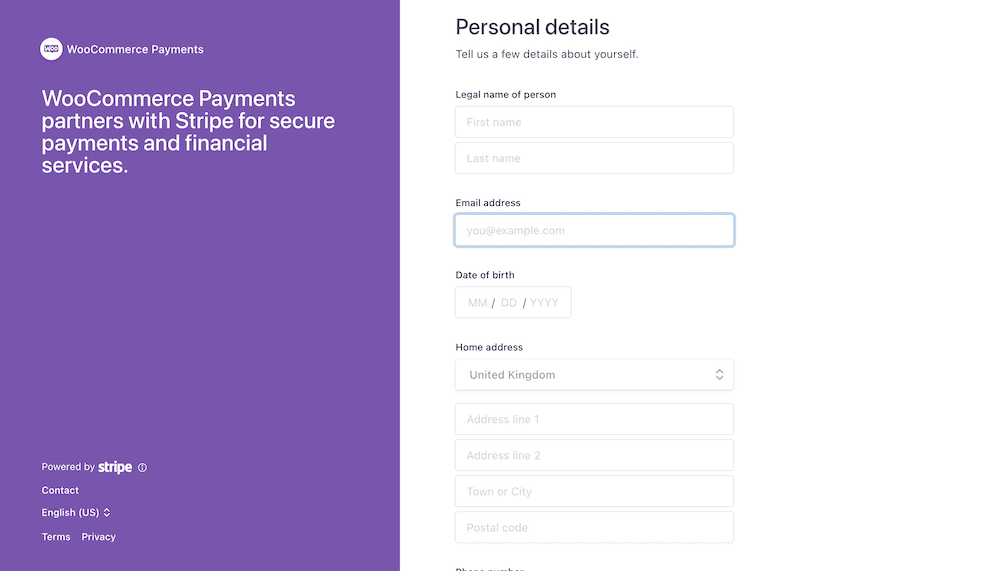
When you complete this process, you’re ready to take a deep dive into the WooCommerce Payments interface.
How To Use WooCommerce Payments
While WooCommerce Payments is a simple solution to use, there’s a lot going on within its various screens. Over the next few sections, we’ll talk about some of them and how you should set up and use the extension.
Account Overview
The first screen you’ll see as a new user WooCommerce Payments is the Overview screen:
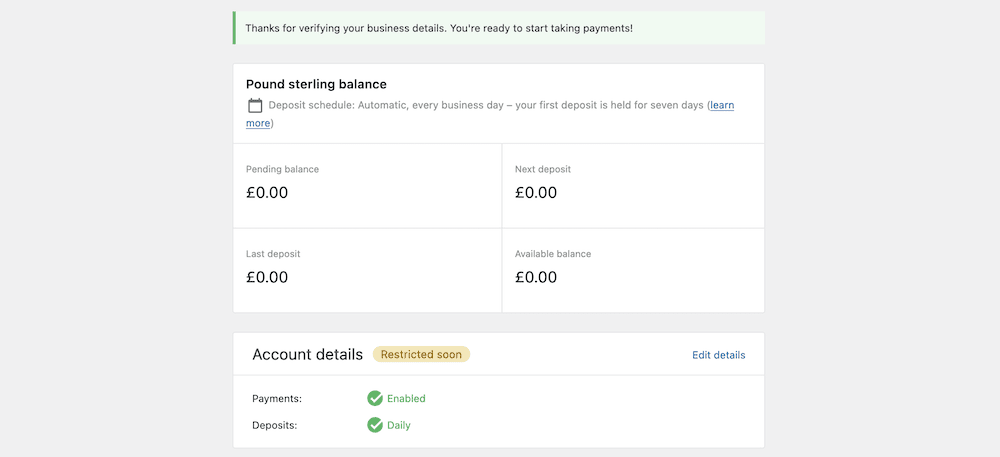
The first panel here shows your overall balance, but it also offers some extra detail. For example, you can see the available balance, which is always helpful, but you also can view the pending balance.
This will offer value once you have a number of transactions for your store. Of course, some transactions won’t process at the same time as others, so it’s nice you get to make the distinction between balances.
You can also see the figures for the last and next deposits. This is going to be relevant in conjunction with the deposit schedule settings above those figures. You’ll see an “at-a-glance” summary of your deposit schedule — the default is an automatic deposit to your bank account every day.
Below is your Account details information:
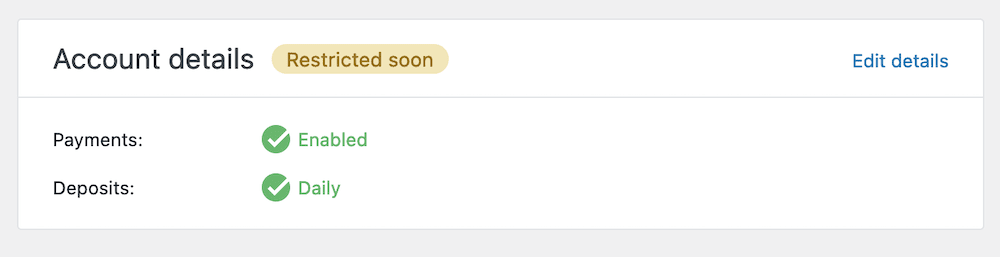
In short, this is a summary of whether you have payments set up — which you should — and your deposit frequency. This is a good time to talk about more settings for your WooCommerce Payments account, so we’ll do that next.
Settings
The WooCommerce Payments Settings link will take you to WooCommerce > Settings > Payments. It’s here that you’ll see a few sections and checkboxes to help you further set up the extension:

There are four different sections here:
- General: You can enable the extension here, and also enable a restricted test mode for local use.
- Payments accepted on checkout: This section offers a simple checkbox to let you enable credit and debit cards.
- Express checkouts: You can also enable Apple Pay and Google Pay, along with deciding on what pages a user can access them.
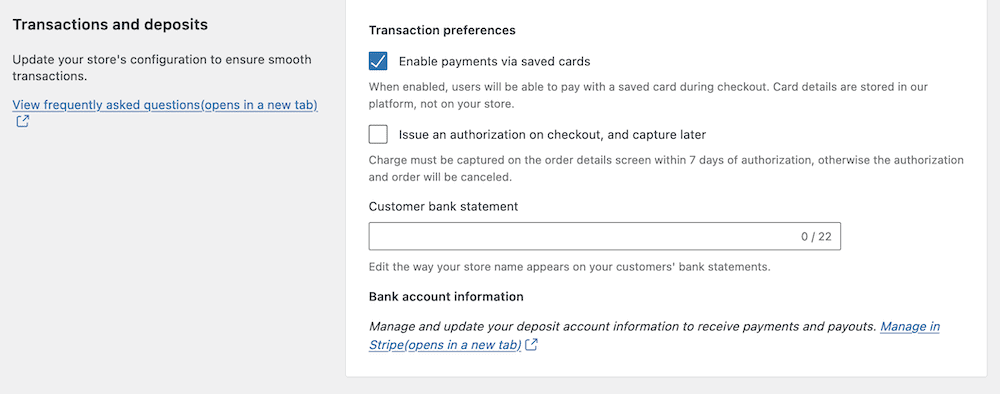
- Transactions and deposits: These settings let you offer the user a smooth checkout and transaction experience, among other options.
Within this last section, you can let a user pay with a saved instance of a card for faster checkout. You can also authorize a card and capture it later. This is more of a user benefit, because they can checkout with a less stringent process.
However, the last field — Customer bank statement — warrants some further attention before we move on.
Bank Statement Descriptors
When you make a purchase, your bank statement will show a clear and defined name of the company you do business with. You can set this within WooCommerce Payments too using the Customer bank statement field:
There are a few requirements you’ll need to adhere to when you set this name:
- You should use no fewer than five and no more than 22 Latin characters.
- It must contain at least one letter and zero special characters.
- The descriptor must reflect your business name in a way that’s transparent to the customer.
In most situations, we would recommend you use your business name or website address. If you do need to use a different descriptor, you should make this clear to the user on checkout.
Transaction Types
The Payments > Transactions screen will show you a list of your current transactions. There are a few details here to note, but we want to pay some special attention to the different types of transactions you’ll see.
Some of these options might cause confusion at first, as it’s easy to misunderstand what they represent. Here’s what each option is for:
- Deposit: This means a transfer from your WooCommerce balance to your designed bank account. It’s a withdrawal as far as you’re concerned. You can see all of your deposits through the Payments > Deposits page.
- Charge: When a customer makes a purchase, they receive a charge — it’s a record of their complete payment.
- Refund: This is when you have had to return a charge to the customer’s card.
- Dispute: If a customer wants to query a charge from you, it’s called a dispute, and it’s logged as a specific transaction type.
- Dispute Reversal: Consider this a “Not Guilty” plea on your behalf. It’s an acknowledgment that you were in the right and the customer lodged an invalid dispute claim.
We should talk more about disputes because you’ll come across them at regular (although not common) intervals. You’ll see all current disputes through the Payments > Disputes screen.
Generally, this is a mediator between your customer and you. The screen within WooCommerce Payments lets you see the nature of the dispute, and respond to it when necessary. You’ll have two choices:
- Accept the dispute: This carries out a refund to the customer and resolves the dispute.
- Challenge the dispute: Stripe will require you to provide evidence for your position. From there, you’ll be able to work to resolve the dispute further.
The hope is that you’ll use the Disputes screen very seldom, if at all. However, when you do need to venture into it, the workflow is intuitive and shouldn’t take up much of your time.
Summary
If an ecommerce site doesn’t have a payment system, it’s almost like a “lookbook” of products. As such, you’ll want your WooCommerce site to be as fast as possible and have a robust checkout page that’s easy to use.
While it is an add-on for WordPress and WooCommerce, WooCommerce Payments is first-party. This means it offers explicit compatibility and integration with the number one ecommerce solution on the market. In addition, the functionality is powered by Stripe’s fantastic gateway, so both you and your users can guarantee a checkout free from issues.
Do you think WooCommerce Payments can hold its own compared to the competition? Share your thoughts with us in the comments section below!


