
Git doesn’t have to be complex, but there are certain facets of it that are intricate and require a deeper understanding – Git hooks, for example. These are scripts that Git will run automatically based on certain events.
While they can be simple, you have much more scope to use them in an effective way. However, to do this, you must understand all the cogs that make up the entire wheel.
For this post, we’ll look at advanced techniques for Git hooks that include some fundamentals, how to create and install them, and more.
Throughout, we’ll explain hook parameters and environment variables, offer some tips and tricks, run through troubleshooting methods, and many other topics.
The Fundamentals of Git Hooks: A Primer
One of Git’s key features is its hooks: a powerful mechanism that lets you automate tasks, enforce standards, and ensure consistent workflows throughout a project’s lifecycle.
Git hooks are scripts that execute automatically at specific points in the Git workflow. You can use them to customize and extend Git’s behavior to meet your project’s needs. Hooks ensure that code quality is maintained, tests are run, and deployments are orchestrated smoothly.
Git offers several types of hooks, and each one will trigger at different stages of the Git workflow:
- Pre-commit. These hooks run before you finalize a commit, which lets you enforce code styles, run tests, or check for syntax errors.
- Post-commit. This will execute after you create a commit. It’s useful for notifications or logging.
- Pre-push. This hook will trigger before you push code and enables you to perform integration tests, check for compatibility, or ensure quality.
- Post-push. The final hook runs after you complete a push. As such, it’s valuable for deploying code to production or updating documentation.
You’ll find hooks within the .git/hooks directory of your Git repository. There are sample hooks within there, too – you can use them as templates to create your own custom scripts. The hooks cover a range of actions and use a sample- prefix for reference:

Hooks trigger during various Git actions. For instance, a pre-commit hook runs when you commit changes, and a pre-push hook triggers before you push to remote. Once you understand more about these triggers, you can deploy hooks more strategically to enforce quality control and streamline your workflow.
How To Create and Install Custom Git Hooks
Creating and installing basic custom Git hooks can be a complex process. However, the fundamentals you’ll use here will set you up for developing advanced hooks later. Let’s run through a few concepts that apply to every hook you create and install.
Choosing an Appropriate Hook Type
Employing the right hook type for your specific use case will be an important first step to take. You can begin by understanding your own development workflow and needs. Here’s a quick checklist of considerations on this:
- First, consider your process’s various stages, such as coding, testing, and deployment. Also, identify where that process could benefit from automation and checks.
- From there, locate spots in your workflow where errors or inconsistencies occur often. Custom Git hooks could help here. For example, if you forget to run tests before a commit, a pre-commit hook can address the issue.
- Next, consider when you’d like to execute the hook within your workflow. For instance, if you want to ensure that all commits meet coding standards, a pre-commit hook is appropriate. If you want to validate code before you push to remote, a pre-push hook will be more suitable.
- Finally, ensure that your chosen hook type is compatible with your development environment and the tools you use. Consider the scripting language you’ll use for the hook and its execution environment.
At this point, you should be able to define clear objectives for your hook. It may even be that each objective requires a different type of hook. However, while it’s tempting to create scripts for every possible scenario, it’s a good idea to focus on addressing critical pain points first.
Naming and Placing Custom Git Hooks
Naming and placing custom Git hooks correctly is crucial for ensuring their functionality and maintainability. As with your code’s functions, files, class names, and more, your Git hooks should also have a consistent and descriptive naming convention.
If hooks will support multiple projects over time as a template, you may want to use prefixes – maybe with developer initials, a department, or a company name. In general, Git hooks use lowercase letters and hyphens for readability – e.g., my-project-pre-commit.
In addition, while you may store Git hooks in the .git/hooks directory of your repo, custom hooks should go in a separate directory within the project’s root folder. This will prevent accidental overwrites during a Git update. However, you should implement version control for those hooks along with the rest of your project’s code.
How To Create a Basic Custom Git Hook
The typical way to write a basic Git hook is to create a new file with the name of your chosen hook (such as pre-commit) in your hooks directory. We’ll list the hook names later when talking about parameters.
Before you open a file to work with it, you should ensure it’s executable using the following command line snippet:
chmod +x path/to/file/hook-nameRemember to replace our placeholders with the right information. We’ll reference this snippet throughout the post, as it should be a typical action whenever you create a new Git hook.
Once the file is executable and open, add your custom logic using your preferred scripting language. This could be Bash, Python, Ruby, and others. Crafting these is, of course, beyond the scope of what we’ll cover here. However, there are some pseudocode examples later on to showcase specific use cases and scenarios.
Finally, before you commit any changes, test your hook by attempting to run the related action (such as a commit). This is the basic approach to creating Git hooks, but there are plenty of advanced use cases. We’ll look at this next.
How To Create and Install Advanced Custom Hooks
Creating basic Git hooks will be something you do a lot throughout your development career. However, plenty of situations will call for more advanced and complex hooks. Next, we’ll look at some use cases and sample hooks for a variety of common scenarios.
Create a Hook That Enforces Code Style Using Linters
Using a linter to enforce code styling is a fantastic application for Git hooks. It can help to maintain consistent code quality throughout your repository and should be something you can get a lot of value from.
Of course, you should choose a linter that suits your project’s programming language. For example, Black is fantastic for Python. We’re going to use ESLint for JavaScript here to create a pre-commit hook.
First, install the linter as a global or local package within your project. You’ll need Node.js and npm for this:
npm install eslint --save-devNext, navigate to your hooks directory within your repo. Create your pre-commit file, then write a script that runs the linter on your staged files. The hook should prevent the commit if the linter finds any issues. Here’s a rough example:
#!/bin/sh

# Stash unstaged changes (optional but recommended)
git stash -q --keep-index

# Run the linter on staged files
npm run lint # Replace with the appropriate linting command
LINT_RESULT=$?

# Unstash the stashed changes (optional but recommended)
git stash pop -q

# Exit with the linter's exit code
exit $LINT_RESULT
Once you ensure the hook is executable, test it out through a commit. The pre-commit hook should run the linter. If there are any code style violations, you won’t be able to complete the commit until you fix the issues.
Of course, you should write a hook that works with your own programming language and linter, according to your project. For instance, you could extend this example with linter configuration settings, integrating it with your build process, and more.
Implement a Hook for Running Tests Before a Commit
Implementing a pre-commit hook to run tests before a commit is an excellent way to catch any potential issues early on. As such, you can ensure that you commit only passing reliable code.
For this example, we’ll use the Jest testing framework for JavaScript. You’ll want to install something suitable for your project (as always):
npm install jest --save-devAs with every hook, navigate to your hooks directory, create a new file, name it, and make it executable. From here, write a script that runs tests on all staged files before the commit. Here’s a rough template:
#!/bin/sh

# Stash unstaged changes (optional but recommended)
git stash -q --keep-index

# Run tests on staged files
npm test # Replace with the appropriate test command
TEST_RESULT=$?

# Unstash the stashed changes (optional but recommended)
git stash pop -q

# Exit with the test's exit code
exit $TEST_RESULT
When you attempt to commit changes, the hook will execute your tests on the staged files. The commit will cease for any failed tests, and you should address the issues before re-committing.
Develop a Hook for Automating Versioning and Tagging
One excellent way to streamline the release process is to automate versioning and tagging within Git. This will ensure consistent versioning across your codebase.
To start, choose a versioning scheme suitable for your project. This is beyond the scope of the article, but common schemes include Semantic Versioning (SemVer) or a custom versioning pattern.
Next, decide exactly what your hook will do. For instance, it might read the current version, increment it according to a chosen scheme, and update the necessary files with the new version. You’ll also want to write a script for creating tags based on the version, which uses Git commands to create lightweight or annotated tags.
Once you create and set permissions for your file, you can begin to write your hook. This can be a complex and highly specific hook that may even change from project to project. However, most hooks of this type will include the following:
- A function that increments a specified part of a version string (for example,
1.2.3) and returns the new version. - The ability to read the current version from a dedicated version file.
- A function to calculate the new version number, including which specific part to increment. For instance,
0for major,1for minor,2for patch.
From here, the script should update the version file with the new number, create a lightweight tag with the new version, and optionally push the new tag to a remote repository. Once you commit changes, the hook will ensure that every commit is associated with an appropriate version and tag.
You will likely want to make this hook fit your project’s requirements even further. For instance, you could handle cases such as creating initial tags, dealing with version conflicts, and updating version references in files.
Understanding Hook Parameters and Environment Variables
One reason Git hooks are so powerful is due to how they handle dynamic variables. However, this can be a complex concept to understand. Next, we’ll look at both environment variables and hook parameters – starting with the latter.
How Parameters Pass to Hooks
Hooks can receive specific parameters from Git to access contextual information from your main codebase. Git sets parameters on an automatic basis at run-time, and while you won’t specifically need to define them most of the time, you may need to declare them. It’s essential to understand these to develop effective hooks.
Here’s an overview of the key points about hook parameters:
- Git hooks use positional variables, where
$1refers to the first parameter,$2to the second parameter, and so on. These parameters are not arbitrary; they have specific meanings and purposes. As such, while they aren’t ‘official,’ they represent accepted conventions when accessing the values of parameters. - The order of the parameters follows a specific pattern. Git passes these parameters to your hook script in a predetermined order based on the context of the hook event.
- The variable names reflect the general purpose of the parameters. For instance,
$1often contains the path to a file while$2could be the source of an action.
If you were to add a parameter that the hook can’t call, the script would generally not be able to use it. Parameters are specific to a particular hook and execution context. To avoid issues, you should only use documented parameters. However, you can assign the value of a positional parameter to another variable and then use it in your script:
#!/bin/sh

# Assign $1 to the variable EXAMPLE
EXAMPLE=$1

# Use EXAMPLE variable
echo "The commit message file is: $EXAMPLE"
In this case, the EXAMPLE variable will have the same value as $1, which is the path to the commit message file. However, using the documented variable names makes your code more understandable.
Note that in some cases, you’ll use standard input (stdin) to define parameters, in which case you should work those elements into your hooks.
Finding Git Hook Parameter Values and Definitions
Because each Git hook will have its own parameters, you will likely need a reference to ascertain what they are for your specific application. The good news is there are a few ways to do this.
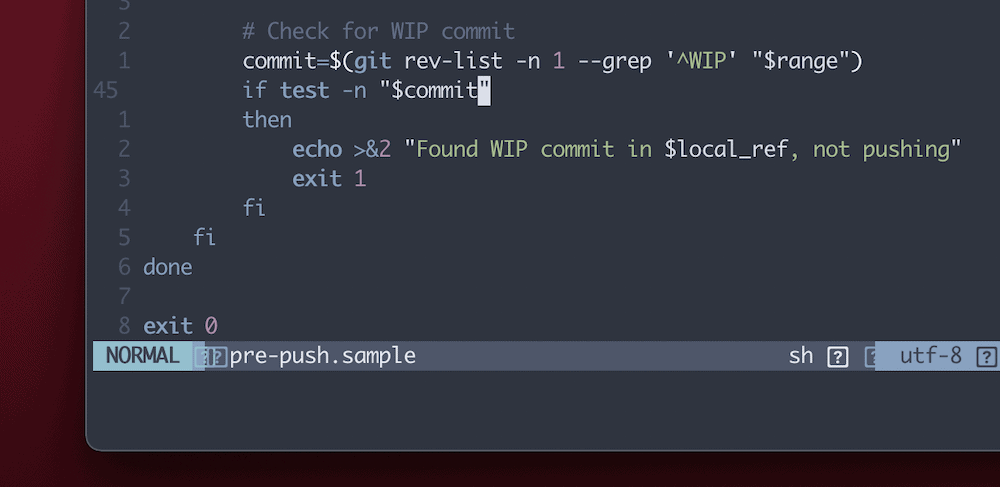
For example, the official Git hooks documentation includes some of the more common parameters. However, the best approach is to open one of the sample Git hooks. These consist of a mini-guide on how to script the hook and will include parameter definitions for you:
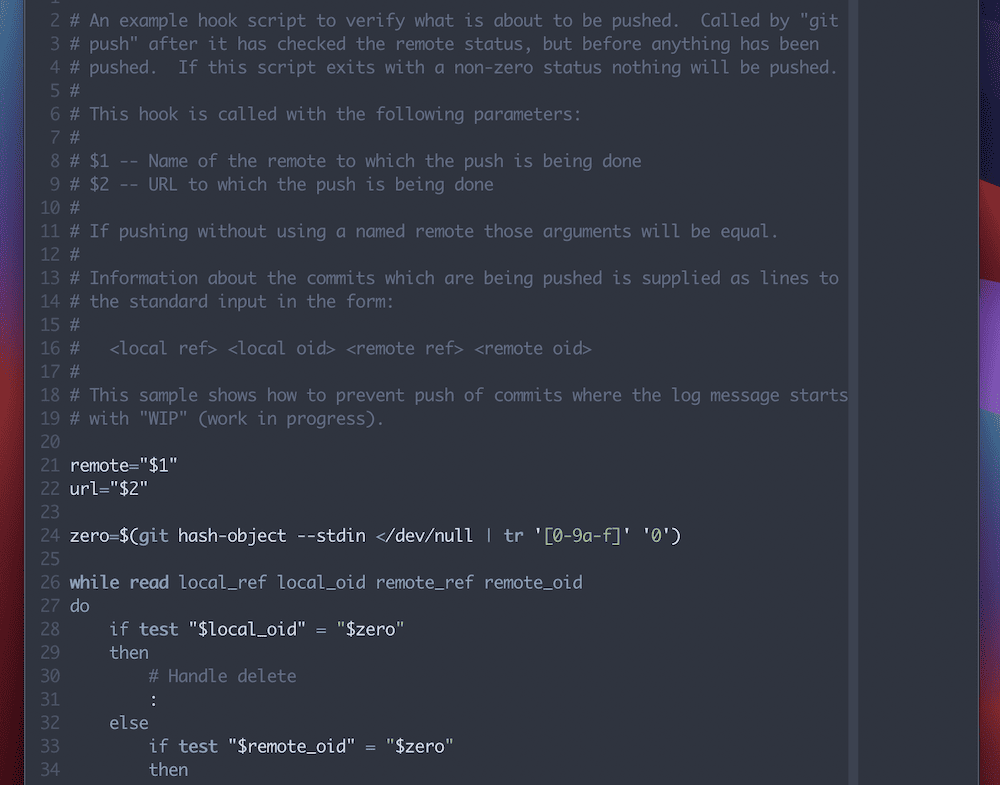
These are an excellent way to get to grips with Git hooks and may even get you some part of the way when it comes to coding them.
Environment Variables
Git hooks can fetch arguments from command-line arguments, and stdin, as we discuss. However, they can also fetch arguments from the environment itself as it runs within a bash shell.
These environment variables let you customize the behavior of your Git hooks and make decisions based on various aspects of the Git workflow. This way, you can create dynamic and context-aware Git hooks. For example, you can use them to validate commit messages, control access to specific branches, or trigger custom actions based on the author’s identity.
Listing all of the environment variables is beyond the scope of this post, too. We recommend you check out the Git documentation and sample hooks for hints on which variables it will use.
Testing the Values of Environment Variables
Git typically sets different environment variables automatically depending on the hook it calls. As such, this can cause problems for you if you’re not aware of what is being set. For instance, take the following result for the GIT_REFLOG_ACTION variable for the pre-rebase and post-merge hooks:
pre-rebase.GIT_REFLOG_ACTION=rebasepost-merge.GIT_REFLOG_ACTION=’pull other master’
Fortunately, there’s a way to test out what Git will do with environment variables using a small snippet within your hook:
#!/bin/bash

echo Running $BASH_SOURCE
set | egrep GIT
echo PWD is $PWD
To summarize the code, line two prints the script currently running; line three sets all environment variables to display, then filters them for those with “GIT” in the name; line four prints the current working directory.
Once you run this, you’ll see output that corresponds with the environment variables associated with your hook. From here, you will have the knowledge to make sure your own Git hooks can utilize environment variables in the way you’d like.
Tips and Tricks to Manage and Share Your Git Hooks
Managing Git hooks across a team or organization is crucial to ensure consistent development practices and automate your workflows in an efficient way. For instance, take the simple act of assigning a dedicated hooks directory. There are two pieces of advice we can give you here:
- Create a central repository or shared location where you store standardized hooks. You can reuse those hooks across multiple projects and clone or link to the repository to provide global access.
- Organize your hooks into a registry or directory structure. This will make it easy for your team to find and use the hooks they need.
The more likely that hooks will feature in multiple projects, the greater the importance of documentation. You should maintain comprehensive documentation that outlines the purpose, usage, and configuration options for each hook within the repo. Code reviews and update strategies for these global hooks will also be essential.
We’d also recommend you store custom hooks in the Version Control System (VCS) along with your project’s codebase. This ensures that the entire team has access to the entire library of hooks.
Using Server-Side Git Hooks
Server-side hooks will execute on the server that hosts the central Git repo. As such, you can enforce policies, perform checks, or trigger actions on the server side.
You have two storage options for your server-side hooks: within the VCS alongside your project or in separate repositories.
Storing Server-Side Hooks Using a VCS
There are two advantages to using your VCS to store server-side hooks. First, you can ensure the hooks have the same versioning and maintenance as the rest of your codebase. Second, you’ll only need to clone one repository to access both the project code and the hooks.
However, depending on the nature of the specific hooks, storing them in the same repo might raise security concerns if those hooks access sensitive information. What’s more, if the hooks are complex or require specific configurations, it might increase the complexity of your main repo.
Storing Server-Side Hooks in Separate Repositories
Keeping server-side hooks in separate repos lets you update and version them independently from your codebase, which can reduce potential conflicts. This modularity can offer greater flexibility.
What’s more, you can store those hooks in repositories with restricted access. This will help you reduce the risk of sensitive data exposure.
In contrast, maintaining multiple repositories might require additional effort. Also, if hooks rely on specific versions of your main codebase, it can be a challenge to coordinate changes between your repos.
Automating Hooks Installations
Automating hook installations across multiple repositories can save time and ensure consistency in your development workflow. By using scripts and templates, you can easily set up hooks in various repositories without manual intervention.
The process begins with a dedicated repository that contains your global hooks. You’ll want to standardize these: for instance, avoid hardcoding paths or values specific to a single repo.
From here, you can begin to write your installation script. For example, the following pseudocode will clone a hook’s template repo and copy (or ‘symlink’) the hooks into the .git/hooks directory of each repository:
# Example installation script
# Usage: ./install_hooks.sh /path/to/repository
TEMPLATE_REPO="https://github.com/yourusername/hooks-template.git"
REPO_PATH="$1"
REPO_NAME=$(basename "$REPO_PATH")

# Clone the template repository
git clone --depth 1 "$TEMPLATE_REPO" "$REPO_NAME-hooks"

# Copy or symlink hooks to the repository
cp -r "$REPO_NAME-hooks/hooks" "$REPO_PATH/.git/"
rm -rf "$REPO_NAME-hooks"
echo "Hooks installed in $REPO_NAME”
Once you save your changes, you can run the installation script for each repo where you want to install the hooks:
./install_hooks.sh /path/to/repository1
./install_hooks.sh /path/to/repository2
# …
Make changes in the template repository whenever you need to update or add hooks. The next time you run the installation script in a repository, the updated hooks will install.
Git Templates
Git templates let you define common hooks and configurations for new repositories. They provide a systematic approach to help you automate setups, configurations, and other elements when you create or clone new repositories. As such, you can ensure that every repo adheres to your typical and established practices.
Once you create a template directory and add your hook scripts, you can configure Git to use the directory as the template for new repositories. You can set this up on a global or local basis for each user.
For global configurations, point to your hooks template directory:
git config --global init.templateDir /path/to/hooks-templateFor local configurations, you can specify the exact repo:
git init --template=/path/to/hooks-templateWhenever you create a new repository using git init or clone an existing repository, Git will automatically copy the contents of your hooks template directory to the .git directory in the new repo.
Finally, while template hooks can be generic, you can also allow for customization hooks based on specific needs. For example, a script could check for a repository-specific hook configuration file and use it if present.
Typical Practices to Help You Maintain Secure Git Hooks
Using Git hooks can be powerful for process automation and enforcing typical practices. However, this can come with the potential to introduce vulnerabilities if you don’t manage your hooks well enough.
Here’s a quick list of practices you could implement for your own hooks:
- Make sure you review and restrict permissions for hooks, especially if they are third-party examples.
- Always validate and sanitize your input parameters to mitigate code injections. Use safe practices, such as avoiding direct use of user input in your scripts.
- Ensure hooks don’t include confidential information. This is where environment variables or secure storage offer immense value.
- Review and test hooks on a regular basis to prevent unintended resource consumption. This could even result in Distributed Denial of Service (DDoS) attacks.
You will also want to implement a thorough and comprehensive test and review process. This will help keep down vulnerabilities and other errors in the future.
Validation
We should talk more about implementing proper validation and error handling for your hooks. This is crucial to ensure reliability, stability, and security.
For instance, you have to always validate any inputs or parameters your hook scripts receive. However, there is much more you can do to ensure good validation. You could ensure that the repository is in the expected state for the hook to run successfully. For example, in a pre-commit hook, check that you’re staging the necessary files before the commit.
Error handling will also be valuable. Exit codes are just as crucial in hooks as they are in your codebase, as are error logs and informative error messages. ‘Graceful failure’ should be your goal here, as it would be with larger codebases.
Of course, in a real-world scenario, your hooks might need more complex validation and error-handling logic. This means regular testing is even more important than before.
Accidental Destructive Actions
Accidents happen, so setting up your Git hooks to prevent these unwanted destructive actions is crucial to safeguard from data loss or damage. Hooks can essentially act as safety nets through user prompting for potentially harmful actions.
Pre-receive and pre-commit hooks work well here. Let’s quickly go over how both of these can help:
- Pre-receive hooks help for server-side checks. This will trigger before accepting new branches or tags from the client. Your script should examine incoming references, check for actions such as force pushes or branch deletions, and prompt the user for confirmation. You’ll also want to analyze the pushed references to determine whether they involve actions such as force pushing (
--force) or branch deletion. - Pre-commit hooks work on the client-side and run before you finalize a commit. While it won’t directly prevent destructive actions on the server, it can help prevent local mistakes before pushing. Your script should analyze the staged changes and look for elements such as
force pushcommands in commit messages. From there, display a warning or error message for the user.
However, regardless of the practices you implement, they have to be secure, efficient, and optimal for your needs. This will require a thorough review and testing strategy.
Reviewing and Testing Git Hooks
Reviewing and testing hooks is essential to ensure they function correctly and align with your development workflow. Peer reviews, clear documentation, an abundance of comments, and more can help make sure hooks are ready for production.
When it comes to testing, it’s important to do so in isolation using diverse sample data. You might also implement automated regression or integration testing.
Finally, we’d advise you to test out hooks in different environments (such as your development, staging, and production servers) to ensure they give consistent behavior. A real-time logging setup will help here, as it can showcase what happens as data moves from server to server.
How To Troubleshoot Your Hooks
As with any codebase, you may have to troubleshoot your hooks, too – even across a few attempts. In fact, no matter what your Git hook type is, you’ll find that the same errors crop up over and again. Many of these will be simple issues that affect all types of projects, such as syntax errors, permissions issues, using relative or hardcoded paths, and much more.
However, it’s also a good idea to check for missing dependencies, as some hooks rely on external tools, files, or libraries. As such, you have to make them available in the environment where you execute the hook.
There are specific issues that can crop up with Git hooks, though. For example, hooks should exit with a non-zero status code to indicate a failure. What’s more, hooks shouldn’t contain infinite loops. Without both of these in place, you can cause unexpected behavior and disrupt your workflow.
You may also find that conflicts between two hooks give you unintended interactions and consequences. So-called ‘race conditions’ can hamper your expectations, too. This is where two or more hooks trigger through similar events, but one completes before the other – it will have an impact on the final result you expect.
This is where reviews and tests become vital. Maintaining documentation is also important to avoid issues and ensure hooks function as you’d expect.
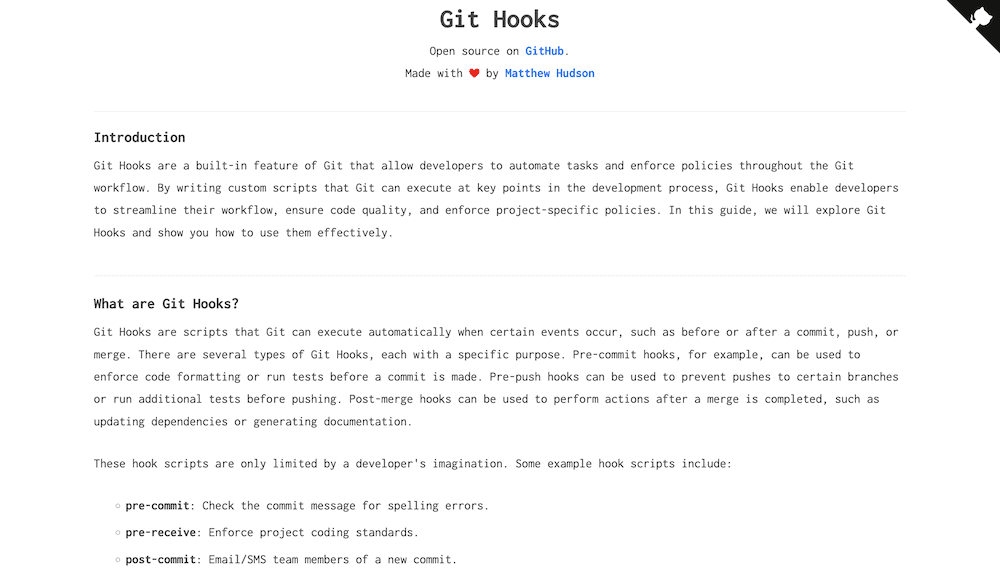
Speaking of documentation, Git’s own reference material is essential reading. In fact, along with this article and maybe the independent Git Hooks guide site (using GitHub Pages), you shouldn’t need too much reading material.
However, you may want to look at apps to help you manage Git hooks, too. Lefthook has regular updates and lots of support on GitHub, while Husky is great for linting your commit messages.
The Benefits of Integrating Hooks Into Continuous Integration (CI/CD) Pipelines
CI/CD pipelines work well with Git hooks, as those scripts can help you automate tasks, ensure consistent quality, and provide security checks.
For instance, pre-commit hooks let you run code quality checks, such as linting, static analysis, and formatting. When it comes to testing, you can trigger unit tests, test suites, or other automated checks at the pre-commit stage. On the other hand, pre-push hooks let you run integration testing, security scanning, and more.
There are plenty of benefits you can leverage from using hooks within your CI/CD pipelines:
- Consistency. Hooks let you enforce consistent practices across all commits and deployments, which will reduce errors across the board.
- Automated checks. You can automate code quality checks, testing, security scanning, and other important tasks. This will reduce manual effort and leave you with more time to dedicate elsewhere.
- Early issue detection. Hooks will let you catch issues early in the development process, which prevents them from propagating through your pipeline.
- Reduced deployment risks. With automated checks and testing triggered by hooks, the risk of deploying faulty code can be significantly reduced.
Because Kinsta’s API lets you set up CI/CD pipelines, you can also integrate Git hooks here too. Kinsta lets you pull your entire repo down from a remote location and allows for pushes using a third-party plugin such as WP Pusher.
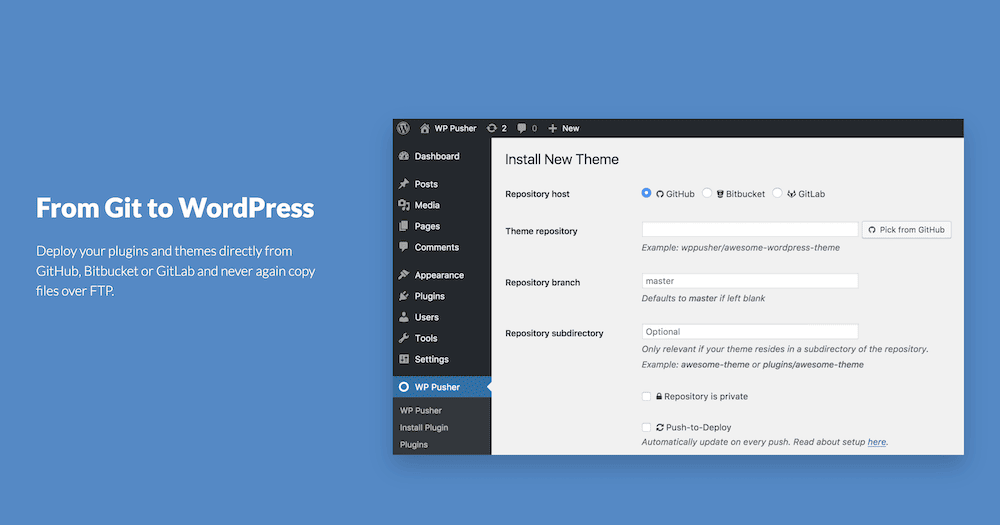
Of course, this also means you have the option to utilize Git hooks too. As such, your Kinsta installation can leverage these powerful scripts within your repo.
Summary
Git is an essential tool for any development project, but one aspect of it, in particular, could hypercharge your coding and deployment workflow. Git hooks let you create scripts using a number of languages to automate various aspects of your version control process. It’s a simple concept with a somewhat complex underbelly.
Our post shows you how to use advanced techniques to utilize Git hooks to their fullest. You’re able to use them both locally and server-side, make them dynamic using parameters and variables, work with multiple remote repos, and more. In fact, we suggest that at this point, Git hooks might become your secret weapon to boost productivity, code quality, and project turnaround time.
Do you have any questions regarding Git hooks and how to use them? Let us know in the comments section below!


