Running your site over HTTPS is no longer optional. Not only is it more secure (everything is encrypted, with nothing passed in plain text), but it also builds trust, is a search engine ranking factor, and provides more accurate referral data. Unfortunately, when migrating from HTTP to HTTPS, website owners can encounter several issues. One of which is ‘mixed content warnings’.
Performance issues tied to encryption have been fixed for the most part thanks to HTTP/2, and Let’s Encrypt has changed the entire industry by providing you with an easy way to get free SSL certificates.
Most importantly for online businesses, web browsers such as Google Chrome and Mozilla Firefox are cracking down on sites not running over HTTPS, and are showing stricter warnings to potential visitors. For example, if you’re using legacy TLS versions, you may encounter ERR_SSL_OBSOLETE_VERSION notifications in Chrome. Warnings are the last thing you want your visitors to see.
To help you avoid those problems, we have an in-depth guide on how to migrate from HTTP to HTTPS. However, after following that process, you might still see mixed content warnings.
Today we’ll show you a few different ways you can fix this issue on your site.
Prefer to watch the video version?
What Is a Mixed Content Warning?
A mixed content warning appears in a user’s browser when the site they’re trying to visit is loading HTTPS and HTTP scripts or content at the same time. This can cause problems since HTTP and HTTPS are completely separate protocols.
When you migrate to HTTPS, everything needs to be running over that protocol, including your images, JavaScript files, and so on. Below are some examples of what can happen if some of your content is still loading over HTTP instead.
Mixed Content Warning Examples
Chrome is currently the top browser, used by over 77% of the web. So the following warning is what most of your visitors would see:
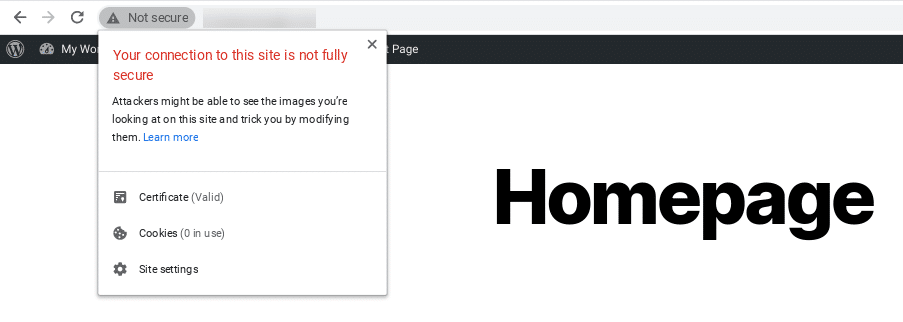
Of course, not everyone is using Chrome.
Here is an example of what happens in Firefox when a mixed content warning displays on a site:
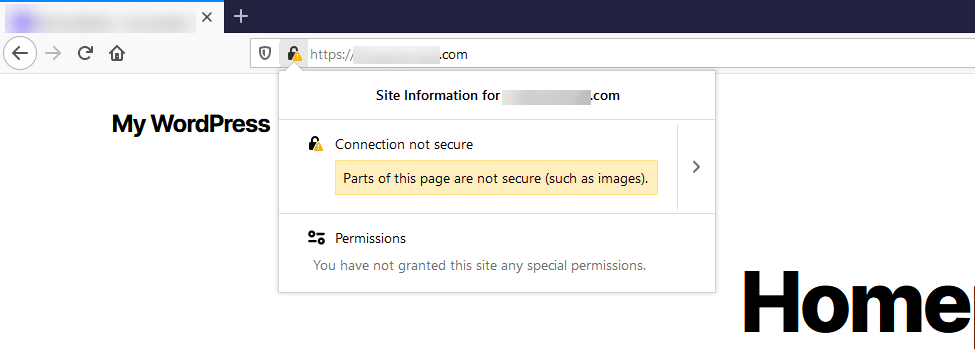
Next is an example of what this warning looks like in Microsoft Edge:
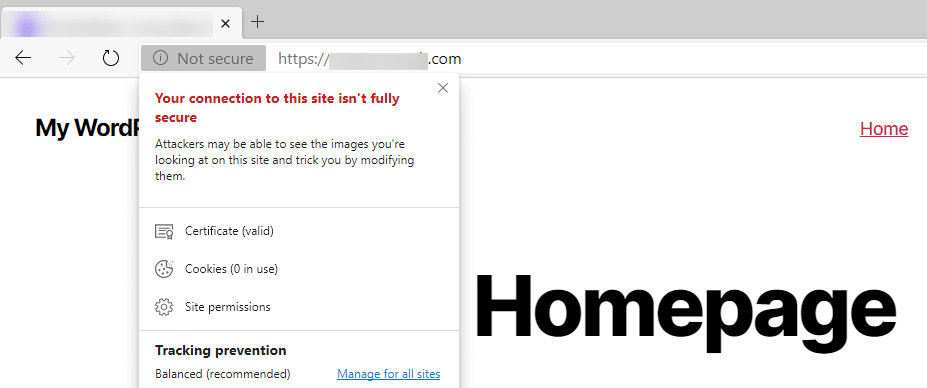
And here’s how it appears in Internet Explorer:
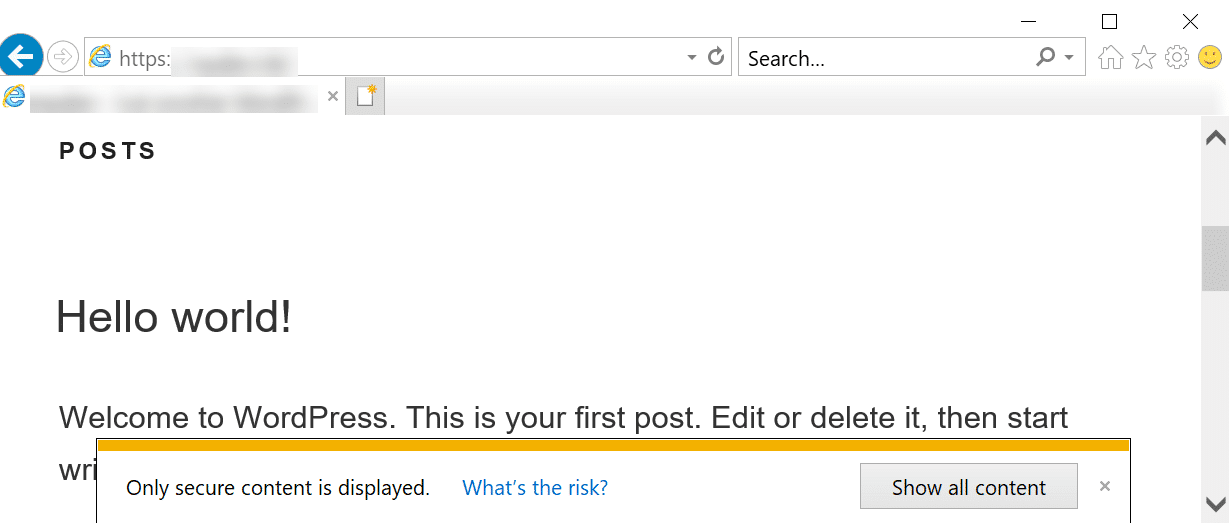
As you can see, Internet Explorer is probably one of the worst places for this warning to appear, because it actually breaks the rendering of the page until the popup is clicked on.
This isn’t an error you want visitors on any browser to see. It can be fixed, but first, you’ll need to understand why it occurs.
What Causes Mixed Content Warnings?
We’ve found that most common mixed content warnings appear right after someone migrates their site from HTTP to HTTPS. Some HTTP links simply get carried over, and this causes mixed content warnings to start firing.
Here are some additional causes of this warning:
- You just added a new service or plugin to your site. In particular, developers sometimes use absolute paths (http://yourdomain.com/style.css) in their plugins or themes to link to CSS and JavaScript, instead of using relative paths (/style.css).
- Your images have hardcoded URLs (such as http://yourdomain.com/image.png) that run over HTTP. These could be within posts, pages, or even widgets.
- You’re linking to HTTP versions of external scripts (hosted jQuery, Font Awesome, etc.).
- You have embedded video scripts that use HTTP instead of HTTPS.
Unfortunately, you may not uncover the real source of the issue until you start troubleshooting.
With that in mind, let’s take a look at some methods you can use to fix mixed content warnings.
How to Fix Mixed Content Warnings (4 Steps)
You can follow the four simple steps below to fix your mixed content warnings. This process assumes that you have already done the following:
- Installed an SSL certificate
- Redirected HTTP to HTTPS (site-wide)
We’ll be using an example development site in the following examples.
1. Find Out Which Resources Are Loading Over HTTP
The first thing you’ll need to do is find out which resources are still loading over HTTP.
Remember that these warnings might only be happening in certain areas of your site, not globally. Browse to the page that’s prompting the warning and launch Chrome DevTools by hitting:
- Windows: F12 or CTRL + Shift + I
- macOS : Cmd + Opt + I
You can also open Chrome DevTools from the tools menu in your browser:
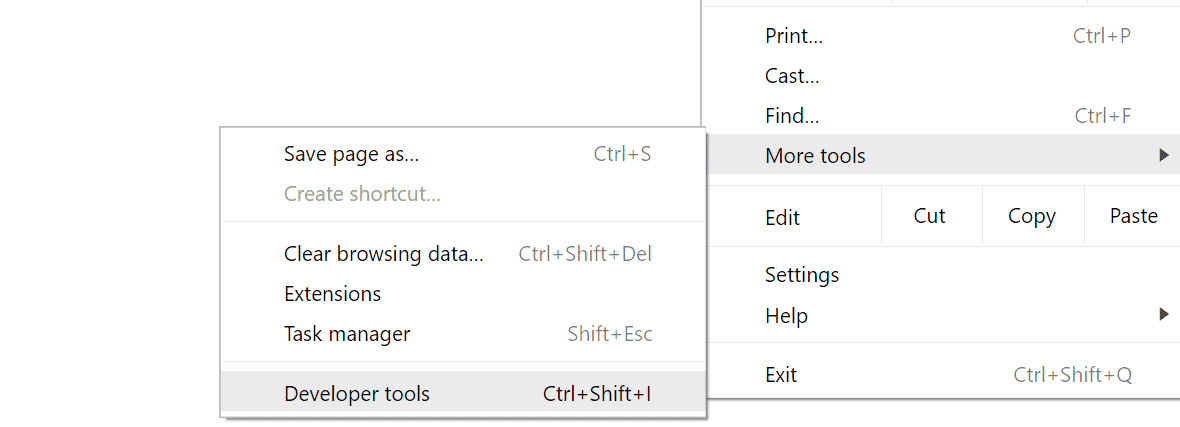
There are a couple of places you can check to find out which resources aren’t loading over HTTPS.
The first is the Console tab. Note that you might need to refresh the page after you have Chrome DevTools open for it to properly load everything.
If mixed content errors are present, they’ll be highlighted in either red or yellow. Typically, they’re accompanied by information explaining that “This request has been blocked; the content must be served over HTTPS.” This means that the browser settings are configured to automatically block any HTTP content.
In an effort to ensure pages only load over HTTPS, Chrome started to begin blocking mixed content by default with Chrome 79. Most recently, they unrolled features to start auto-upgrading mixed images and media.
Therefore, when using Chrome DevTools, you may see mixed content messages indicating some requested elements were automatically upgraded:
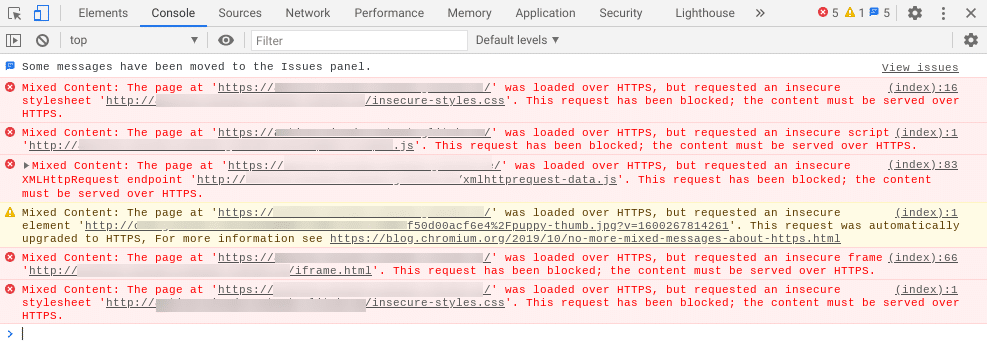
Here, we can clearly see that there are a variety of insecure elements causing the mixed content warnings, including a stylesheet and script.
You’ll also notice that a request was made for an insecure .jpg image, which was automatically upgraded to HTTPS. (Note: If this were in another browser other than Chrome, it wouldn’t be automatically upgraded).
You can also look in the Security tab of Chrome DevTools. This will show you any non-secure origins:
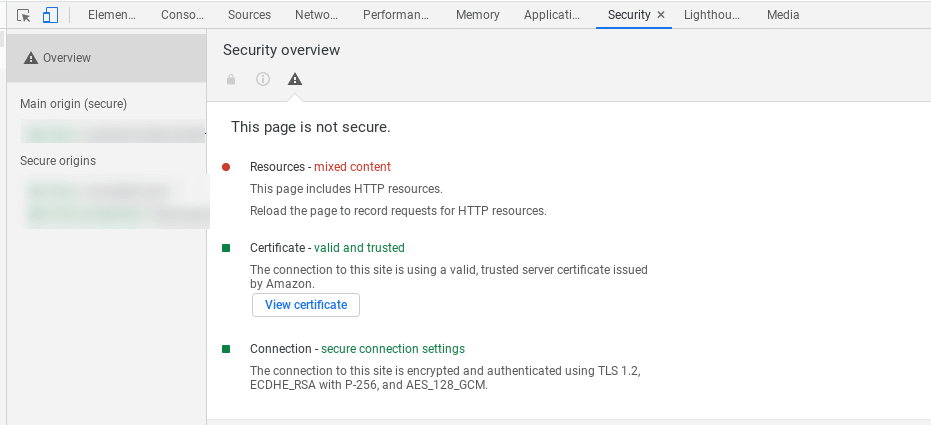
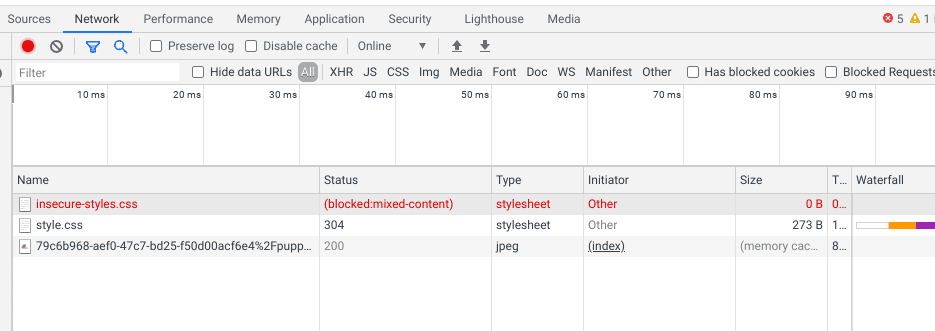
Under the Network tab, you can also find a list of blocked requests:
If you aren’t using Chrome, or you just want a quick summary of the errors, you can also use a free tool like Why No Padlock.
It scans an individual page and shows you all of the insecure resources:

This tool is easy to use. You can simply enter your URL and click on Test Page, and it will show you any errors that are present. Plus, it’s free!
Checking HTTPS Warnings in Bulk
If you’re worried about the rest of your site, you might want to check it in bulk. Here are some recommended options for doing that:
- There’s a free little tool called SSL Check from JitBit, which you can use to crawl your HTTPS site and search for insecure images and scripts that will trigger a warning message in browsers. The number of pages crawled is limited to 400 per website.
- The Ahrefs Site Audit tool has the ability to detect HTTPS/HTTP mixed content. If you already have access to this solution, or someone on your marketing team does, it can be a great way to be thorough.
- HTTPS Checker is a desktop software you can install to scan your site. It can help you check for “not secure” warnings and content after big changes. It is available on Windows, Mac, and Ubuntu. The free plan enables you to check up to 500 pages per scan.
- SSL Insecure Content Fixer is a WordPress plugin you can install on your site to uncover errors that lead to mixed content warnings. It’s free to use, and will even automatically perform fixes to resolve the errors.
Using any of the above tools can help save you time over having to manually check each page on your site for mixed content warnings and errors. For a thorough assessment of the potential errors on your site, you might consider using a combination of these solutions.
2. Verify Whether HTTP Resources Are Accessible Over HTTPS
The next step is confirming that the resources loading over HTTP are accessible over HTTPS. They most likely are, you just need to update the links.
As an example, let’s say our mixed content errors pointed to the following insecure jQuery script and .jpg image:
- http://ajax.googleapis.com/ajax/libs/jquery/3.31/jquery.min.js
- http://example-site.com/wp-content/50d00acf6e4%2Fpuppy-thumb.jpg?v=1600261043278
If we take both of those URLs, input them into our browser’s address bar, and replace “http” with “https” at the beginning, we can see that they load just fine. Therefore, we simply need to do a search and replace on our site.
3. Perform a Search and Replace
There are a lot of ways to perform a search and replace. In this section, we will walk you through two different recommended options.
If you’re curious, we don’t recommend using a tool such as Really Simple SSL. While it’s a great plugin, it’s best not to rely on a solution like this over the long term. You won’t be migrating back to HTTP later, so it’s best to do it the right way and update your HTTP URLs in your database (as we’ll show you below).
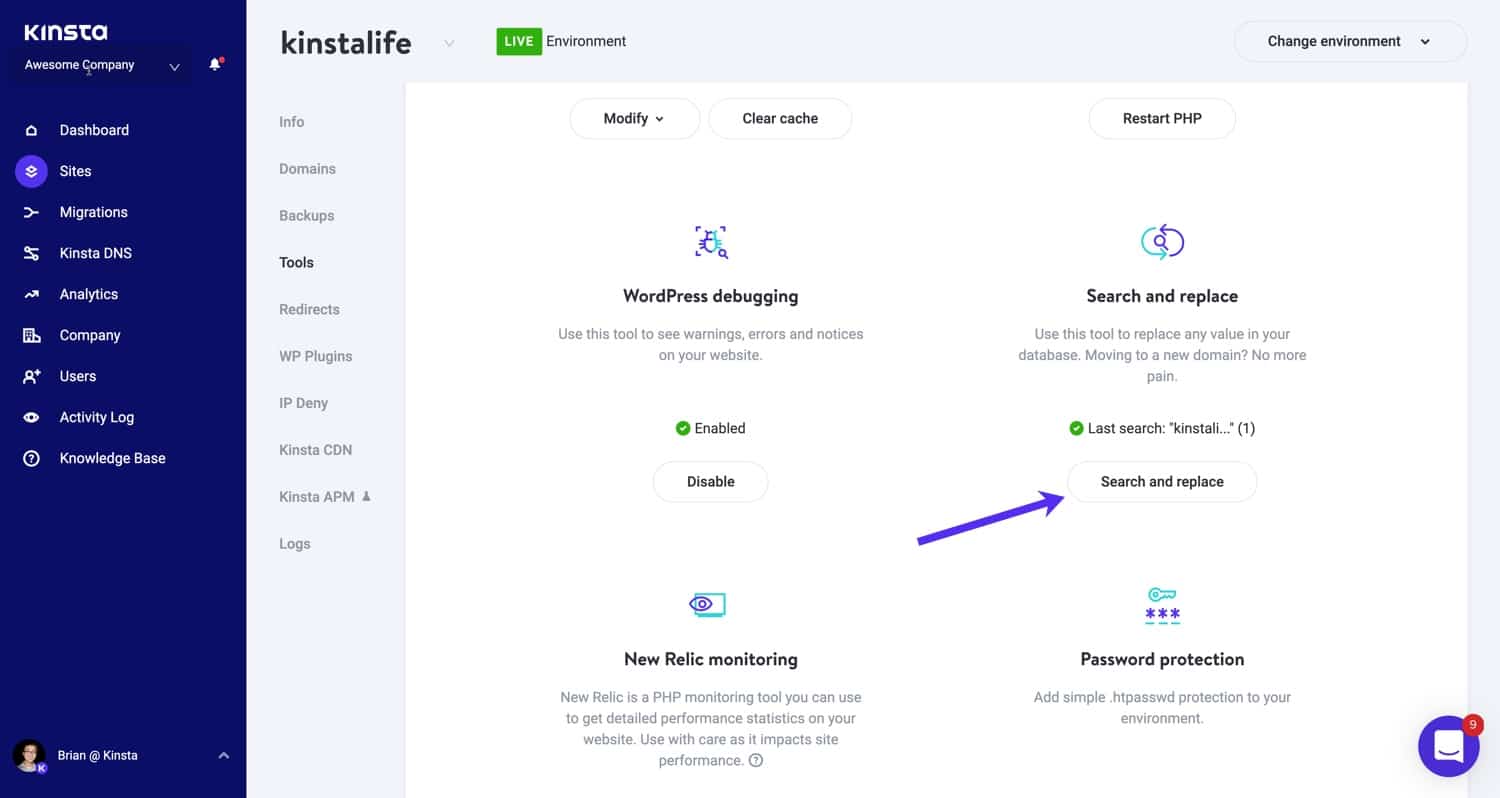
If you’re a Kinsta customer, you can use our search and replace tool, which is available right within the MyKinsta dashboard.
Go to your site’s Tools page and click on Search and Replace:
Next, in the search field, enter the value you want to look for in the database.
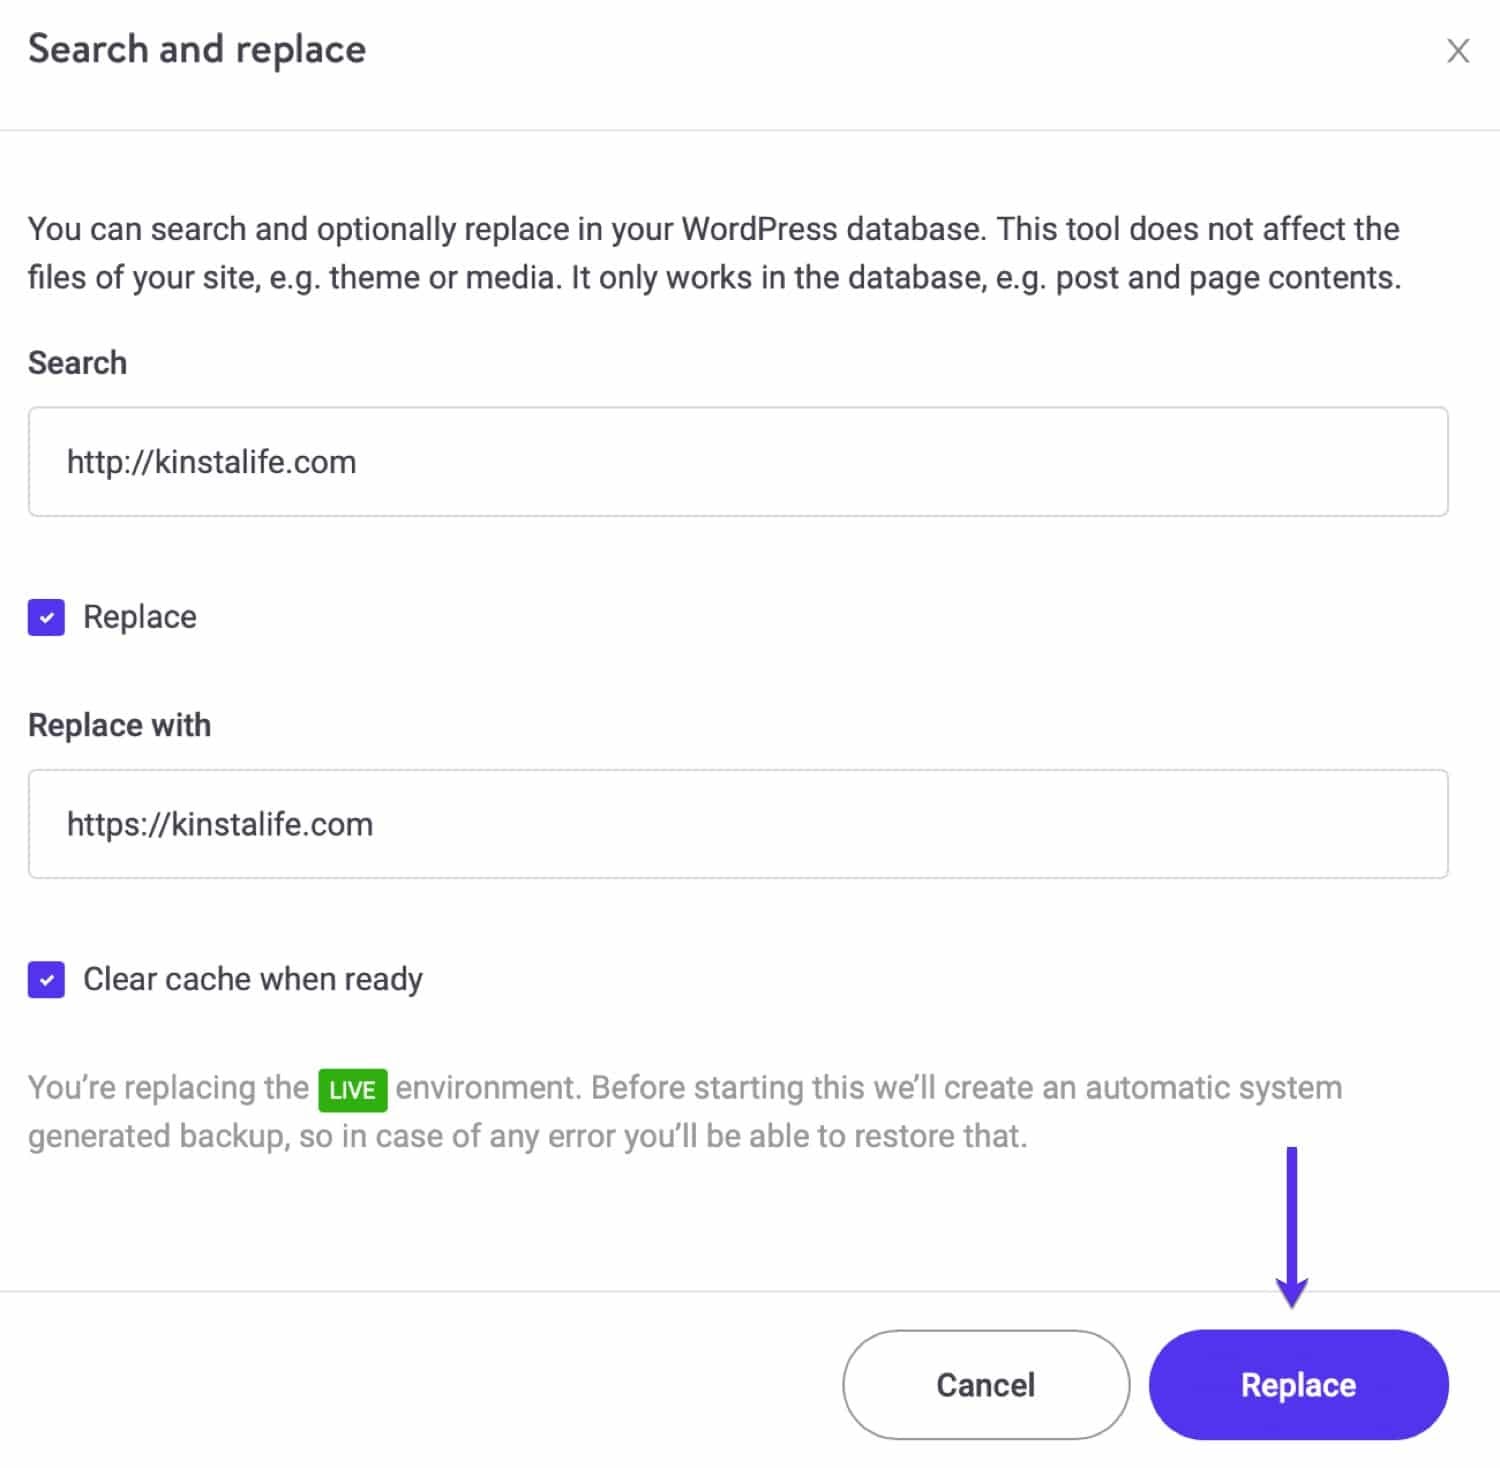
In this case, we will use our HTTP domain: http://kinstalife.com. Then click on the Search button. The search and replace tool will show the number of occurrences for the given string.
Check the Replace box to continue with the replacement process. In the Replace with field, enter whatever should replace the value you are searching for. In this case, we will use our HTTPS domain: https://kinstalife.com.
We also recommend leaving the Clear cache when ready box checked, to automatically purge the Kinsta cache after the search and replace process is complete. Finally, click on the Replace button:
Important: Make sure you don’t include any leading/trailing white space in either of these fields, as this might produce undesirable results.
Search and Replace Alternatives
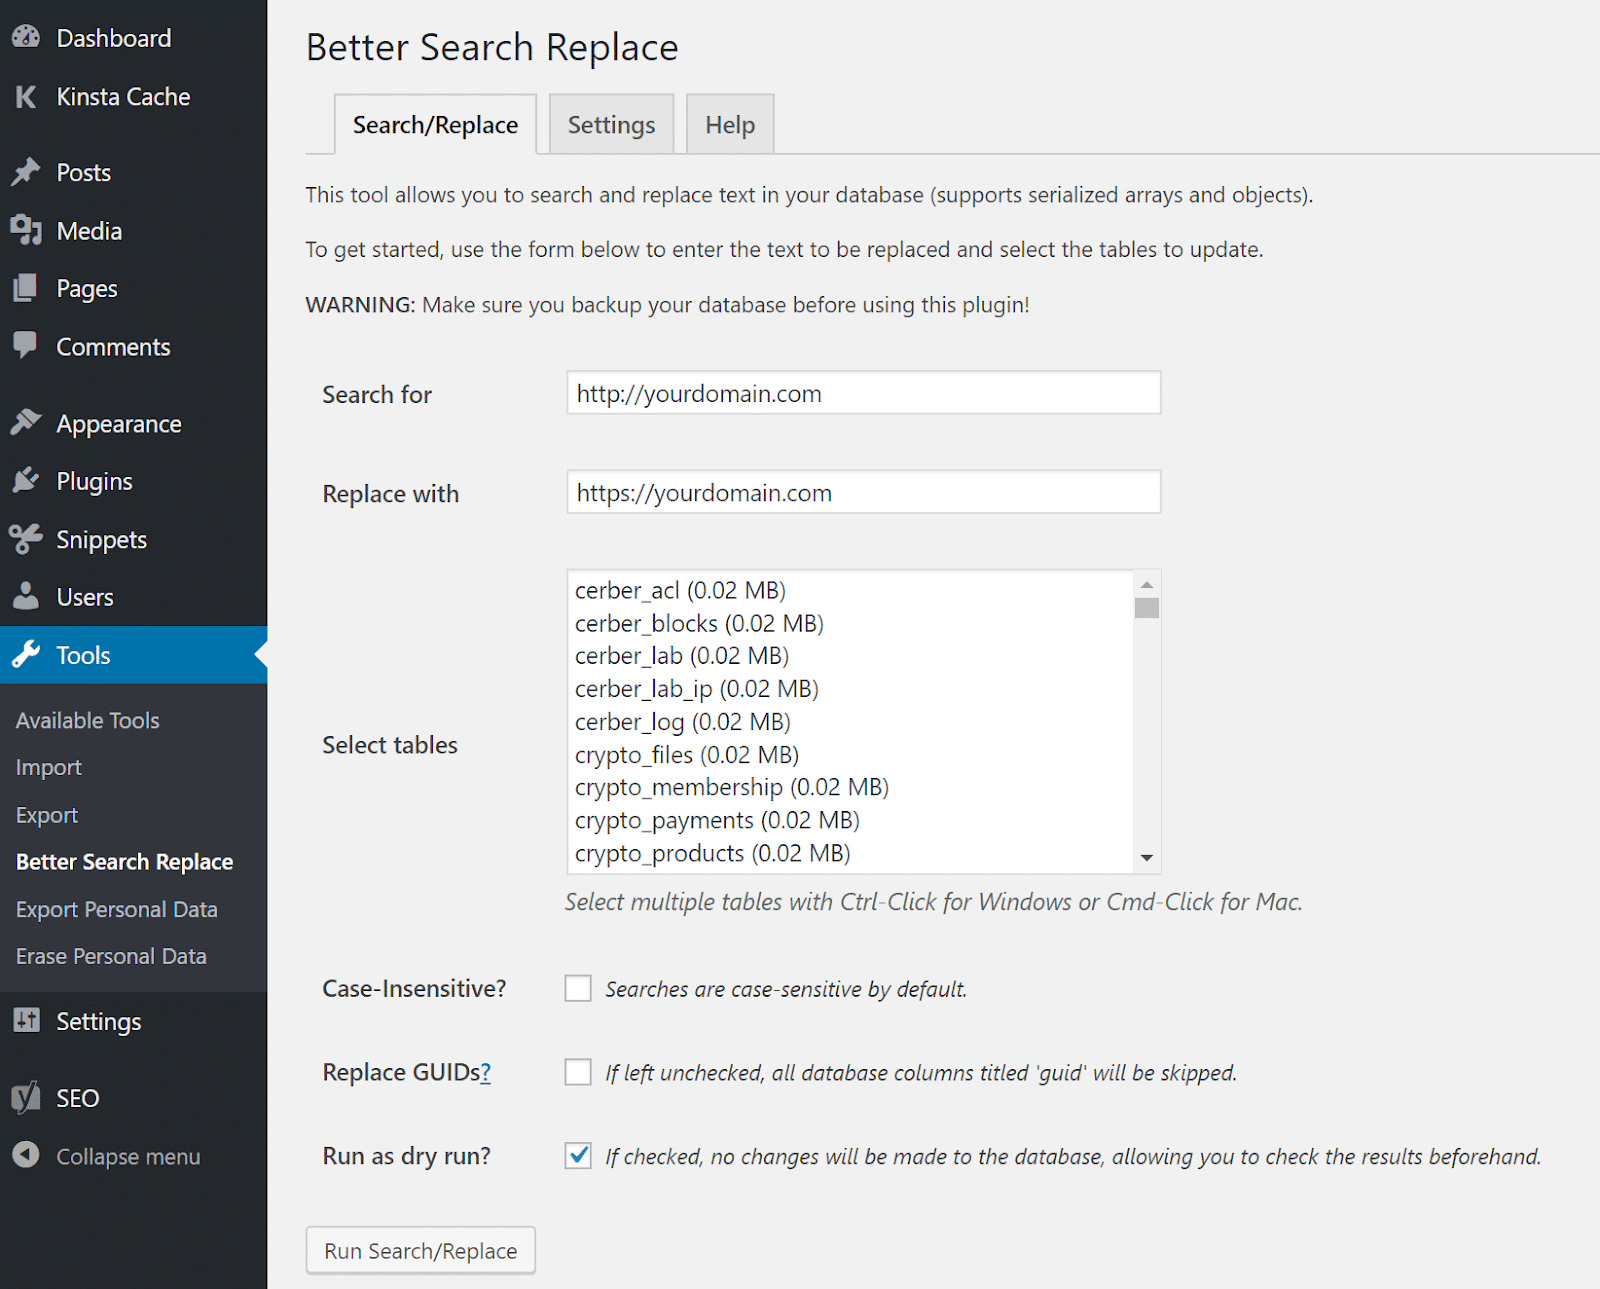
If you aren’t using Kinsta, you can accomplish this same task with the free Better Search Replace plugin, and then simply delete it after you’re done:

You can download this tool from the WordPress Plugin Directory, or by searching for it within your WordPress dashboard.
After activating it, just search for your HTTP domain (http://yourdomain.com) and replace that with your HTTPS domain (https://yourdomain.com):
As an alternative, you could also do a search and replace with the interconnect/it Search Replace DB PHP Script or WP-CLI.
Check out our video to learn more about using search and replace in WordPress:
4. Confirm That the Mixed Content Warnings Are Gone
After you finish doing the search and replace, you’ll want to double-check your site to confirm that the mixed content warnings are gone. We recommend visiting your site on the frontend and clicking around on a few pages while looking at the browser status indicator up in the address bar.
On our site, we can see that the .jpg image is now fixed, but an insecure script warning remains.
That’s because we ran a search and replace on resources loading from our own domain. The jQuery warning is caused by an external script that has to be manually updated:

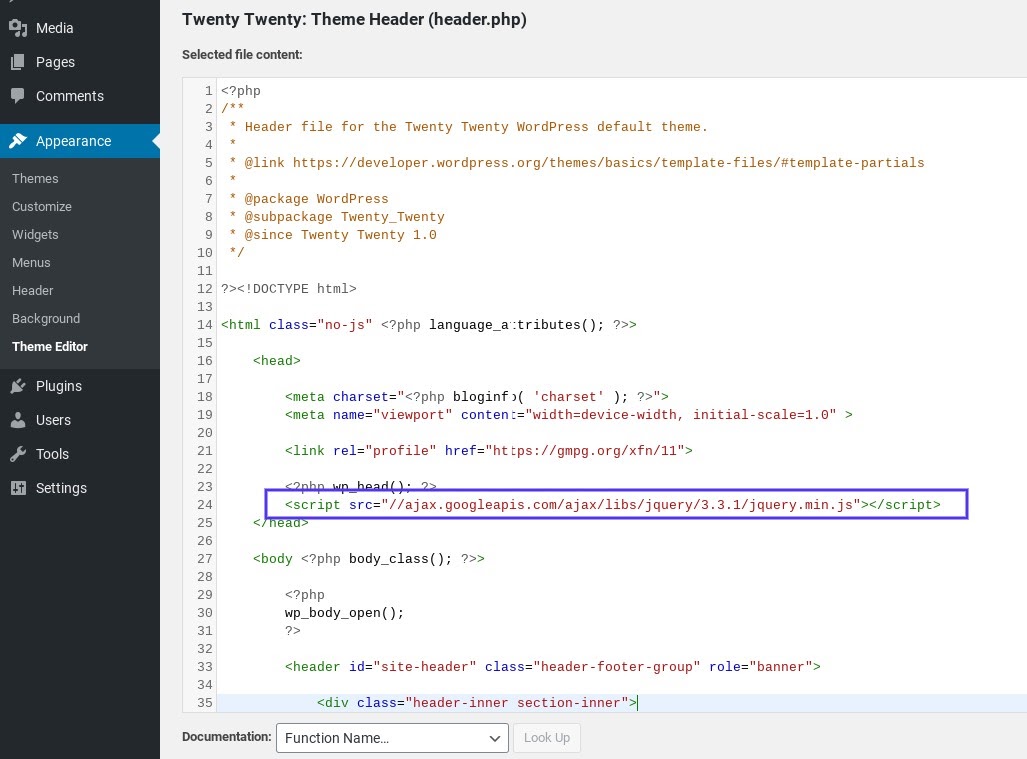
In this case, the script needed to be manually added to our header (header.php). It should be using a relative URL, so we updated it to //ajax.googleapis.com/ajax/libs/jquery/3.3.1/jquery.min.js:
The search and replace will most likely fix all of your issues.
In general, you’ll only run into additional problems if you have something hardcoded on your site.
If you think there’s an external script hardcoded in one of your plugins or themes, and you’re having trouble tracking it down, feel free to reach out to the relevant developer for assistance.
No Mixed Content Warnings Examples
So you now know what to look for to fix these mixed content errors.
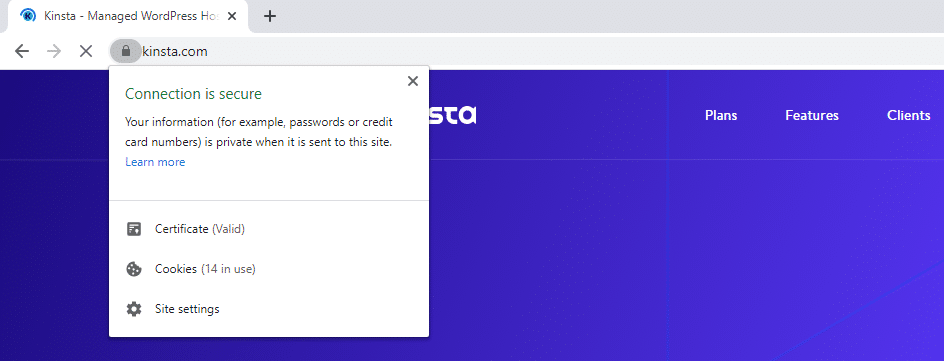
Here is an example of what happens in Chrome when everything is loading correctly over HTTPS, with no mixed content warnings:
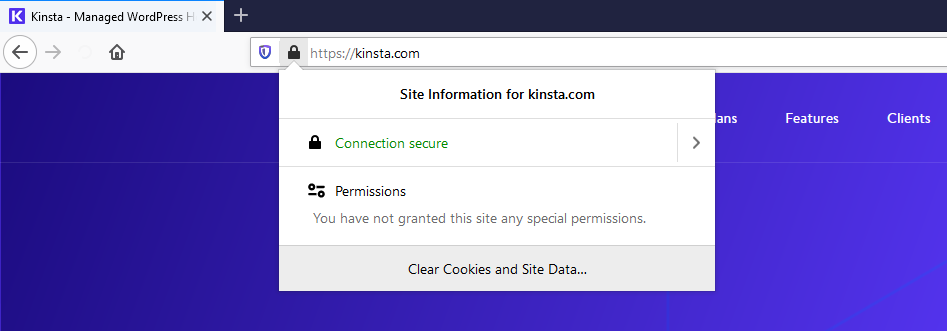
Firefox will offer a similar message:
And here’s what you’ll see in Microsoft Edge:
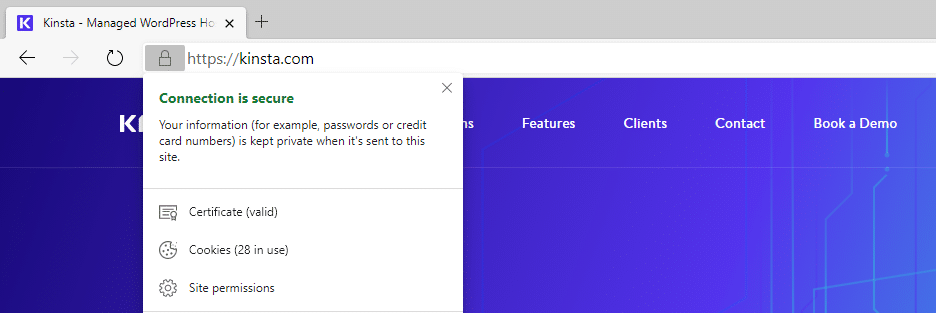
Although the wording of the message may vary slightly depending on which browser you’re using, you should see a notification indicating a secure connection. If you do, you’ll know that you are no longer dealing with mixed content errors on your site.
What About HSTS?
Some of you might be wondering why you can’t simply use HSTS (HTTP Strict Transport Security) to fix this problem. HSTS was created as a way to force the browser to use secure connections when a site is running over HTTPS.
It’s a security header you can add to your web server and is reflected in the response header as ‘Strict-Transport-Security’.
However, HSTS isn’t a quick fix for all mixed content warnings. HSTS merely handles redirects, whereas the mixed content warning is a feature of the browser itself. You also don’t have control over whether third-party sites enable HSTS.
Therefore, you’ll always need to update your http:// URLs. Esa Jokinen dives deeper into the reasons why in this Server Fault discussion.
Additional Recommendations (Special Cases)
If you’re using the Elementor page builder, you must also go into the Elementor settings and update your site’s URL there, so the CSS files will regenerate with the new URL.
Once you have done that, clearing the cache should resolve any insecure warnings due to Elementor. In addition, if you’re using the Kinsta CDN, it’s recommended to purge the CDN zone as well.
Summary
Mixed content warnings can be frustrating to deal with, especially when there are a handful of causes they can be attributed to. Luckily, there are some simple steps you can take to fix these issues.
In most cases, a simple search and replace should quickly resolve your mixed content warnings and have your site back to normal in just a few minutes. If that doesn’t fix everything, it’s likely there are one or two hardcoded scripts left behind. You’ll need to find them and manually update them in order to clear this error or hire a developer who can do that for you.
If you have any feedback or run into any issues, let us know below in the comments section!


