
A WordPress site title is a simple yet crucial part of your website. It’s one of the first things you fill in as a WordPress site owner, and it’s easy to forget about.
But there often comes a time when you must learn how to change the WordPress site title, whether that’s because you’re rebranding, your core business practices shifted, or you simply used a placeholder for the WordPress site title in the first place.
Keep reading to learn all about the importance of WordPress site titles, and how to change the WordPress site title with a few simple clicks!
Why Your WordPress Site Title is Important
Forgetting about the WordPress site title seems natural; it’s such a basic part of the entire WordPress interface. Not to mention, many brands replace the frontend view of the WordPress site title with a logo. So, what’s the point of worrying about the site title at all? We can assure you that even when hidden by a logo, WordPress site titles have several key benefits:
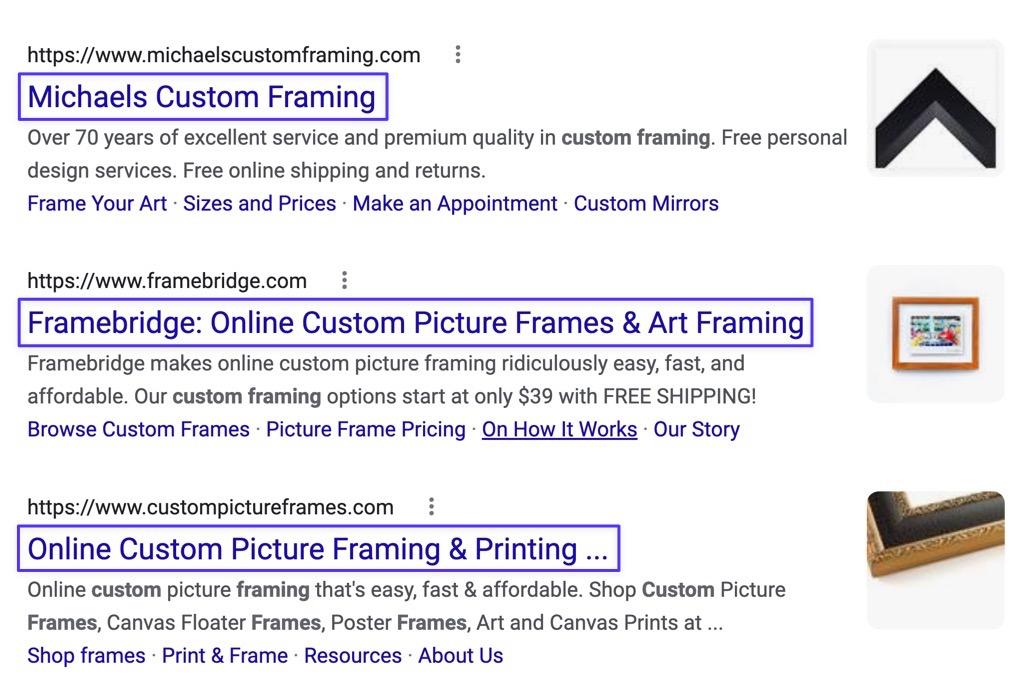
- It’s the name of your website and brand: Site visitors see the site title first on search engines. They may also view it at the top of your website if you don’t have a logo. The WordPress site title specifies, to both users and search engines, what your brand is called and what they can expect to find on the website.
- It increases understanding of your website: Relevancy matters online, and that’s why you want to guide website visitors as much as possible, even if you think something on your site seems simple. Visitors may have come from a referring website, social network, ad, or search engine, so the WordPress title serves as a way to show users that they’re in the right place and that they can expect relevant content.
- SEO is affected: Search engines display your WordPress site title as the first thing users see about your site when searching. Your rankings may change as well, depending on the relevancy of your site title, how attractive it is to users, and whether search engines agree that it’s an appealing, relevant title.
When To Change the WordPress Site Title
You shouldn’t change your site title that frequently. Otherwise, you risk alienating users who have come to know your brand, while also confusing search engines that logged the original name as your title.
Yet, in some situations, you may find that changing the WordPress site title makes for a wise decision.
Here’s when to change the WordPress site title:
- If you only had a placeholder or the default WordPress title: Some website owners quickly make a WordPress site and choose to include a placeholder as the title, or they opt for the “My Blog” or “My WordPress Site” defaults. You must change these to establish relevancy and professionalism.
- After inheriting a website: Receiving a website from a developer or previous owner may reveal that the original webmaster didn’t properly fill in the WordPress site title, or it’s no longer relevant to the brand.
- For rebranding: It’s often essential to change the WordPress site title if the business plans to rebrand, whether it’s the name, logo, or sometimes just the colors.
- After customizing your WordPress theme: Customizing a WordPress theme means changing settings, adjusting headers, and adding media items, so you may need to adjust your site title to reflect what was changed or if the title doesn’t look right anymore.
- For core business shifts: Brands may consider changing their WordPress site title if there’s a drastic shift in core business activities, like selling entirely different products from before or adding new services.
- After a merger or acquisition: These practices typically result in the business adding a hyphenated name or a complete rebranding, both of which require a change in the WordPress site title.
- If an SEO analysis proves a slight change might help: Perhaps your WordPress site title isn’t providing the organic search engine results you expected. We recommend completing an analysis before making a site title change, but it’s possible that adjusting the wording of your title could help avoid competition and target valuable keywords.
- If the current site title field is empty: You should always have the WordPress site title filled in for SEO purposes (even if you’ve replaced it on the frontend with a logo), so you may have to fill in an empty field.
- To add brand specifics: Although not always advised, some site owners see strong results by expanding their site title to include a quick mention of core products or services. This can also help with SEO if targeting the right keywords.
What To Consider Before Changing Your WordPress Site Title
Before you learn how to change the WordPress site title, it’s essential to remember a few key points about site titles in general:
A Site Title’s Impact on SEO
A WordPress site title plays a significant role in search engine optimization.
- It’s the first element discovered by search engines.
- Users make decisions based on that title in search engine results.
- Site titles must present useful information to the search engine user, so search engines take user-friendliness and relevance into account as well.
Therefore, we recommend following these SEO best practices to ensure your site title works for you in the search engine world:
- Keep it specific and concise with your brand name, and craft that name so that it’s related to what people can expect on your website.
- Consider adding a few keywords to the site title, but avoid stuffing in too many keywords.
- Try to make any keywords related to the core products, services, or content you offer.
- Keep site titles shorter than 65 characters so the entire text shows up on search engines. Understand that even shorter titles may get cut off on smaller devices.
- Test out how the site title appears on the search engines, along with different browsers and devices.
- Complete research on the effectiveness of your site title, then don’t change the site title after that. You’ll mess with quality search engine results by changing it too much.
- Avoid “stop” words (like “the,” “a,” and “with”) to conserve space and stick to a concise title.
- Make sure your site title isn’t too similar to other websites on the search results page to avoid confusion and prevent looking like a competitor.
- Use a “|” or “-“ to add a break between your brand name and tagline or product offerings in the site title.
Site Title vs Site Tagline
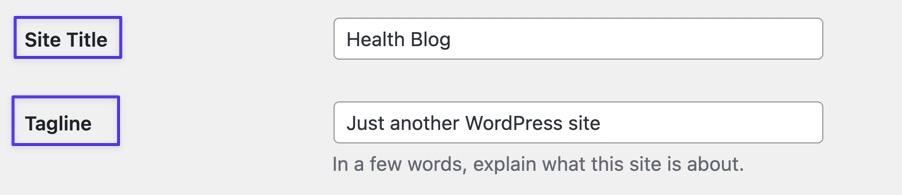
You’ll notice that right by the Site Title field in WordPress, there’s an option to have a Site Tagline.
These two WordPress elements also appear with each other on the frontend.

They’re often confused for one another or considered all part of the same thing, but the Site Title and Site Tagline are unique in their own ways.
The WordPress Site Title:
- Shows the “what” of your website.
- Should contain a concise, relevant name to your site; it’s typically a business, blog, or personal name.
- Dictates the metadata used for the site title or homepage heading.
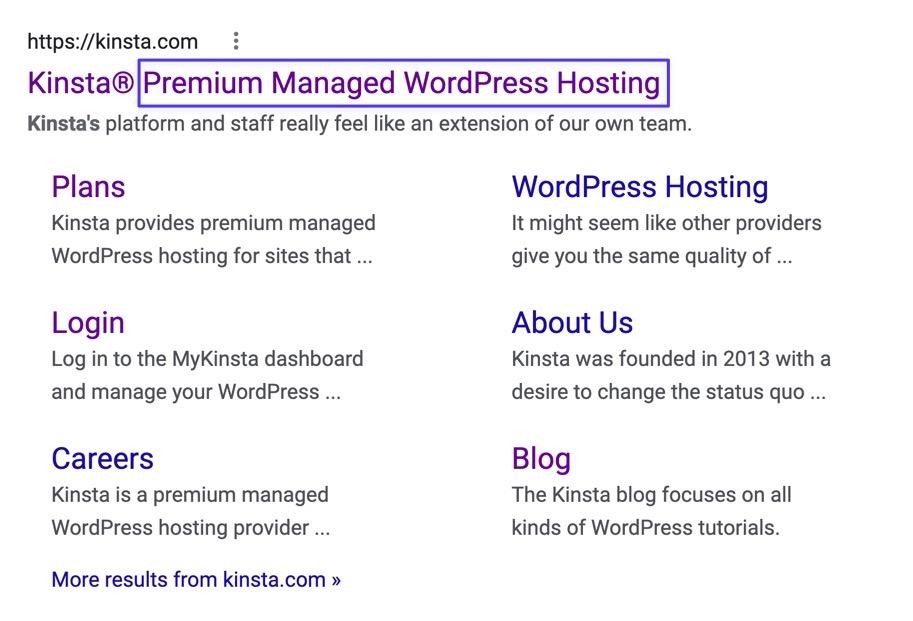
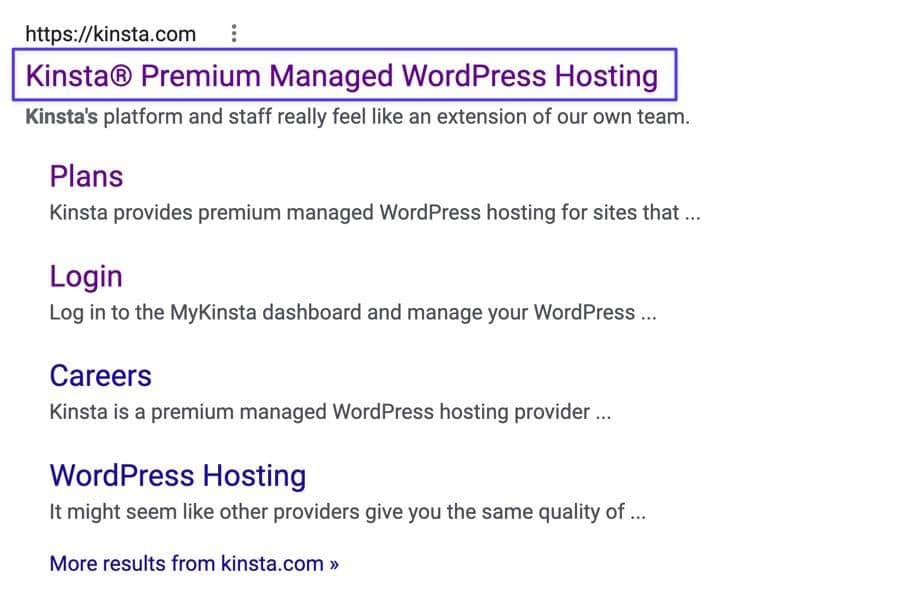
- Appears as the primary headline text in search results, right below the site URL.
- Offers a clickable link to your website on search engines.
- Shows up as the placeholder logo on the frontend of your WordPress site.
- Can be used to appear in a portion of all page results on search engines.
The WordPress Tagline:
- Shows the “why” or “how” of your website.
- Should contain a brief description of the website.
- Dictates any extra metadata used after the site title when shown on search engines.
- Can contain some keywords for SEO purposes.
- Often lists a few core products or services.
- Gets combined with the site title on search engines to make one long clickable link.
- Gets placed near (usually underneath) the site title on the frontend of WordPress.
Having a Logo Doesn’t Negate the Importance of a WordPress Site Title
WordPress themes and page builders offer intuitive control panels to upload logos; that’s often one of the first tasks a site owner or developer takes when customizing a theme. However, an uploaded logo means that you no longer see the WordPress site title or tagline on the frontend.
So, does that mean the site title doesn’t matter anymore? Absolutely not!
Yes, the site title has become slightly less important on the visual part of your site’s user interface, but it’s still essential to have an optimized site title (and tagline) within the WordPress settings.
Why’s that?
- WordPress still uses the site title in many of its core files.
- Search engines also crawl for site titles and taglines to present them on results pages.
- Social media sites still pull site titles and taglines when a user shares your content on places like Facebook, Twitter, and Pinterest.
As you can see, the WordPress site title offers a wide array of benefits, even when not prominently displayed on the frontend. So keep that Site Title field filled in your settings!
How To Change the WordPress Site Title
You can change the WordPress site title using 1 of 5 methods. We’ll walk you through them all, starting with the simplest and moving to the most complicated.
Method 1: Using the WordPress Customizer
The easiest option to learn how to change the WordPress site title is by using the WordPress Customizer.
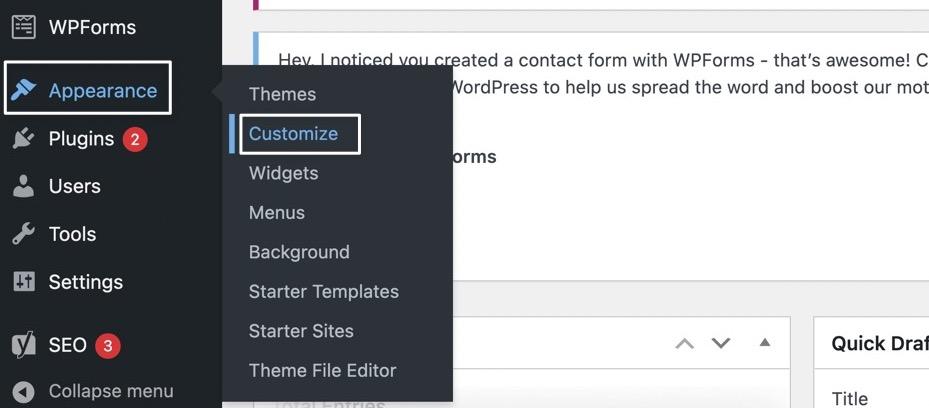
To do so, open your WordPress dashboard and go to Appearance > Customize.
This opens the WordPress Customizer, which displays all the customization tools on the left, along with a visual preview of your website to the right.
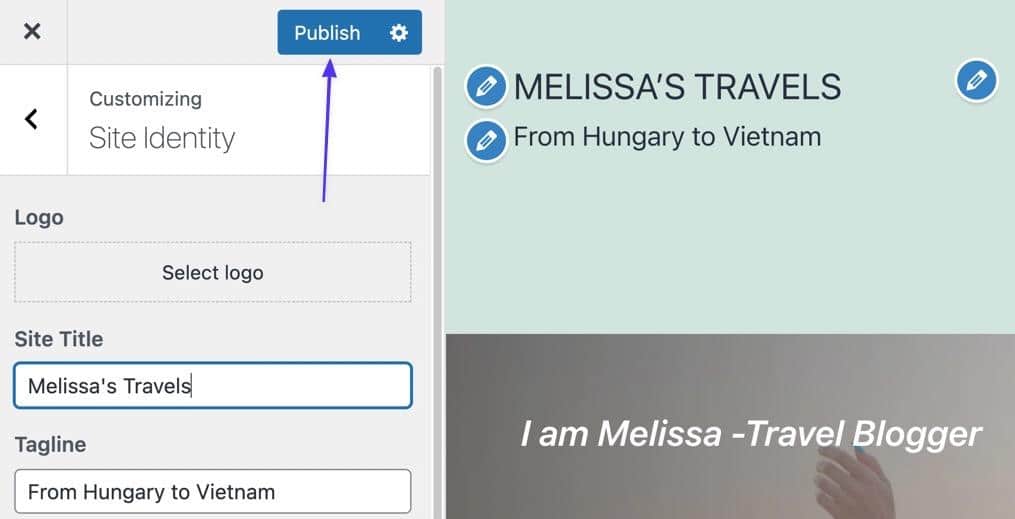
Choose the Site Identity option to proceed.
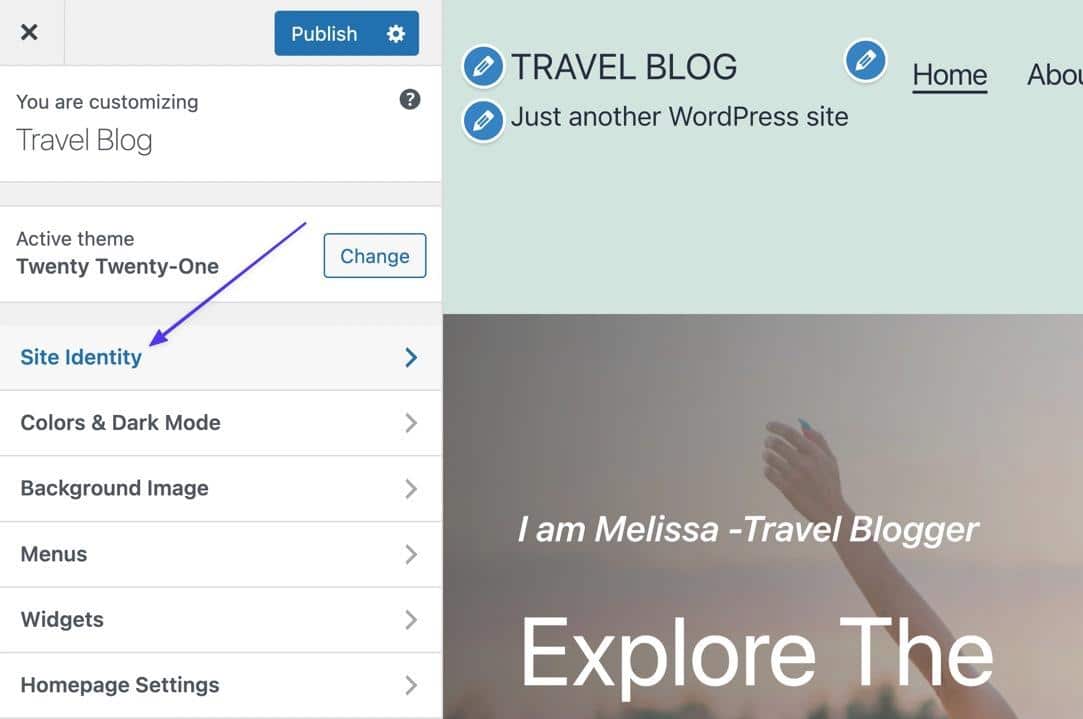
The Site Identity module offers settings to adjust your site title, upload a logo, change the tagline, remove the site title from being displayed, and other things like site icon customization.
Look for the Site Title field; this is what you use to change the site title.
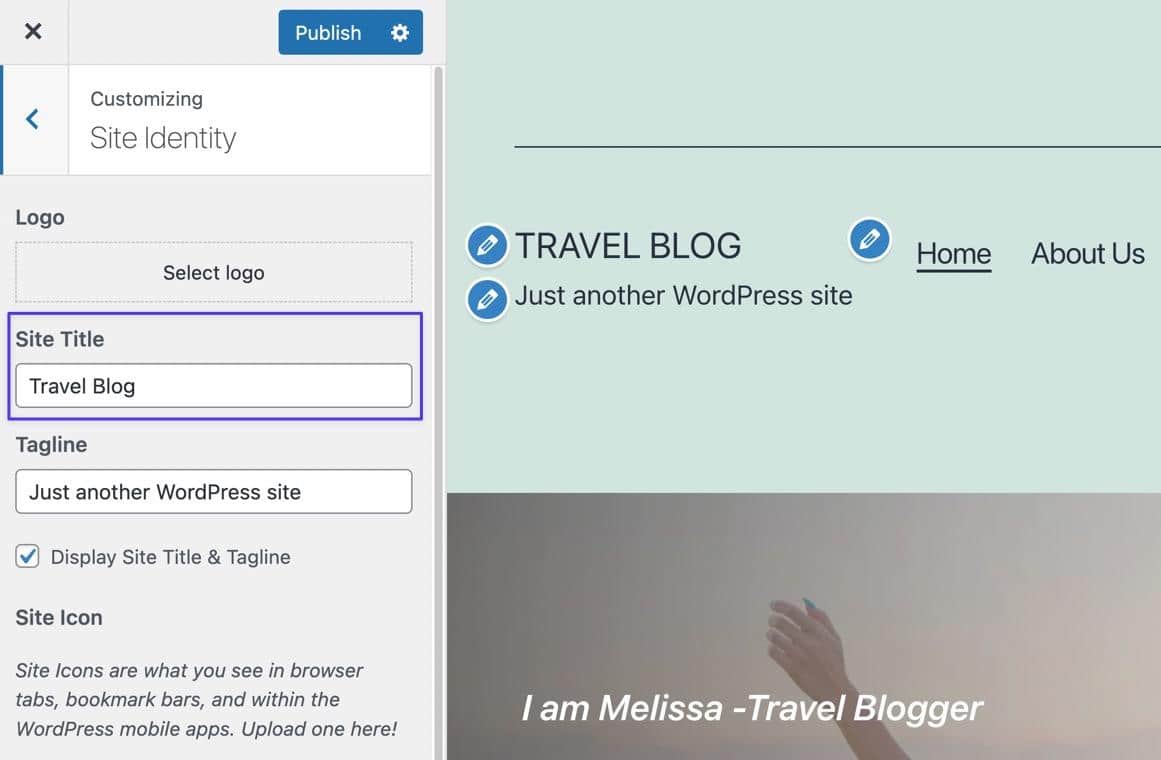
Type in the new site title, and make sure the adjustment gets reflected on the visual preview.
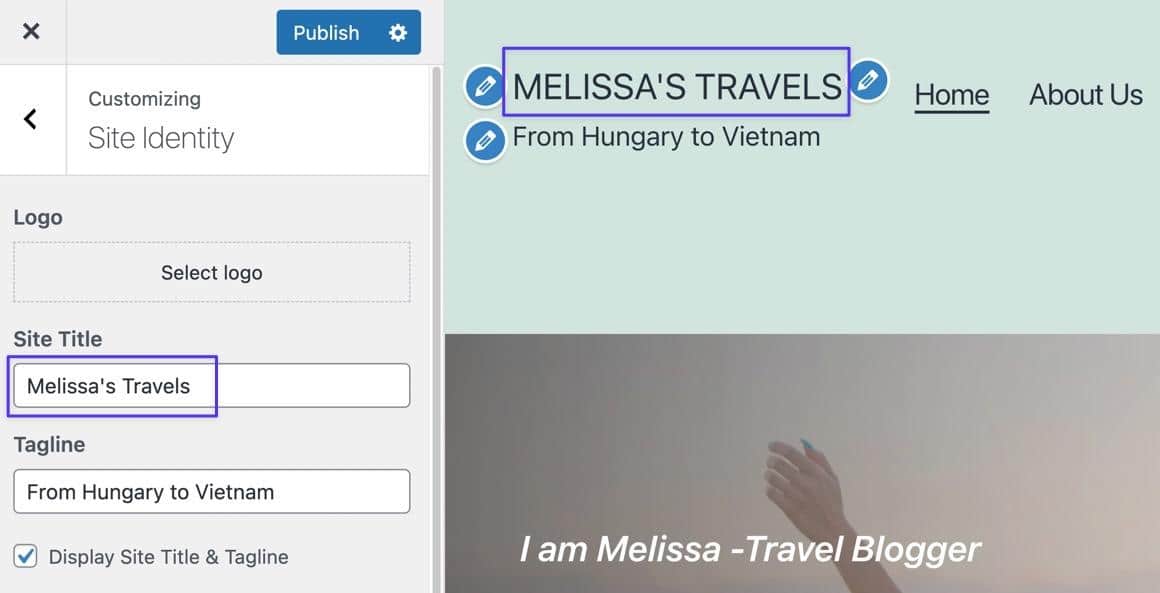
You can also adjust the Tagline field if needed. Another way to change the site title is by checking or unchecking the “Display Site Title & Tagline” box. As you can see, removing the check hides the site title from display on the frontend.
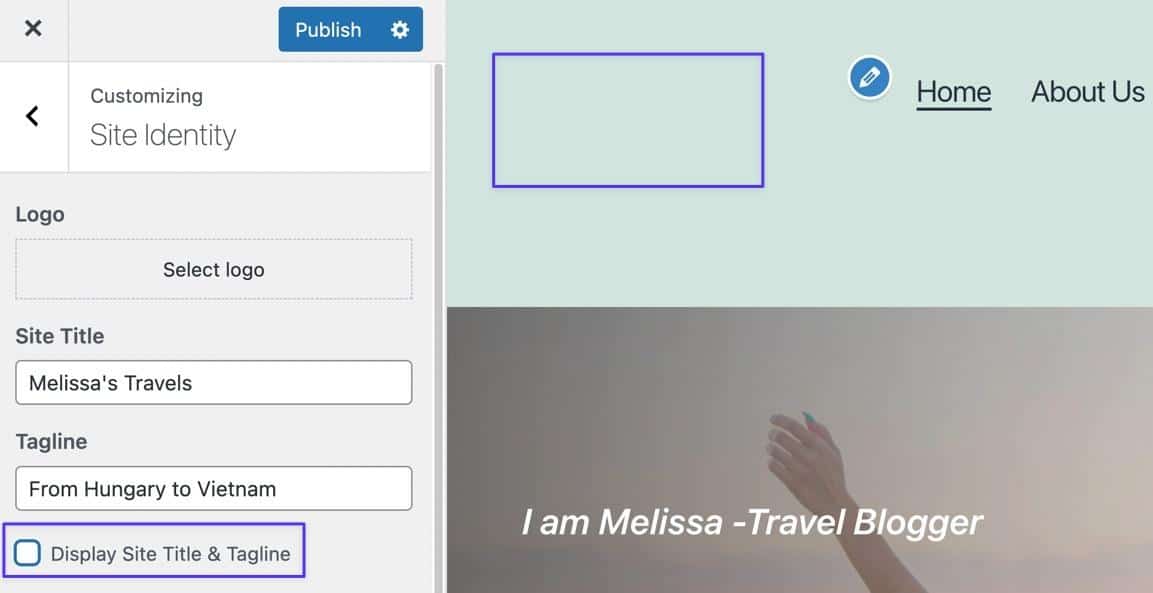
Finally, make sure you click the Publish button to activate the changes.
Method 2: Adjust the WordPress Settings
Perhaps just as easy a method as the previous option, this one only takes a few clicks to modify your WordPress site title in the WordPress General Settings section.
In the WordPress dashboard, go to Settings > General.
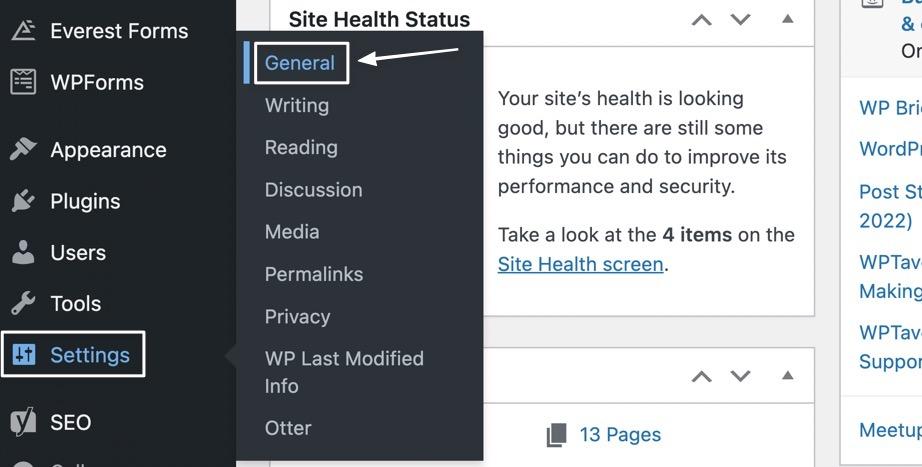
The General Settings page shows several fields to customize, but the Site Title field is right at the top, and that’s all you need to change the display of your WordPress site title.
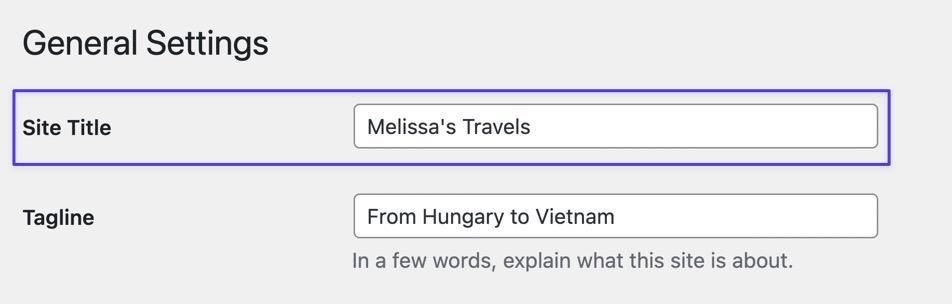
Simply swap out what’s already in the field to make the change. The Tagline field is also available underneath the Site Title field, so you can adjust that, too, if needed.
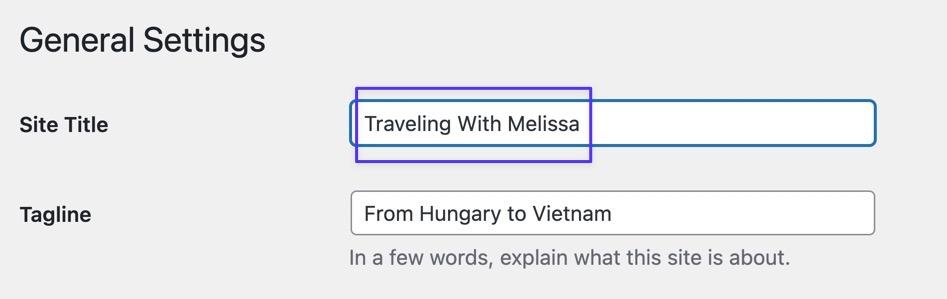
Make sure you click the Save Changes button to lock in the new site title.
You can then check the frontend of your WordPress website to see the results.

Method 3: Using a Plugin
There aren’t many plugins available to directly change the WordPress site title, and that’s because it’s not really a necessary tool, considering the functionality is already built into WordPress, and it only takes a few seconds to do.
However, some plugins take control over the display of your WordPress site title, mostly when it’s shown in search engines.
Yoast SEO is one of those plugins. Therefore, if you would like more control over the SEO title for pages, posts, and your overall website, install and activate Yoast SEO. You can learn how to install a plugin with this guide if you have any questions about that process.
Once Yoast is activated on your website, you’ll see an SEO tab added to the WordPress menu to the left. Go to SEO > Search Appearance to manage how your site title looks on search engines.
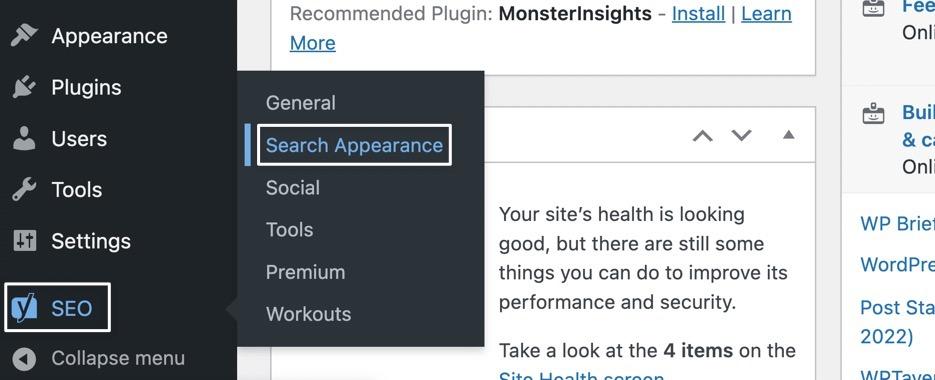
Choose the Content Types tab to reveal settings for single posts and pages.
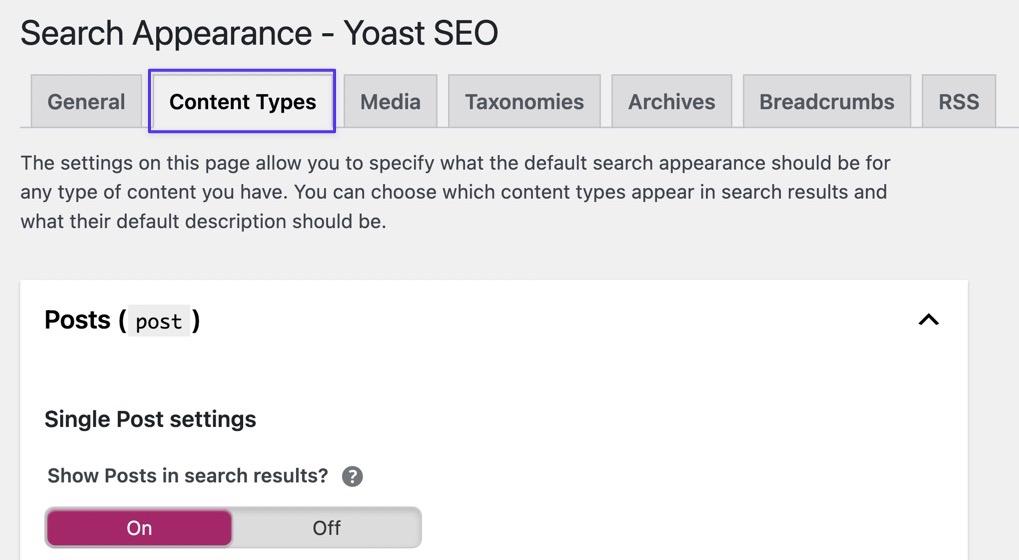
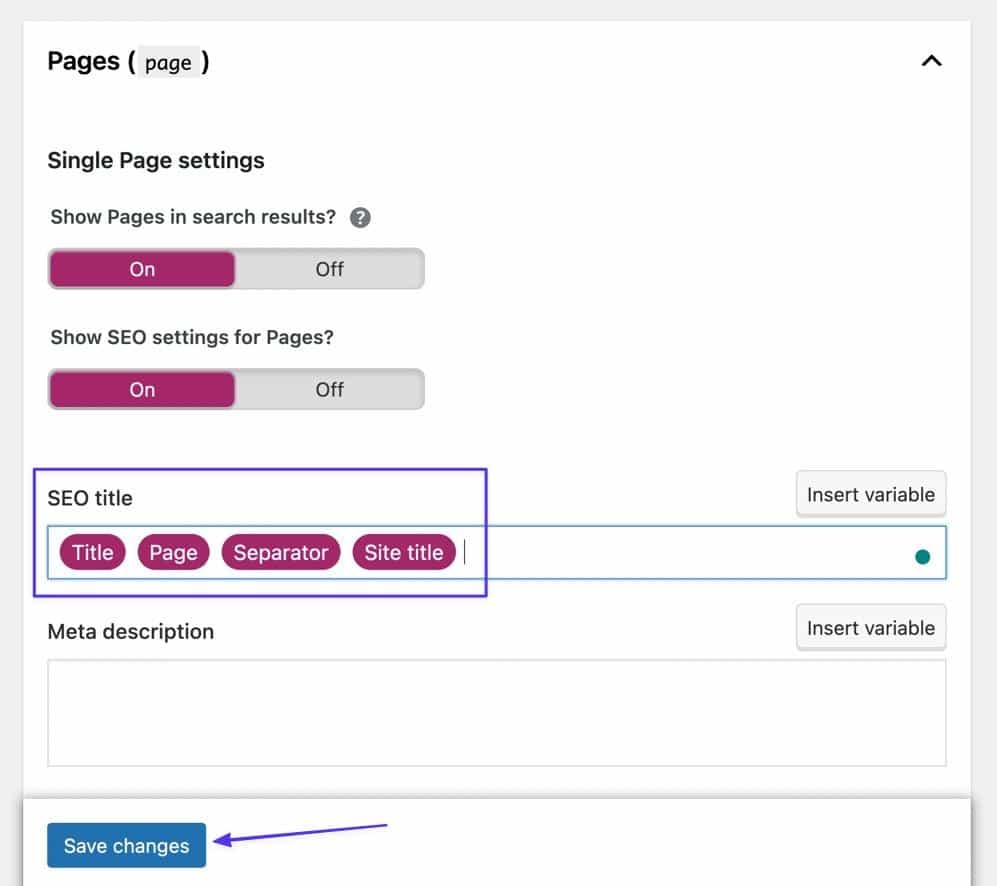
Scroll down to open the Pages section, then make sure the following options are turned to On:
- Show Pages in search results?
- Show SEO settings for Pages?
After that, you’re able to modify which dynamic elements appear within the SEO title. Use the SEO Title field to delete any elements you prefer not to show on search engines like Google. The plugin automatically adds items like Title, Page, Separator, and Site Title.
You can also type in your own non-dynamic text to appear on search results for every page.
In general, we recommend sticking to a variation of this for the homepage:
- Site Title
- Separator
- Tagline
Yet, it’s wise to include specific page information for all other pages and posts, like this:
- Page
- Separator
- Site title (you can typically remove this for posts)
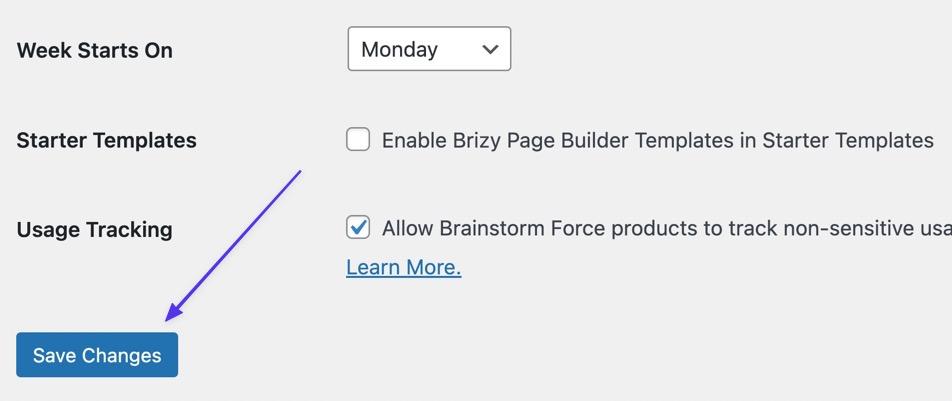
Hit the Save Changes button to finish the process.
Or Set SEO Titles on Individual Pages
As an alternative, the Yoast SEO plugin offers search engine optimization settings on every page and post you create. Therefore, it’s possible to change the SEO site title for pages on an individual basis.
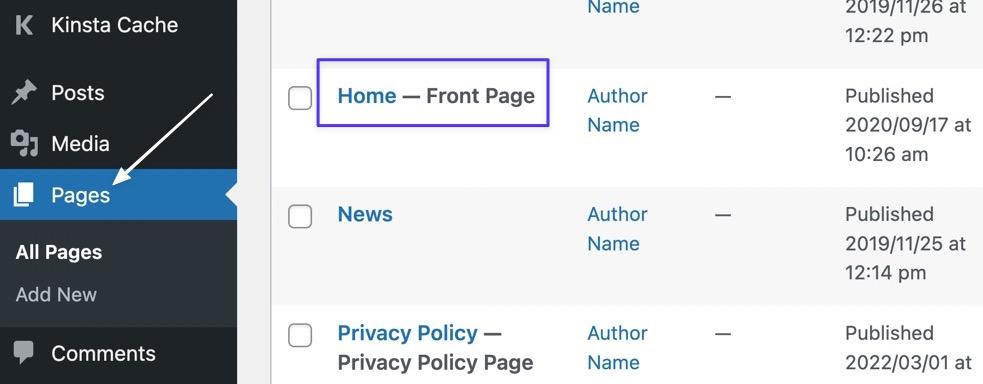
To achieve that, go to the Pages list, then click on your Homepage (or whichever other page you’d like to open to change the SEO site title).
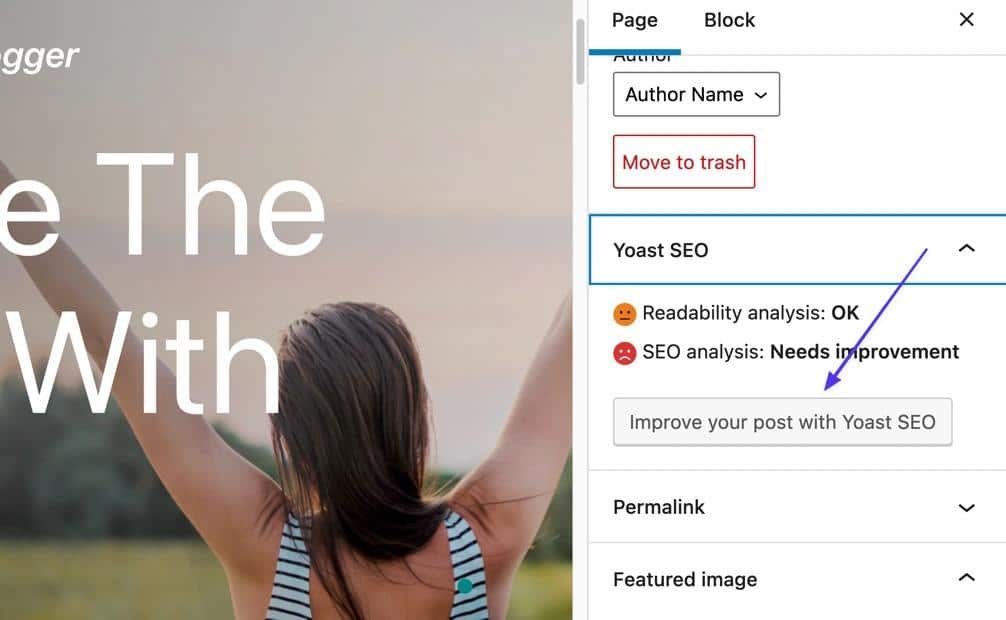
Make sure you have the Page tab open to the right of the editor. Find and open the Yoast SEO tab, and click the button that reads “Improve your post with Yoast SEO.”
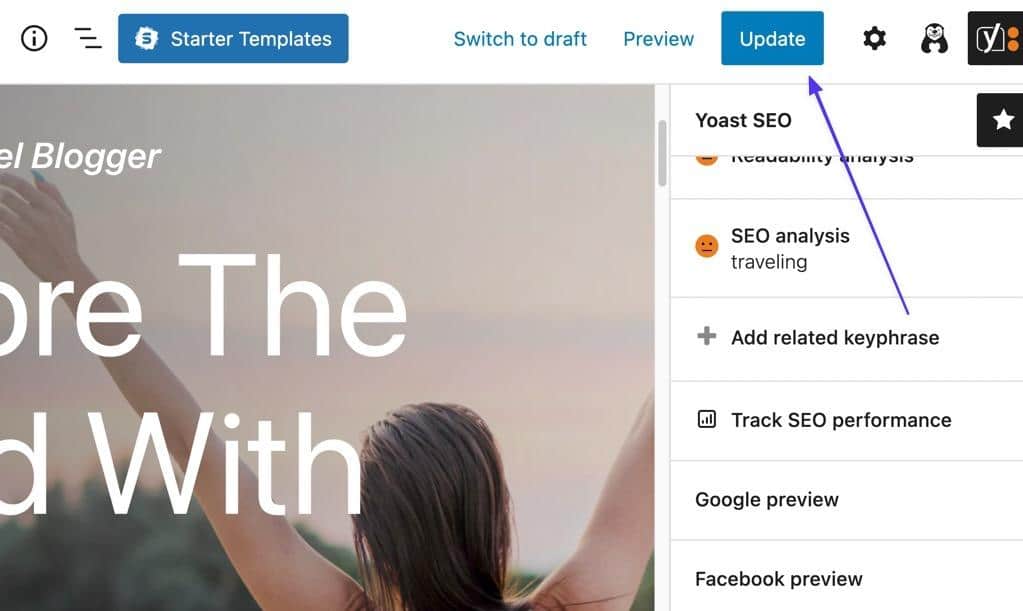
Several subsections appear: Google Preview, Facebook Preview, and Twitter Preview; each of these has its own site and page title settings for you to configure. Yet for now, we’ll only walk you through the Google Preview option, seeing as how that’s the most immediate SEO priority. So, click on Google Preview.

The popup window provides a preview of what users see when your site ends up in their search results. Use the SEO Title field to add or remove variables.
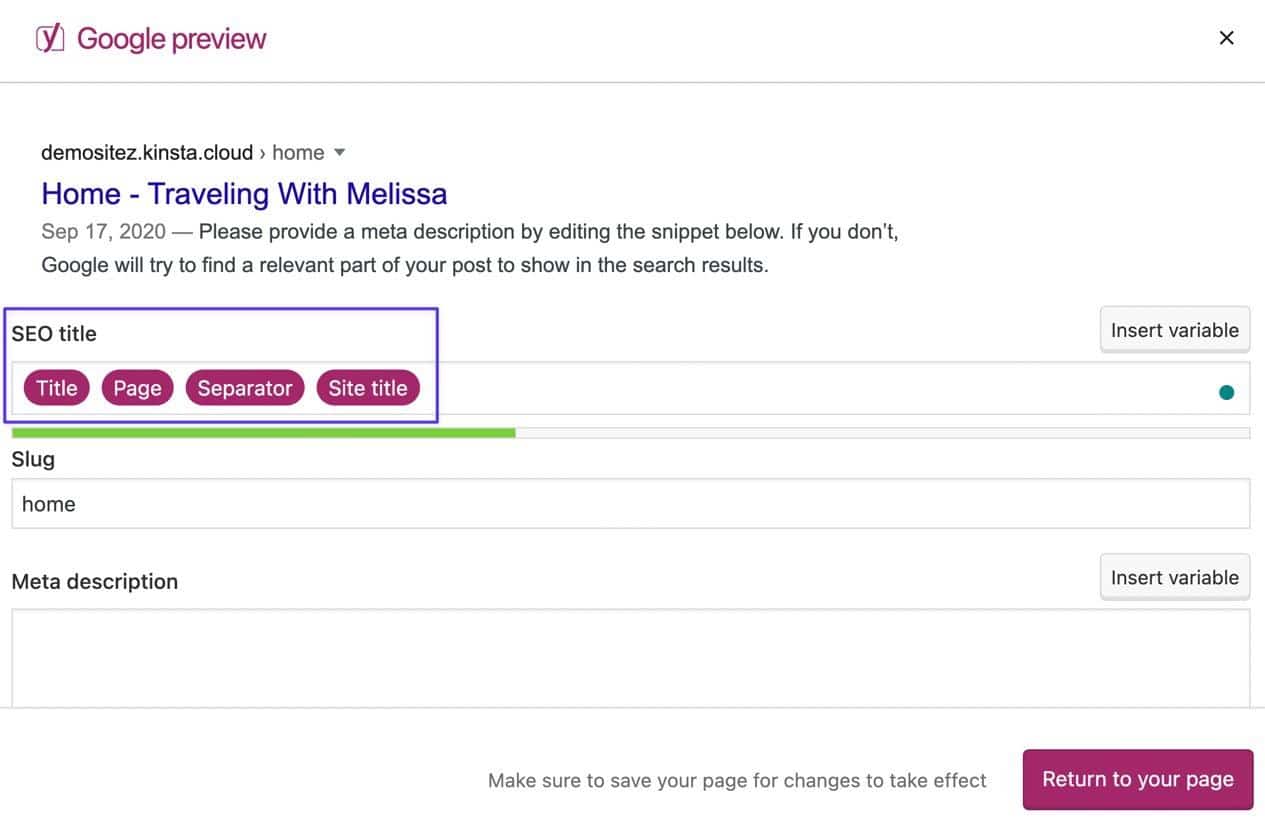
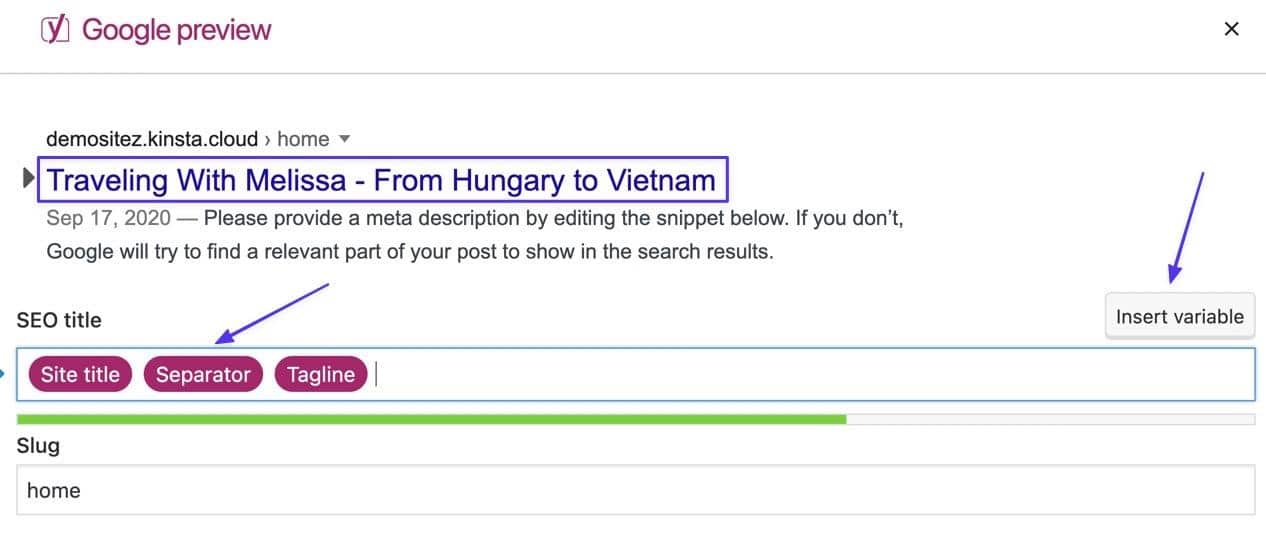
All changes get reflected in the preview. Use the Insert Variable button to use default dynamic elements from Yoast, and consider sticking to the Site Title, Separator, and Tagline variables when working with your homepage.
Click the Update button to save your changes.
Remember, this method doesn’t change anything about your site title on the backend of WordPress, but it does provide control over what your site title looks like when viewed on search engines.
Method 4: Adjust the WordPress Theme Files (functions.php)
The next two methods are the most technical solutions for changing your WordPress site title, but they’re often the only ways to change your site title if you lose access to the WordPress dashboard from something like a hack or a faulty site file. These methods are also nice if you’d like to better understand the backend workings of WordPress a little more.
In this section, you’ll find and edit the functions.php file, which is part of the hierarchy of major WordPress files.
If Using a Child Theme
Theme customization varies based on whether you use a standalone theme or a child theme. Child themes are beneficial in that you don’t lose functions.php customizations if you were to swap out for another theme. Just keep in mind that each child theme has its own functions.php file, so you must access those instead of the files from the parent theme.
Accessing the functions.php File
Having said that, your best route for accessing the functions.php theme file is by using an FTP client. We’ll use one of the most powerful, popular FTP clients, FileZilla. Learn how to use SFTP to connect to your WordPress site if you’re not yet experienced.
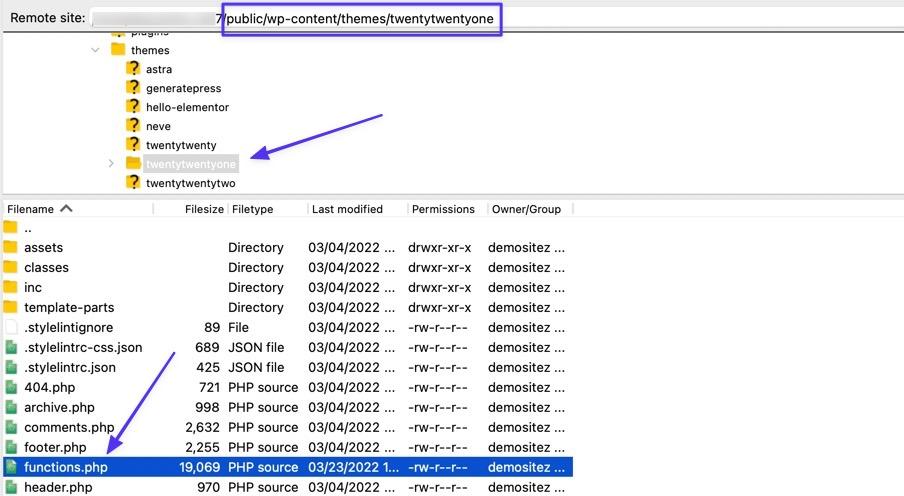
Once you’re connected to the site via an FTP Client and SFTP, go to your core site directory (often the name of your site or /www), then navigate to /public > > /wp-content > /themes. Select your currently active theme file; for this tutorial, we’re using /twentytwentyone. Scroll through its theme files to locate functions.php. Right-click and choose to Edit the file in a text editor.
Paste the following code to the very bottom of the functions.php file. This code overrides your current WordPress title (configured in the WordPress Settings) and allows you to make the changes through functions.php.
update_option( ‘blogname’, “put your site title here” );
update_option( ‘blogdescription’, “put your site tagline here” );
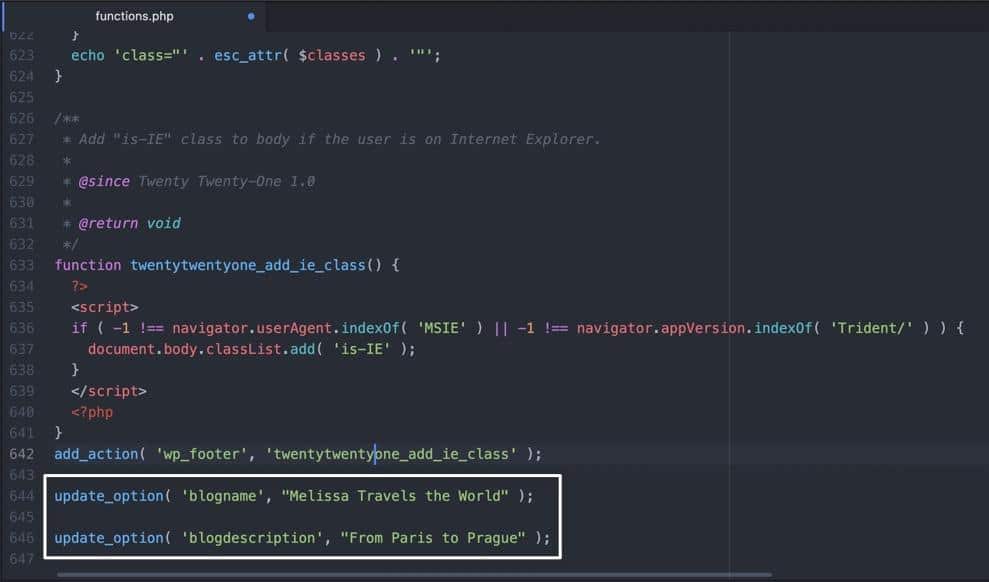
Just replace the “put your site title here” text (keep the parentheses), then save the file and override the previous file within your FTP client.
The changes automatically appear on the frontend of your website upon checking.

Method 5: Use phpMyAdmin
The final method to change a WordPress title is to access your WordPress database. The functions.php file is actually pulling information from the database, so that previous method simply overrides what’s held inside the database. However, you can utilize the phpMyAdmin database to change your WordPress title at its original source.
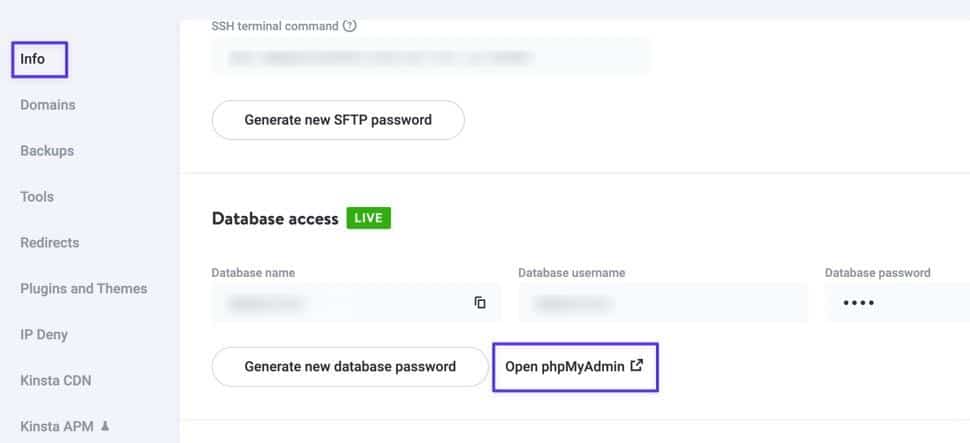
All hosts have their own way to access phpMyAdmin, so ask your hosting provider if you’re having trouble. Kinsta users should go to the MyKinsta dashboard and navigate to the Sites page. Choose the site for which you want to change the title, then go to Info > Database Access.
Click on the Open phpMyAdmin link. Log in to the phpMyAdmin dashboard with those credentials from before (not your WordPress credentials).
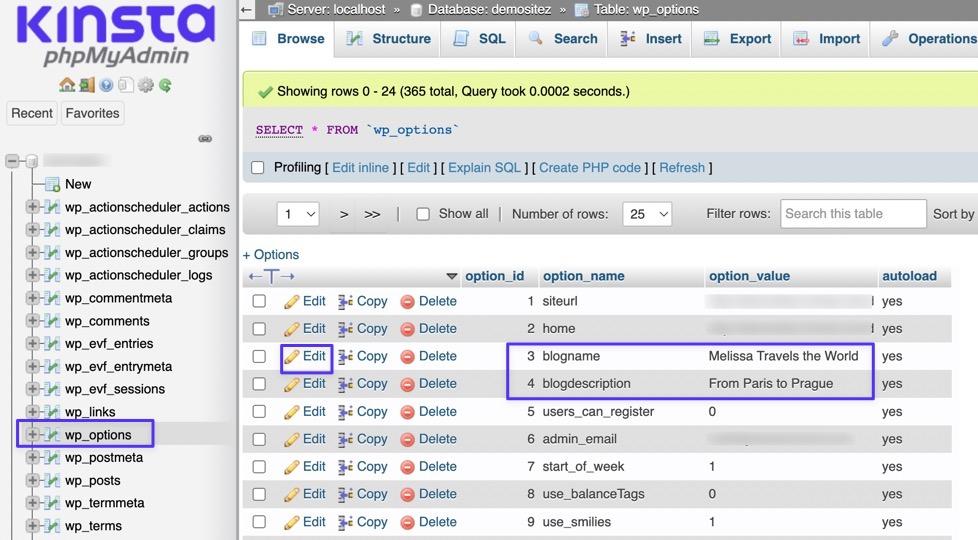
With your primary site database open, click on the /wp-options section. Under the “option name” field, find the blogname option, then click on Edit.
Modify the “option value” field for “blogname” with whatever new WordPress title you want to use.
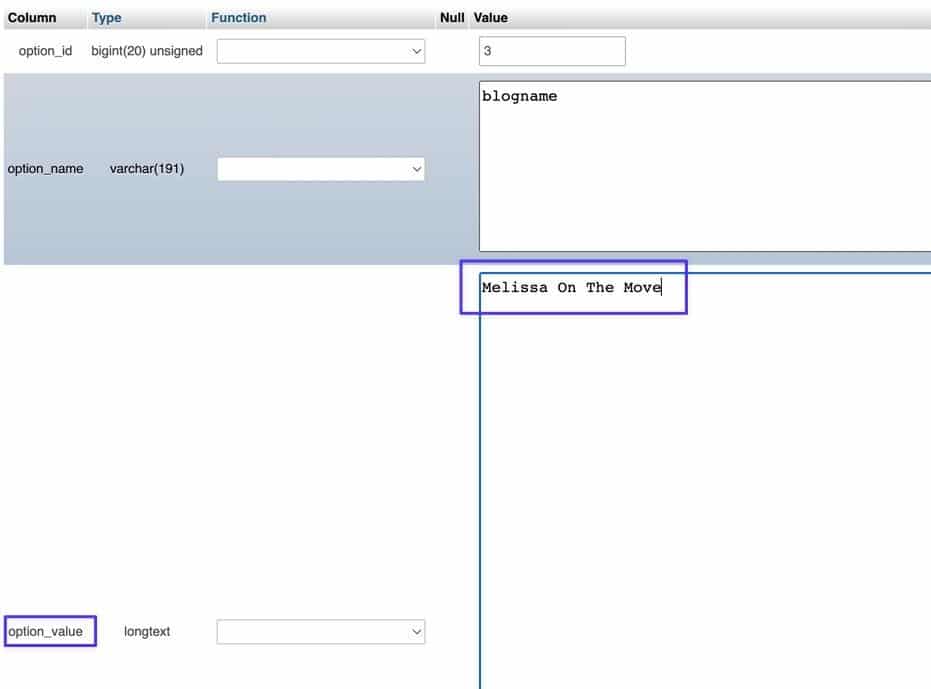
At the very bottom of the phpMyAdmin page, ensure the left side dropdown menu is set to Save. Click the Go button on the right to lock in these new changes.

Check back on the frontend of your WordPress site to see the updated site title.

What To Do After Changing Your WordPress Site Title
Although the process is fairly straightforward, there are some checks to complete after changing your site title.
1. Check to See If the WordPress Site Title Actually Changed
You went through the steps, but did the title really change? You can double-check that it all worked by looking at the frontend of your website.

The site title also appears on the backend, near the upper-left corner.
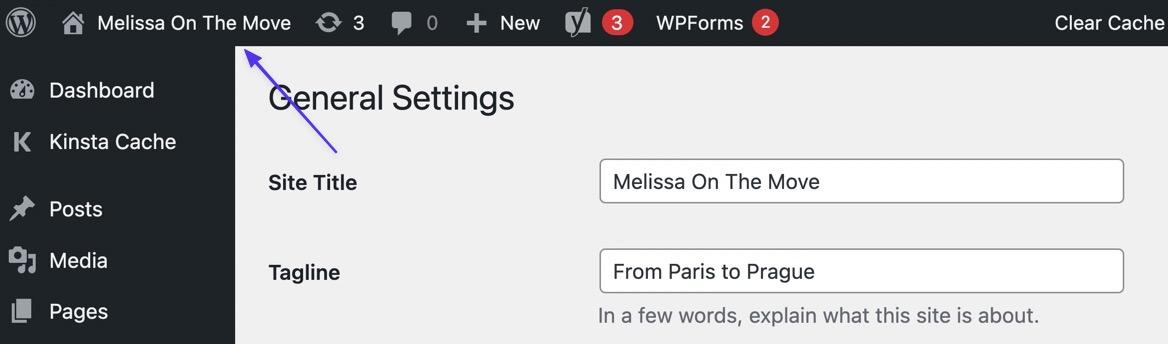
If you’re not seeing changes to your site title reflected in either area, consider clearing your WordPress cache.
2. Make Sure the Site Title Field is Not Empty
It’s tempting to leave the Site Title field empty in your WordPress Settings or the WordPress Customizer, but it’s essential to still fill the field with relevant, optimized text so that the search engines can learn about your site.

3. Consider Adding a Logo
The site title functionality in WordPress works fine as a placeholder on the frontend, but it’s not exactly the prettiest option to represent your brand. We recommend uploading a logo (while still having an active site title) to build brand recognition and the SEO advantages of a backend site title.
You can upload a logo to replace your frontend site title by going to Appearance > Customize > Site Identity > Logo.
4. Check Your SEO Results on Google
The whole point of a customizable site title is to control your site’s appearance on search engines, while also optimizing for relevance and keywords. Therefore, it makes sense to see if the results from your site title changes get reflected on the place that matters most: Google.
Does the title look the way it does in your settings? Is it too long or too short? And how does the rest of the metadata, like the description, look with the title?
5. Make Sure Your Site Content is Relevant to the Title
The WordPress site title provides a promise to visitors, a promise of what they can expect to find if they click through to the website. Make sure the site title is aligned with what’s on the homepage, your blog, your online store, and across the entire website.
6. Check To See If the Site Title Shows Up When Sharing to Social Media
Many WordPress themes offer social sharing buttons on pages, posts, and product pages, giving visitors a chance to share your content with friends online.
Social sites like Facebook and Twitter use their own systems for extracting metadata, so it’s essential to see if your site title (and images, descriptions, and URLs) look suitable for sharing.
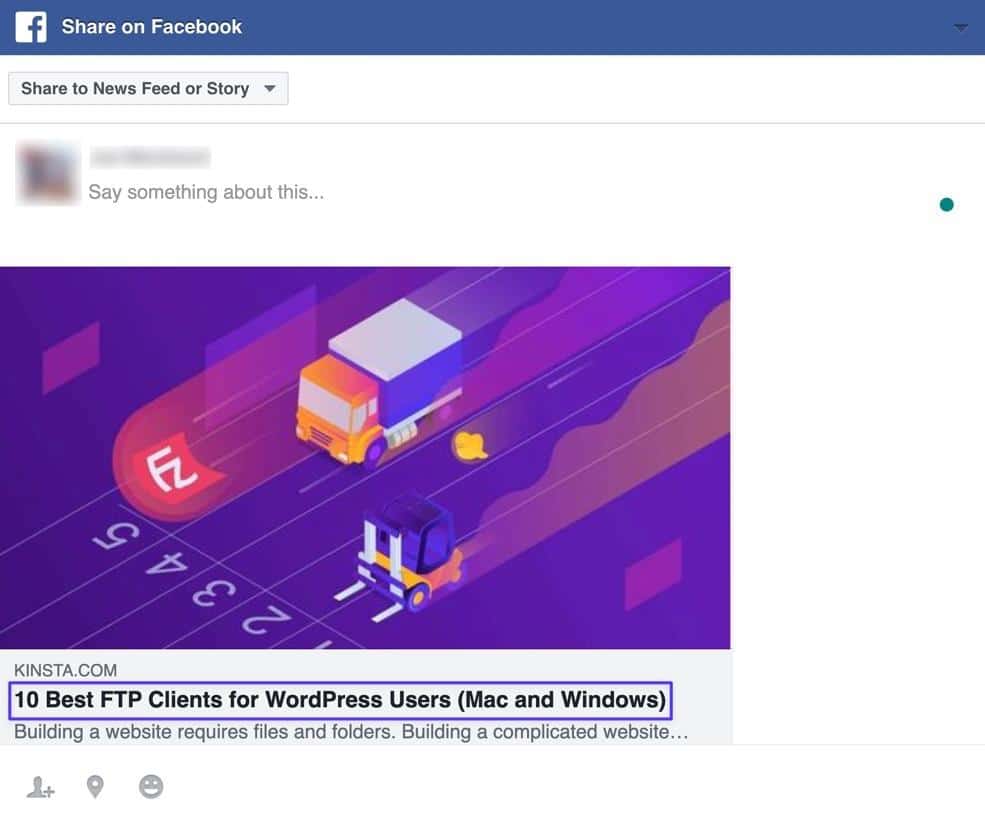
If you have problems with the site title on social sites, the Yoast SEO plugin offers settings to resolve these issues for Facebook and Twitter.
7. See How the Site Title Looks in Browser Tabs
Along with a favicon, browsers present your site (or page) title inside each tab that’s open inside a user’s browser. Therefore, you should check to see that the site title looks acceptable.
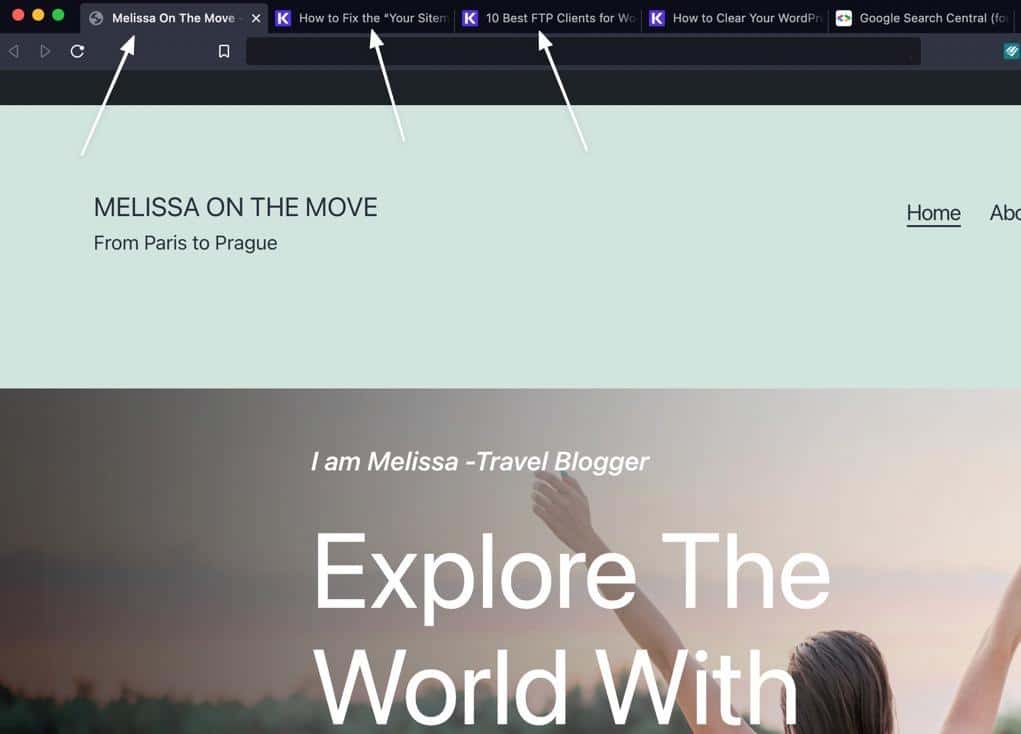
There’s a slim chance you can see the entire site title on a browser tab, so don’t panic by thinking it’s too long; that’s normal.
8. Make Sure the Site Title Isn’t Showing if You Have a Logo
Occasionally, you may find that a theme’s design keeps your site title hidden behind an uploaded logo. Slight styling changes could push that logo a little far to the right or left to reveal the site title alongside your logo.
If that ends up happening, talk to your theme developer to work on making the title hidden again. Refrain from deleting the site title from your WordPress Settings, as this could hurt your SEO.
9. Prompt the Search Engines to Crawl Your Website
Search engines like Google crawl new content rather quickly, yet it’s not a guarantee that you see a new site title reflected on Google moments after you change it. In fact, it could take a few hours or days for Google to process the modifications.
To speed up the indexing of a new site title, consider submitting a new site map and asking Google to crawl your site again in Google Search Central.
Summary
In this article, we explained:
- When to Change the WordPress Site Title
- Why Your WordPress Site title is Important
- What to Consider Before Changing WordPress Site Title
- How to Change WordPress Site Title (5 Simple Methods)
- Method 1: Using the WordPress Customizer
- Method 2: From the WordPress Settings
- Method 3: Using a Plugin
- Method 4: By Adjusting the Theme Files (functions.php)
- Method 5: With phpMyAdmin
- What to Do After Changing the WordPress Site Title
As mentioned before, start with the 1st method and move down the list, as these methods go from easiest to most technical.
Let us know in the comments if you have any questions about how to change the WordPress site title. Which method do you like the most for changing your site title?


