
When publishing content online, you must show users that the blog post, page, or media is fresh, accurate, and up to date.
One way of revealing the timeliness of your content is by displaying the “Last Updated” date somewhere on a WordPress blog post or page, like above or below the featured image, title, or the entire article.
This way, the user sees the most recently updated date along with the “Published” date, or you can replace the Published date altogether.
In short, the displayed date ends up being more recent, indicating to the reader (and search engines) that your content is fresh, and that you haven’t allowed too much time to pass (which could cause broken links, inaccurate information, or outdated images).
Check Out Our Video Guide to Showing Last Updated Date on WordPress Posts and Pages
Where To View the Published and Last Updated Dates
Depending on your theme styling, the published date could appear on posts, pages, or both; the placement is most commonly right after the title, before the content, and often complemented with a byline.

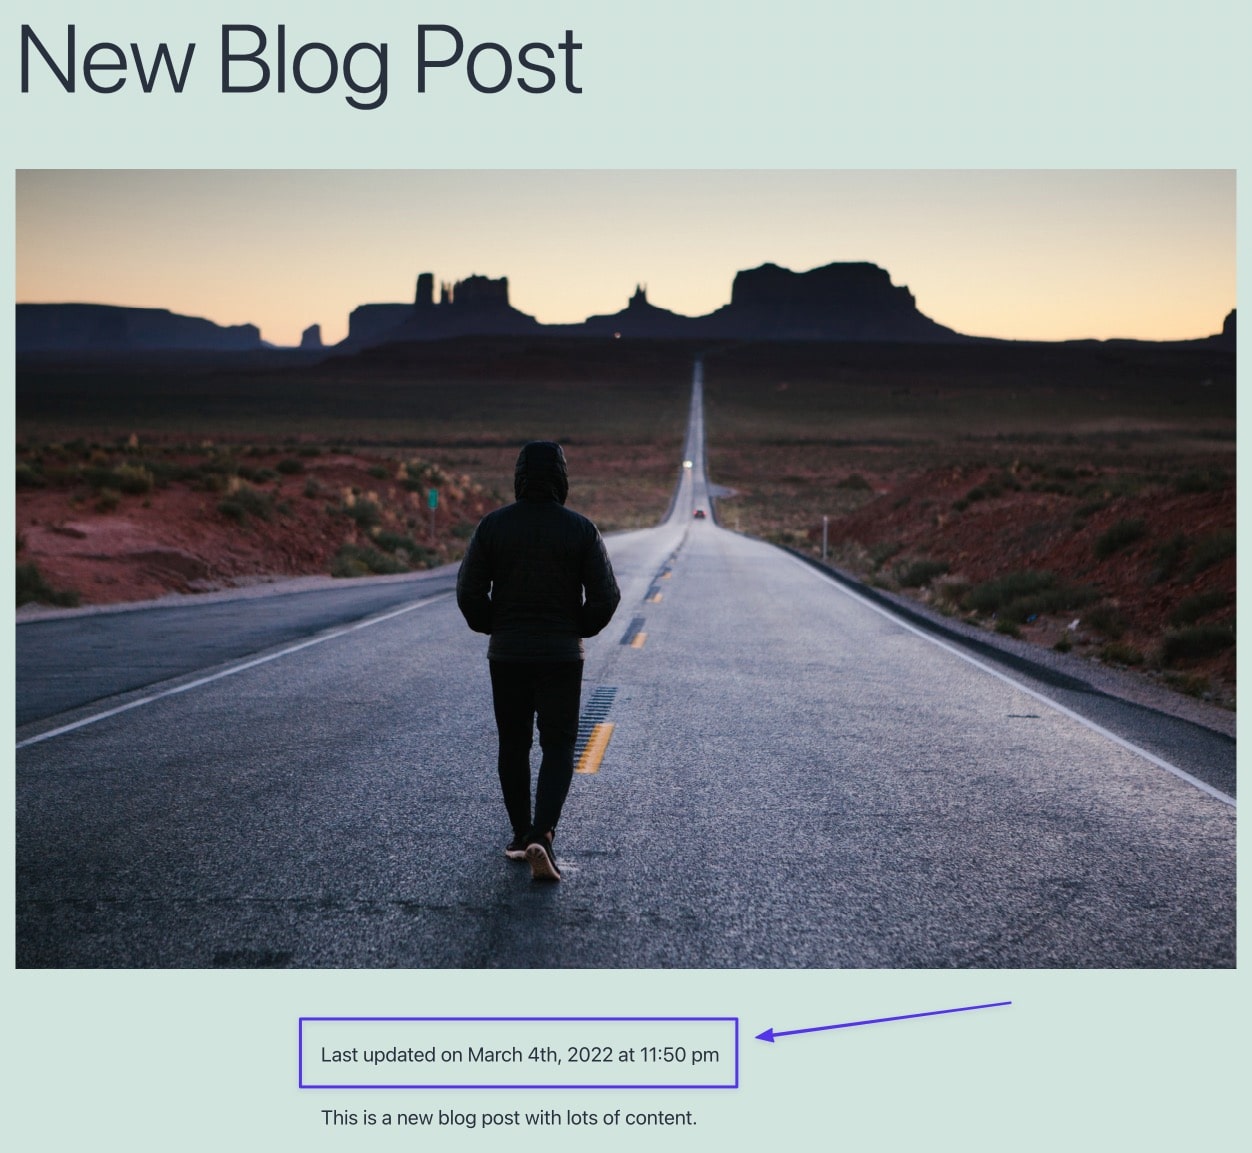
Having said that, the styling and placement of the published date depends entirely on your theme. You may see it above the featured image and with an icon, like on the theme below.

Some themes even place the published and last updated dates at the end of your content, right before the comments box.

You can also find the Published date on the backend by going to the Date column in your Posts list.

WordPress also reveals the published date within the Post editor.

In this article, we explain the benefits of showing the “Last Updated” date instead of the Published date. We’ll also walk you through various methods to display the last updated date, while also demonstrating how to tell when a website was last updated.
Keep reading to learn all about it!
Benefits of Displaying the “Last Updated” Date on Your Site
Updating your content regularly, and displaying the last updated date, results in various benefits for the site owner, search engine users, and those already on your website. It’s also helpful for SEO purposes, considering the search engines consider newness and relevance when determining rankings.
Here are the primary benefits of displaying the “Last Updated” date on your pages and posts.
- The most recent date is more accurate than the Published date, and it shows that your content is probably more refreshed when compared to something that was published a while ago.
- Users see that it’s an updated article and don’t assume it’s an old one, potentially increasing your click-through rates and the overall time users spend reading.
- Your “Last Updated” date gives you more potential for standing out since search engines display those dates in the results and your results get placed right by listings from other sites.
- It gives search engines another way to recognize the post as fresh. Search engines crawl the content, of course; but that doesn’t happen all the time, and the “Last Updated” date reinforces any changes made on your site.
- More recent dates provide a sense of trust that you have eliminated content issues like broken links, broken images, and any content that’s not true anymore.
- Search engines tend to index your site more frequently when the content (and date) gets updated. This isn’t a hard rule, but search engines are known to log sites with constantly updating content, crawling them more frequently.
- You increase the potential for higher overall search rankings because the entirety of your site receives benefits from your updated posts.
- It gives you a visual excuse/reminder to update your content, since you may notice an older date and realize that a refresh is in order.
- Search engines prefer you update old content as opposed to creating a new post every time you have new information about the same topic. This eliminates the potential for duplicate content and ties into why showing the most recent date is best for improving SEO.
- Some publications (like online newspapers) need to have the “Last Updated” date so that content with corrections and new information gets shown at the top of the site feed. This is so users don’t miss those updates.
How To Show the Last Updated Date in WordPress
By default, WordPress doesn’t show the last updated date for new or refreshed content, but rather the published date. That published date remains even if it’s several years later with multiple updates to the post.
Some modern themes provide built-in features for presenting the last updated date with a few clicks of the mouse. It’s a good practice to first check the WordPress Customizer for any date customization settings from your theme. But there’s no guarantee anything is available.
If you can’t add the last updated date within the WordPress Customizer, use these methods to add it:
- By editing the functions.php file and CSS
- By modifying and adding code to your theme template
- With a plugin
The first two methods require you to access your site’s theme files, so read up on WordPress file hierarchies (and how to understand them) if you’re not experienced yet.
View the three methods below to understand the best course of action in your situation.
Method 1: Edit functions.php and CSS in Your Theme
The first method for adding the “Last Updated” date in WordPress involves accessing your theme’s functions.php file and adding code to the file. As an alternative, you can add that code to a child theme or site-specific plugin to avoid any issues with the code disappearing if you switch or update the theme.
All of those options use the same type of CSS code, so we’ll give you bits of code to add, and show you how to place it in the functions.php file. If using a child theme or site-specific plugin, simply take that same code and modify those files.
To begin, go to your theme’s functions.php file. The easiest way to access functions.php is connecting with SFTP using an FTP client. You can generally find it in your FTP client by going to /www (or your site name) > /public > /wp-content > /themes > /theme-name (in this tutorial we’re using /twentytwentyone).

Open the file using a text or markdown editor, then add the following code (this code should also work if using a child theme/site-specific plugin):
function show_last_updated( $content ) {
  $u_time = get_the_time('U');
  $u_modified_time = get_the_modified_time('U');
  if ($u_modified_time >= $u_time + 86400) {
    $updated_date = get_the_modified_time('F jS, Y');
    $updated_time = get_the_modified_time('h:i a');
    $custom_content .= '<p class="last-updated-date">Recently updated on '. $updated_date . ' at '. $updated_time .'</p>';
  }
  $custom_content .= $content;
  return $custom_content;
}
add_filter( 'the_content', 'show_last_updated' );
Save and upload the file back to your server. As a result, the last updated date appears right before your post’s content. The code initially checks if the published date and last updated dates are the same.
If they are the same, you’ll still see the published date by itself. If they’re different, the last updated date gets shown along with the published date.
How To Change the Styling of Your New Last Updated Date
The new PHP code in functions.php lacks styling, but it still may end up looking acceptable from your theme’s styling. If not, consider styling the last updated date by inserting custom CSS code to control how it looks. Here’s some example code to try out or expand upon:
.last-updated-date {
  font-size: large;
  font-family: monospace;
  text-transform: uppercase;
  color: white;
  background-color: black;
}
Notice we’re using the last-updated-date class that correlates to the PHP code inserted into functions.php. You can change this for your own purposes, but make sure you also use the same class in your CSS code.
Note: It’s entirely possible to change the CSS properties and values depending on your needs; these are just examples.
Insert that CSS code into the field after going to Appearance > Customize > Additional CSS in WordPress. This enables the CSS site-wide instead of only on one page or post.

After publishing the CSS code, these styling changes get reflected on all frontend instances of the last updated dates. For instance, we changed the background color, font color, font family, font size, and also transformed everything to uppercase lettering.

How To Remove the Last Updated Date from Pages and Other Non-Post Content
You may now find that just about every webpage on your website has a last updated date; that’s no good, considering you have no reason to show when pages like the Homepage, product pages, About Us page, and shopping cart were last updated.
This Privacy Policy page, for instance, now shows when it was last updated, even though that’s useless information for someone who lands on the page (and the theme didn’t show the published date in the first place).

If you find yourself in this situation, it’s probably because of your theme. Some WordPress themes automatically strip pages of their last updated and published dates since there’s no reason for them. But you may end up with a theme without those capabilities. In that case, all you need is a simple addition to the previously implemented PHP code.
So, go back to your theme’s functions.php file and add this between 86400 and ).
&& is_singular('post')Like this:
function show_last_updated( $content ) {
  $u_time = get_the_time('U');
  $u_modified_time = get_the_modified_time('U');
  if ($u_modified_time >= $u_time + 86400 && is_singular('post')) {
    $updated_date = get_the_modified_time('F jS, Y');
    $updated_time = get_the_modified_time('h:i a');
    $custom_content .= '<p class="last-updated-date">Recently updated on '. $updated_date . ' at '. $updated_time .'</p>';
  }
  $custom_content .= $content;
  return $custom_content;
}
add_filter( 'the_content', 'show_last_updated' );
With this addition, the recently updated date text gets hidden from every WordPress Post Type that isn’t a Post (like for Pages or Products).

Remove the Published Date and ONLY Show the Last Updated Date
It’s common for the published date to stick around even after you implement the code to add the last updated date. Some themes remove it, but it’s not all that common. The problem is that now you have two dates showing on your WordPress posts: the published date and the last updated date.
Although some situations may make this acceptable, two dates most likely cause confusion for the reader. So, you might want to hide the published date but keep around the last updated date.
There are plugins to make this happen, but the CSS fix is a simple one, so we don’t recommend installing an entire plugin just to remove one element on your site.
To get rid of the published date but keep the last updated date (previously added from the methods above), go to Appearance > Customize > Additional CSS in the WordPress dashboard.
Paste this code into the Additional CSS field:
.entry-date {
  display: none !important;
}
Click the Publish button to put those changes into effect.

You should now see the published date removed but the last updated date is still shown.

Keep in mind that although the .entry-date CSS class name is common in a wide range of themes, it’s not used in all themes. So, if this particular code doesn’t work for you, it’s most likely because your theme uses a class name that’s not .entry-date.
But the CSS code is still good, so all you have to do is figure out the class name your theme uses for the published date. For that, navigate to the frontend of a blog post and right click on the published date currently showing. Select the Inspect option (this varies based on your browser: Chrome uses “Inspect,” Firefox uses “Inspect Element,” and for Safari you must hit the Option key + C)

This reveals the Developer’s Tools section of your browser, which displays coding elements of your current page, particularly the CSS code of the page element you just clicked.
It should show up as the main element if you clicked on the date, but if not, look for a section for <time class=. The CSS class for your published date should appear right after that; in this case, it’s entry-date. But developers use many variations of this when creating themes, like post-date, posts-date, and published-date.

Only copy that class (not the parentheses or other elements).
Paste the code in the following CSS snippet, replacing yourthemes-class-name. Make sure you keep the period before the class name.
.yourthemes-class-name {
  display: none;
}
And that should do the trick!
A Quick (But Only Sometimes Effective) Way to Get Rid of the Published Date
One quick and codeless way to remove the published date but still keep around the last updated date (inserted from the previous method), is by entirely removing date formatting in the WordPress General Settings.
In WordPress, go to Settings > General, then scroll down to the Date Format and Time Format sections. Choose the Custom option for both and clear out the example formatting in each field. Click the Save Changes button at the bottom.

As a result, no more published dates appear on your blog posts (or any post type for that matter), yet the last updated date remains, as long as you’ve implemented the necessary code to show the last updated date in the functions.php file (shown earlier in this article).

Method 2: Edit Your Theme Template
Theme developers use varying templates within the theme’s files to display information. Most of the time, a theme template dictates where and how the post metadata (like the published date) shows up on the theme.
You may have to conduct some searching, but the idea is to locate the template (and the code within that template) responsible for sharing a post’s date and time on the frontend. Again, developers differ on the templates used, but it’s common to see the published date code in one of these templates:
- index.php
- page.php
- single.php
- archive.php
- content.php
- template-tags.php
- template-functions.php
- A PHP file within the
/incfolder - A PHP file within the
/postfolder - A PHP file within the
/contentfolder - A file within the
/excerptfolder - A file within the
/template-partsfolder
It’s left up to the developer’s discretion (and their own style), so you must dig around to figure out where the right code is located, or to locate a file named differently than the ones listed above.
Here are some options for finding the right theme file:
- Send a message to the theme developer and ask which theme template controls the output of published dates for posts. You could also complete a search online or in a theme’s user forum.
- Check the most common theme templates. You can start with index.php, page.php, and single.php for simpler themes, but most modern themes use files like
/template-parts,/excerpts, and/inc. - Use the FTP client’s search function to look for instances of text like
posted,time,date,get_the_time, orget_the_date.
For this example, we’re using the Twenty Twenty One theme, and we found that the published date code is located in the template-tags.php file, giving you an idea of how there’s not much standardization from theme developers.
Indicators of the Published date in this file include:
- A reference to the time class
get_the_datecode- “Published” text

When you find indicators like that, decide on an area within the code that makes sense to place the last updated date. It’s usually best to insert the new code before or after the section that already displays the published date.
Copy this code and paste it into your desired spot:
$u_time = get_the_time('U');
$u_modified_time = get_the_modified_time('U');
if ($u_modified_time >= $u_time + 86400) {
  echo "<p>Last Updated on ";
  the_modified_time('F jS, Y');
  echo " at ";
  the_modified_time();
  echo "</p> ";
}
Working with template files tends to take a little longer to find the right folders, but it pays off with several benefits — mainly that the last updated date actually gets shown in multiple areas.
One of those areas is right where you inserted the code for posts. In this example, we can now see the last updated date and text at the bottom of the article, right above the published date.

Changing the theme template also provides the last updated date on the main Blog/Archive page, where all WordPress posts get listed in sequence. Therefore, every updated post reveals that date in the list, giving site visitors even more transparency on the freshness of your content.

Change the Location of Where the Last Updated Date Appears
Theme templates dictate how dates appear on WordPress posts, but they also decide where the date gets listed on a post.
Since it depends on the theme and its template structure, you may find that one theme presents the published and last updated dates at the top of the post, right below the title but above the content. Other theme developers opt to reveal dates towards the bottom, like prior to the author’s biography, or even somewhere unique like in the sidebar.
Therefore, it’s required to use theme templates to adjust where the last updated or published date gets placed on a post. Sometimes, this means simply moving the code you inserted in Method 2 somewhere else in that same PHP file.
Other times, that PHP file is actually a “template part” file, which then gets pulled by a master template that organizes all the template parts, resulting in the post’s format.
Using our Twenty Twenty One theme example from before, it’s clear that the template-tags.php file is only a small piece that eventually gets inserted into a master post theme file. Therefore, it’s your job to either ask the developer which theme template handles post formatting, or do some research on your own.
Although we can’t guarantee this works for every theme, it’s an excellent starting point to look for a “master” theme template called something like single.php, content-single.php, or even post.php.
For the Twenty Twenty One theme, we can actually insert the last updated code in either single.php or content-single.php, seeing as how single.php serves as the “master” template file, but content-single.php is the template part that single.php is pulling from.

To move the location of the last updated date, take the code mentioned in Method 2 and paste it where you want it to go. We can see that this file has a header section and a snippet for the_content, so we’ll place the last updated date code right between those two, moving the date from the default position below the content to right before the content.

On the frontend, the last updated date now appears where we want it to, and you can either remove the repeated date from the previous location (towards the bottom) or leave them both in there.

Adding the Last Updated Date in the Astra Theme
Since the usage (and names) of theme templates change from theme to theme, we’ll show you how to insert the last updated date in a few themes that are popular for their multi-purpose design options and speed: Astra, Neve, and Zakra.
The first, Astra, is a well-known multipurpose theme with a library of free starter templates. Each of those starter templates adds new files to the theme template directory, but the basic structure remains the same. For this tutorial, we installed a starter template and now want to add a last updated date to the top of each post.
To give you an idea of how different each theme works, the Astra theme (with its Travel Blog starter template) doesn’t even show the published date by default. Regardless, you can still add the last updated date. To insert the date using Method 1 from this article, go to /wp-content > /themes > /astra in your FTP client. Open the functions.php file.

Paste the Method 1 code at the end of the file and save it to your server. The result is the last updated date showing up at the top of your blog posts.

Using Method 2, find the theme template called single-layout.php. It’s located under /astra > /template-parts > /single.

You’re using the same code, but some theme templates require you to specify you’re using PHP code; so, add the bracket around the code if you’re seeing code on the frontend and not the rendered date.
It should look like this:
<?php
function show_last_updated( $content ) {
  $u_time = get_the_time('U');
  $u_modified_time = get_the_modified_time('U');
  if ($u_modified_time >= $u_time + 86400) {
    $updated_date = get_the_modified_time('F jS, Y');
    $updated_time = get_the_modified_time('h:i a');
    $custom_content .= '<p class="last-updated-date">Recently updated on '. $updated_date . ' at '. $updated_time .'</p>';
  }
  $custom_content .= $content;
  return $custom_content;
}
add_filter( 'the_content', 'show_last_updated' );
Place the snippet right above the line that includes the_content code.

Saving and uploading that new file to the server generates a recently updated line before the content starts on the Astra theme!

Adding the Last Updated Date in the Neve Theme
The Neve theme provides an excellent reminder to always check the WordPress Customizer before messing around with any code. Every theme adds its own settings within the Customizer, so you may just find a toggle to only display the last updated date. And that’s exactly the case with Neve.
To turn on the setting in WordPress, go to Appearance > Customize > Layout > Blog/Archive. Click on the Post Meta dropdown. Make sure the Date is visible under Meta Order, then turn on the option to “Use last updated date instead of the published one.”
The most recent date then gets shown on the blog page and each individual post.

Adding the Last Updated Date in the Zakra WordPress Theme
Zakra is another tricky one where you might think to go to the /template-parts folder in your WordPress files in order to find the code that serves up the published date. However, the right spot is within the /inc folder.
To add the last updated date to Zakra, connect via an FTP client and go to your site’s /themes folder. Then, navigate to /zakra > /inc > template-tags.php. Open the file for editing.

Paste the previously discussed code between ); (from the get_the_time function) and $posted_on = sprintf(. Save the file back to the server.

The date now appears on the frontend of all posts for the Zakra theme.

If You’re Still Having Trouble Editing Your Theme Design
As you may have noticed several times throughout this article, every theme has its own built-in styling, CSS code, and PHP functionality. Therefore, it’s impossible to tell how each theme responds to our example code. In addition, many themes already have the proper styling, or even show the last updated date without you having to make any adjustments.
Regardless of the situation, most problems when dealing with the last updated date arise because of hard-coded theme files, or some sort of uniqueness within the files. Therefore, it’s often best to contact your theme developer and mention what you’re trying to achieve. They can often provide a quick solution with the proper CSS or PHP code required for your particular situation.
Method 3: Use a Plugin
We recommend using one of the above methods to modify post dates prior to relying on a plugin. That’s because every plugin you add creates more potential for performance and security issues; this particular date change is a small one, so we’d rather avoid adding a plugin when all you have to do is edit the functions.php file or a theme template.
Having said that, you may find that none of the above methods work, or they don’t function the way you want. In that case, consider installing and activating the WP Last Modified Info plugin.
This plugin takes the guesswork out of the equation, allowing you to add the last updated date, adjust settings (like to replace the published date), and format the date’s appearance and placement.

Once activated, go to Settings > WP Last Modified Info in the WordPress dashboard. On the Post Options page, turn on the switch to “Enable for Posts/Pages on Frontend.”

You can also choose to change the display method to:
- Before Content
- After Content
- Replace Published Date
- Manual (using a shortcode)
Scroll down on the page to locate other settings for:
- Date formatting
- Time formatting
- Time gap

Save those settings to reveal the last updated date on the frontend of your site. If something doesn’t look quite right, go back to the settings to see if there’s something available to fix it to what you want to see.

Automatically, the plugin activates the last updated date for pages as well. If you’d like to remove that default, go back to the plugin settings to fill in the “Post Types to Show Modified Info” field. Simply type “Posts” into the field to ensure that nothing gets updated on the Pages post type. With all the changes set, be sure to click the Save Settings button.

How To Tell When a WordPress Post or Page Was Last Updated
Displaying the most recently updated date on a WordPress post is one thing, but what about actually viewing when a post was last updated? After all, this is an important part of identifying old posts that you should modify.
In addition, looking at the published and last updated dates can help troubleshoot problems you may encounter while adding the last updated date. For instance, most of the code in this article requires there to actually be a last updated date to pull. That means you won’t see any dates if the post hasn’t been updated, which you may not know until looking for a date on the backend.
To see when a WordPress post or page was last updated (even before implementing any code from the methods above) you can turn to one area in the WordPress dashboard.
Unfortunately, WordPress doesn’t automatically display a Modified or Last Updated date on the backend when you add to your posts and pages, even when you implement some of the code from our methods above. Going to the Posts list in WordPress only shows a Published Date column.

The same is true for the post and page editors; you can look at the Post tab to see the Published date but nothing about when it was last updated.

The Built-in Way to Get an Idea of the Last Updated Date in WordPress
With no help from the built-in display functionality, it’s best to open the post in question and click on the Post tab to the right. Scroll down to find a Revisions button.
- If you don’t see a Revisions button, that means you’ve never updated it.
- If you see a Revisions button, click on it.

Although this isn’t a guarantee for finding the last updated date, it gives you a pretty good idea of the activity on this post.
Revisions get saved into WordPress whether or not you publish the post, so you may have some revision logs that aren’t actually last updated dates. But you can look at the past revisions to see which of them you published most recently, based on the content inside the revision.
Each revision logs the date and time, which you can assume is the last updated date as well.

If you’ve already implemented the last updated date code from one of the earlier methods, yet you’re not seeing a date on the frontend, this is an excellent way to see if the post has an updated date in the first place; if it doesn’t, the code won’t display anything.
Or Use a Plugin to Find the Last Updated Date on the Backend
The WP Last Modified Info plugin not only adds the Last Modified date to the frontend, but it creates columns and sections throughout the dashboard to make it easier to spot posts you haven’t updated in a while.
With the WP Last Modified Info plugin installed, navigate to the Posts list in WordPress. Automatically, the plugin generates a new column next to Date called Last Modified.

The plugin also shows a tab within the post editor called Last Updated, displaying the last updated date and time for the individual post.

Summary
In this article, you learned:
- How to tell when a website was last updated
- The benefits of displaying the last updated date on your website
- How to show the last updated date in WordPress using the following methods:
- Method 1: Editing functions.php and CSS in your theme
- Method 2: Editing theme templates
- Method 3: Using a plugin like WP Last Modified Info
We also explored tips on:
- How to change the styling of the last updated date
- How to remove the last updated date from pages and anything else that’s not a post
- Removing the published date so that only the last updated date appears
- Changing the location of where the last updated date shows up on a post
Finally, we showed you how to add the last updated date to several popular themes, including:
- Twenty Twenty
- Twenty Twenty One
- Astra
- Neve
- Zakra
Let us know in the comments if you have any further questions about how to show the Last Updated date on your WordPress website!


